
- Thread starter
- #1
Hey guys,
I picked up my '24 Maverick XL Hybrid on Friday and immediately got to work adding a hitch. I should've just paid the $100 for a factory hitch, but that's a long story.
I used these two videos for help, but both had inaccuracies:
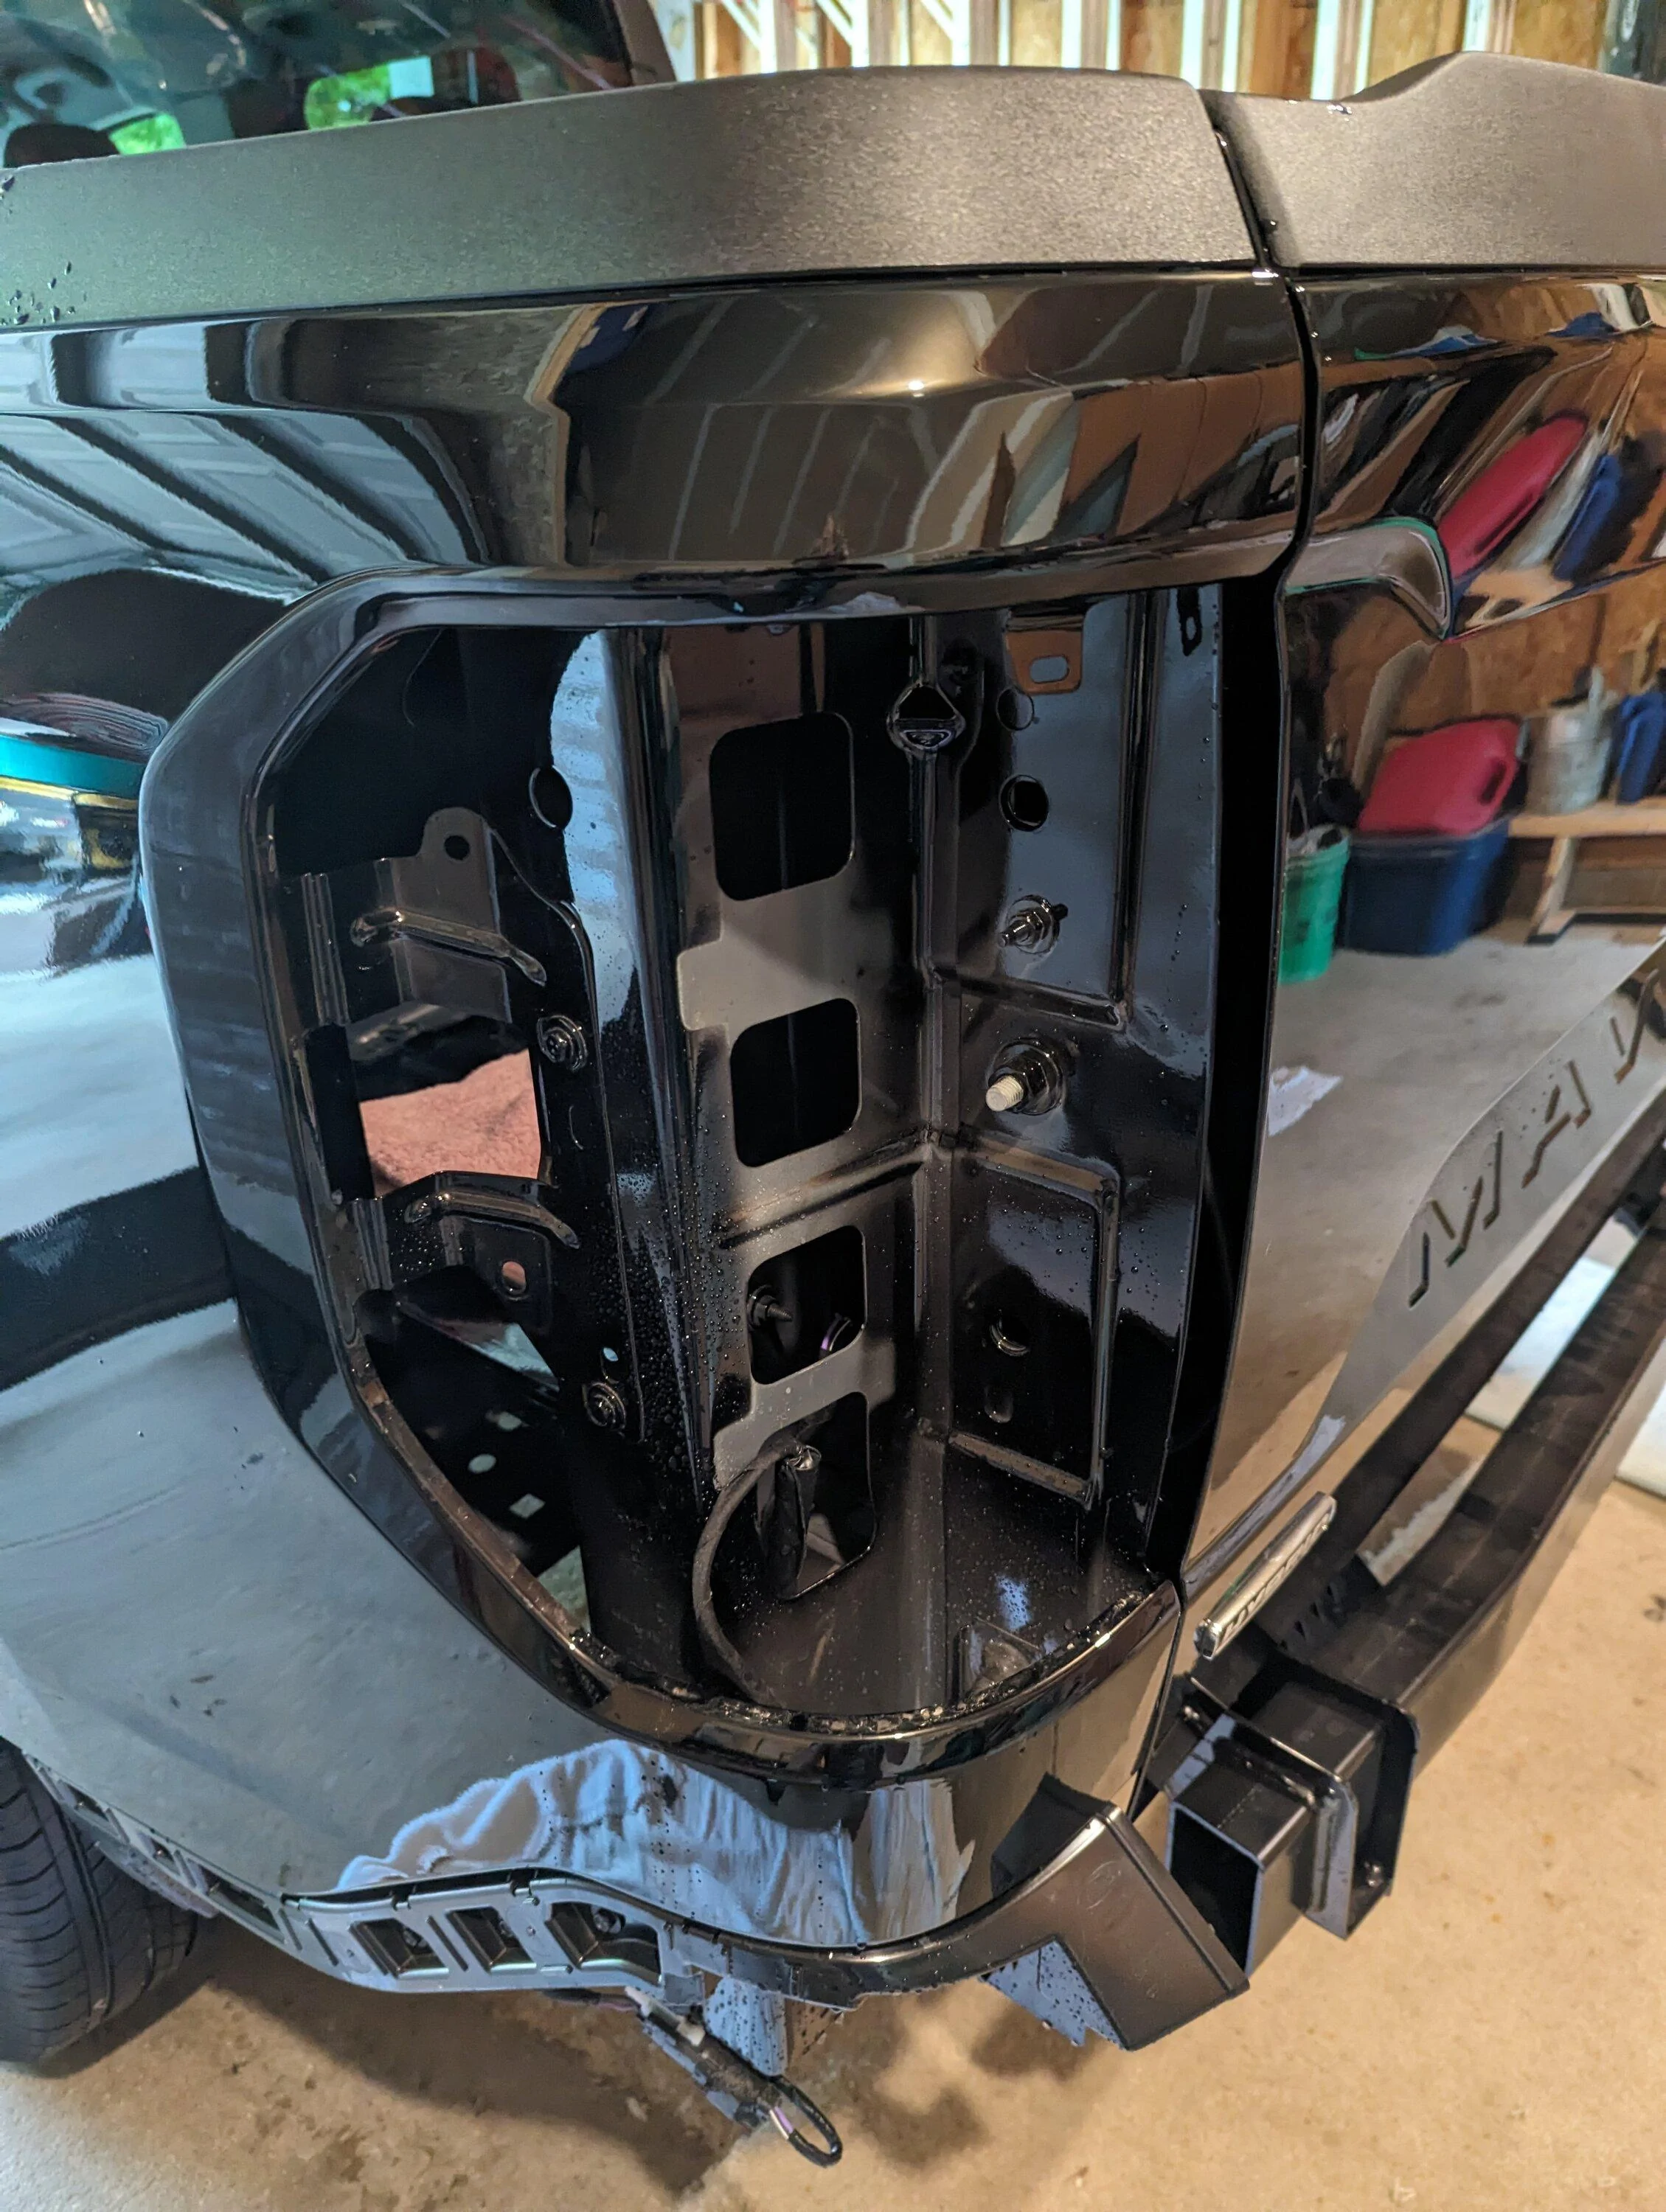
The first video is a '22 Maverick with a 3500 lb Harbor Freight hitch receiver. I started following his video and quickly realized that there were screws holding the bumper cover in different locations on my '24. Then I watched the 2nd video ('23 Maverick with an OEM bumper/hitch) and found out where the missing screws were...behind the tail lights. Taking the tail lights out was scary and did not happen in the same way as the video. Once I got the bumper cover off I realized that I didn't need to remove the bumper at all if I just removed the tail gate.
I thought this would take all of 30 seconds, but I was wrong. Ford's tail gate design for this truck is awful, and there's even a bracket installed on the passenger side preventing you from removing the tail gate easily. I removed the bracket, then tried to pull the tail gate off only to realize that it's spring loaded to assist in closing, which puts tension on the driver's side when trying to pull it out of the hinge point. This is dangerous with a brand new vehicle, and I was very close to denting/scratching the tail gate several times. I also forgot to unplug the wiring harness after getting the thing loose from both hinge points. So I had to reinstall it just to unplug the harness because the connector is located in a difficult place to reach under the truck behind the spare tire.
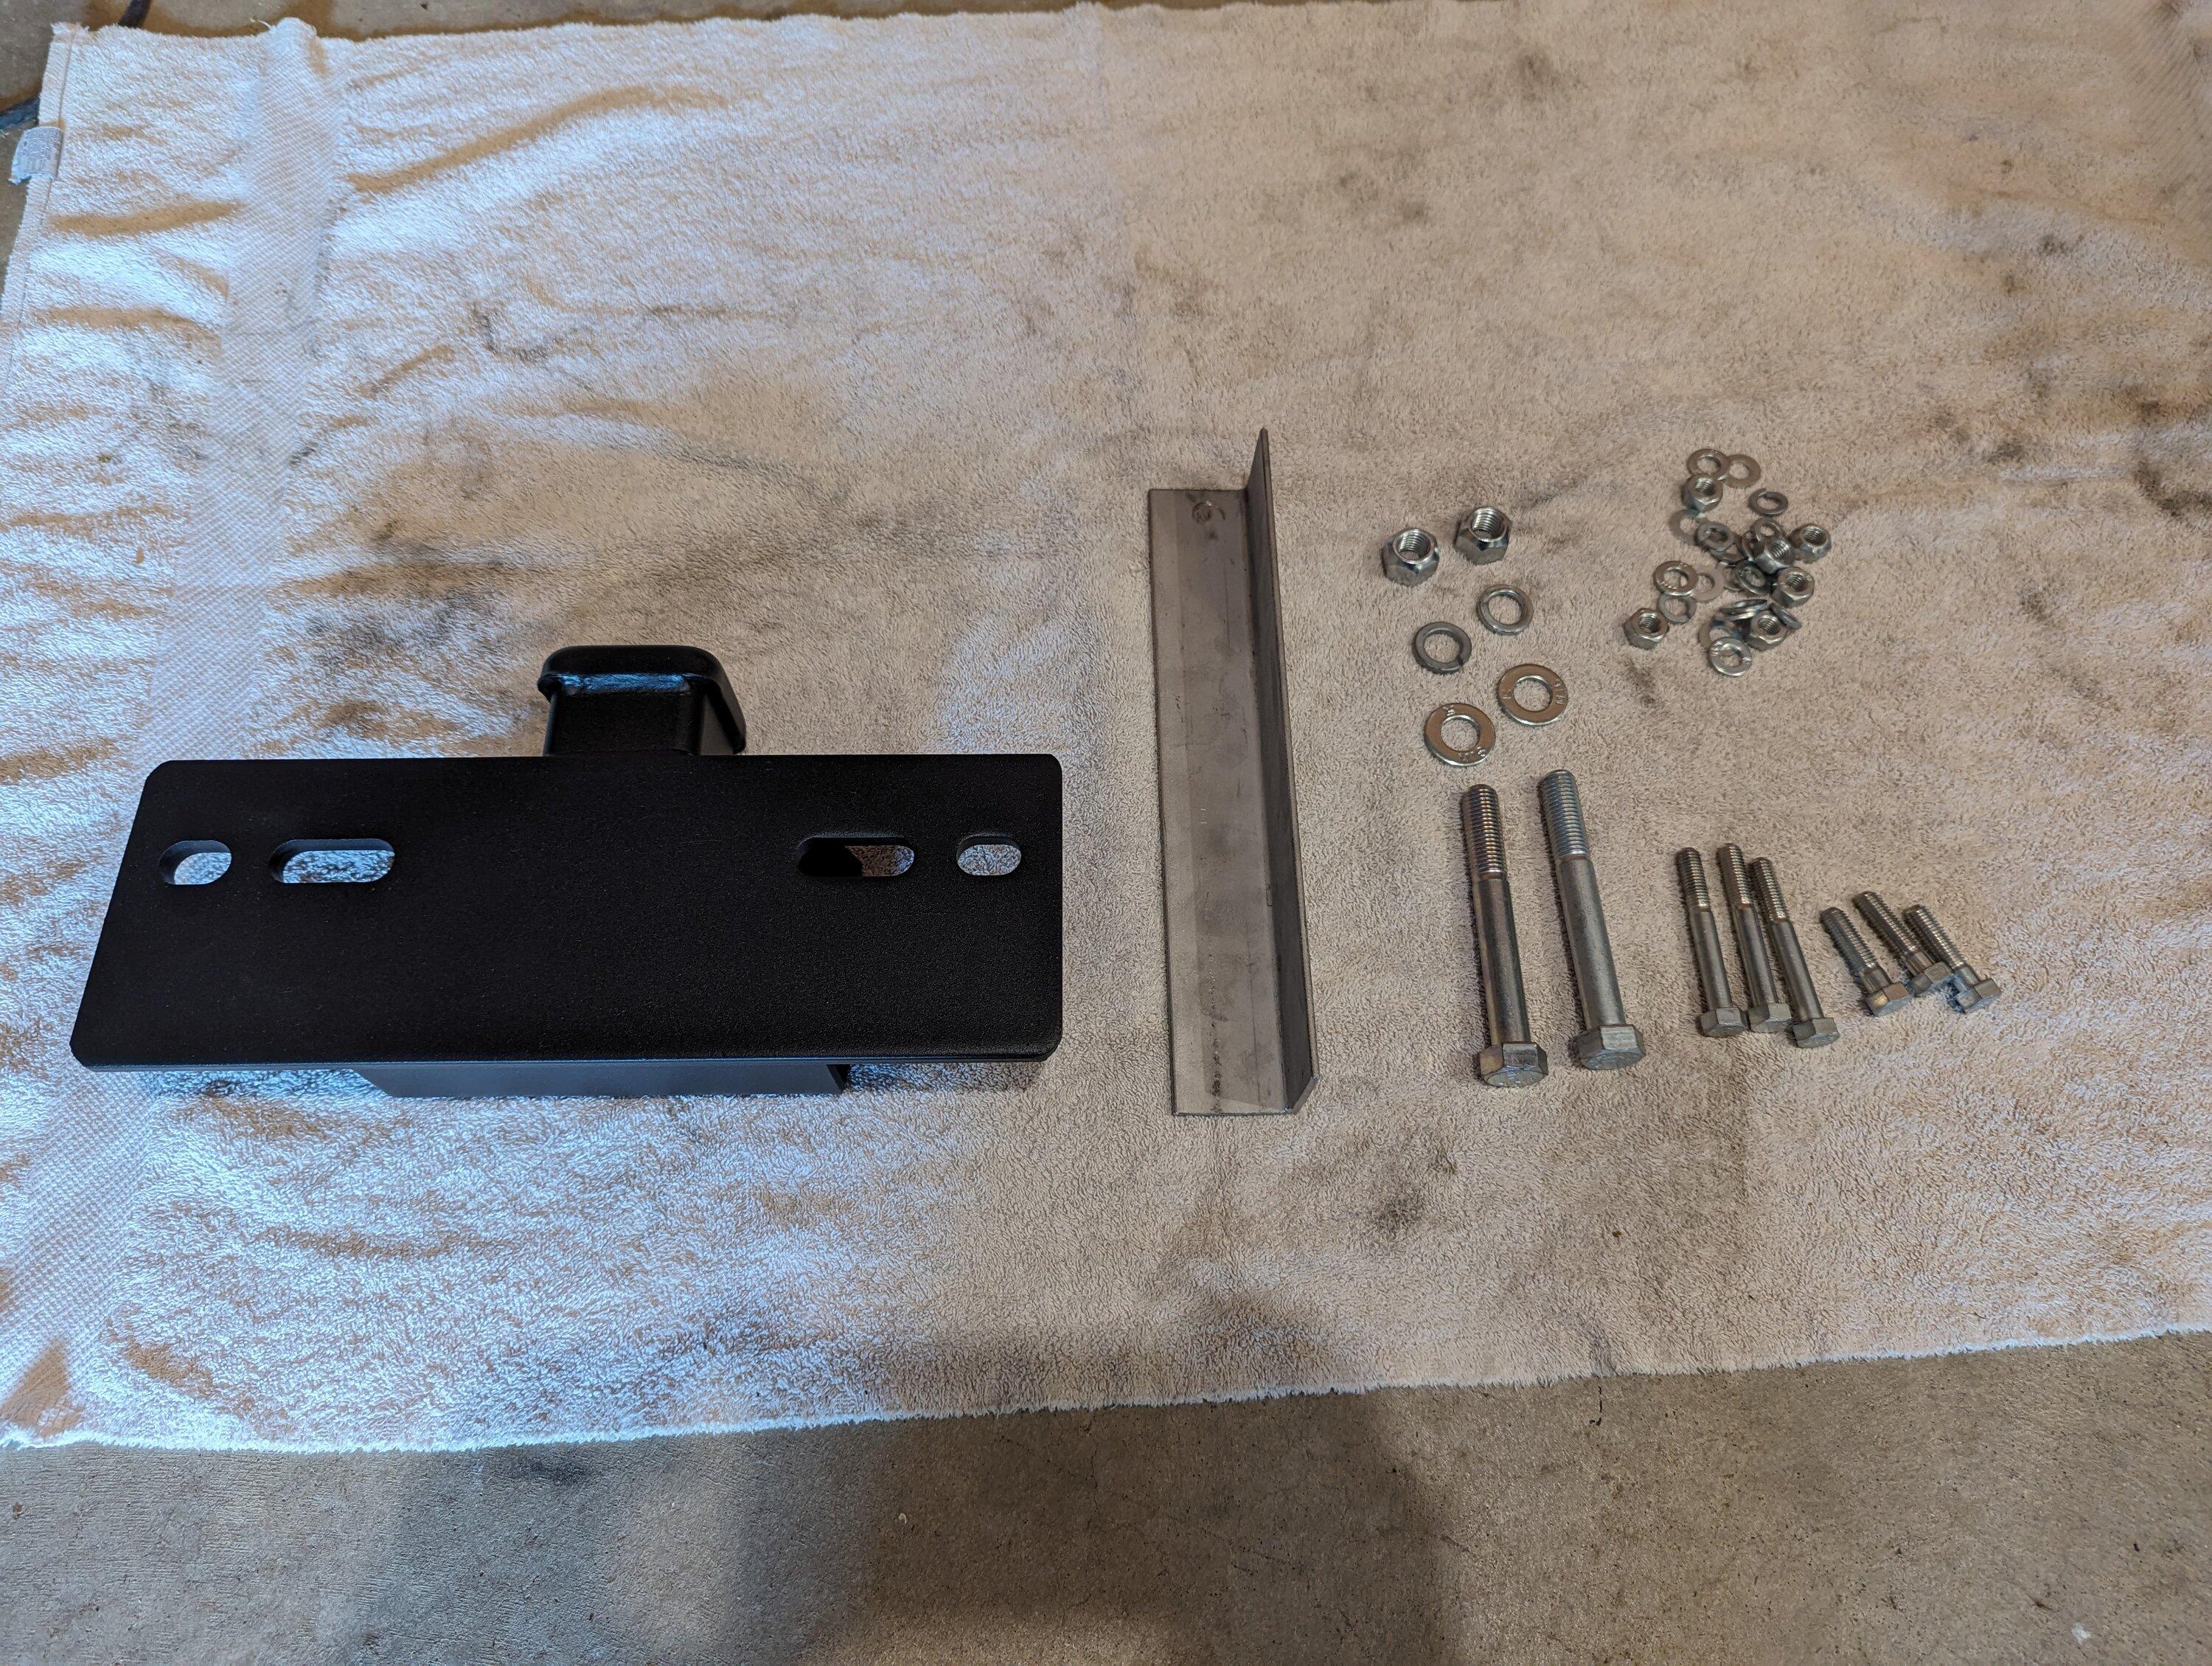
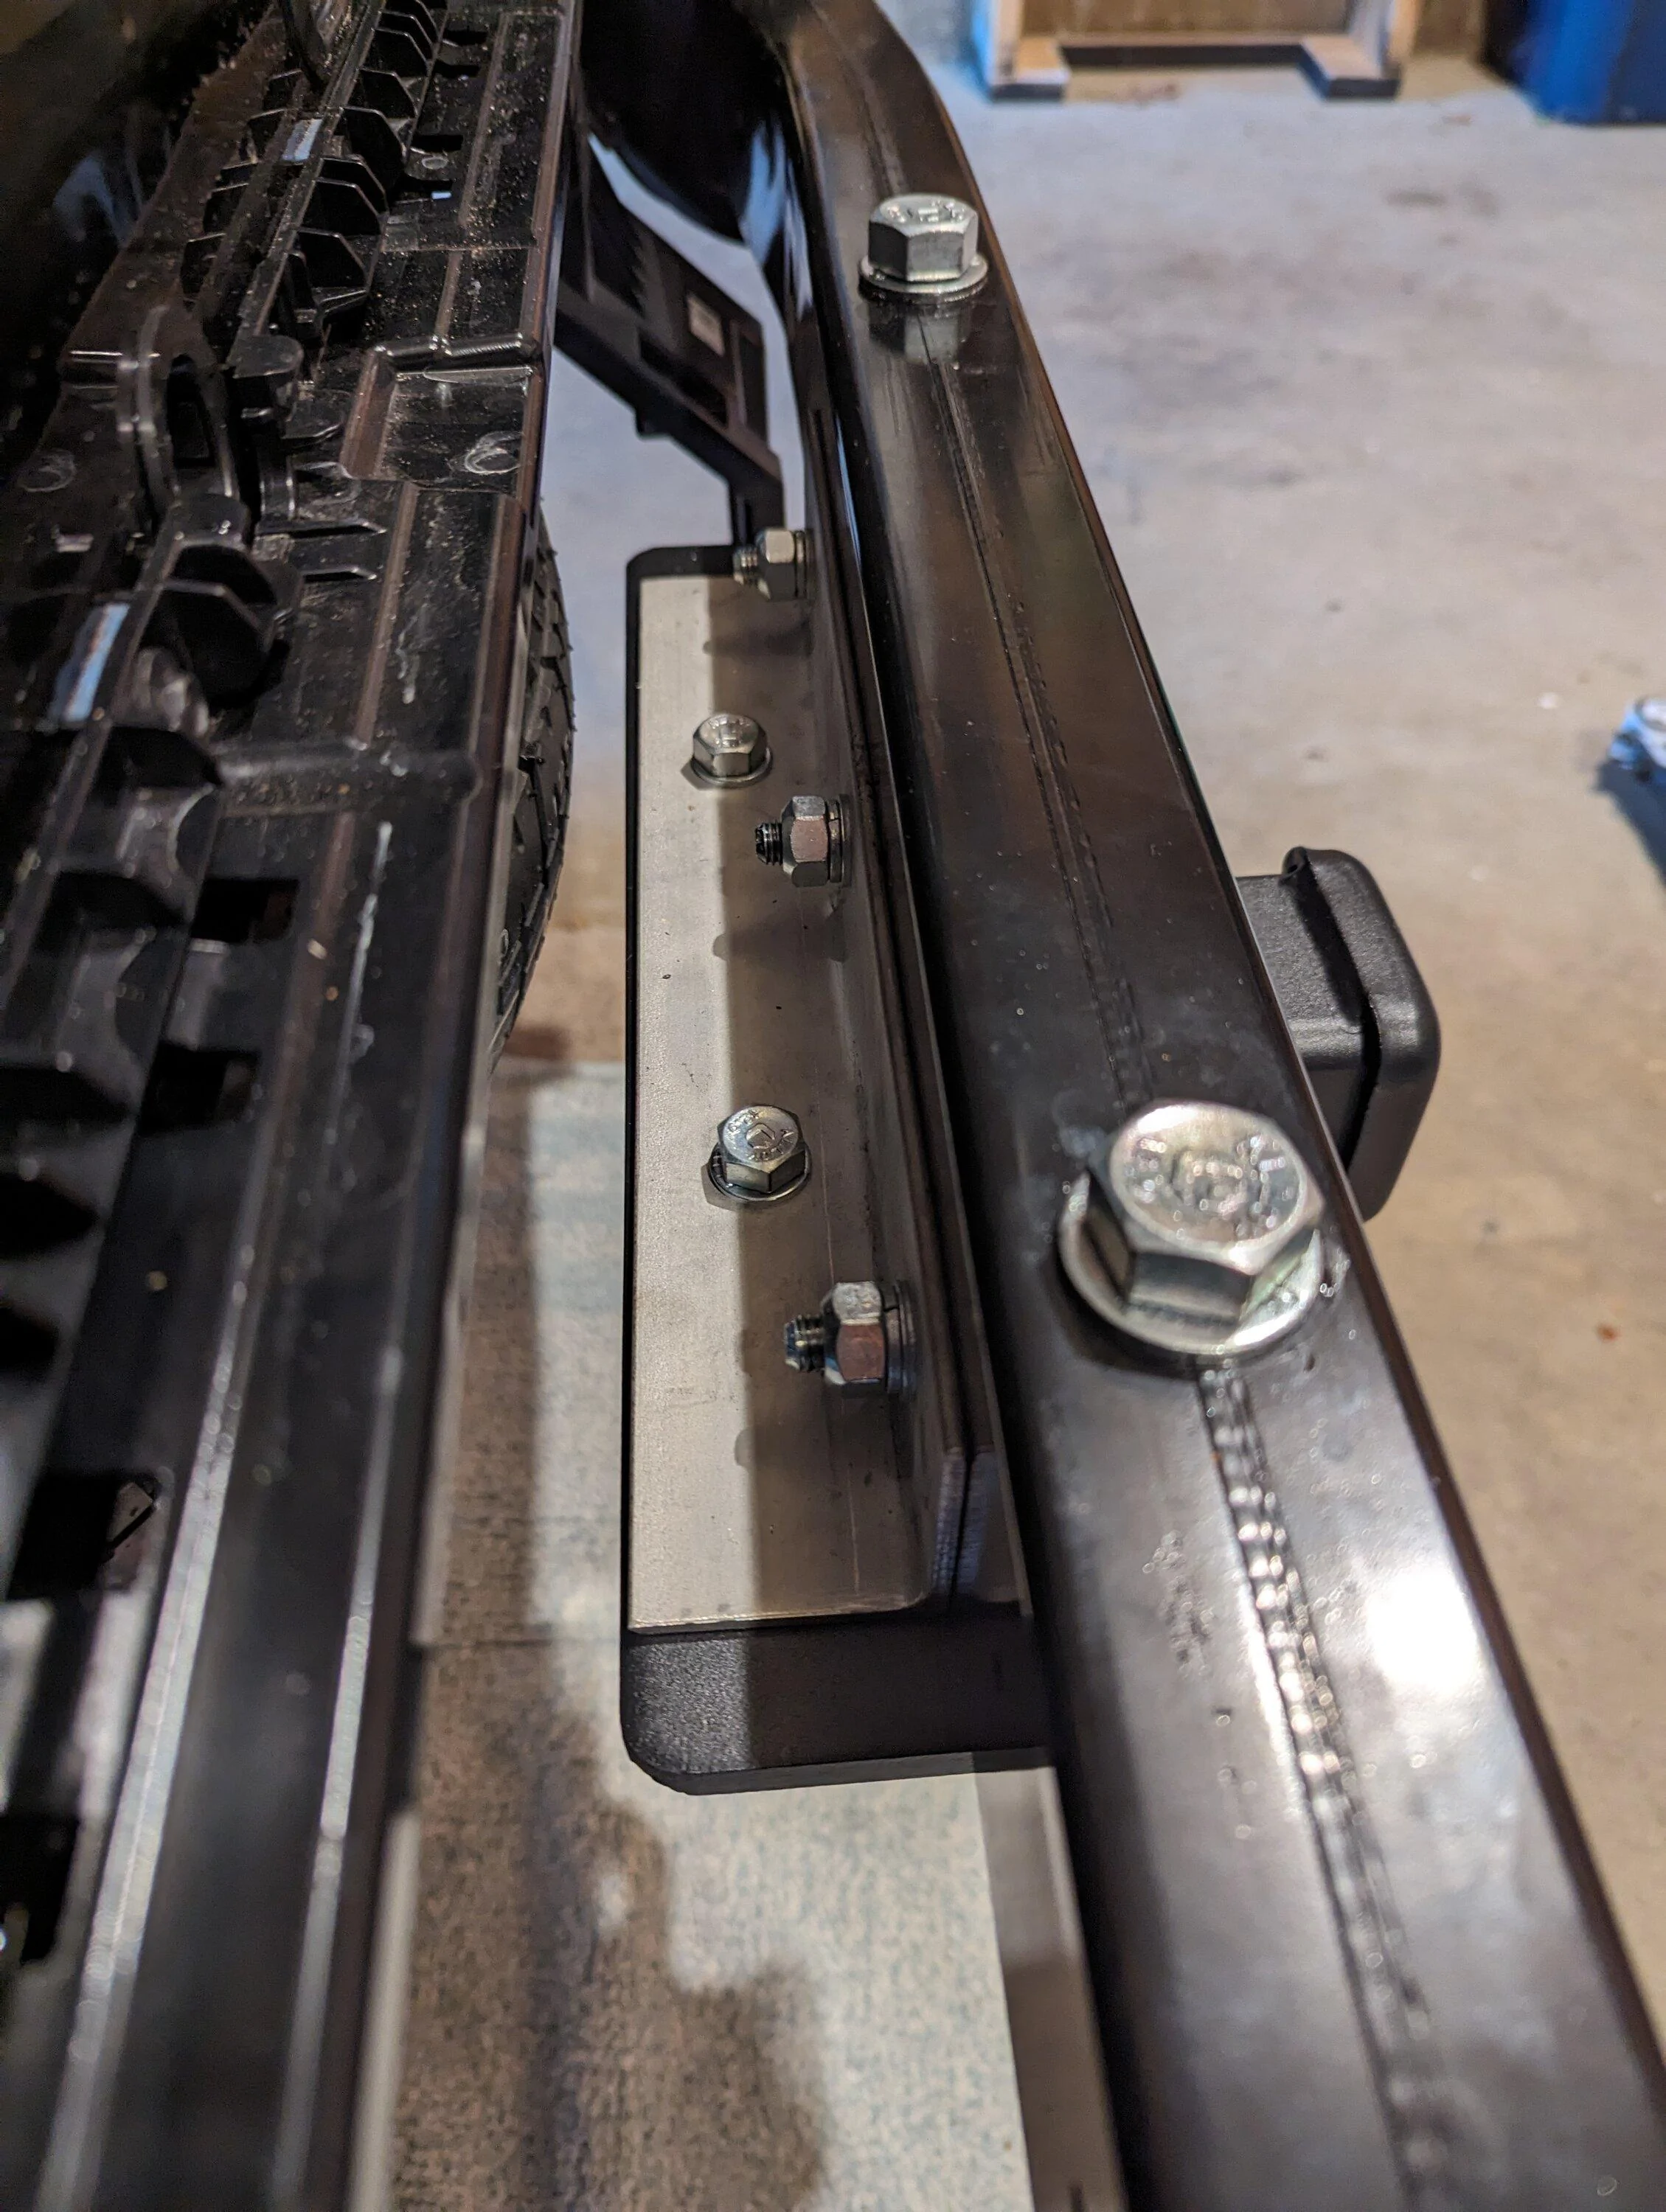
With the tail gate off, I had plenty of access to drill all my holes and bolt on the hitch receiver, which is very stout. I'm guessing this thing could easily handle more than 5000 lbs. I have access to some really nice fasteners so I use grade 12.9 metric bolts. I used M16 bolts for the main attachment fasteners, and I used 5 M10 bolts for some support in holding a piece of angle stainless steel on the back side. The stainless steel piece of a free piece of scrap I found so I figured I'd add it since it wasn't much extra work.
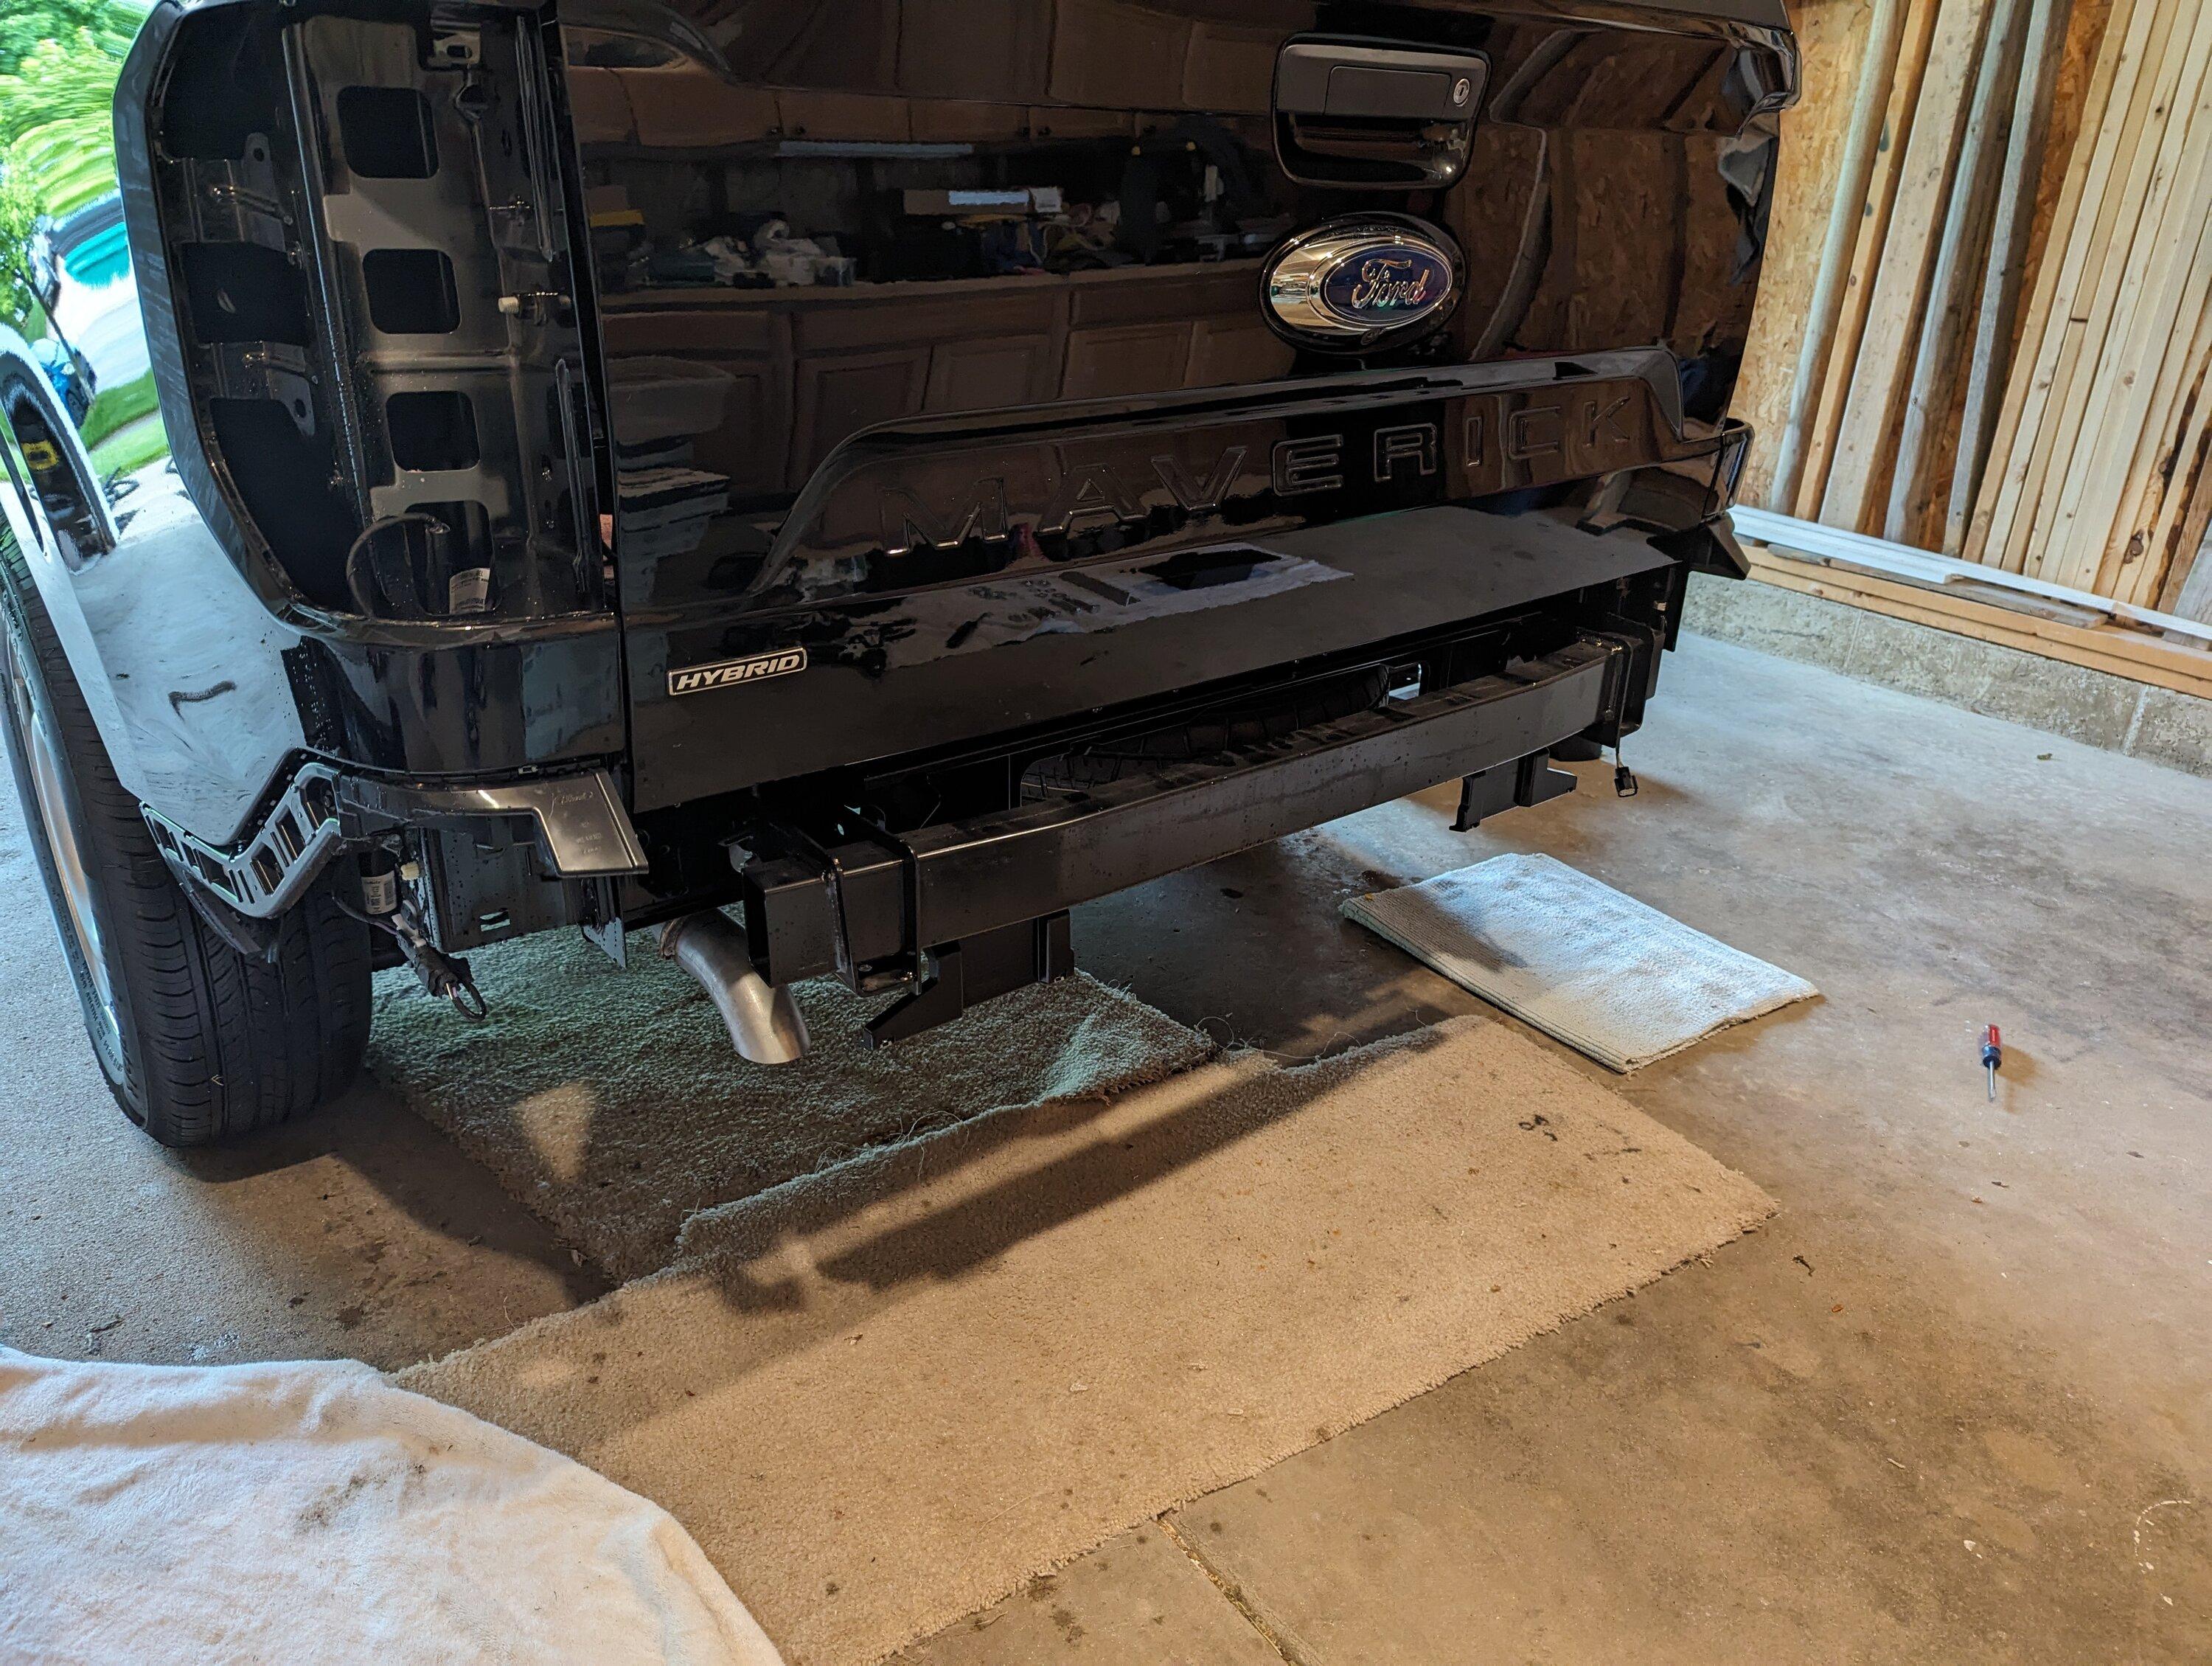
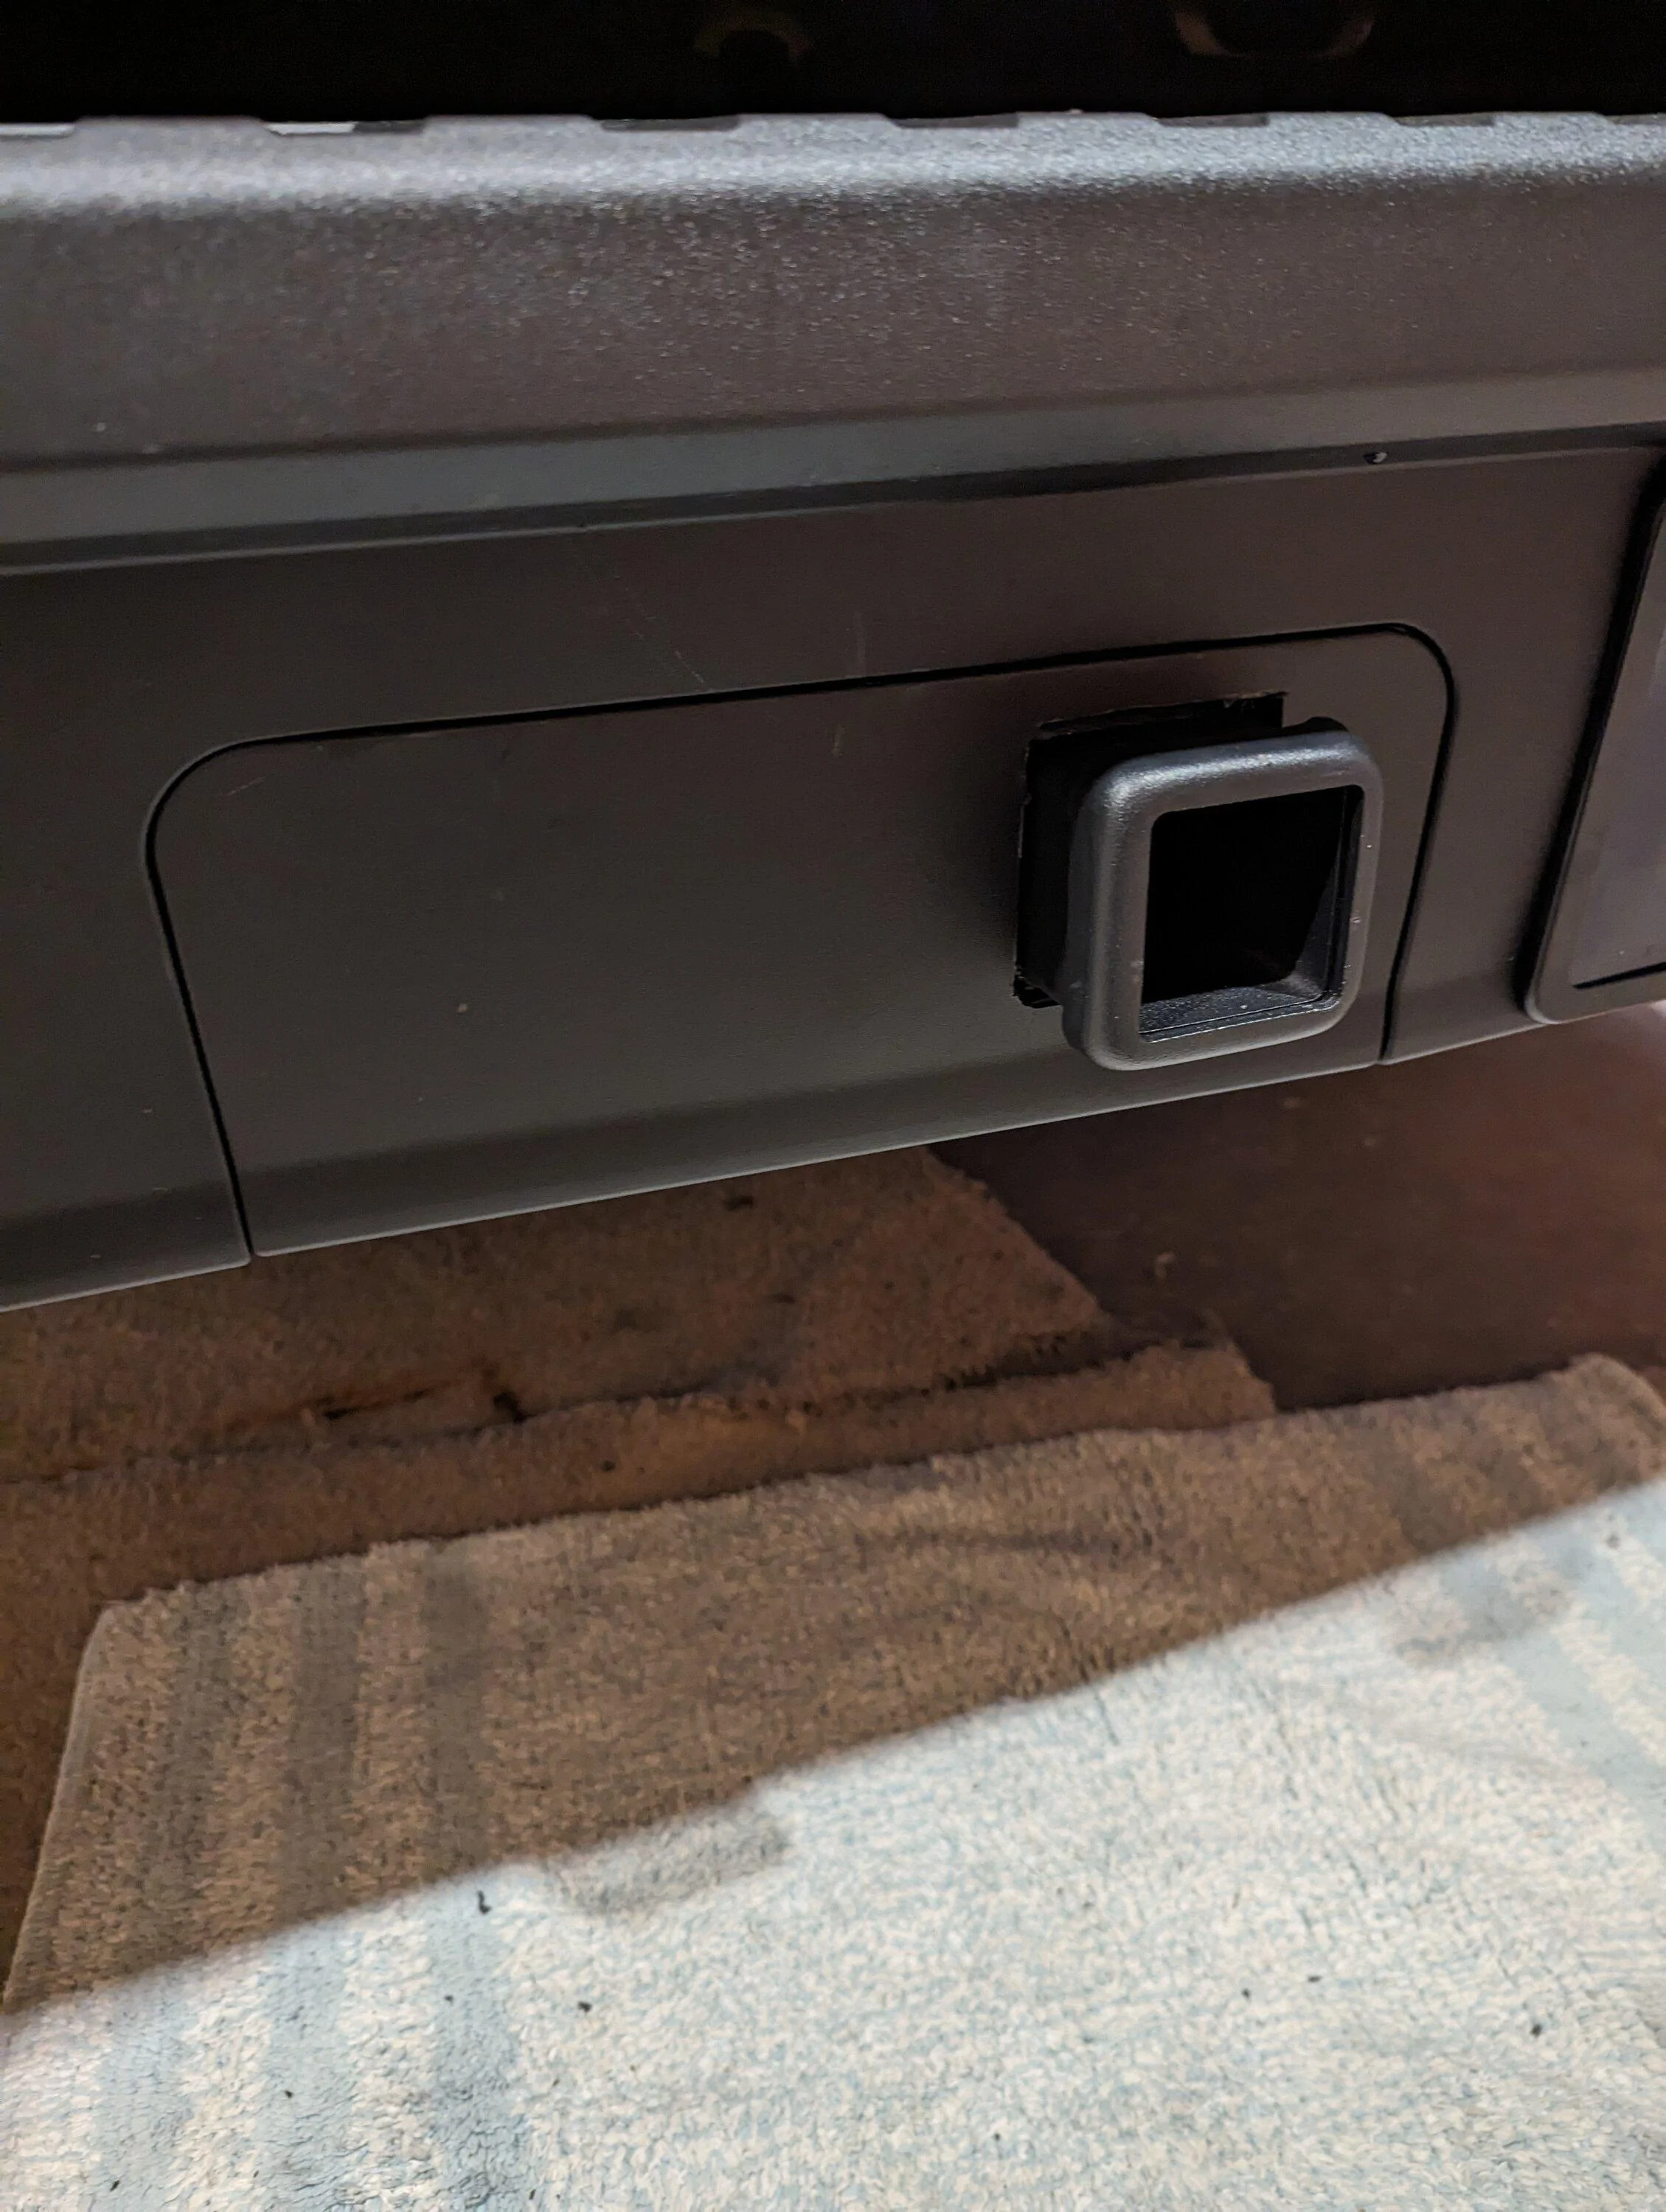
After attaching the hitch, I put everything back in place and then decided to try to replace the hitch access panel with a square cut-out for the receiver. I was so proud of myself for manipulating this thing back in place with such a nice clean fit until I realized that I just blocked easy access for attaching a pin to a hitch insert and the hooks for backup chains. *face palm*. Ohh well, when the time comes, I'll probably have to hack that access panel again. For now though I like how it looks.
Here's some pictures I took along the way:
Parts
Tail light removed (there's a single screw near the bottom of each tail light cavity that has to be removed to pull the bumper cover
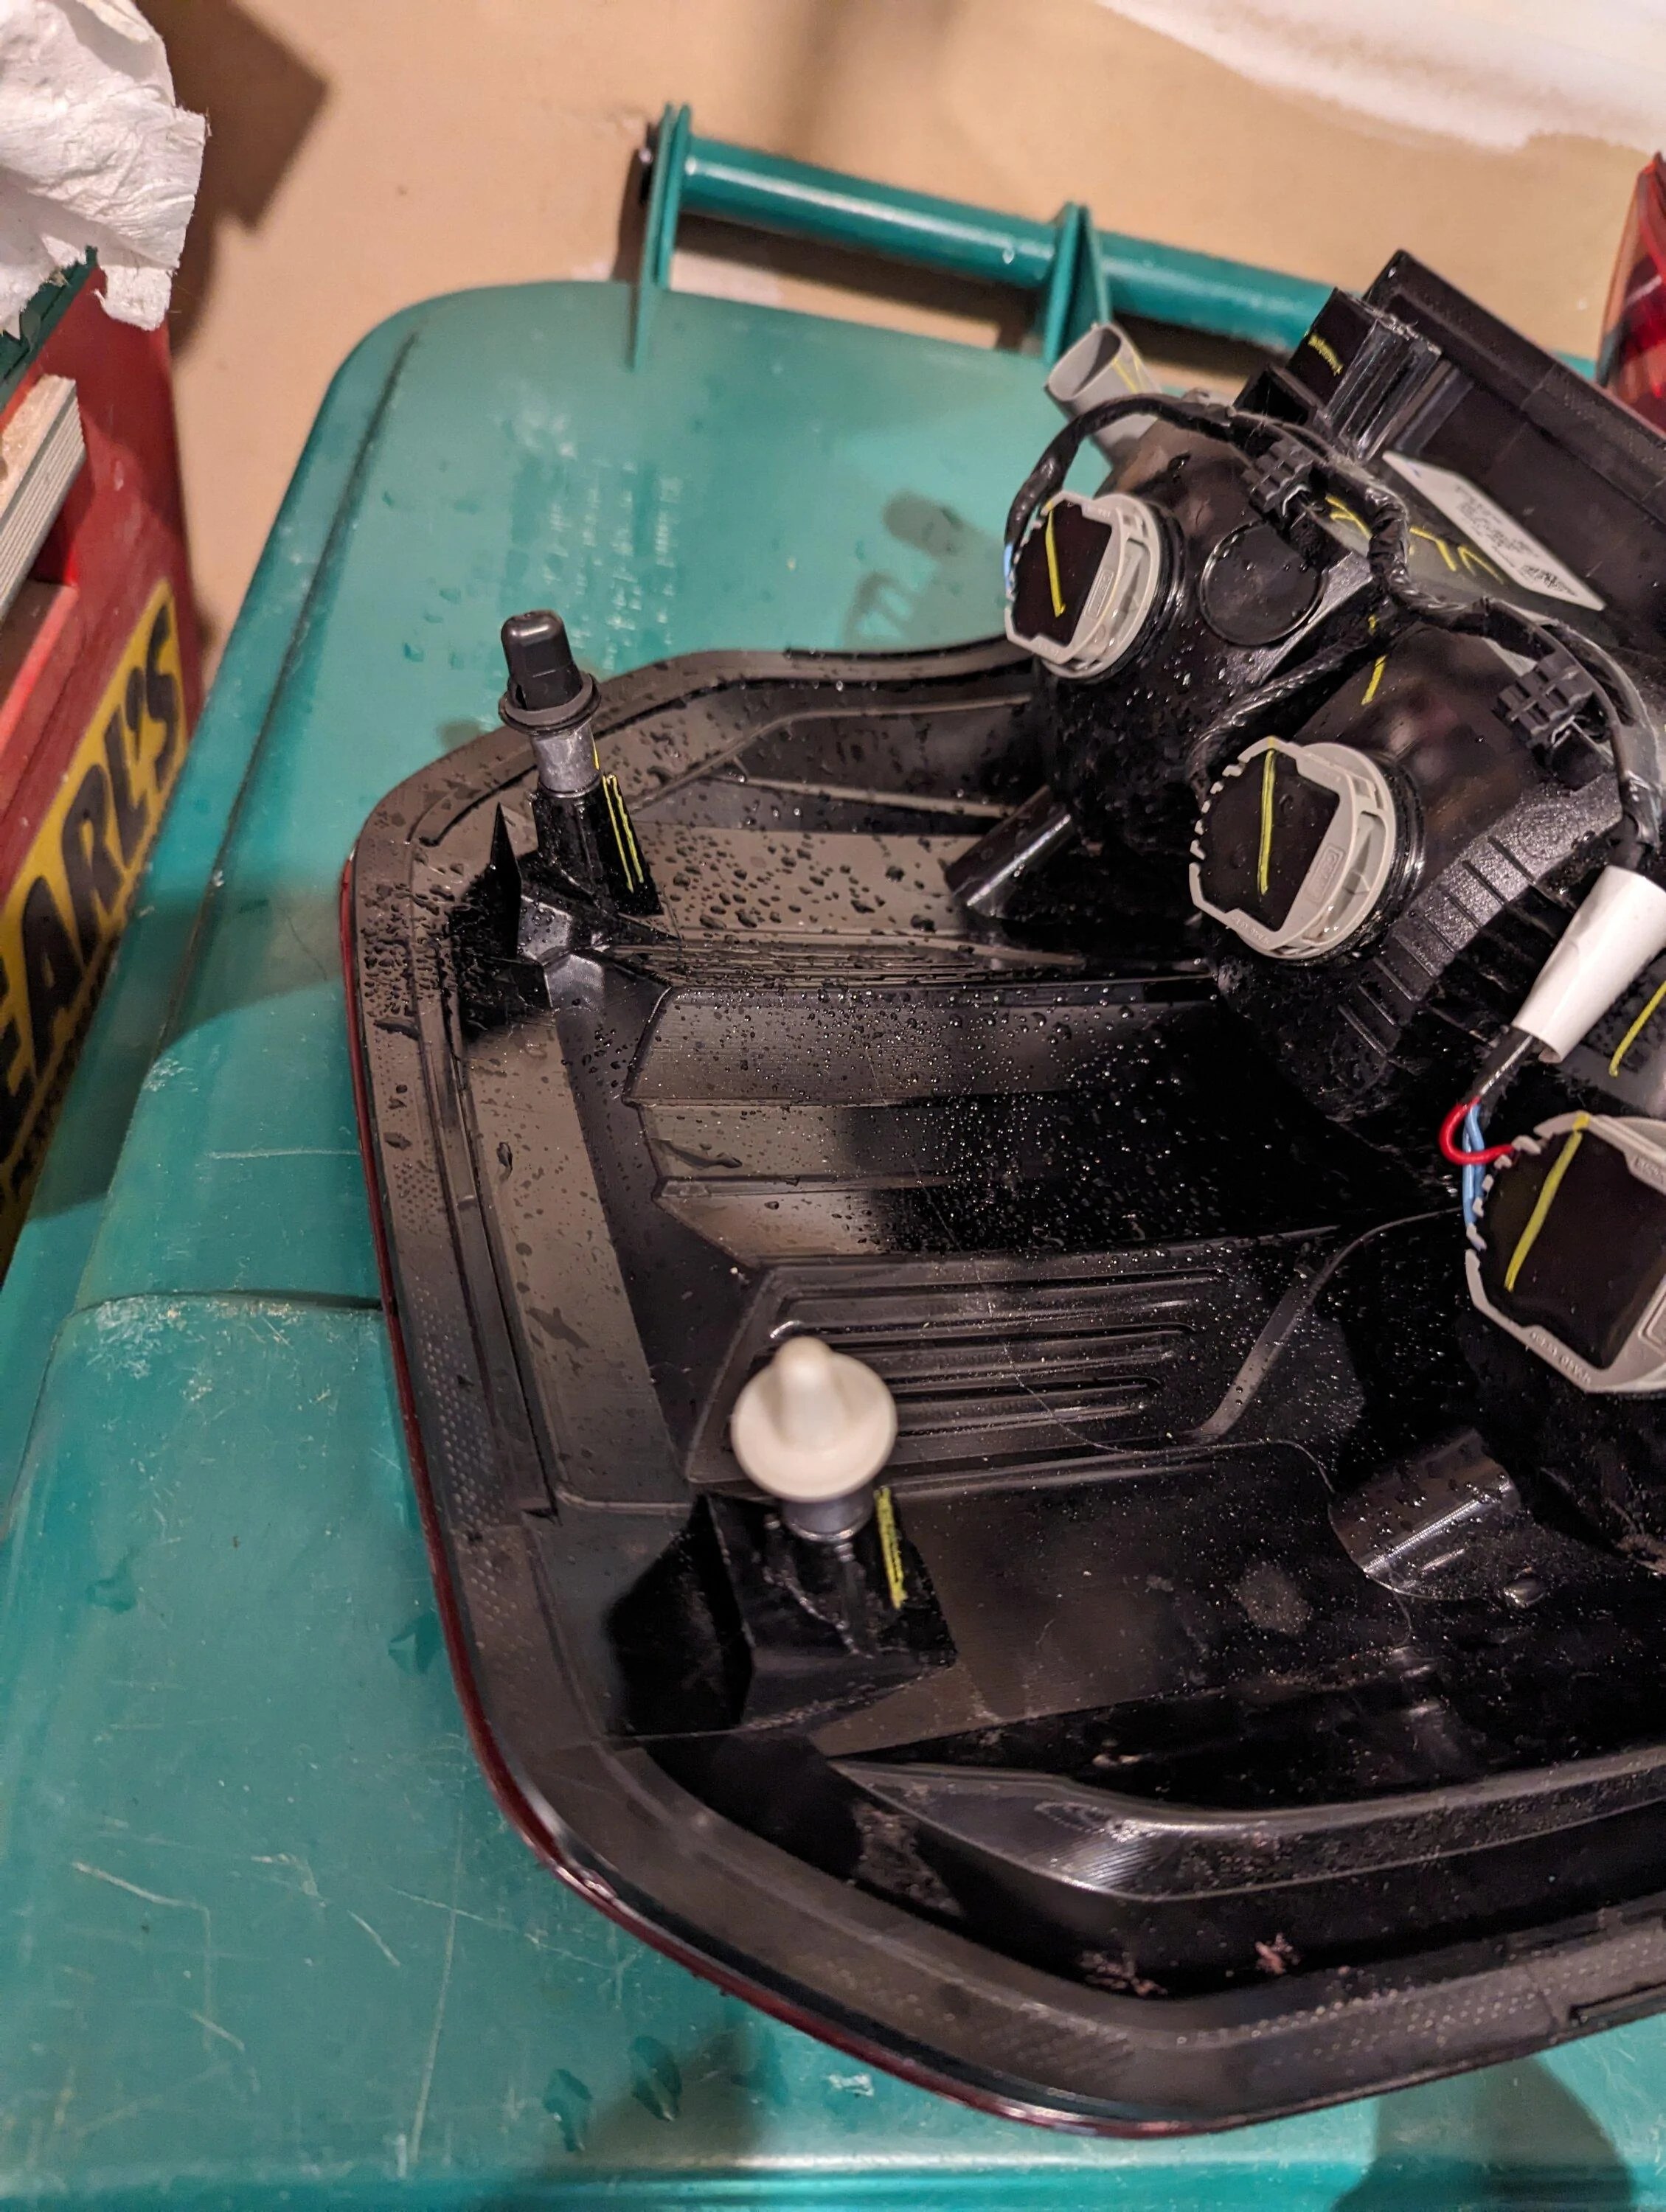
Tail light assembly (the black and white posts are very difficult to wrestle loose from the inside. I'm not impressed with Ford's design here)
Bumper cover removed (detaching the hidden clips on both sides after all of the screws were removed did not go the way the guy in the 2nd video showed. I think he's wrong)
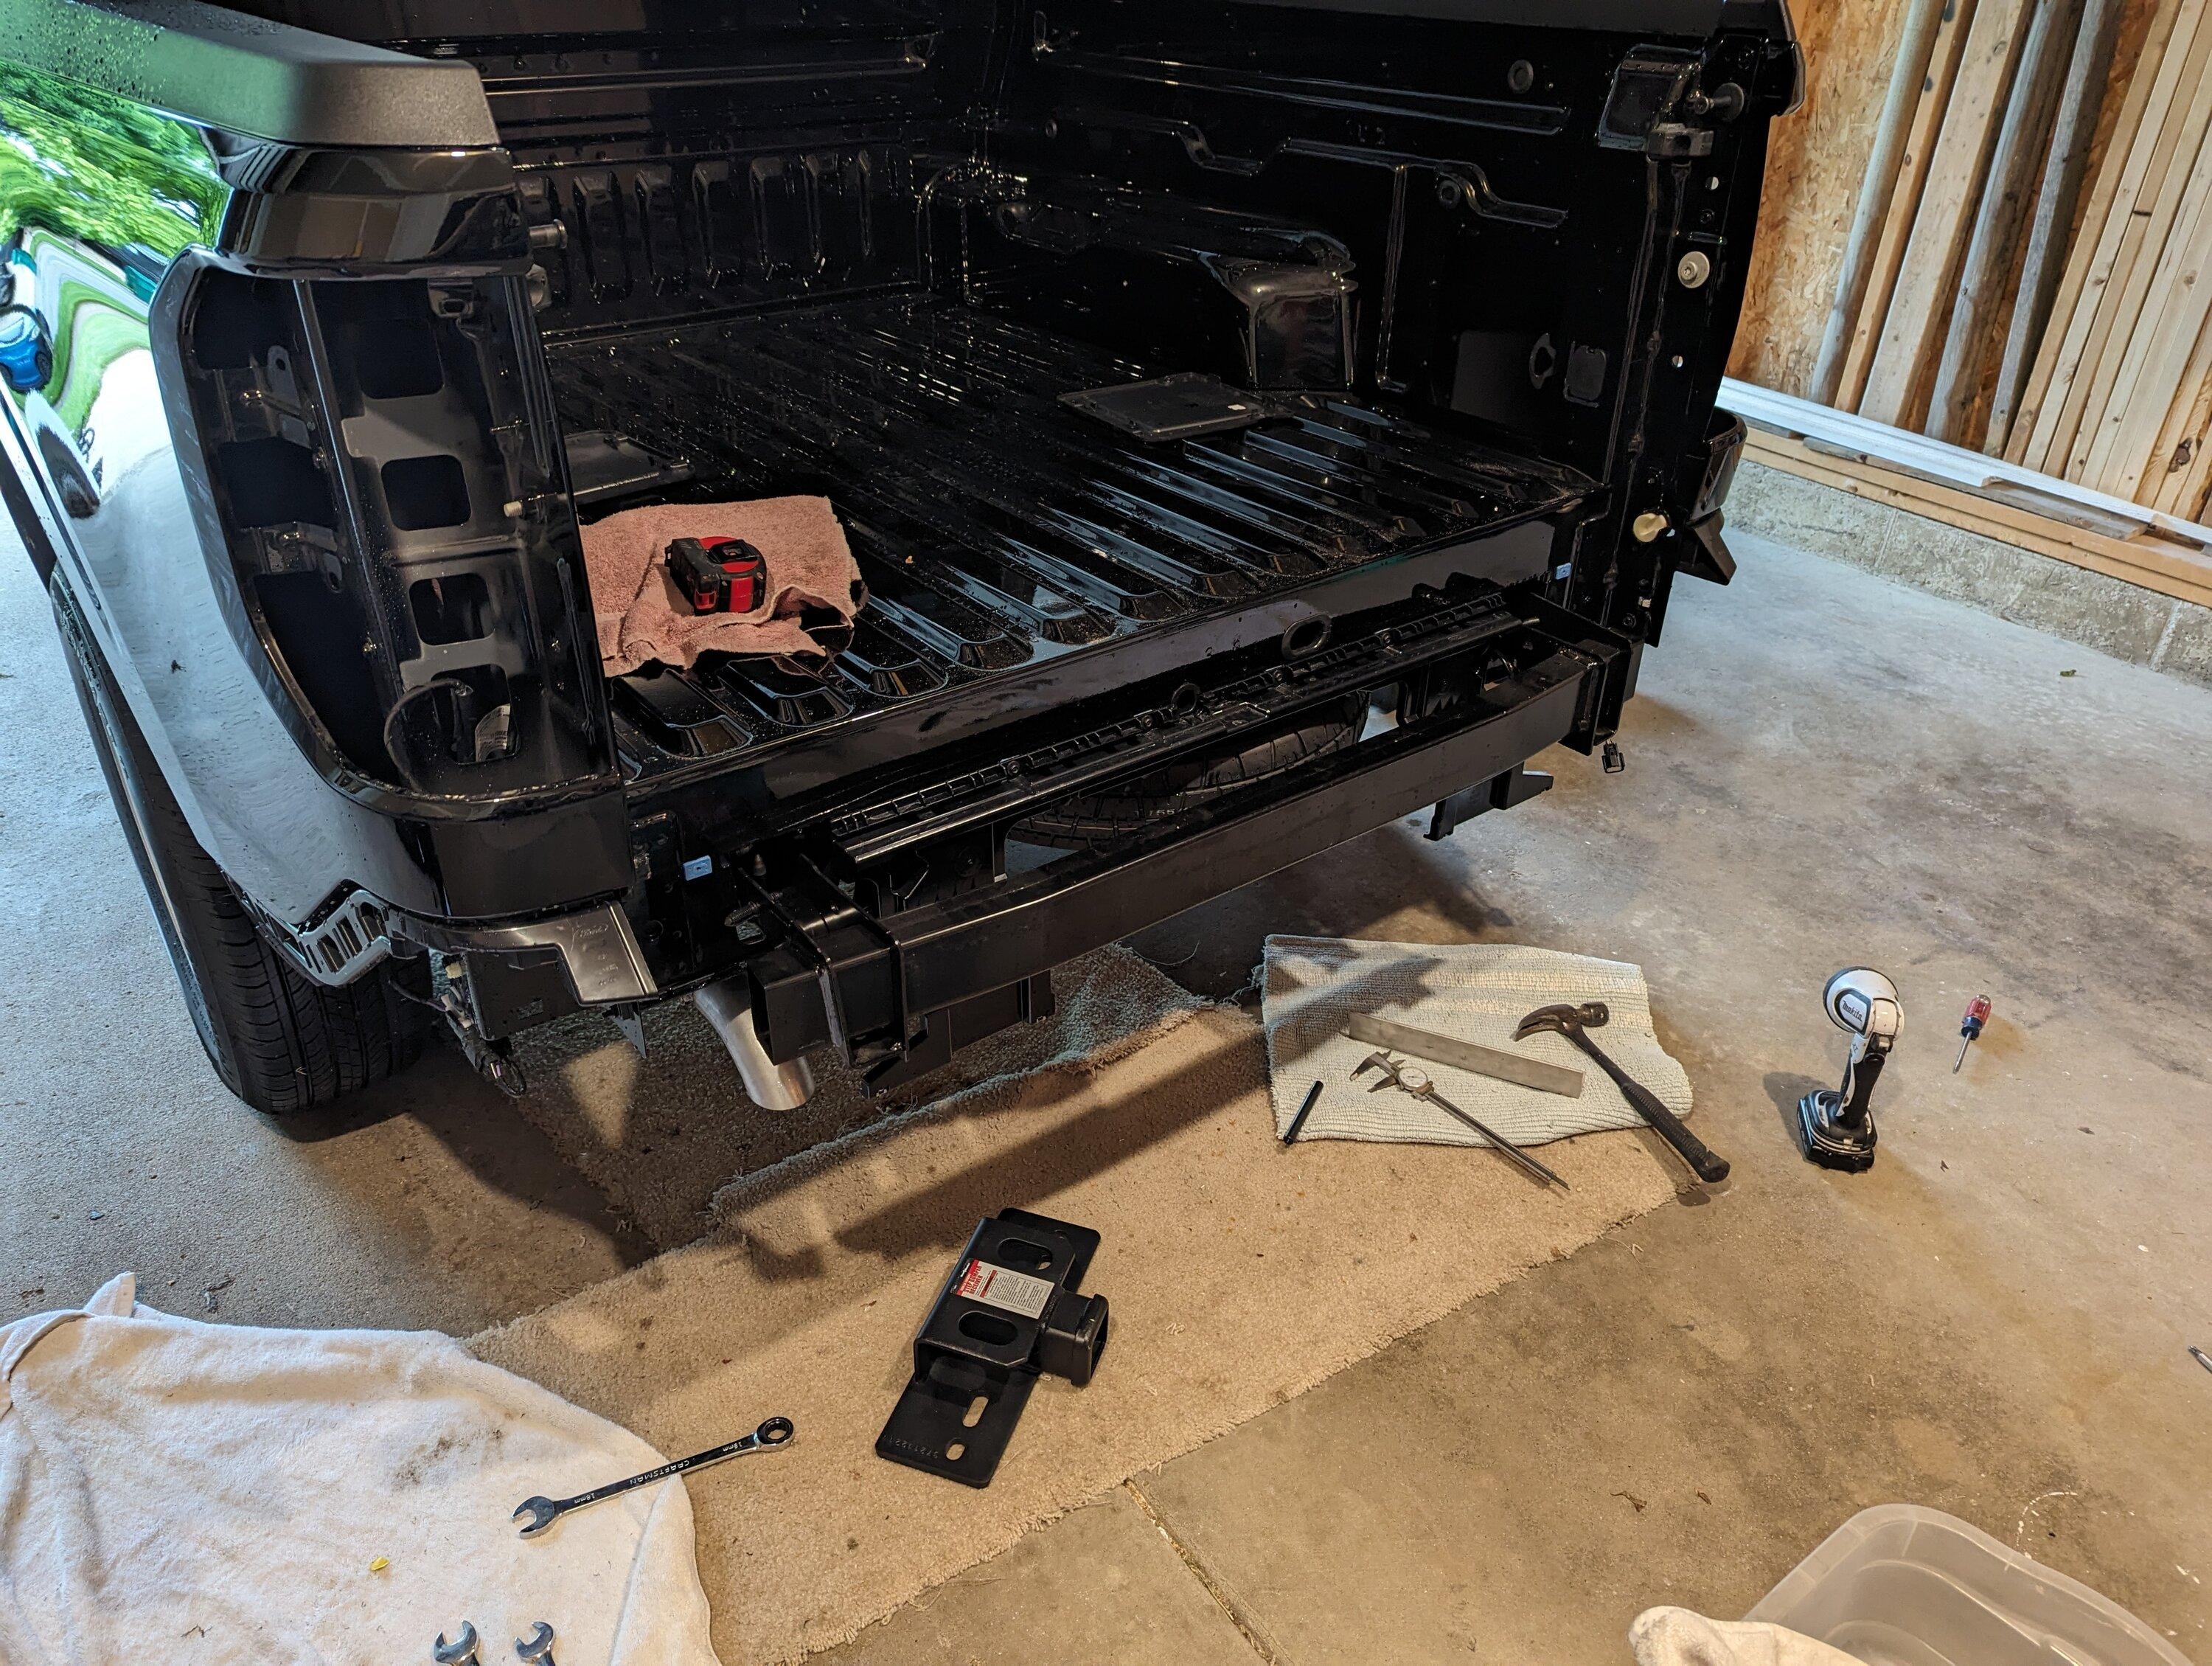
Tail gate removed
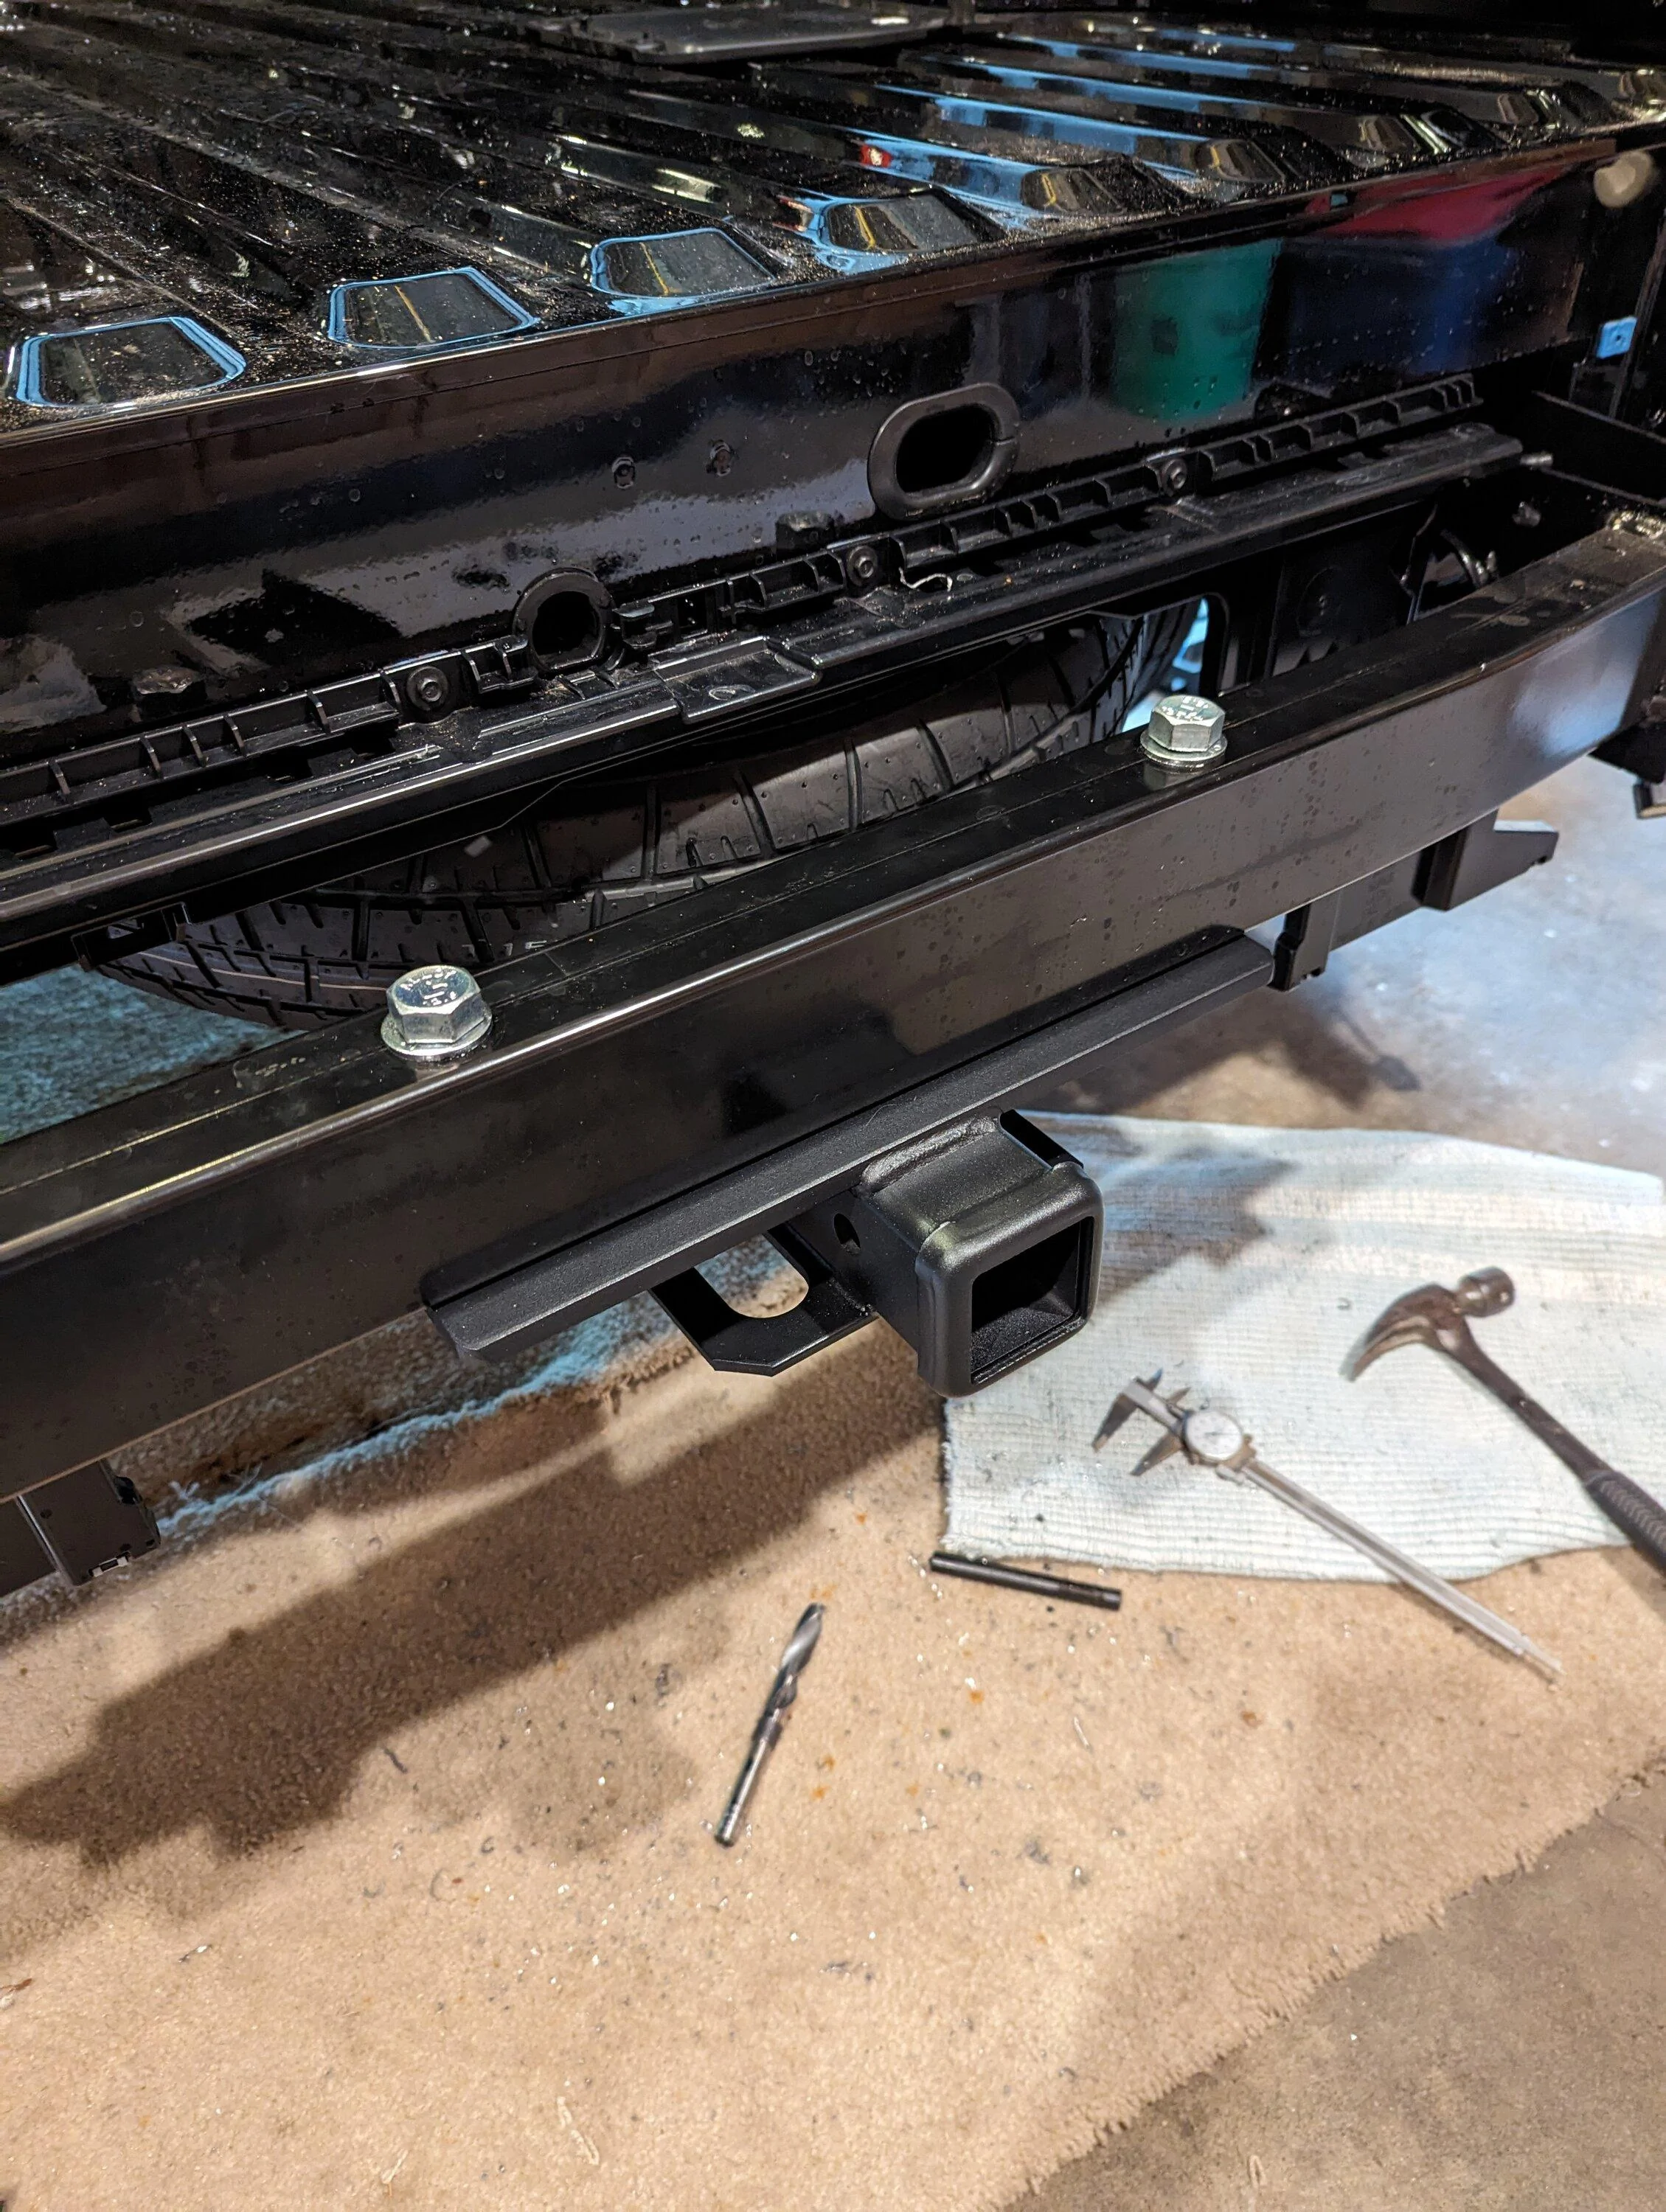
2 x M16 bolts holding hitch receiver on
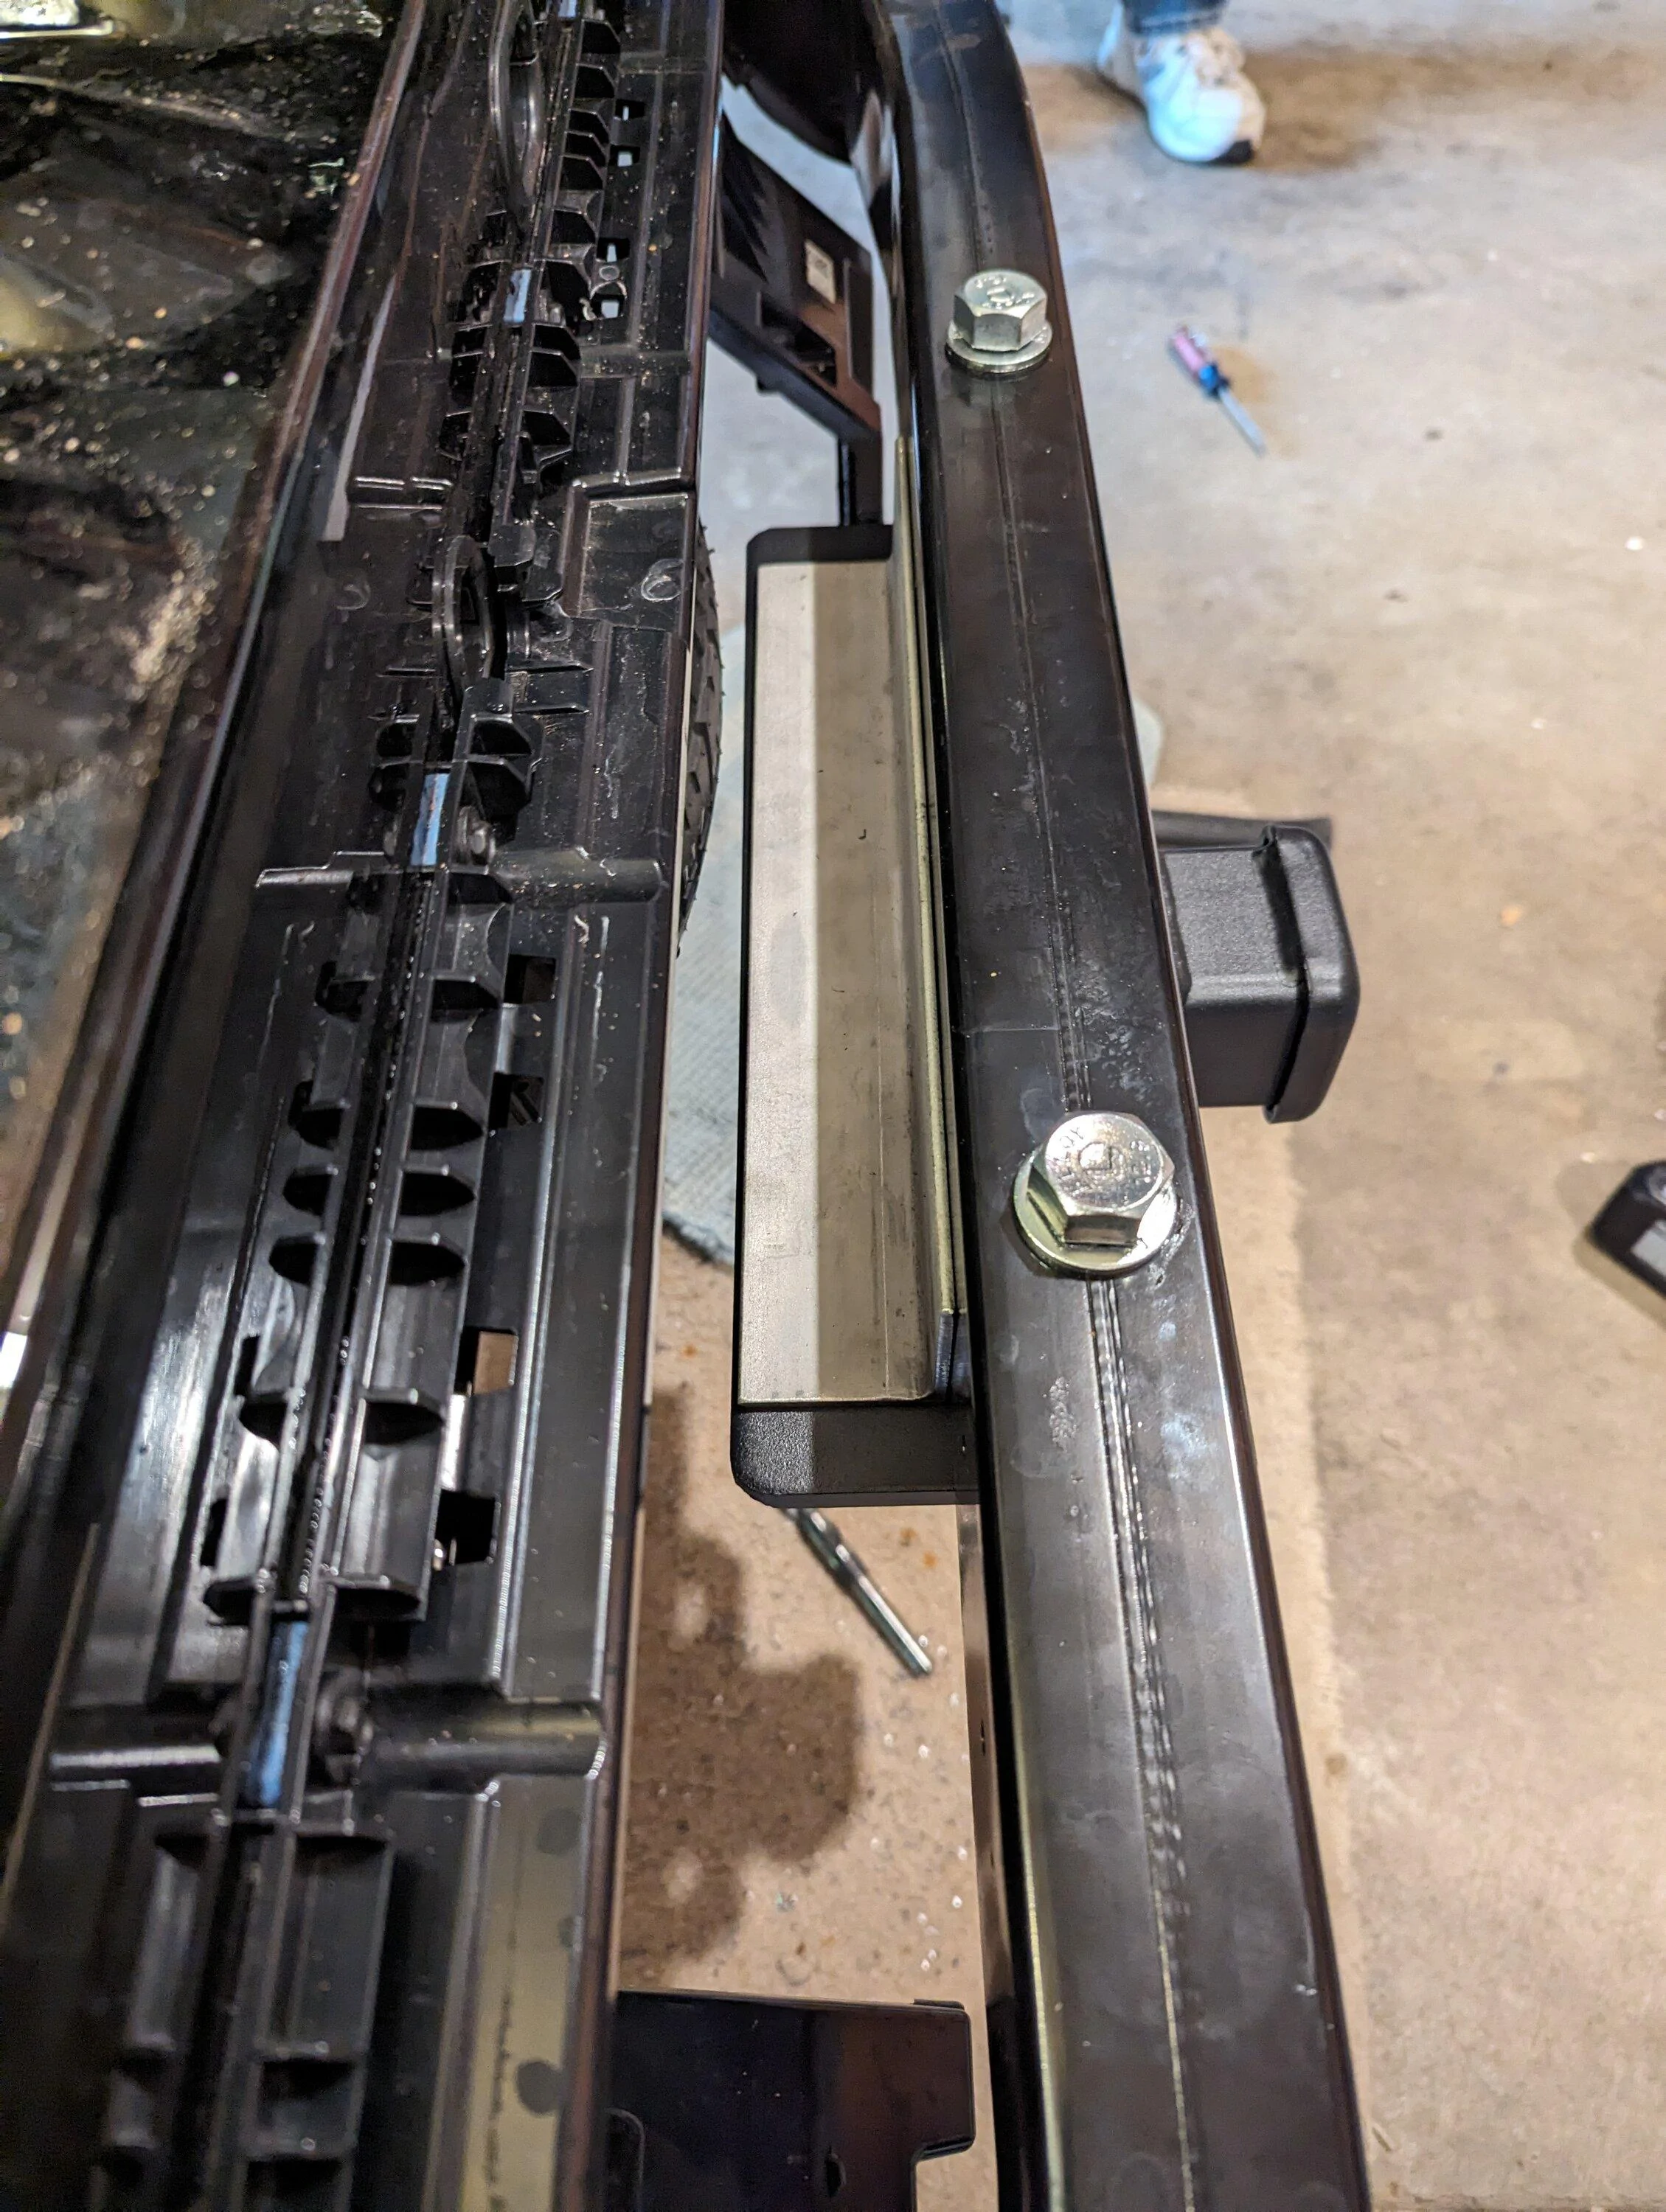
Piece of angle stainless sitting on the back side before drilling holes (I was bummed that my hitch was about 0.5 degress off parallel)
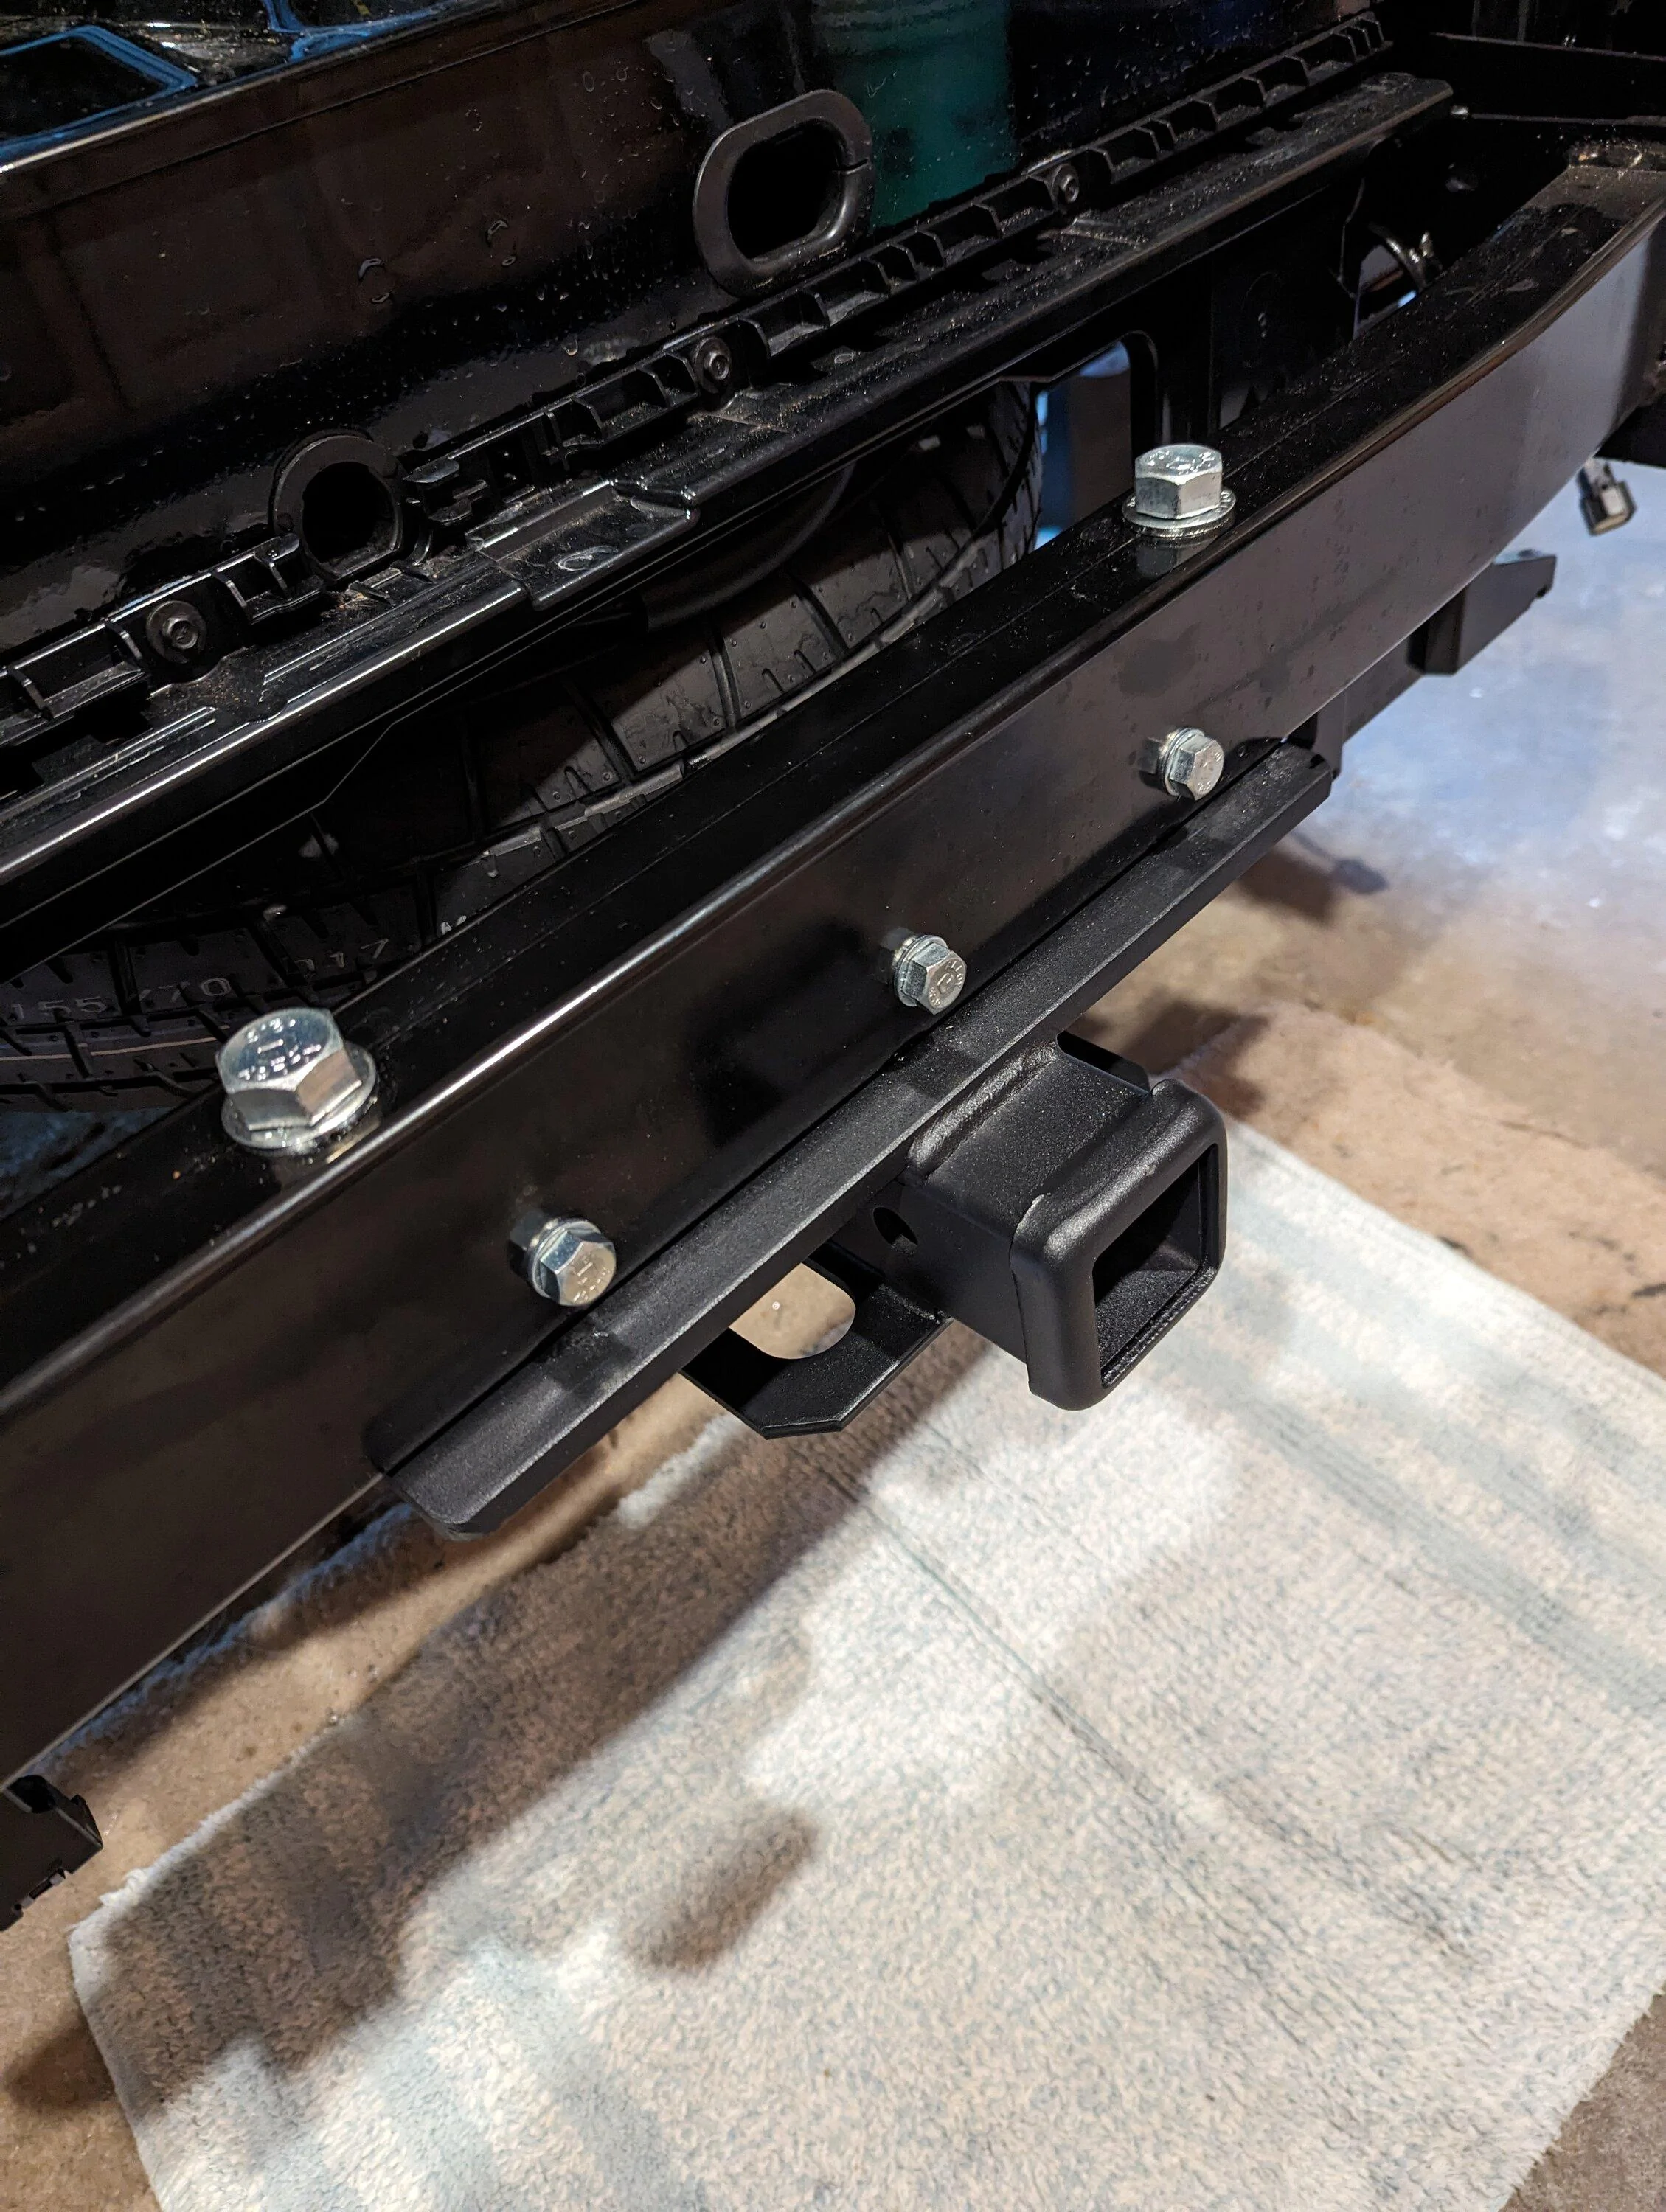
Fully attached
Access panel re-attached
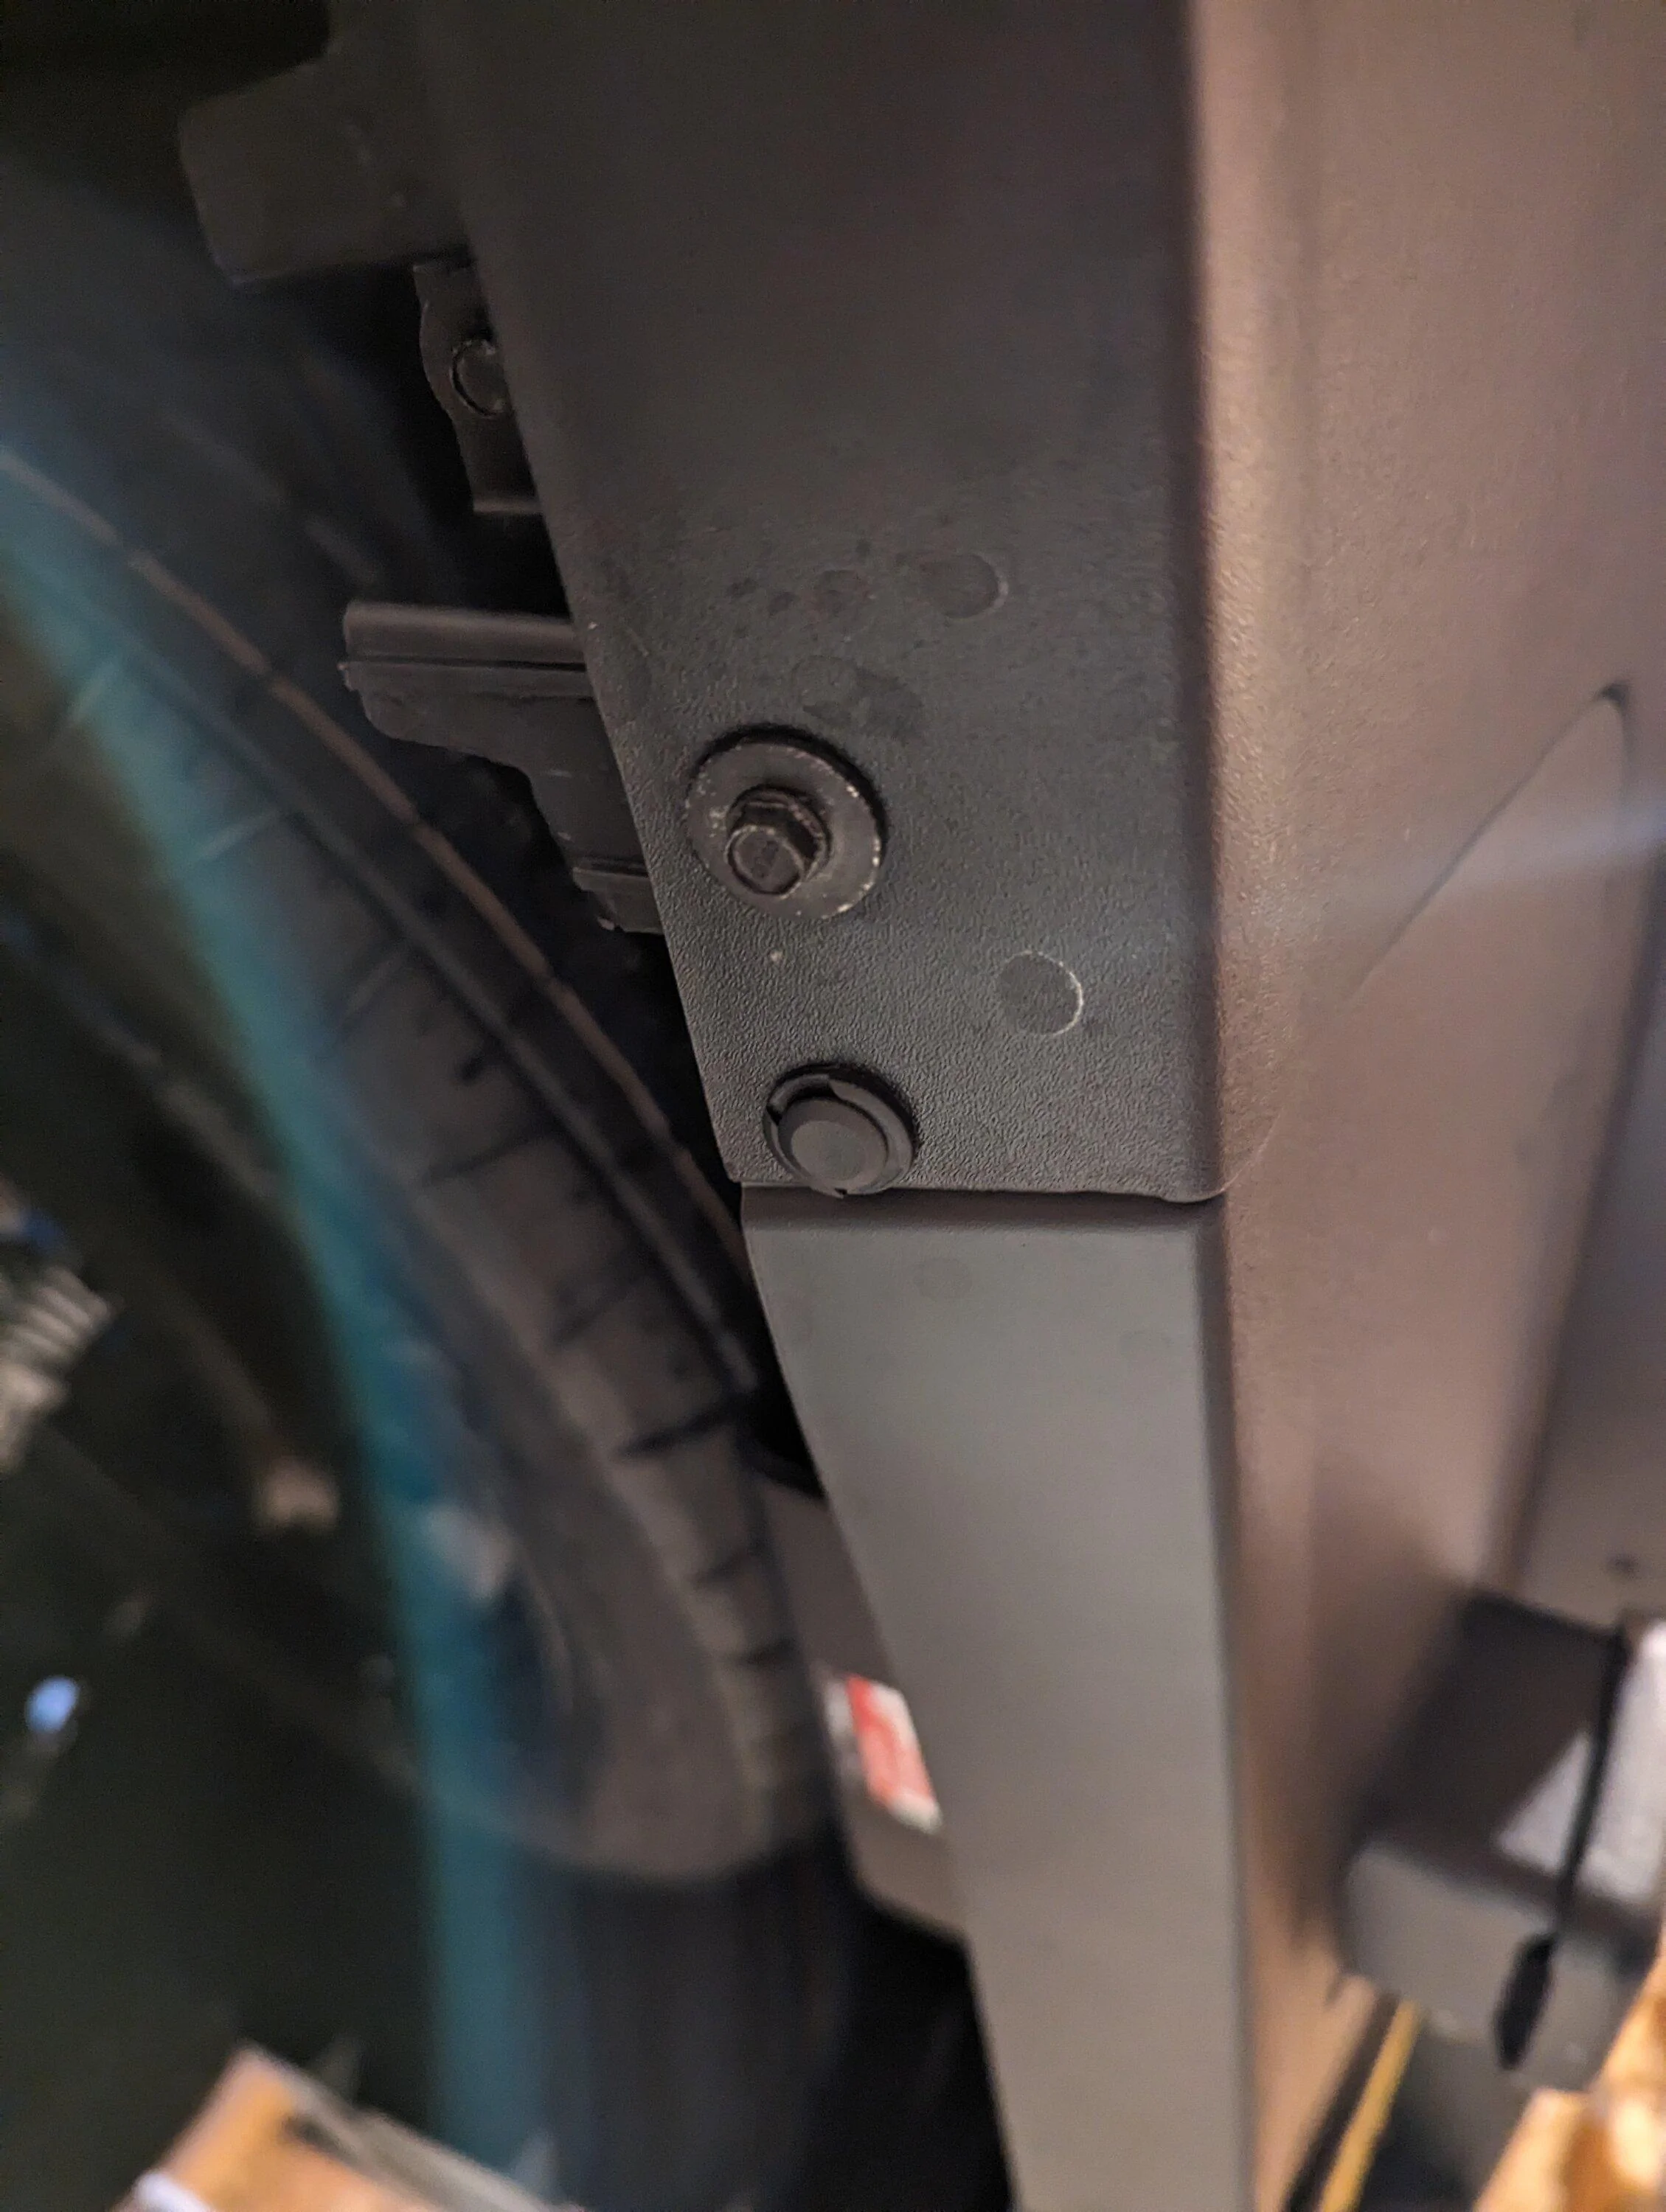
I added a couple generic push tabs to the bottom to replace the rivets that had to be drilled out
All in all it was a successful and frustrating few hours in the garage. If anyone is interested in repeating this procedure feel free to message me for tips.
I picked up my '24 Maverick XL Hybrid on Friday and immediately got to work adding a hitch. I should've just paid the $100 for a factory hitch, but that's a long story.
I used these two videos for help, but both had inaccuracies:
The first video is a '22 Maverick with a 3500 lb Harbor Freight hitch receiver. I started following his video and quickly realized that there were screws holding the bumper cover in different locations on my '24. Then I watched the 2nd video ('23 Maverick with an OEM bumper/hitch) and found out where the missing screws were...behind the tail lights. Taking the tail lights out was scary and did not happen in the same way as the video. Once I got the bumper cover off I realized that I didn't need to remove the bumper at all if I just removed the tail gate.
I thought this would take all of 30 seconds, but I was wrong. Ford's tail gate design for this truck is awful, and there's even a bracket installed on the passenger side preventing you from removing the tail gate easily. I removed the bracket, then tried to pull the tail gate off only to realize that it's spring loaded to assist in closing, which puts tension on the driver's side when trying to pull it out of the hinge point. This is dangerous with a brand new vehicle, and I was very close to denting/scratching the tail gate several times. I also forgot to unplug the wiring harness after getting the thing loose from both hinge points. So I had to reinstall it just to unplug the harness because the connector is located in a difficult place to reach under the truck behind the spare tire.
With the tail gate off, I had plenty of access to drill all my holes and bolt on the hitch receiver, which is very stout. I'm guessing this thing could easily handle more than 5000 lbs. I have access to some really nice fasteners so I use grade 12.9 metric bolts. I used M16 bolts for the main attachment fasteners, and I used 5 M10 bolts for some support in holding a piece of angle stainless steel on the back side. The stainless steel piece of a free piece of scrap I found so I figured I'd add it since it wasn't much extra work.
After attaching the hitch, I put everything back in place and then decided to try to replace the hitch access panel with a square cut-out for the receiver. I was so proud of myself for manipulating this thing back in place with such a nice clean fit until I realized that I just blocked easy access for attaching a pin to a hitch insert and the hooks for backup chains. *face palm*. Ohh well, when the time comes, I'll probably have to hack that access panel again. For now though I like how it looks.
Here's some pictures I took along the way:
Parts
Tail light removed (there's a single screw near the bottom of each tail light cavity that has to be removed to pull the bumper cover
Tail light assembly (the black and white posts are very difficult to wrestle loose from the inside. I'm not impressed with Ford's design here)
Bumper cover removed (detaching the hidden clips on both sides after all of the screws were removed did not go the way the guy in the 2nd video showed. I think he's wrong)
Tail gate removed
2 x M16 bolts holding hitch receiver on
Piece of angle stainless sitting on the back side before drilling holes (I was bummed that my hitch was about 0.5 degress off parallel)
Fully attached
Access panel re-attached
I added a couple generic push tabs to the bottom to replace the rivets that had to be drilled out
All in all it was a successful and frustrating few hours in the garage. If anyone is interested in repeating this procedure feel free to message me for tips.
Sponsored
