- First Name
- Cole
- Joined
- Aug 11, 2025
- Threads
- 2
- Messages
- 10
- Reaction score
- 13
- Location
- Kansas City
- Vehicle(s)
- 2024 Maverick Fx4 Lariat
- Engine
- 2.0L EcoBoost
- Thread starter
- #1
Pictures at the bottom. I provided WAY too much detail in this post but compiling all I know in one place in case someone is in a similar spot as me someday, hope I can help that person!
This forum has a ton of posts regarding upgrading the stock Mav stereo system but only a handful regarding the Lariat B&O system. As others have stated, I agree that from a clarity perspective, the B&O system is pretty adequate (the rears are ass but not worth the hassle given their awful placement). That being said, I have always found the B&O system to be too quiet, as well as having actually laughable levels of 'bass' (the stock B&O system has a 6x9 infinite baffle 'subwoofer' behind the rear seat). However, the biggest sin of the B&O system is the bass rolling off at around volume level 22-ish, which compounded the lack of overall volume issue to me. So with that context, I decided that I wanted to upgrade the stock system, but wanted to do so in such a way that it could EASILY be returned to stock for any reason at a future date and by any party, as well as somewhat cost effective (aftermarket audio is never exactly cheap).
Below are the the parts I used to frankenstein together an upgrade to the stock B&O stereo for ~$900 (including taxes).
As is, the stock B&O amplifier powers the 6x9 'sub', the front door speakers, and the front tweeters. The center channel and rear speakers are powered by the head unit, to my understanding. Since the door speakers are the primary source of mids and highs, I planned to focus my efforts there for the speaker upgrades, leaving the rest mostly untouched.
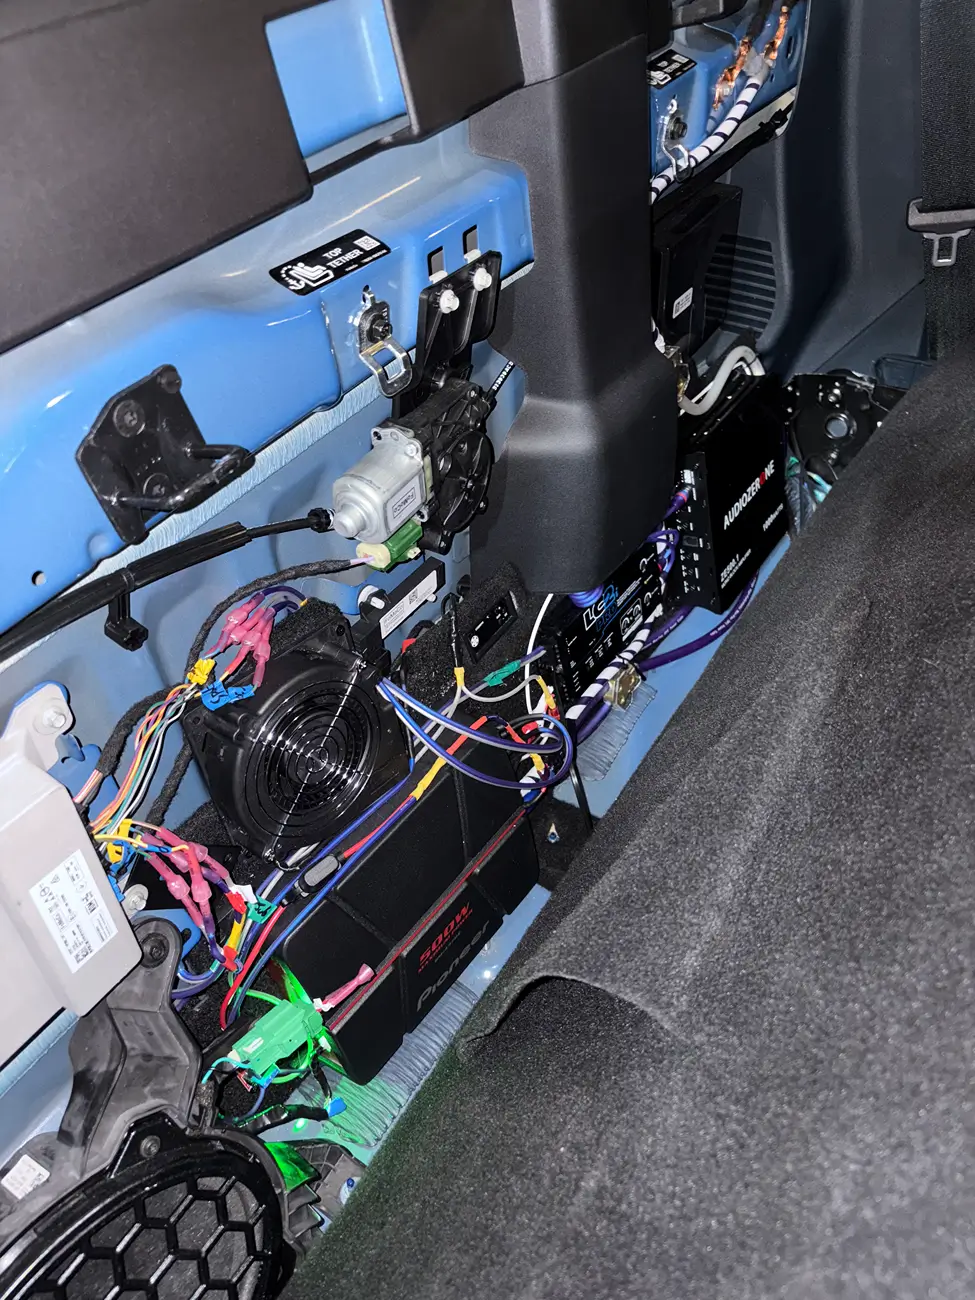
My plan is to retain (but unplug) the 6x9 which will keep the hole in the body from being an empty cavasse others have complained about, and retain the stock amplifier, passing all signals through it, but only actually utilizing it for the front tweeters (a waste but allows for easy reversing at a later date if needed).I utilized an AudioControl LC2i Pro which I fed a signal from the subwoofer outputs out of the stock B&O amp going to a monoblock amp, and the stock B&O speaker outputs going to the high level inputs of two channel amp. This proved to be a wise setup alllowing me to independently adjust gains independently between the sub and front door speakers, as well as retain all stock fade/balance controls as well as the stock high/mids/bass controls in the Headunit. I have purchased the Skar Audio loaded box to live under the rear seat and to be powered by the monoblock amplifier, and have purchased a set of component speakers for the front doors that will be powered by the two channel amp. I will mount all this behind the rear seat and retain the factory wiring using male/female spade connectors on both the factory and aftermarket wiring to allow easy connecting between the two systems (and reconnecting of the stock system back together in just minutes if the aftermarket equipment is removed.. The component speakers come with small tweeters that I will replace the stocks with (thingiverse adapters to mount these tweeters into the factory locations) (still powered off the factory amplifier).
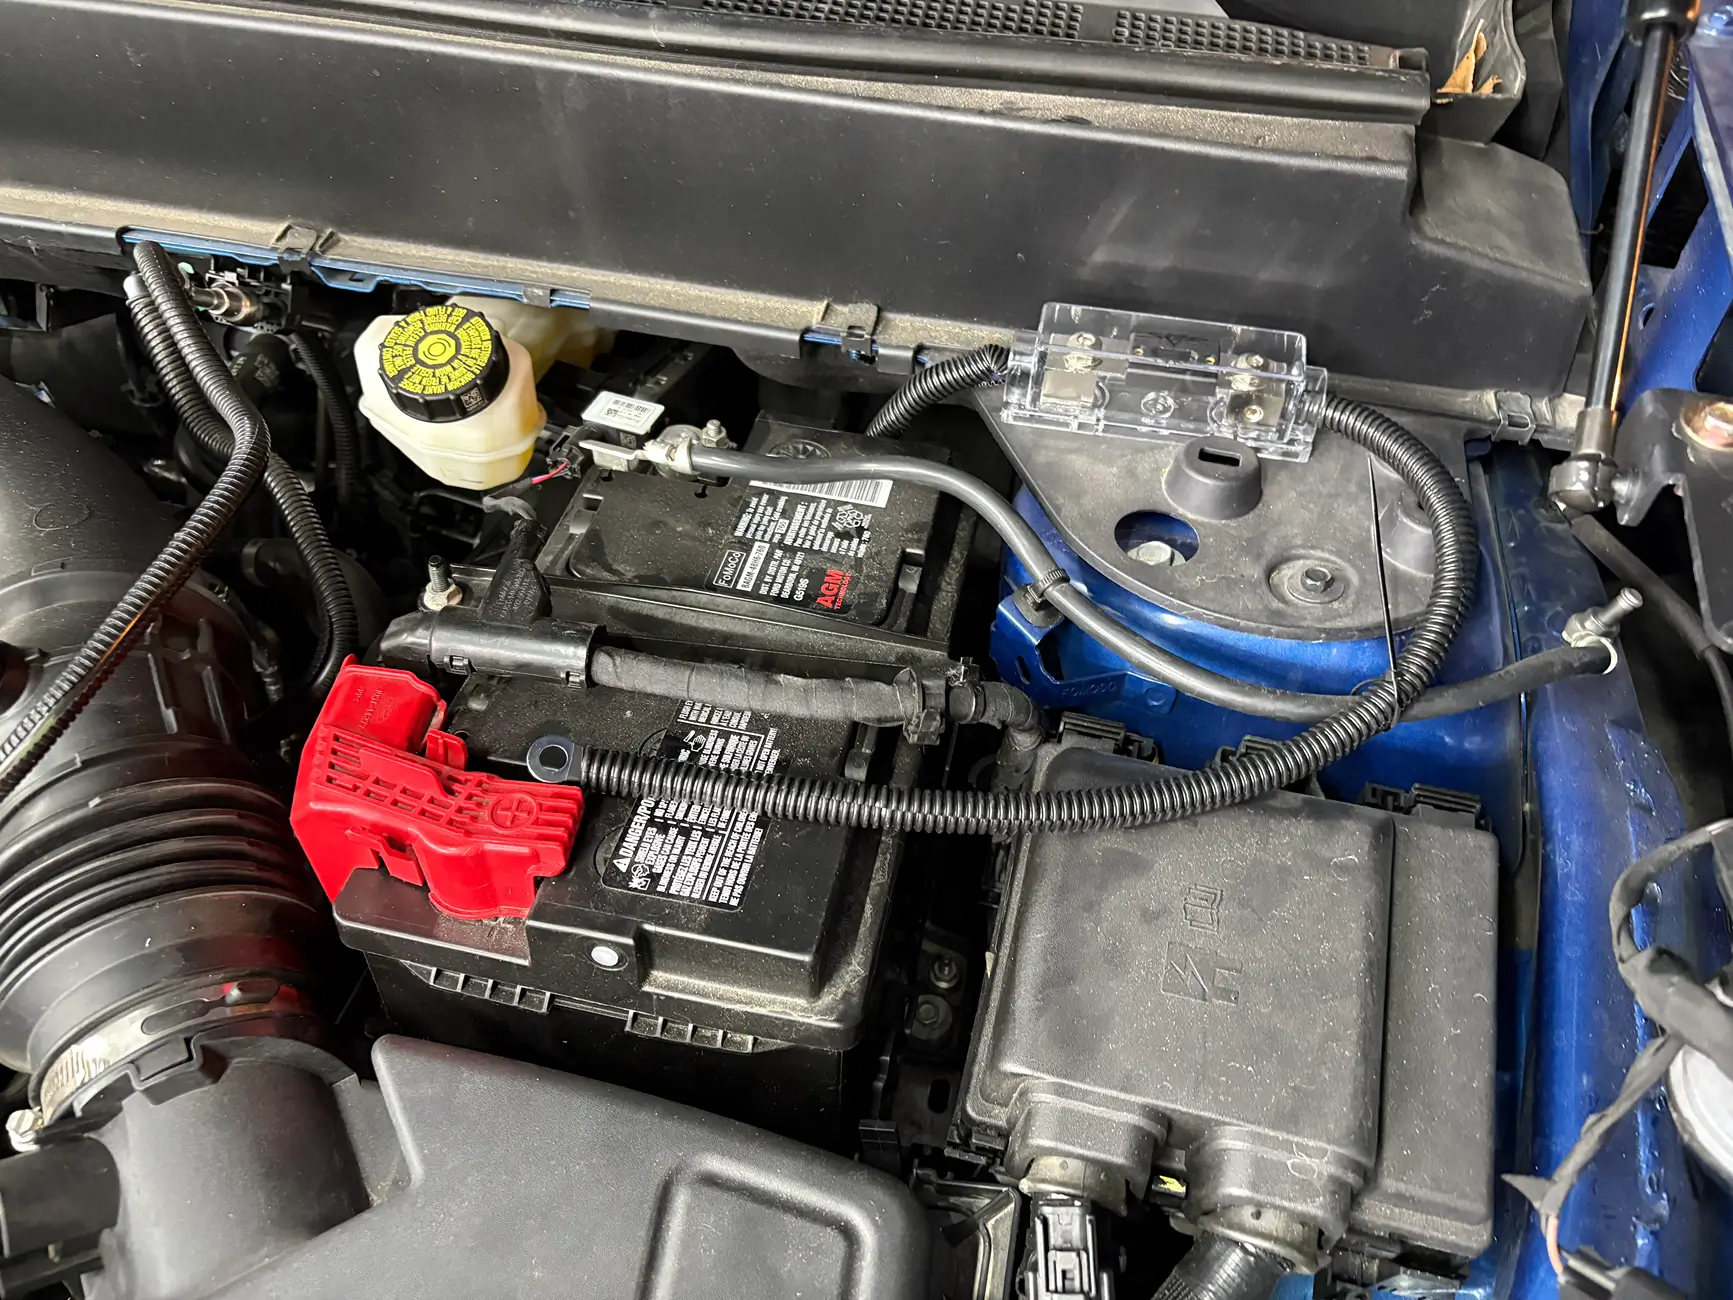
I cut up an old cardboard box and used it to quickly design a template for the amp mounts behind the rear seat, then transferred that to a 1/4" sheet of plywood and wrapped that in some black felt. This allowed me to build most of the system from my workbench rather than breaking my back bent over in the backseat except when I had to be (like when tapping into the speaker wires coming out of the factory B&O amplifier and running the power wire from the battery (ran it through the provided wire channels along the driver side door sills).
The addition of the small two channel amplifier for the front doors has proved to be a MAJOR upgrade. Honestly, it can be WAY too loud and I used the amp gain to turn it down fairly significantly, setting it to be just a little bit louder than stock (which is what I was after). In addition, the subwoofer also can provide far too much bass but sometimes that is fun! I ran a discrete bass knob to next to the drivers seat for easy adjustments, as needed. Overall, this project probably took me around 8-10 hours between the various sessions from start to finish but everything works and despite the stock B&O system having pretty adequate clarity, these aftermarket component horns in the doors are MUCH clearer. I am pretty thrilled with the result and how modular everything is (I could have this all uninstalled and back to stock in under an hour, easily).
Full disclosure, I cheaped out a bit on the amps, but they both actually have good reviews and Im not going to be pushing them anywhere near their limit. If one of them dies someday, I can always swap it out fairly easily.
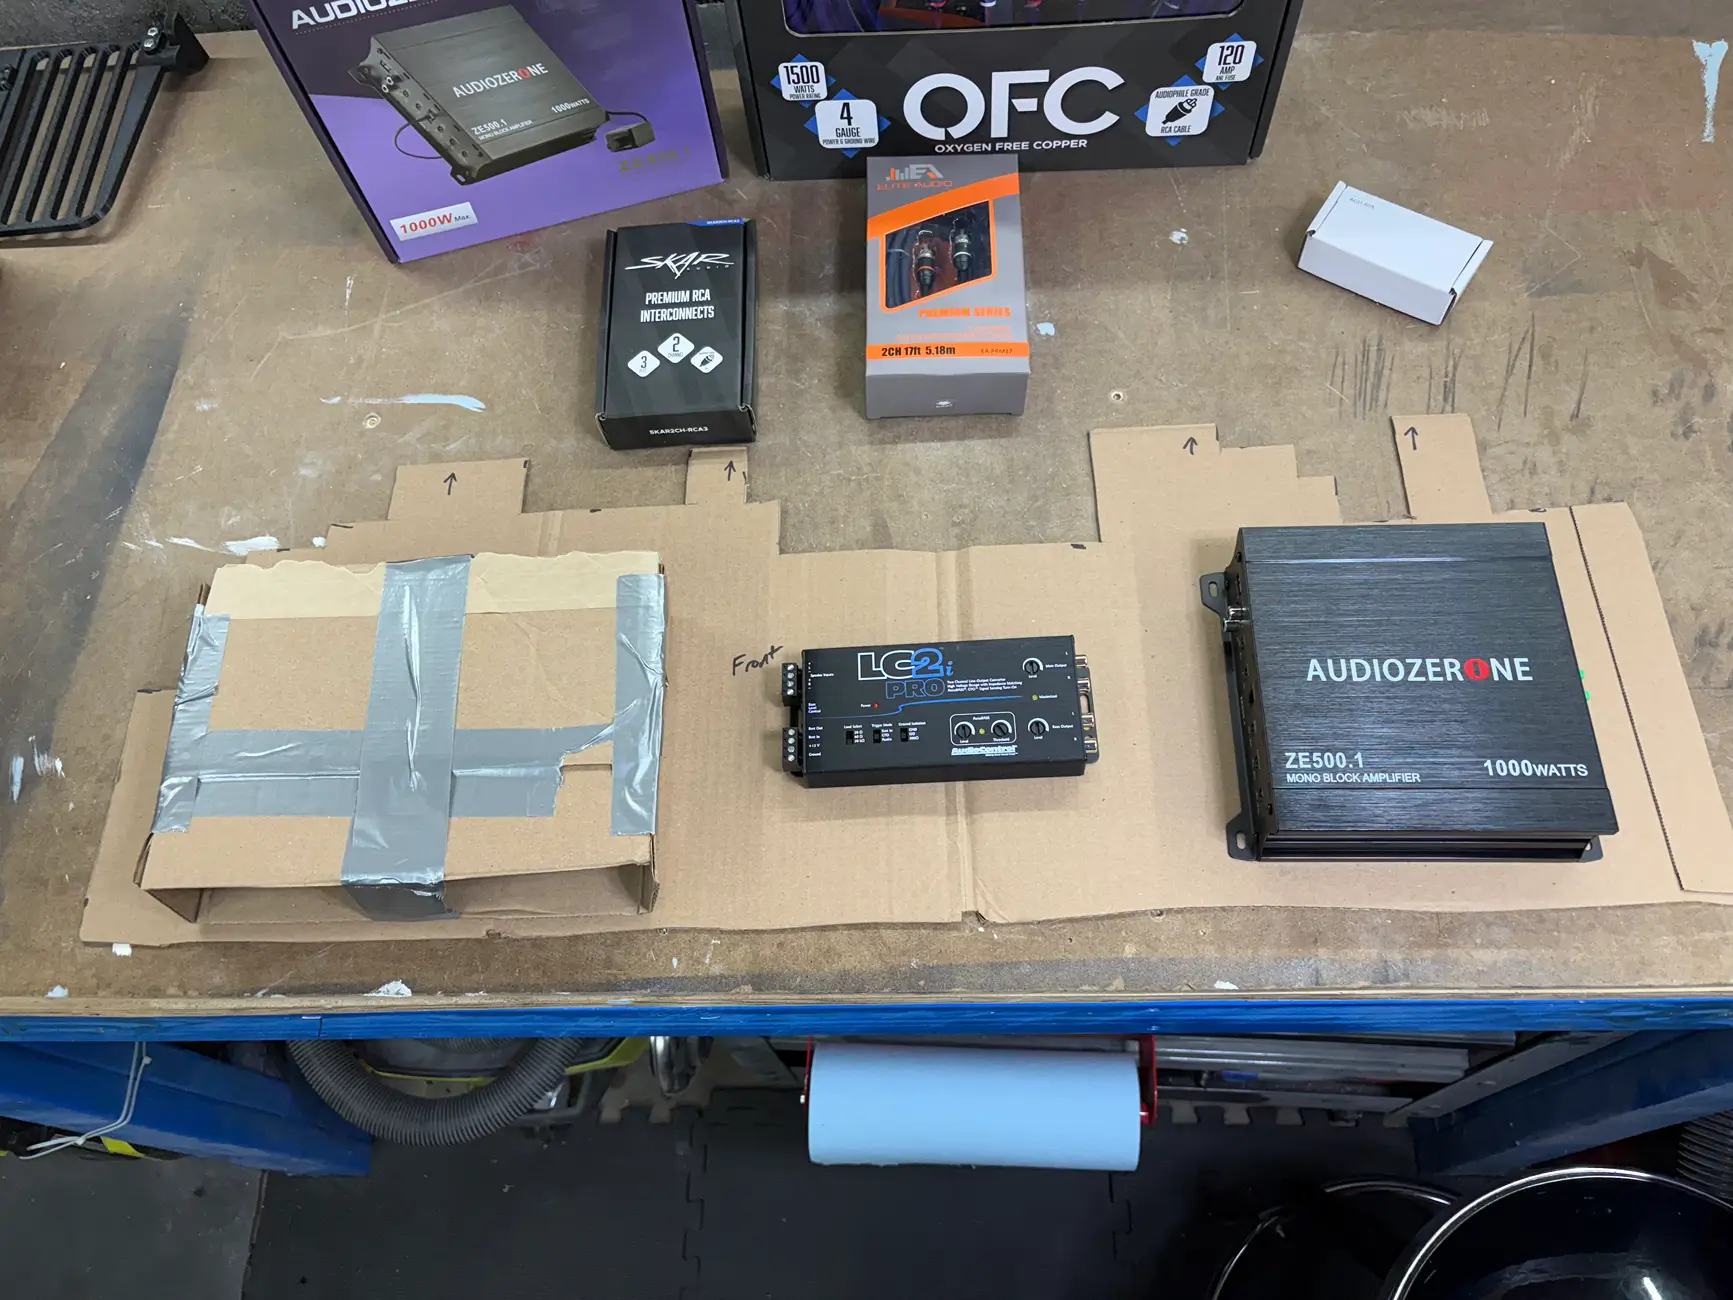
Parts list:
Pictures below!
This forum has a ton of posts regarding upgrading the stock Mav stereo system but only a handful regarding the Lariat B&O system. As others have stated, I agree that from a clarity perspective, the B&O system is pretty adequate (the rears are ass but not worth the hassle given their awful placement). That being said, I have always found the B&O system to be too quiet, as well as having actually laughable levels of 'bass' (the stock B&O system has a 6x9 infinite baffle 'subwoofer' behind the rear seat). However, the biggest sin of the B&O system is the bass rolling off at around volume level 22-ish, which compounded the lack of overall volume issue to me. So with that context, I decided that I wanted to upgrade the stock system, but wanted to do so in such a way that it could EASILY be returned to stock for any reason at a future date and by any party, as well as somewhat cost effective (aftermarket audio is never exactly cheap).
Below are the the parts I used to frankenstein together an upgrade to the stock B&O stereo for ~$900 (including taxes).
As is, the stock B&O amplifier powers the 6x9 'sub', the front door speakers, and the front tweeters. The center channel and rear speakers are powered by the head unit, to my understanding. Since the door speakers are the primary source of mids and highs, I planned to focus my efforts there for the speaker upgrades, leaving the rest mostly untouched.
My plan is to retain (but unplug) the 6x9 which will keep the hole in the body from being an empty cavasse others have complained about, and retain the stock amplifier, passing all signals through it, but only actually utilizing it for the front tweeters (a waste but allows for easy reversing at a later date if needed).I utilized an AudioControl LC2i Pro which I fed a signal from the subwoofer outputs out of the stock B&O amp going to a monoblock amp, and the stock B&O speaker outputs going to the high level inputs of two channel amp. This proved to be a wise setup alllowing me to independently adjust gains independently between the sub and front door speakers, as well as retain all stock fade/balance controls as well as the stock high/mids/bass controls in the Headunit. I have purchased the Skar Audio loaded box to live under the rear seat and to be powered by the monoblock amplifier, and have purchased a set of component speakers for the front doors that will be powered by the two channel amp. I will mount all this behind the rear seat and retain the factory wiring using male/female spade connectors on both the factory and aftermarket wiring to allow easy connecting between the two systems (and reconnecting of the stock system back together in just minutes if the aftermarket equipment is removed.. The component speakers come with small tweeters that I will replace the stocks with (thingiverse adapters to mount these tweeters into the factory locations) (still powered off the factory amplifier).
I cut up an old cardboard box and used it to quickly design a template for the amp mounts behind the rear seat, then transferred that to a 1/4" sheet of plywood and wrapped that in some black felt. This allowed me to build most of the system from my workbench rather than breaking my back bent over in the backseat except when I had to be (like when tapping into the speaker wires coming out of the factory B&O amplifier and running the power wire from the battery (ran it through the provided wire channels along the driver side door sills).
The addition of the small two channel amplifier for the front doors has proved to be a MAJOR upgrade. Honestly, it can be WAY too loud and I used the amp gain to turn it down fairly significantly, setting it to be just a little bit louder than stock (which is what I was after). In addition, the subwoofer also can provide far too much bass but sometimes that is fun! I ran a discrete bass knob to next to the drivers seat for easy adjustments, as needed. Overall, this project probably took me around 8-10 hours between the various sessions from start to finish but everything works and despite the stock B&O system having pretty adequate clarity, these aftermarket component horns in the doors are MUCH clearer. I am pretty thrilled with the result and how modular everything is (I could have this all uninstalled and back to stock in under an hour, easily).
Full disclosure, I cheaped out a bit on the amps, but they both actually have good reviews and Im not going to be pushing them anywhere near their limit. If one of them dies someday, I can always swap it out fairly easily.
Parts list:
- Skar Audio Loaded Sub/Box:https://skaraudio.com/products/sing...022-up-ford-maverick-L-VS-1X10FORDMAV-2022-UP
- $300
- Monoblock Amplifier: https://www.amazon.com/dp/B0CMCKR2MS?ref=ppx_yo2ov_dt_b_fed_asin_title
- $70
- Two Channel Amplifier: https://www.amazon.com/dp/B01KKHT4YU?ref=ppx_yo2ov_dt_b_fed_asin_title&th=1
- $75
- LC2i Pro: https://www.amazon.com/dp/B0CGRZJGCH?ref=ppx_yo2ov_dt_b_fed_asin_title&th=1
- $175
- Amplifier wiring kit: https://www.amazon.com/dp/B075K326XP?ref=ppx_yo2ov_dt_b_fed_asin_title&th=1
- $60
- Power Blocks: https://www.amazon.com/dp/B0B3X8SJR3?ref=ppx_yo2ov_dt_b_fed_asin_title
- $6
- Component speakers: https://www.crutchfield.com/p_301K170/Hertz-K-170.html?omnews=20063448
- $100
Pictures below!
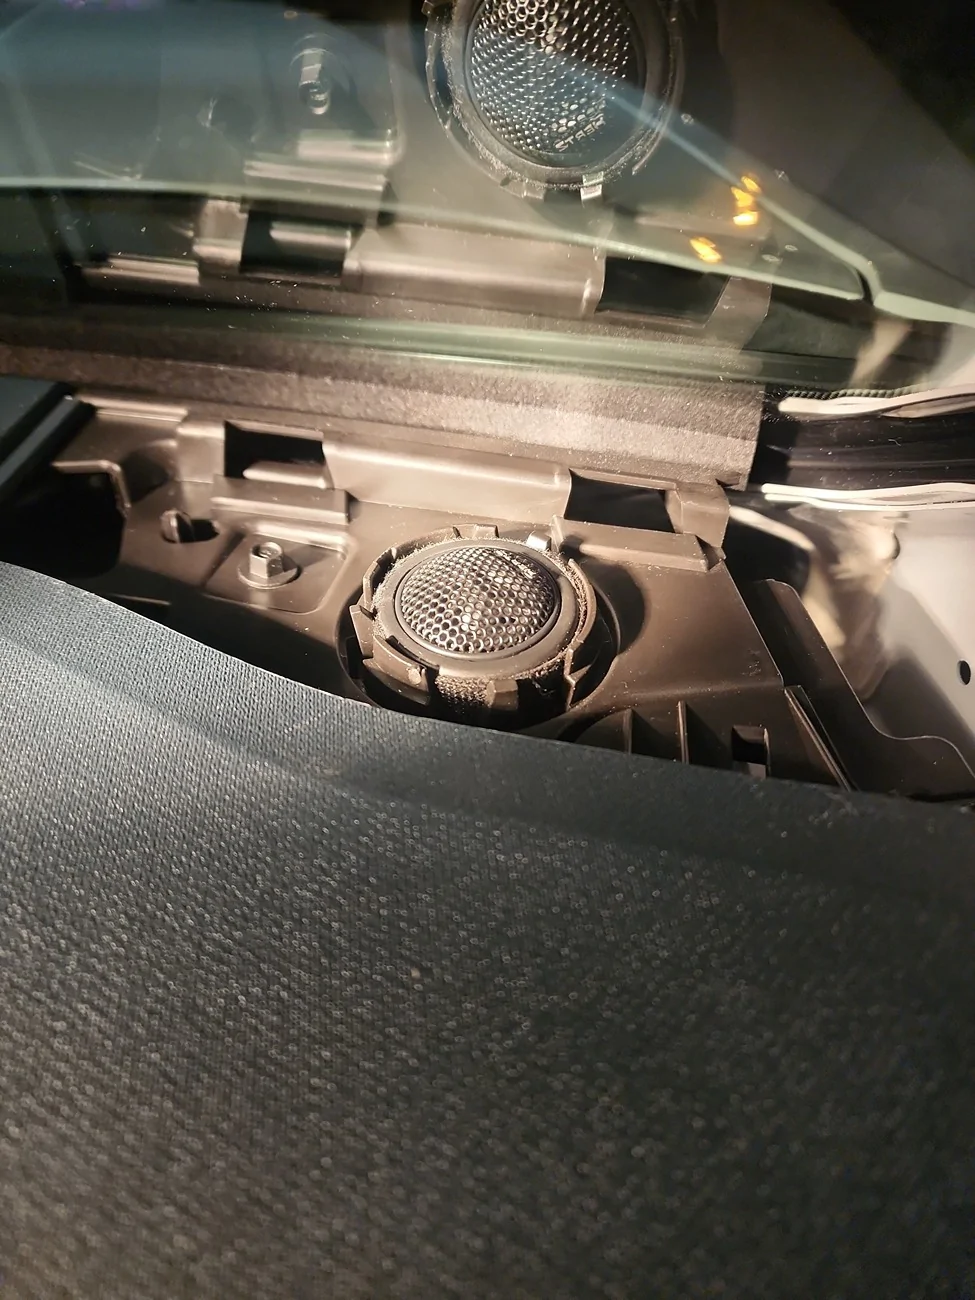
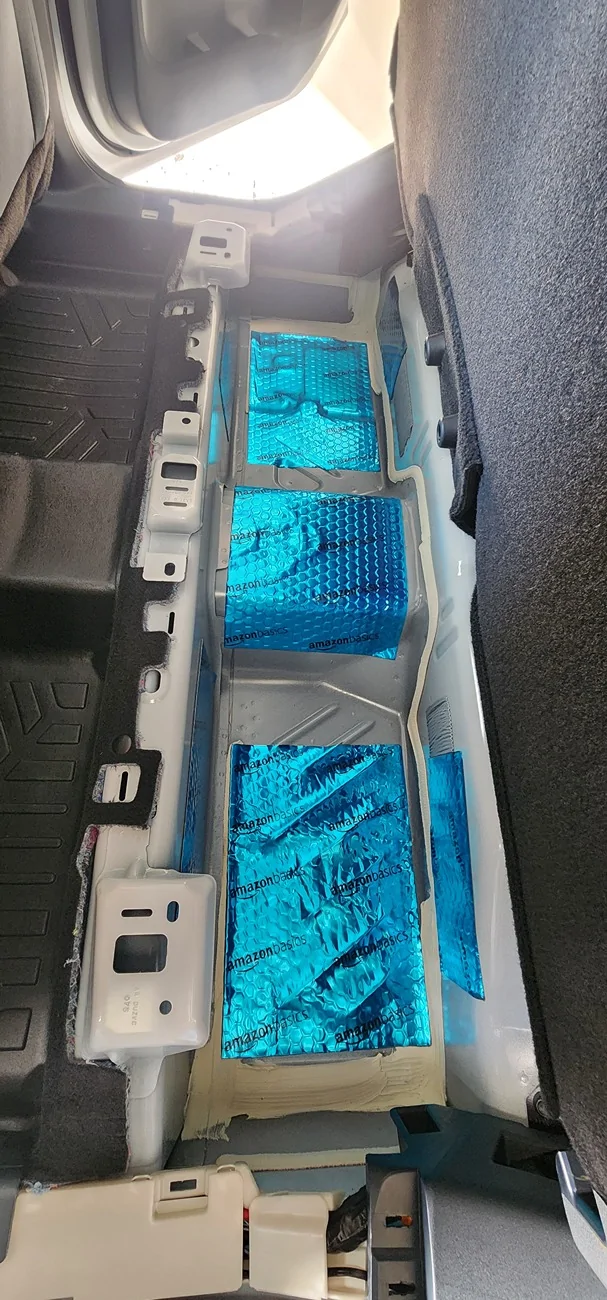
- The starting point, stock B&O system
-
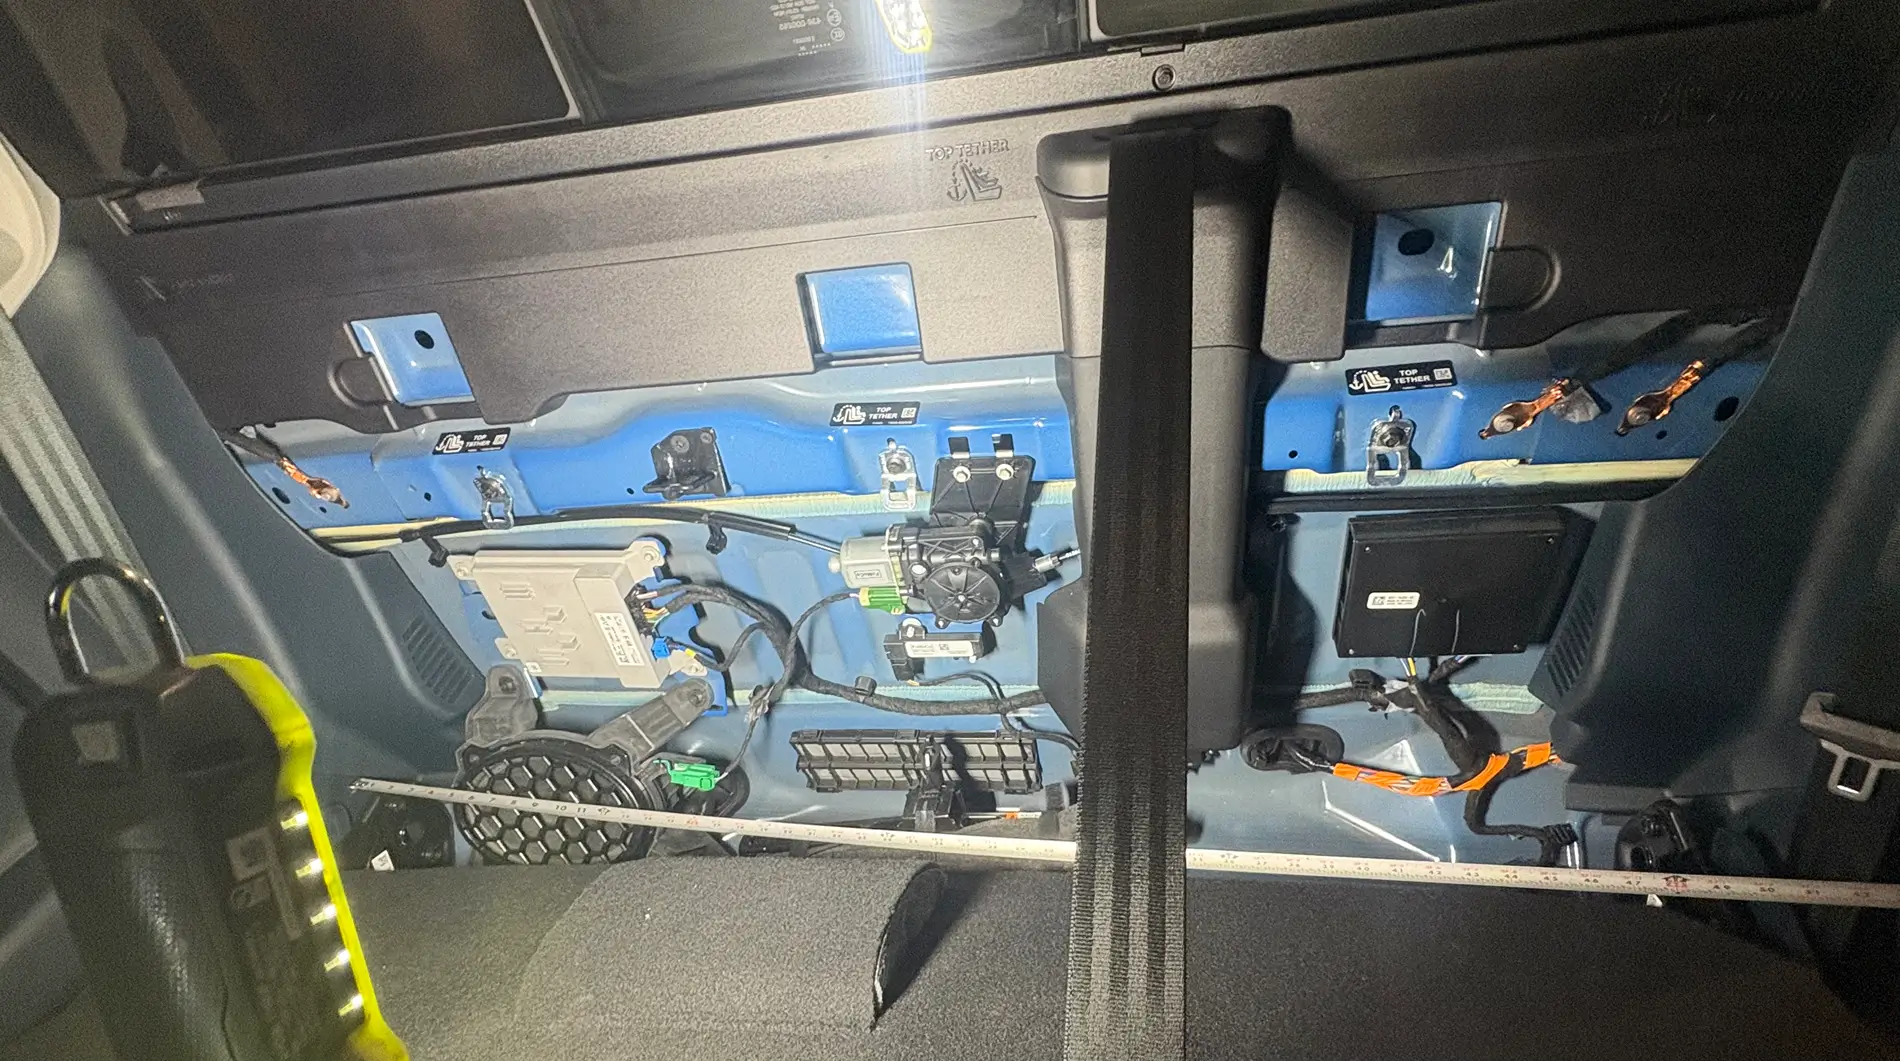
- Using cardboard to figure out the maximum room I had available. This was just simply trial and error.
-
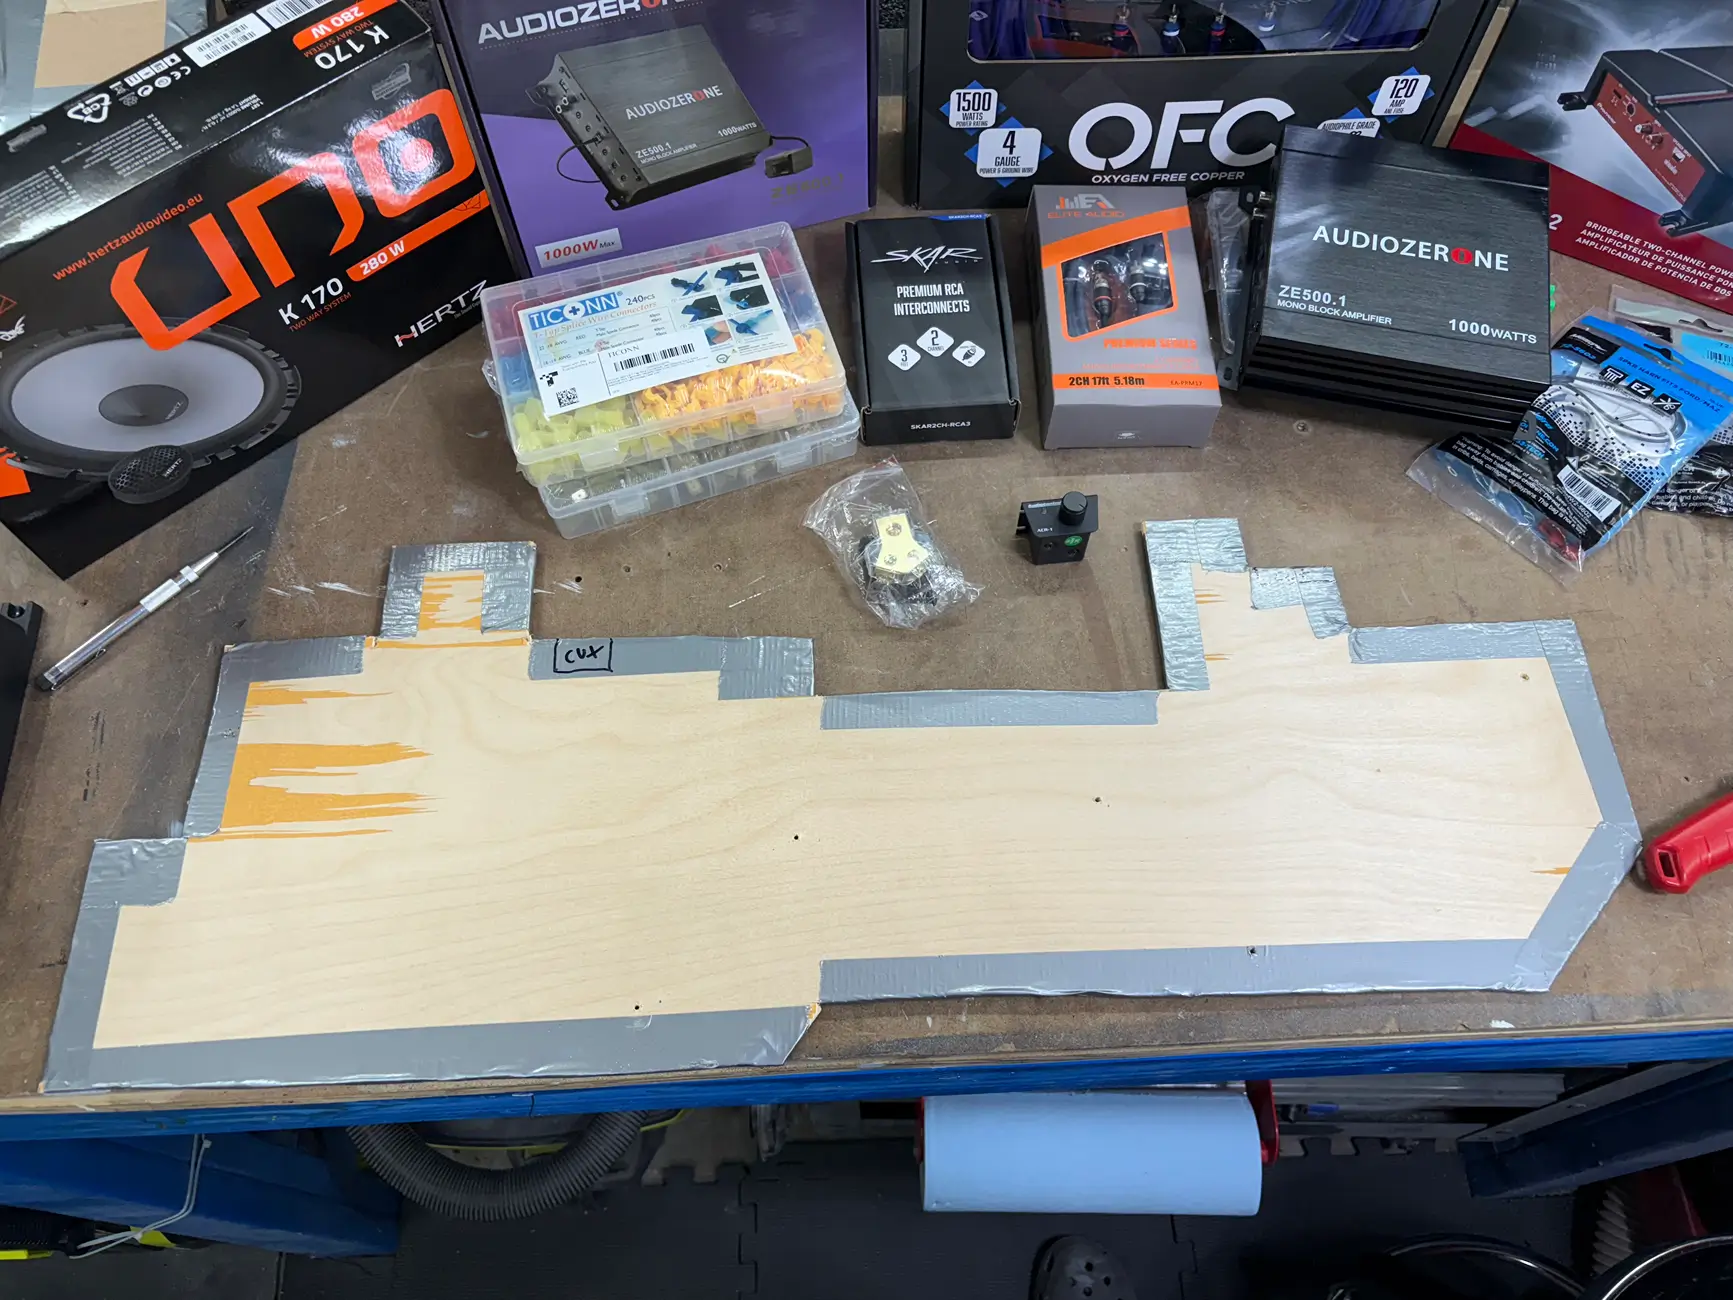
- After I felt comfortable with my template, I transferred this to some scrap 1/4" plywood I had laying around. When I cut the plywood to shape, it splintered the veneer so I covered the edges in duck tape just to avoid splinters. Didnt mind the appearance since I planned to wrap with fent regardless.
-
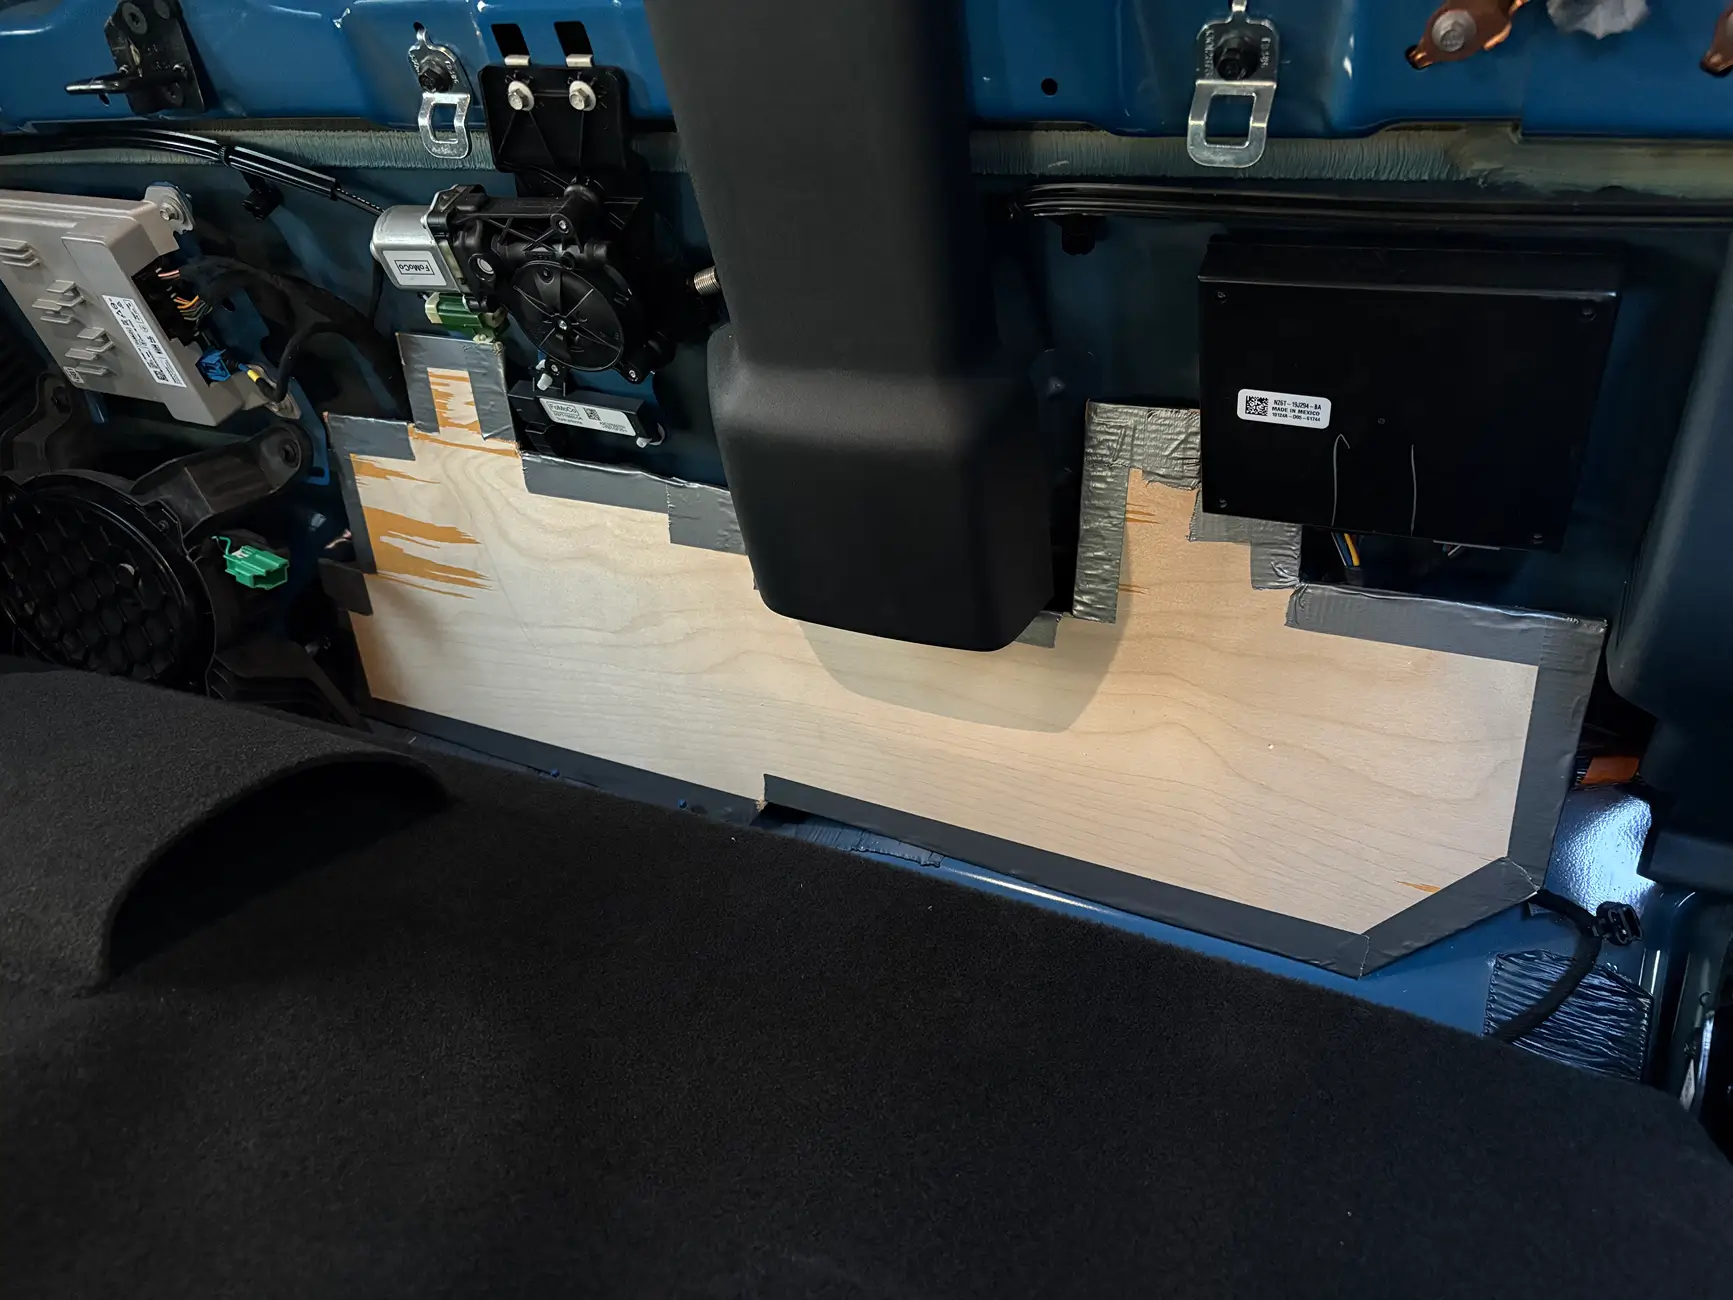
- The final trimmed look set in place. I put some blocks at the top of the two highest points to provide clearance for the stock wiring that would still need to be there behind this panel.
-
- The look after I wrapped and stapled in the felt
-
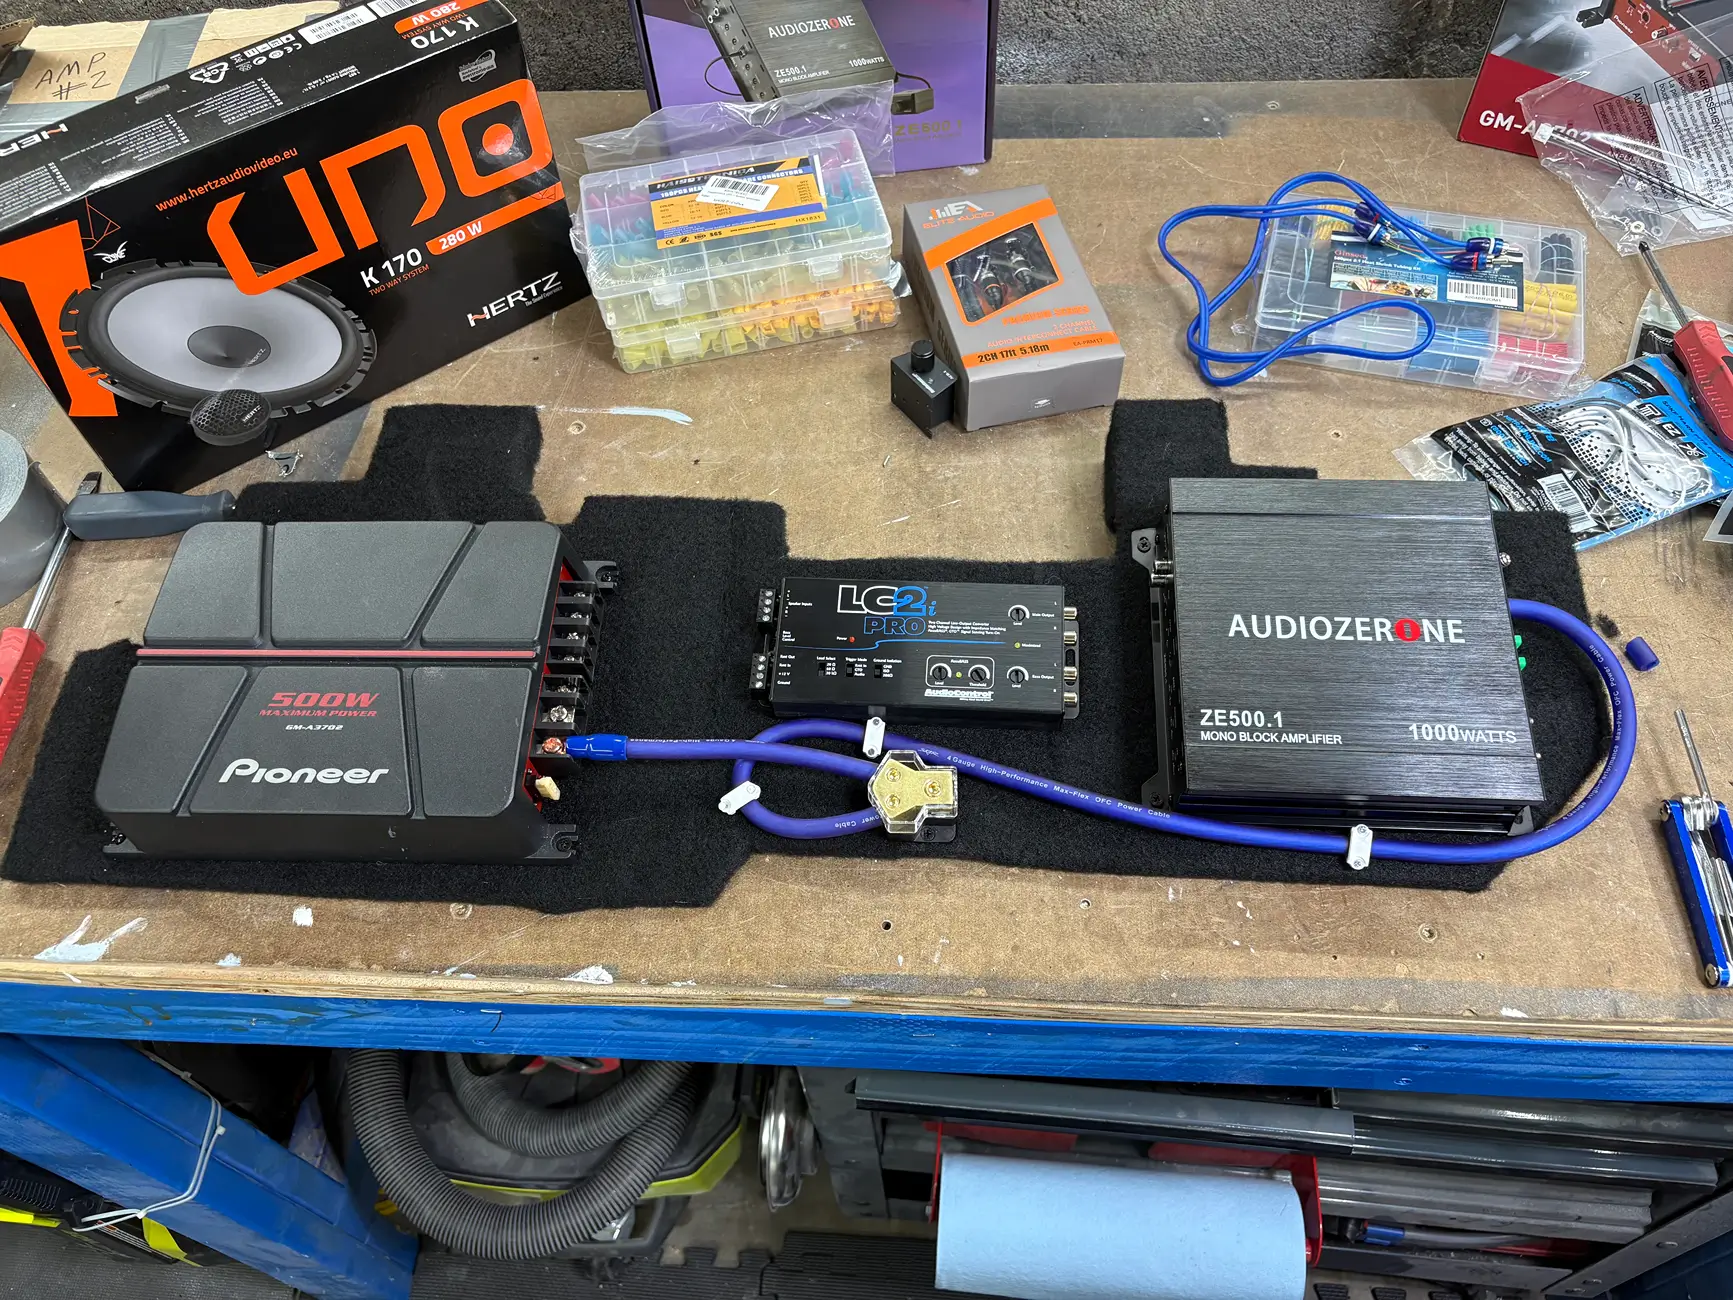
- At this point, I started wiring in the components and screwing them into this board. I didnt want a bunch of screws sticking out the back so afterwards I went back with a cutoff tool and knocked everything (mostly) flush on the backside of the board.
-
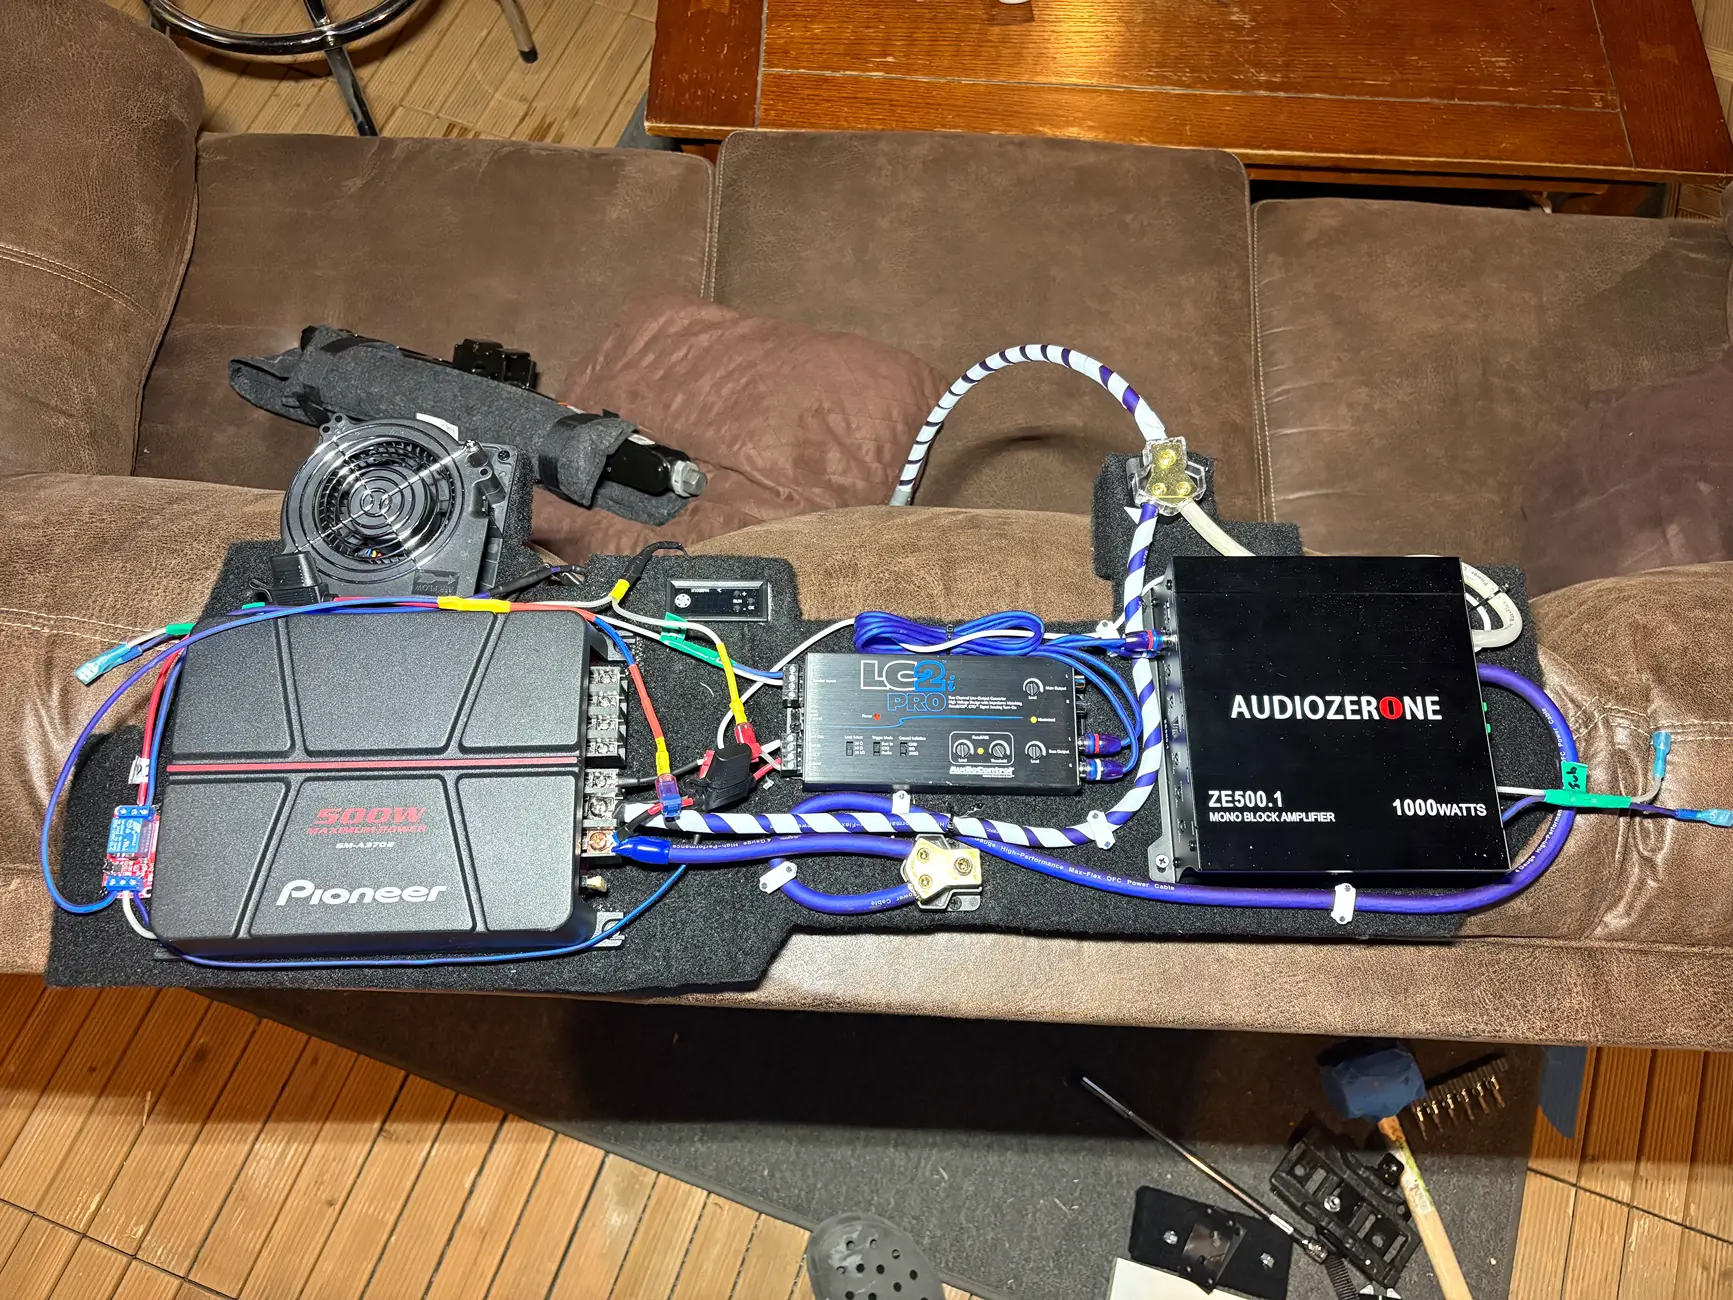
- For those of you that get the joke, now is the point where I tell you to 'draw the rest of the fucking owl'. No magic to it, just putting wires where they go and finding space on this panel wherever I could, keeping it as reasonably neat as possible.
-
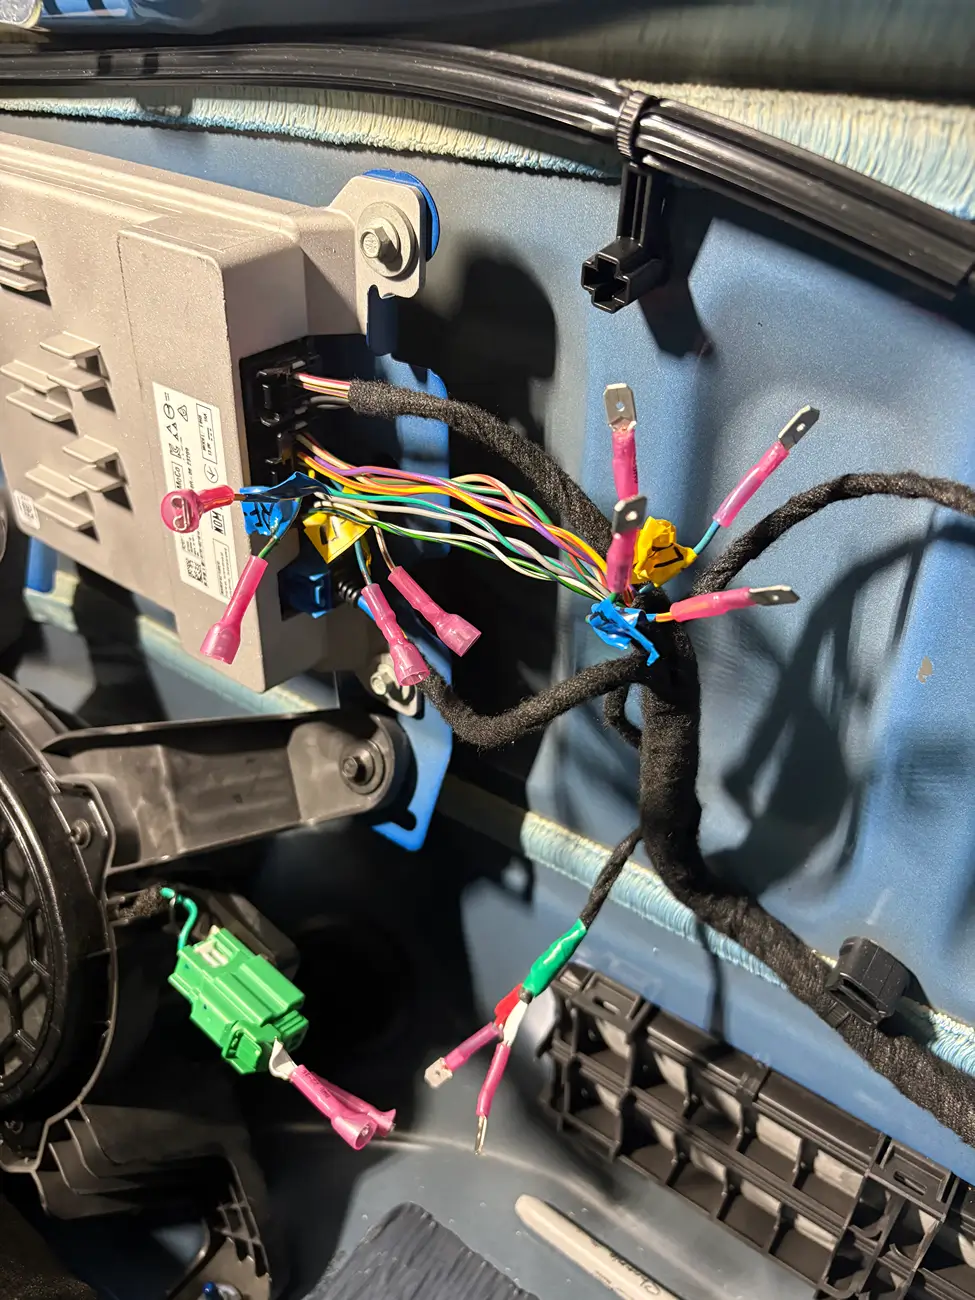
- At this point, I switched to the part I had been putting off for a variety of reasons and started snipping the speaker leads. I tapped into leads 6/16 and 7/17 for the front speakers (6 and 7 are the negatives, 16 and 17 are the positives). One set of leads would go out of the factory amp and into my amps, and then the other leads would take the output of my system and utilize the stock wiring to run the signal to the new door speakers. For the sub, I just ran a short wire to the sub directly below the monoblock amp on the right.
-
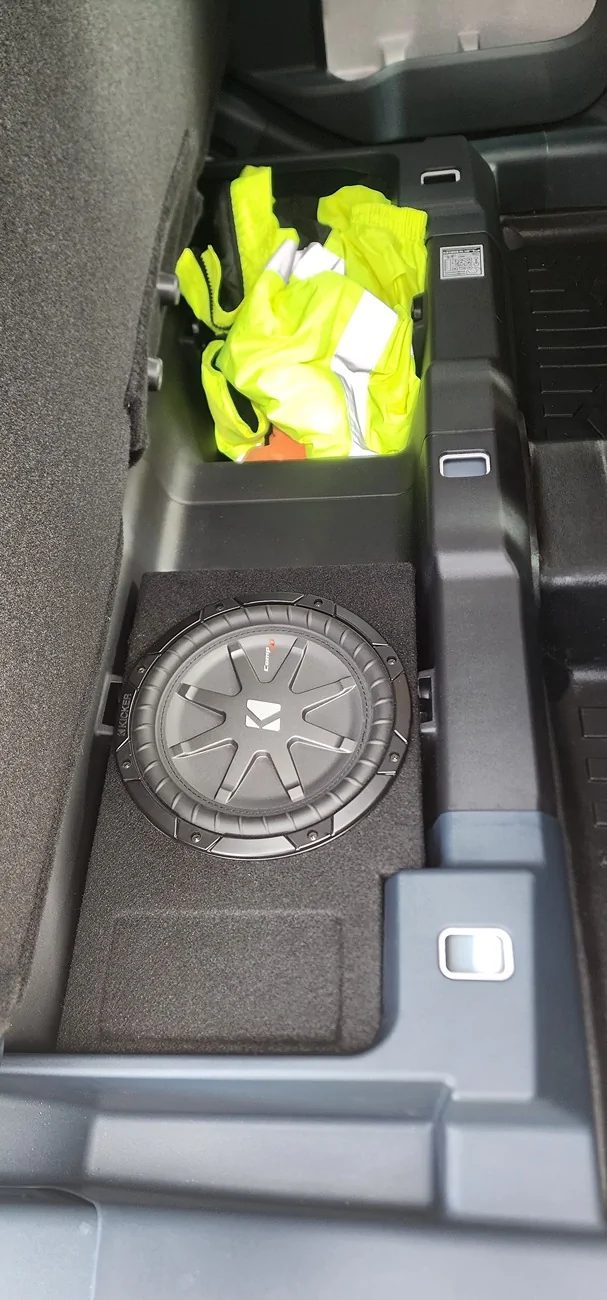
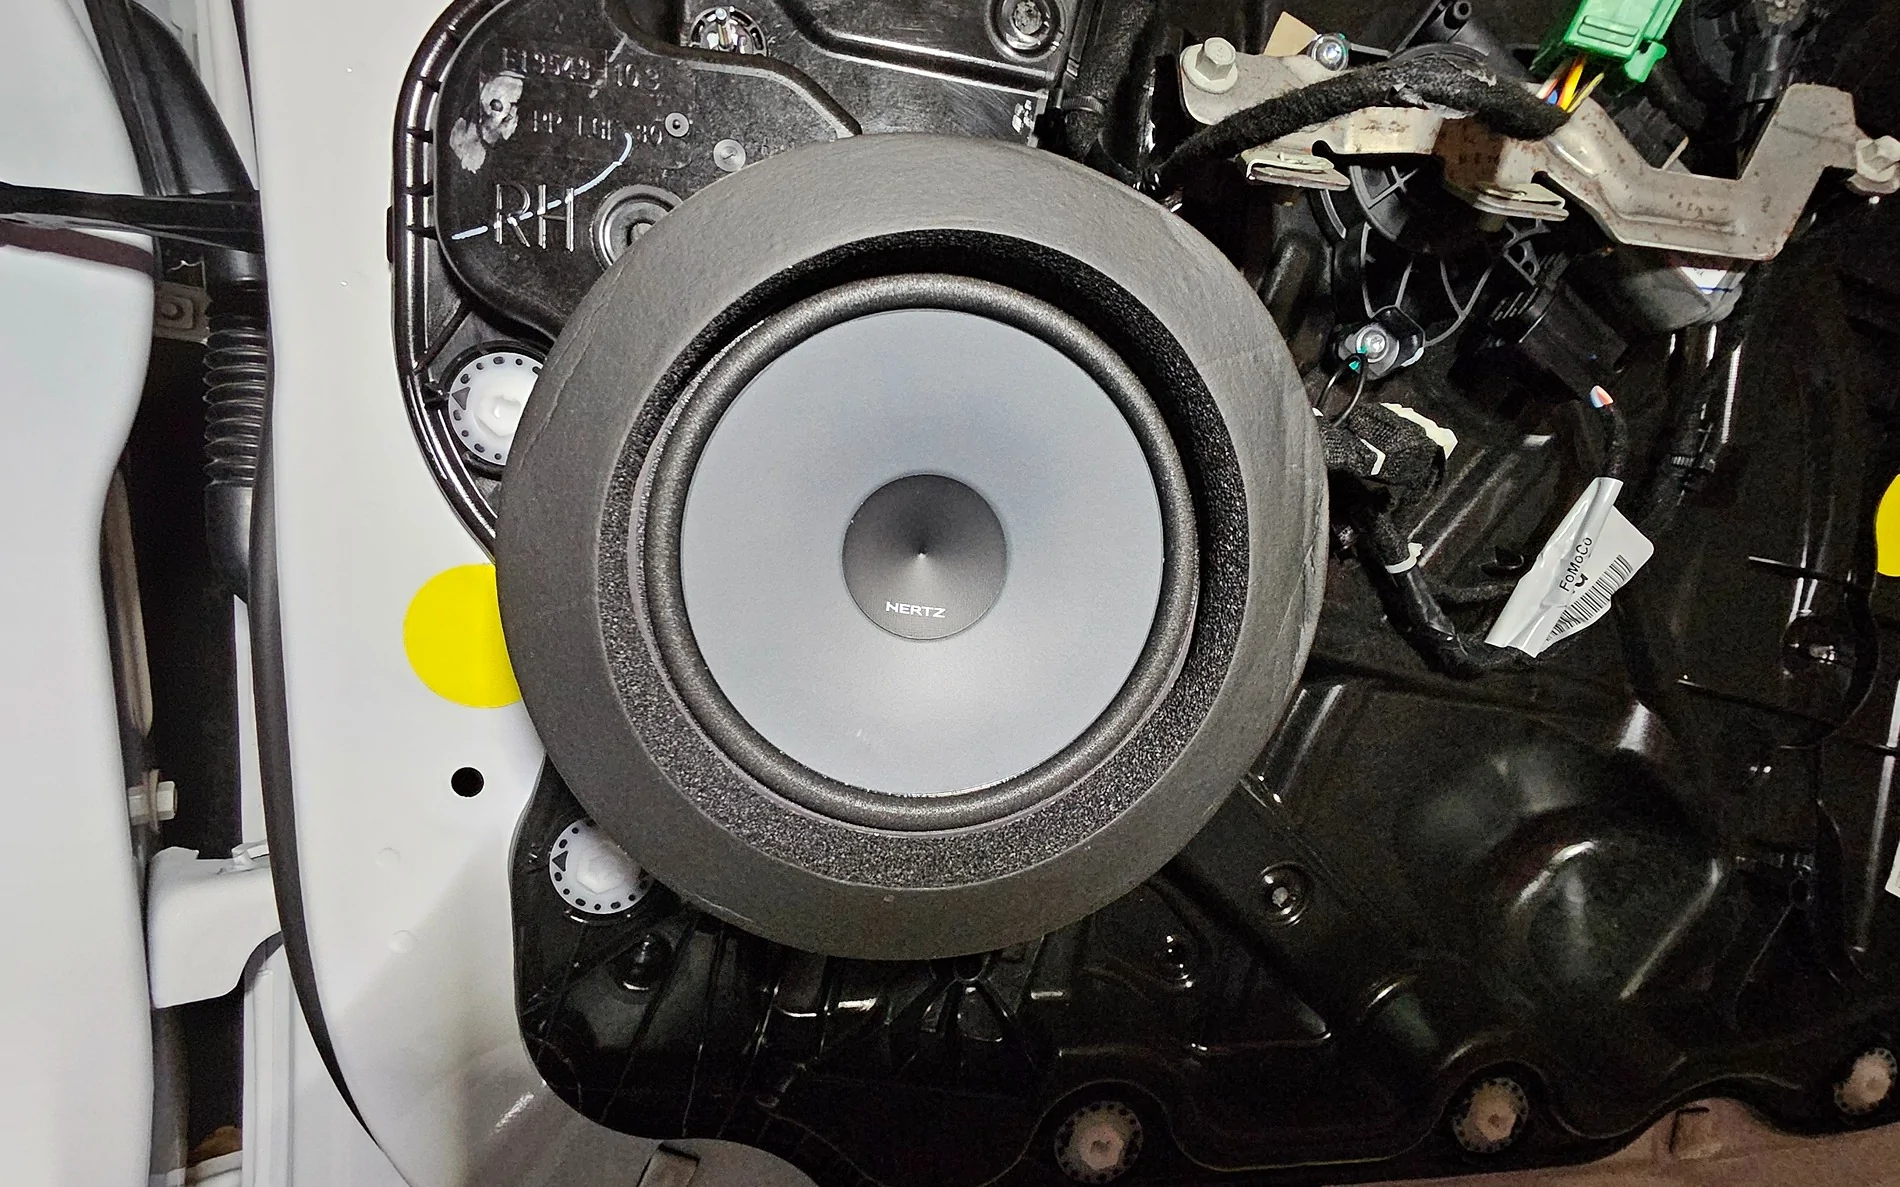
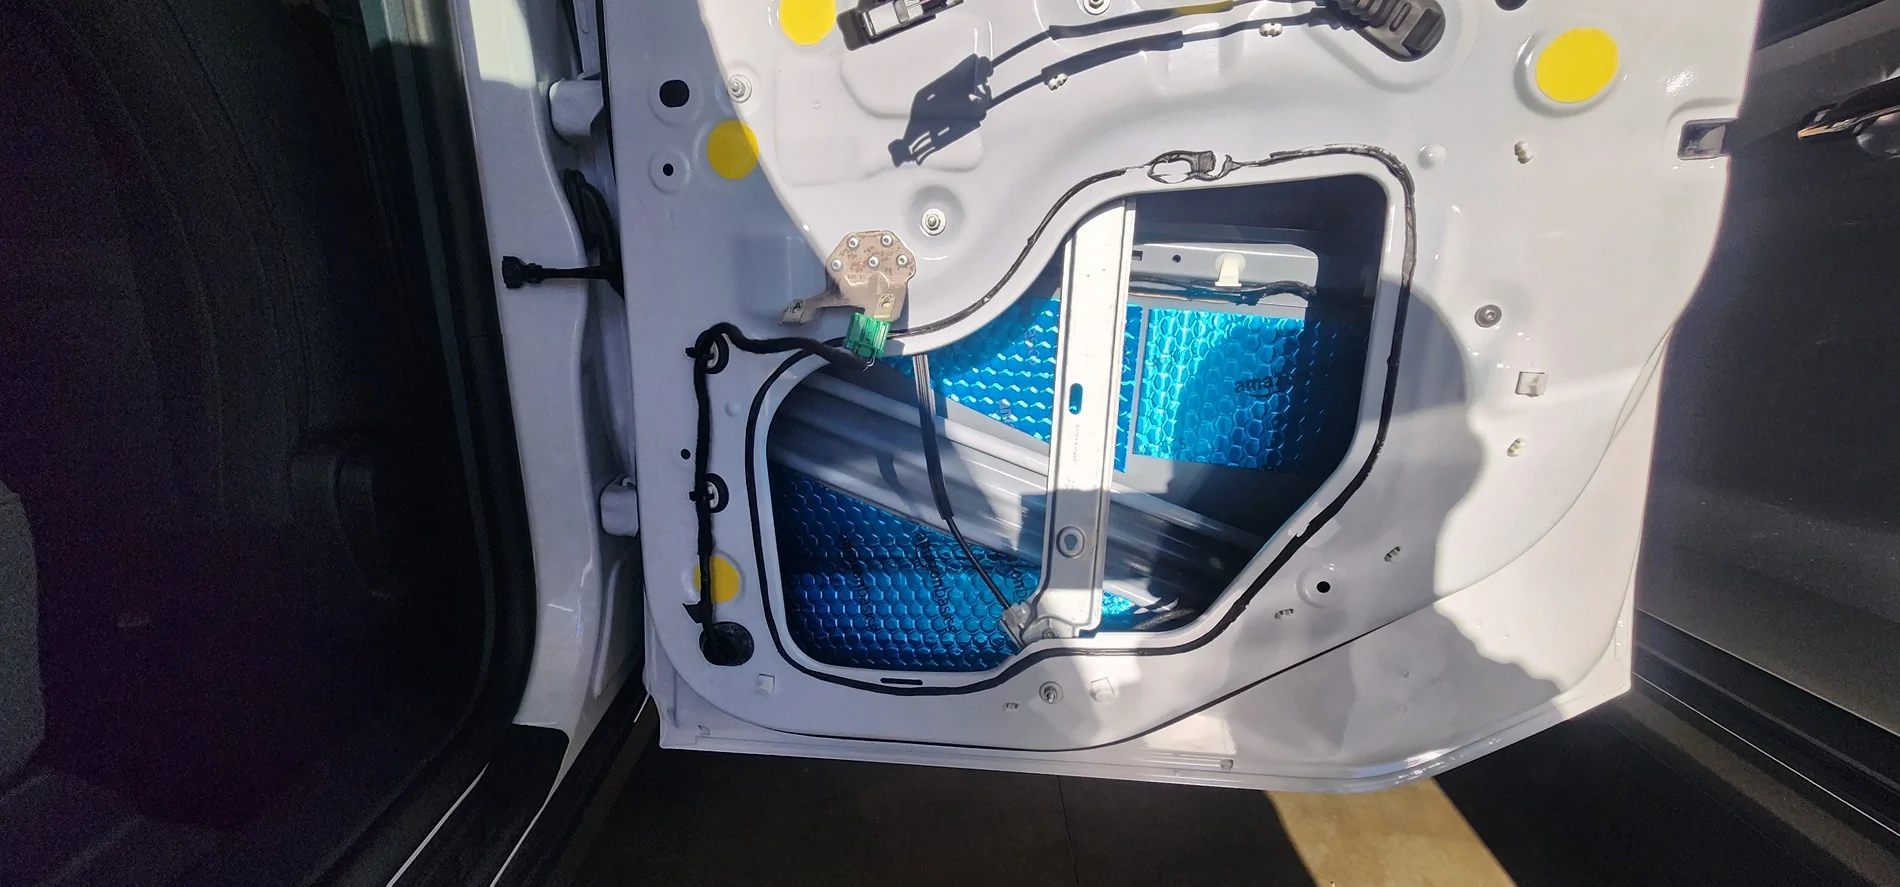
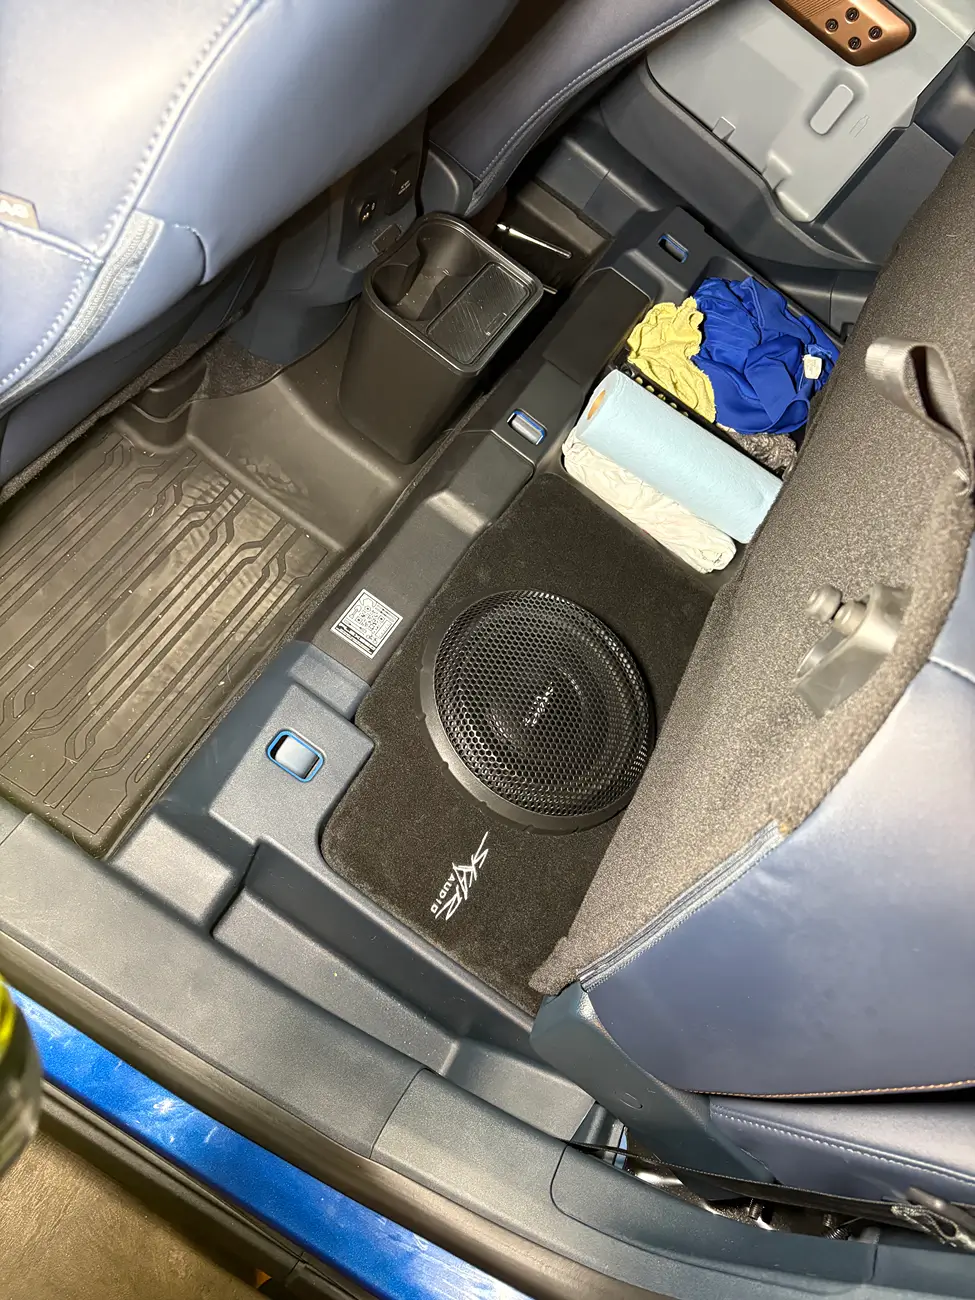
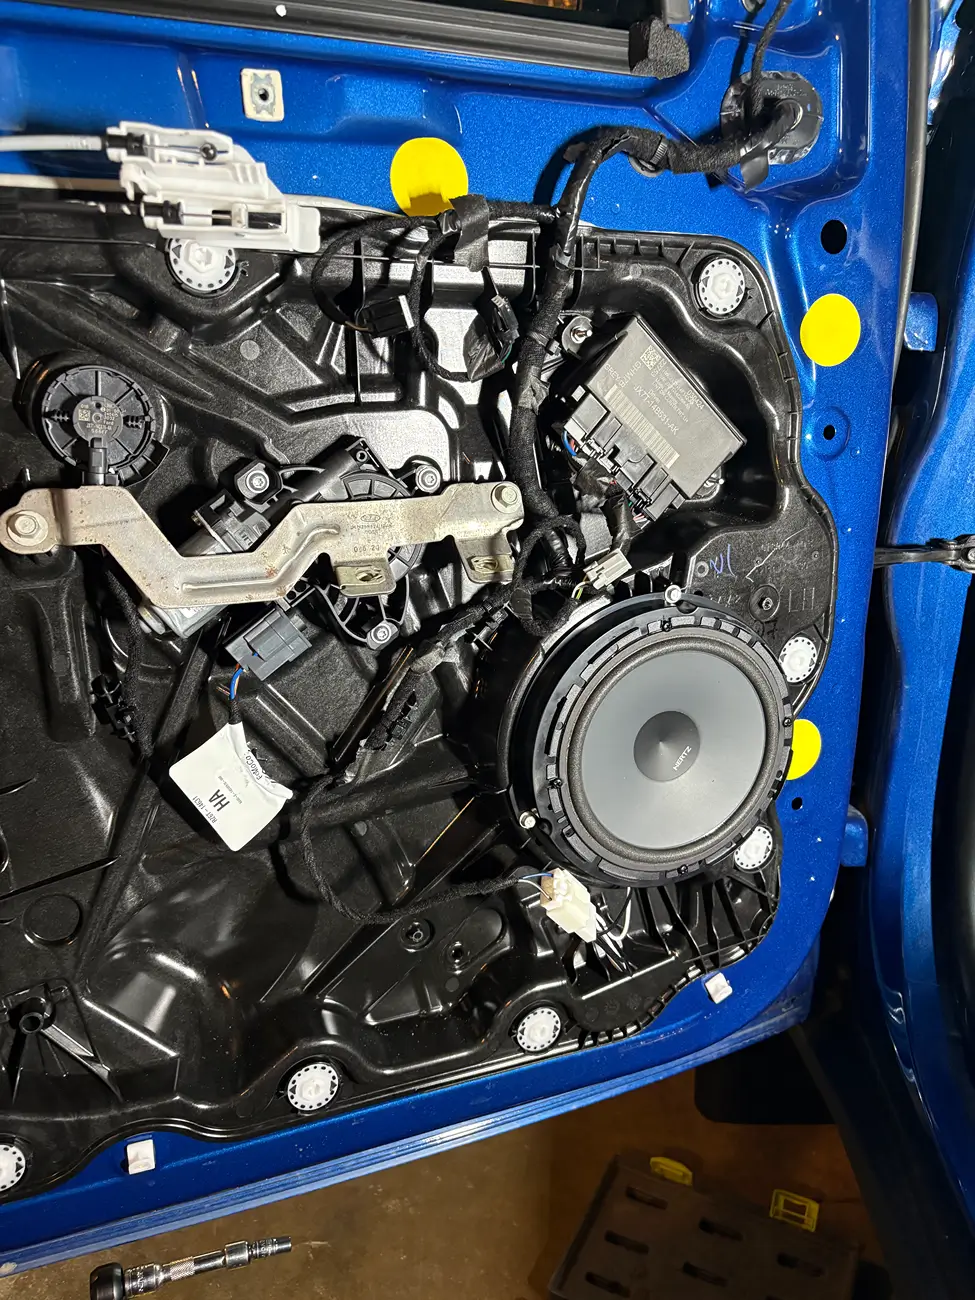
- At this point, I pulled off door panels and put the new door speakers in, as well as dropping that Skar audo box into the rear seat tub. Everything fit well (crutchfield sent adapters for the speakers).
-
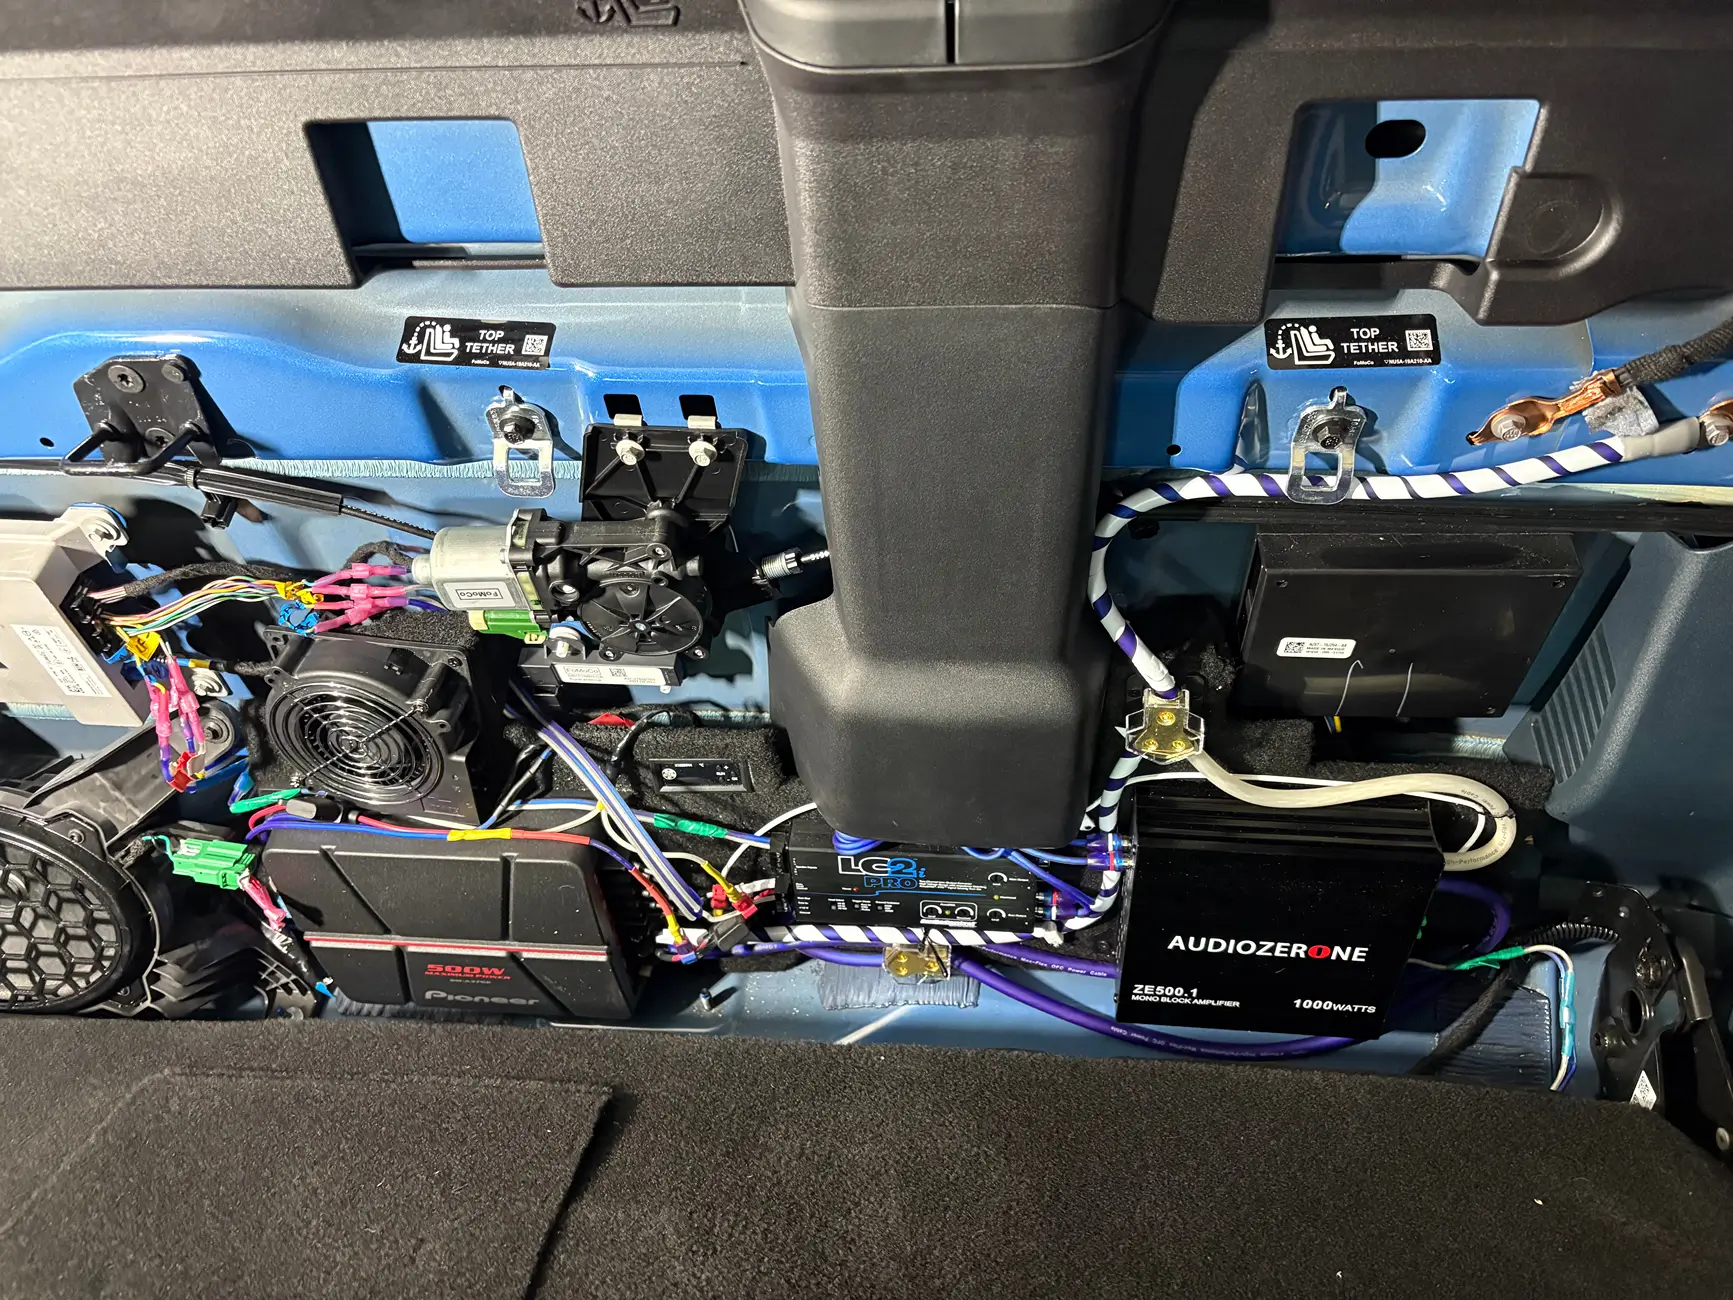
- Finally, i loaded in my finished amp/component board and hooked everything up which was easy given the male/female taps located in their appropriate locations and everything worked the first time. From here, it was just a matter of setting levels and gains on the various components to dial in the sound. Works great!
-

Sponsored