
- First Name
- Sam
- Joined
- May 2, 2024
- Threads
- 27
- Messages
- 149
- Reaction score
- 362
- Location
- California
- Vehicle(s)
- 2017 Super Duty 2024 Maverick
- Engine
- 2.5L Hybrid
- Thread starter
- #1
Finally had some time to install my @Diode Dynamics Fog Lights several weeks ago the install was easy and my install was slightly different and not exactly per the suggested instructions from DD..
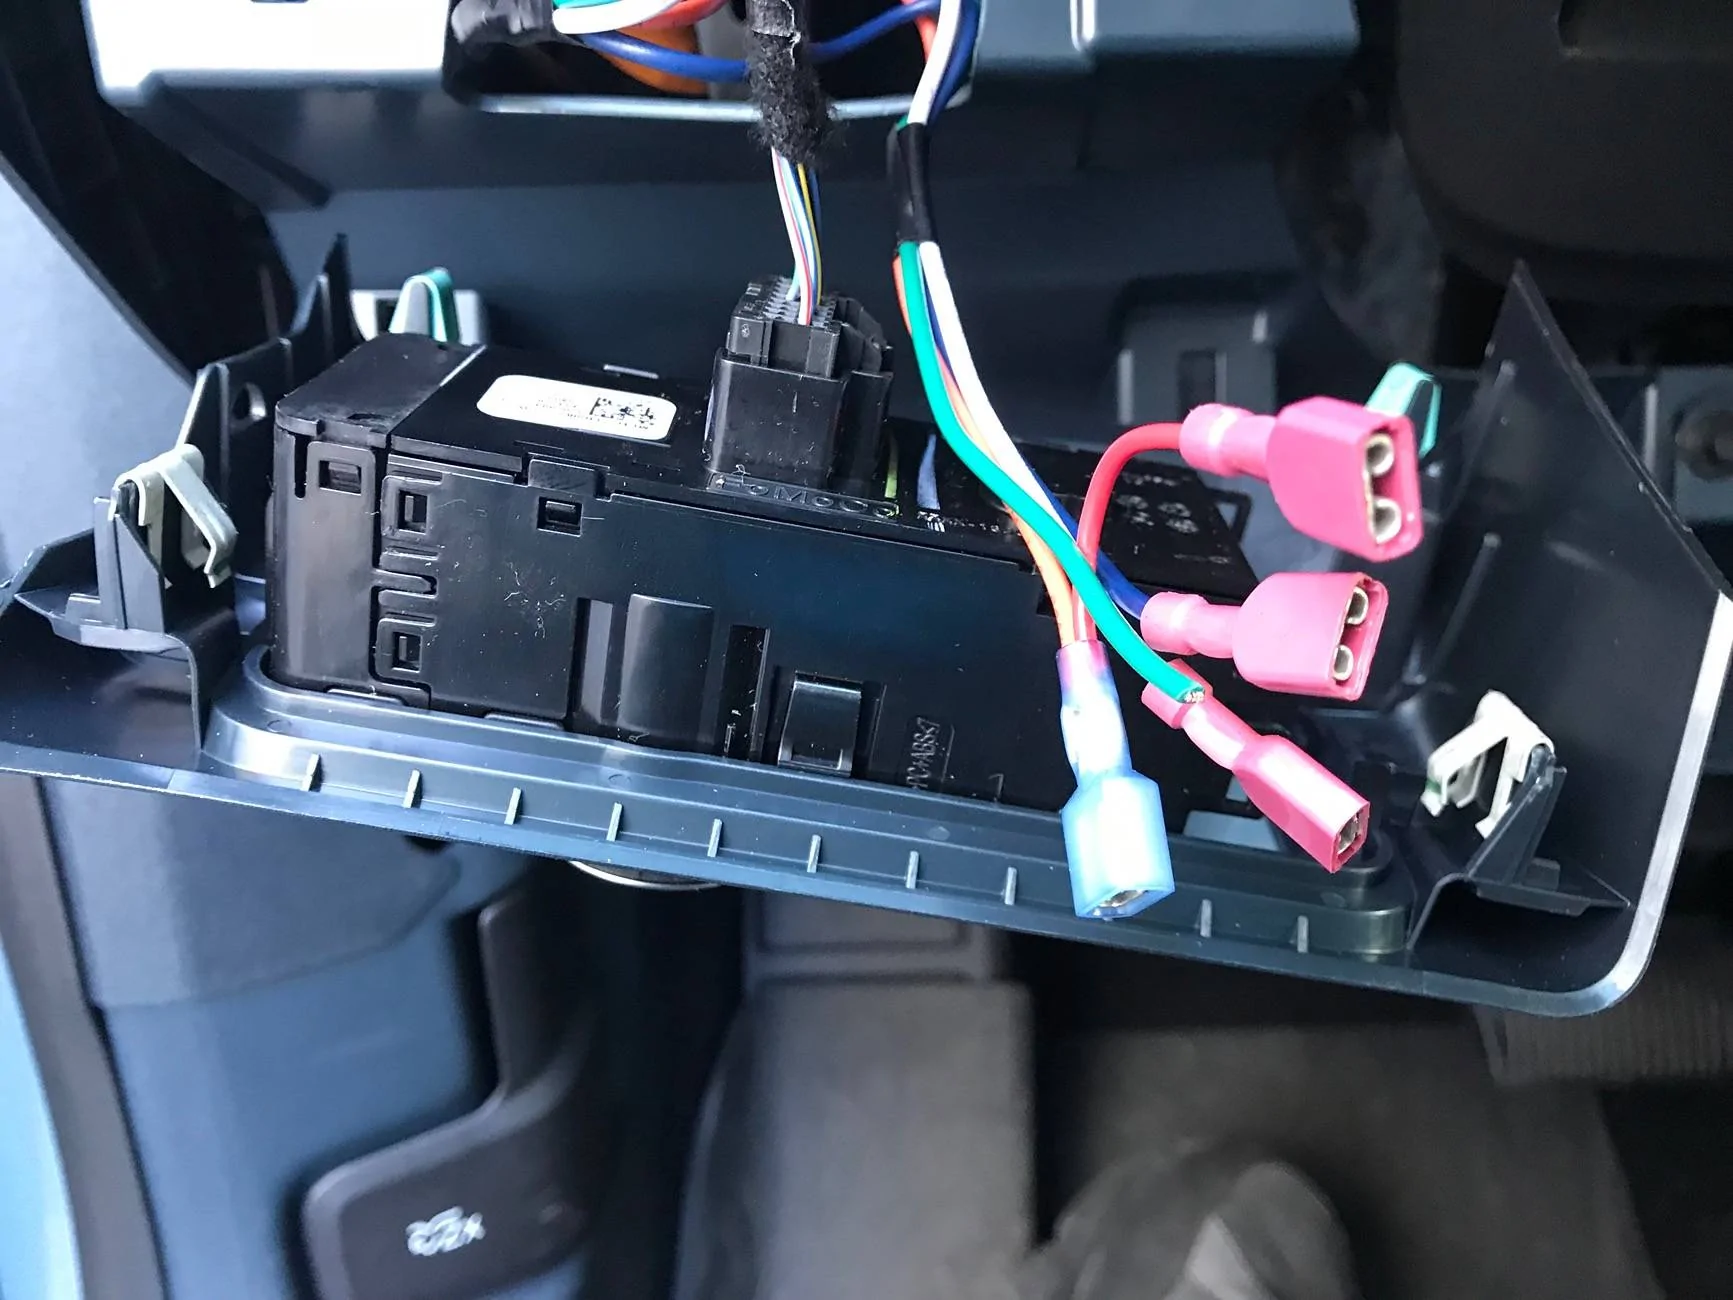
I started my install by doing the Fog Light switch inside the cab, I didn’t want to mess with going the F150 switch route and the needed forscan thing for several reasons.. So before installing while I was considering who what and where as well as looking at what others had done I came up with an idea.
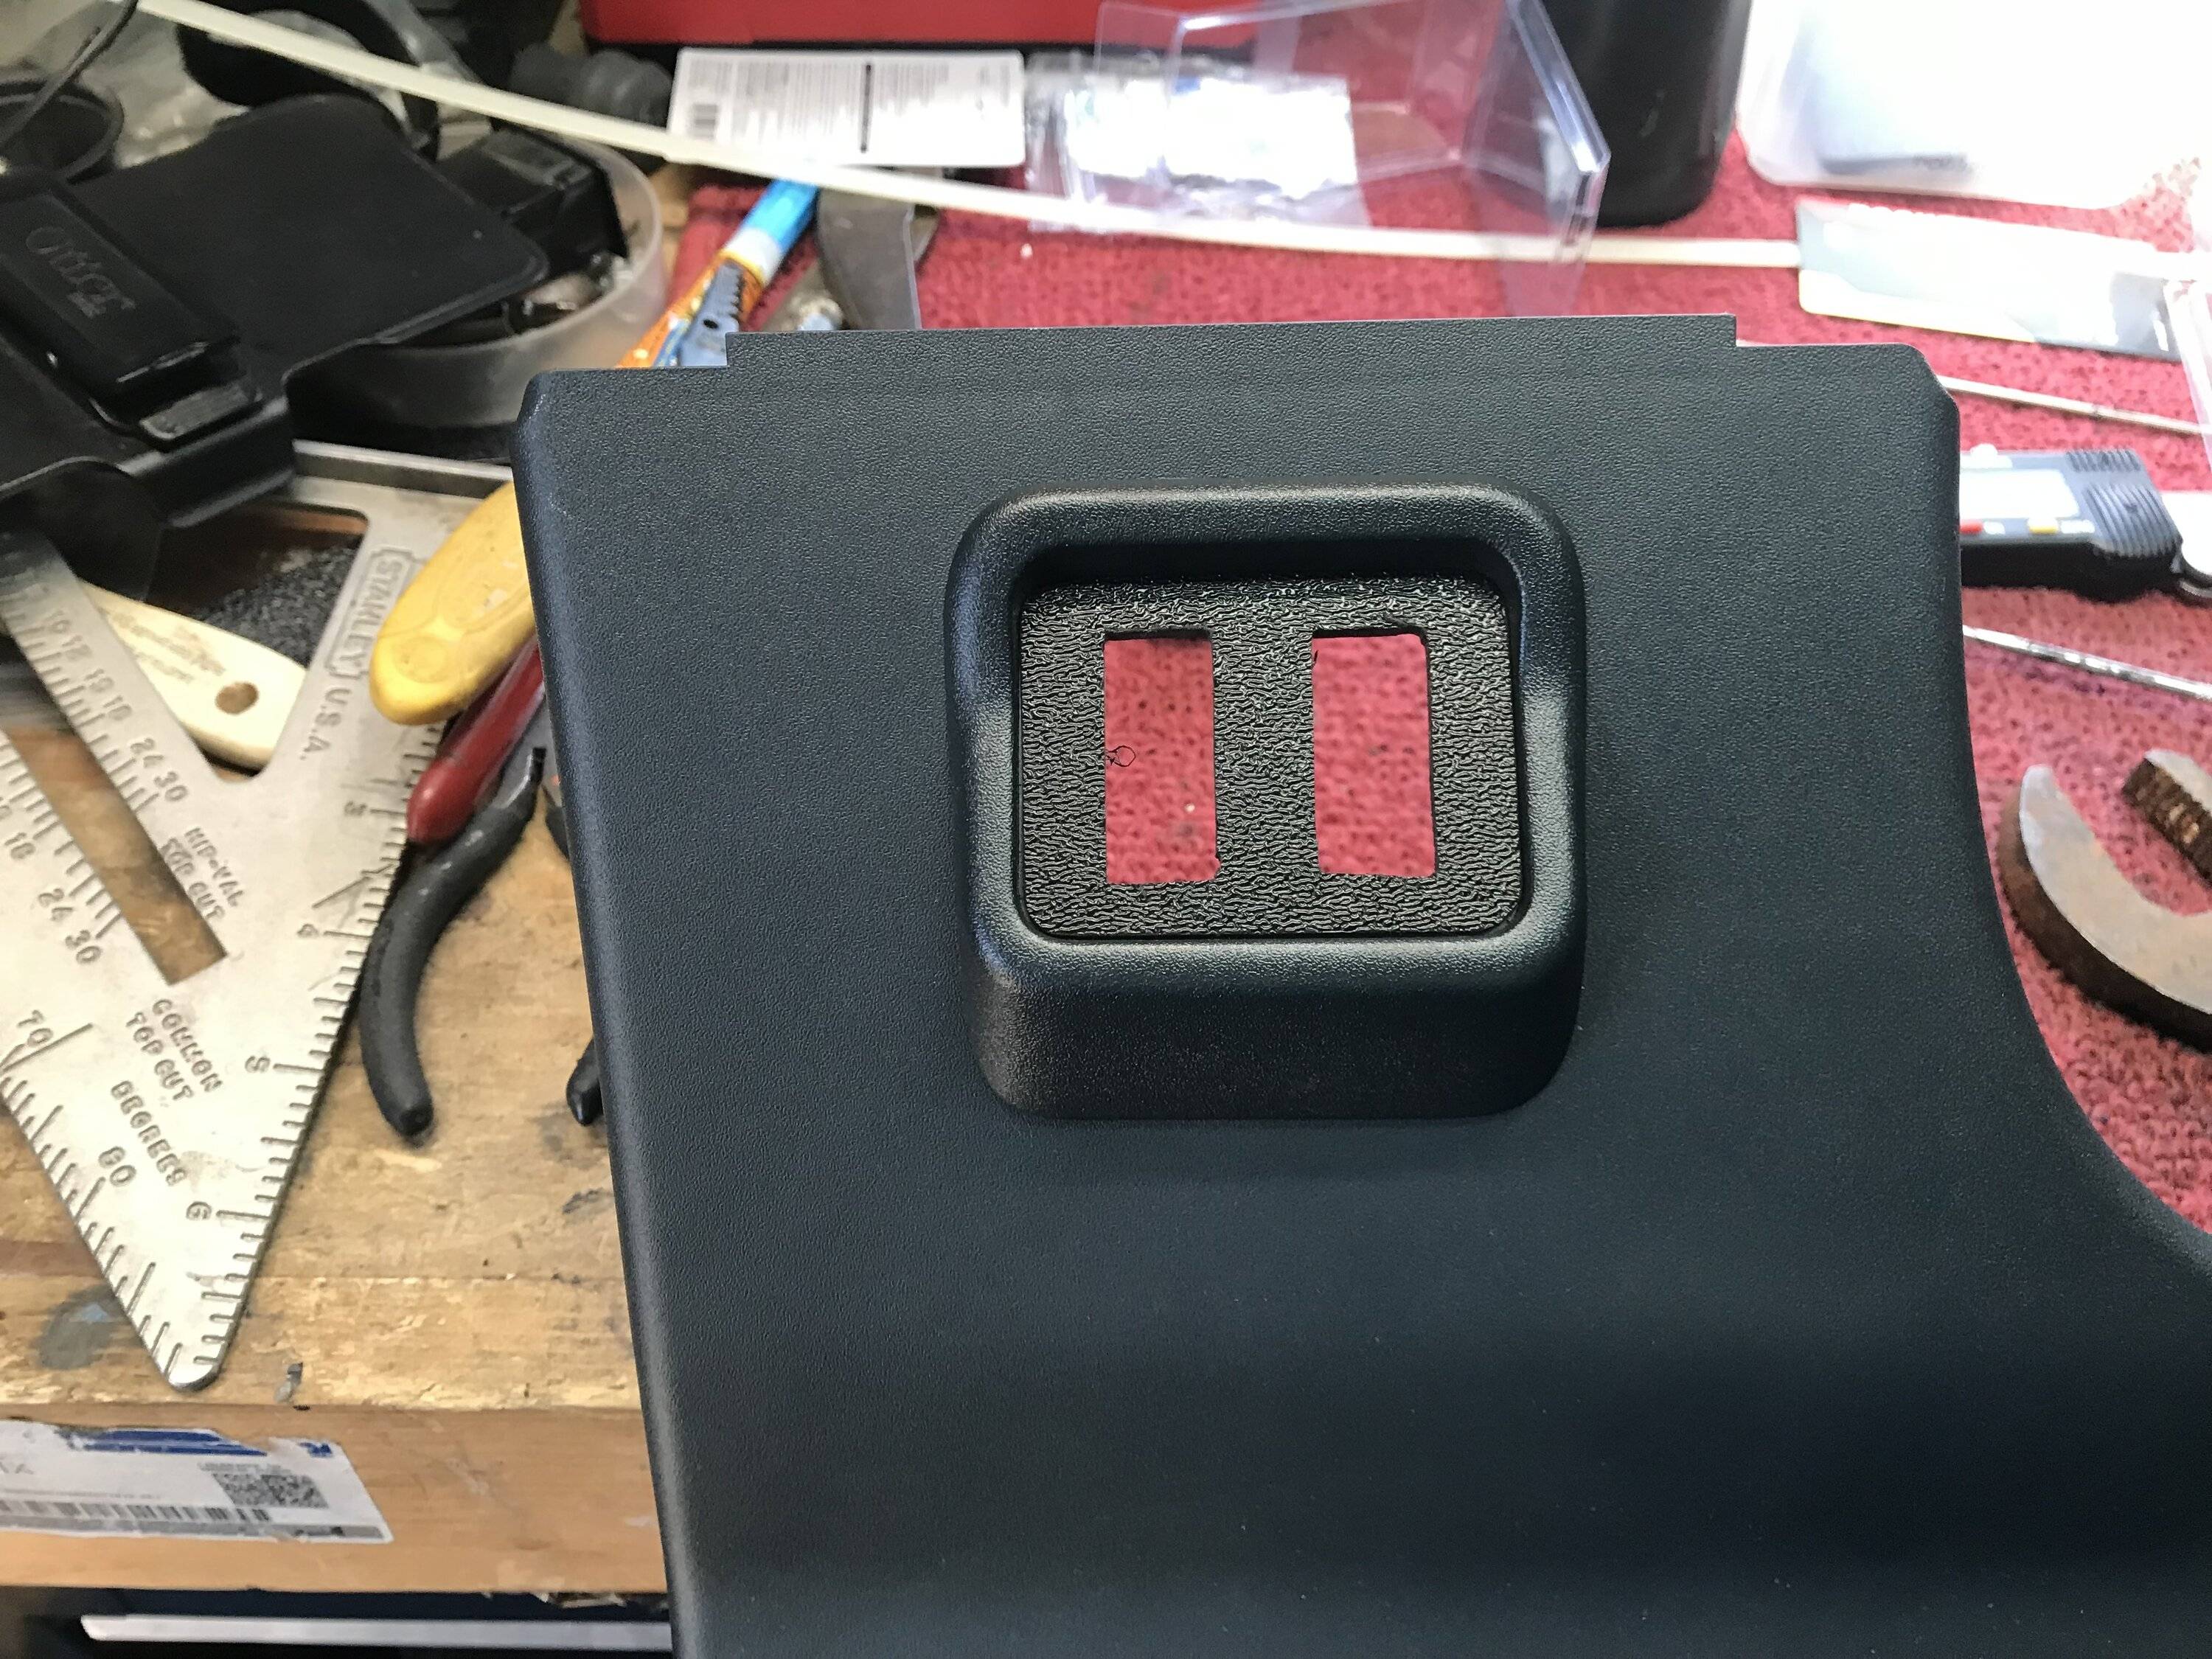
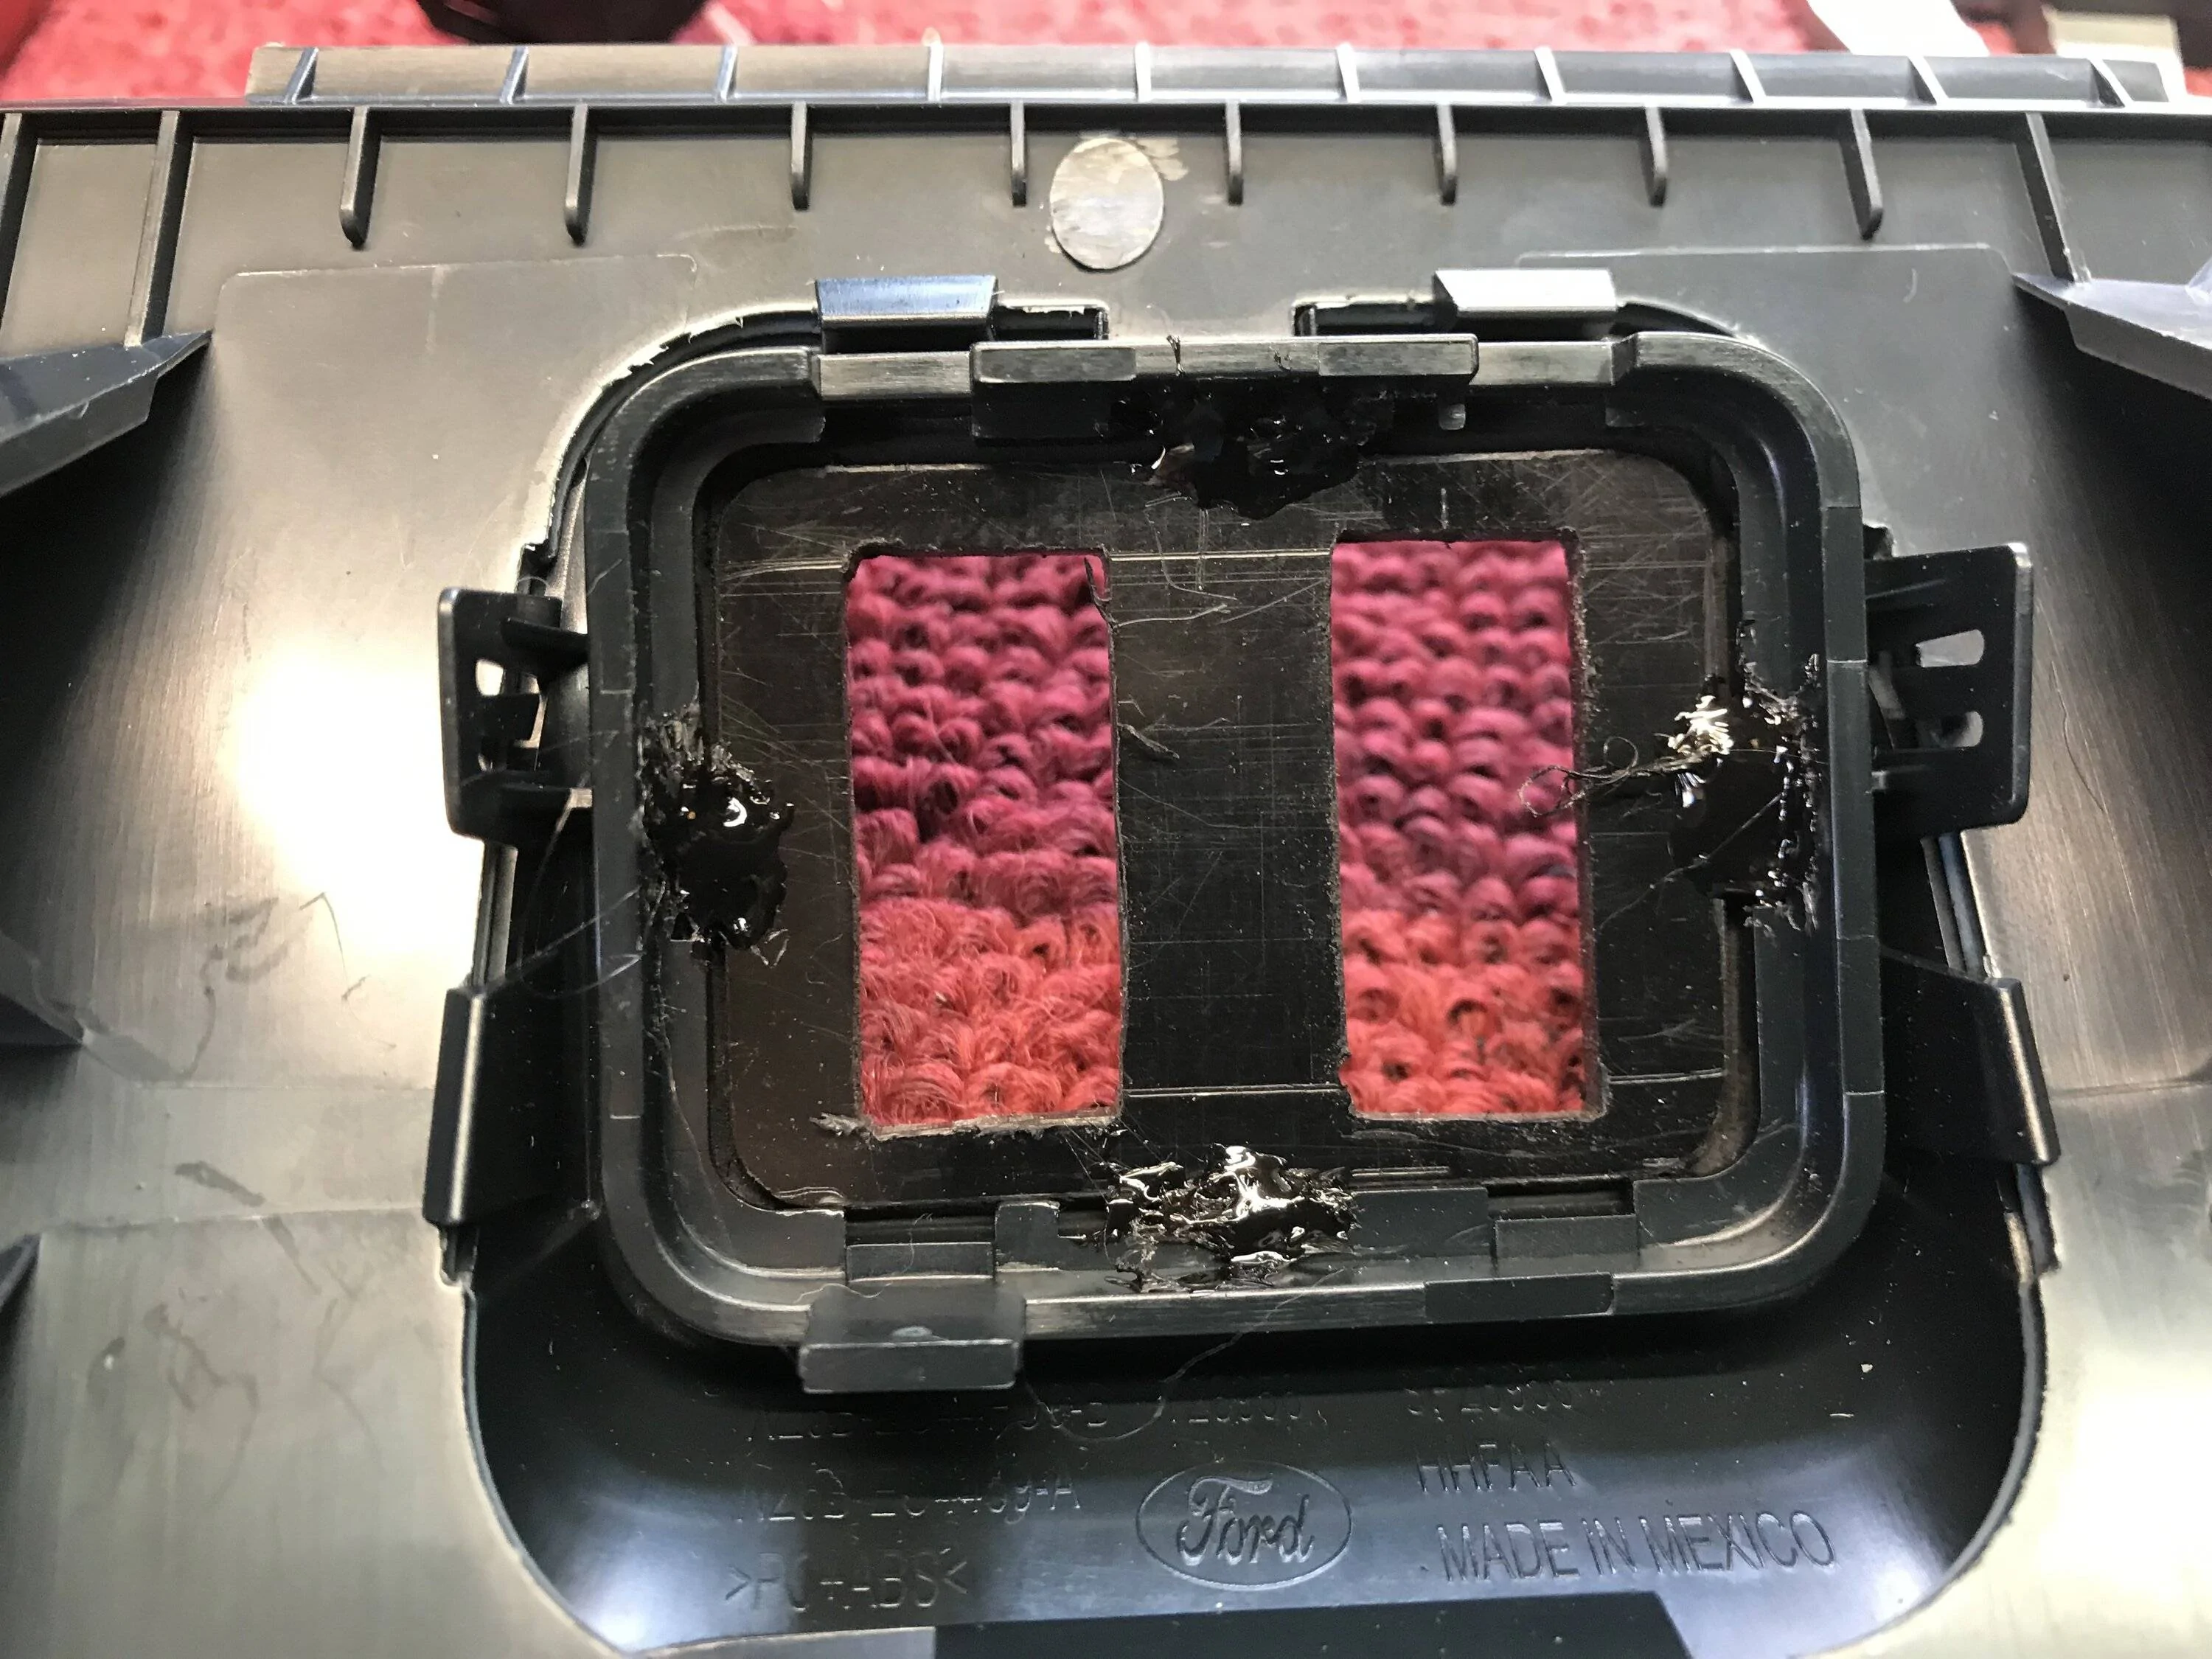
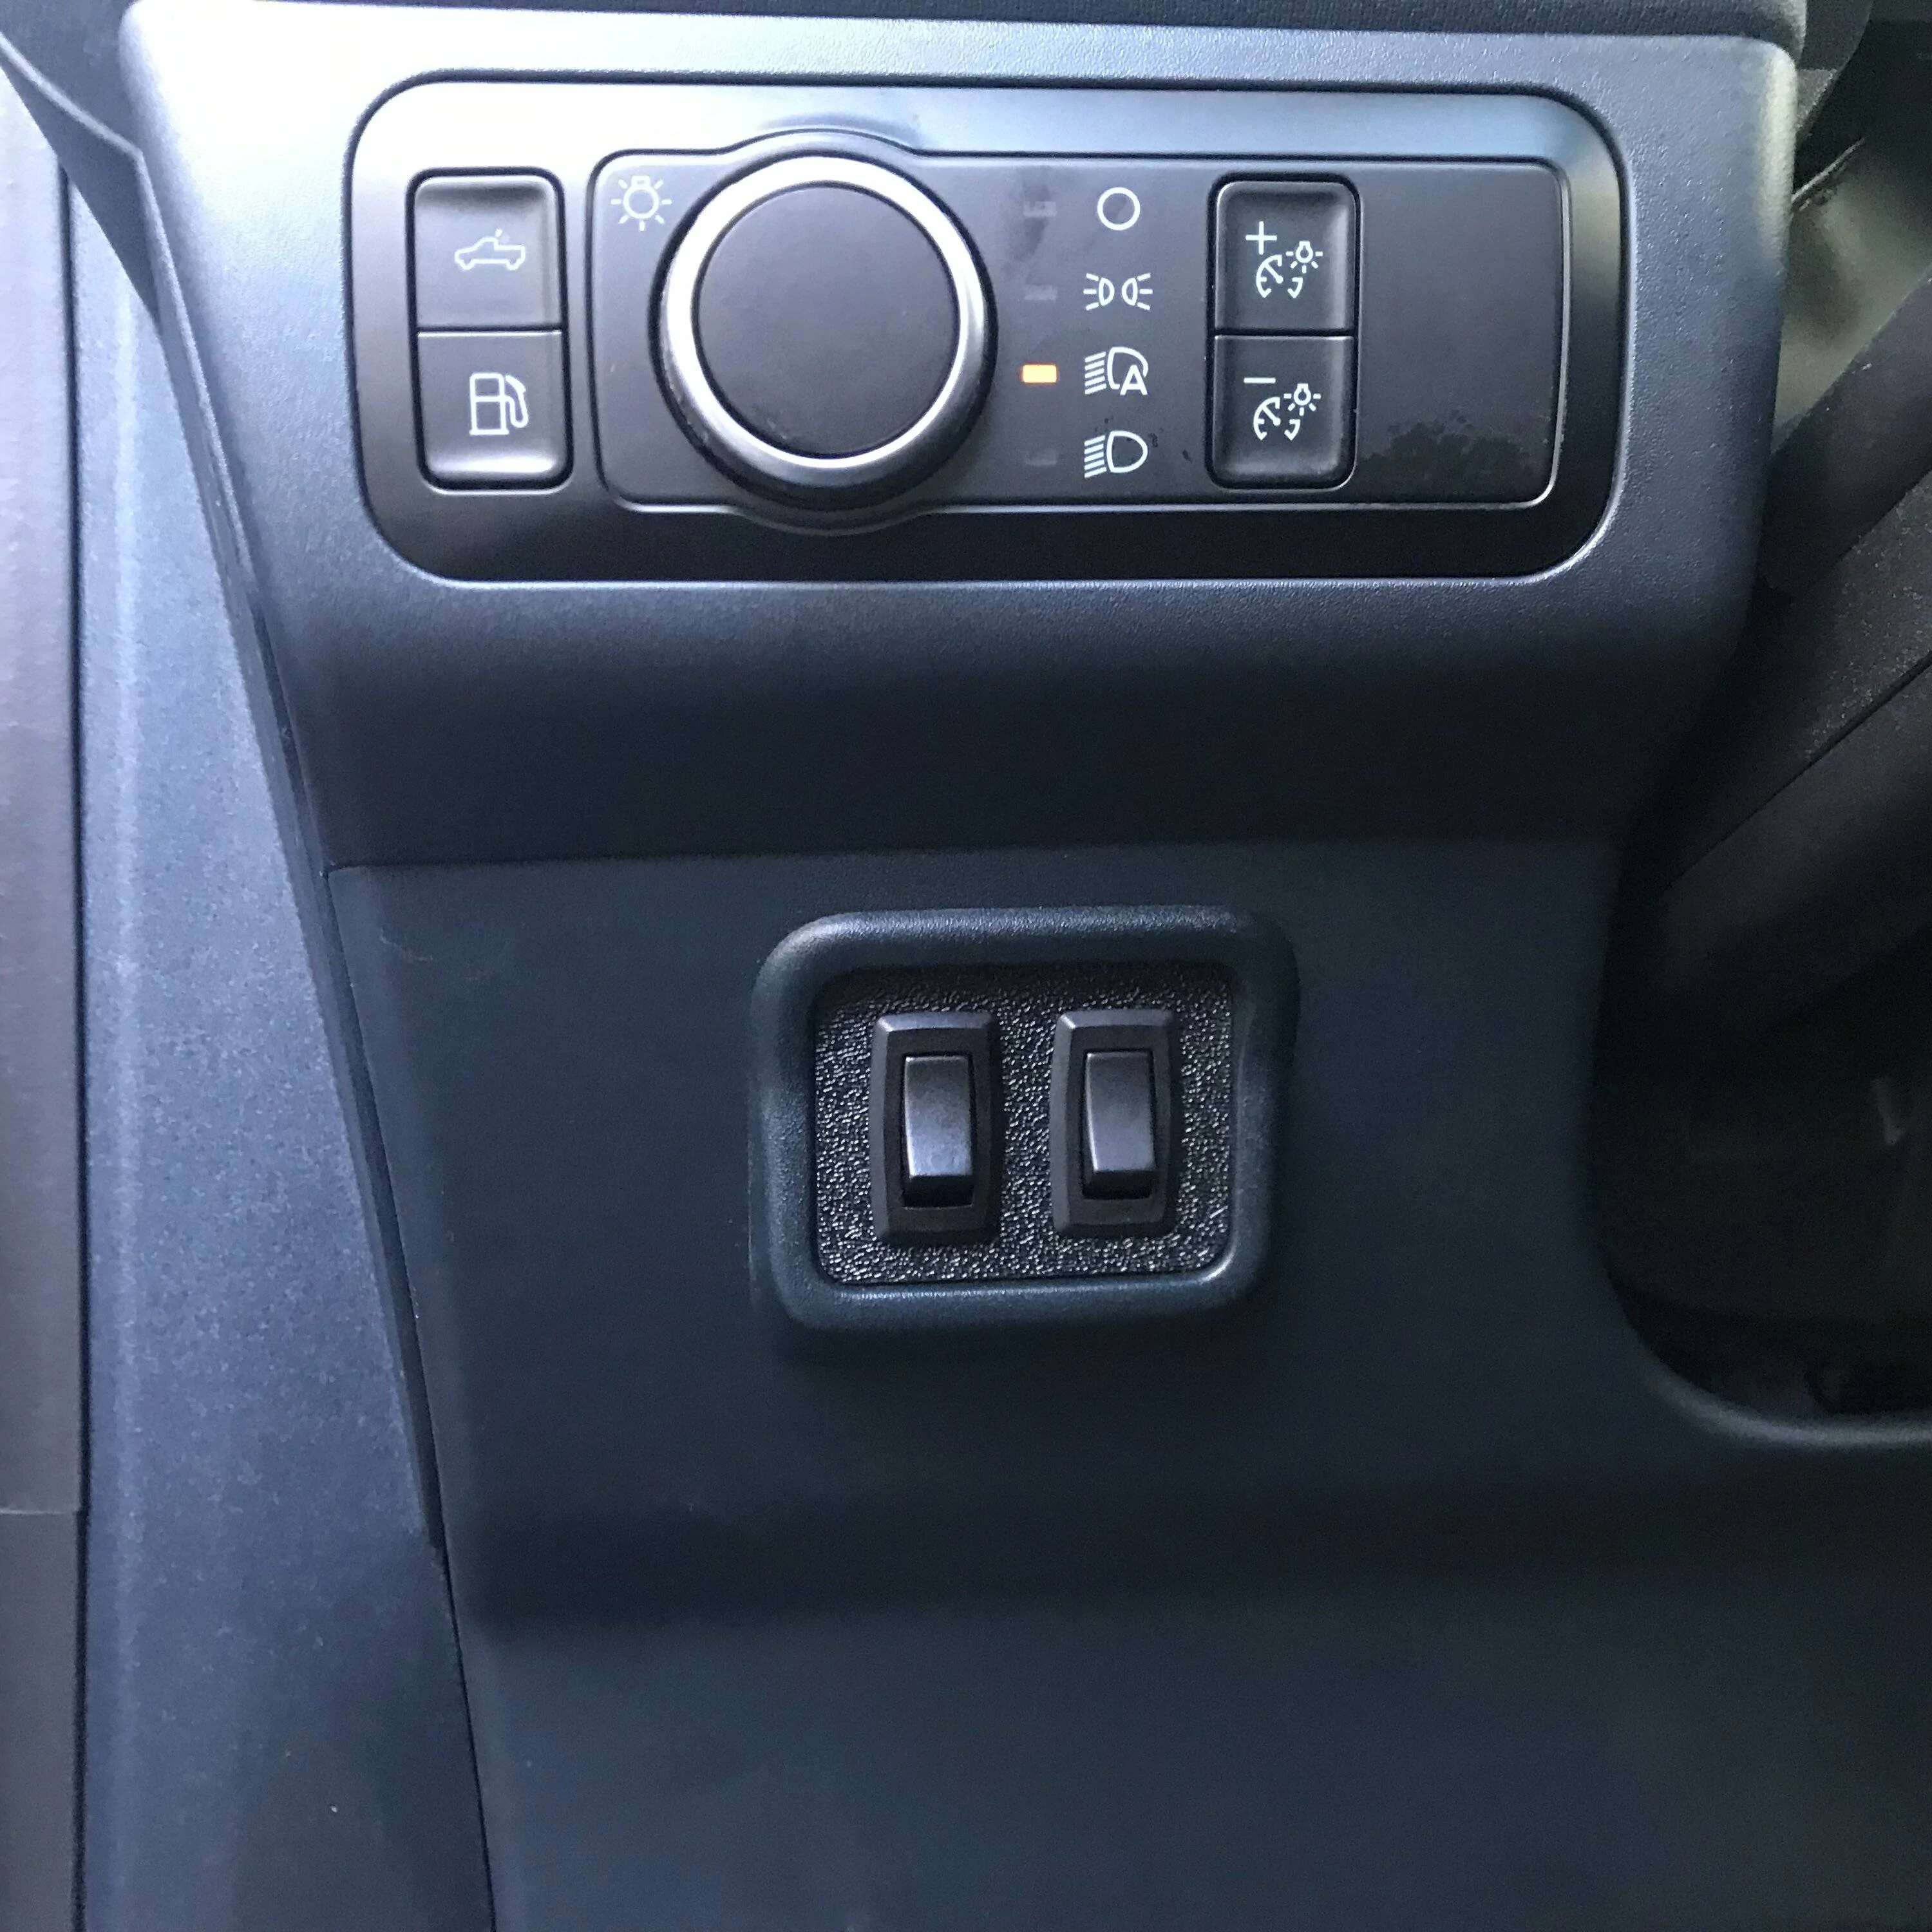
I got the idea while reading one of the threads posted about towing and the factory brake controller.. Since I own a hybrid and do not have the 4k tow package thought I’d look into tow package's lower panel as it it might offer a perfect location for a couple of toggle switch’s.. I started searching the web and bought a lower panel it comes without the controller but has the mounting bezel.. This looked like it was going to be rather simple, all I needed to do was make a small plate/panel to fit into the controllers location.. I already had some textured ABS plastic sheet it was 1/8’’ thick and should do the trick..
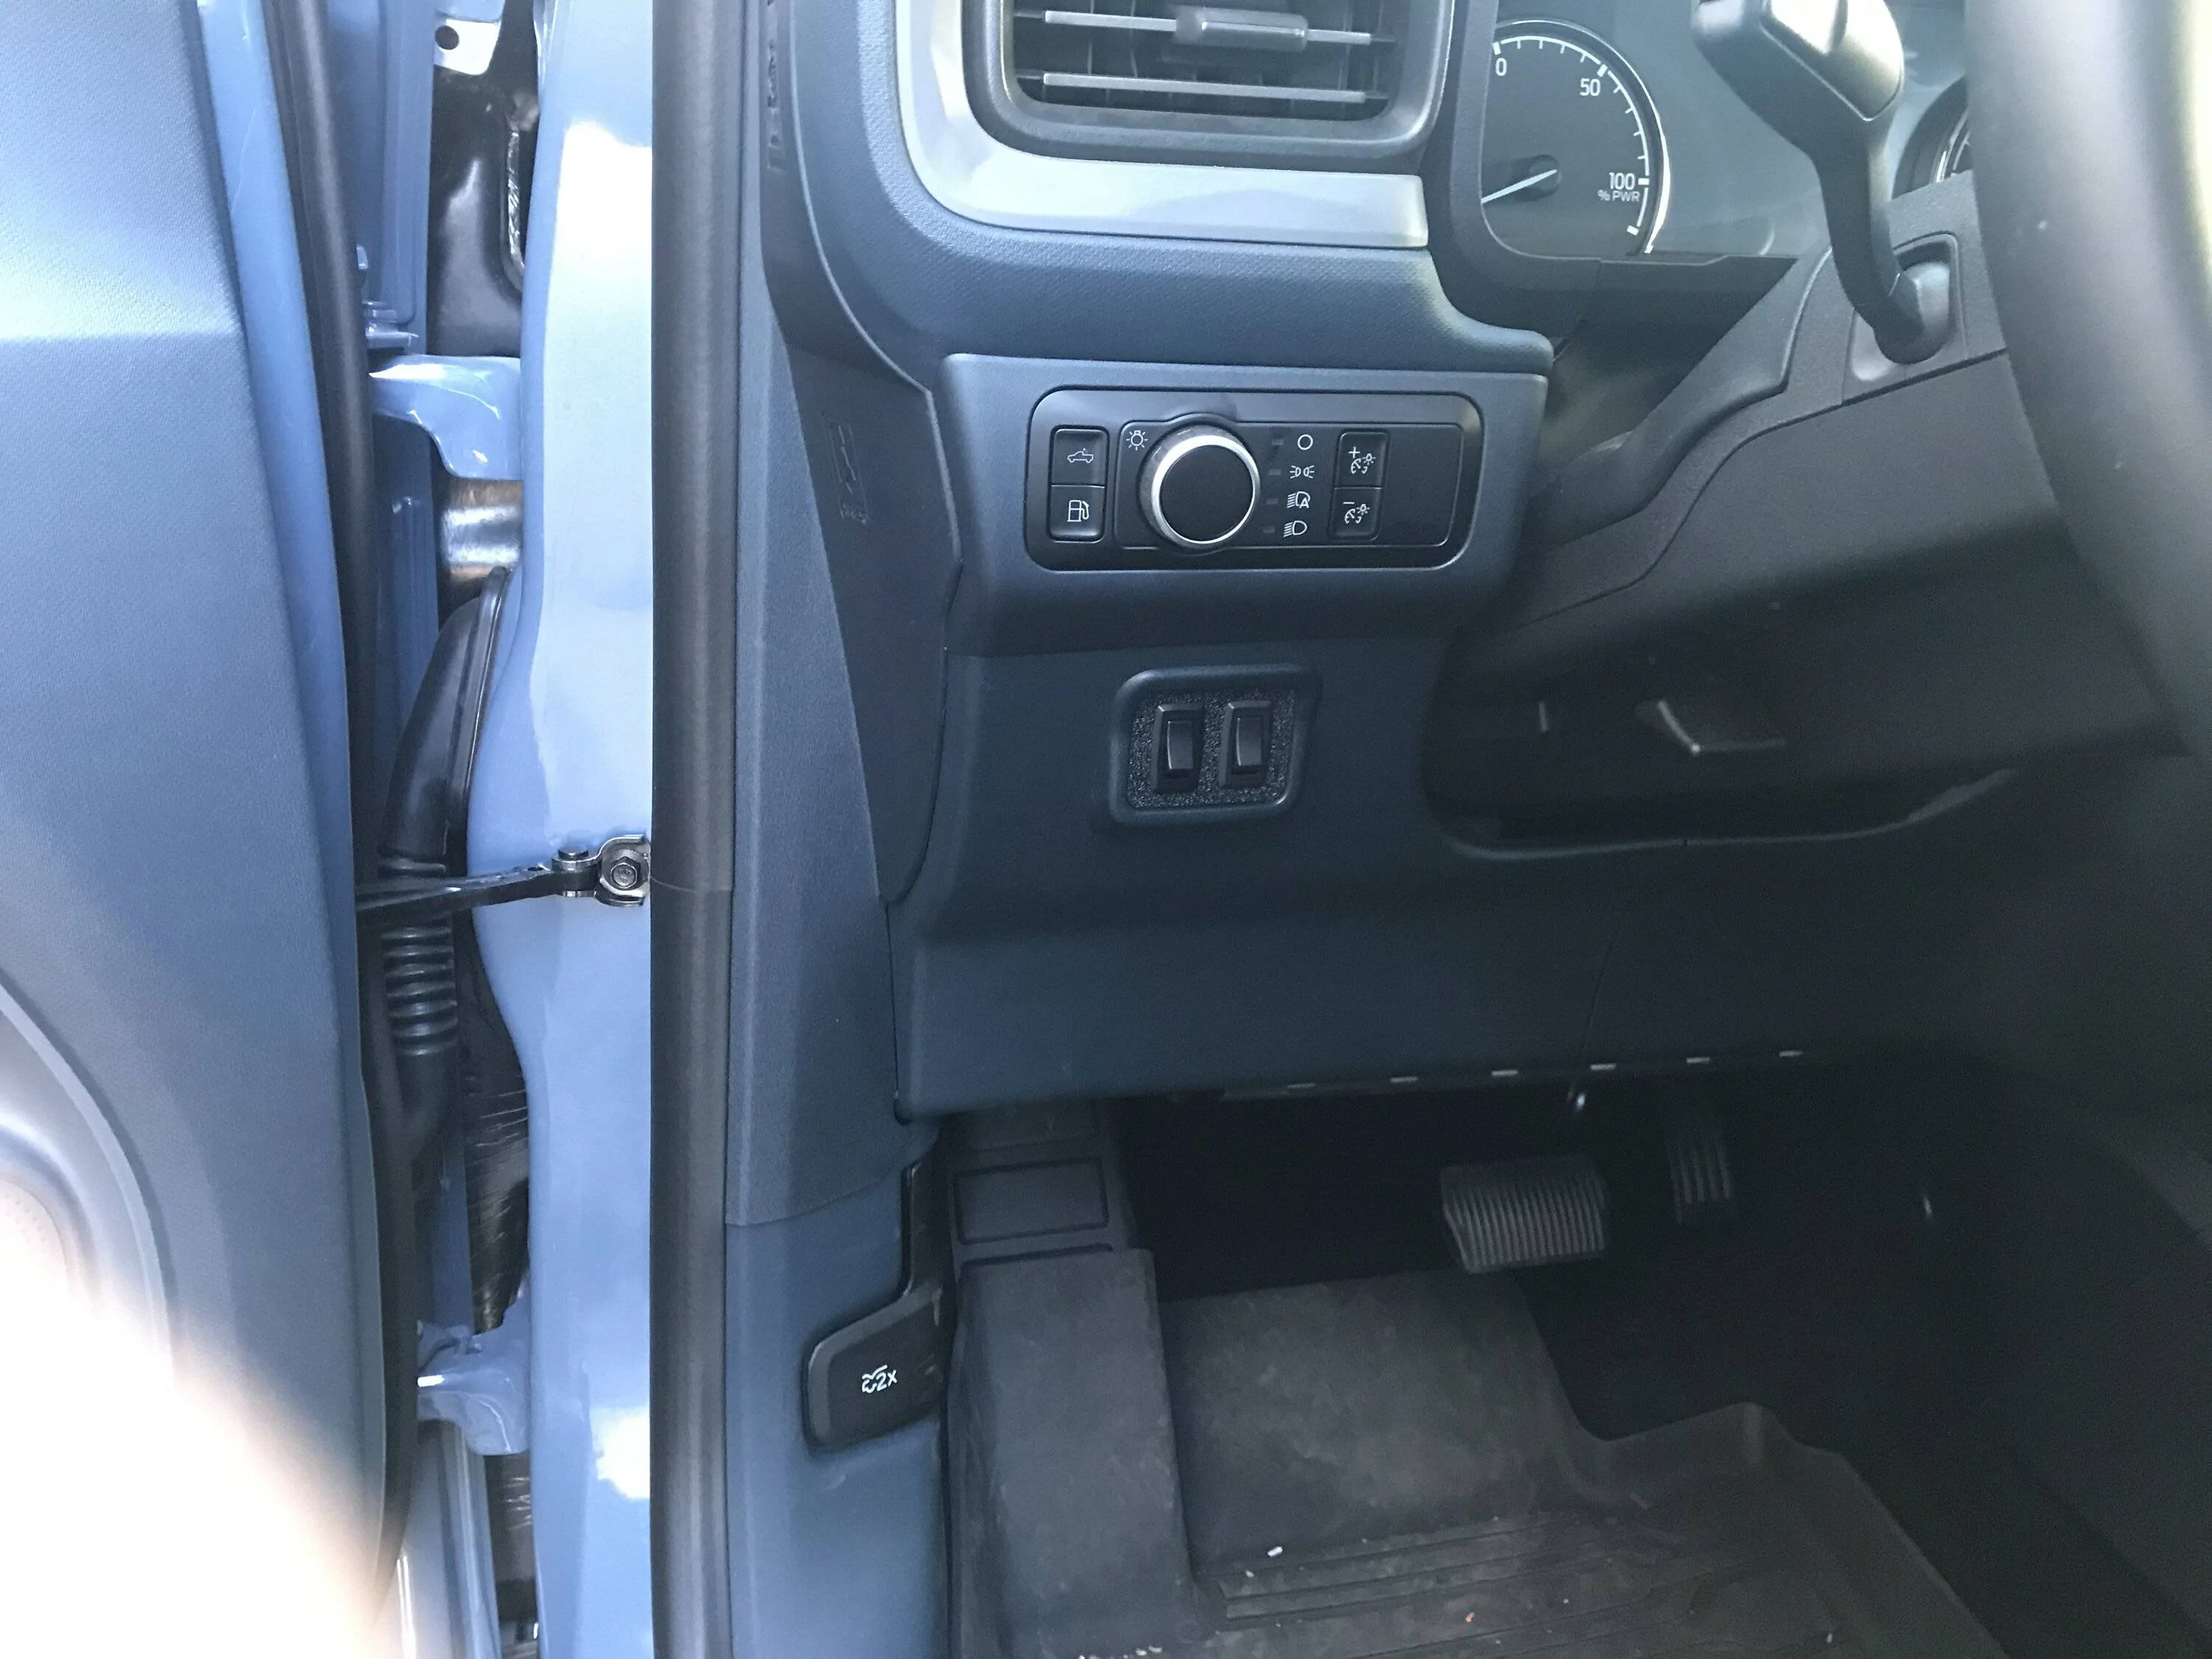
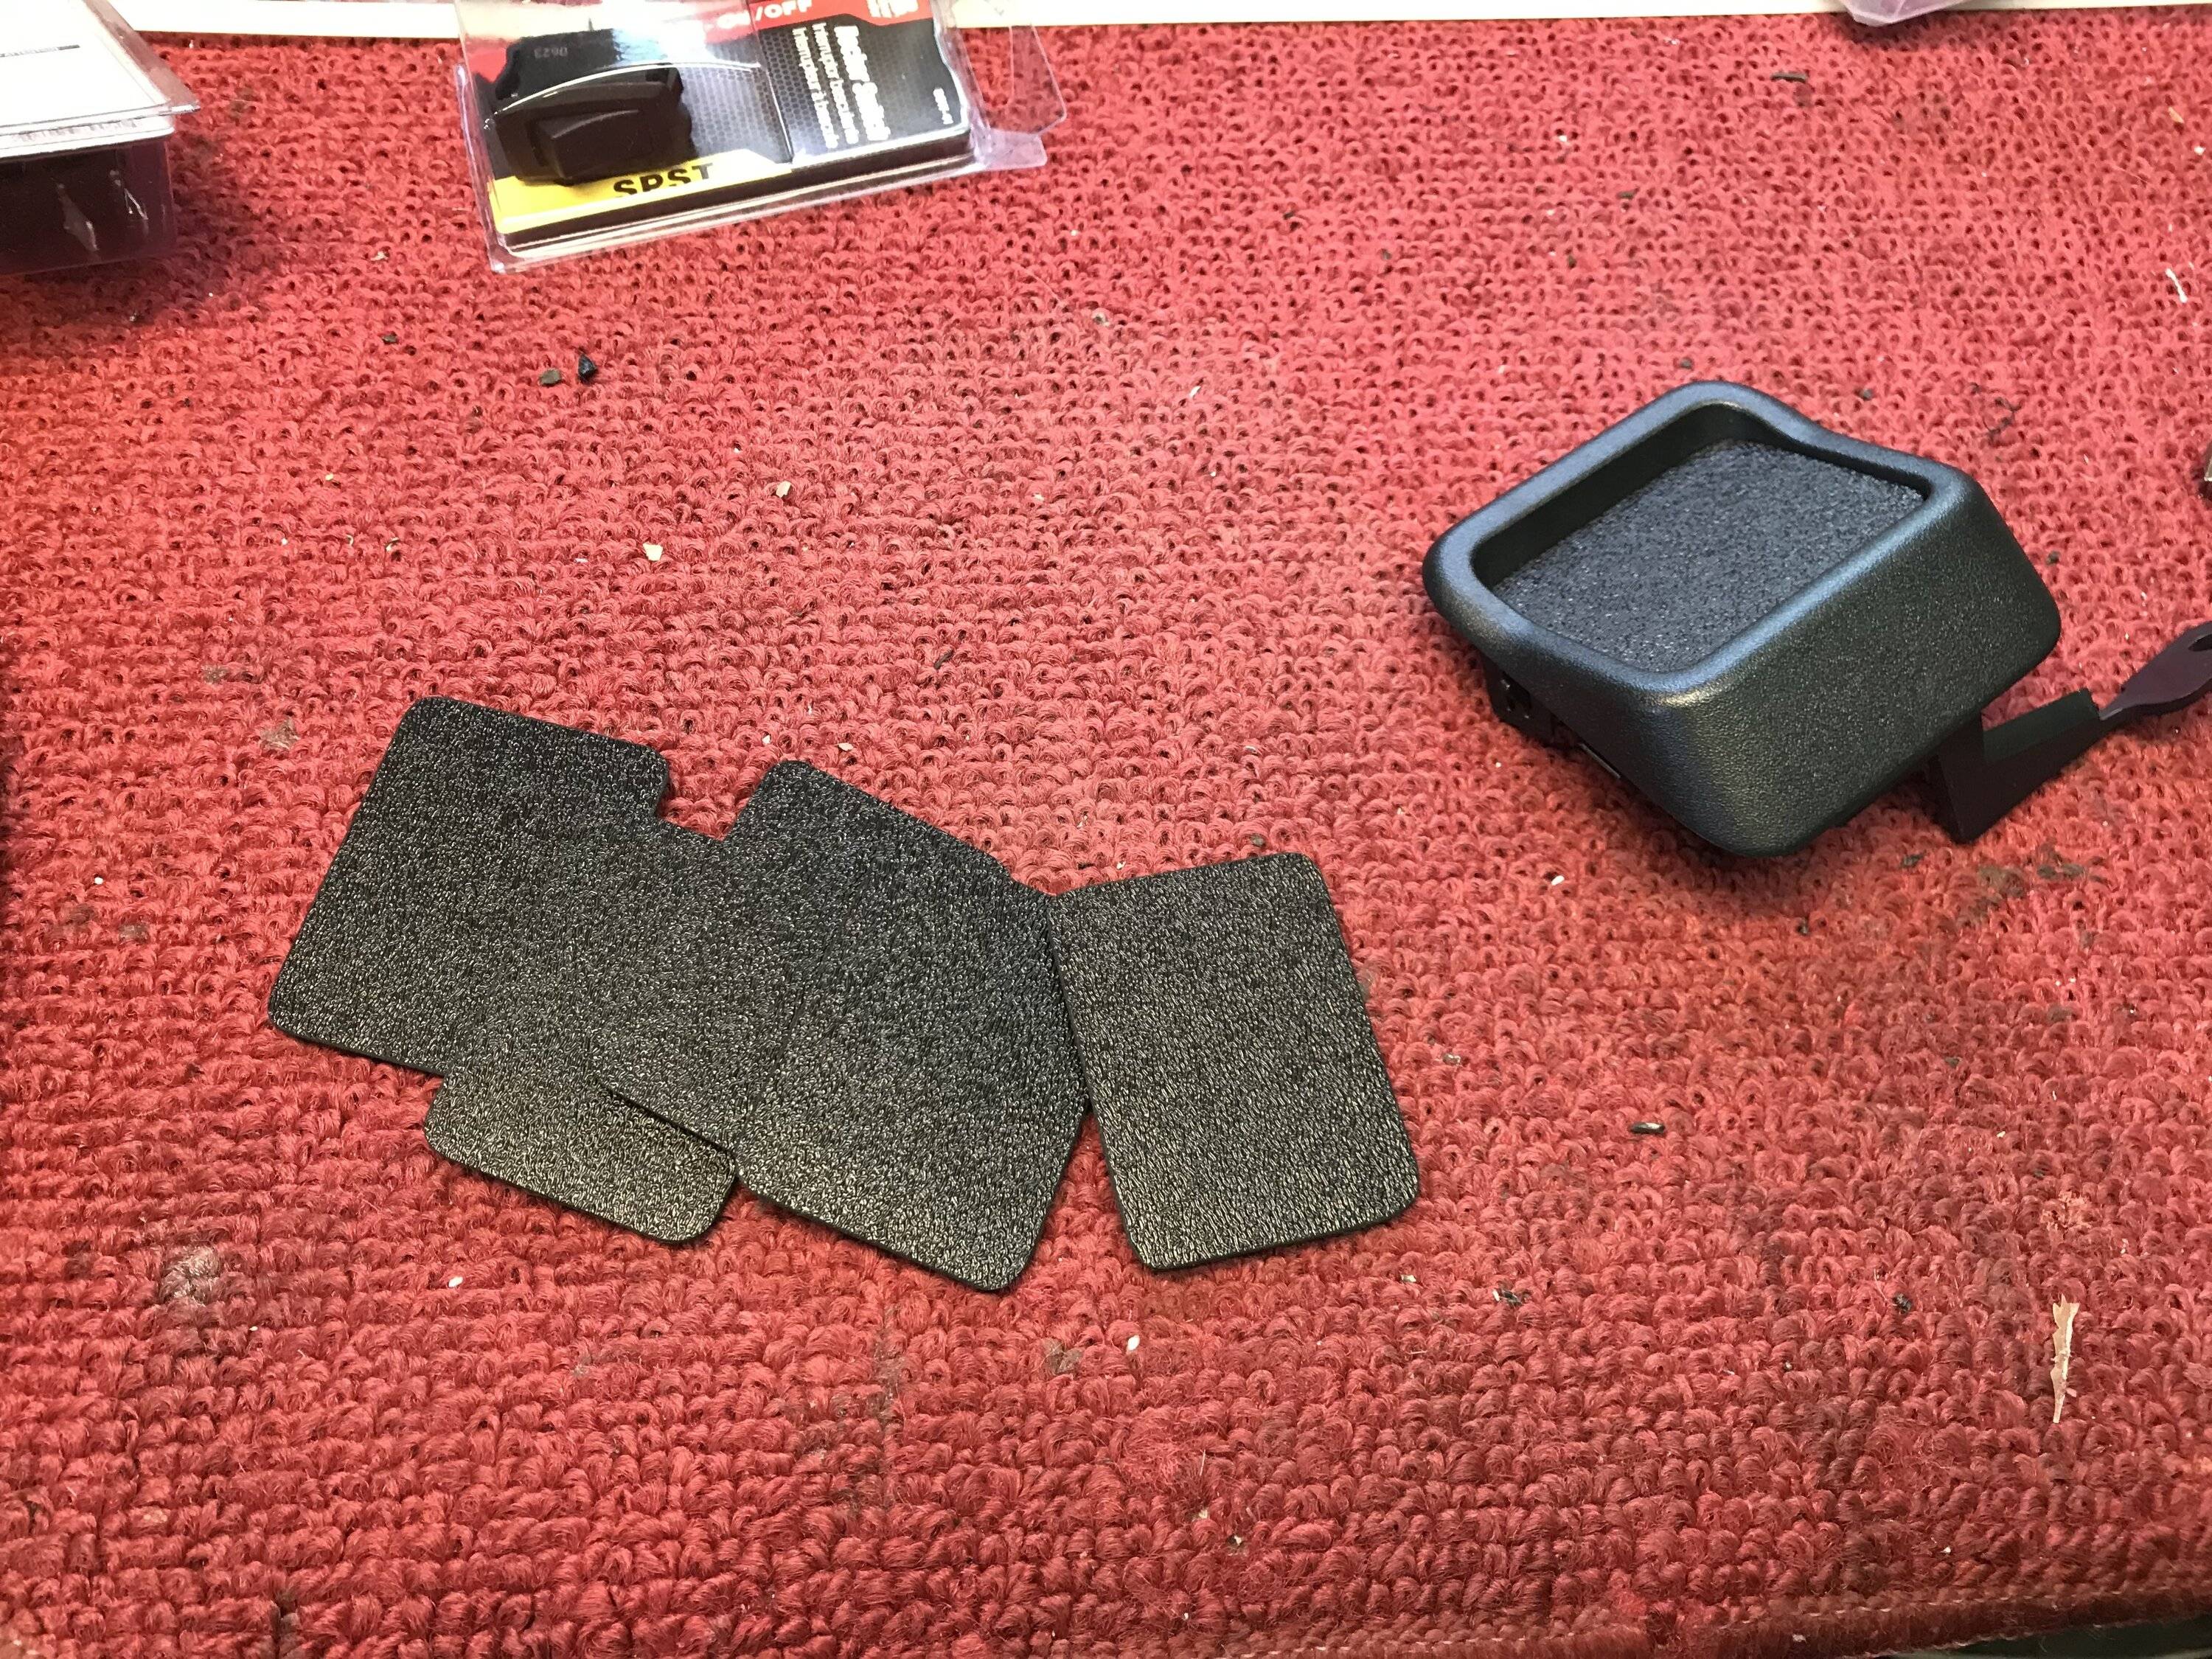
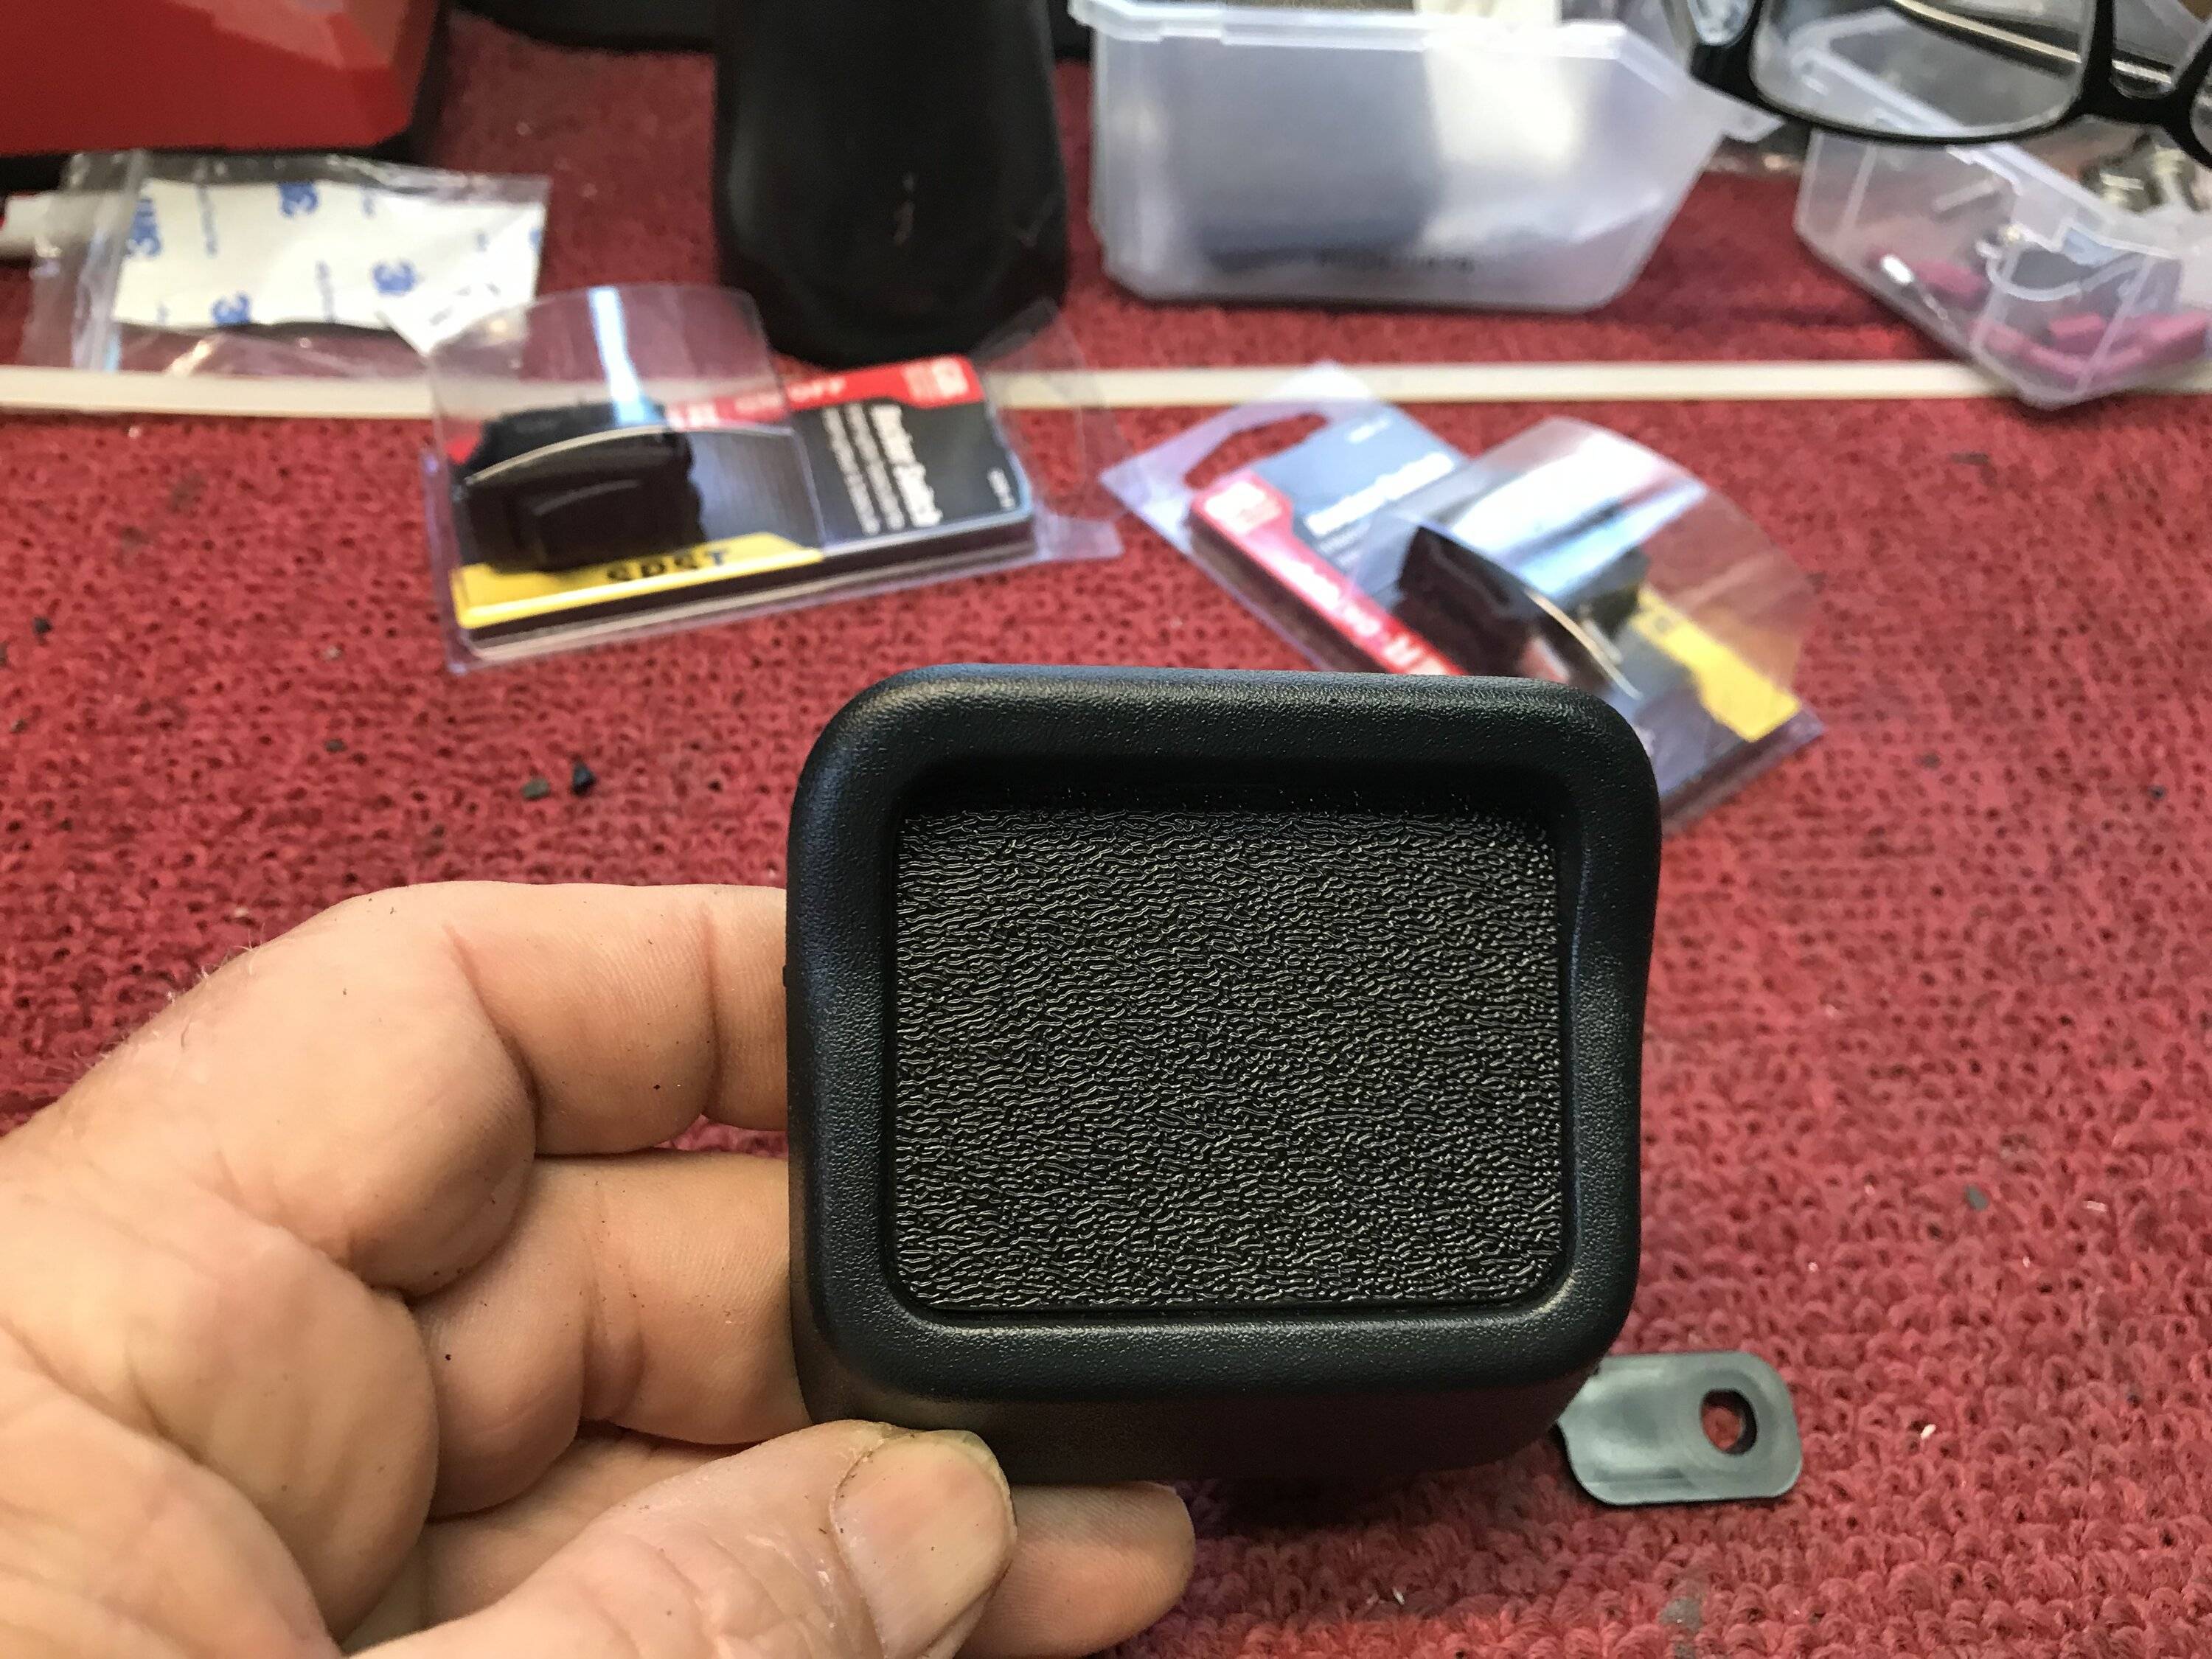
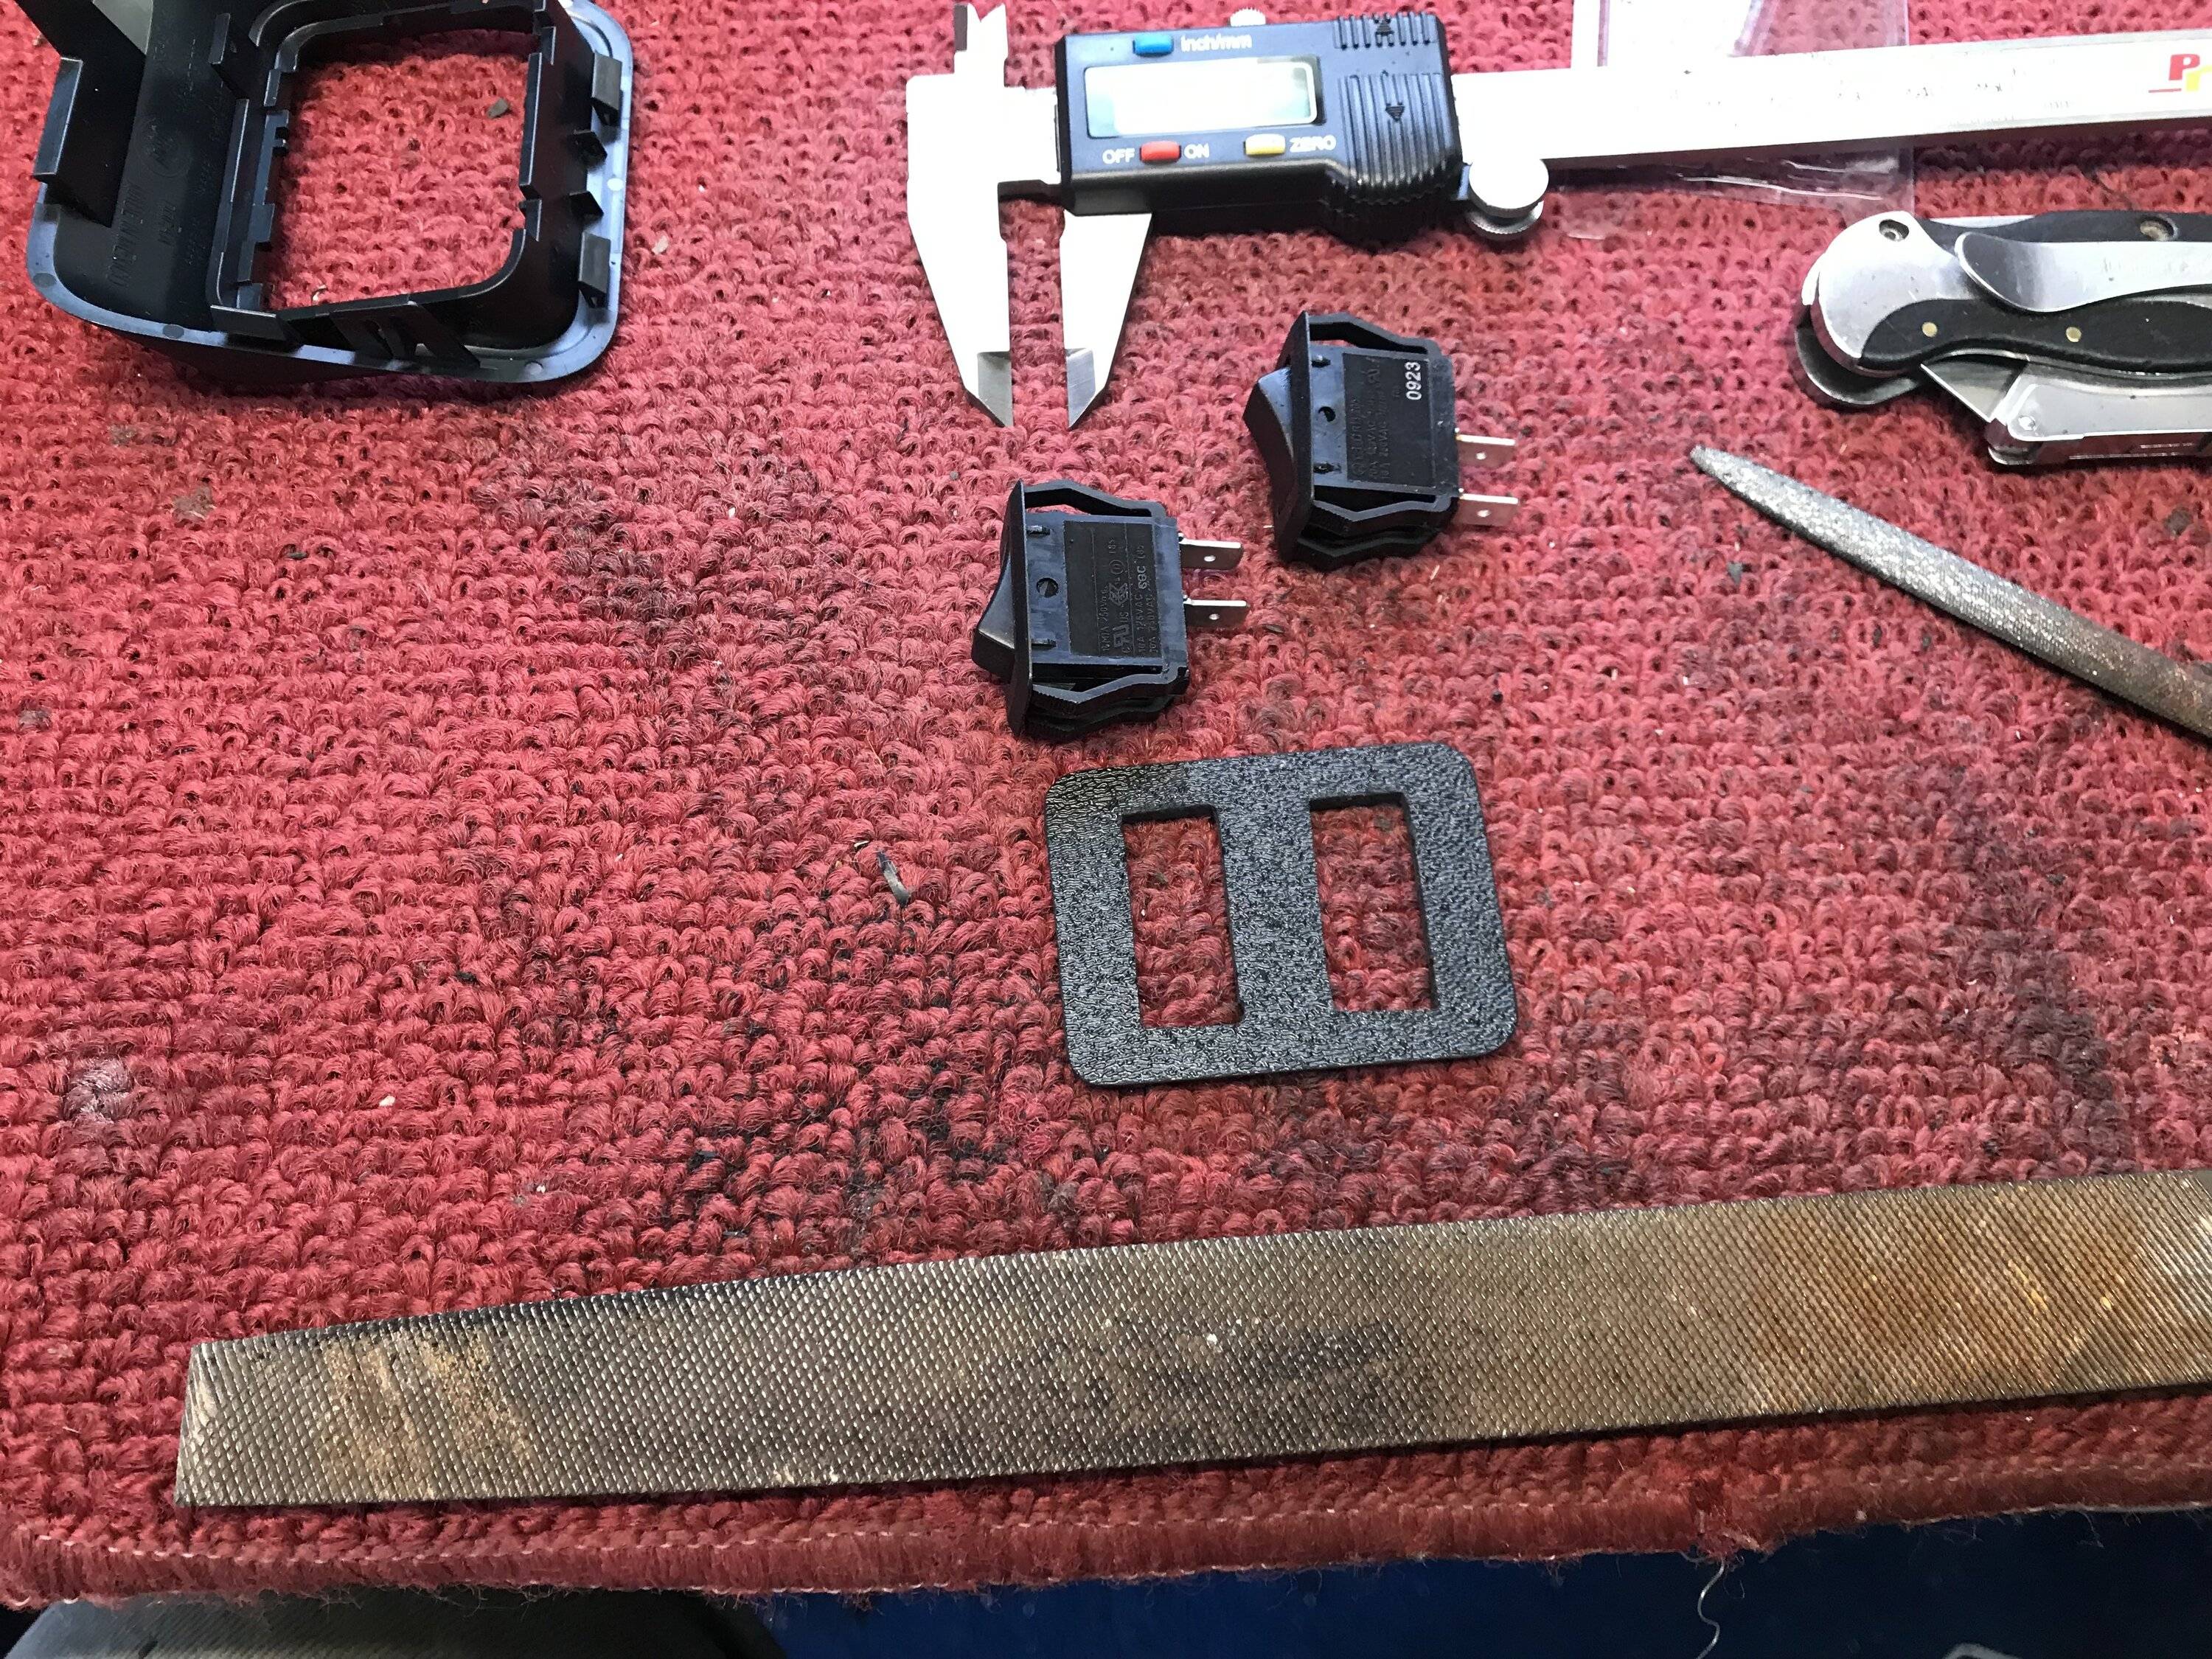
I measured the opening and then cut myself several piece's to have some backups just in case.. As I started to fit the small plastic panel to the bezel opening it was not sitting as flush as I would like so I decided to cut a shallow bevel on the back of it to make it fit more flush with the bezels mounting face.. Once fitment was to my liking I centered and spaced my 2 new switch’s location in the panel marked it and cut there openings out, when I was happy with the fit of the panel and the switch’s I then used some ABS glue since both were ABS plastic to bond them together..


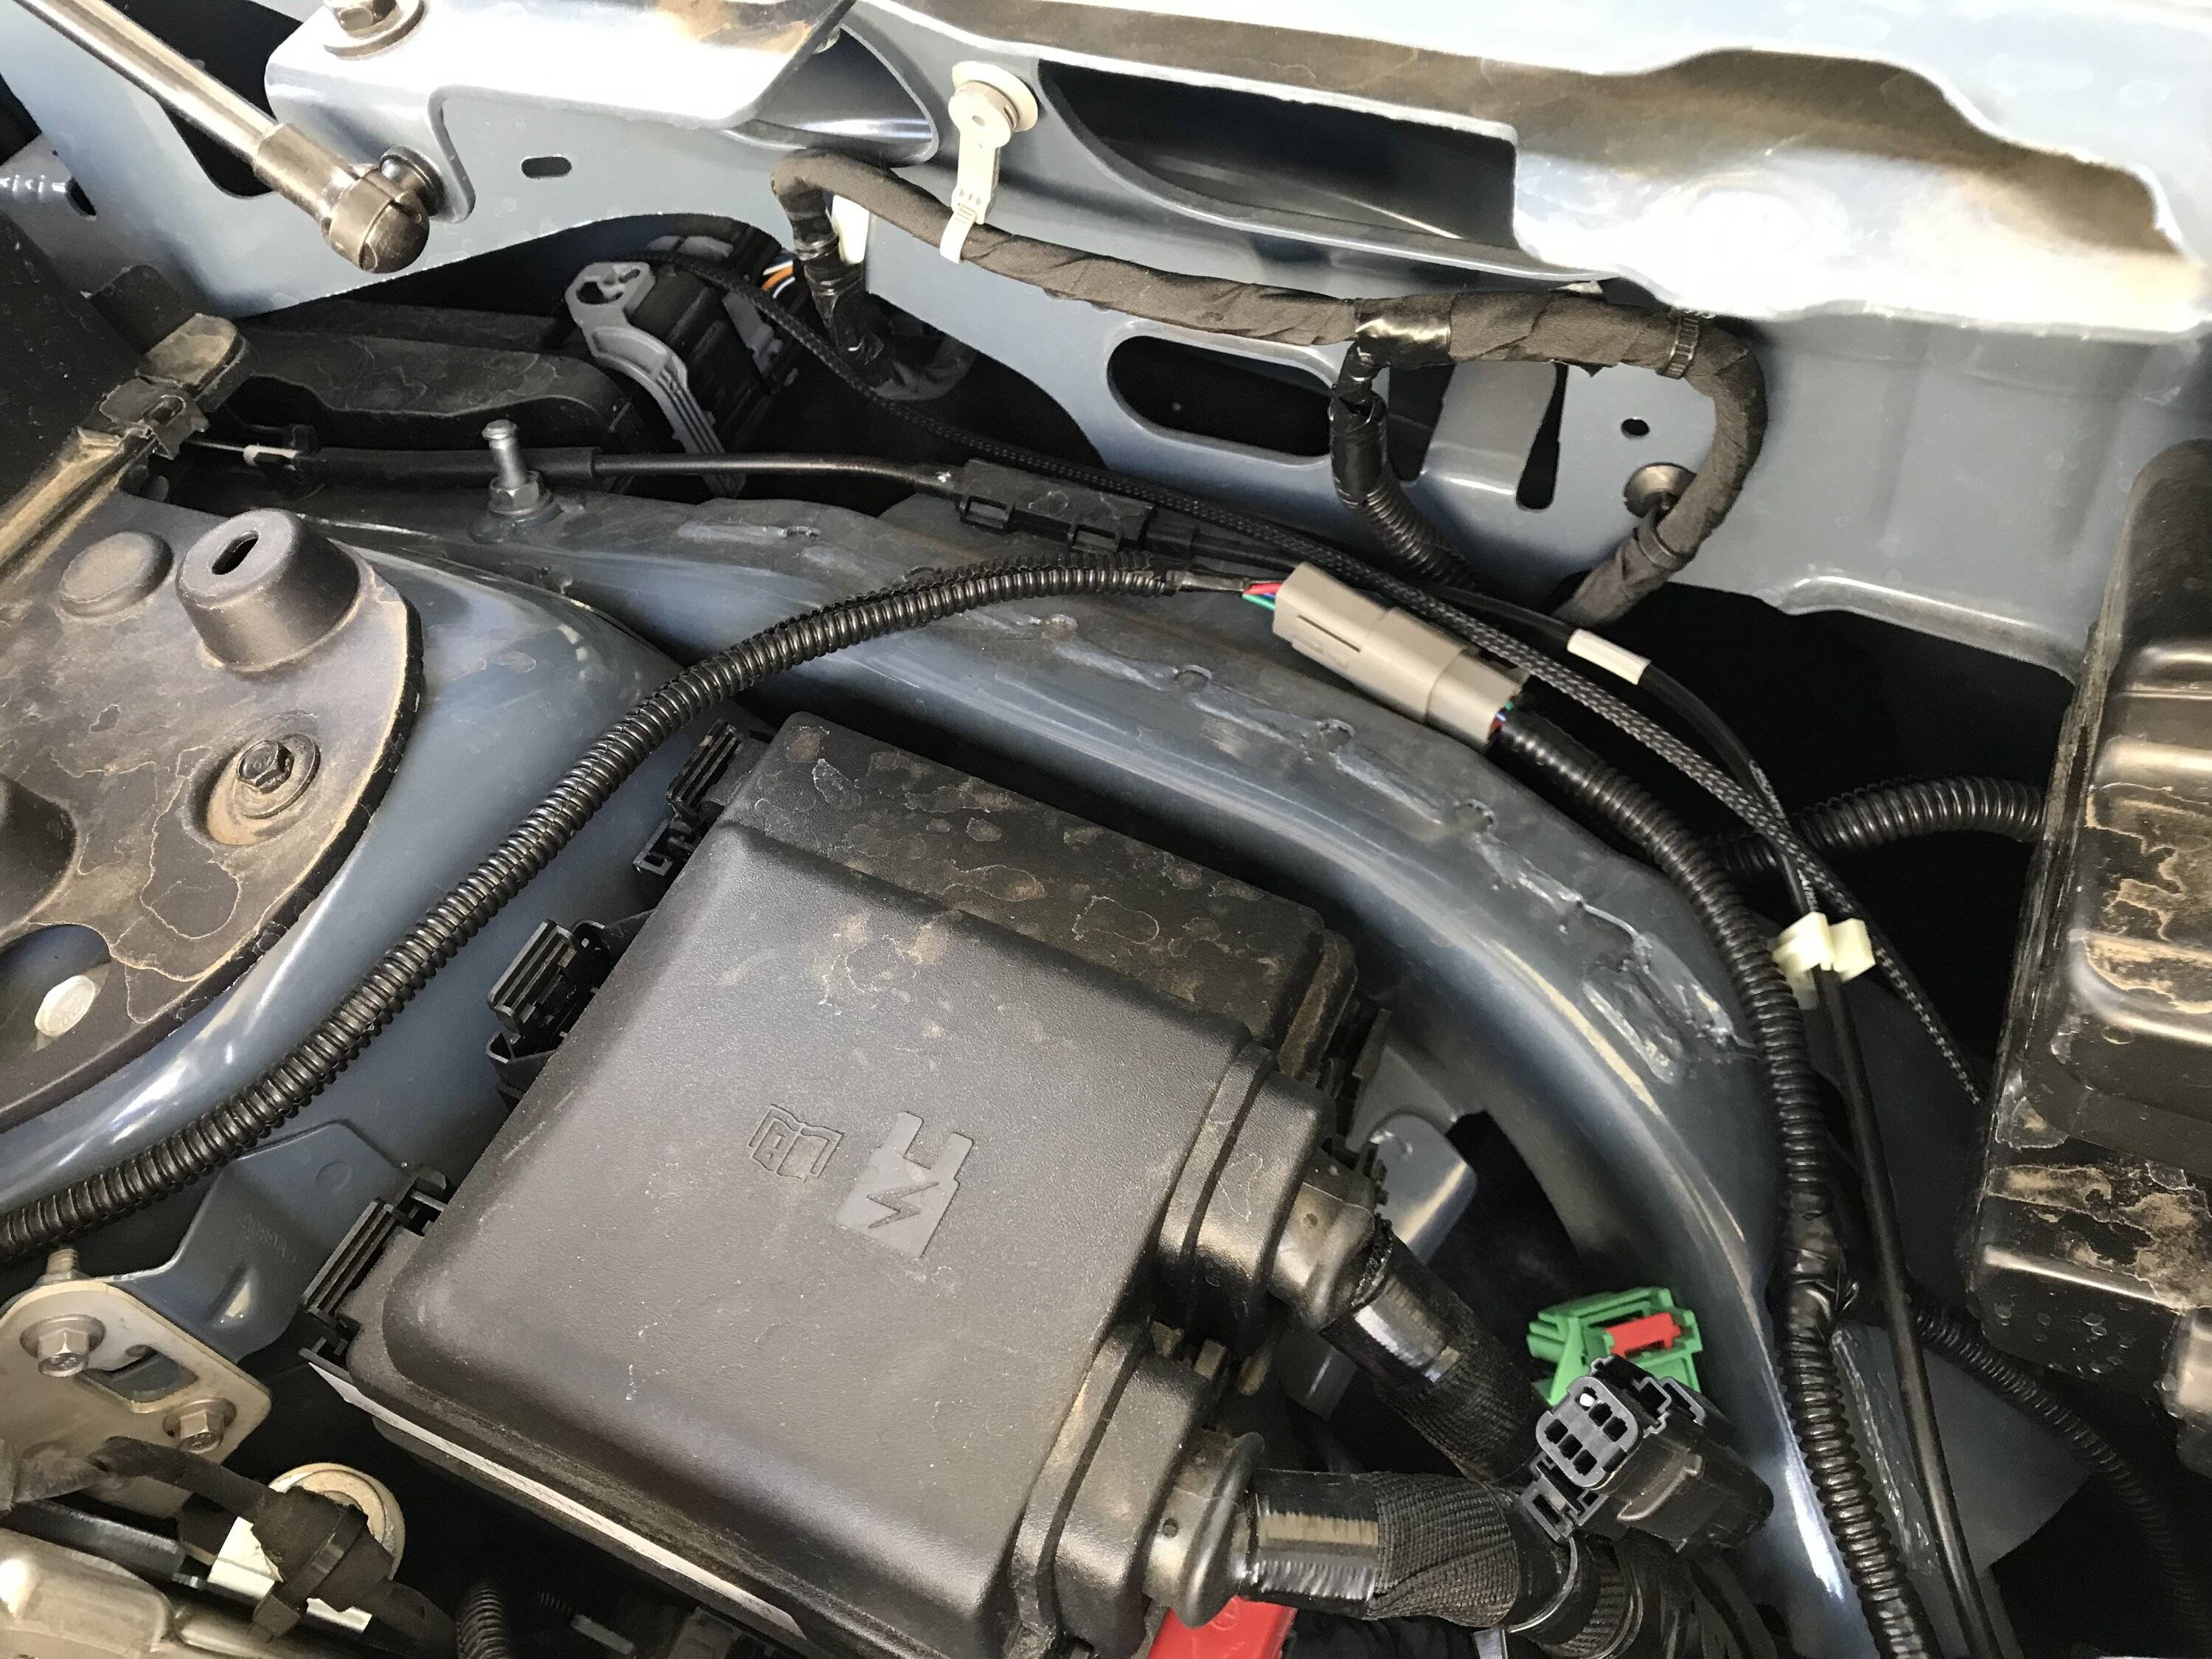
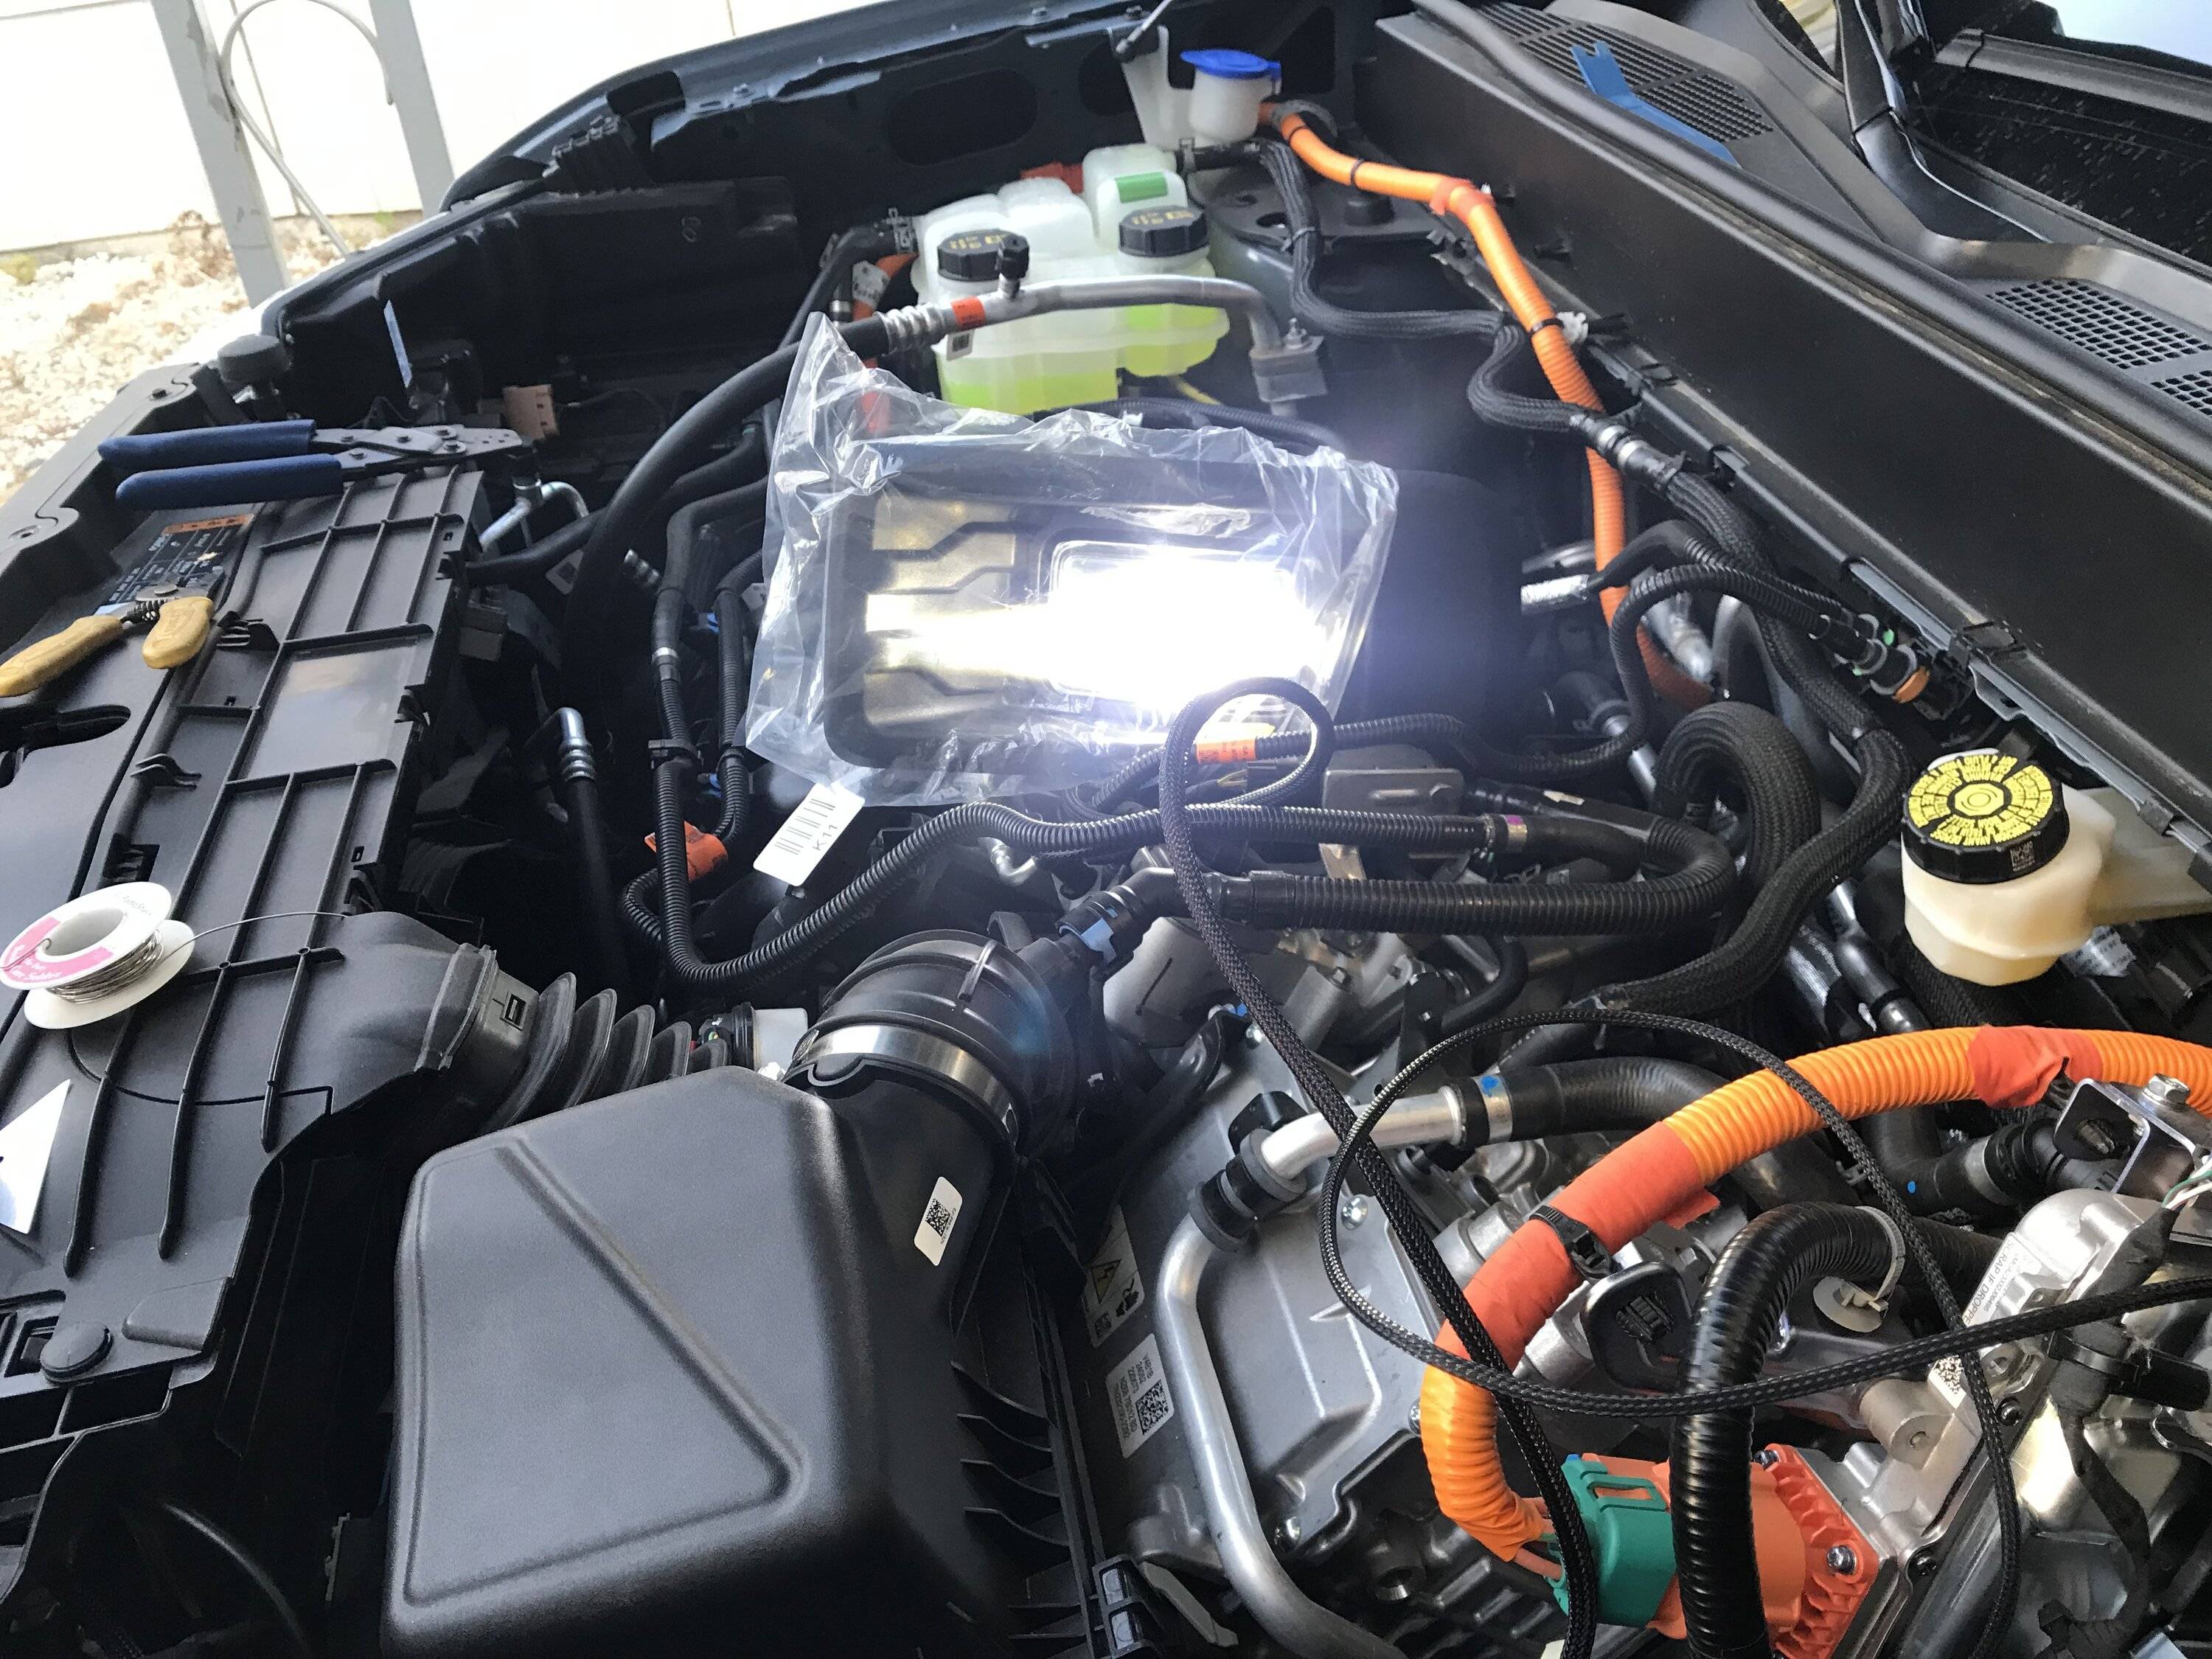
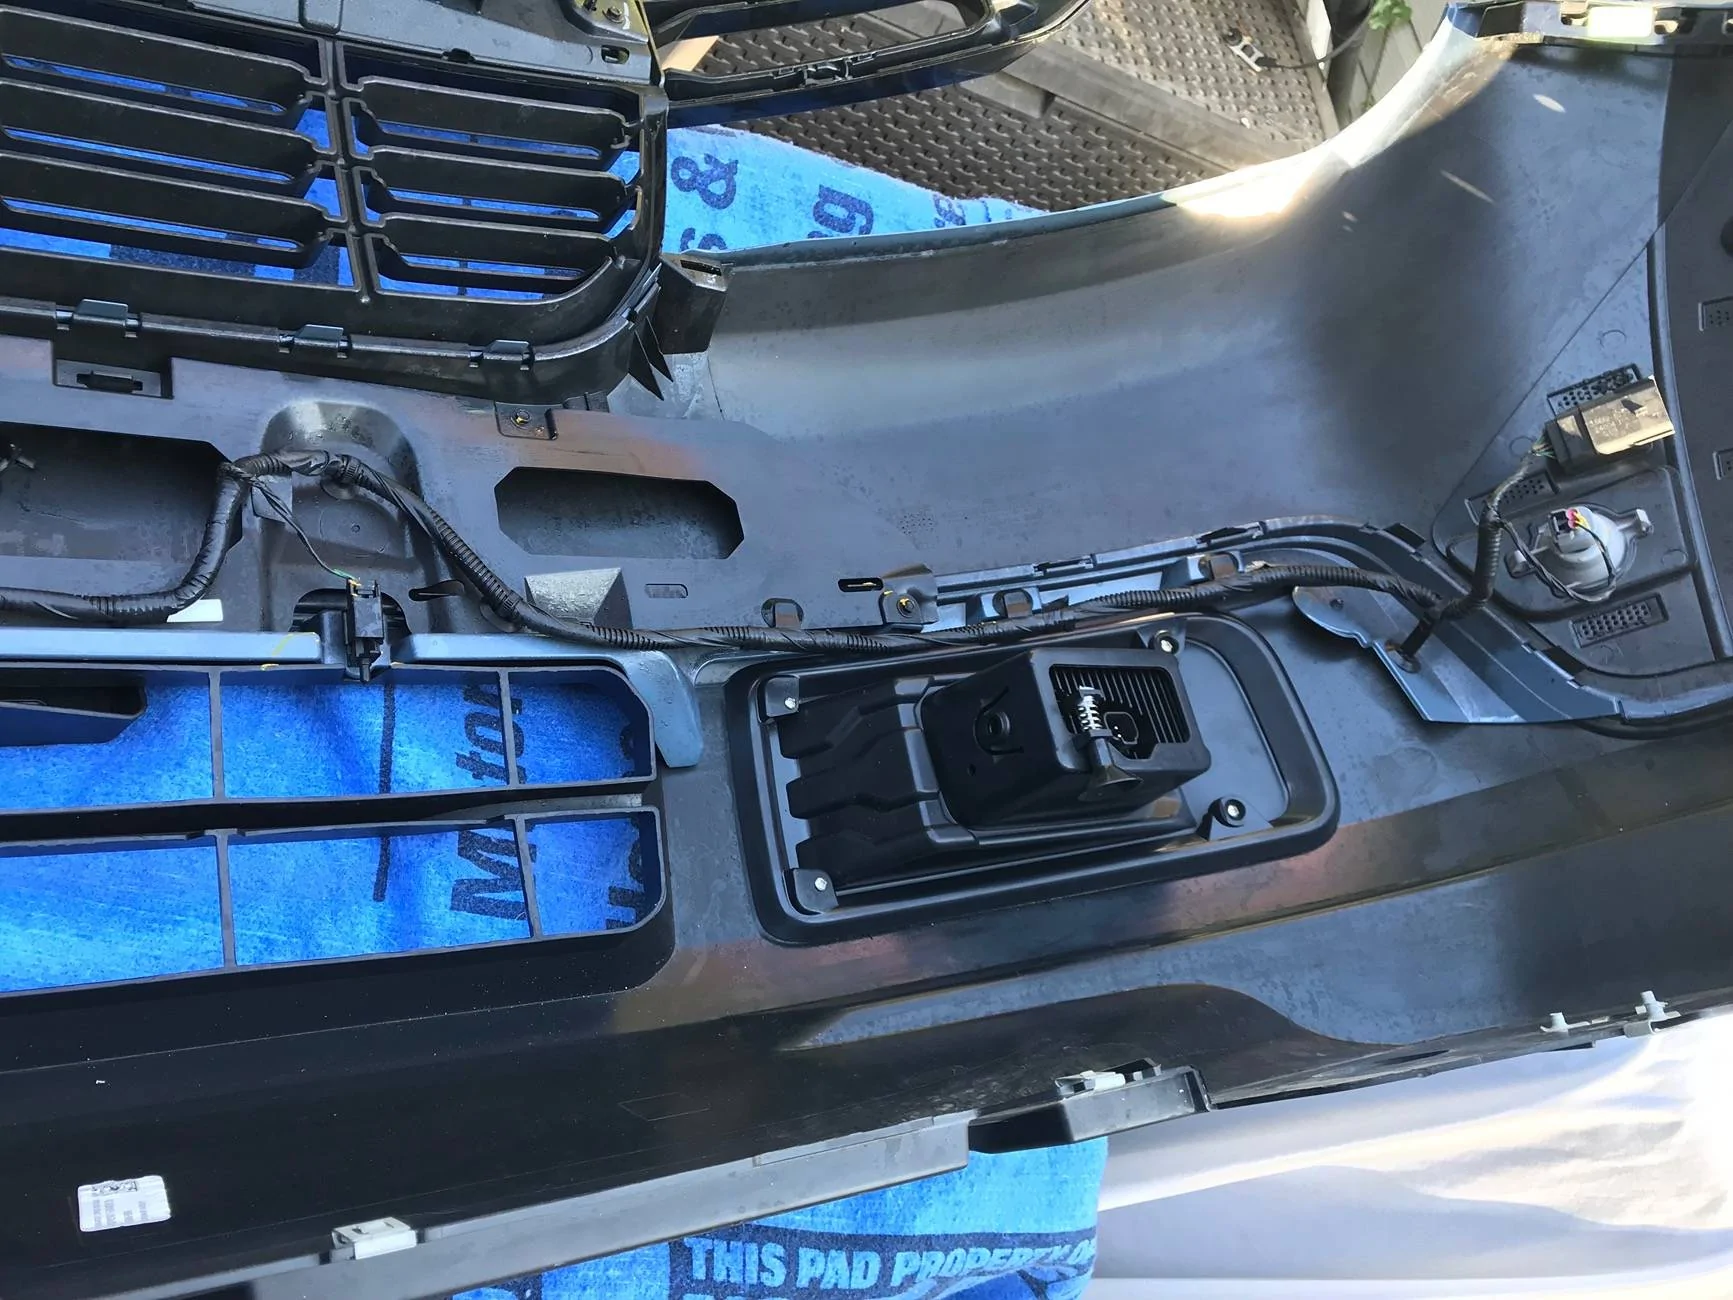
Next was the fog's wiring harness while not totally following the DD provided instruction, I decided to locate the electronic relay in a location where it would be accessible if I ever needed (if this thing ever took a dump I did not want to have to pull the whole front end off just to replace it) the decided location was on the drivers side frame inside the engine compartment...
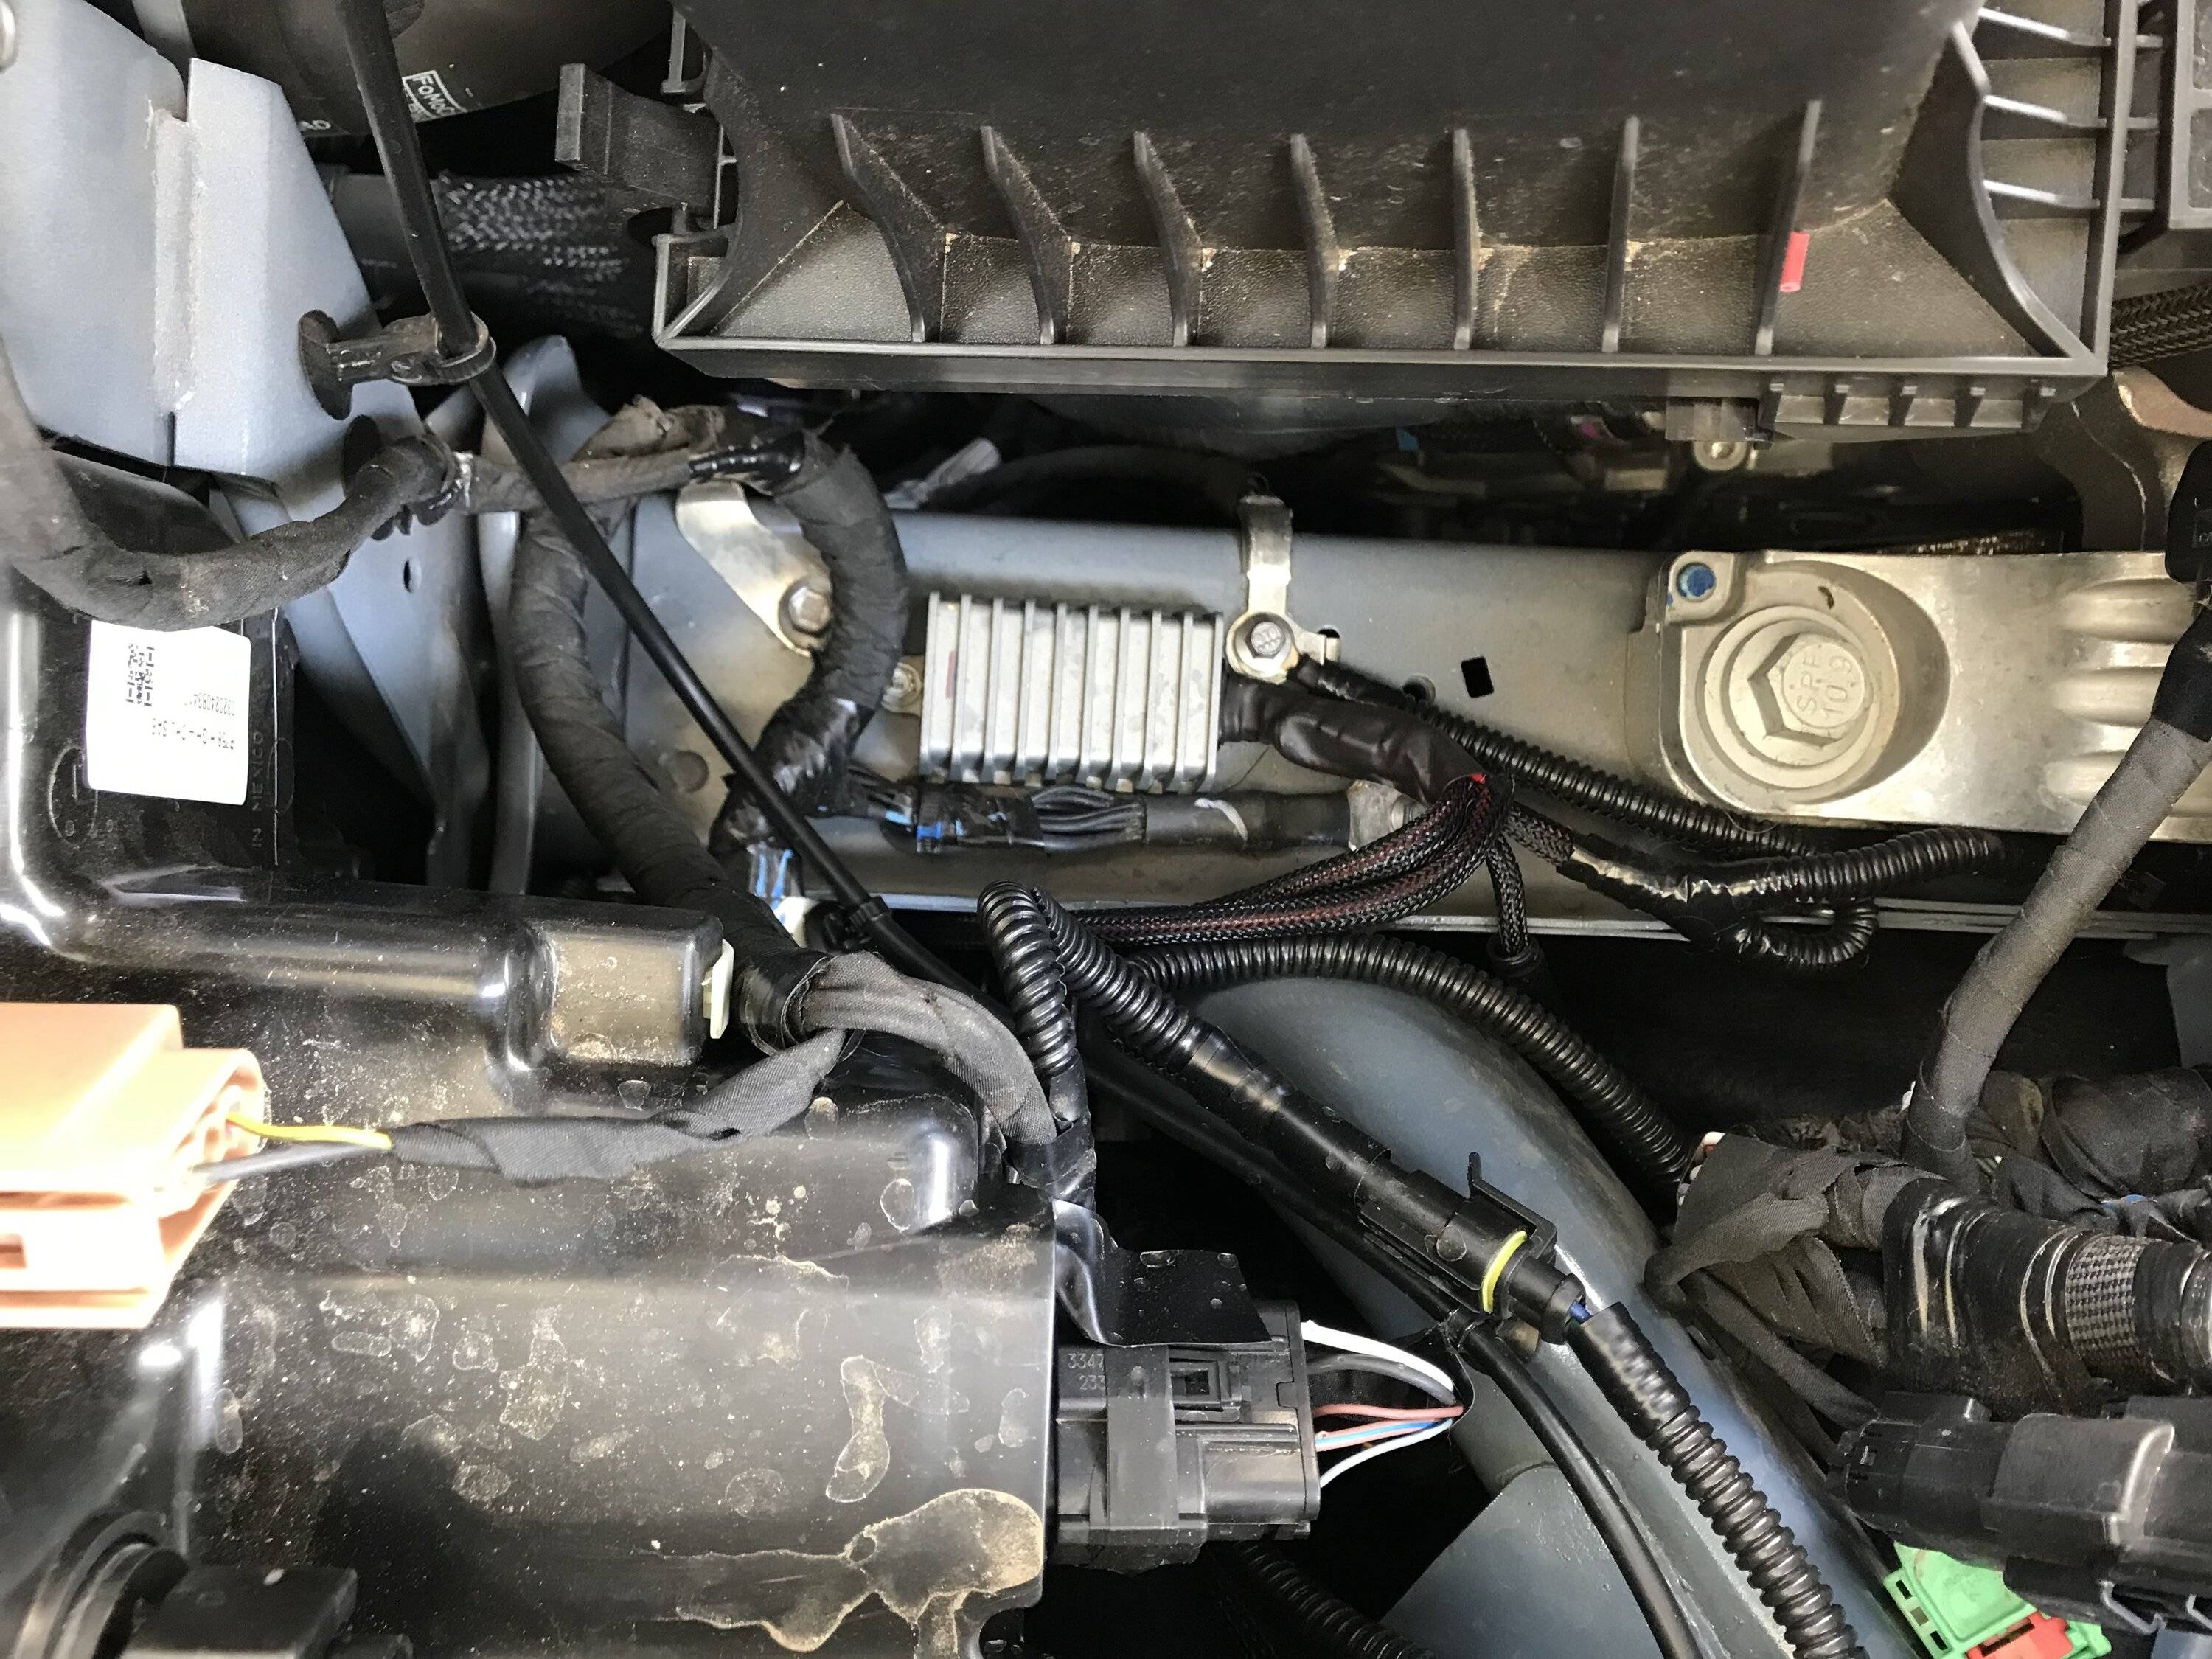
It fit nicely in that location and also allowed me to shorten up some portions of the supplied mile long control switch wiring harness so I drilled a hole and mounted it. For the ground I tagged a factory frame ground only a few inches away, as well as the relays + power tap.
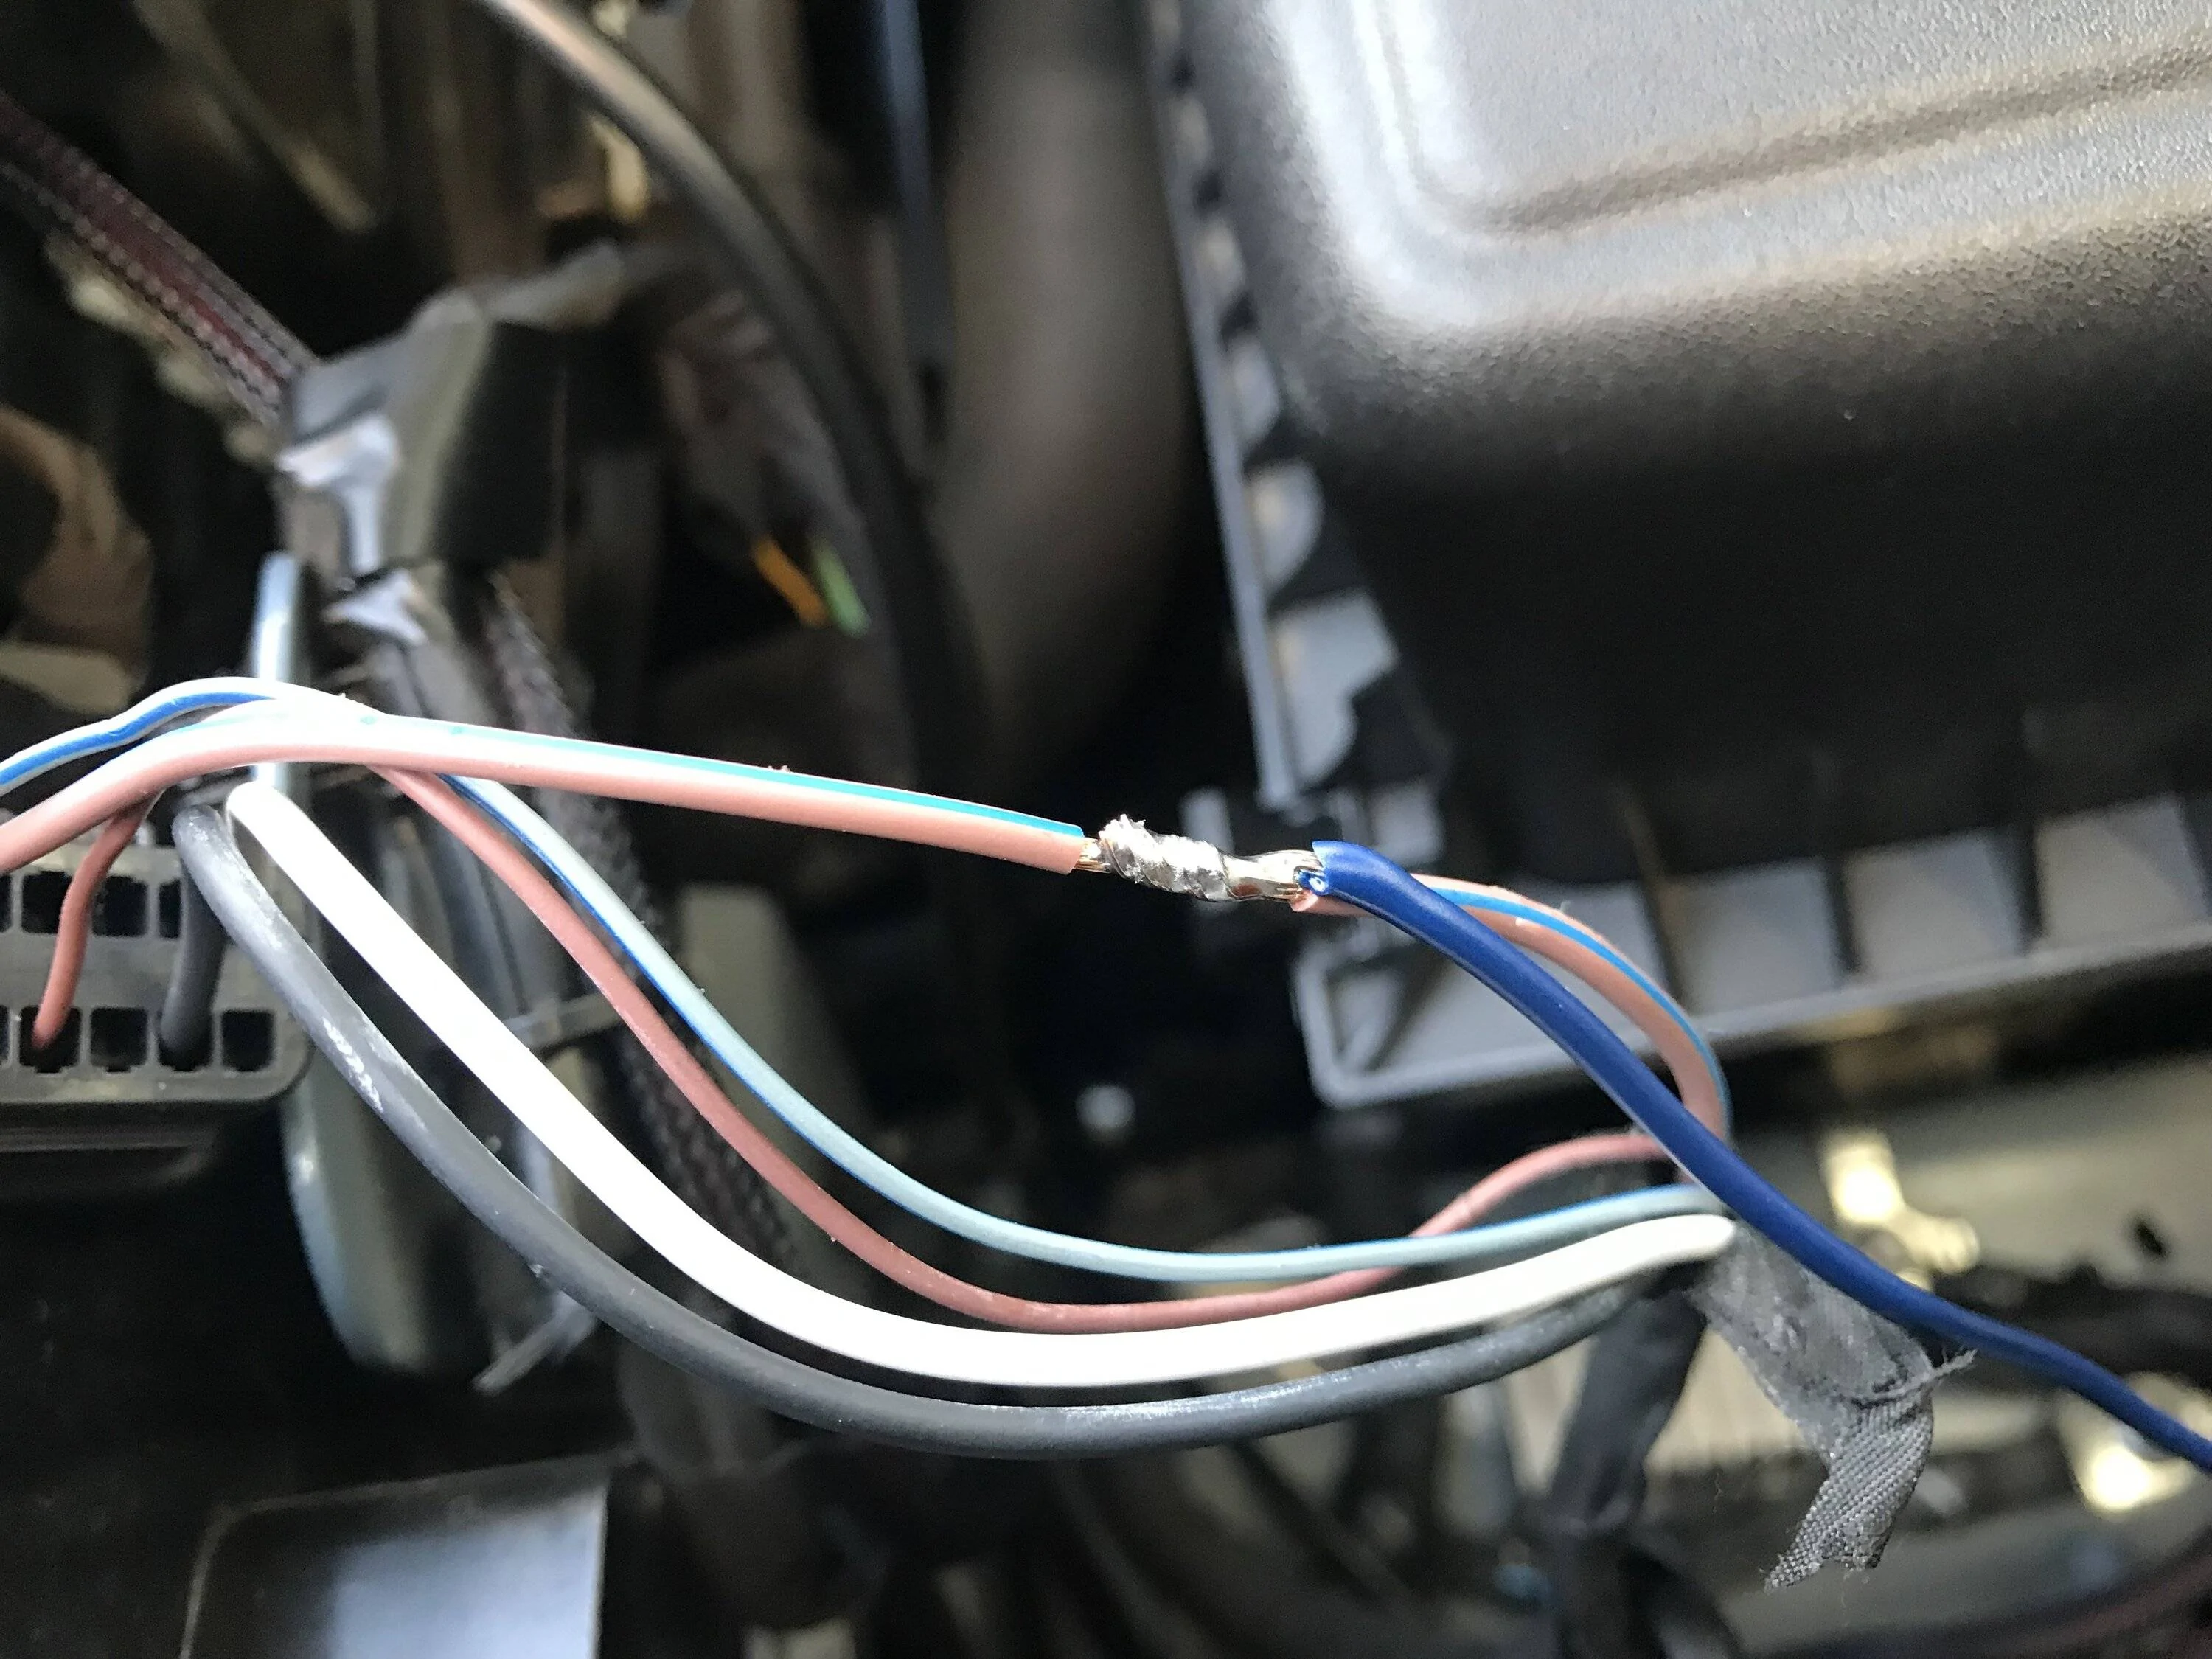
For the fog lights toggle switch’s power I tied that into the drivers side headlight wiring instead of the passengers side, since I do not like or use T taps I soldered my splices to the factory wiring and coated them with liquid electrical tape once dry I then taped them up and installed some corrugated plastic wire loom…
I made my own wiring harness assembly to go into the cab I added a 6 pin molex plug and extra wiring for possible future lighting additions, I ran my wire bundle thru the large firewall plug on the drivers side, attached the wires to my switch's and spliced the needed wires into the trucks and DD wiring harness.. After the control wiring was roughly laid out and as I installed them I added some corrugated plastic wire loom to wiring harness's to keep things looking clean and close to factory... I decided to do a quick test with one of the lights just to make sure all was working as intended and it did....
Now that the wiring is all sorted out other than plugging the lights in and before I go and pull the complete front grill and bumper assembly off of the truck, I had already gave this some thought before I ever even ordered my lights. I thought why cant I just cut the openings for the fog lights from the front while the bumpers still on the truck.. I had looked at some of the install videos and didn't see any reason why it could not be done, as it would be a heck of a lot easier doing this work while the bumper is on the truck than on a makeshift work bench...
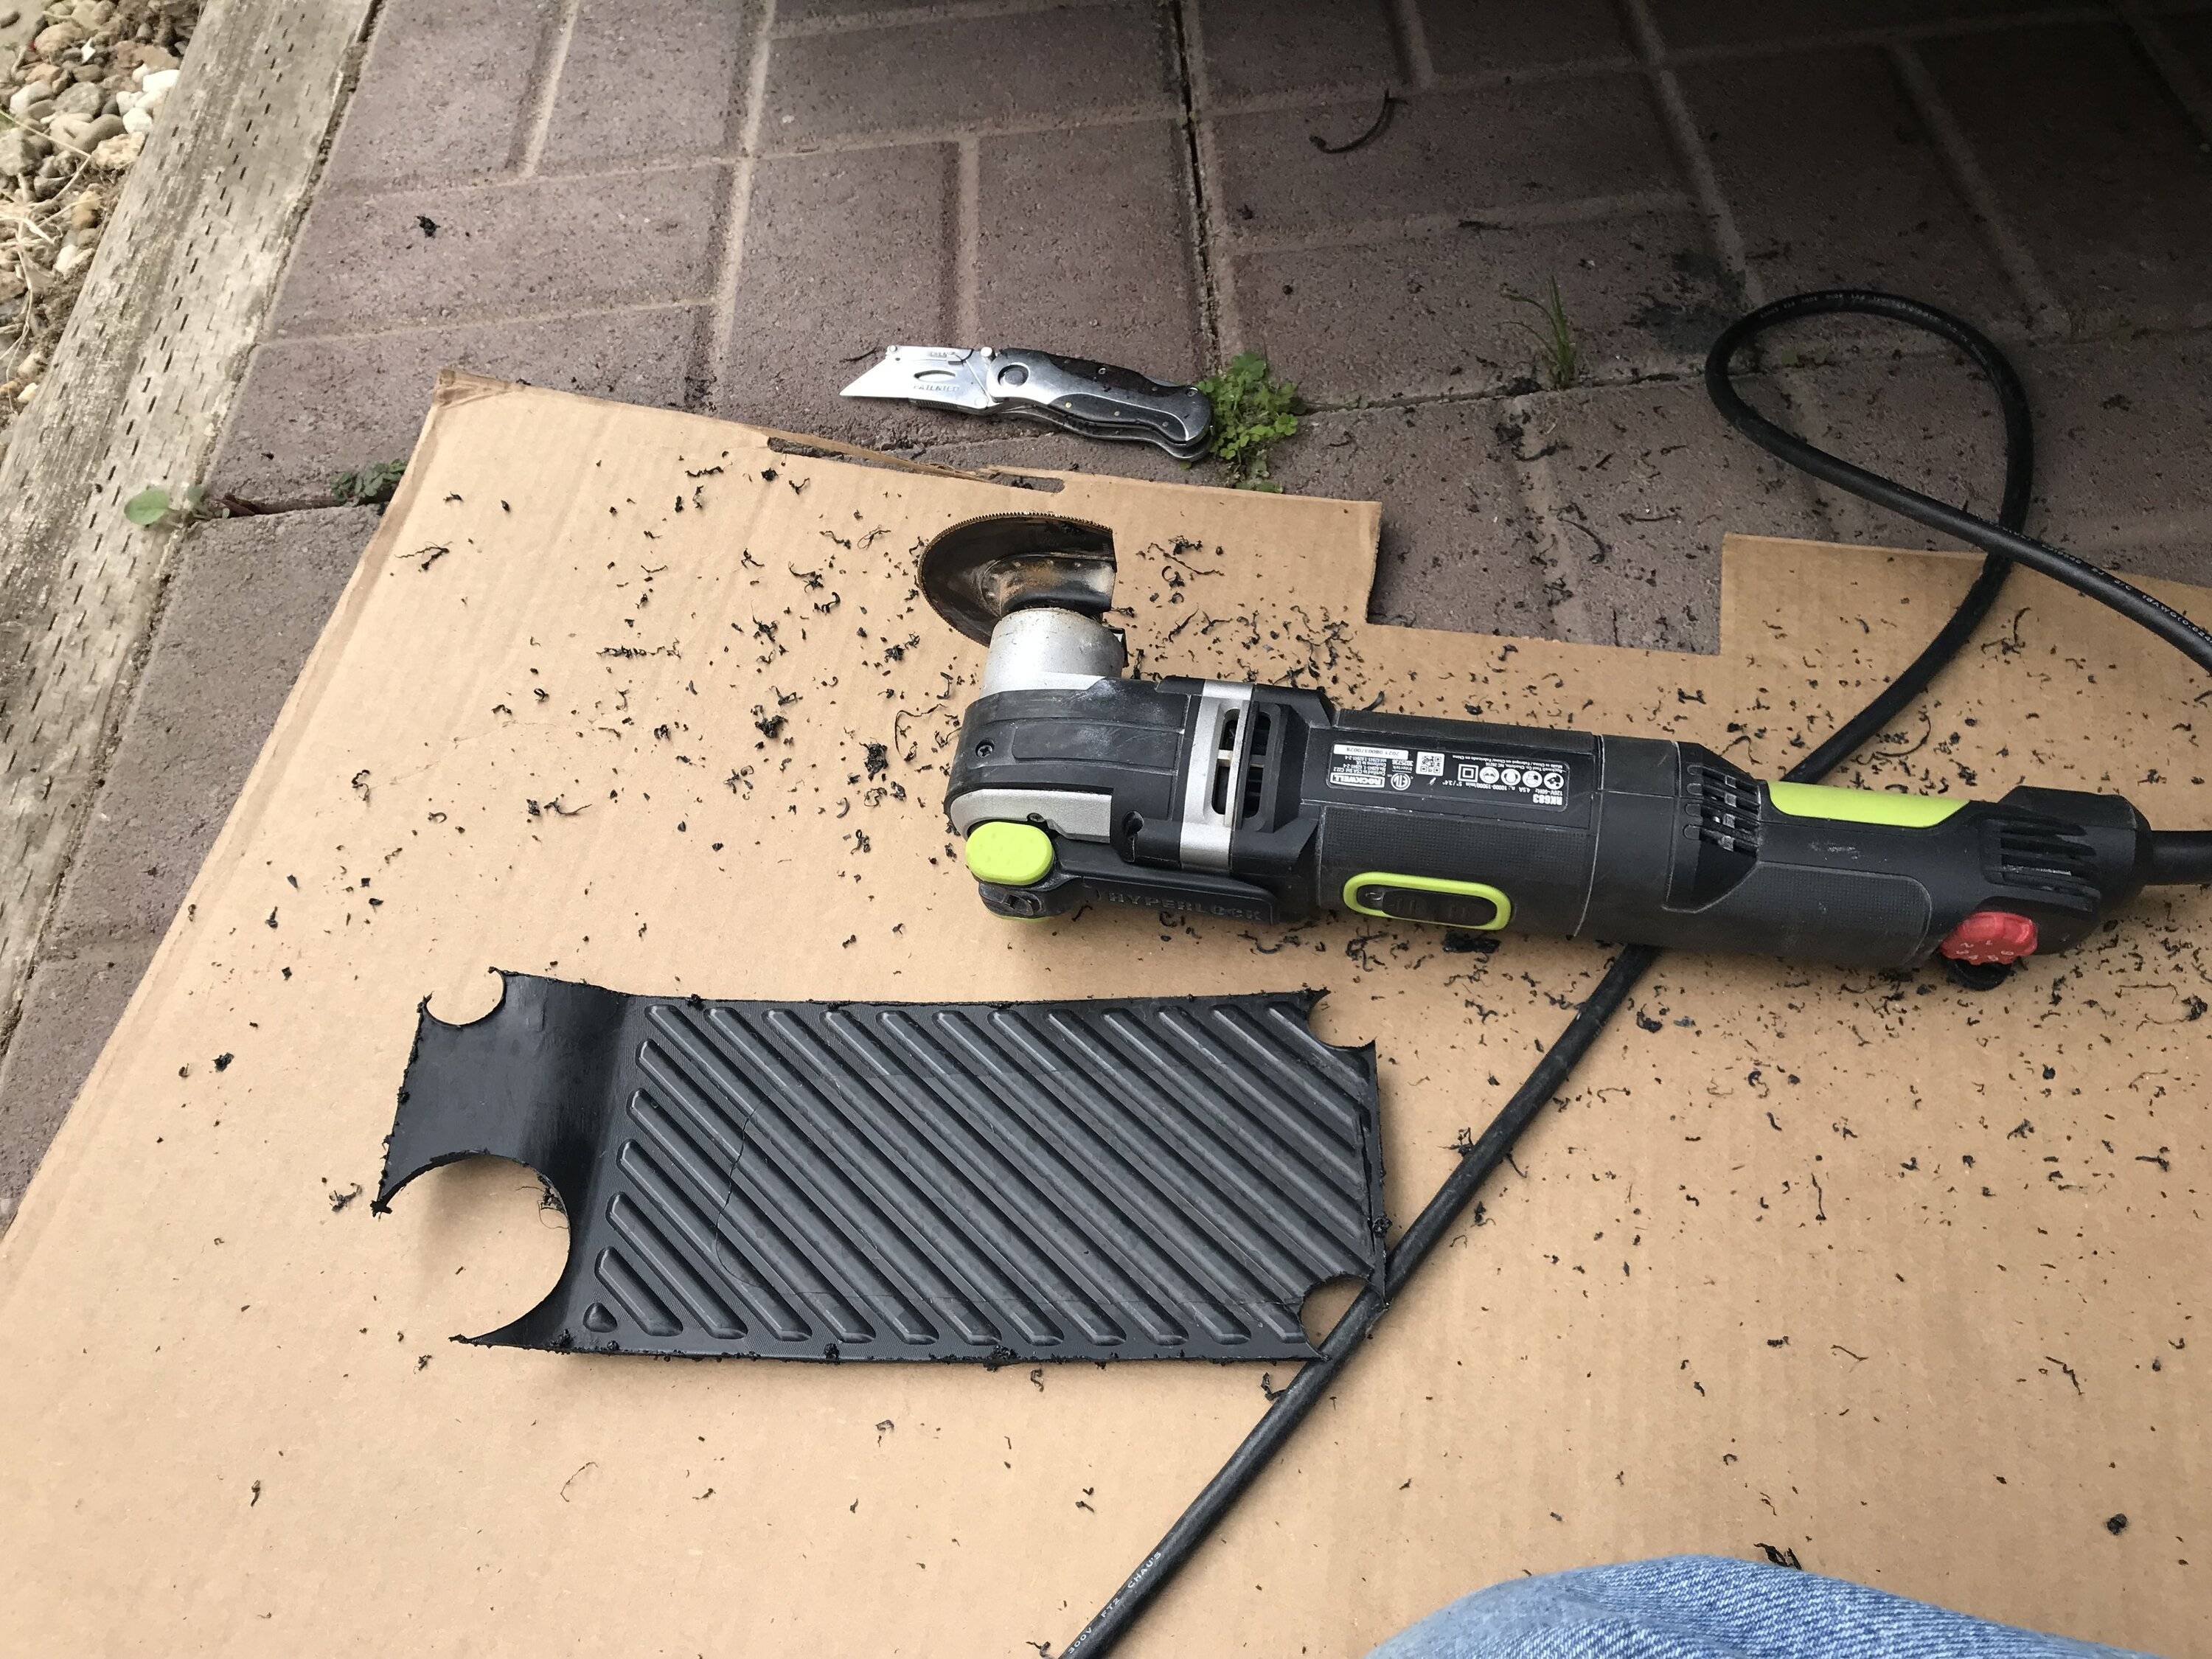
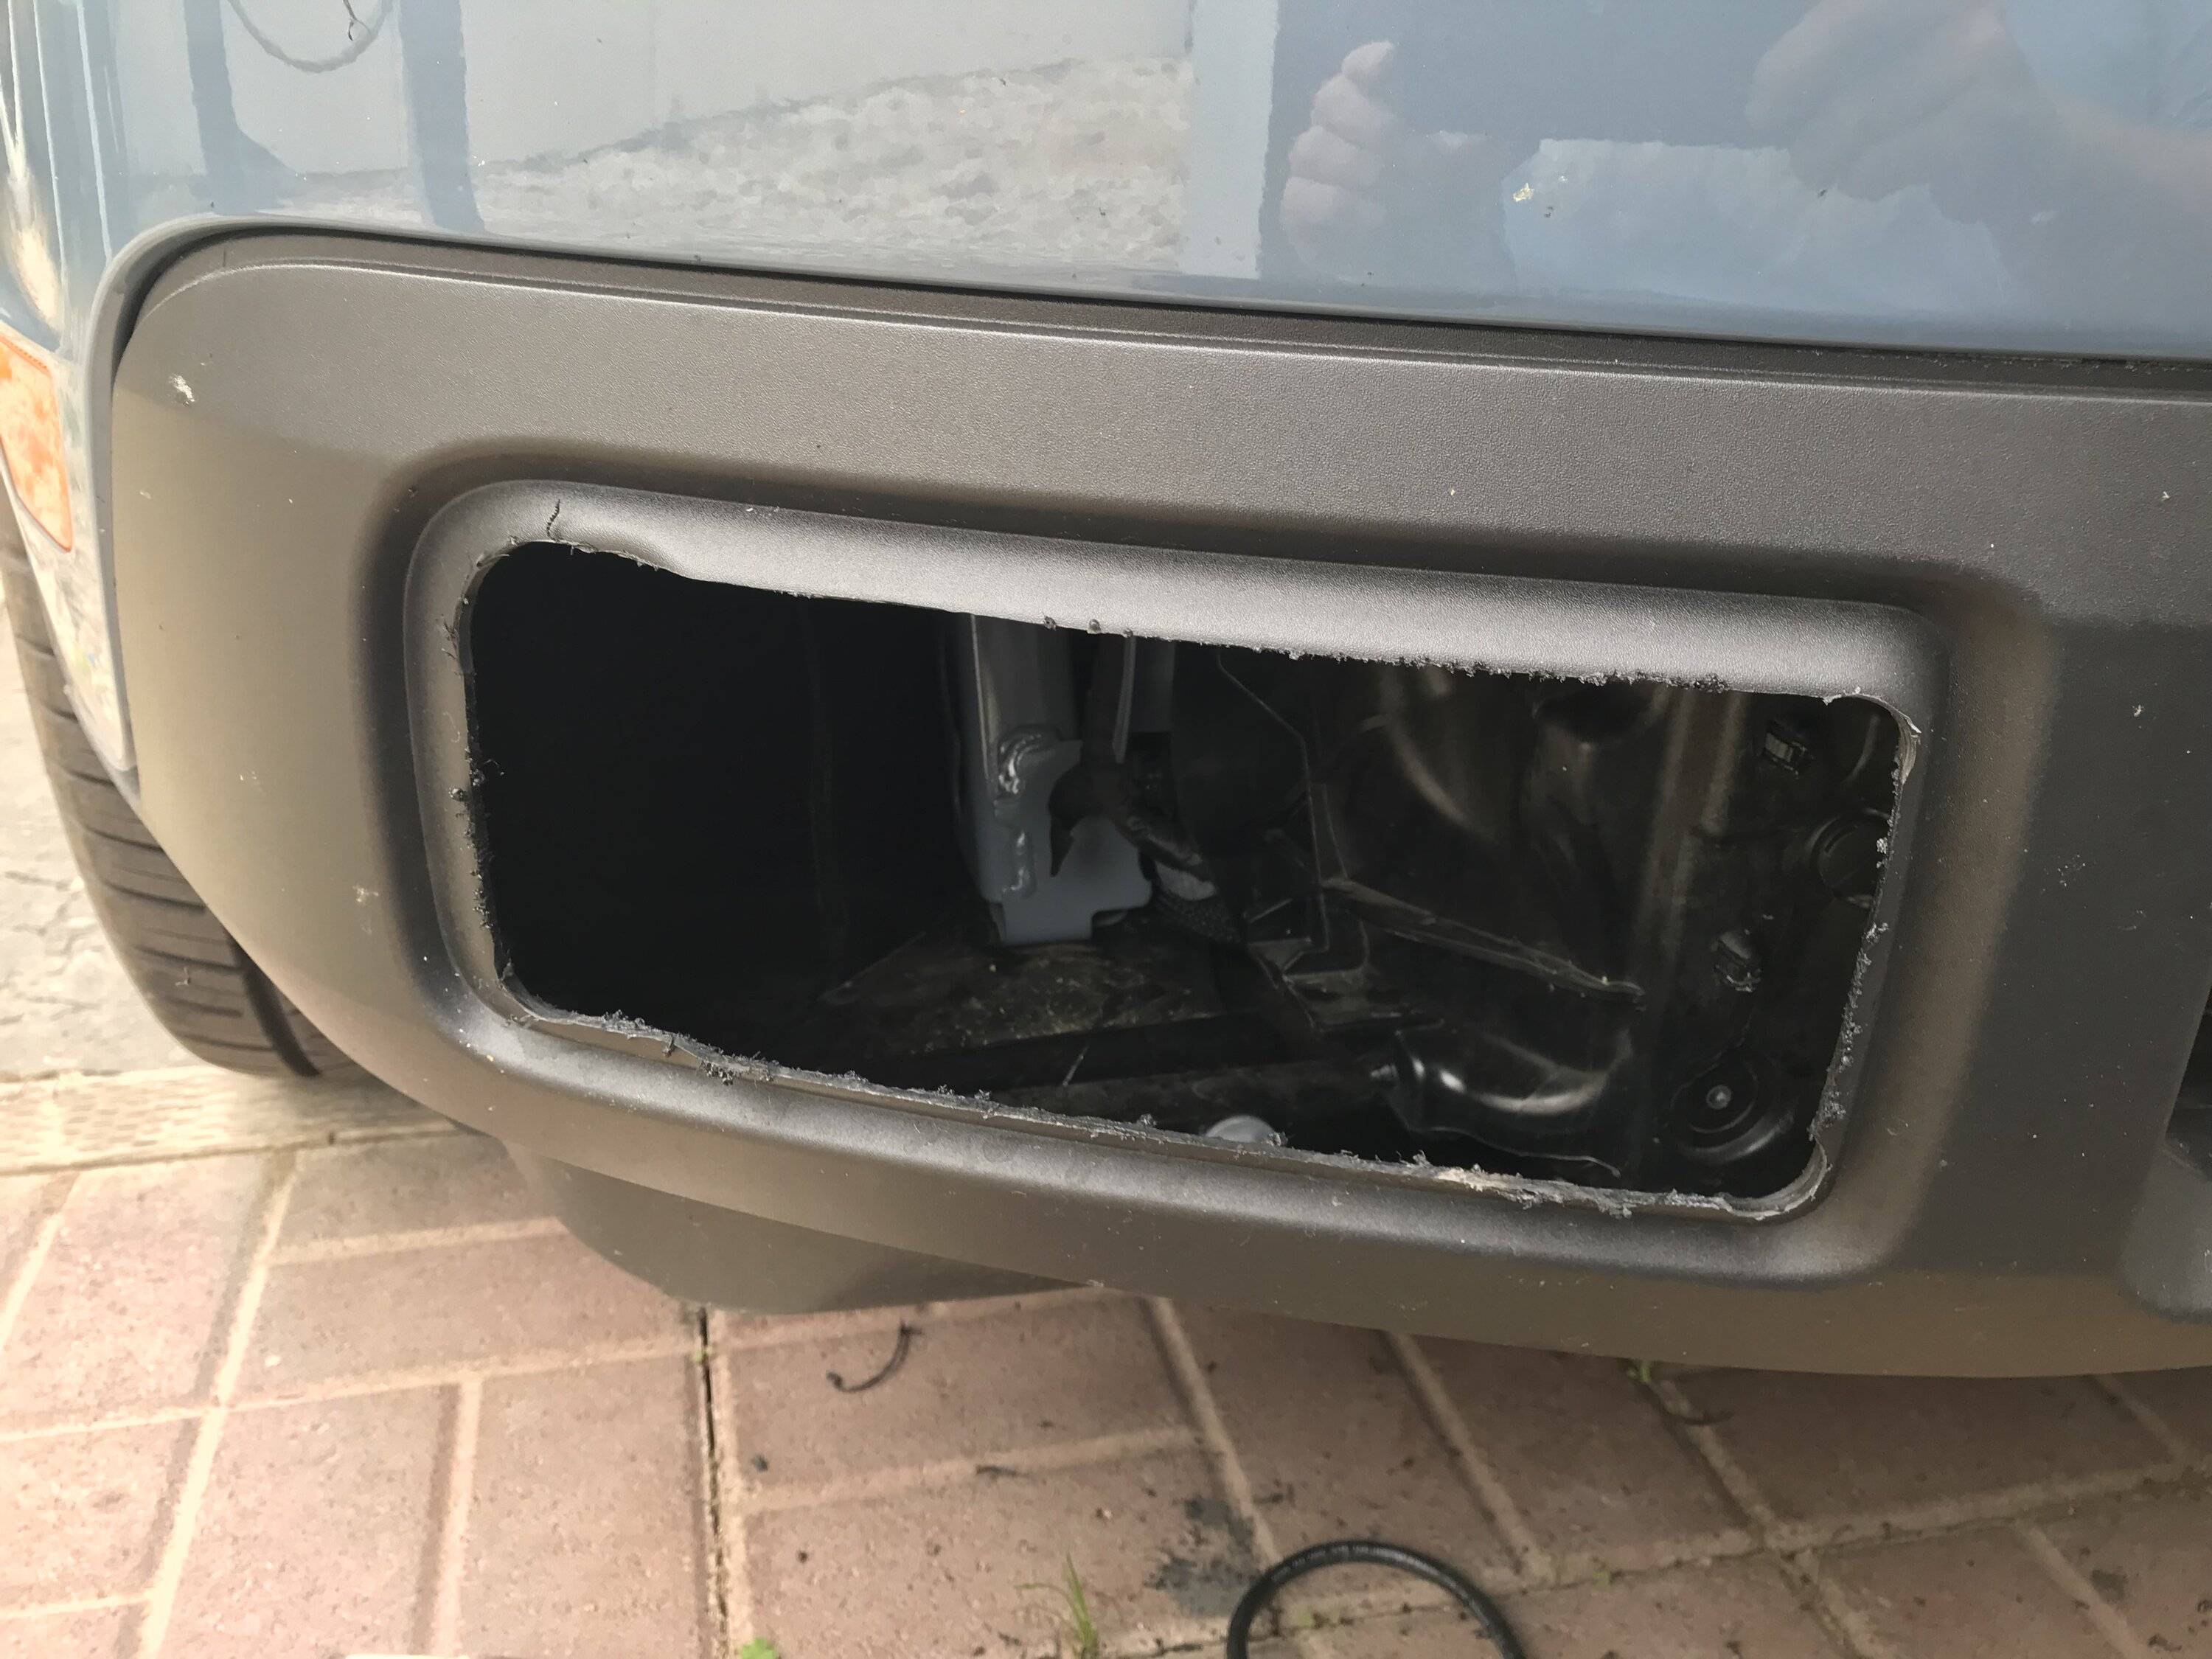
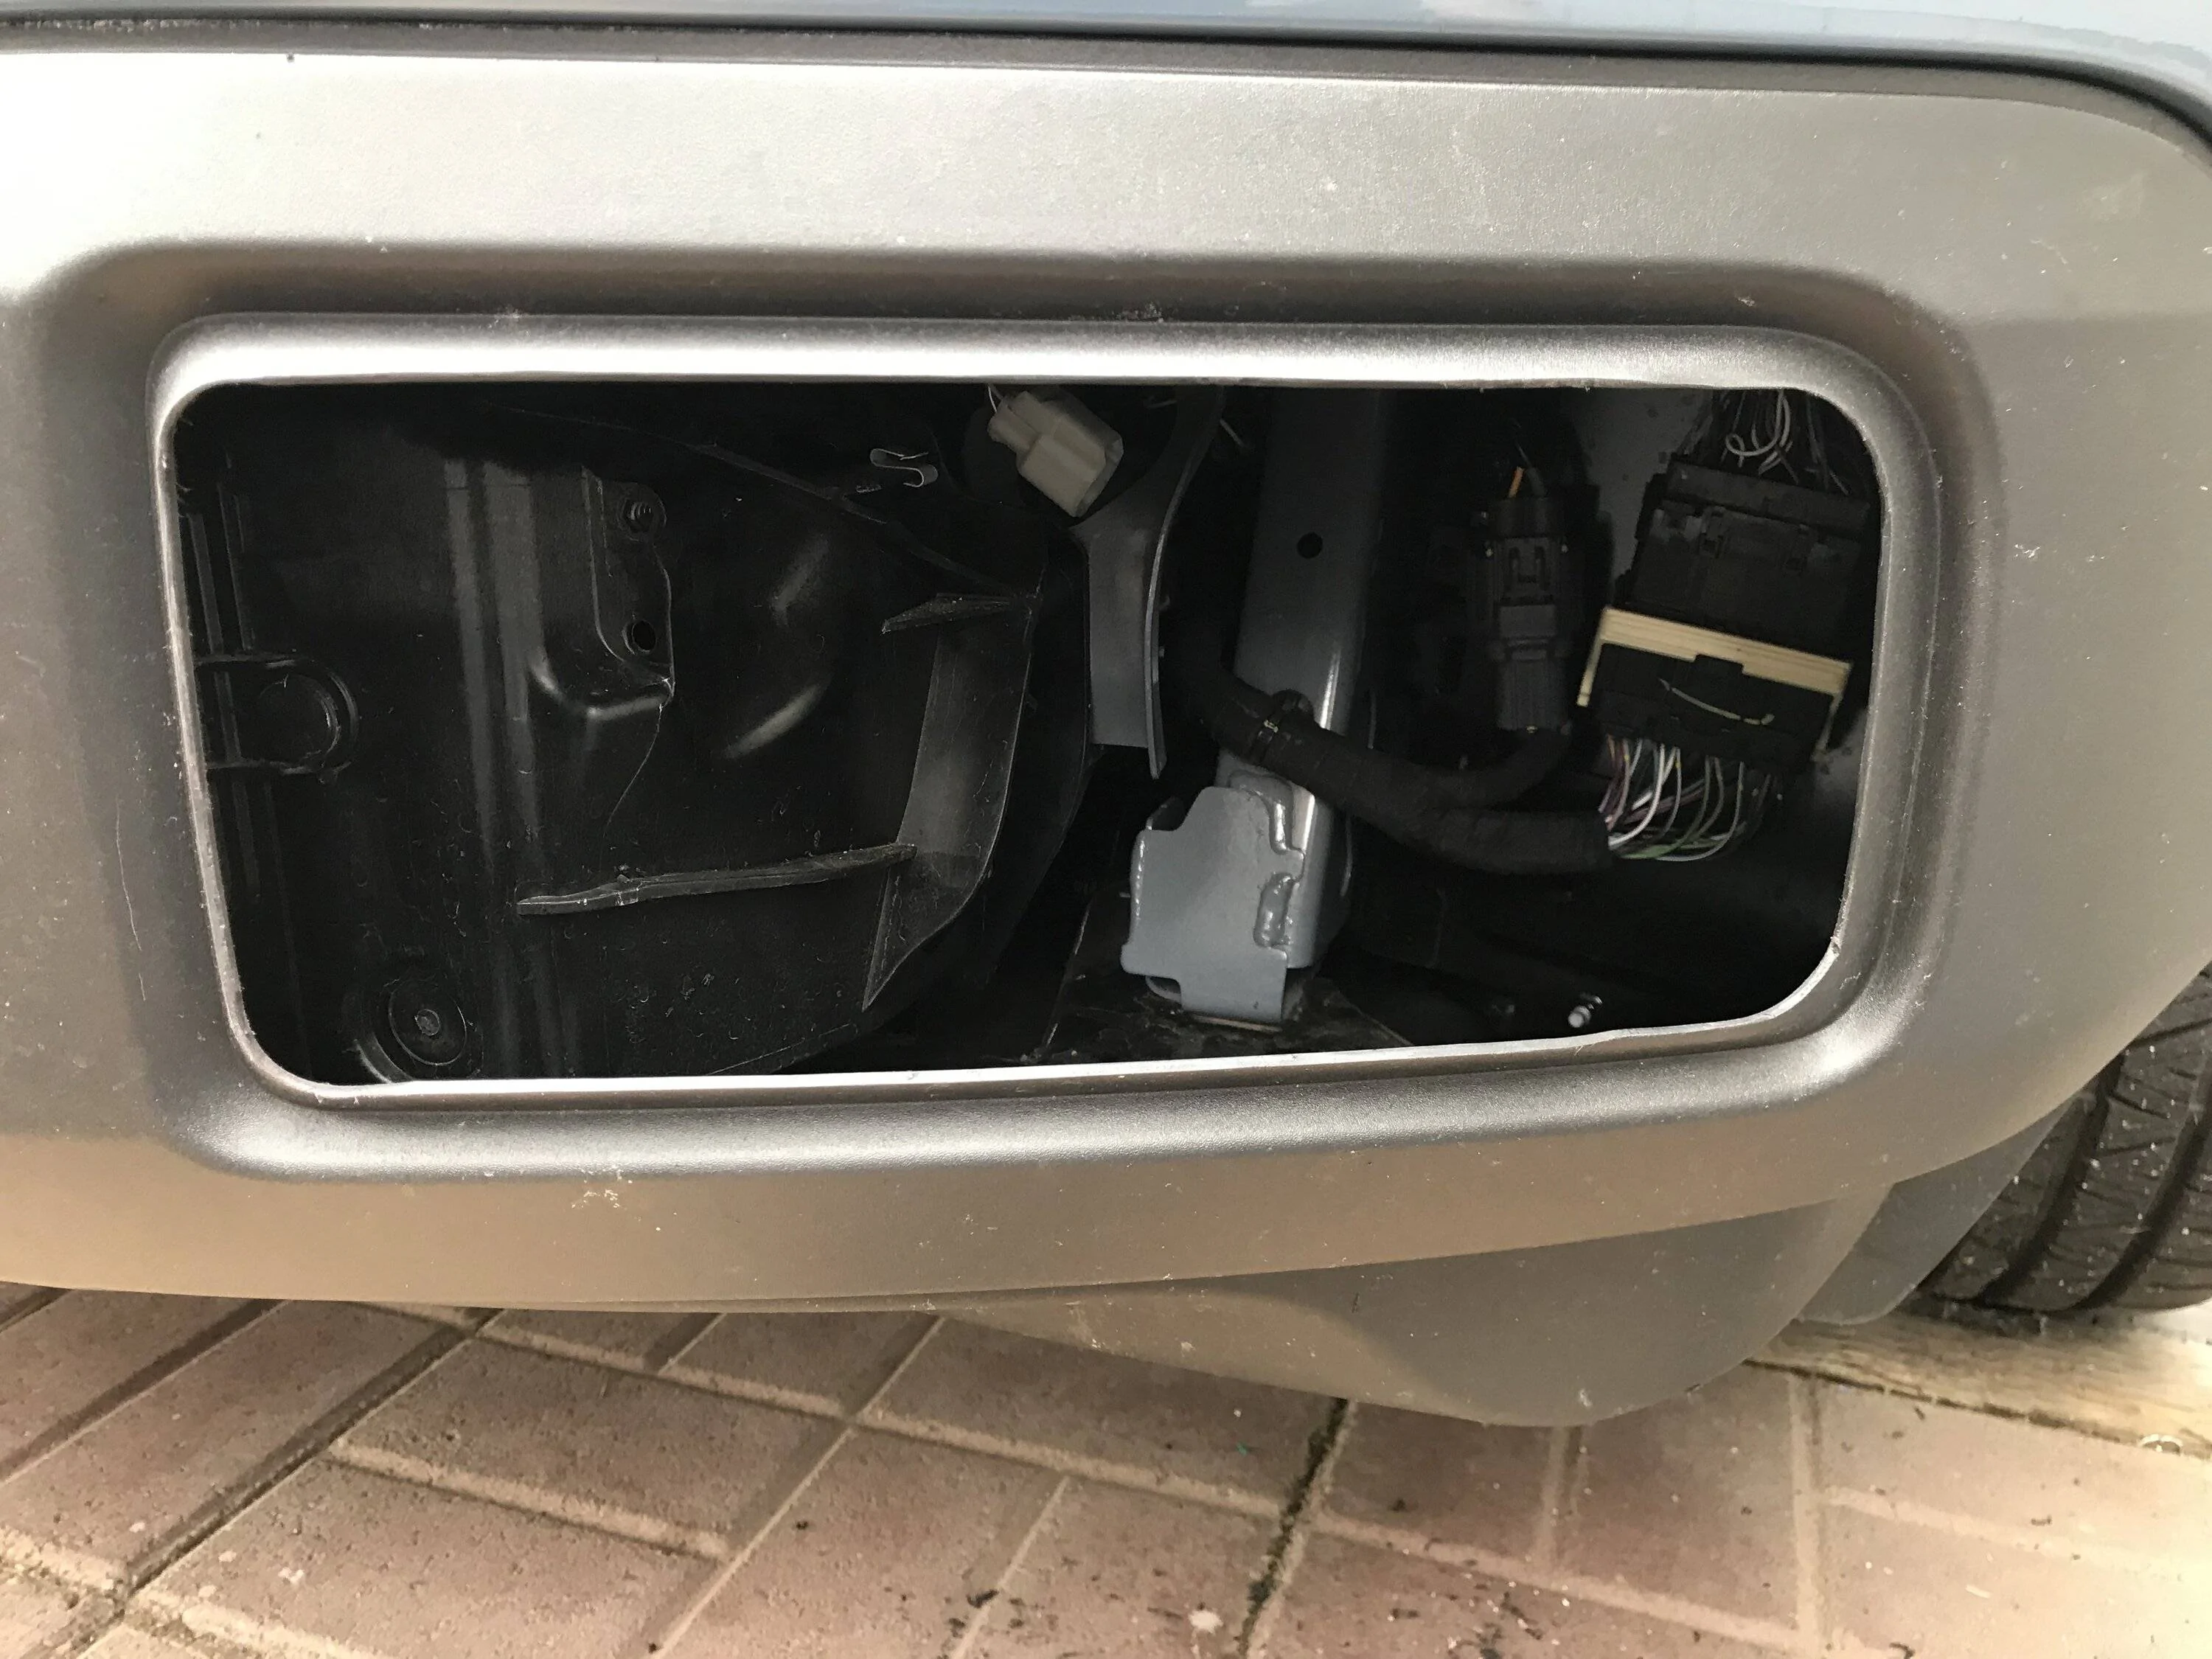
I decided I would just rough in an opening on the raised portion up of the bumpers lights locations.. I started with a hole saw and cut out the 4 corners of that raised portion I used 2 different sizes, then I just took my oscillating saw and cut between the holes both did a very clean job...

Once the openings were roughed in I then took the lights mounting trim ring put it thru the hole aligned it inside the opening and began to use it as a visual guide to do the finish trimming out of the remainder of the openings as needed.. Once I thought it was good I used the fog light assembly itself to finish trimming the opening up and make sure they were fitting flush on the bumper…
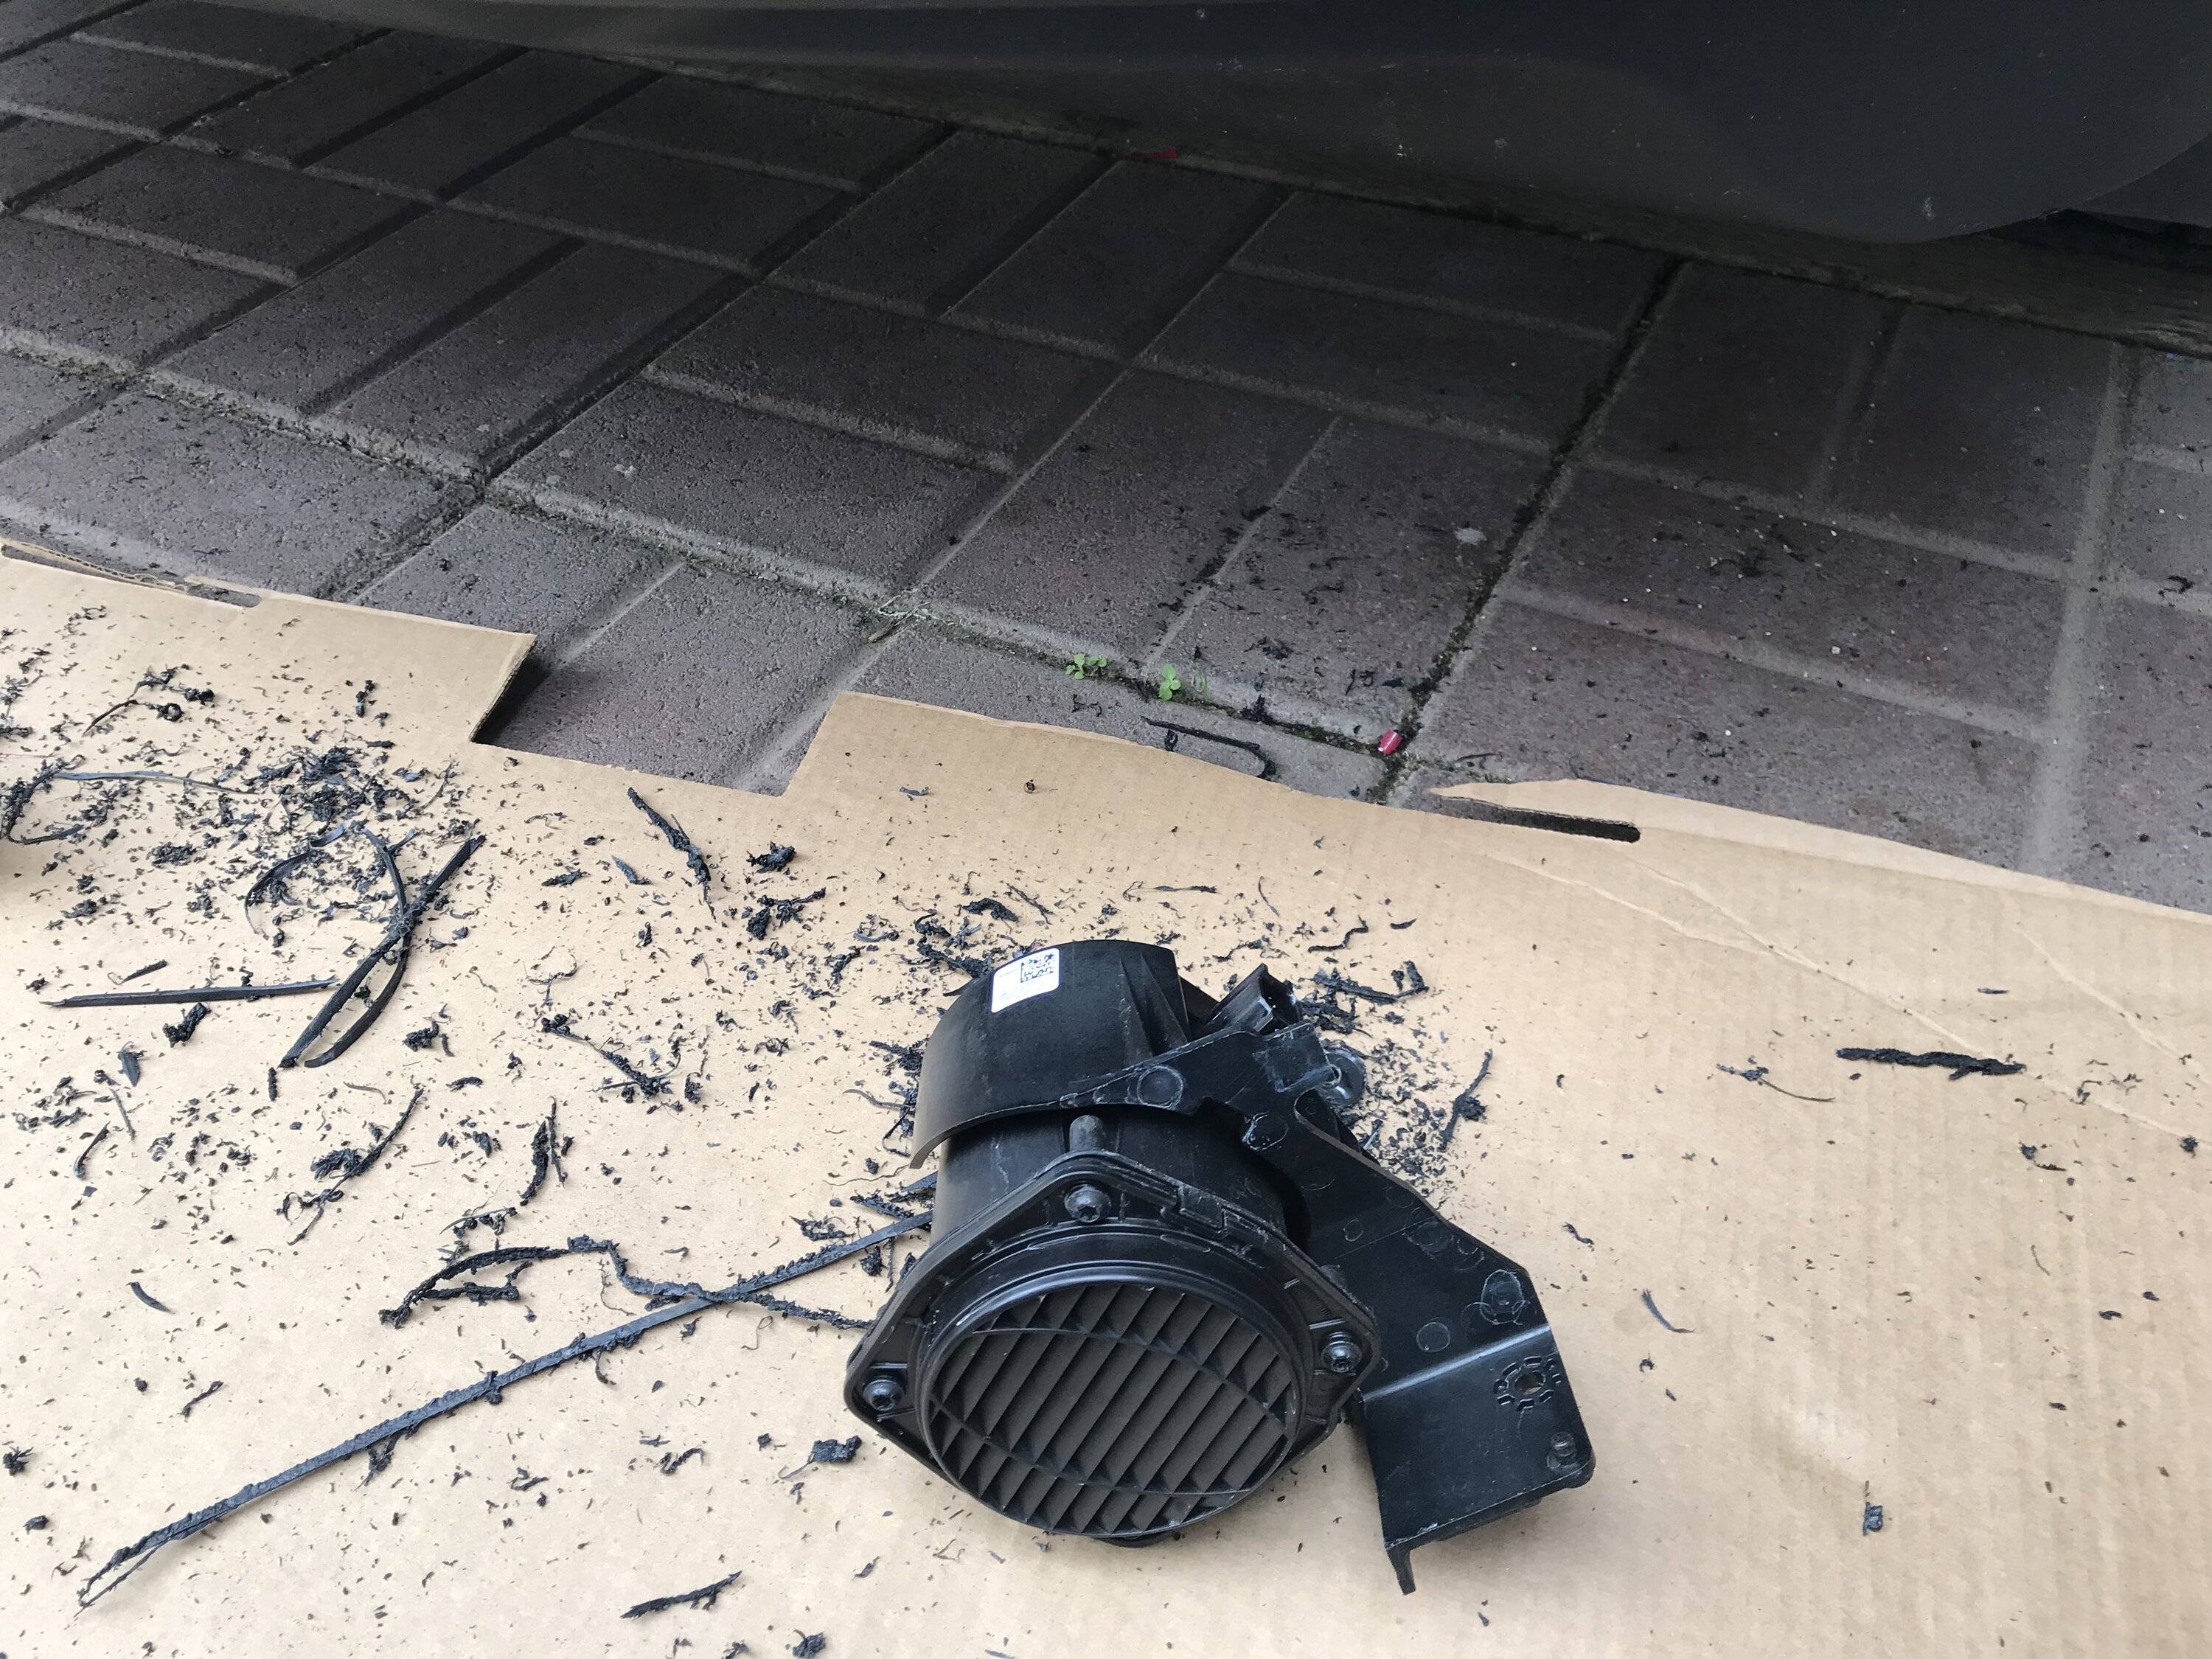
As you can see from the pic I ended up with about a 3/8” perimeter on the top the bottom and the outside edge and about 1/2” on the inside edge for the lights to sit flush.. On the drivers side I needed to take out the annoying backup alarm or as Ford calls it Pedestrian Safety System, it was easy to remove thru the new opening I needed to do this in order to allow clearance for the lights fitment...
Now with all the really hard and dirty work done it was time for the easy part remove the front grill and bumper assembly from the truck.. Disassembly was pretty straight forward as per the instructions although not in the instructions I removed the lower splash shield as it frees up a couple of attachment points on each side that it shares with the fender liners.. I also removed an additional fender liner clip per side which gave me more working room in the inner fender/bumper area.. The 3 per side 10mm bolts with my big hands were a little fun I used a 1/4'' socket and ratchet to loose and to reinstall them not a lot of working room in there so I put some grip tape on my socket which made it much easier to remove and install the bolts by hand… The rest of the removal was as per the book, I did it solo but a extra pair of hands would have been nice when I finally pulled it off...
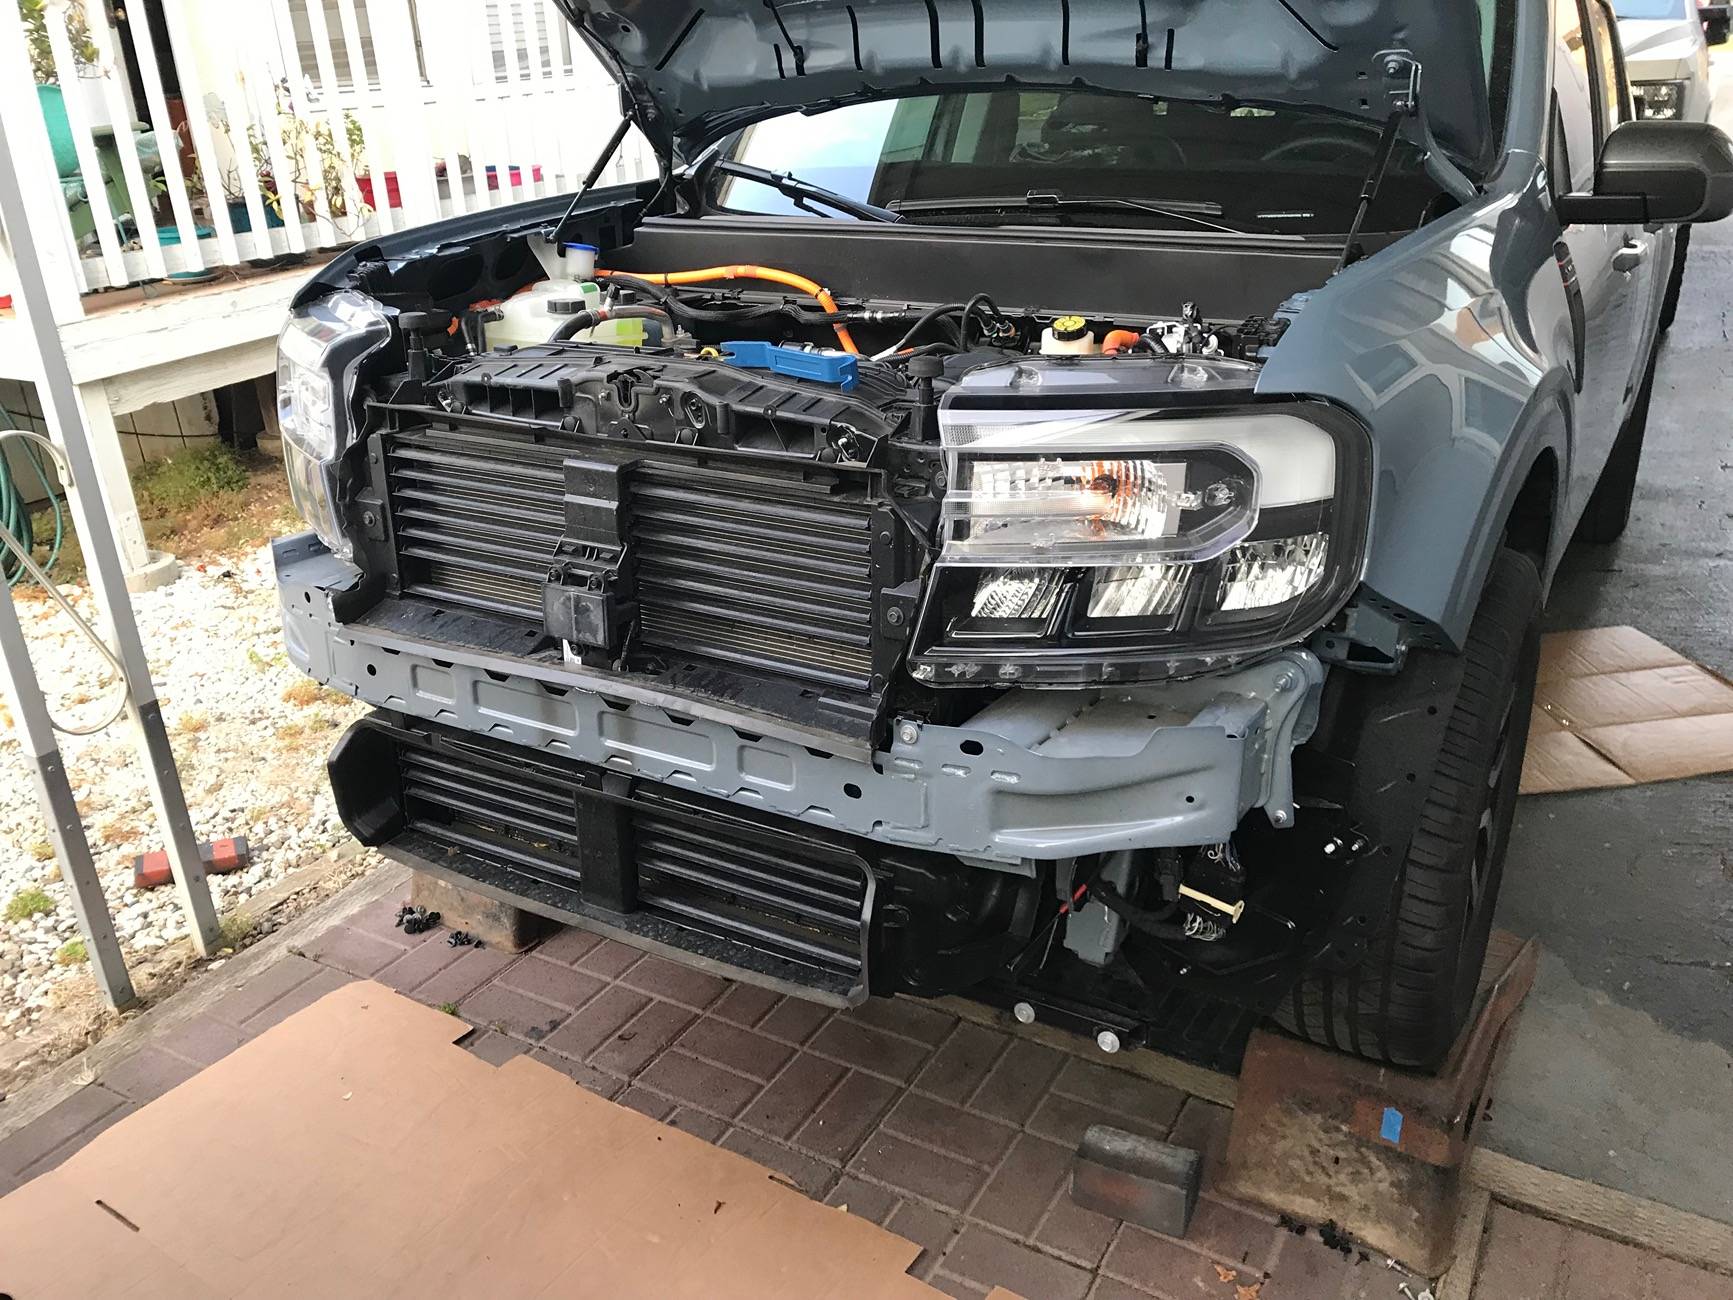
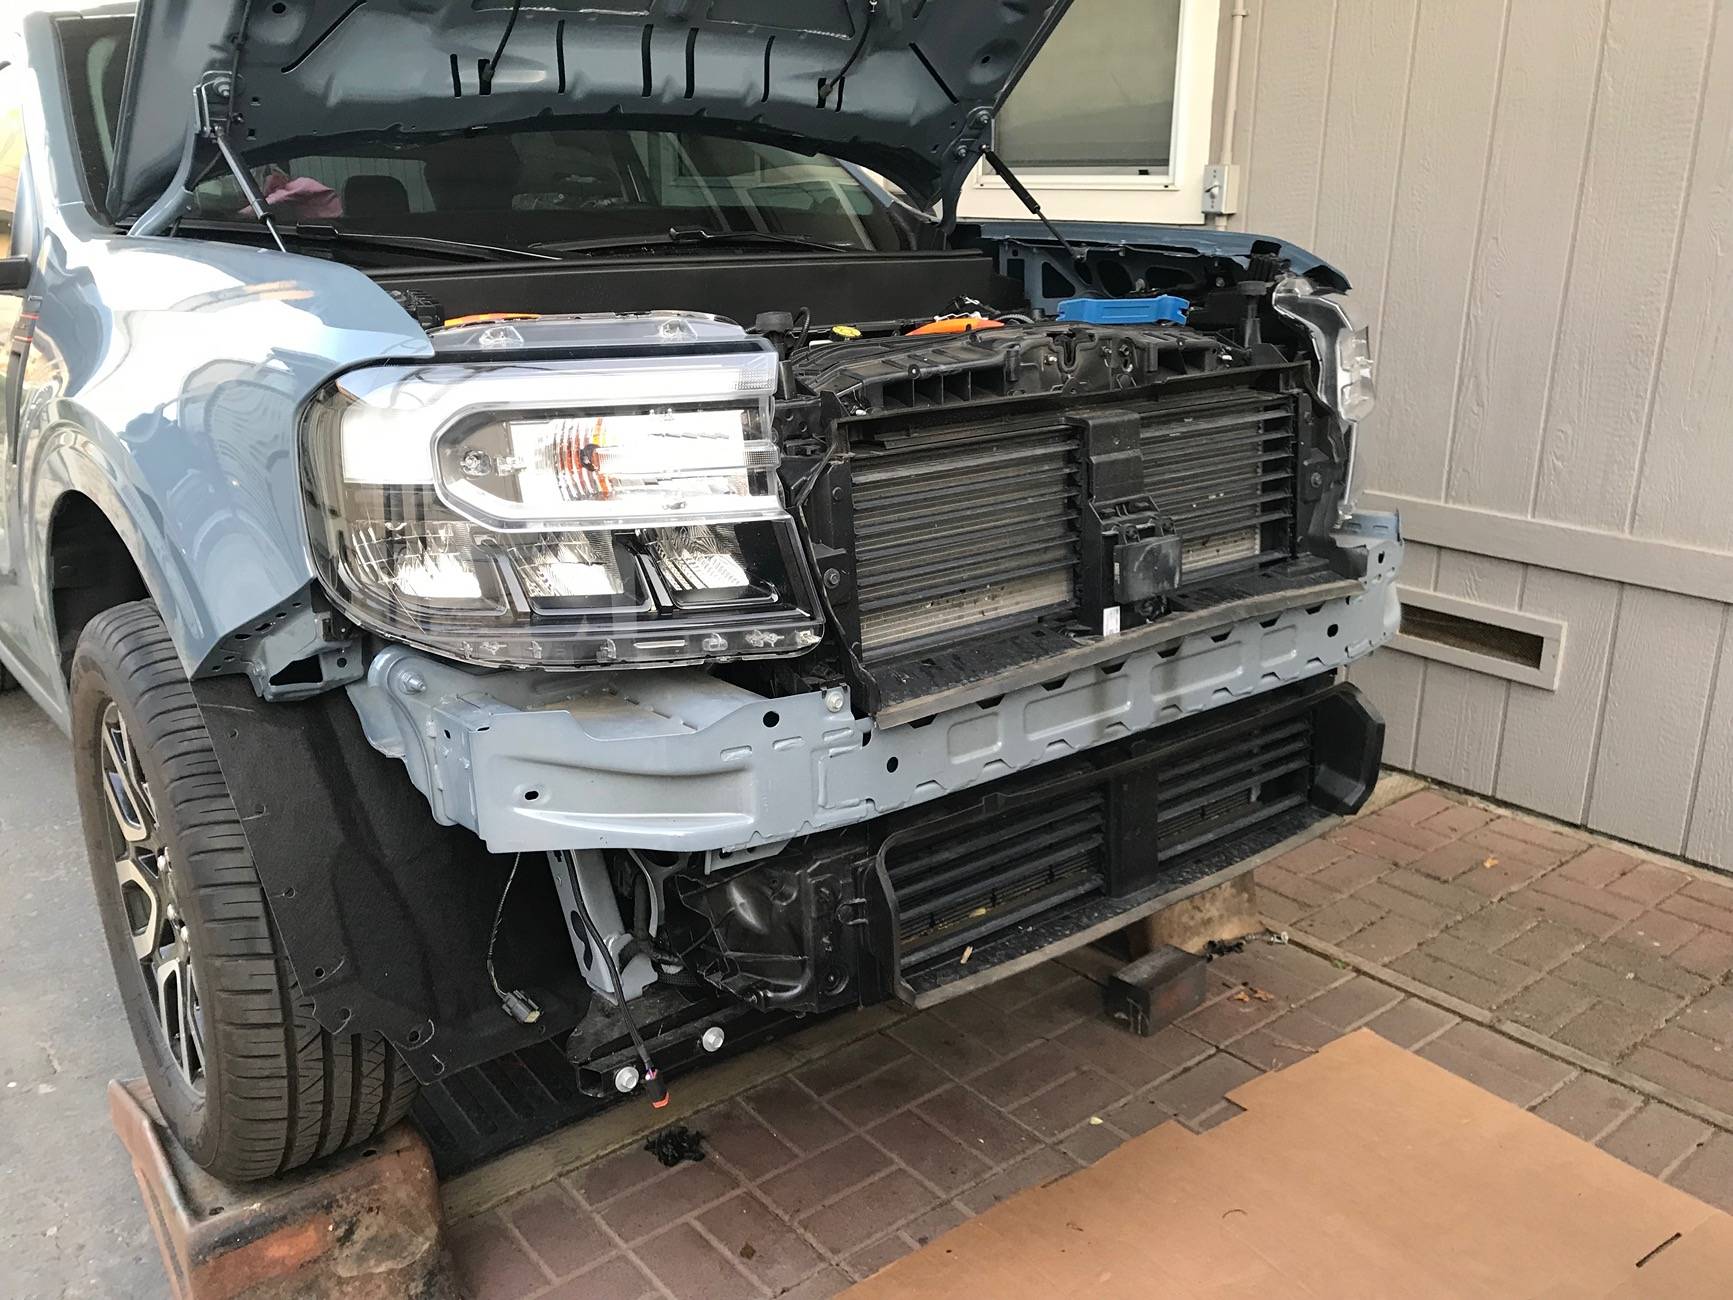
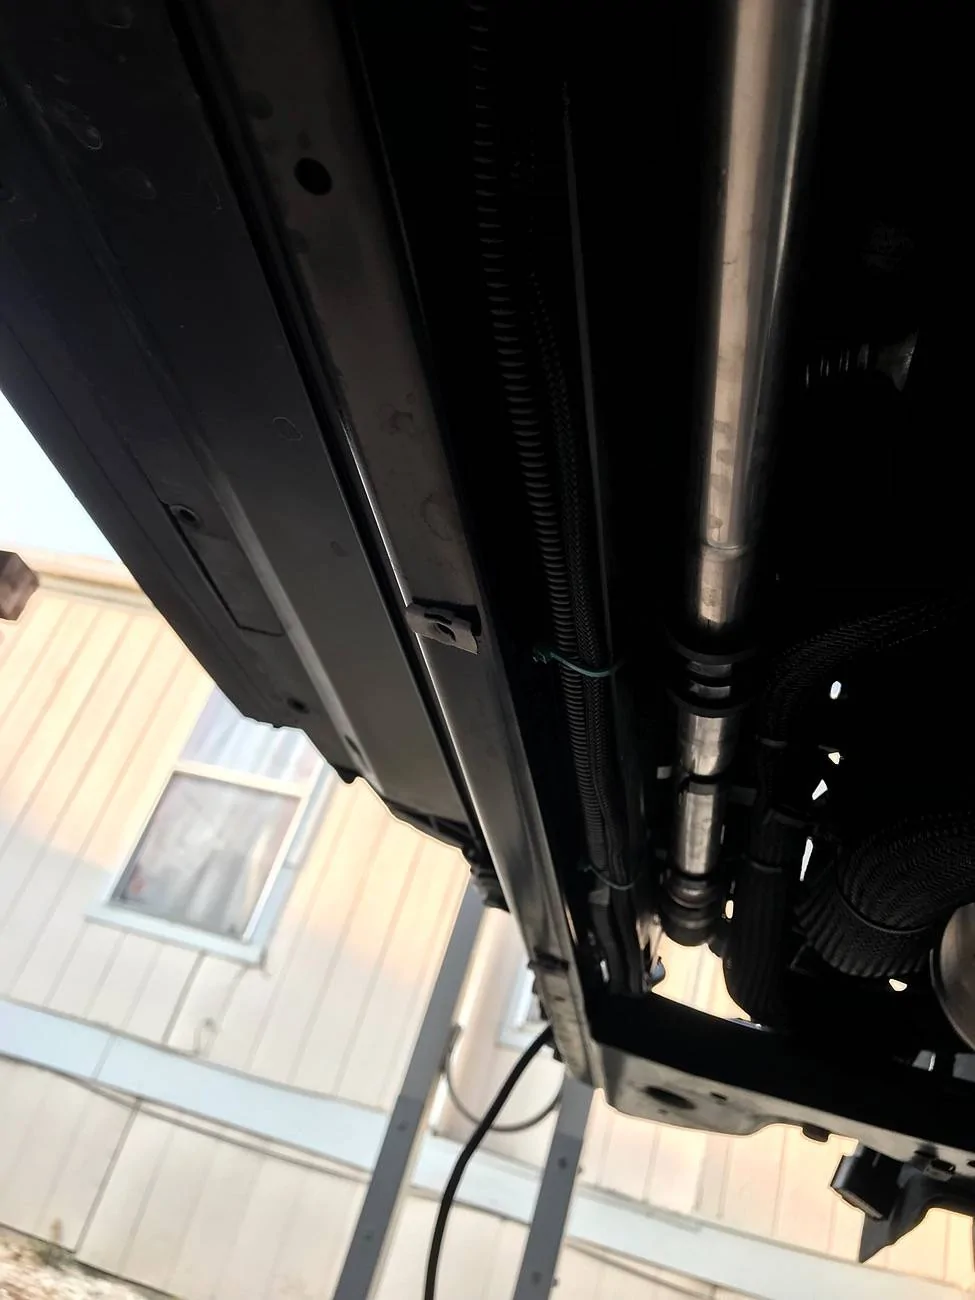
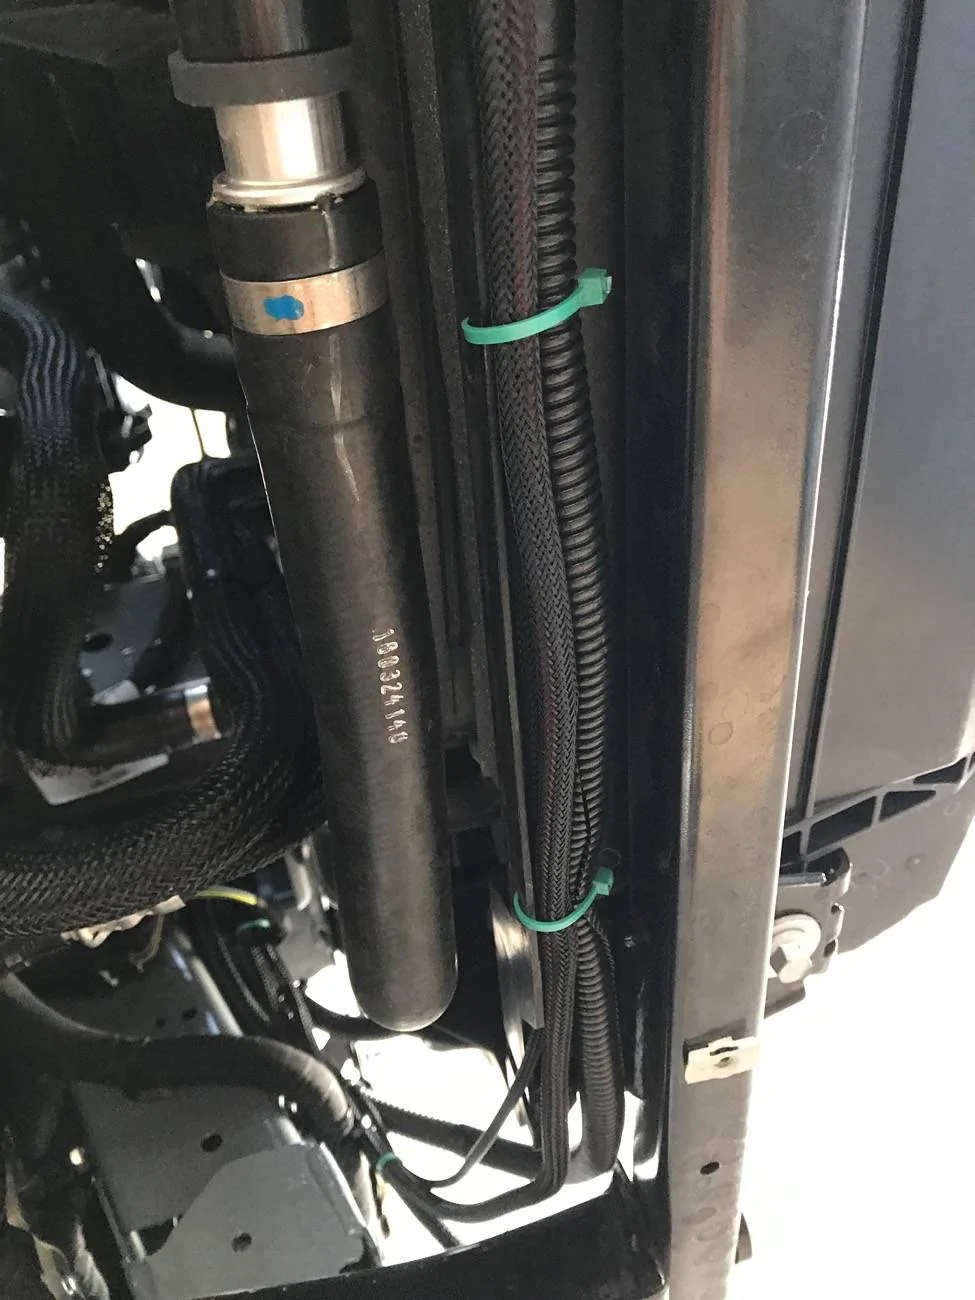
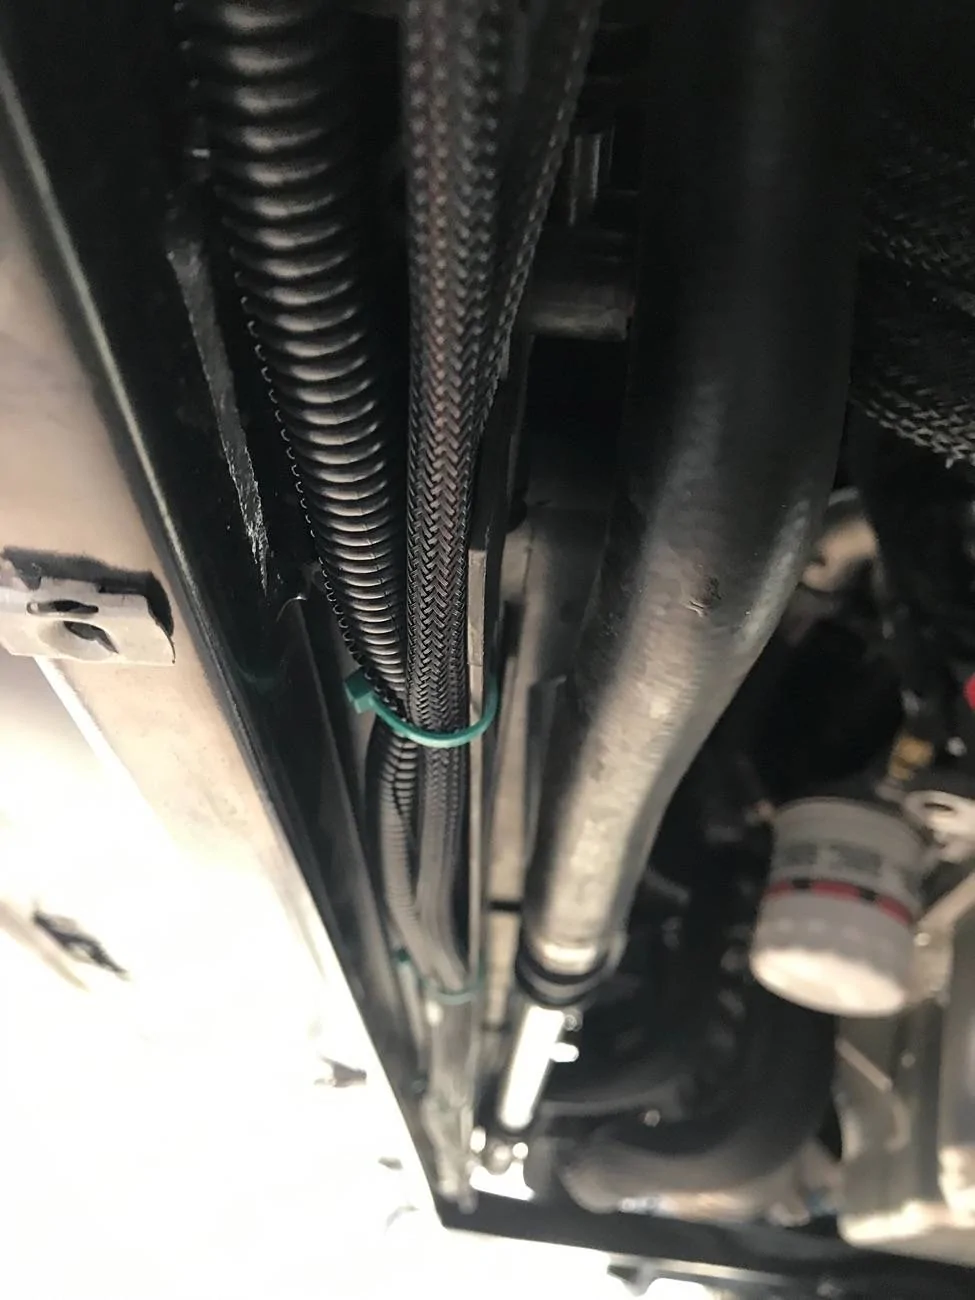
I did not like DD suggested route for the passenger's side fog light wiring so I changed it and ran it below along a frame cross member under the radiator there is a small channel in it with some holes that were a perfect fit for it and some wire ties to hold it in place…
Now with the bumper and grille off and on a padded table it was easy to just install the lights, and now the grill and bumper was just about ready to reinstall on the truck...
I did some additional changes to the truck while the bumper was off I did not remount the backup alarm in the suggested location did some additional work to relocated it to the rear of the truck… I also relocated my horns to the passengers side I tucked them in behind the bumper…

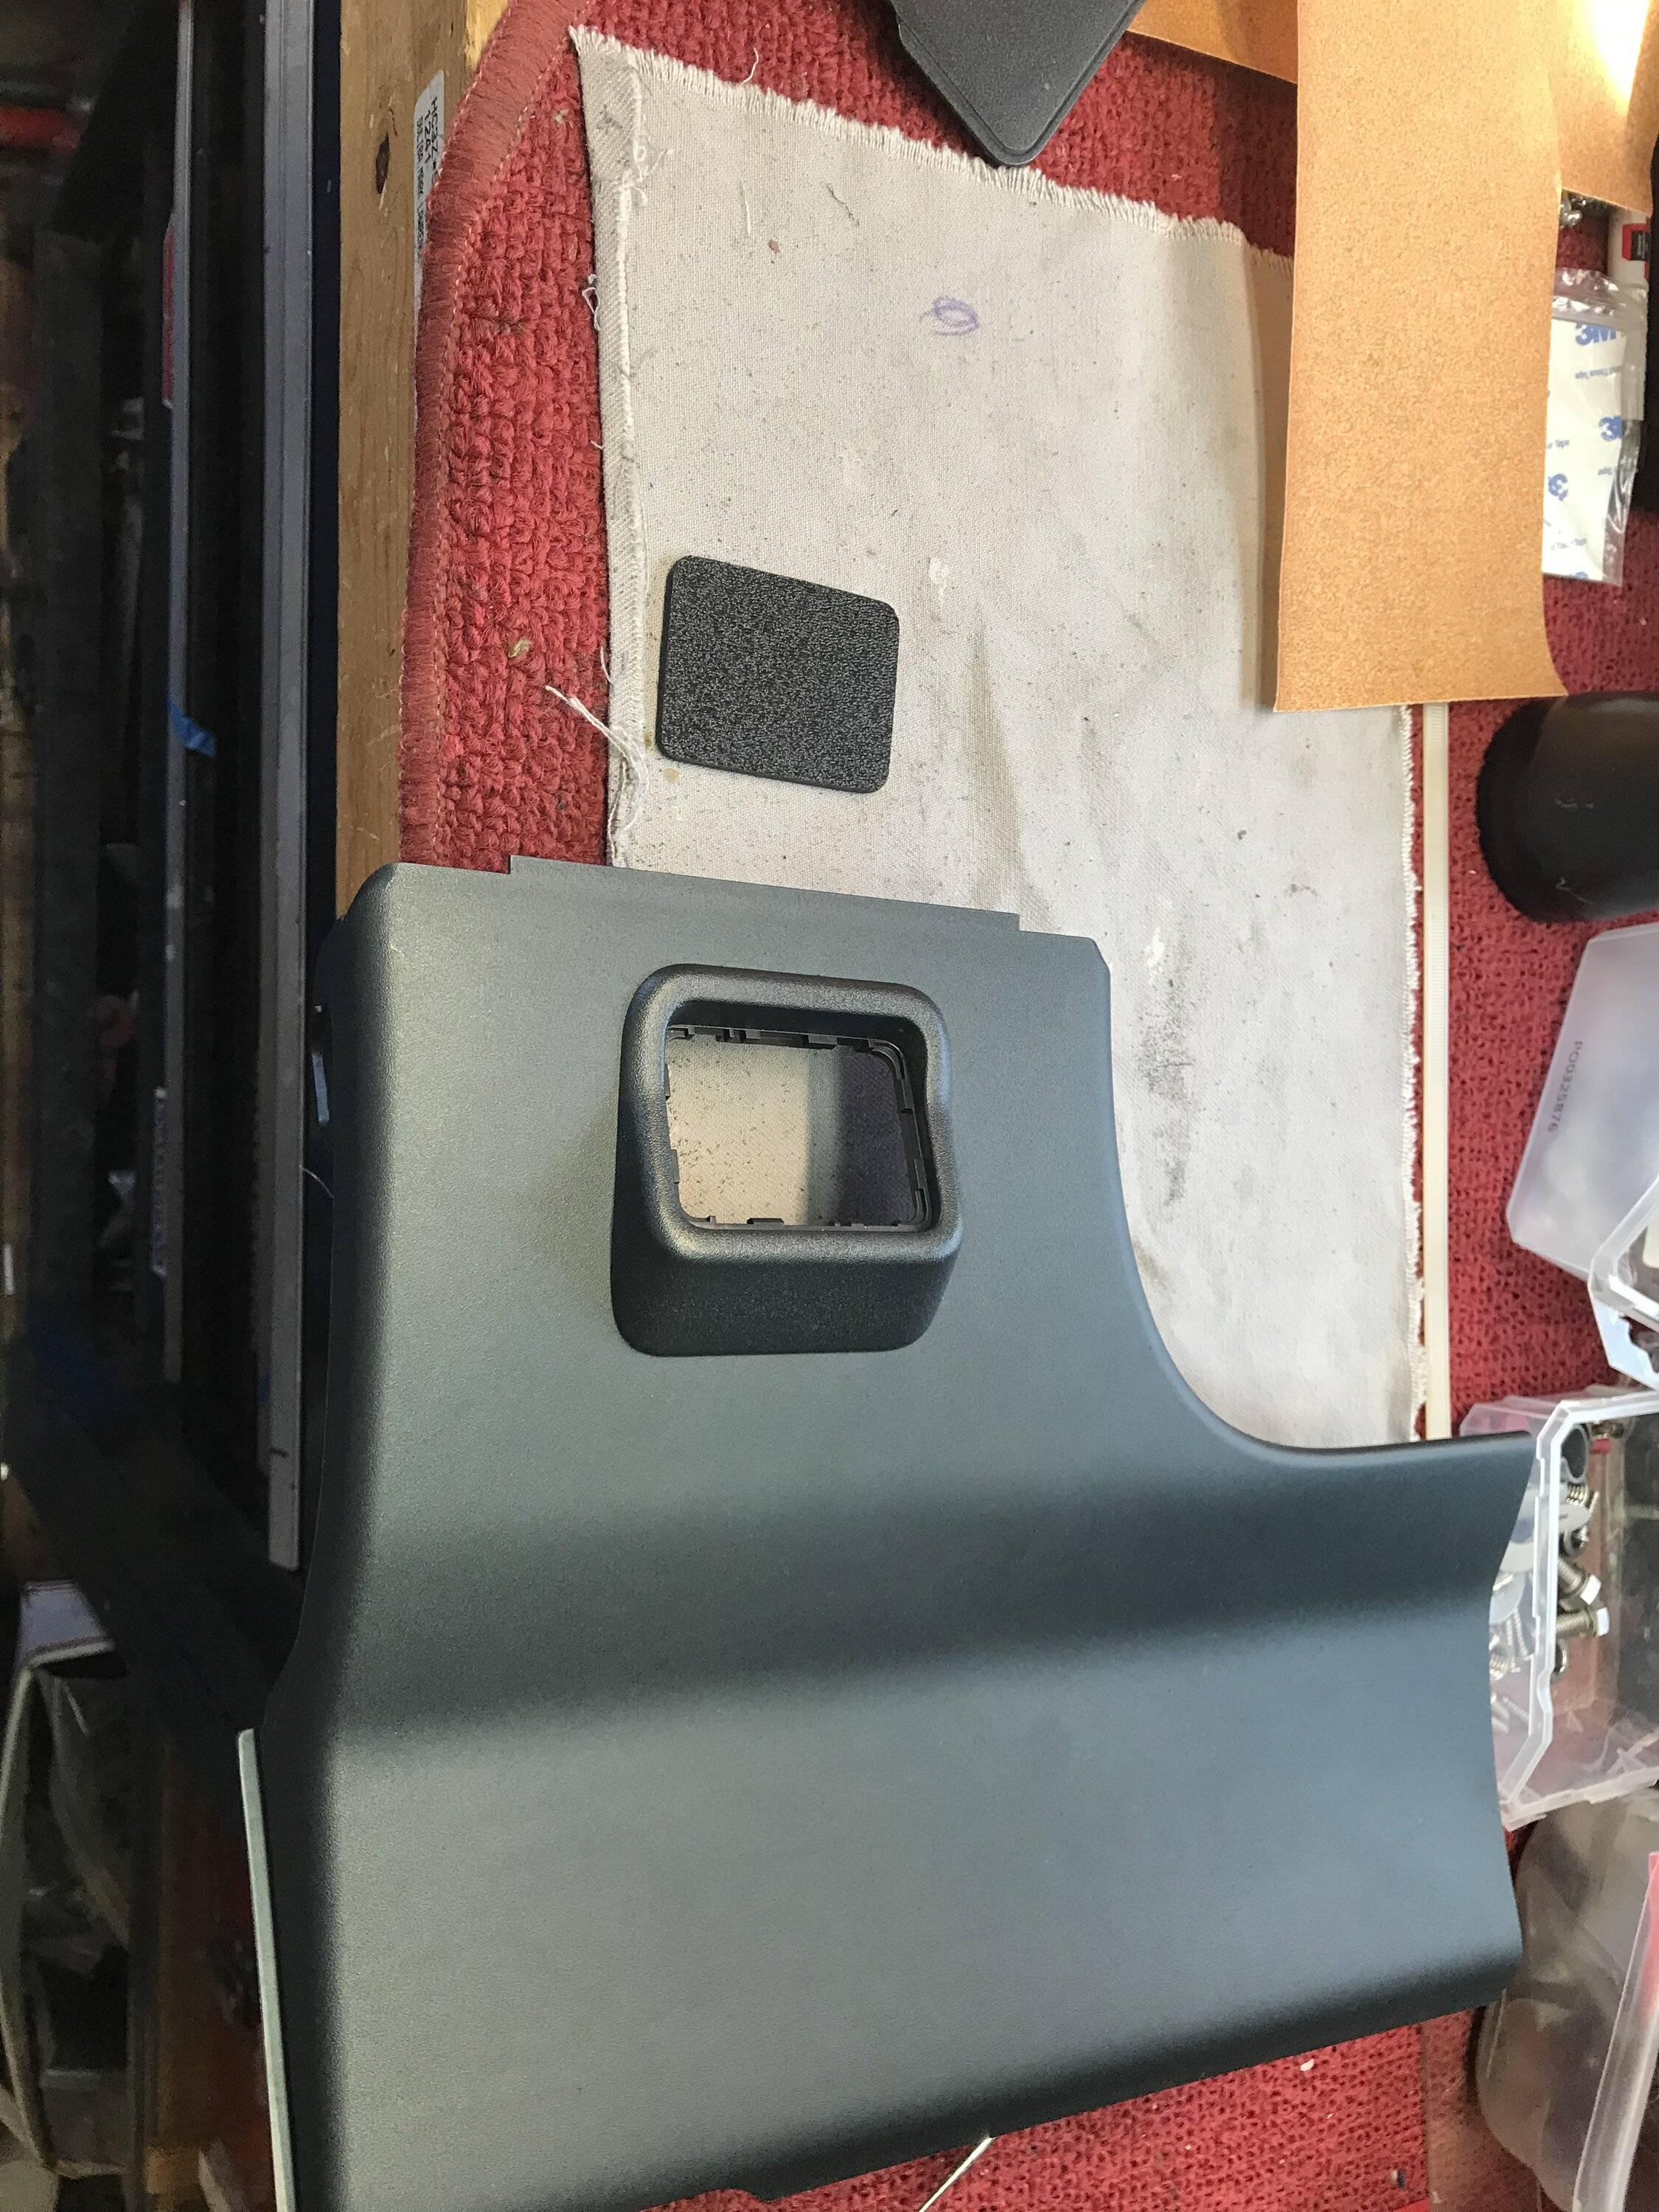
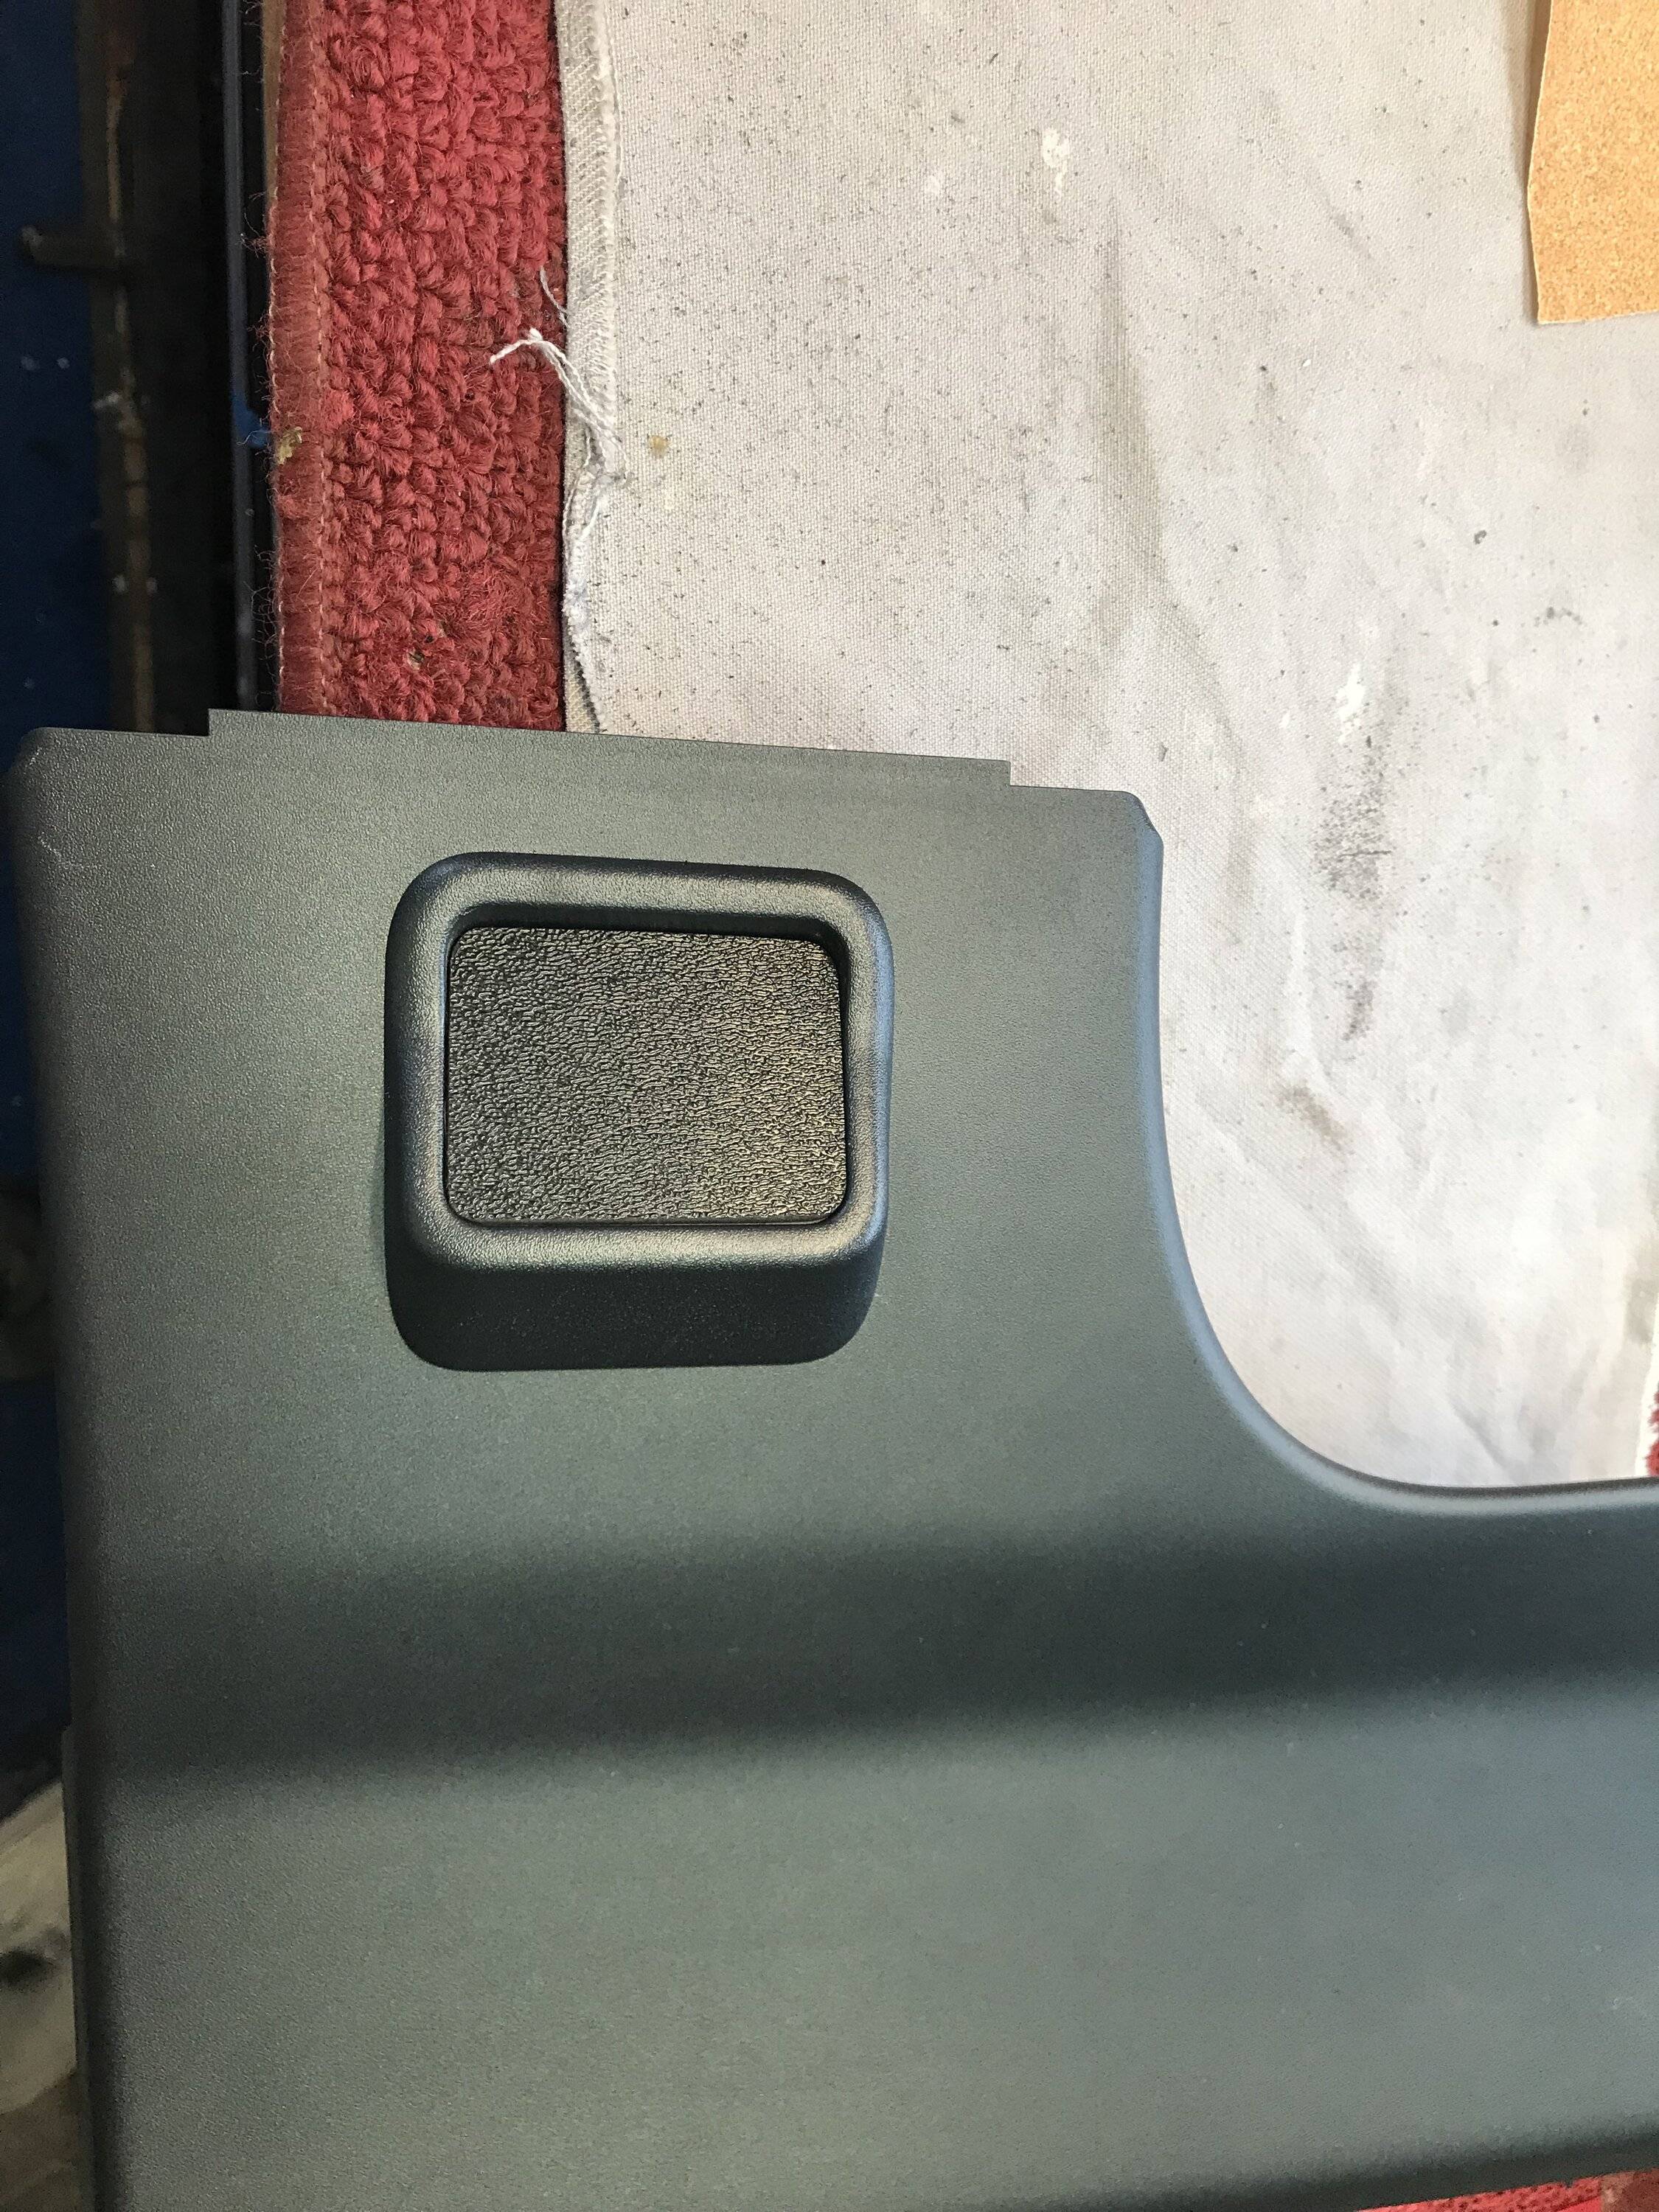
I started my install by doing the Fog Light switch inside the cab, I didn’t want to mess with going the F150 switch route and the needed forscan thing for several reasons.. So before installing while I was considering who what and where as well as looking at what others had done I came up with an idea.
I got the idea while reading one of the threads posted about towing and the factory brake controller.. Since I own a hybrid and do not have the 4k tow package thought I’d look into tow package's lower panel as it it might offer a perfect location for a couple of toggle switch’s.. I started searching the web and bought a lower panel it comes without the controller but has the mounting bezel.. This looked like it was going to be rather simple, all I needed to do was make a small plate/panel to fit into the controllers location.. I already had some textured ABS plastic sheet it was 1/8’’ thick and should do the trick..
I measured the opening and then cut myself several piece's to have some backups just in case.. As I started to fit the small plastic panel to the bezel opening it was not sitting as flush as I would like so I decided to cut a shallow bevel on the back of it to make it fit more flush with the bezels mounting face.. Once fitment was to my liking I centered and spaced my 2 new switch’s location in the panel marked it and cut there openings out, when I was happy with the fit of the panel and the switch’s I then used some ABS glue since both were ABS plastic to bond them together..
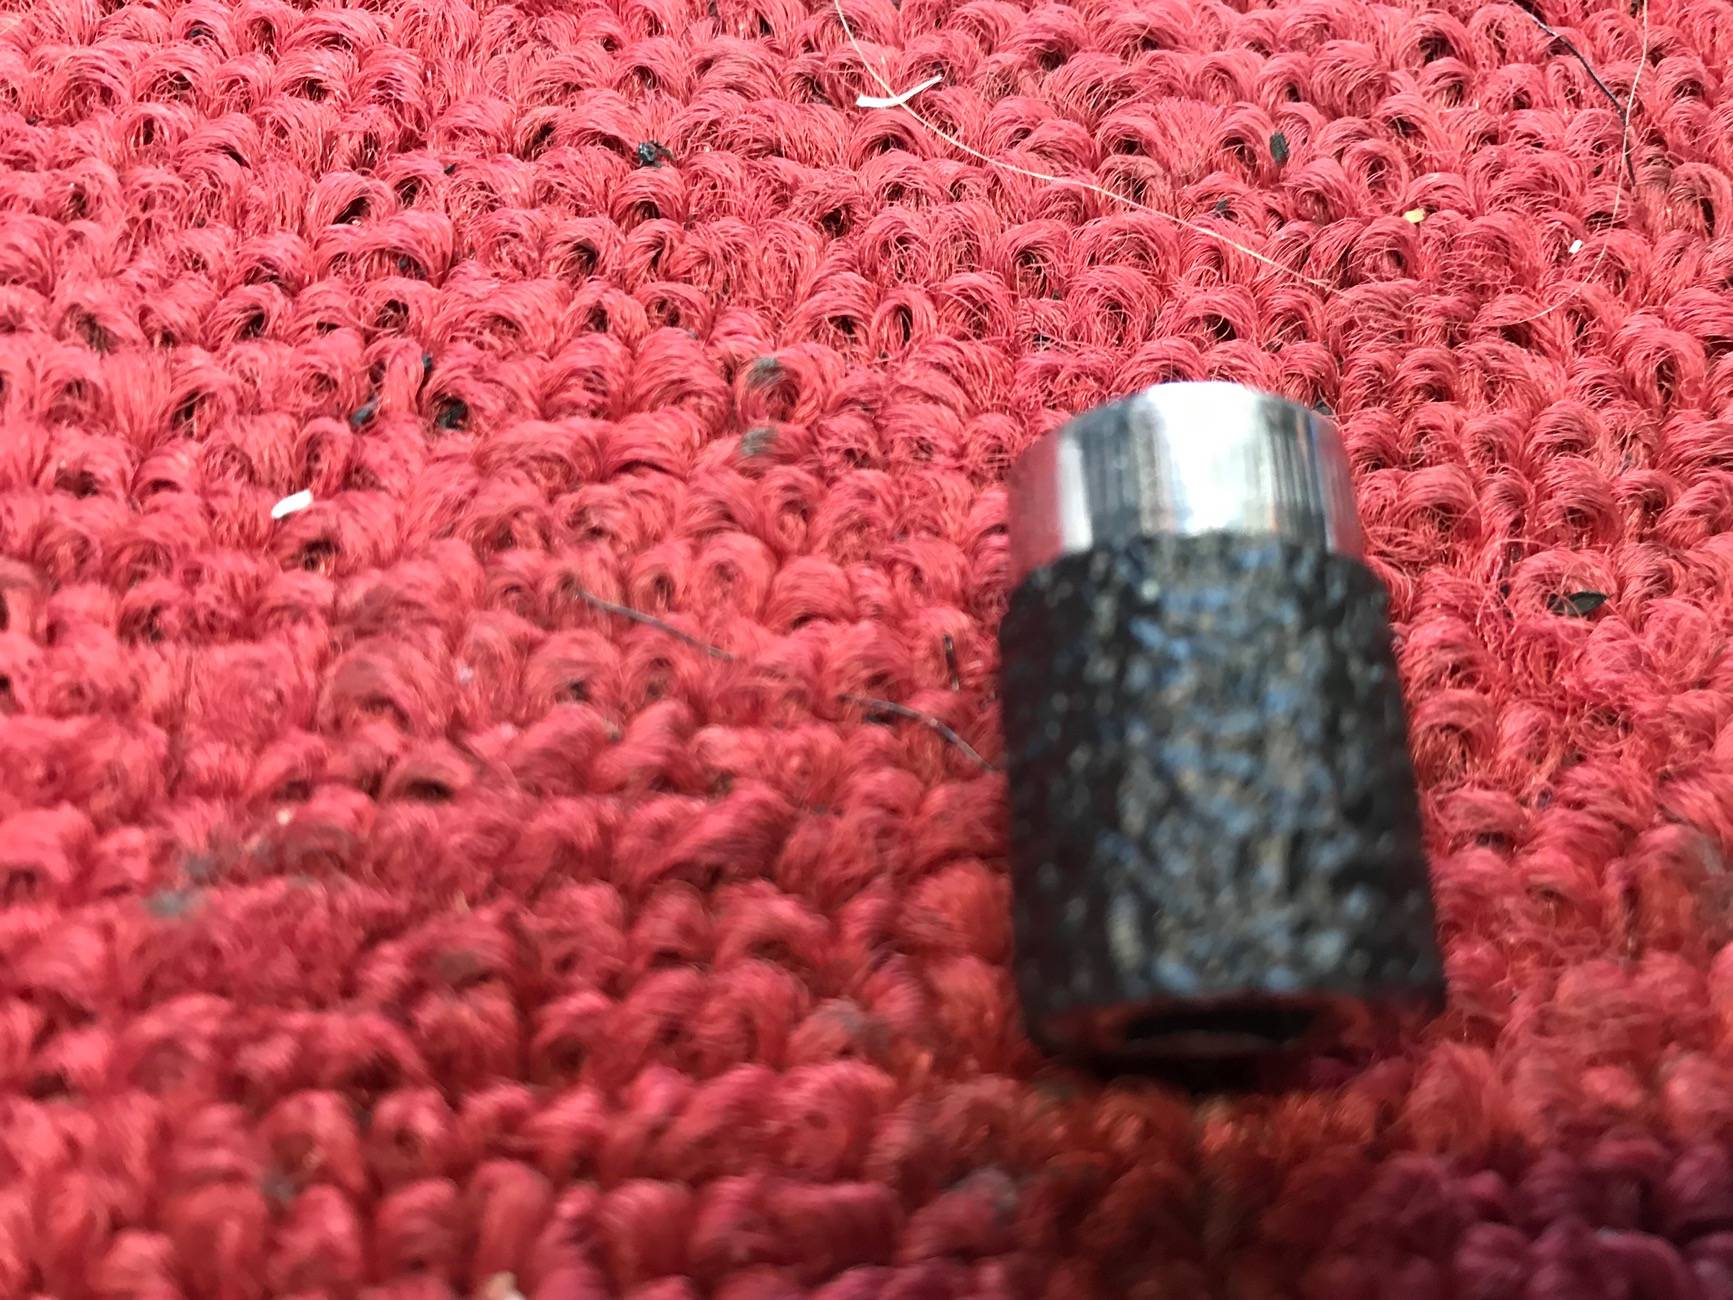
Next was the fog's wiring harness while not totally following the DD provided instruction, I decided to locate the electronic relay in a location where it would be accessible if I ever needed (if this thing ever took a dump I did not want to have to pull the whole front end off just to replace it) the decided location was on the drivers side frame inside the engine compartment...
It fit nicely in that location and also allowed me to shorten up some portions of the supplied mile long control switch wiring harness so I drilled a hole and mounted it. For the ground I tagged a factory frame ground only a few inches away, as well as the relays + power tap.
For the fog lights toggle switch’s power I tied that into the drivers side headlight wiring instead of the passengers side, since I do not like or use T taps I soldered my splices to the factory wiring and coated them with liquid electrical tape once dry I then taped them up and installed some corrugated plastic wire loom…
I made my own wiring harness assembly to go into the cab I added a 6 pin molex plug and extra wiring for possible future lighting additions, I ran my wire bundle thru the large firewall plug on the drivers side, attached the wires to my switch's and spliced the needed wires into the trucks and DD wiring harness.. After the control wiring was roughly laid out and as I installed them I added some corrugated plastic wire loom to wiring harness's to keep things looking clean and close to factory... I decided to do a quick test with one of the lights just to make sure all was working as intended and it did....
Now that the wiring is all sorted out other than plugging the lights in and before I go and pull the complete front grill and bumper assembly off of the truck, I had already gave this some thought before I ever even ordered my lights. I thought why cant I just cut the openings for the fog lights from the front while the bumpers still on the truck.. I had looked at some of the install videos and didn't see any reason why it could not be done, as it would be a heck of a lot easier doing this work while the bumper is on the truck than on a makeshift work bench...
I decided I would just rough in an opening on the raised portion up of the bumpers lights locations.. I started with a hole saw and cut out the 4 corners of that raised portion I used 2 different sizes, then I just took my oscillating saw and cut between the holes both did a very clean job...
Once the openings were roughed in I then took the lights mounting trim ring put it thru the hole aligned it inside the opening and began to use it as a visual guide to do the finish trimming out of the remainder of the openings as needed.. Once I thought it was good I used the fog light assembly itself to finish trimming the opening up and make sure they were fitting flush on the bumper…
As you can see from the pic I ended up with about a 3/8” perimeter on the top the bottom and the outside edge and about 1/2” on the inside edge for the lights to sit flush.. On the drivers side I needed to take out the annoying backup alarm or as Ford calls it Pedestrian Safety System, it was easy to remove thru the new opening I needed to do this in order to allow clearance for the lights fitment...
Now with all the really hard and dirty work done it was time for the easy part remove the front grill and bumper assembly from the truck.. Disassembly was pretty straight forward as per the instructions although not in the instructions I removed the lower splash shield as it frees up a couple of attachment points on each side that it shares with the fender liners.. I also removed an additional fender liner clip per side which gave me more working room in the inner fender/bumper area.. The 3 per side 10mm bolts with my big hands were a little fun I used a 1/4'' socket and ratchet to loose and to reinstall them not a lot of working room in there so I put some grip tape on my socket which made it much easier to remove and install the bolts by hand… The rest of the removal was as per the book, I did it solo but a extra pair of hands would have been nice when I finally pulled it off...
I did not like DD suggested route for the passenger's side fog light wiring so I changed it and ran it below along a frame cross member under the radiator there is a small channel in it with some holes that were a perfect fit for it and some wire ties to hold it in place…
Now with the bumper and grille off and on a padded table it was easy to just install the lights, and now the grill and bumper was just about ready to reinstall on the truck...
I did some additional changes to the truck while the bumper was off I did not remount the backup alarm in the suggested location did some additional work to relocated it to the rear of the truck… I also relocated my horns to the passengers side I tucked them in behind the bumper…
Sponsored
Last edited:
