
- First Name
- Dan
- Joined
- Feb 9, 2023
- Threads
- 8
- Messages
- 119
- Reaction score
- 186
- Location
- SouthEast Wisconsin
- Vehicle(s)
- 2024 Mav Lariat Hybrid, 2015 Hyundai Santa Fe
- Engine
- 2.5L Hybrid
- Thread starter
- #1
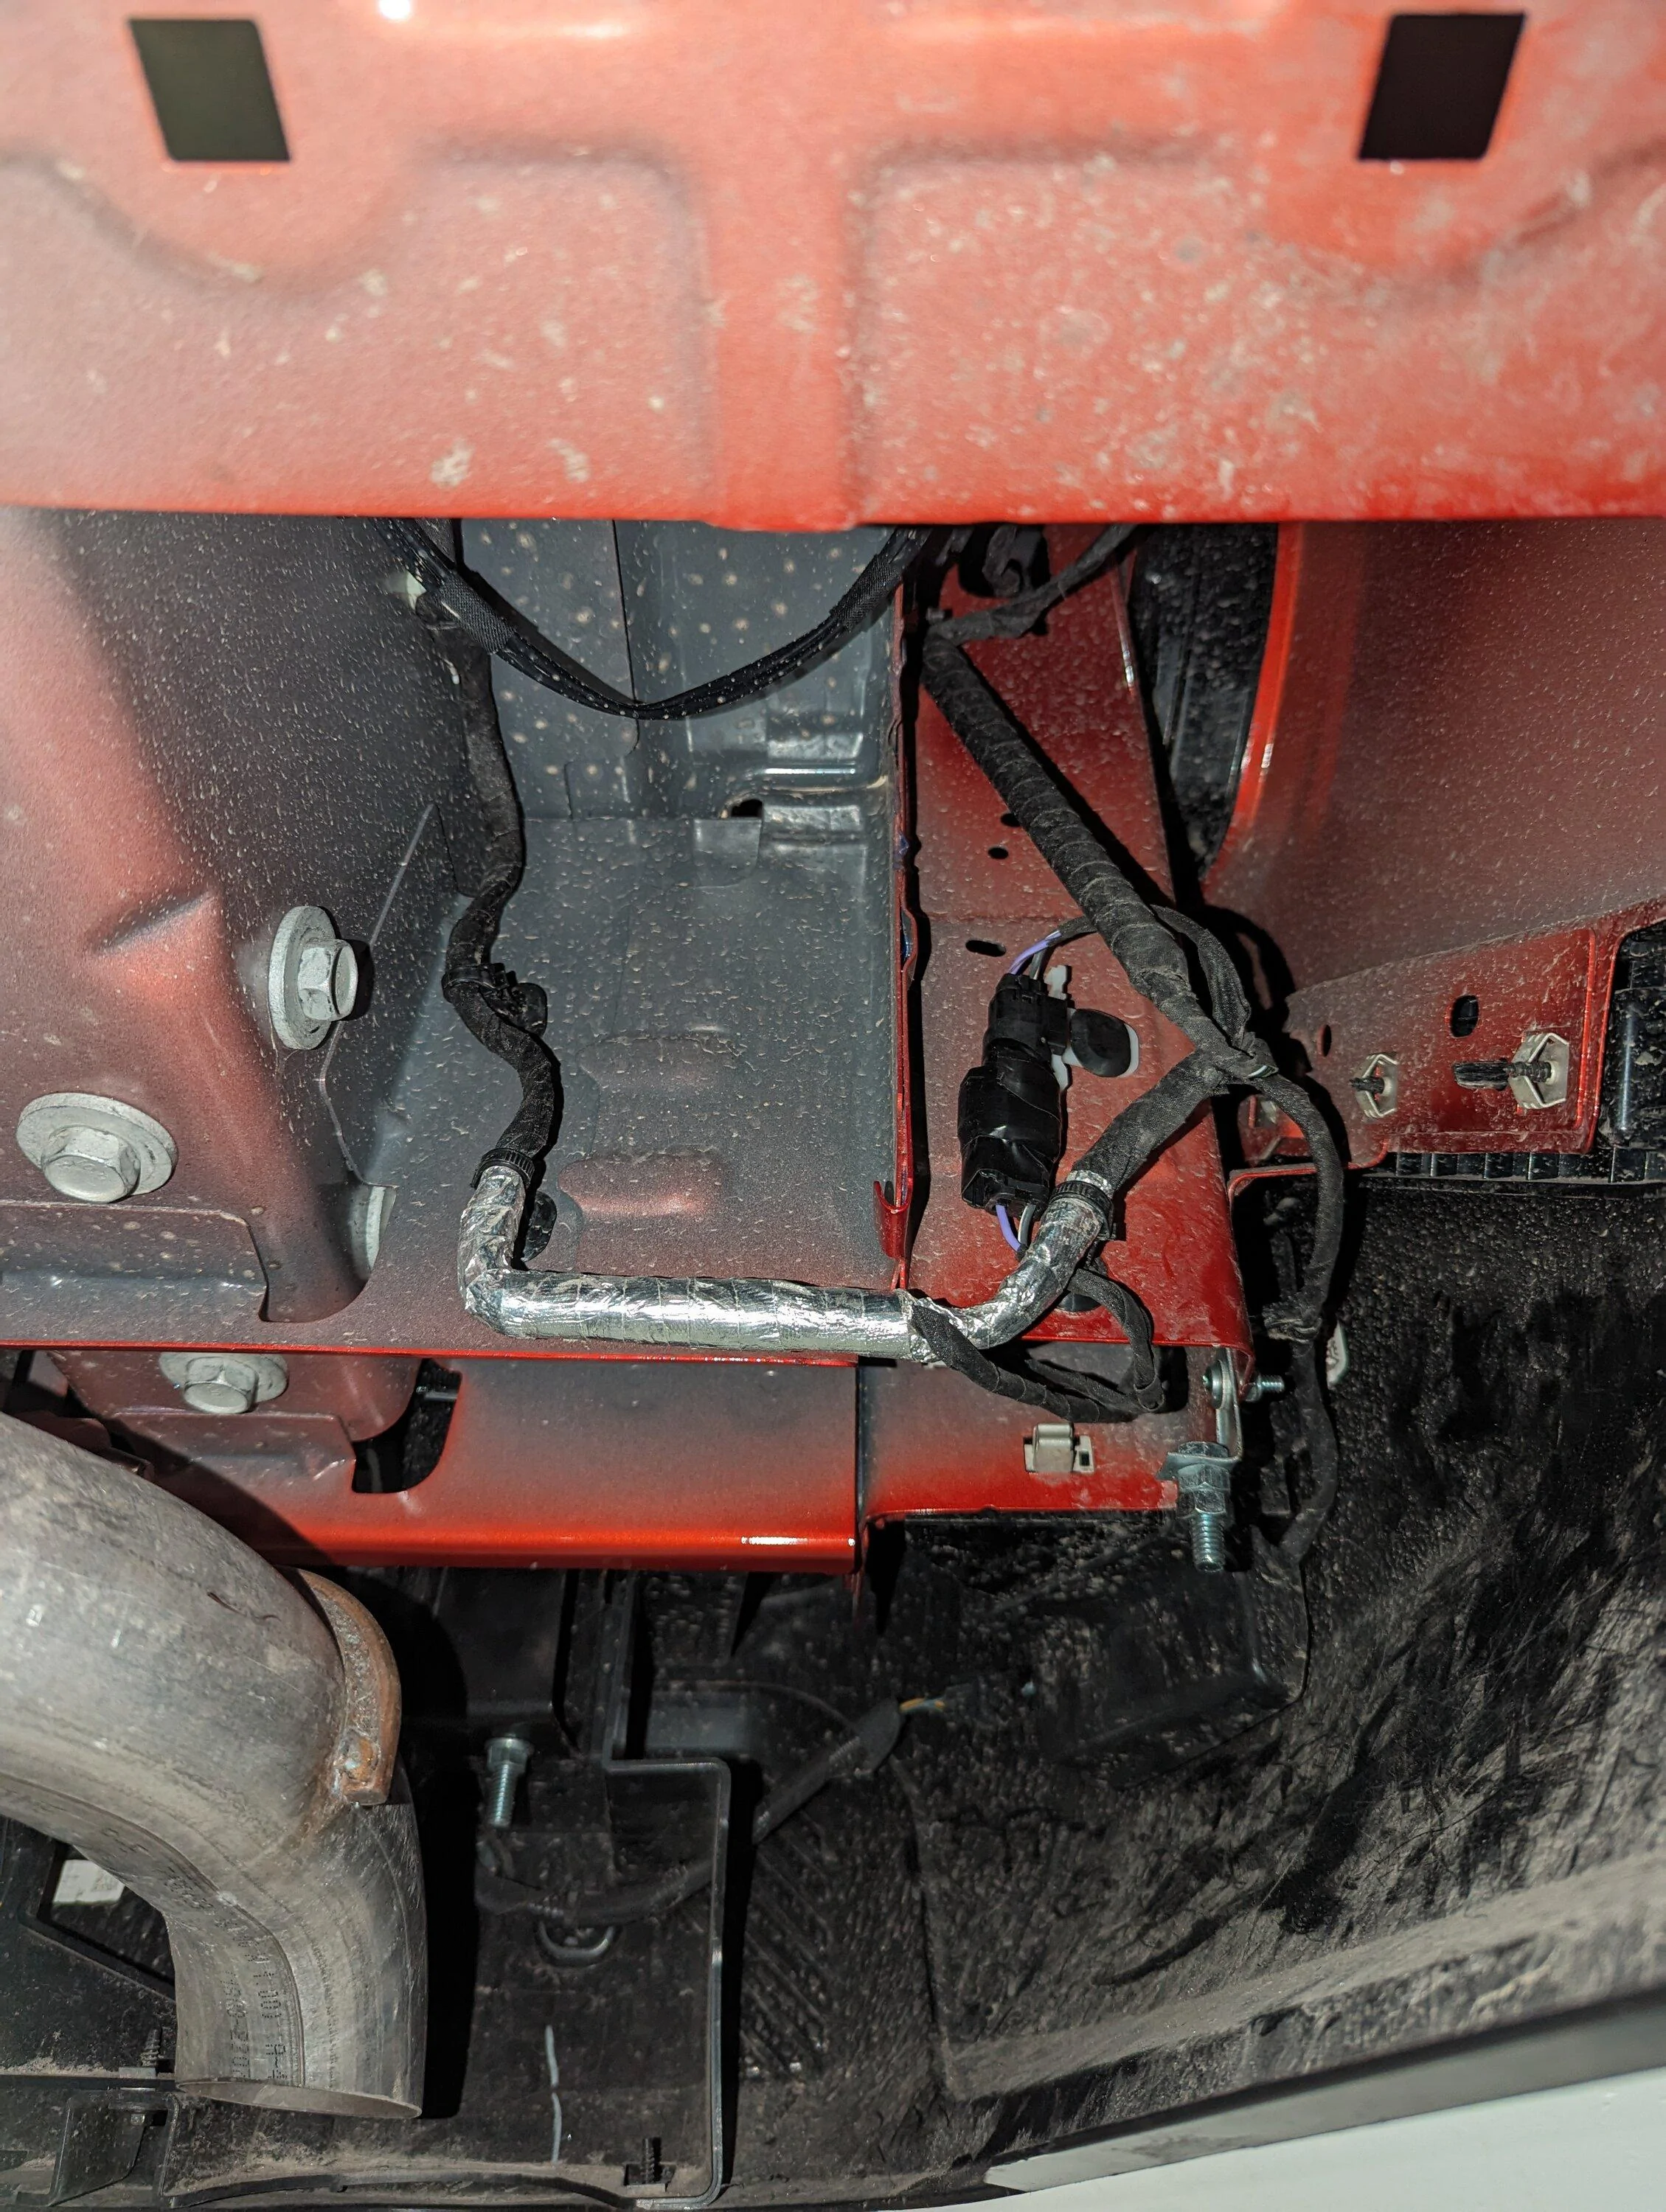
There are some other, older threads on this subject, but I can't seem to find them. So, I decided to start a new one (this got a little long, sorry !). This concerns the large, open underbody cavity behind the left rear (drivers side ) tire. You need to crawl under your truck to see the issue. Lots of exposed wiring, no protection for the inner quarter body panel and you can see the tail light assembly. MTC members complain about potential rust issues or getting dirt and mud thrown up and accumulating in that area. Here in the midwest, I'm more worried about snow and salt being packed in there. Also, there was a thread about right rear tail lights malfunctioning. Could it be all the crap being sprayed up there. Just sayin' !!
I finally picked up my '24 Lariat Hybrid after a 16 month wait. Before it saw any rain or snow, I used some of the ideas i remember from other threads and designed my own shield.
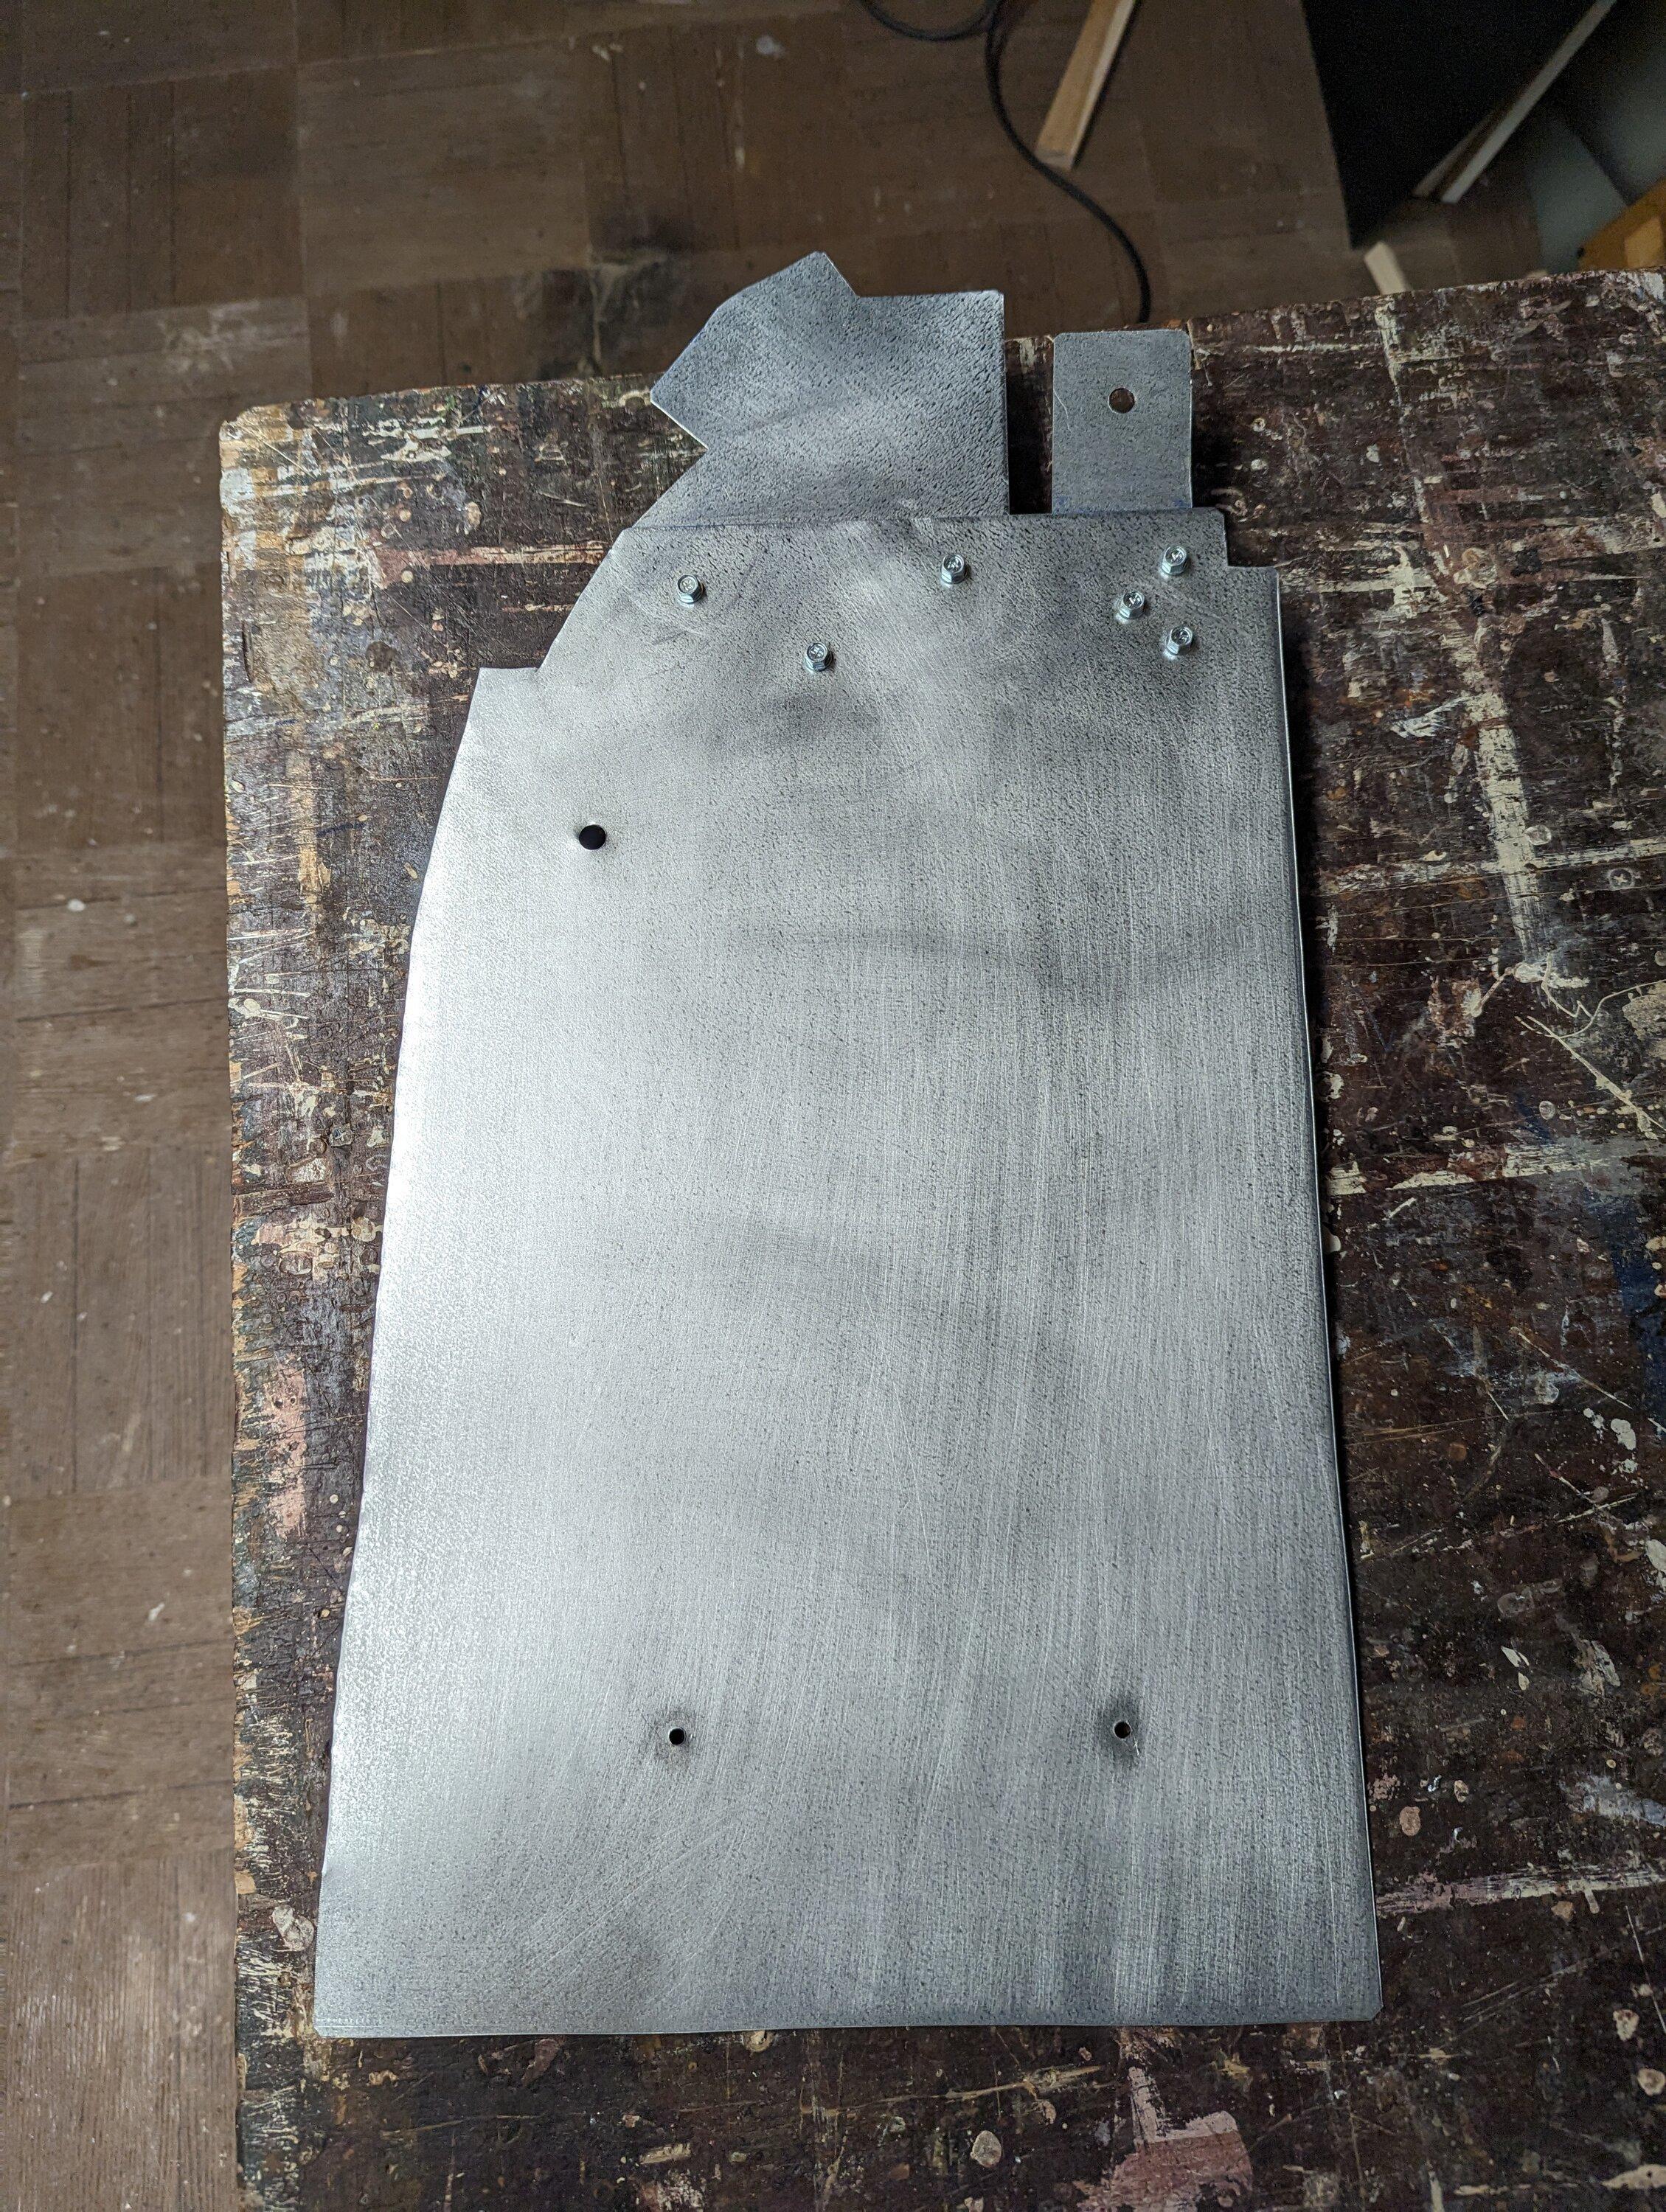
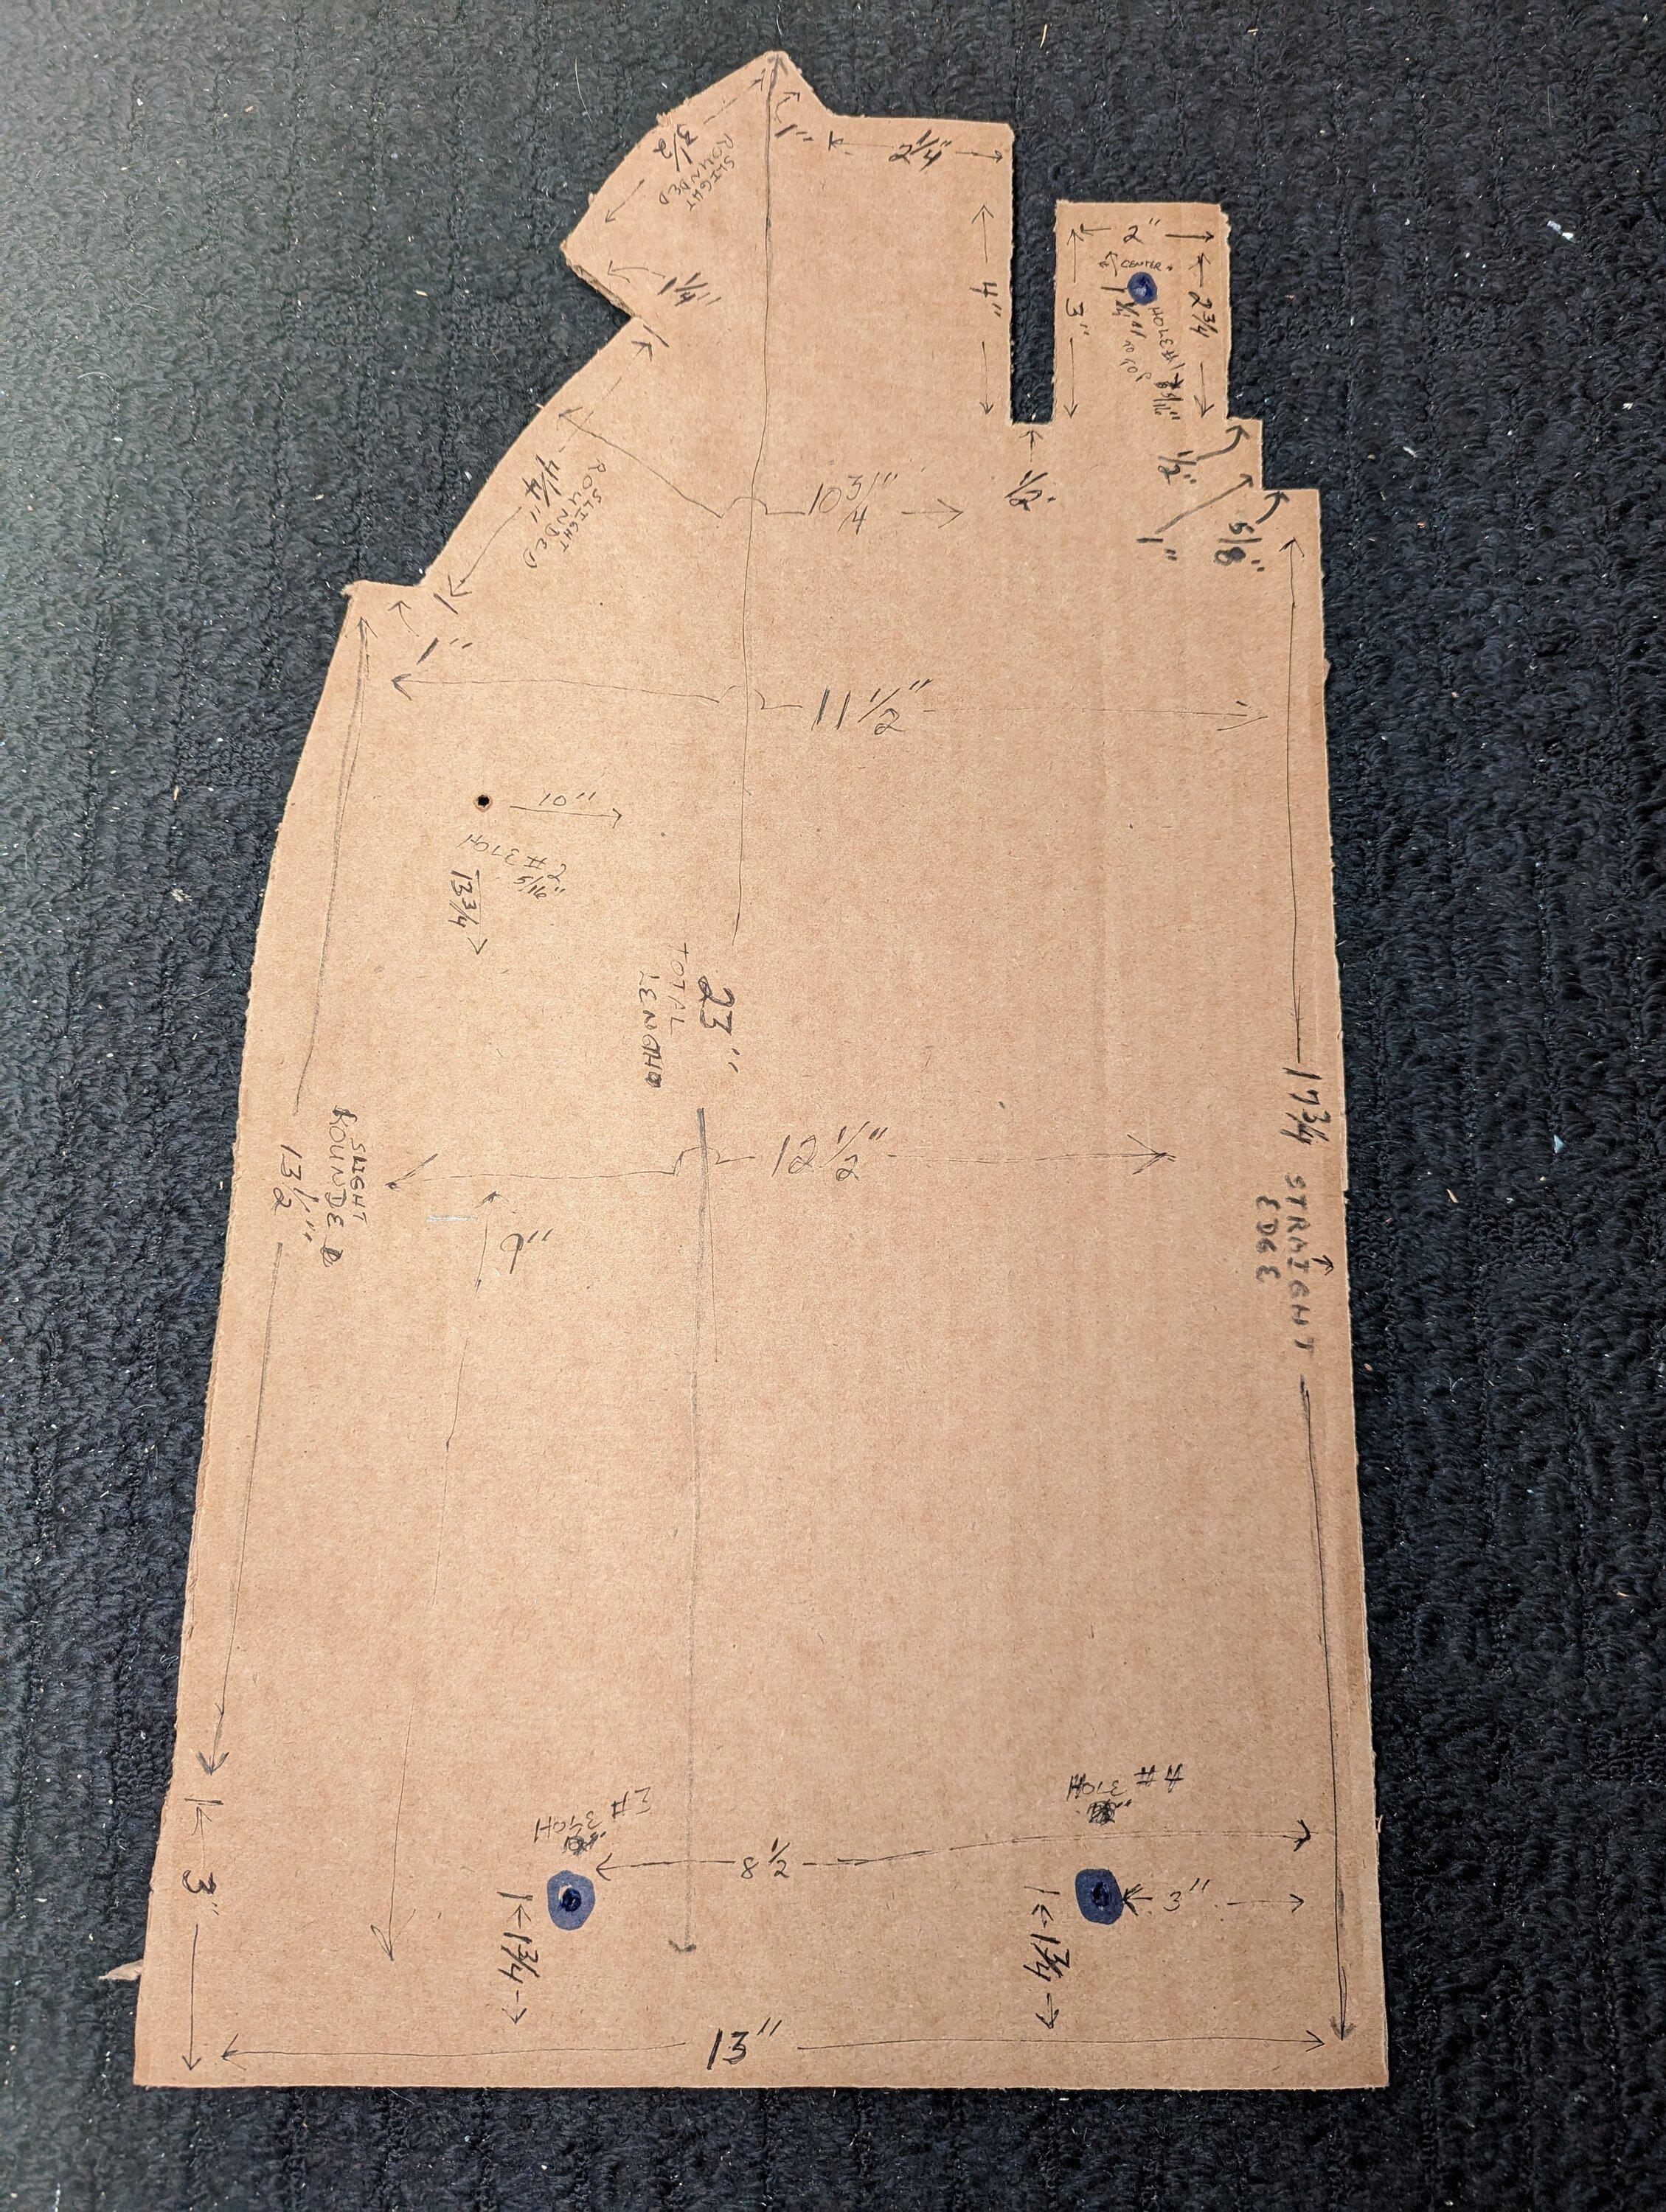
First, I made a cardboard template and made sure it fit and covered the cavity. Then traced it to the metal, cut and drilled once.
I used a heavier grade of galvanized sheet metal, a little thicker than duct work metal, but that would work too (Or any other type of sheet metal). I was able to cut it with tin snips. You need some skills, but it's not to hard.
The final piece measured 13" x 23".
See the attached pictures for my design and measurements. My piece was a little short so I just screwed on the extra tabs that extend to the bumper.
The shield is straight, no bending or shaping.
The mounting point by the tire is a little higher that the mount point by the bumper. No need to worry about bending around the silver shielded, low hanging wire. (See pictures).
It's not meant to a exact, water tight fit, just keep the spray, mud and snow out.
For mounting, I used existing holes:
1) Right behind the tire, there were 2, 5/8" square holes. I drilled 1/2" holes in my shield (picture has smaller holes) and used toggle bolts and fender washers to secure the shield.
2) towards the bumper, there was existing hole in the bumper mount frame that I used. Needed a 1", 5/16" lag bolt. I inserted the lag bolt ( a little tricky in that tight space), then a nut to tighten in place. I then used a fender washer and locking nut to attach the shield.
3) this one could be optional. I used an "L" bracket and similar to #2 above, used a bolt and nut to create another mounting point. I had to move 1 wire to free up a hole to mount the "L" bracket.
If you expand the "before" picture, you can see to the 2 silver mounting bolts.
Once built and fitted, I cleaned and sanded the new shield and primed, then painted it black. Not sure if the paint will hold up; we'll see.
I used bolts, fender washers and nuts that I had laying around, painted them too. Once it warms up, I'll look into replacing them with more rust resistant hardware. Stainless, galvanized ?
Thank you to the MTC members who crawled under the back of their Mavericks and discovered this overlooked shield and brought it to our attention. There are great solutions from other MTC members, mine is just another option.
Before, from the factory, picture. Already showing splatter !
My shield picture
After picture

Design and measurements
I finally picked up my '24 Lariat Hybrid after a 16 month wait. Before it saw any rain or snow, I used some of the ideas i remember from other threads and designed my own shield.
First, I made a cardboard template and made sure it fit and covered the cavity. Then traced it to the metal, cut and drilled once.
I used a heavier grade of galvanized sheet metal, a little thicker than duct work metal, but that would work too (Or any other type of sheet metal). I was able to cut it with tin snips. You need some skills, but it's not to hard.
The final piece measured 13" x 23".
See the attached pictures for my design and measurements. My piece was a little short so I just screwed on the extra tabs that extend to the bumper.
The shield is straight, no bending or shaping.
The mounting point by the tire is a little higher that the mount point by the bumper. No need to worry about bending around the silver shielded, low hanging wire. (See pictures).
It's not meant to a exact, water tight fit, just keep the spray, mud and snow out.
For mounting, I used existing holes:
1) Right behind the tire, there were 2, 5/8" square holes. I drilled 1/2" holes in my shield (picture has smaller holes) and used toggle bolts and fender washers to secure the shield.
2) towards the bumper, there was existing hole in the bumper mount frame that I used. Needed a 1", 5/16" lag bolt. I inserted the lag bolt ( a little tricky in that tight space), then a nut to tighten in place. I then used a fender washer and locking nut to attach the shield.
3) this one could be optional. I used an "L" bracket and similar to #2 above, used a bolt and nut to create another mounting point. I had to move 1 wire to free up a hole to mount the "L" bracket.
If you expand the "before" picture, you can see to the 2 silver mounting bolts.
Once built and fitted, I cleaned and sanded the new shield and primed, then painted it black. Not sure if the paint will hold up; we'll see.
I used bolts, fender washers and nuts that I had laying around, painted them too. Once it warms up, I'll look into replacing them with more rust resistant hardware. Stainless, galvanized ?
Thank you to the MTC members who crawled under the back of their Mavericks and discovered this overlooked shield and brought it to our attention. There are great solutions from other MTC members, mine is just another option.
Before, from the factory, picture. Already showing splatter !
My shield picture
After picture
Design and measurements
Sponsored
Last edited:
