OP
OP

- First Name
- Bill
- Joined
- Aug 1, 2022
- Threads
- 7
- Messages
- 525
- Reaction score
- 818
- Location
- Central MA
- Vehicle(s)
- 2022 Maverick XLT
- Engine
- 2.0L EcoBoost
- Thread starter
- #16
Short story - it worked! I verified on the way home that BLIS was functioning normally and there was no indication on the dash that a trailer was connected.
The installation:
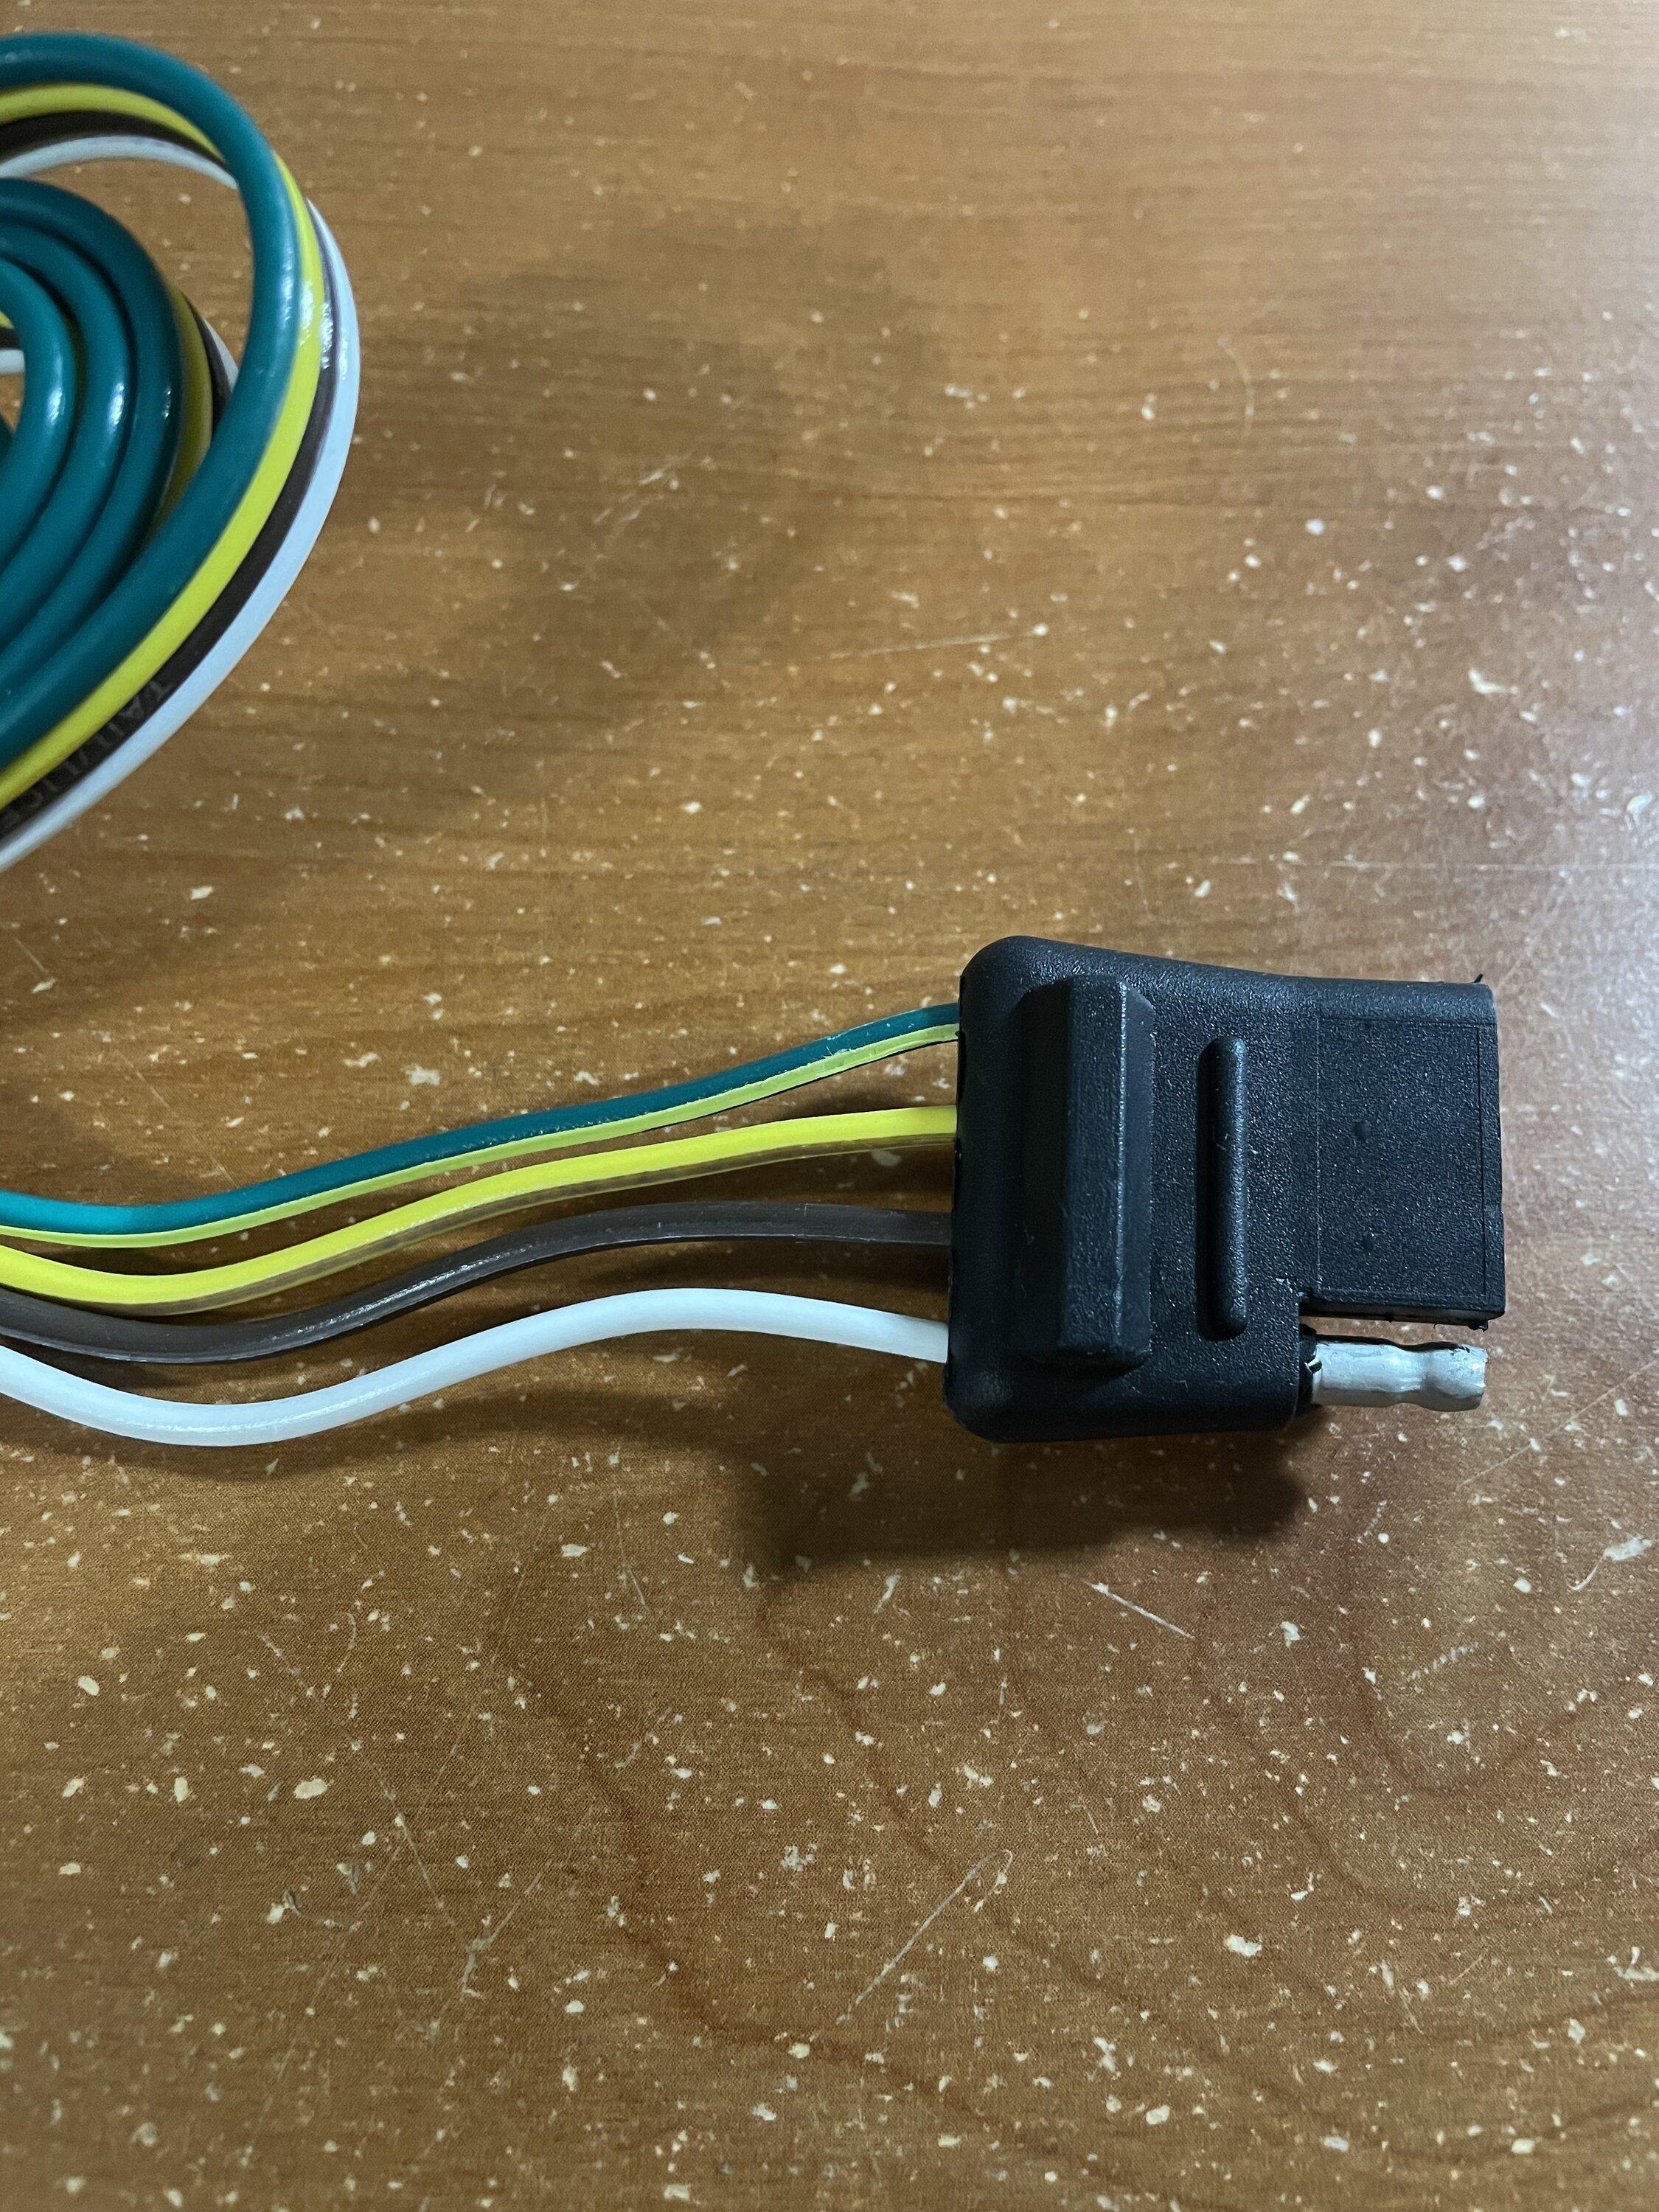
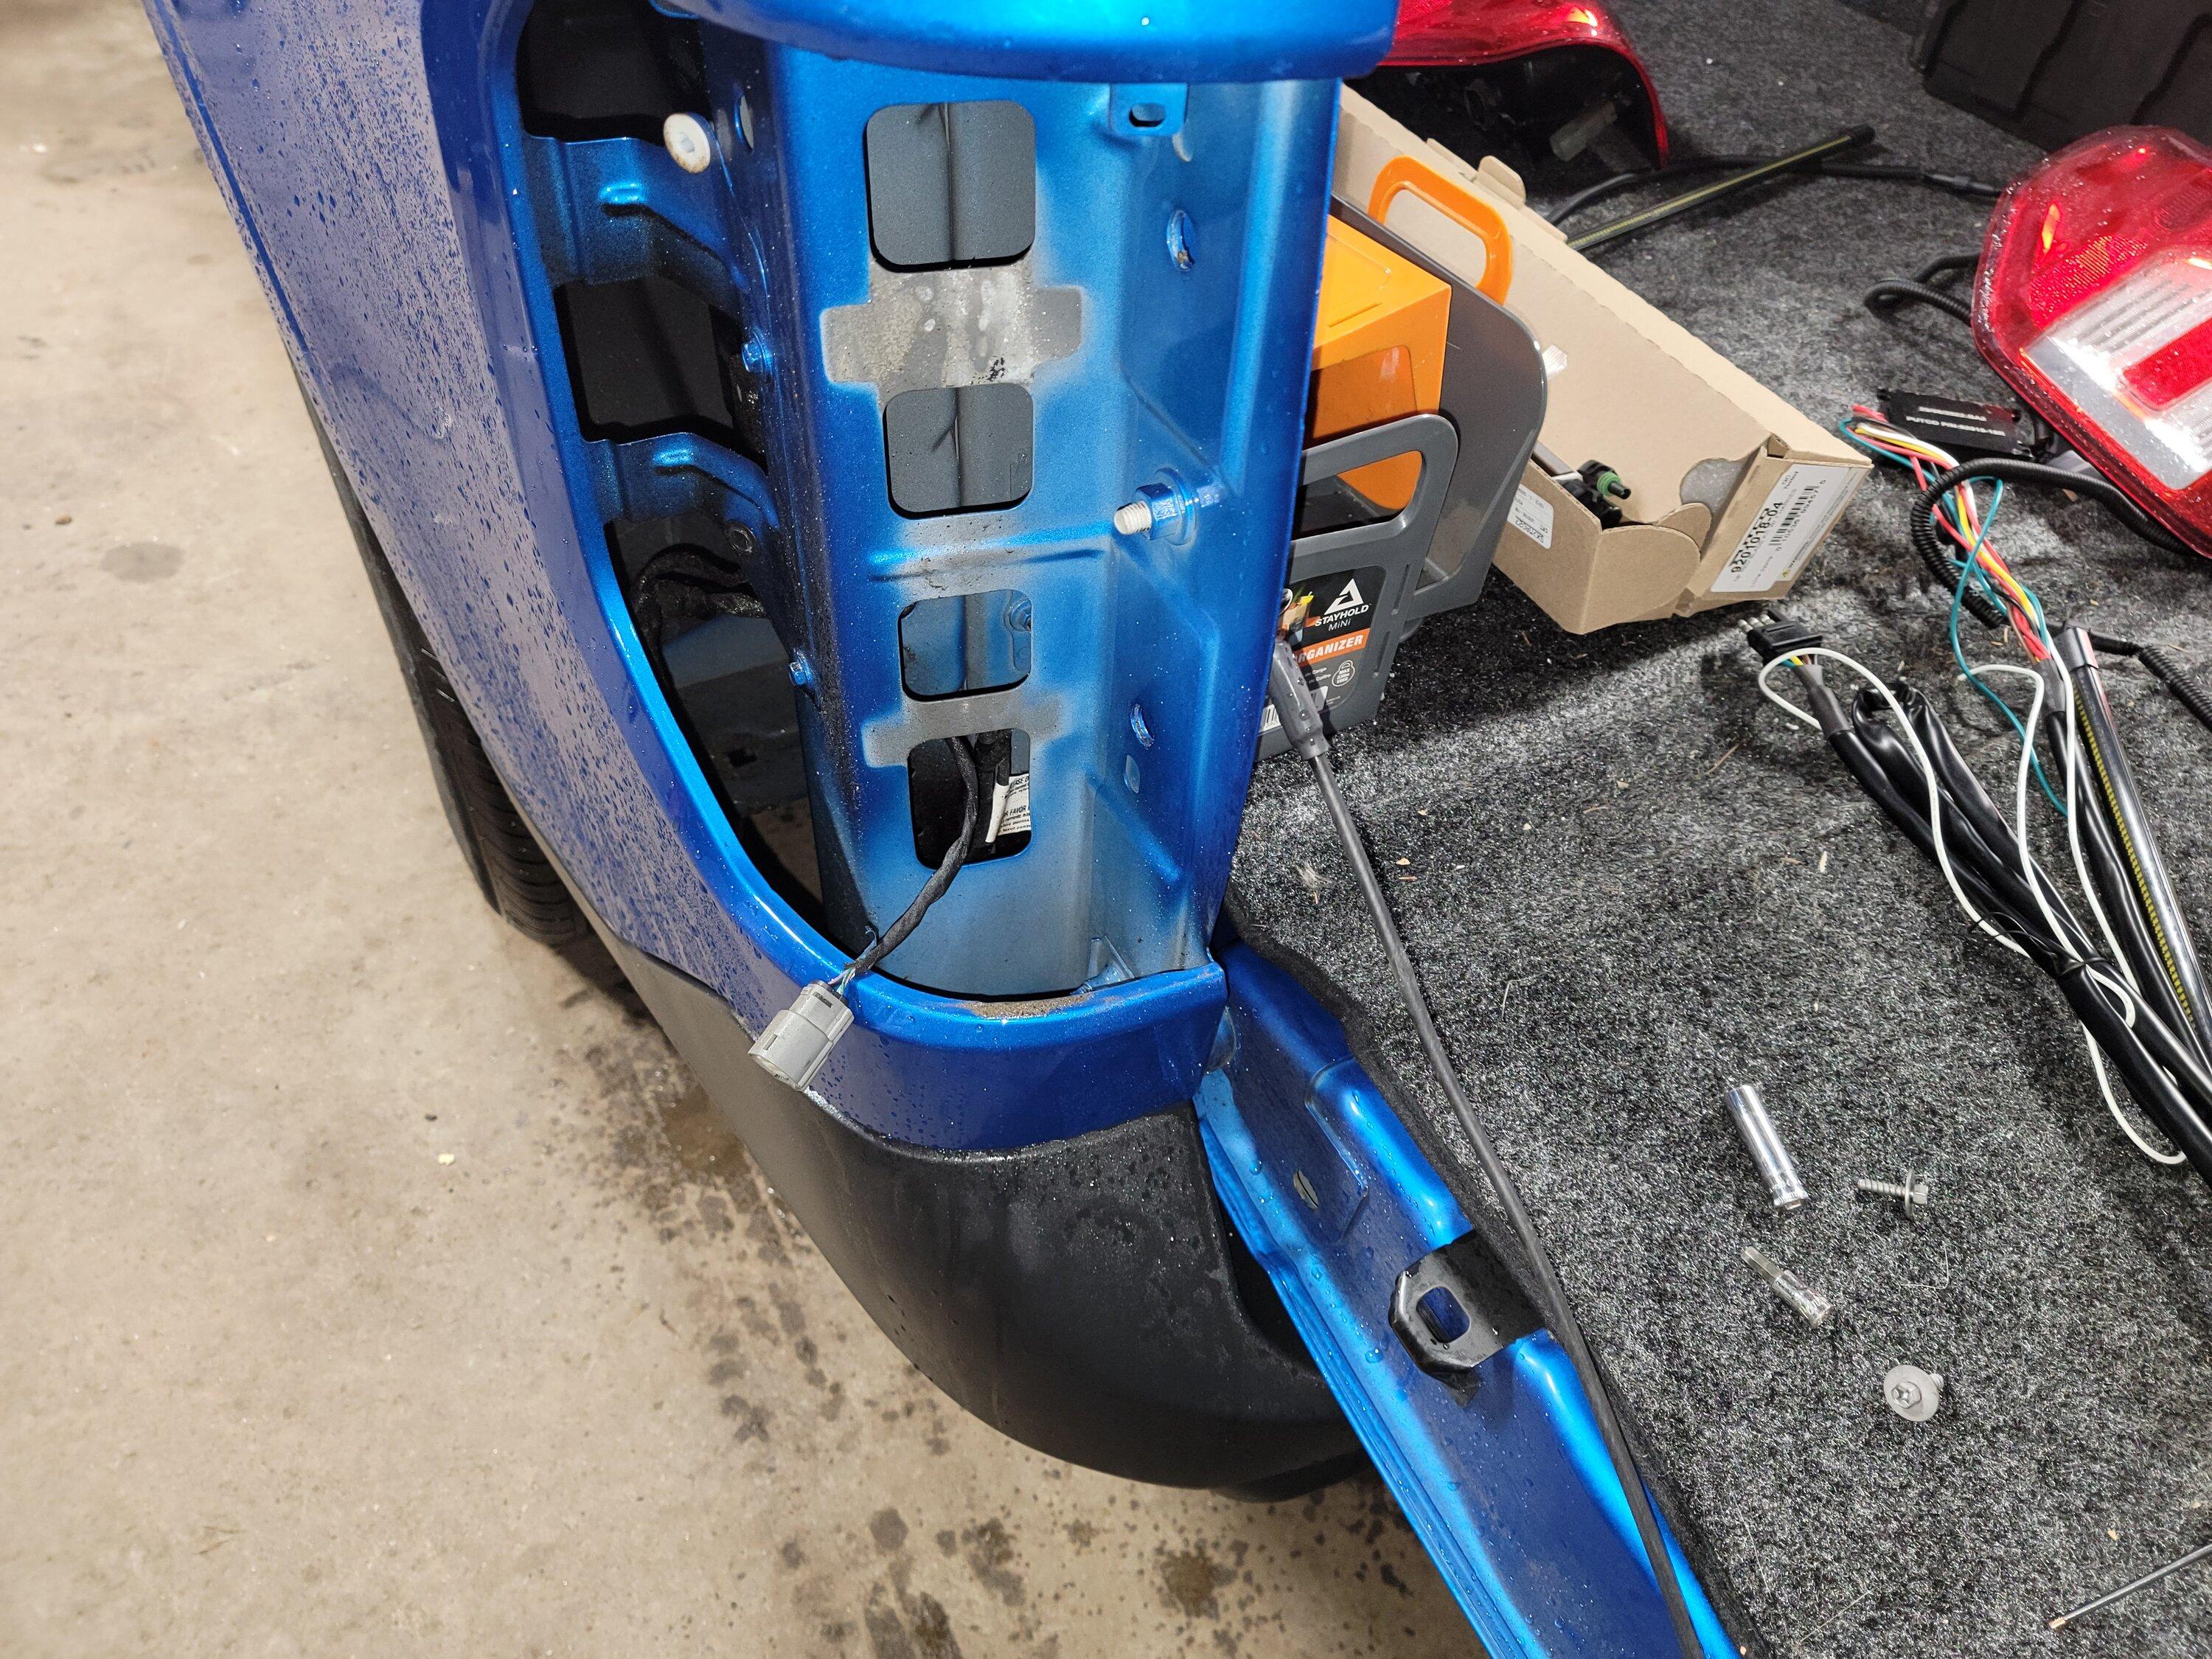
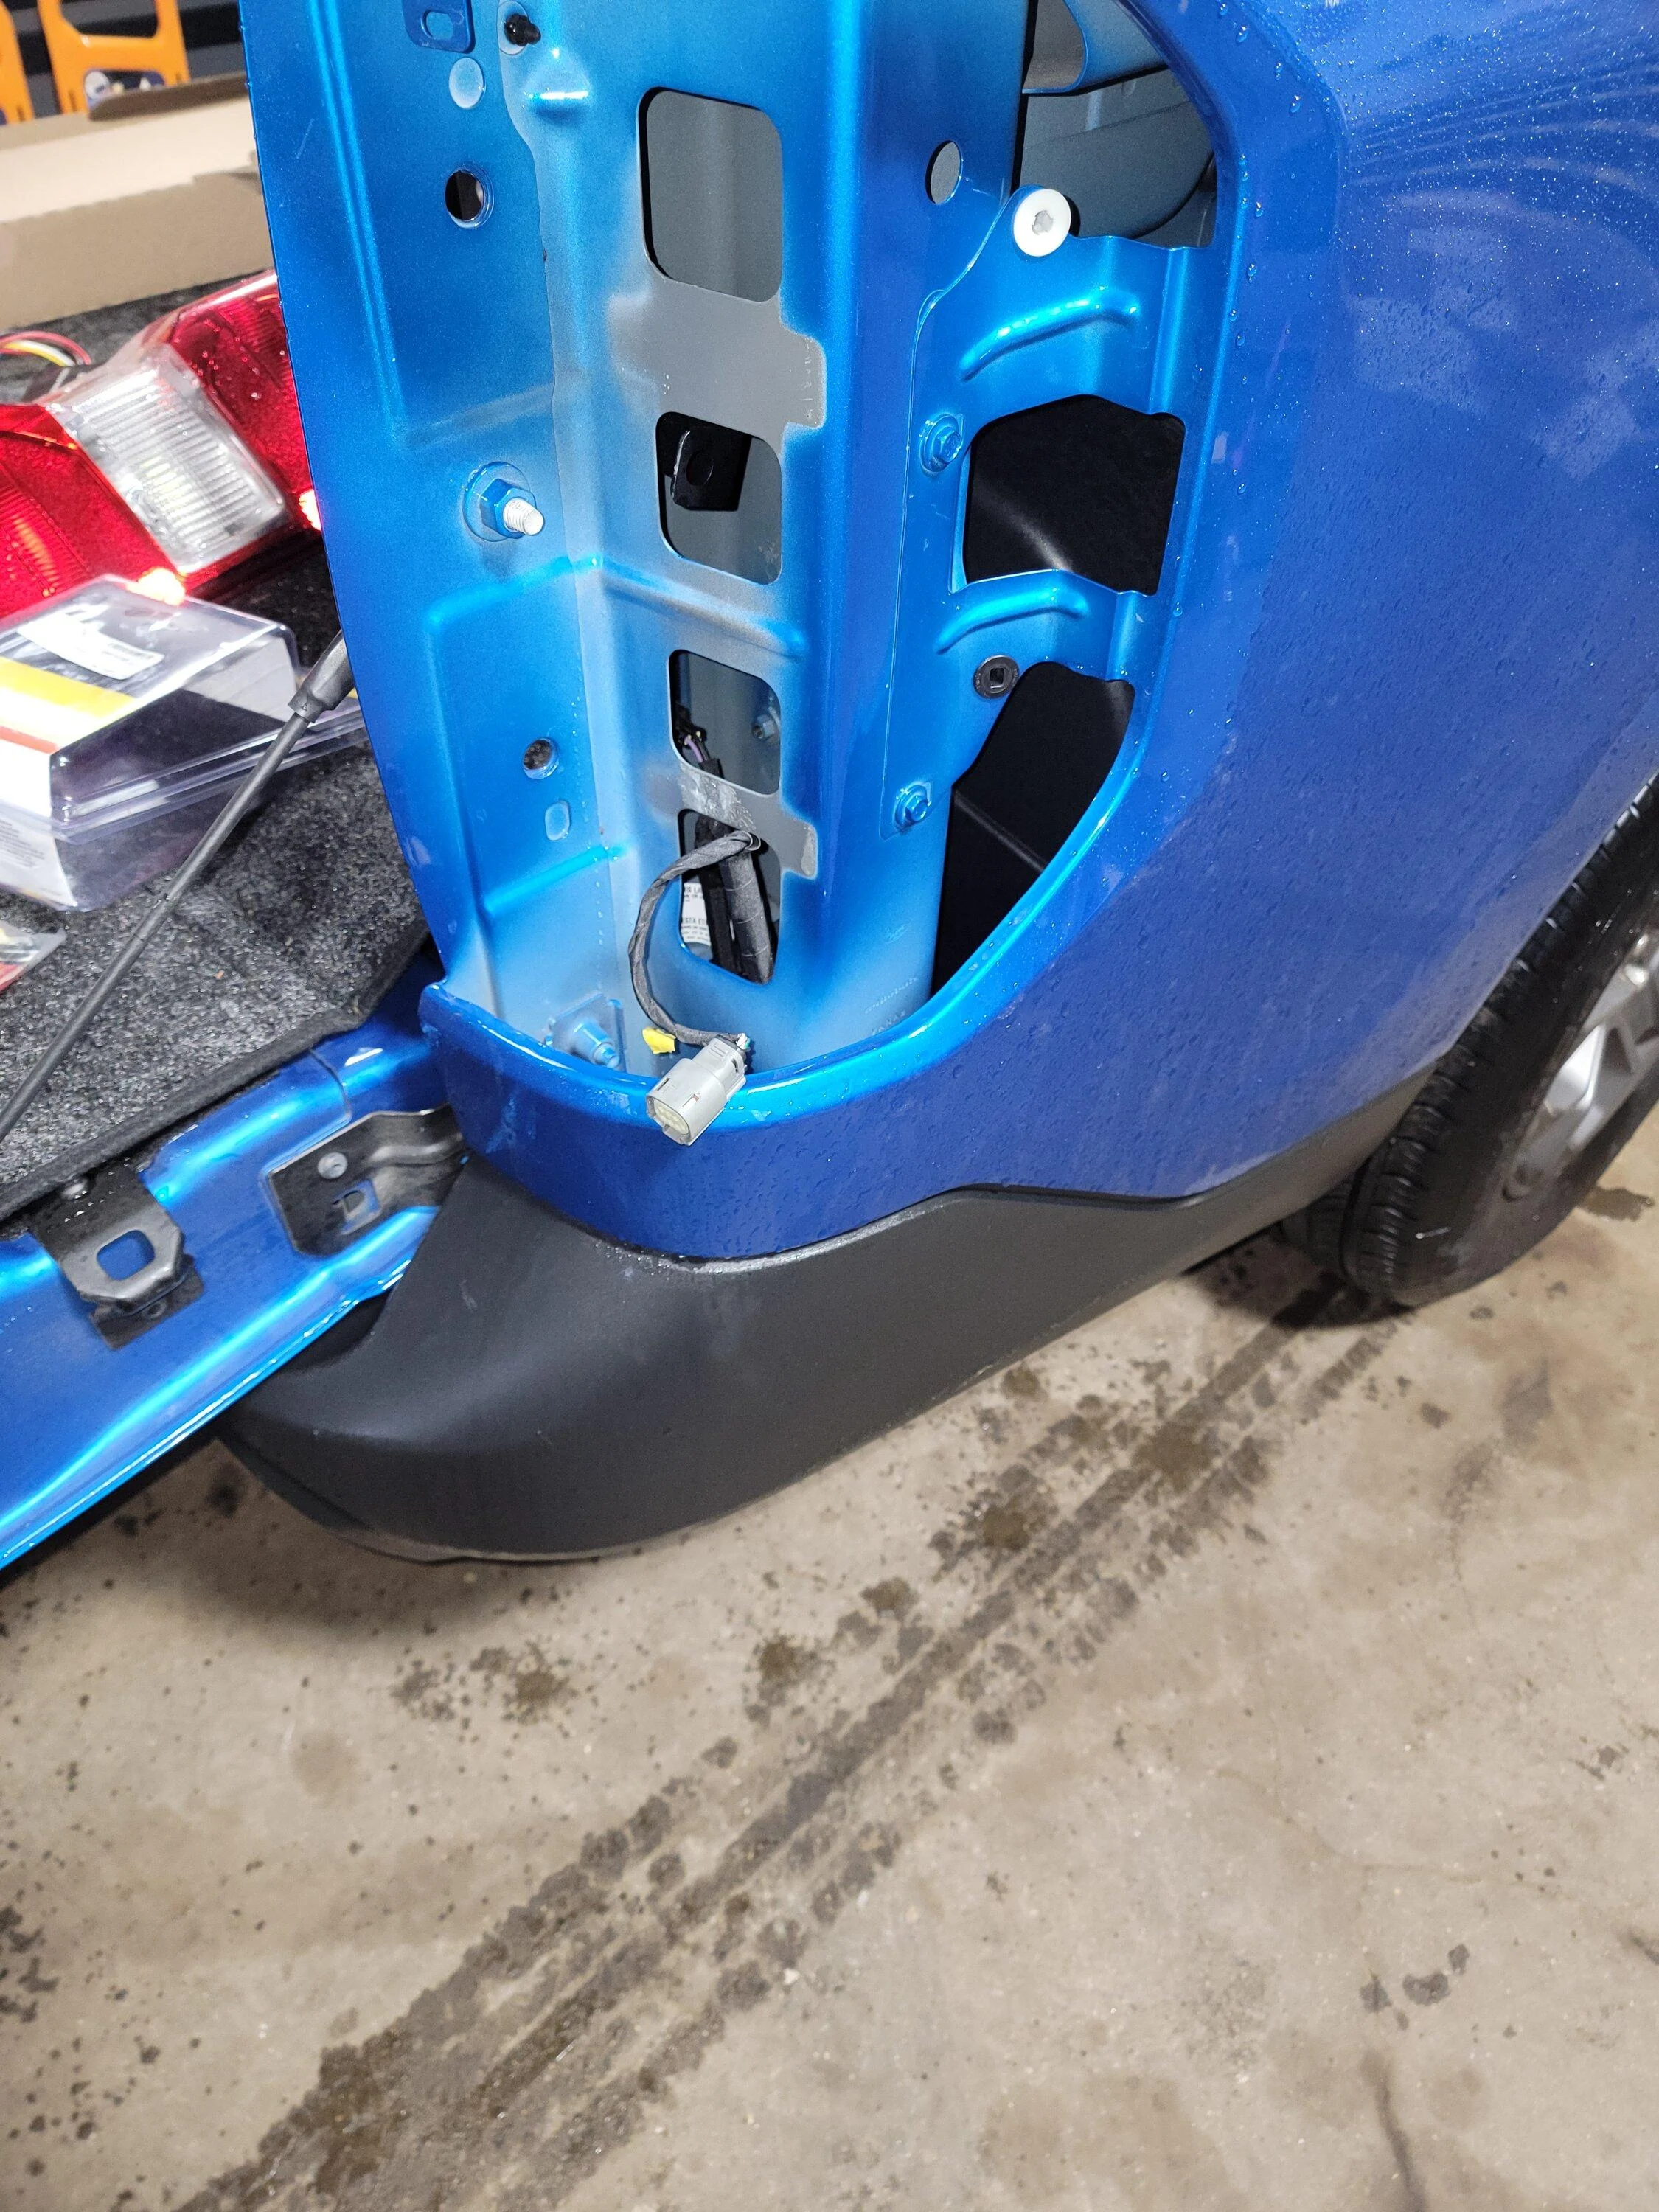
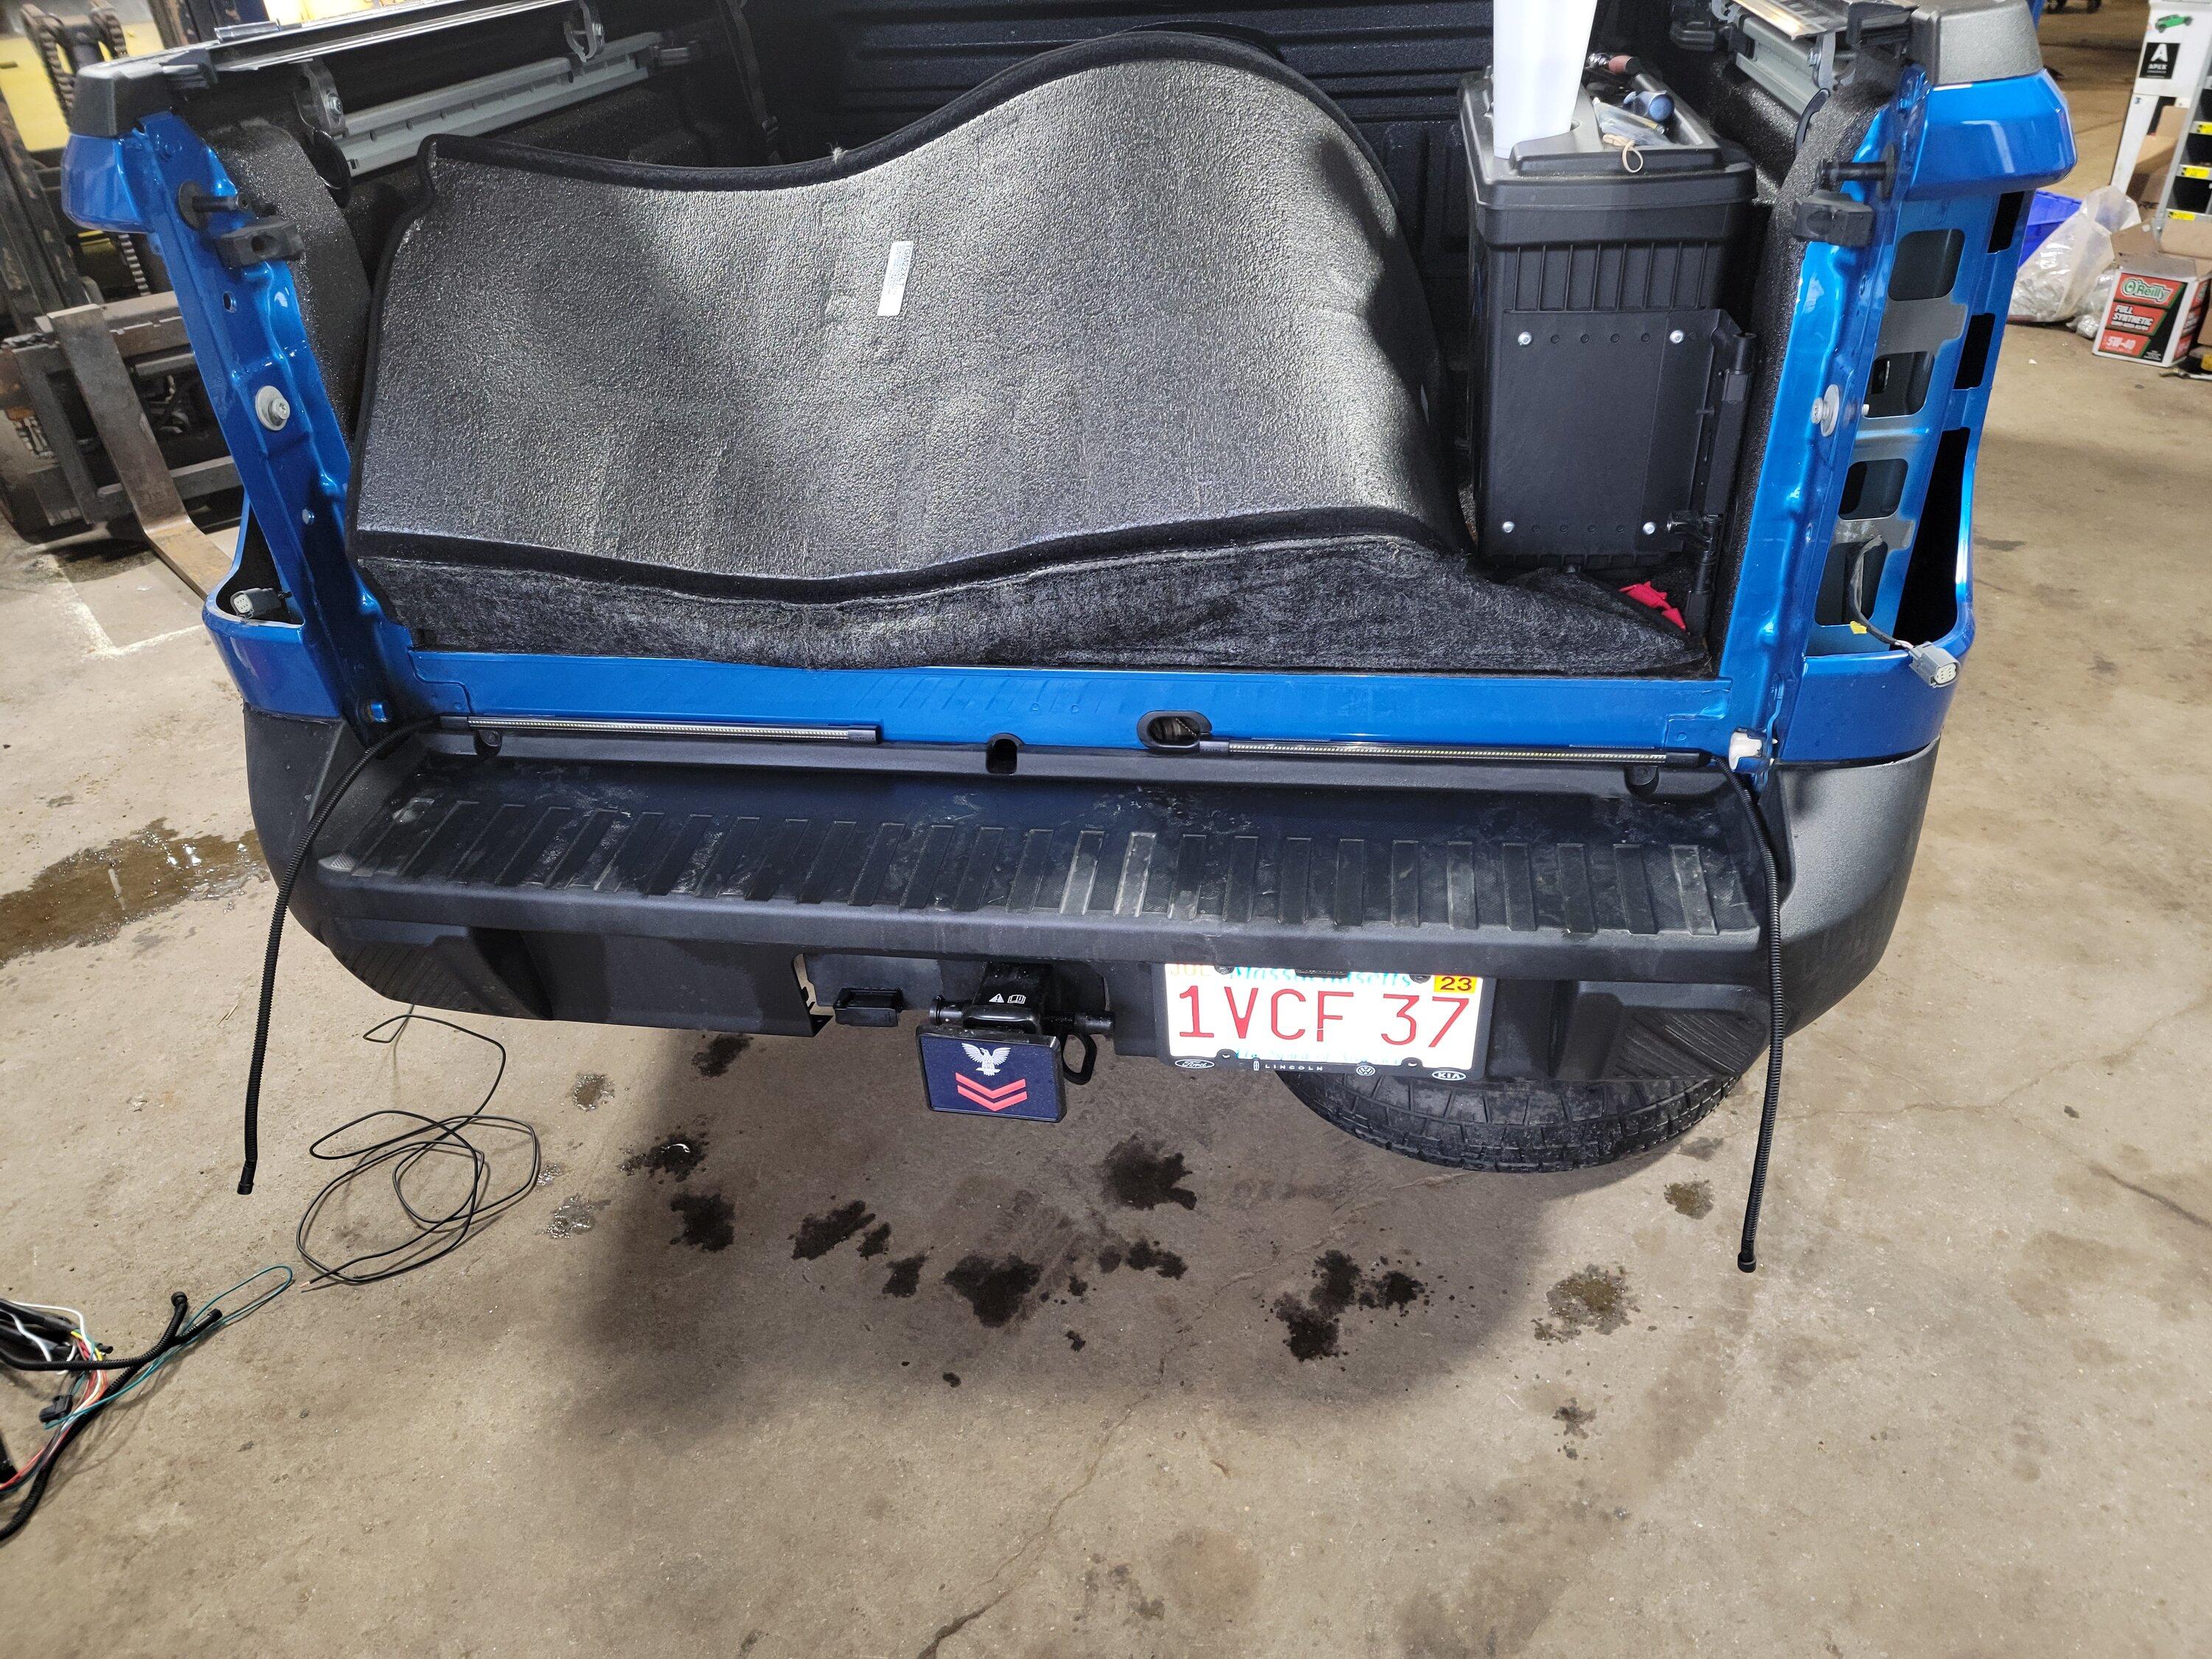
Step 1 - remove both taillights since the the Curt unit will plug into both. It is necessary to drop the spare tire and remove a plastic guard to plug into the passenger side harness. The green wire end of the Curt harness then gets fed up through the taillight opening.
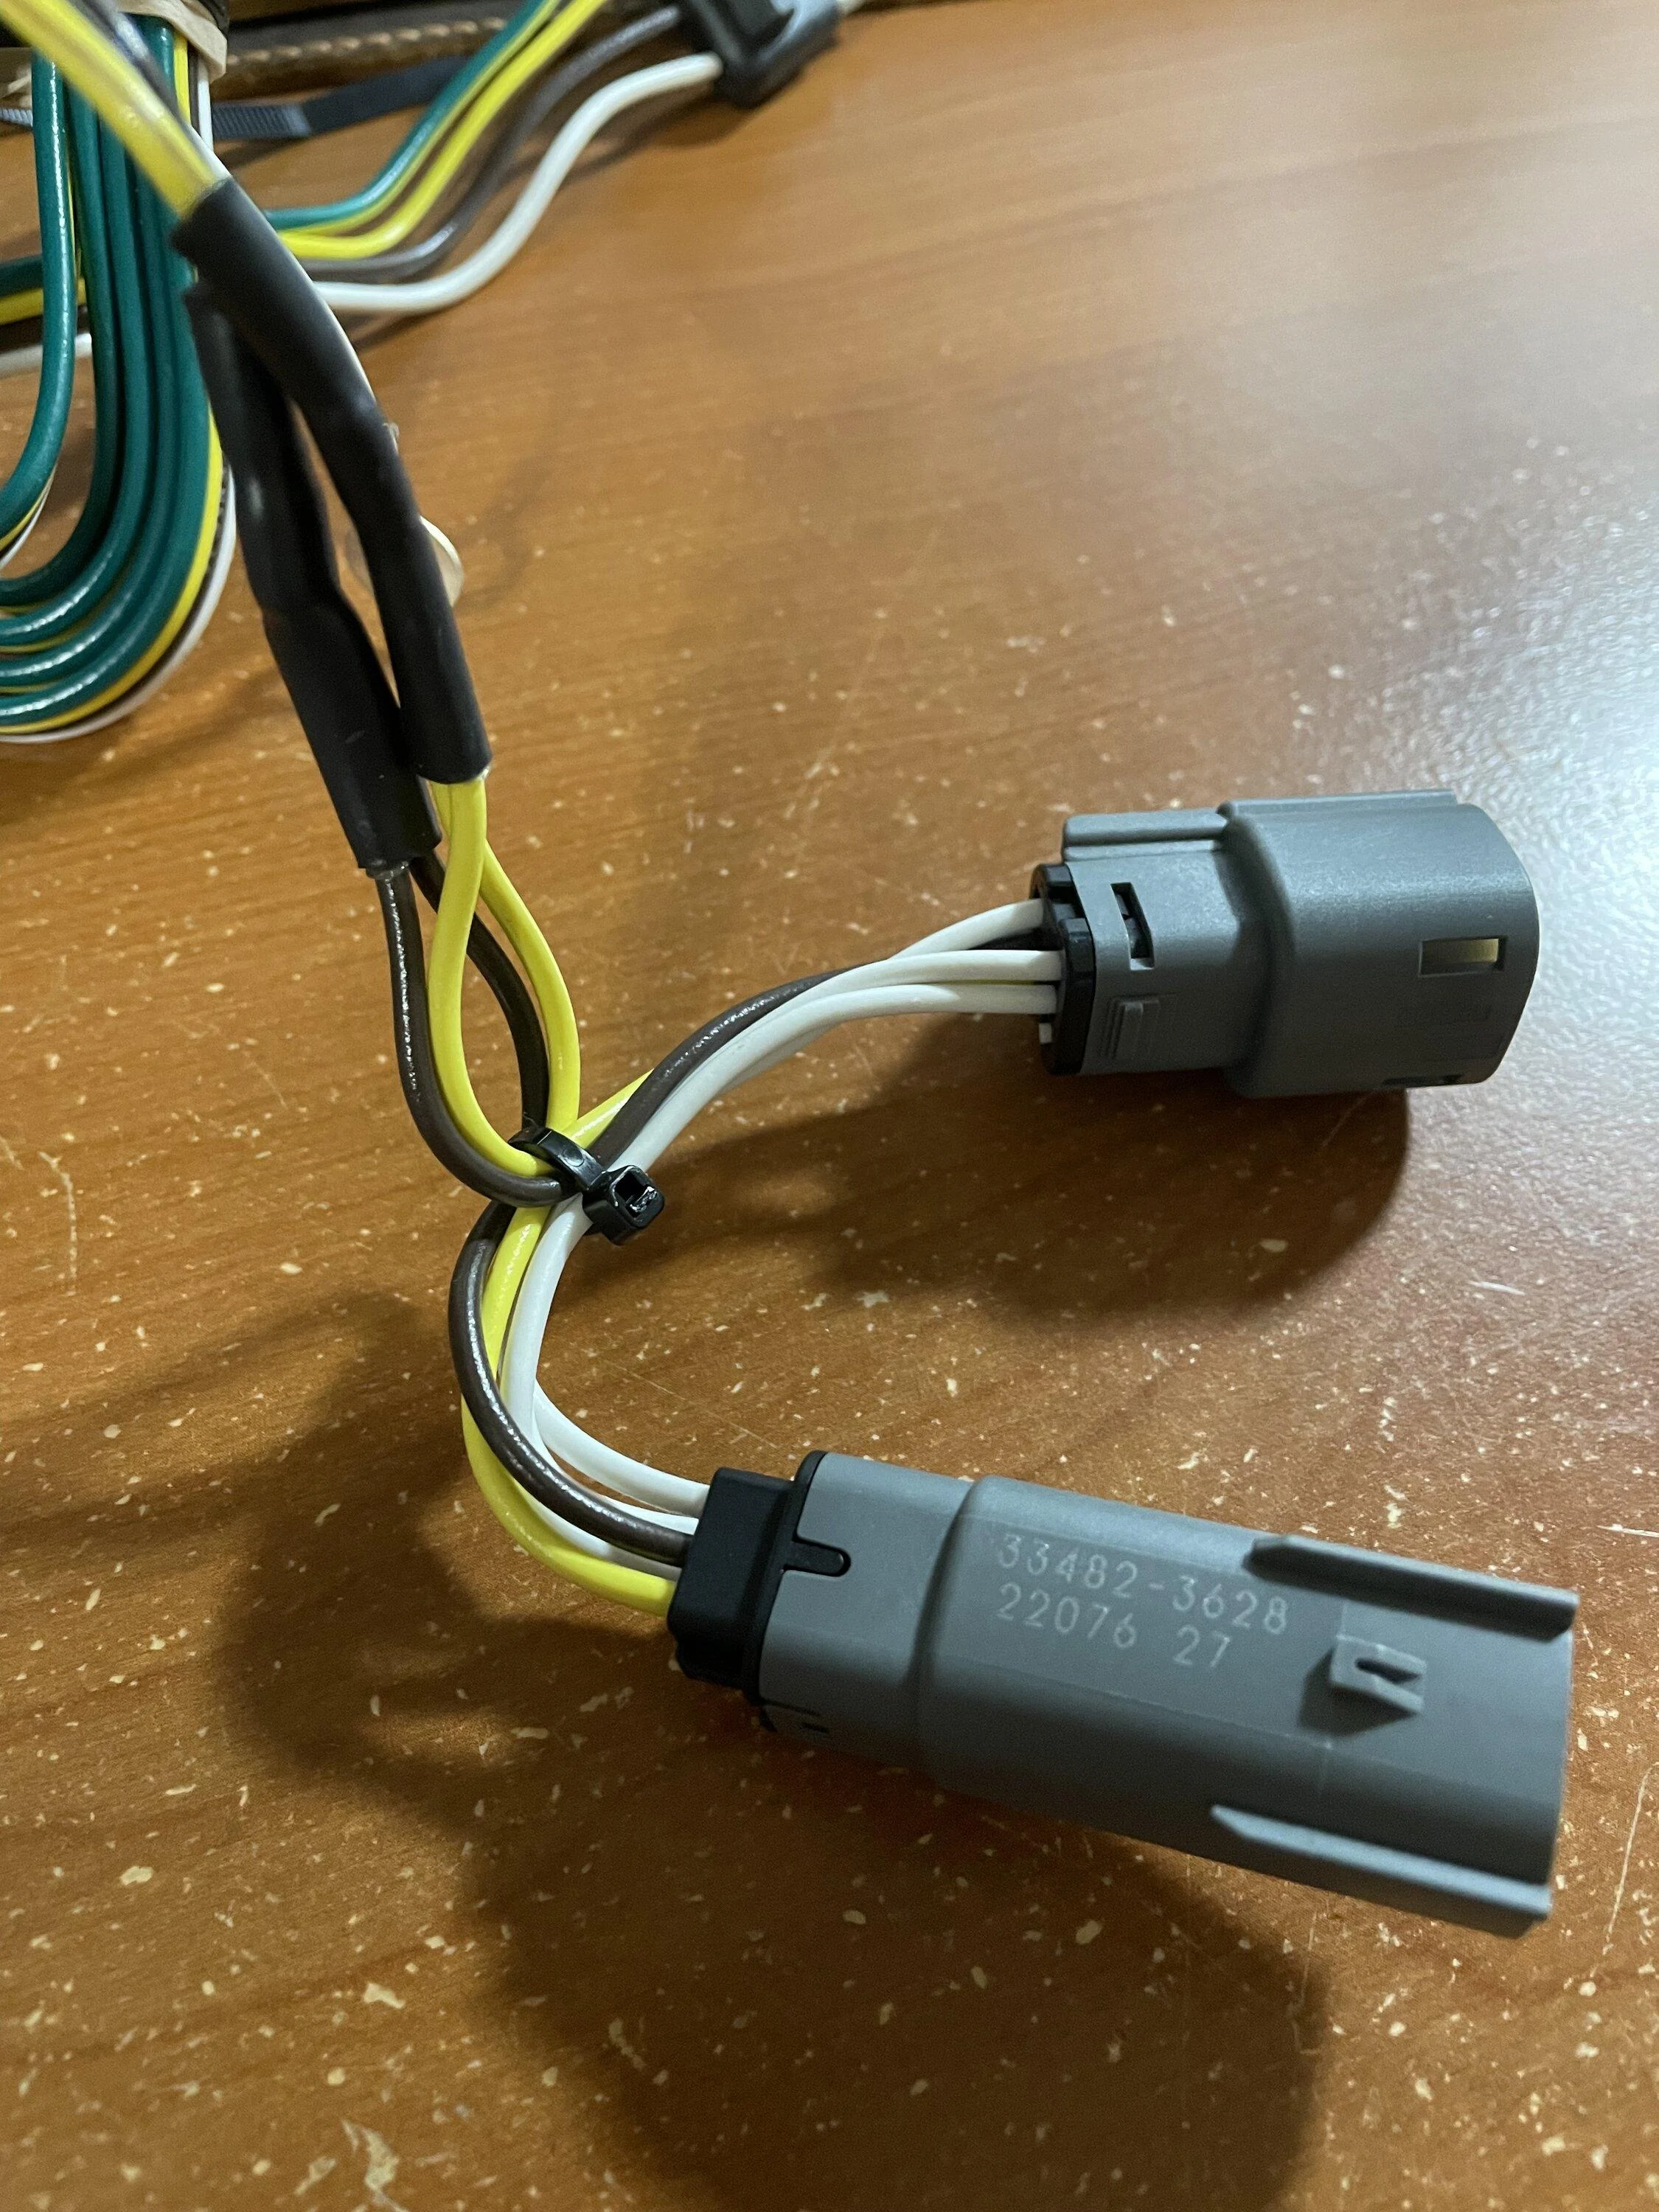
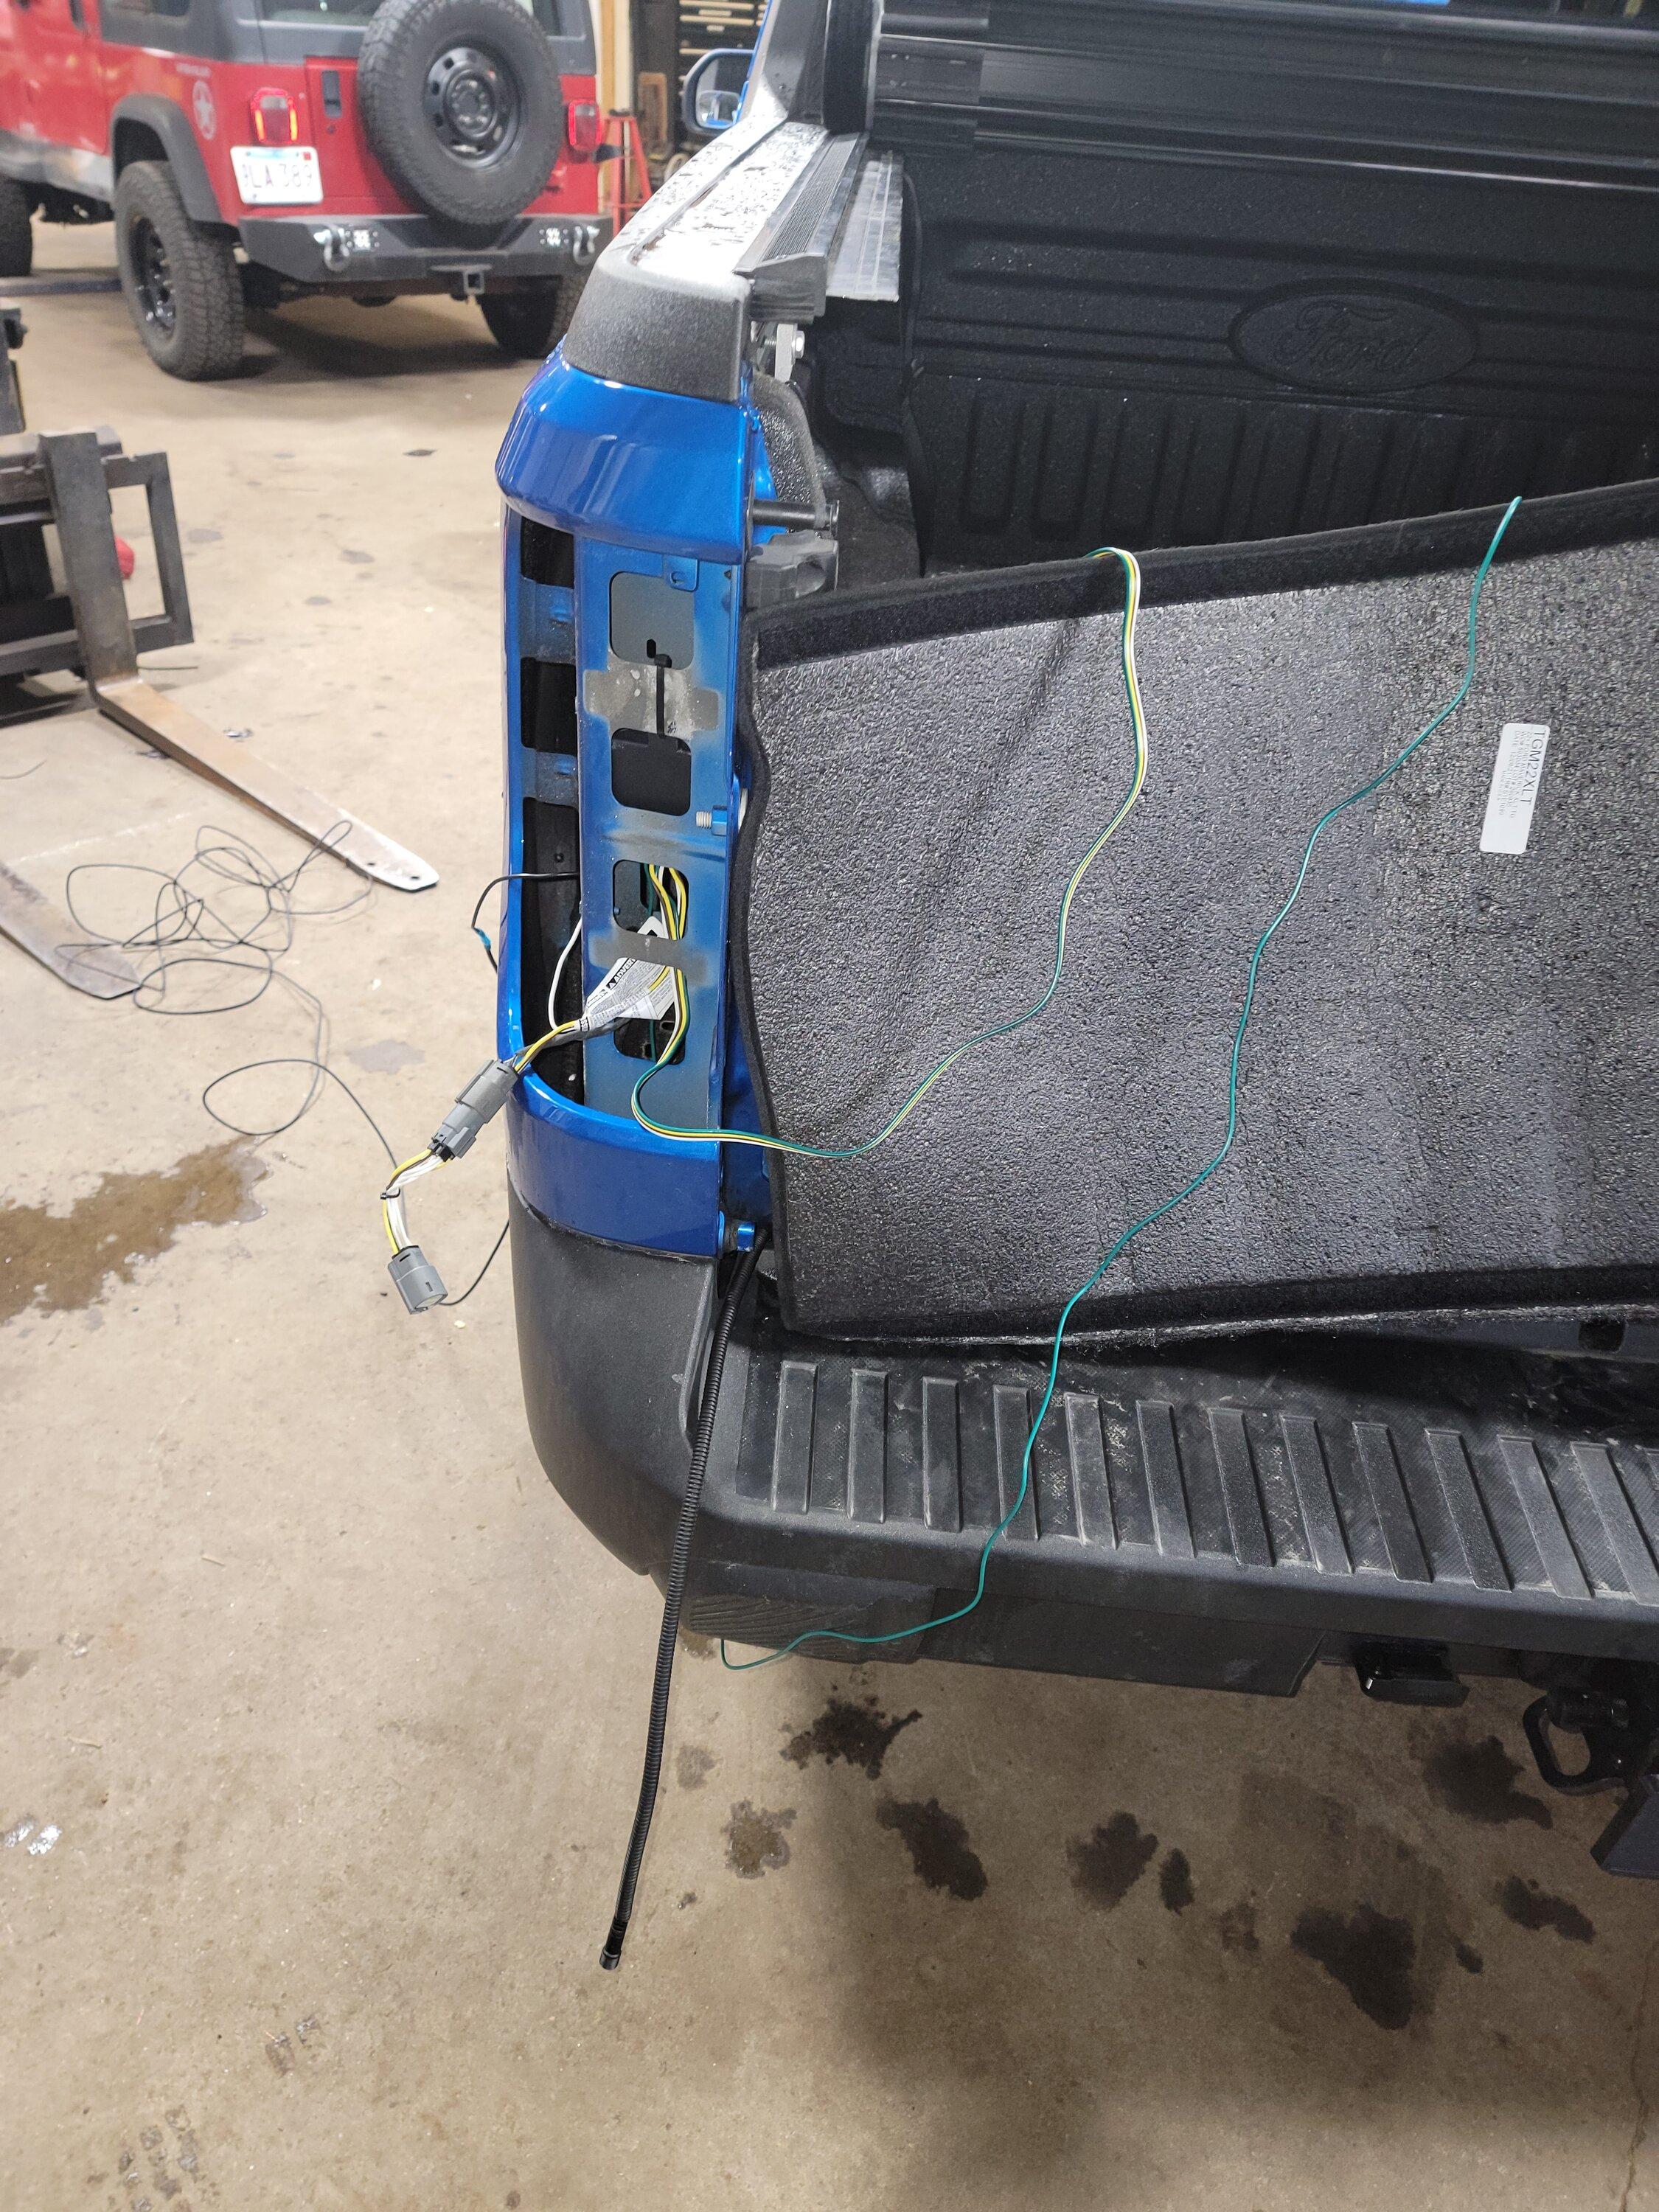
Step 2 - connect the Curt harness to the taillight plug, leaving the small pigtail to plug into the taillight itself. The green wire will run to the passenger side taillight and plug in there as well. The reverse wire from the light bar will need to be hardwired into the white reverse wire on the Curt harness. An optional step we took was to hardwire the Curt harness and light bar together, eliminating the 4-pin connectors (and the potential for corrosion).

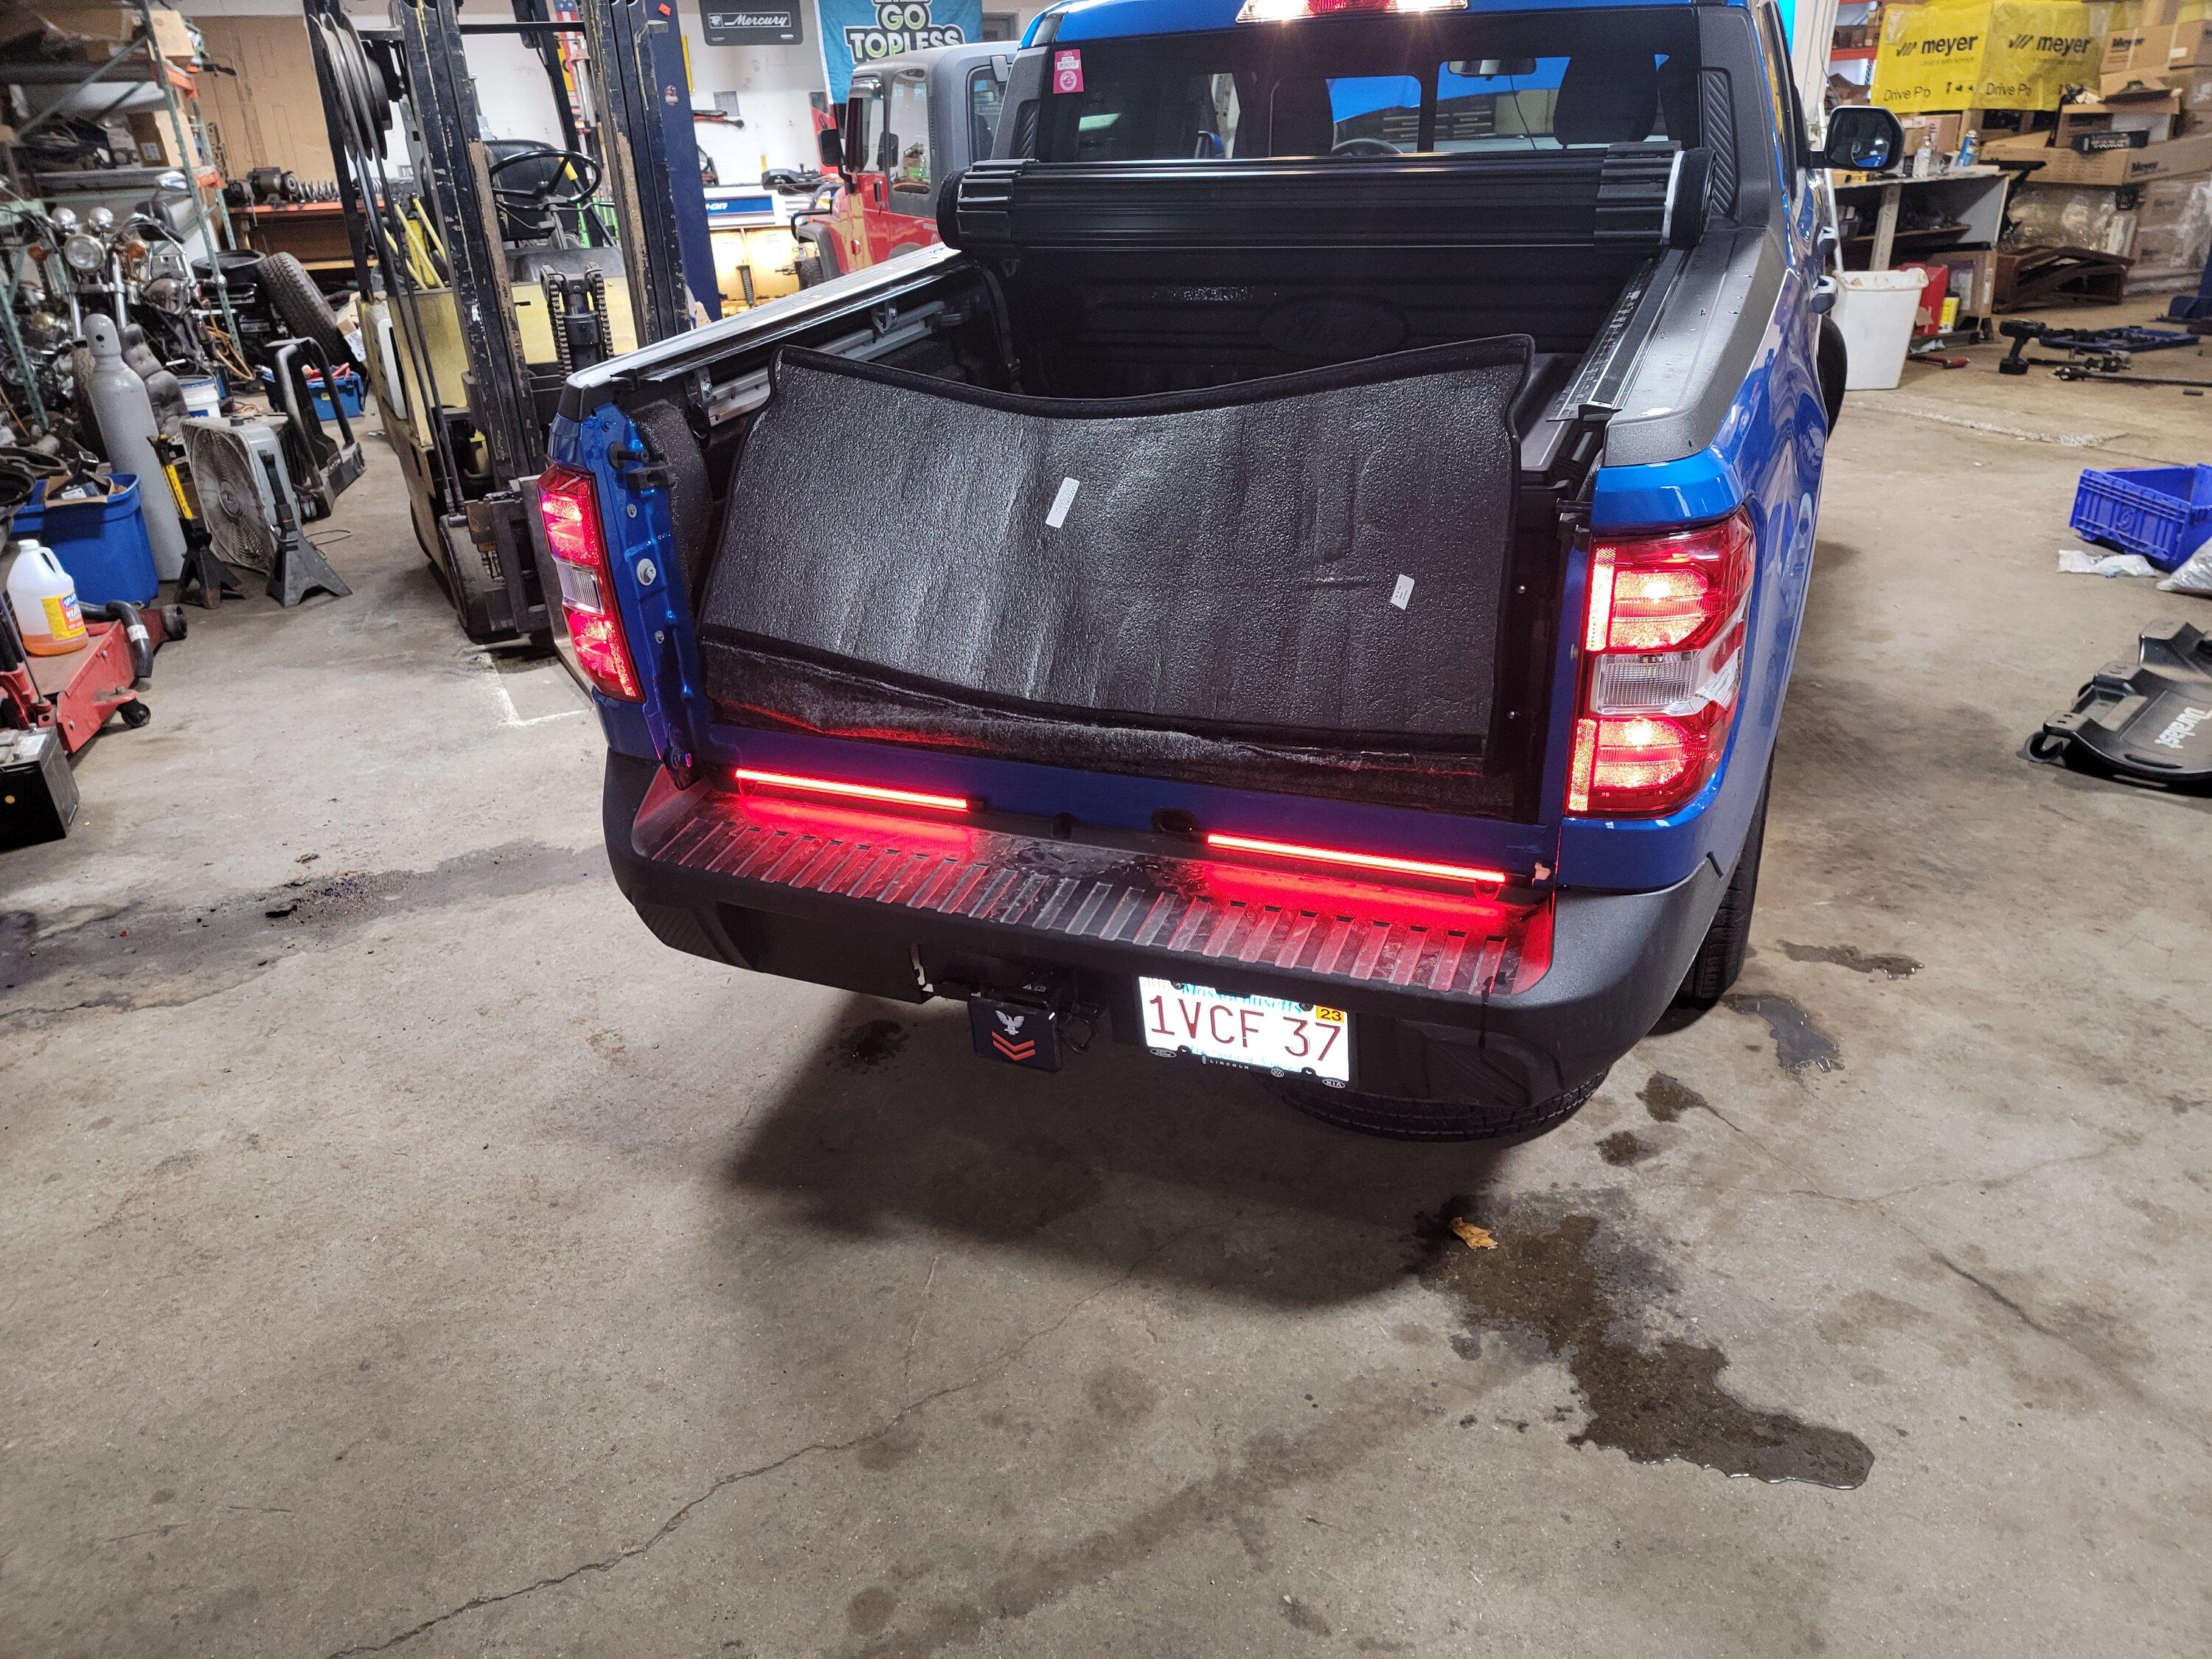
Step 3 - mounting the light bar sections. In my case, I chose a split bar to leave the spare tire access hole clear. The light bar sections are attached with 3M dual action velcro strips (2 per bar), which has two advantages. One is that the bar can be moved, if necessary, and the other is that the velcro strips raise the bar enough to overcome the panel overlay near the end of the bumper.
Step 4 - the black wire seen on the floor at left is the power wire that runs up to the battery. There is another plastic shield amidships that needs to be removed so the wire can be run through that area.
The final step before buttoning everything back up was to test everything again. Prior to running all the wires, we did basic connections and then bench-tested the light bar laying on the tailgate. Once we saw that it worked, the installation proceeded.
Start to finish install time was around 3.5 hours but that was partly due to interruptions at the shop and partly due to figuring out how best to run the wires on a Maverick (this is the first one my old shop has worked on).
The installation:
Step 1 - remove both taillights since the the Curt unit will plug into both. It is necessary to drop the spare tire and remove a plastic guard to plug into the passenger side harness. The green wire end of the Curt harness then gets fed up through the taillight opening.
Step 2 - connect the Curt harness to the taillight plug, leaving the small pigtail to plug into the taillight itself. The green wire will run to the passenger side taillight and plug in there as well. The reverse wire from the light bar will need to be hardwired into the white reverse wire on the Curt harness. An optional step we took was to hardwire the Curt harness and light bar together, eliminating the 4-pin connectors (and the potential for corrosion).
Step 3 - mounting the light bar sections. In my case, I chose a split bar to leave the spare tire access hole clear. The light bar sections are attached with 3M dual action velcro strips (2 per bar), which has two advantages. One is that the bar can be moved, if necessary, and the other is that the velcro strips raise the bar enough to overcome the panel overlay near the end of the bumper.
Step 4 - the black wire seen on the floor at left is the power wire that runs up to the battery. There is another plastic shield amidships that needs to be removed so the wire can be run through that area.
The final step before buttoning everything back up was to test everything again. Prior to running all the wires, we did basic connections and then bench-tested the light bar laying on the tailgate. Once we saw that it worked, the installation proceeded.
Start to finish install time was around 3.5 hours but that was partly due to interruptions at the shop and partly due to figuring out how best to run the wires on a Maverick (this is the first one my old shop has worked on).
Sponsored

") Thanks!
Thanks!