
Has anyone installed this on a 2025 yet? I’m struggling to figure out the instructions. It looks different to me. The muffler isnt in this area
Sponsored
I’m going to install mine in the next hour. If you look through these threads you’ll note that the resonator has been replaced with the in pipe screen.Has anyone installed this on a 2025 yet? I’m struggling to figure out the instructions. It looks different to me. The muffler isnt in this area
Curious if that bolt in step 1 is painted over for you as well.I’m going to install mine in the next hour. If you look through these threads you’ll note that the resonator has been replaced with the in pipe screen.
good luck!
It was but it came off very easily and I hit it with a few squirts of fluid film after I was done. About to post a few photos.Curious if that bolt in step 1 is painted over for you as well.
Following, want to install on '25 also if it's the same/straight forward. Thanks for going first!I’m going to install mine in the next hour. If you look through these threads you’ll note that the resonator has been replaced with the in pipe screen.
good luck!
I’ve never installed it on a 22-24 but the biggest “issue” I had was identifying the proper locations for the hanger/brackets.Following, want to install on '25 also if it's the same/straight forward. Thanks for going first!
Id suggest a few bourbons before hand.Thanks Mabett! Got mine in from Amazon day before yesterday and will be installing tomorrow. Thanks in advance to those posting with suggestions and pictures. A BIG shout out to Mabett guy, "Ryan". I had sent him a PM about the rebate and in about 30 minutes it was credited back to my Visa! This guy is on top of customer service for me and today that is hard to find elsewhere. Now for tomorrow's install, lets see how many cuss words come out and do I use the bourbon or a couple good hefeweizen beers?
Thanks for the tips! Only 15 degrees here this morning, and supposed to be pretty cold tomorrow. Will start the heater up a couple hours ahead of my install time, then git with it!Id suggest a few bourbons before hand.
My advice is to install the spring nuts (or whatever they call them) and then you’ll quickly see what plate is the front and the rear.
Youll need to remove the two bolts on either side of the exhaust hanger and you can use those to hold up the rear plate which lets you know the approximate location of the brackets you add.
Overall a really easy install
That’s exactly what I did. Let the propane heater do its thing until it was upper 40s in the garage.Thanks for the tips! Only 15 degrees here this morning, and supposed to be pretty cold tomorrow. Will start the heater up a couple hours ahead of my install time, then git with it!
Is the home Depot hardware to replace the included hardware or hardware that was already on the truck?@A.Bursell - Thanks for the tips regarding the weather strip and zinc plated bolts.
https://www.homedepot.com/p/Everbil...-Steel-Flange-Bolt-2-per-Bag-802528/204281407
https://www.homedepot.com/p/Everbil...-Flange-Bolt-2-Piece-per-Bag-840198/205011282
I’ve never installed it on a 22-24 but the biggest “issue” I had was identifying the proper locations for the hanger/brackets.
The instructions are laughably bad and the 3 minute video doesn’t offer much help with it. However it is very easy to tell what the “front” and “rear” plates are and you can hold them up in their locations to give you the approximate location of where those hangers should be.
I followed @A.Bursell and used zinc coated hardware from Home Depot and also a rubber weather stripping on the front lip.
We shouldn’t have to install this part period and Mabett has done mostly a great job with this shield but the front right lip could be machine to fit better.
It is a snug fit with my rear bumper cover and that appears to be because of the back up sensors but that’s what you want right?
Took me about an hour with half of that time spent drinking beer and contemplating proper location of the brackets. Really about about 20-25 minute job.
Also for those who live in areas of salted roads. This is 306 miles on the odometer and I applied Fluid Film.
85 ft lbs on the two 18mm frame bolts. Tighten the one closer to the rear of the truck first then the other.I'm trying to use the search function here but did anyone determine the right torque spec for some of these bolts?
Thanks for the help! Did get it all done yesterday. Not hard at all, took more time rounding up my shop light, tools and blanket than anything else. The tips from you and others were spot on. Leave loose the bolts, so you can adjust things before tightening. Your advice on locations of the holes for the brackets was very helpful. I still had to spin the brackets around a few times to see how things lined up, but not bad at all. The only issue I had was those big bolts on each side of the hanger. I laughed looking at the video with the guy using the supplied micky mouse wrench! I could barely get it to break loose using my breaker bar and socket. That dude on the video HAD to have removed it first then put it back in for video purposes! The incredible Hulk himself couldn't do that with the little wrench. I did Loctite the large bolts. Have a great day!That’s exactly what I did. Let the propane heater do its thing until it was upper 40s in the garage.
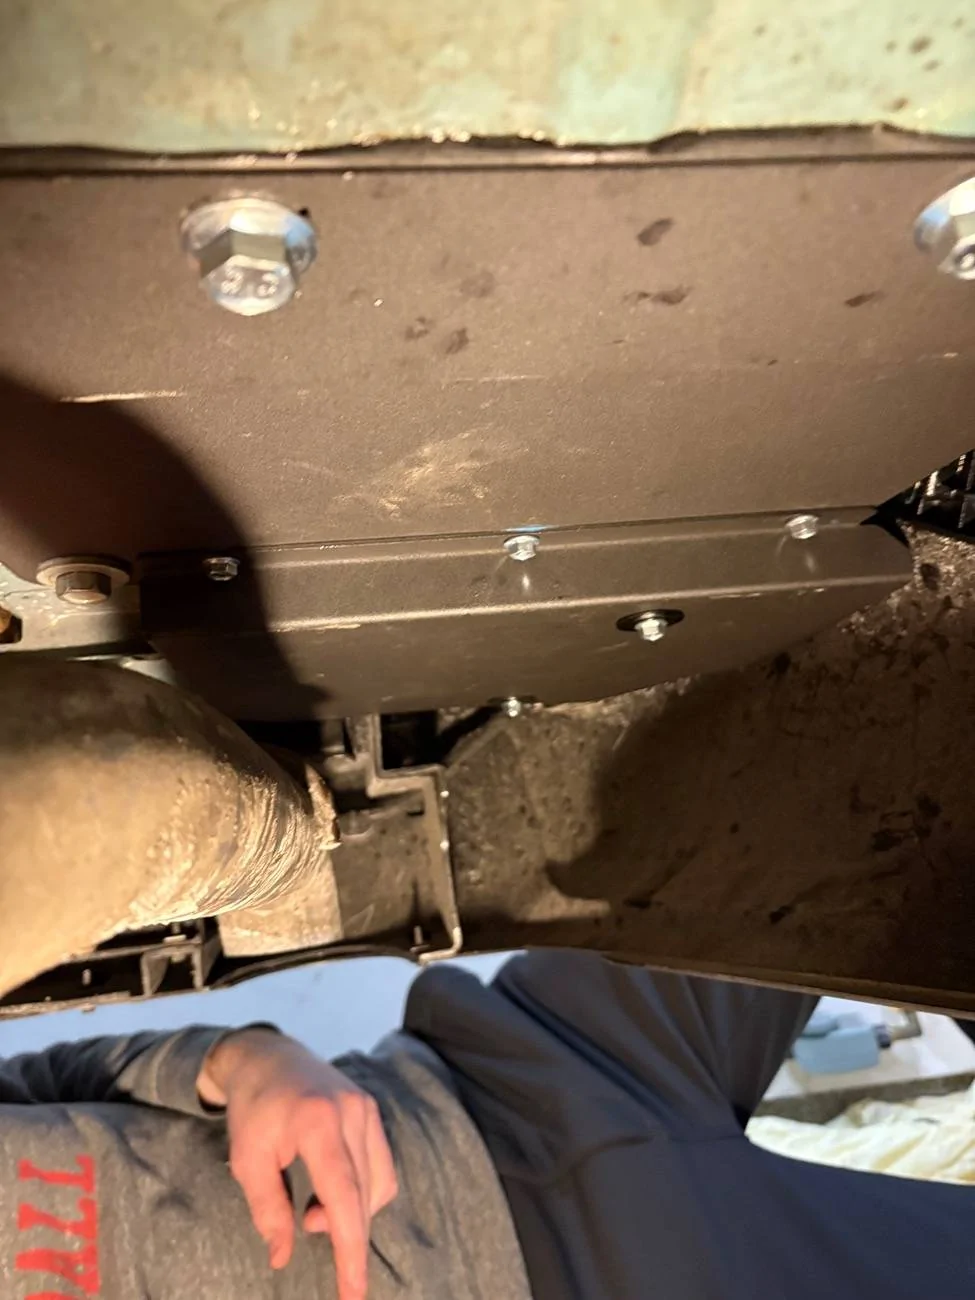
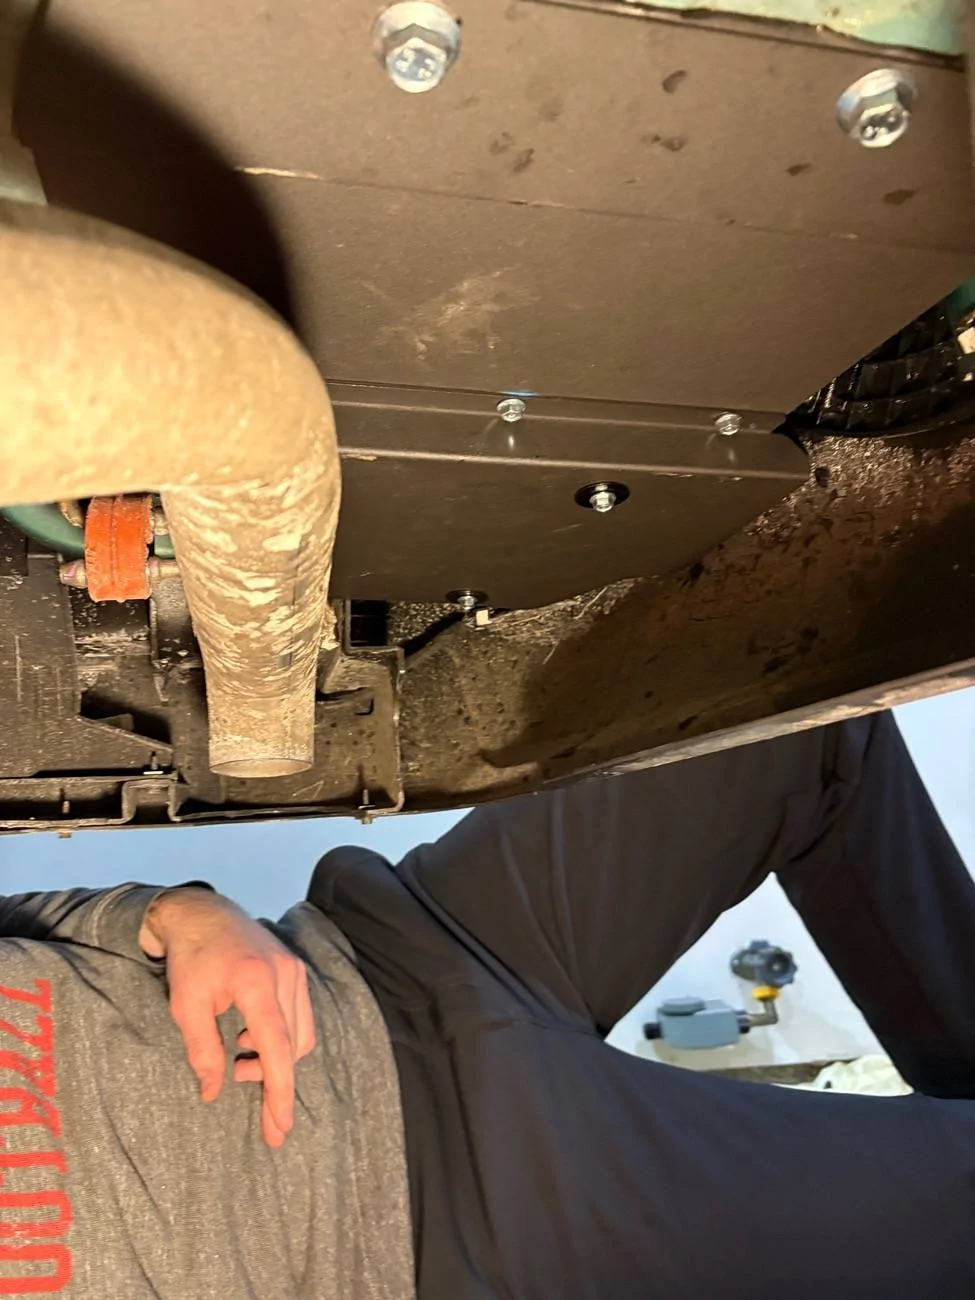
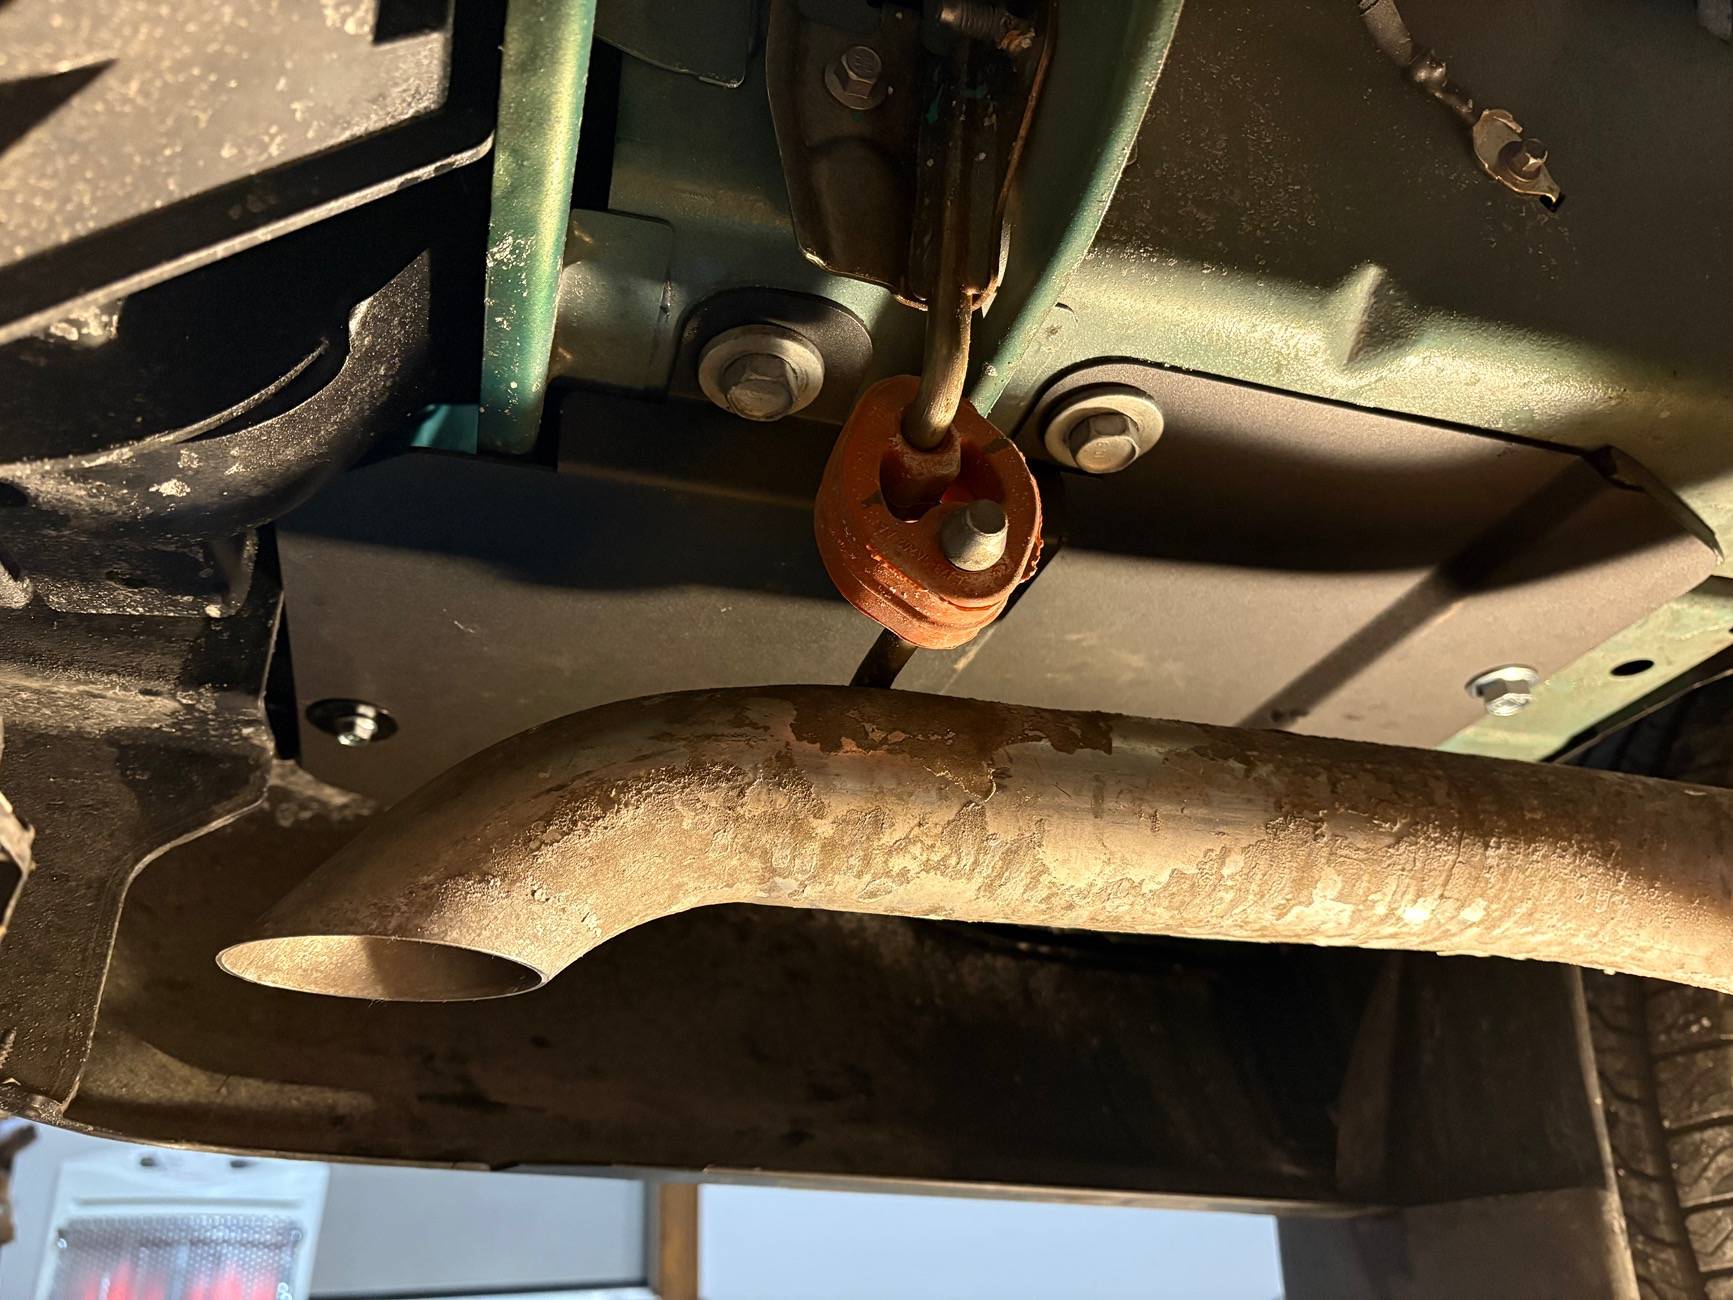
In the below picture you’ll see the two bolts you need to remove above the exhaust. Before you remove those I would just slide the rear plate into place using that as your guide to get an appropriate location for the hangers. They are both for the back piece and both are farther back than I would have expected.
That is a picture of the two existing bolts you remove and reuse. The plate to the left is your rear plate and that is going to have the two brackets/hangers.
You can see one of them for me just above the exhaust tip there with the black washer and zinc coated flange bolt.
The other is where you remove the clip for the wiring harness.
Truly an easy job. You’ll knock it out.
Awesome! I can absolutely see where others have gotten frustrated but taking your time and the tips from others makes it a breeze.Thanks for the help! Did get it all done yesterday. Not hard at all, took more time rounding up my shop light, tools and blanket than anything else. The tips from you and others were spot on. Leave loose the bolts, so you can adjust things before tightening. Your advice on locations of the holes for the brackets was very helpful. I still had to spin the brackets around a few times to see how things lined up, but not bad at all. The only issue I had was those big bolts on each side of the hanger. I laughed looking at the video with the guy using the supplied micky mouse wrench! I could barely get it to break loose using my breaker bar and socket. That dude on the video HAD to have removed it first then put it back in for video purposes! The incredible Hulk himself couldn't do that with the little wrench. I did Loctite the large bolts. Have a great day!
I wanted to do that, but the Mav was ready on a snowy Monday. Frustrating, but nothing I can do about the weather.Ordered. Thanks!!! Applying Fluid Film before she ever sees salt and this will add further protection.
