
- Thread starter
- #1
Hello MTC,
I recently took apart my Maverick and decided to BAP my headlights. This is a very tedious process, but if you are patient, it is something that you can do. I hope this post contains information that will make more forum members more confident in BAP'ing their headlights, as I did.
Before going into the process, I will say that this is a tedious process. There is lots of patience required to separate the headlights. I am by no means a professional mechanic, but I have experience rebuilding cars.
The first step you will need to do is disassemble the front end of your Maverick. Several different videos discuss how to disassemble your front end. I found MrBoom_5.0's video very helpful.
MrBoom_5.0 Front End Disassembly Video
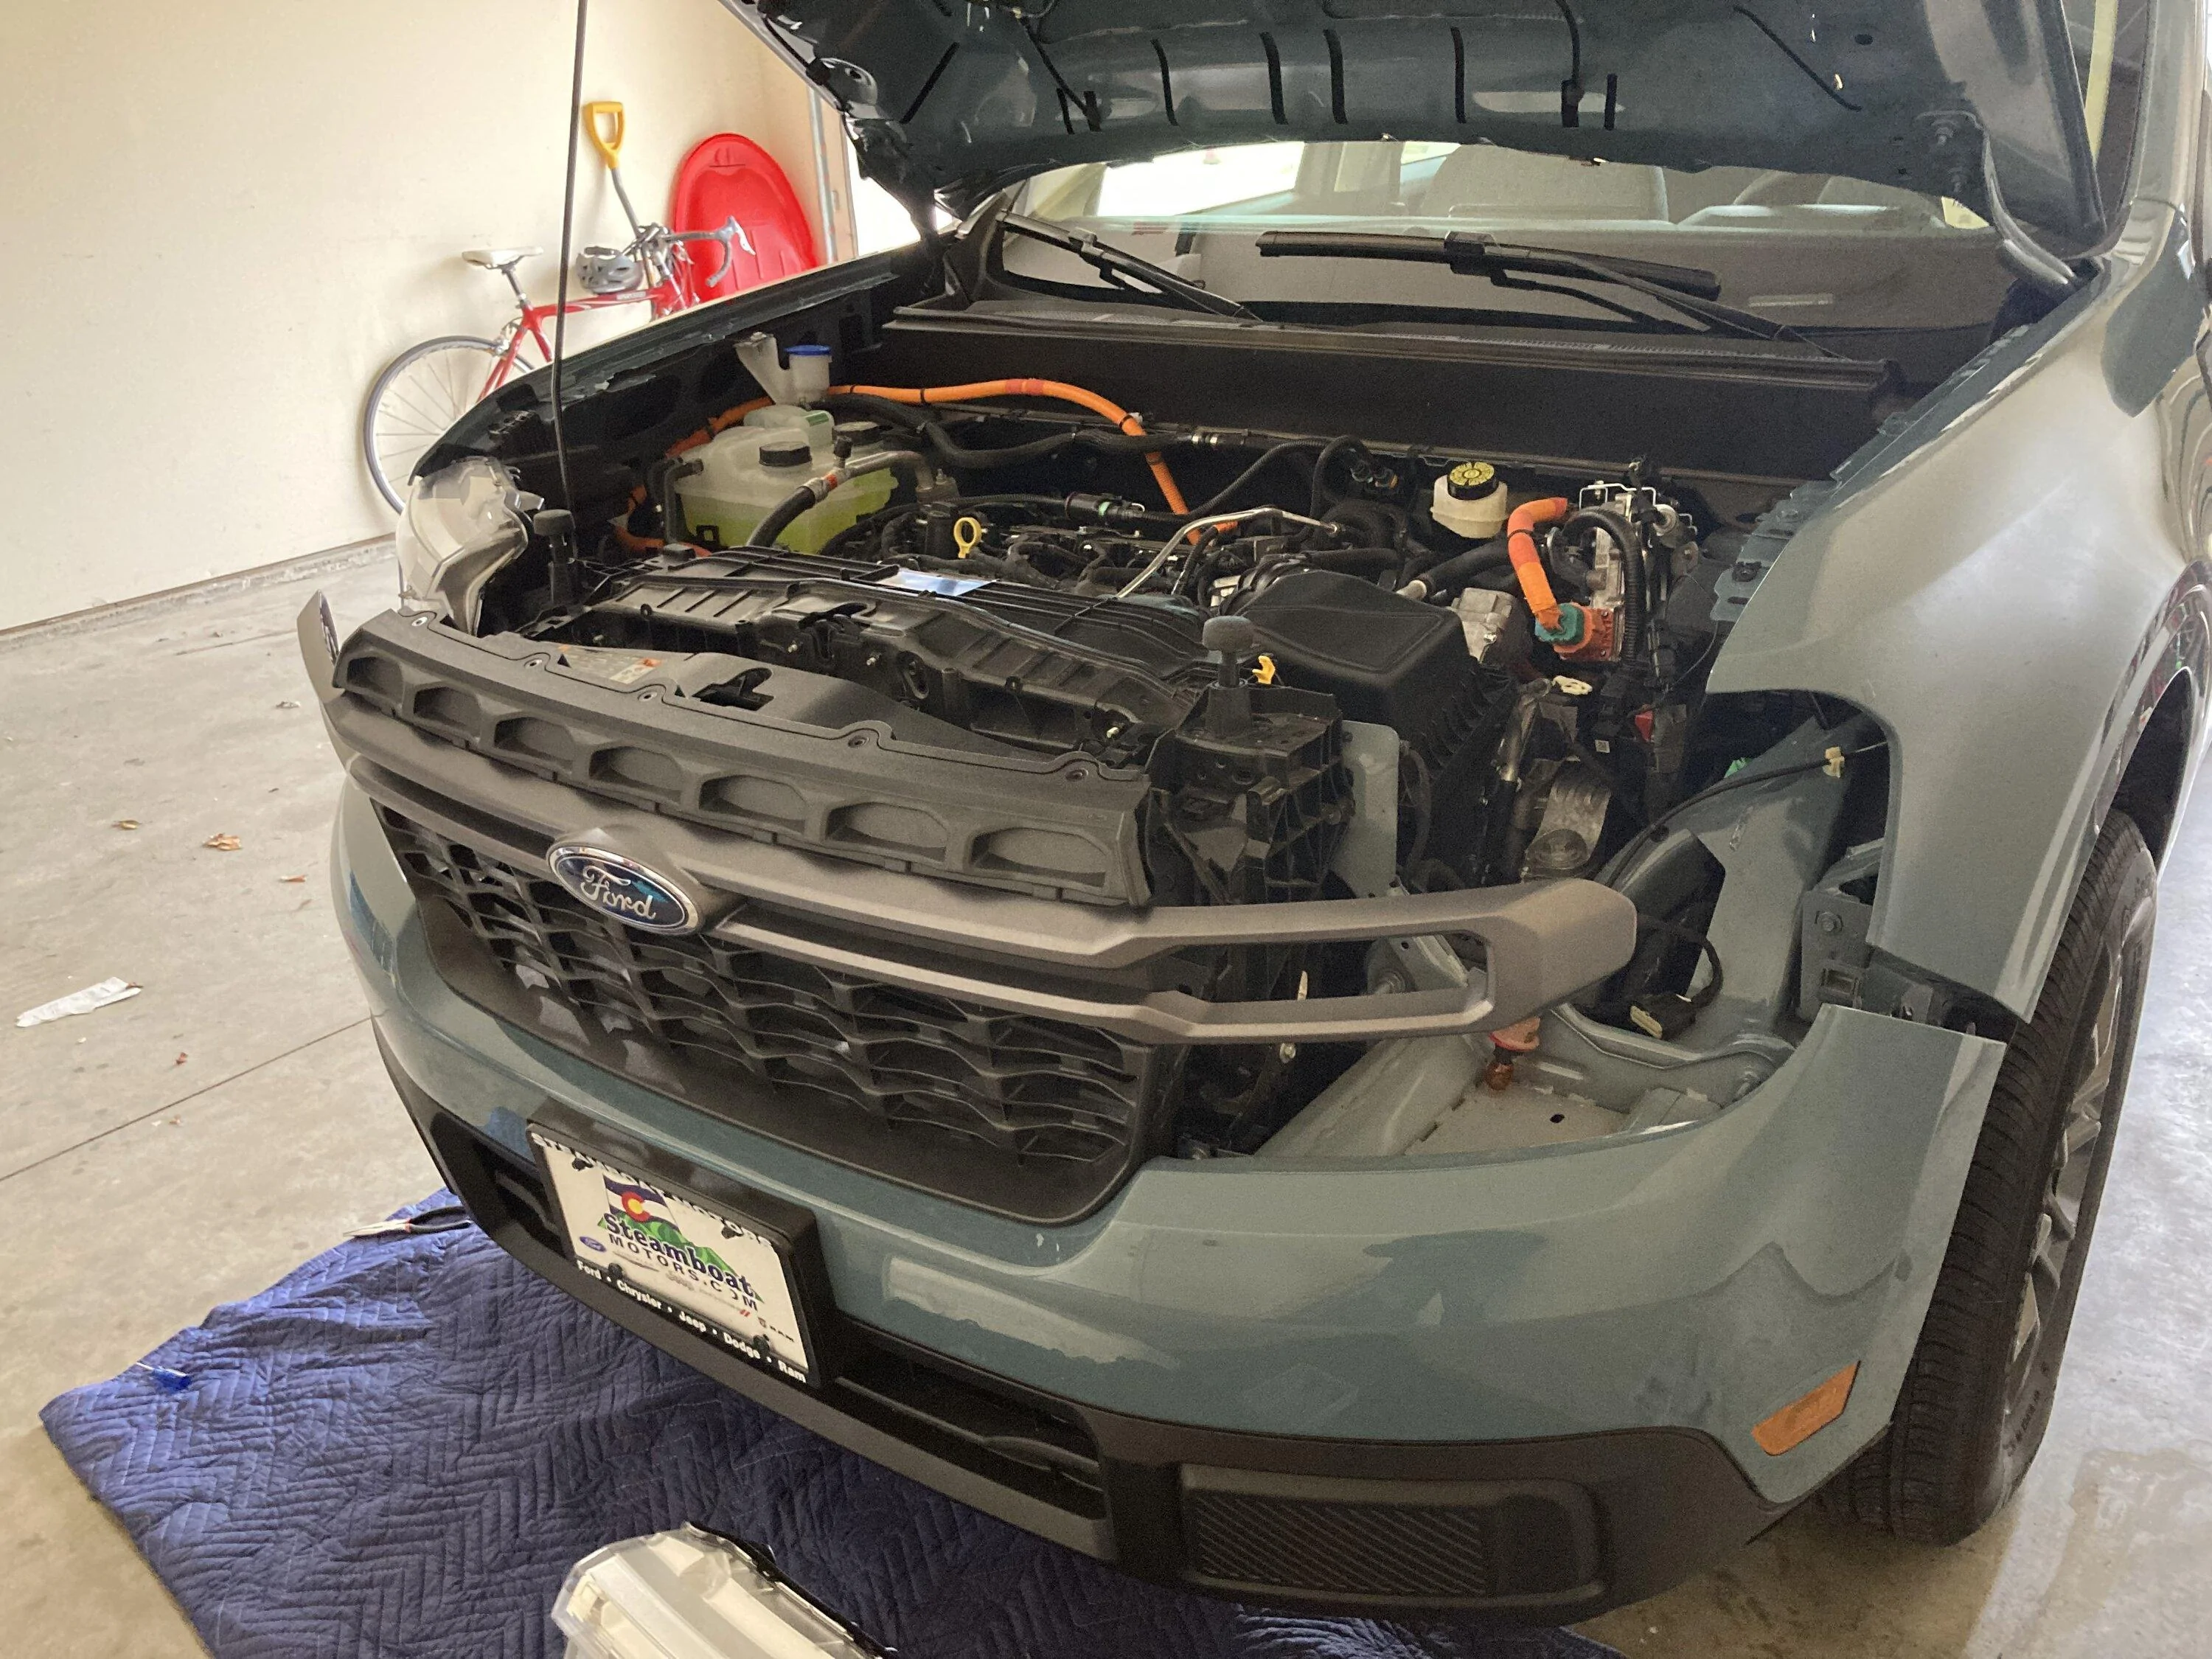
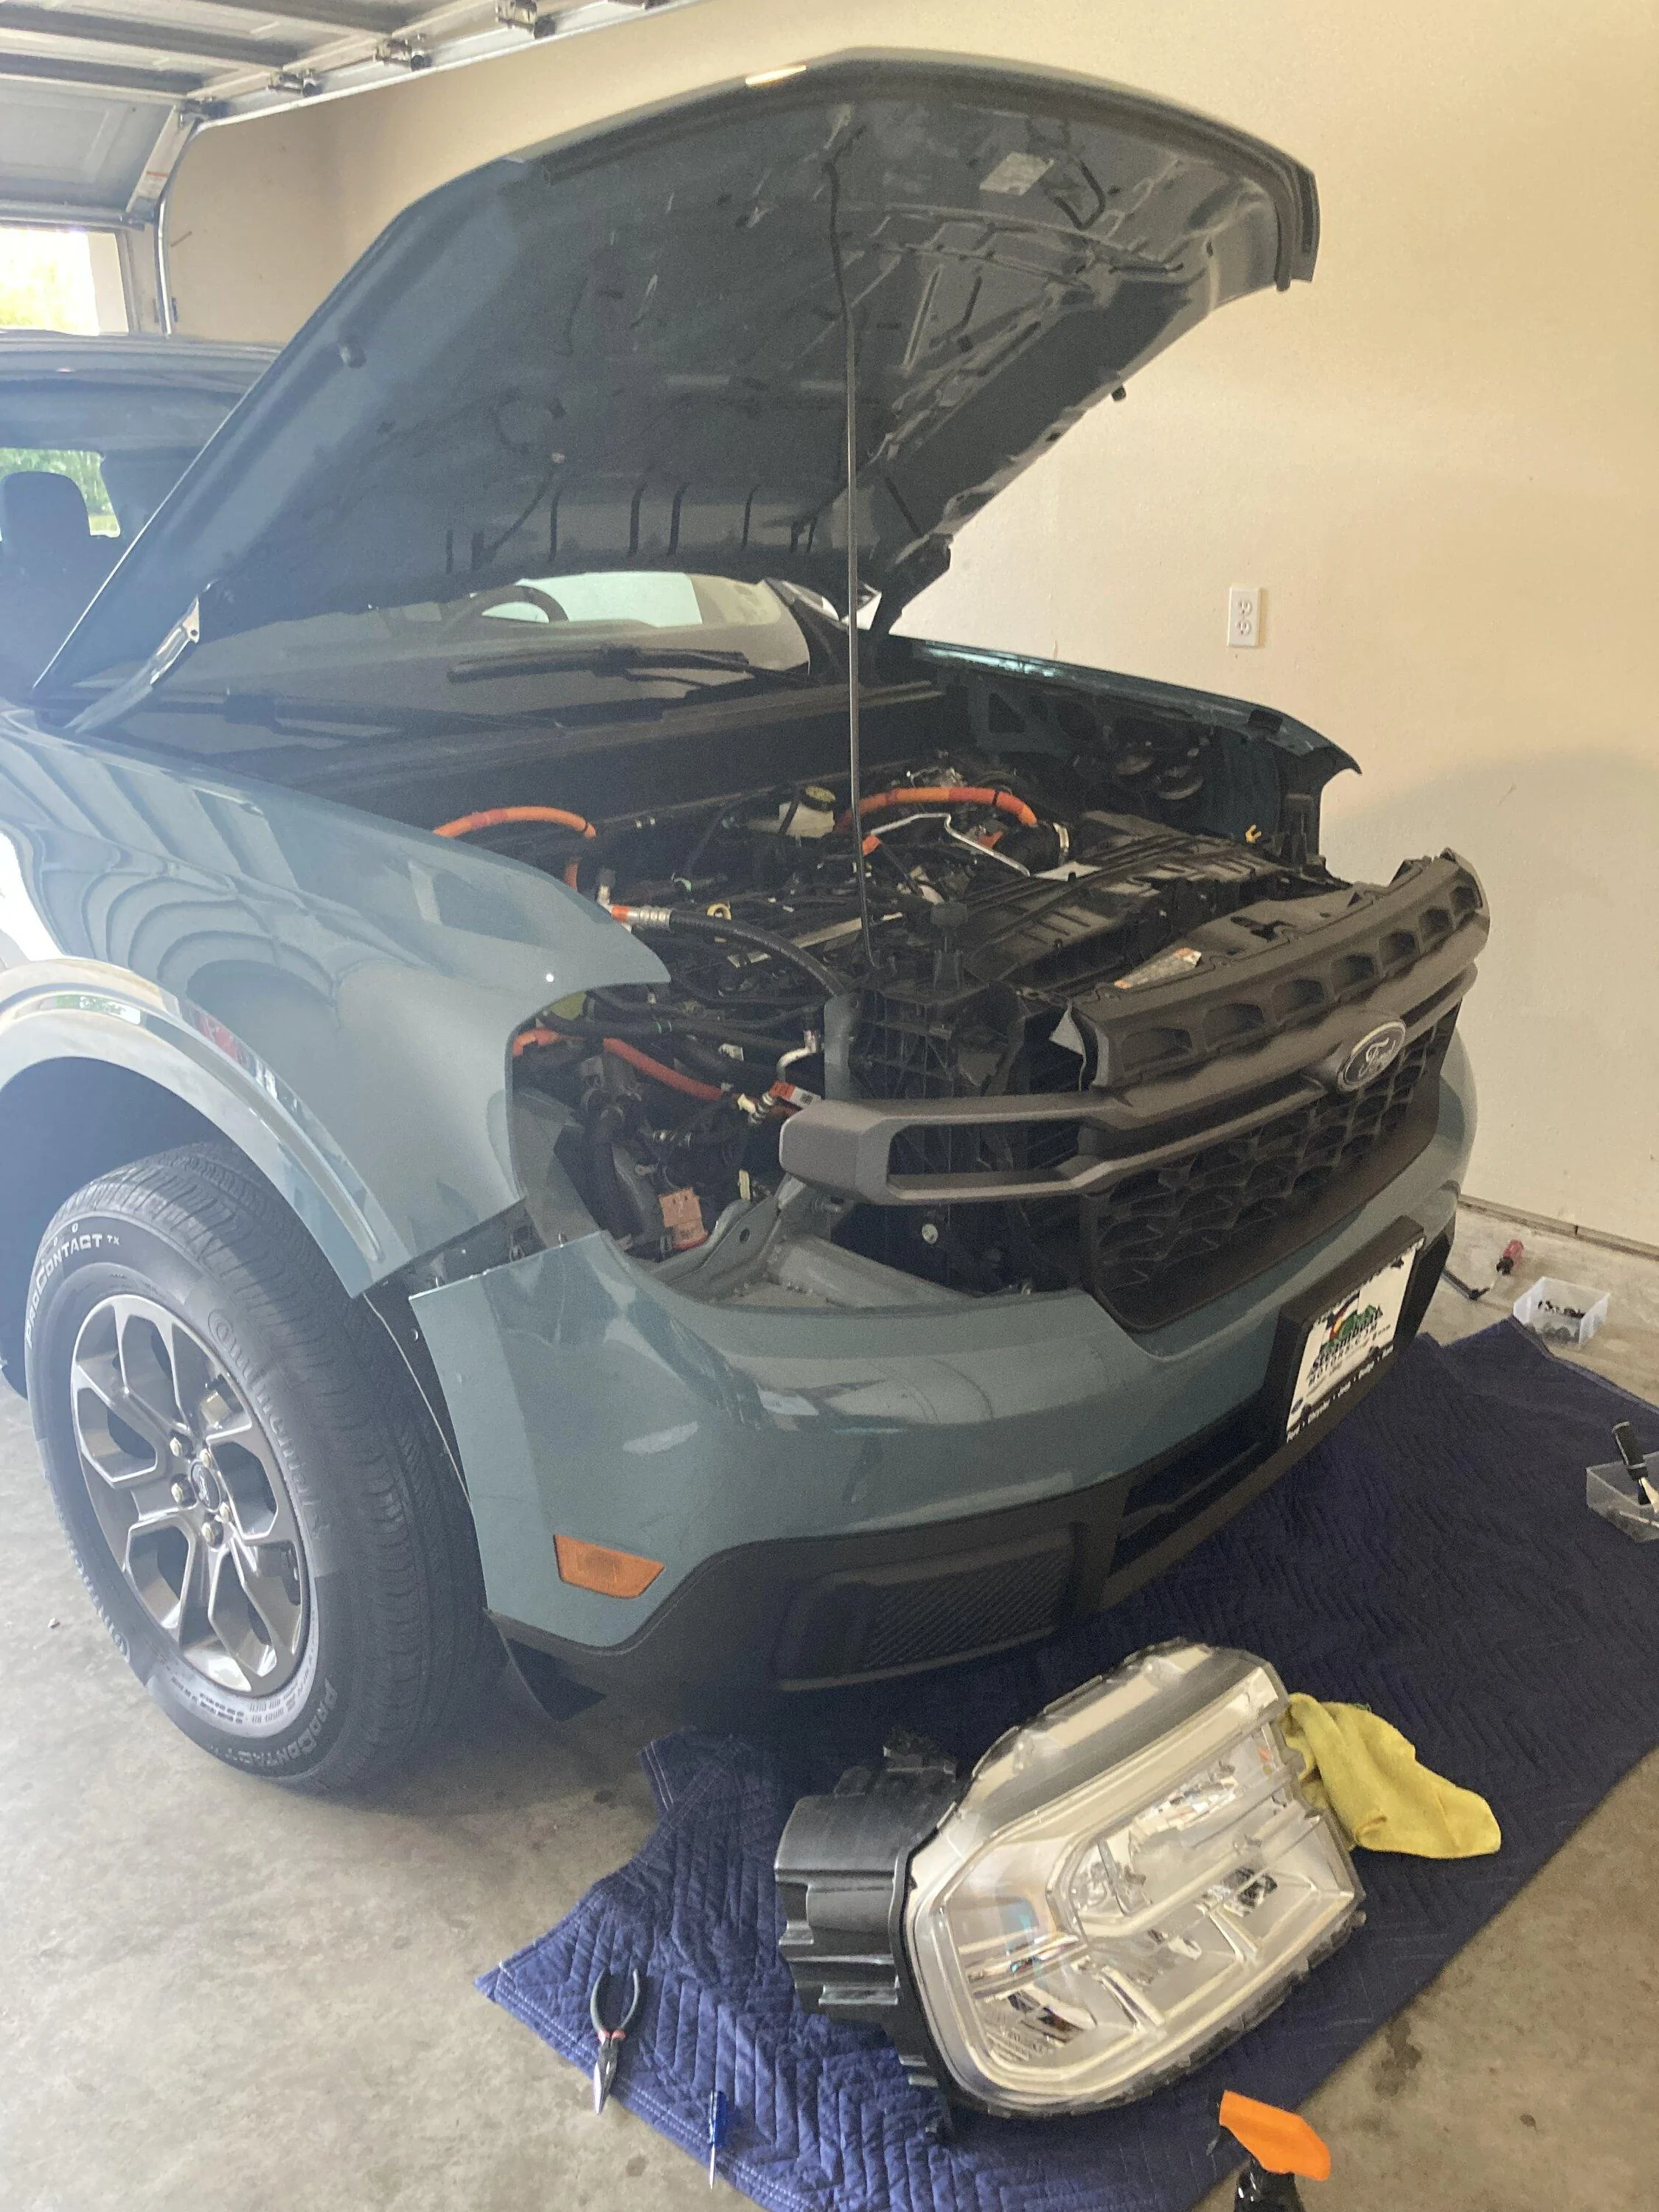
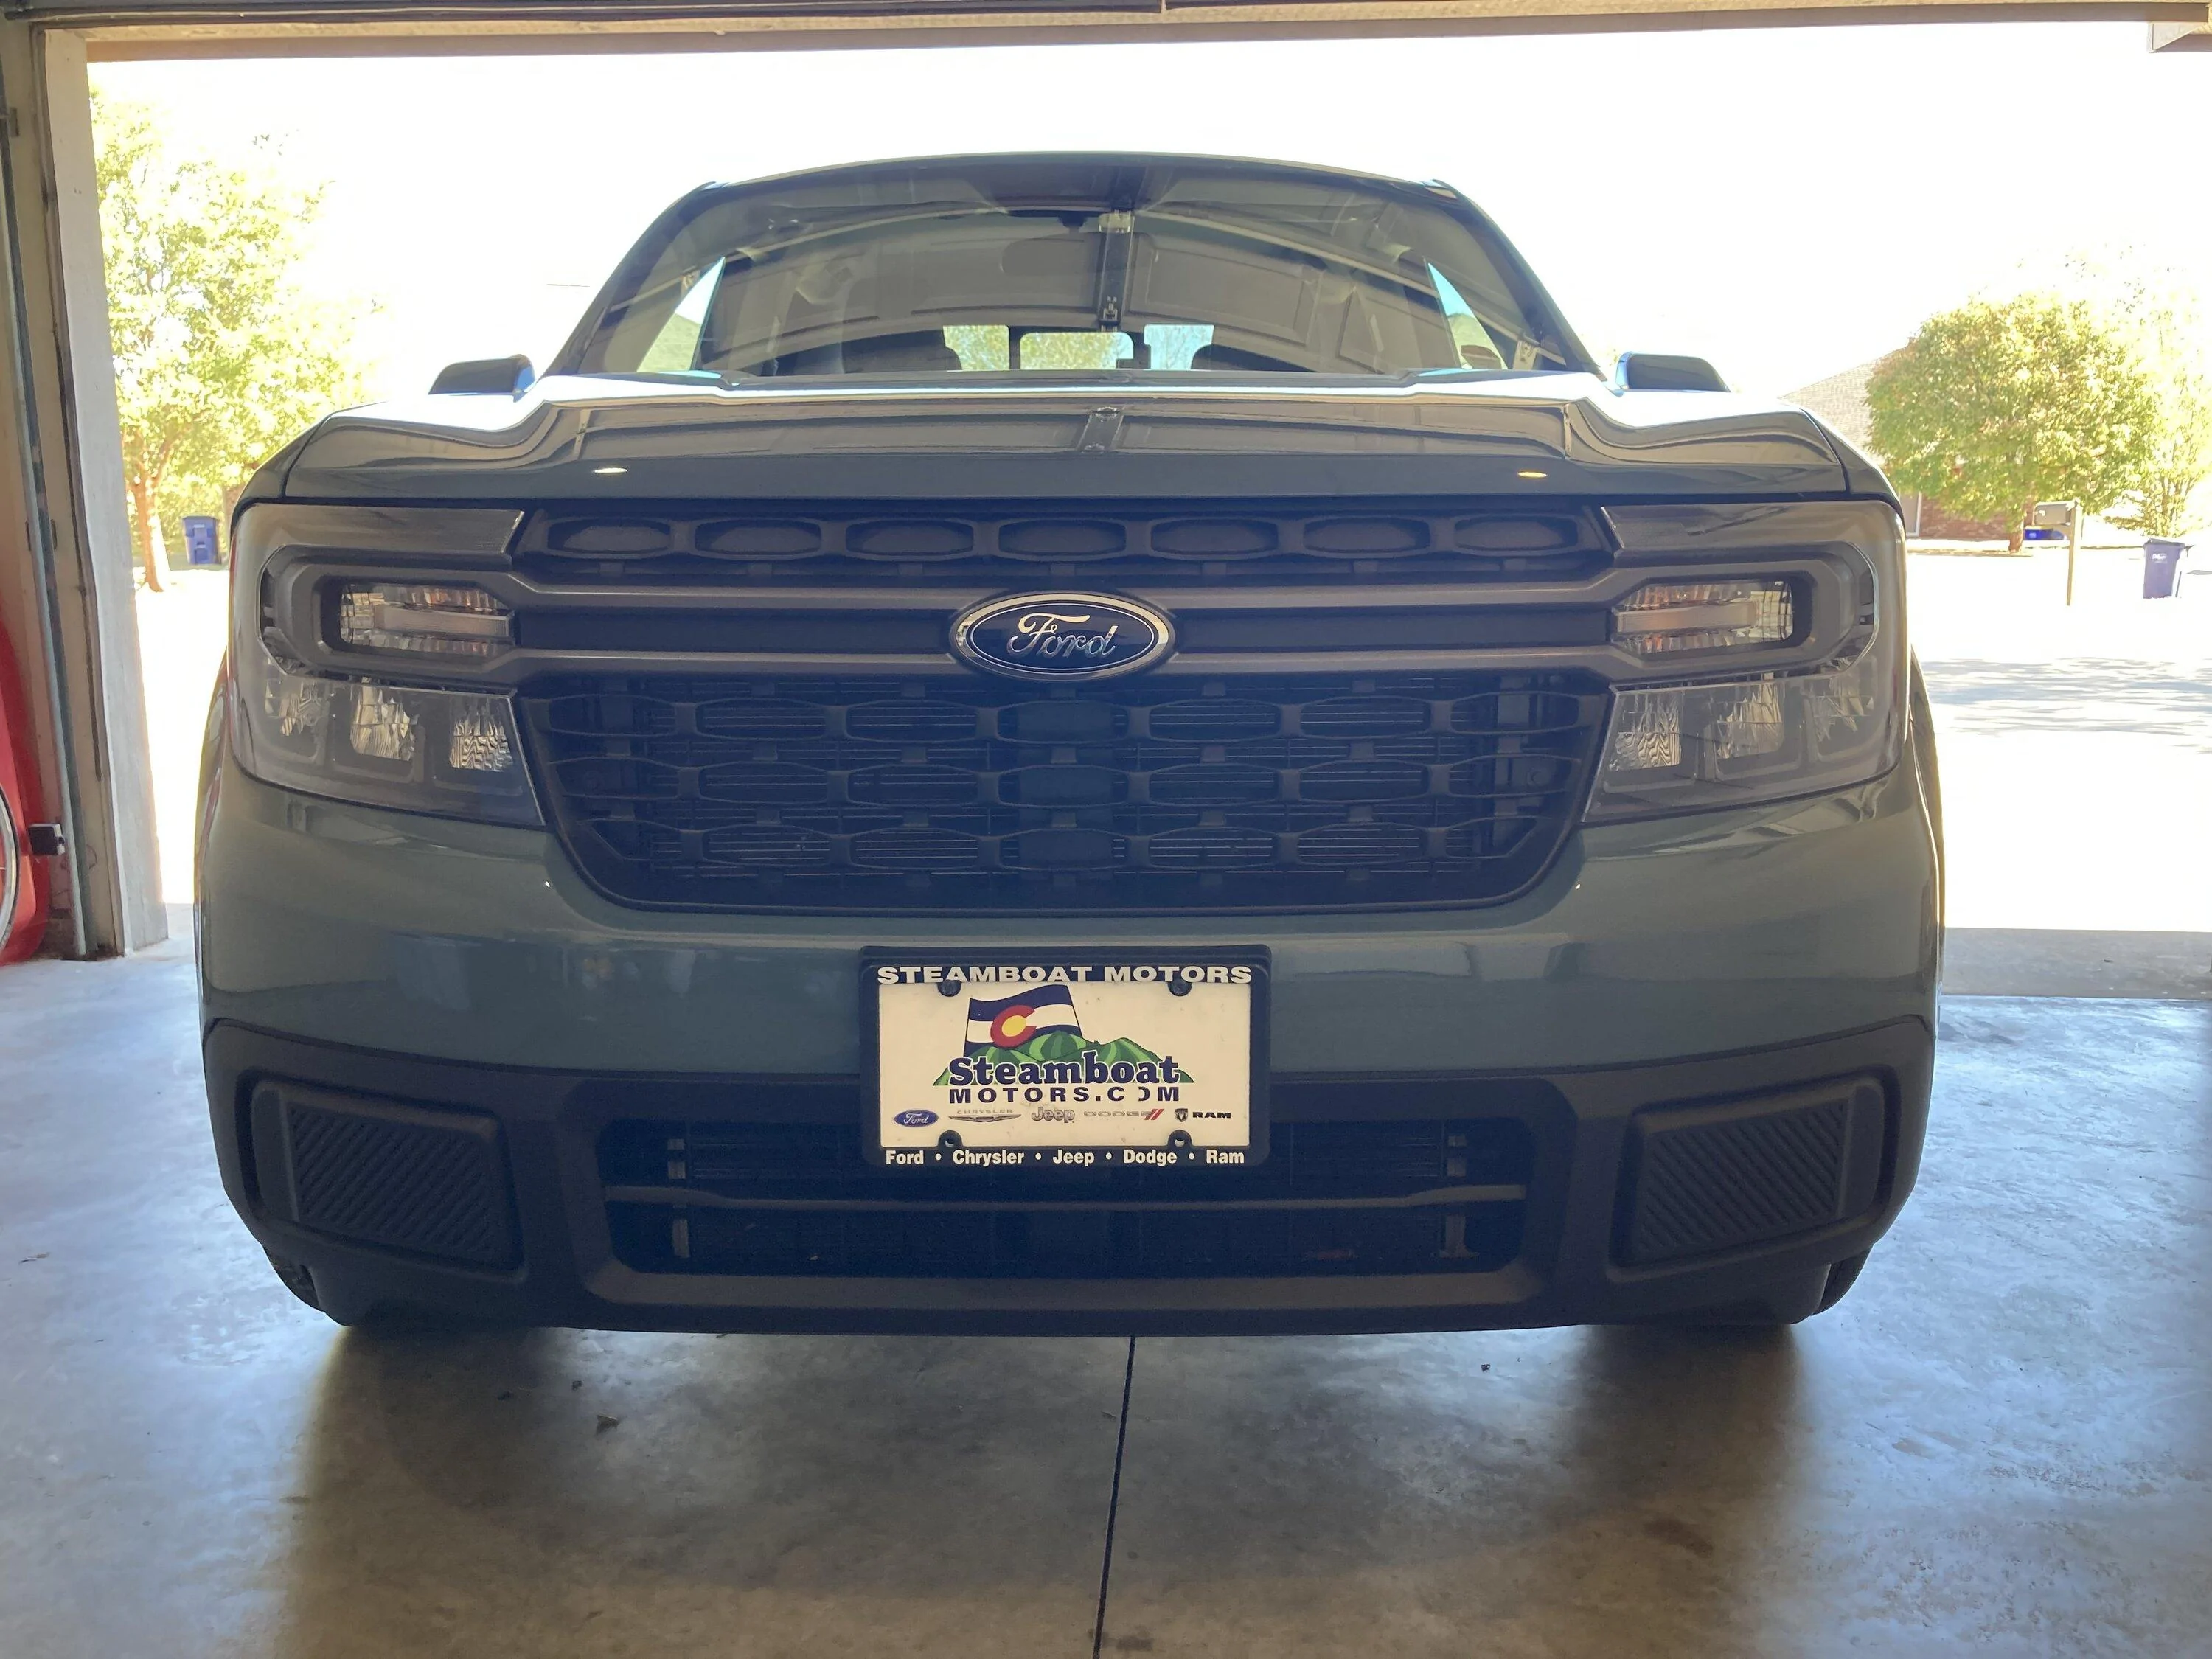
I did not take the whole front end off, just enough so I could access the headlights. You will need to remove the amber turn signal bulb (1/4 turn) and the electrical connection to the headlight. There is also a white piece of plastic that holds the wires to the headlights that will need to be removed. It should look like this when all of this is done:
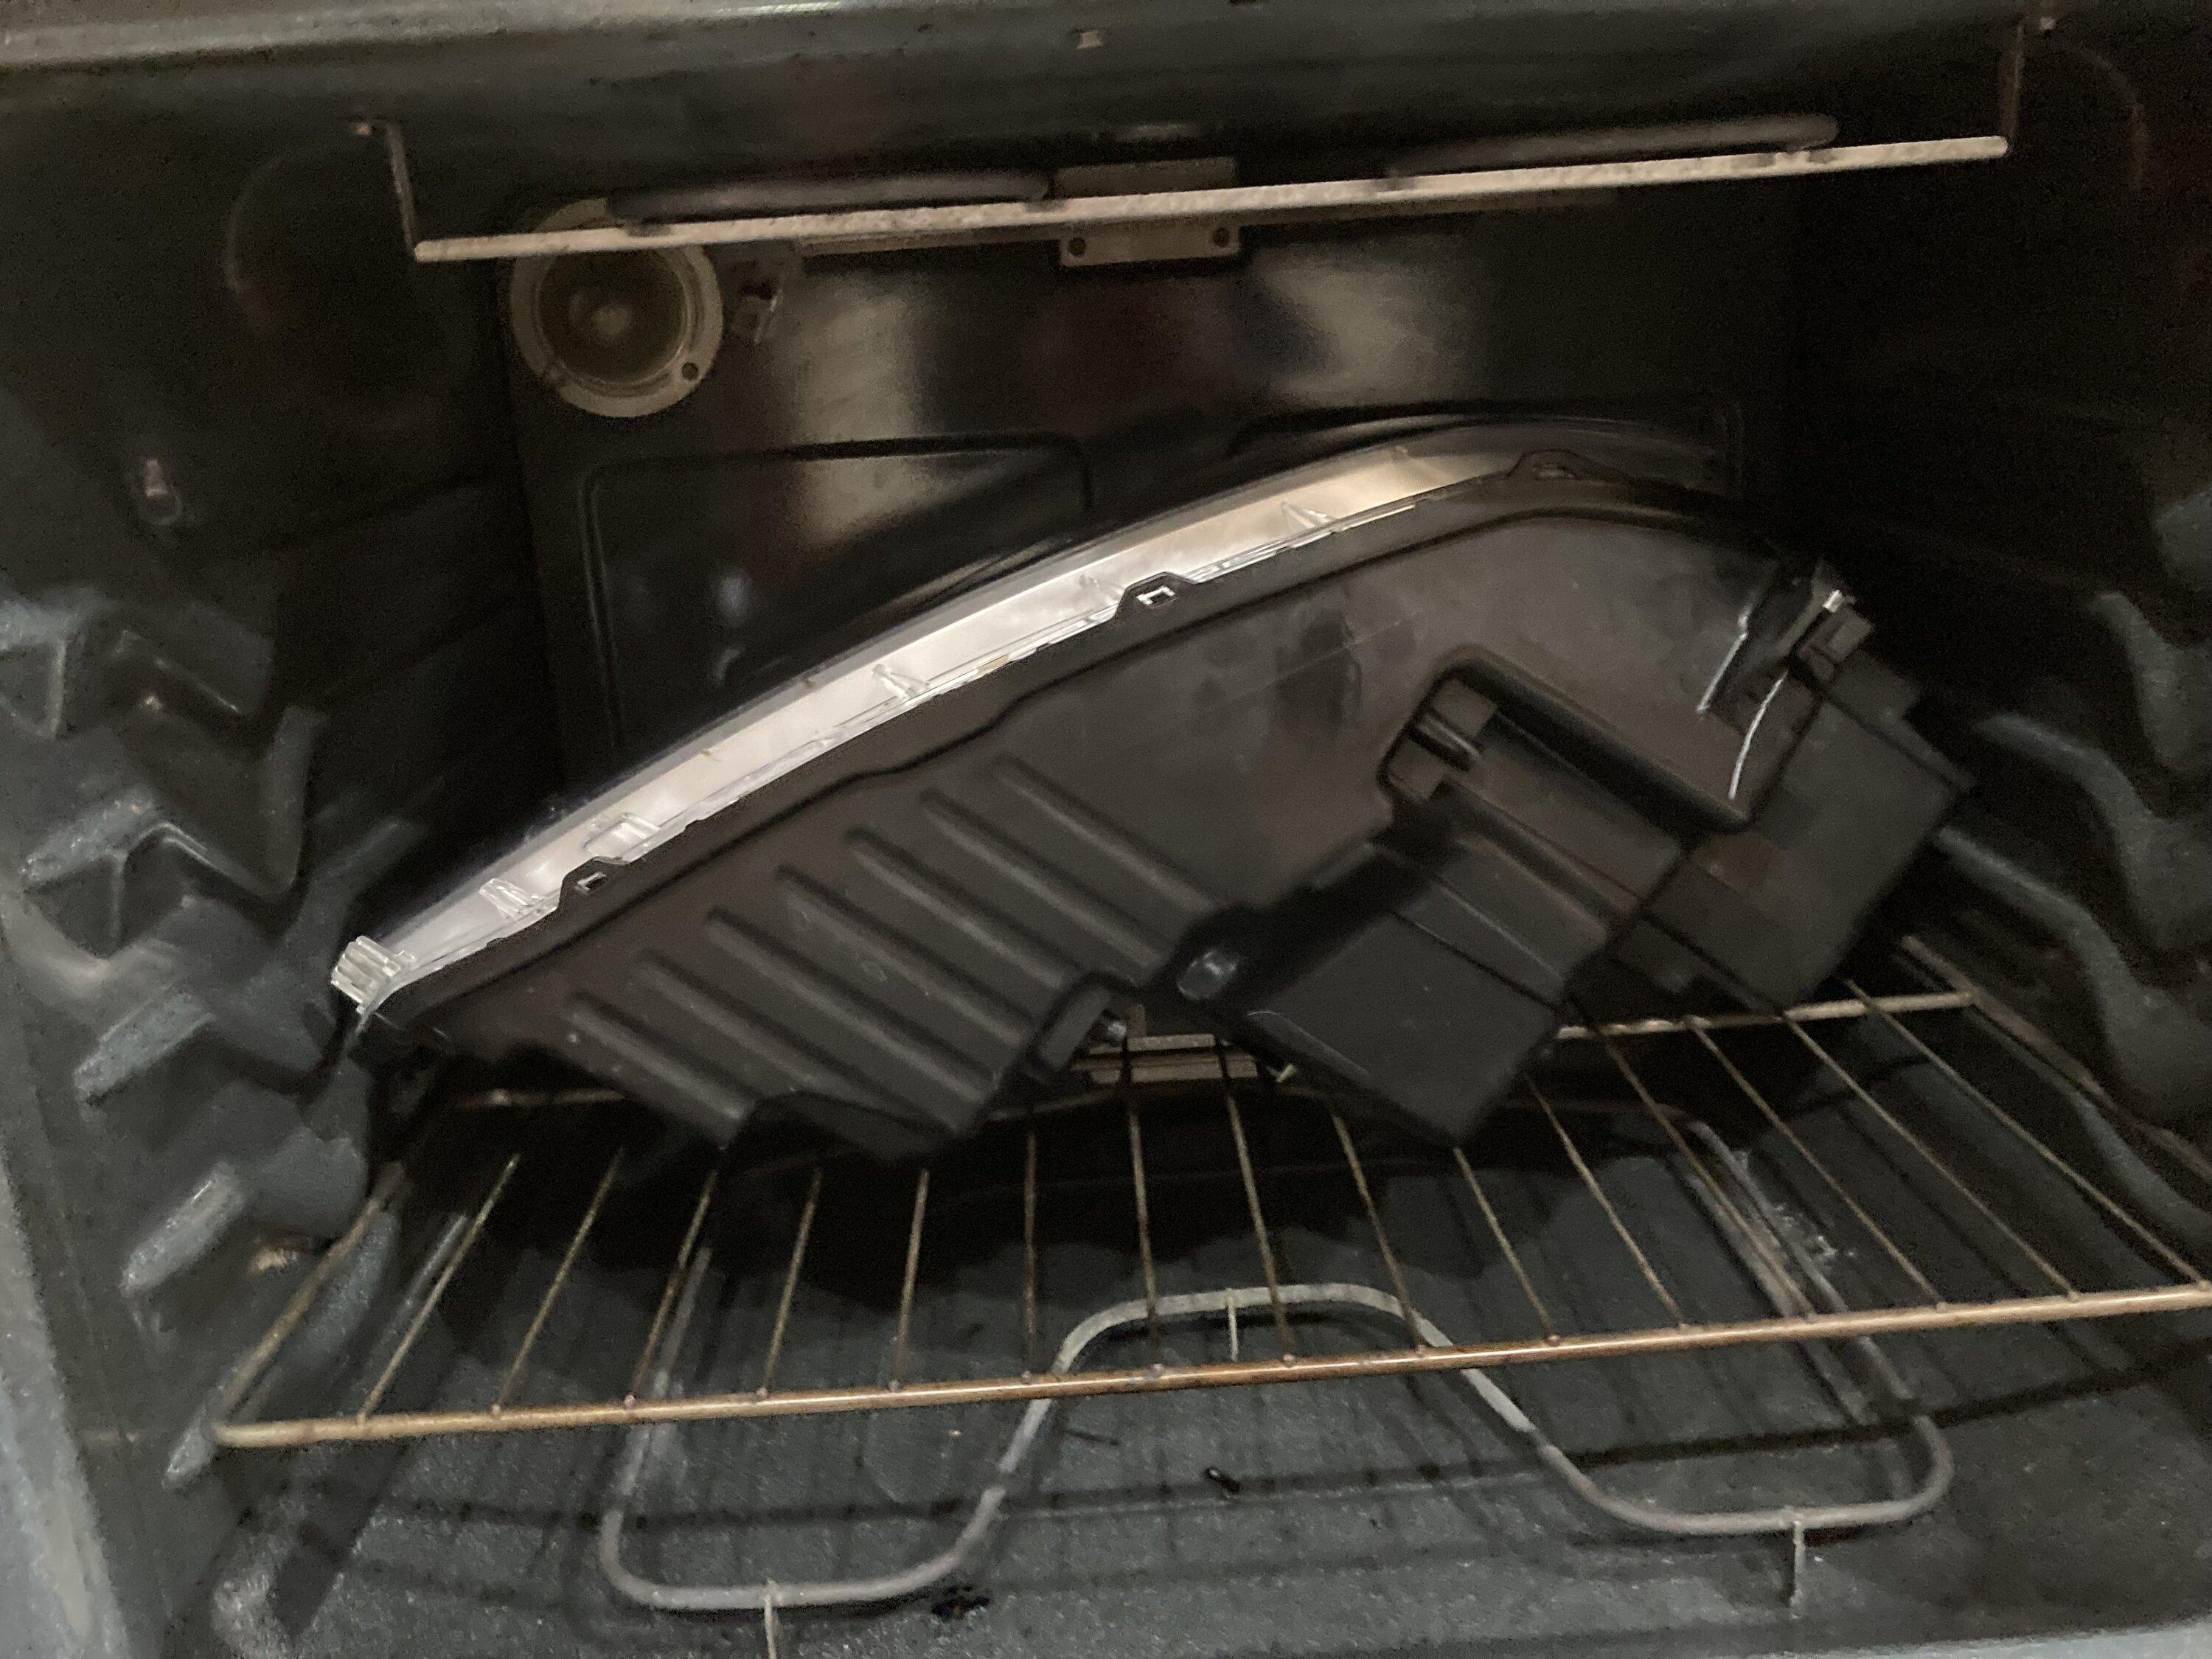
Now for the fun part. With the headlights removed, remove the six screws. You will need to soften the sealant inside the headlights. The most popular method is putting your headlight into the oven. I watched a few videos detailing this method before attempting it myself. Knowing my oven does not heat up well, I settled on 280 degrees Fahrenheit for 15 minutes. If my oven were more efficient/warmer, I would do 270 degrees. I did not feel comfortable going much higher than 280. I put a piece of parchment paper on a baking tray to help protect the headlight (I did not do this initially, as you can see in the photo below). I would advise you to put something down on the bottom grate.
Preheat the oven without the headlight and pop it in once it hits your temperature.
You will want gloves to remove your headlight and a flathead screwdriver to separate the lens. My best advice is to separate the headlight from the outer lip first, then the inner lip. Remove the plastic tabs holding the headlight together. Pay close attention to the corners. This is where it can get tricky. If you feel things are getting difficult to separate, put your headlight back into the oven. I did this on my first headlight two times (10 minutes each time I put it back in) and only once with the second. Once you separate the outer lip, you can work on the inner seal.
With a bit of patience, your headlight will separate.
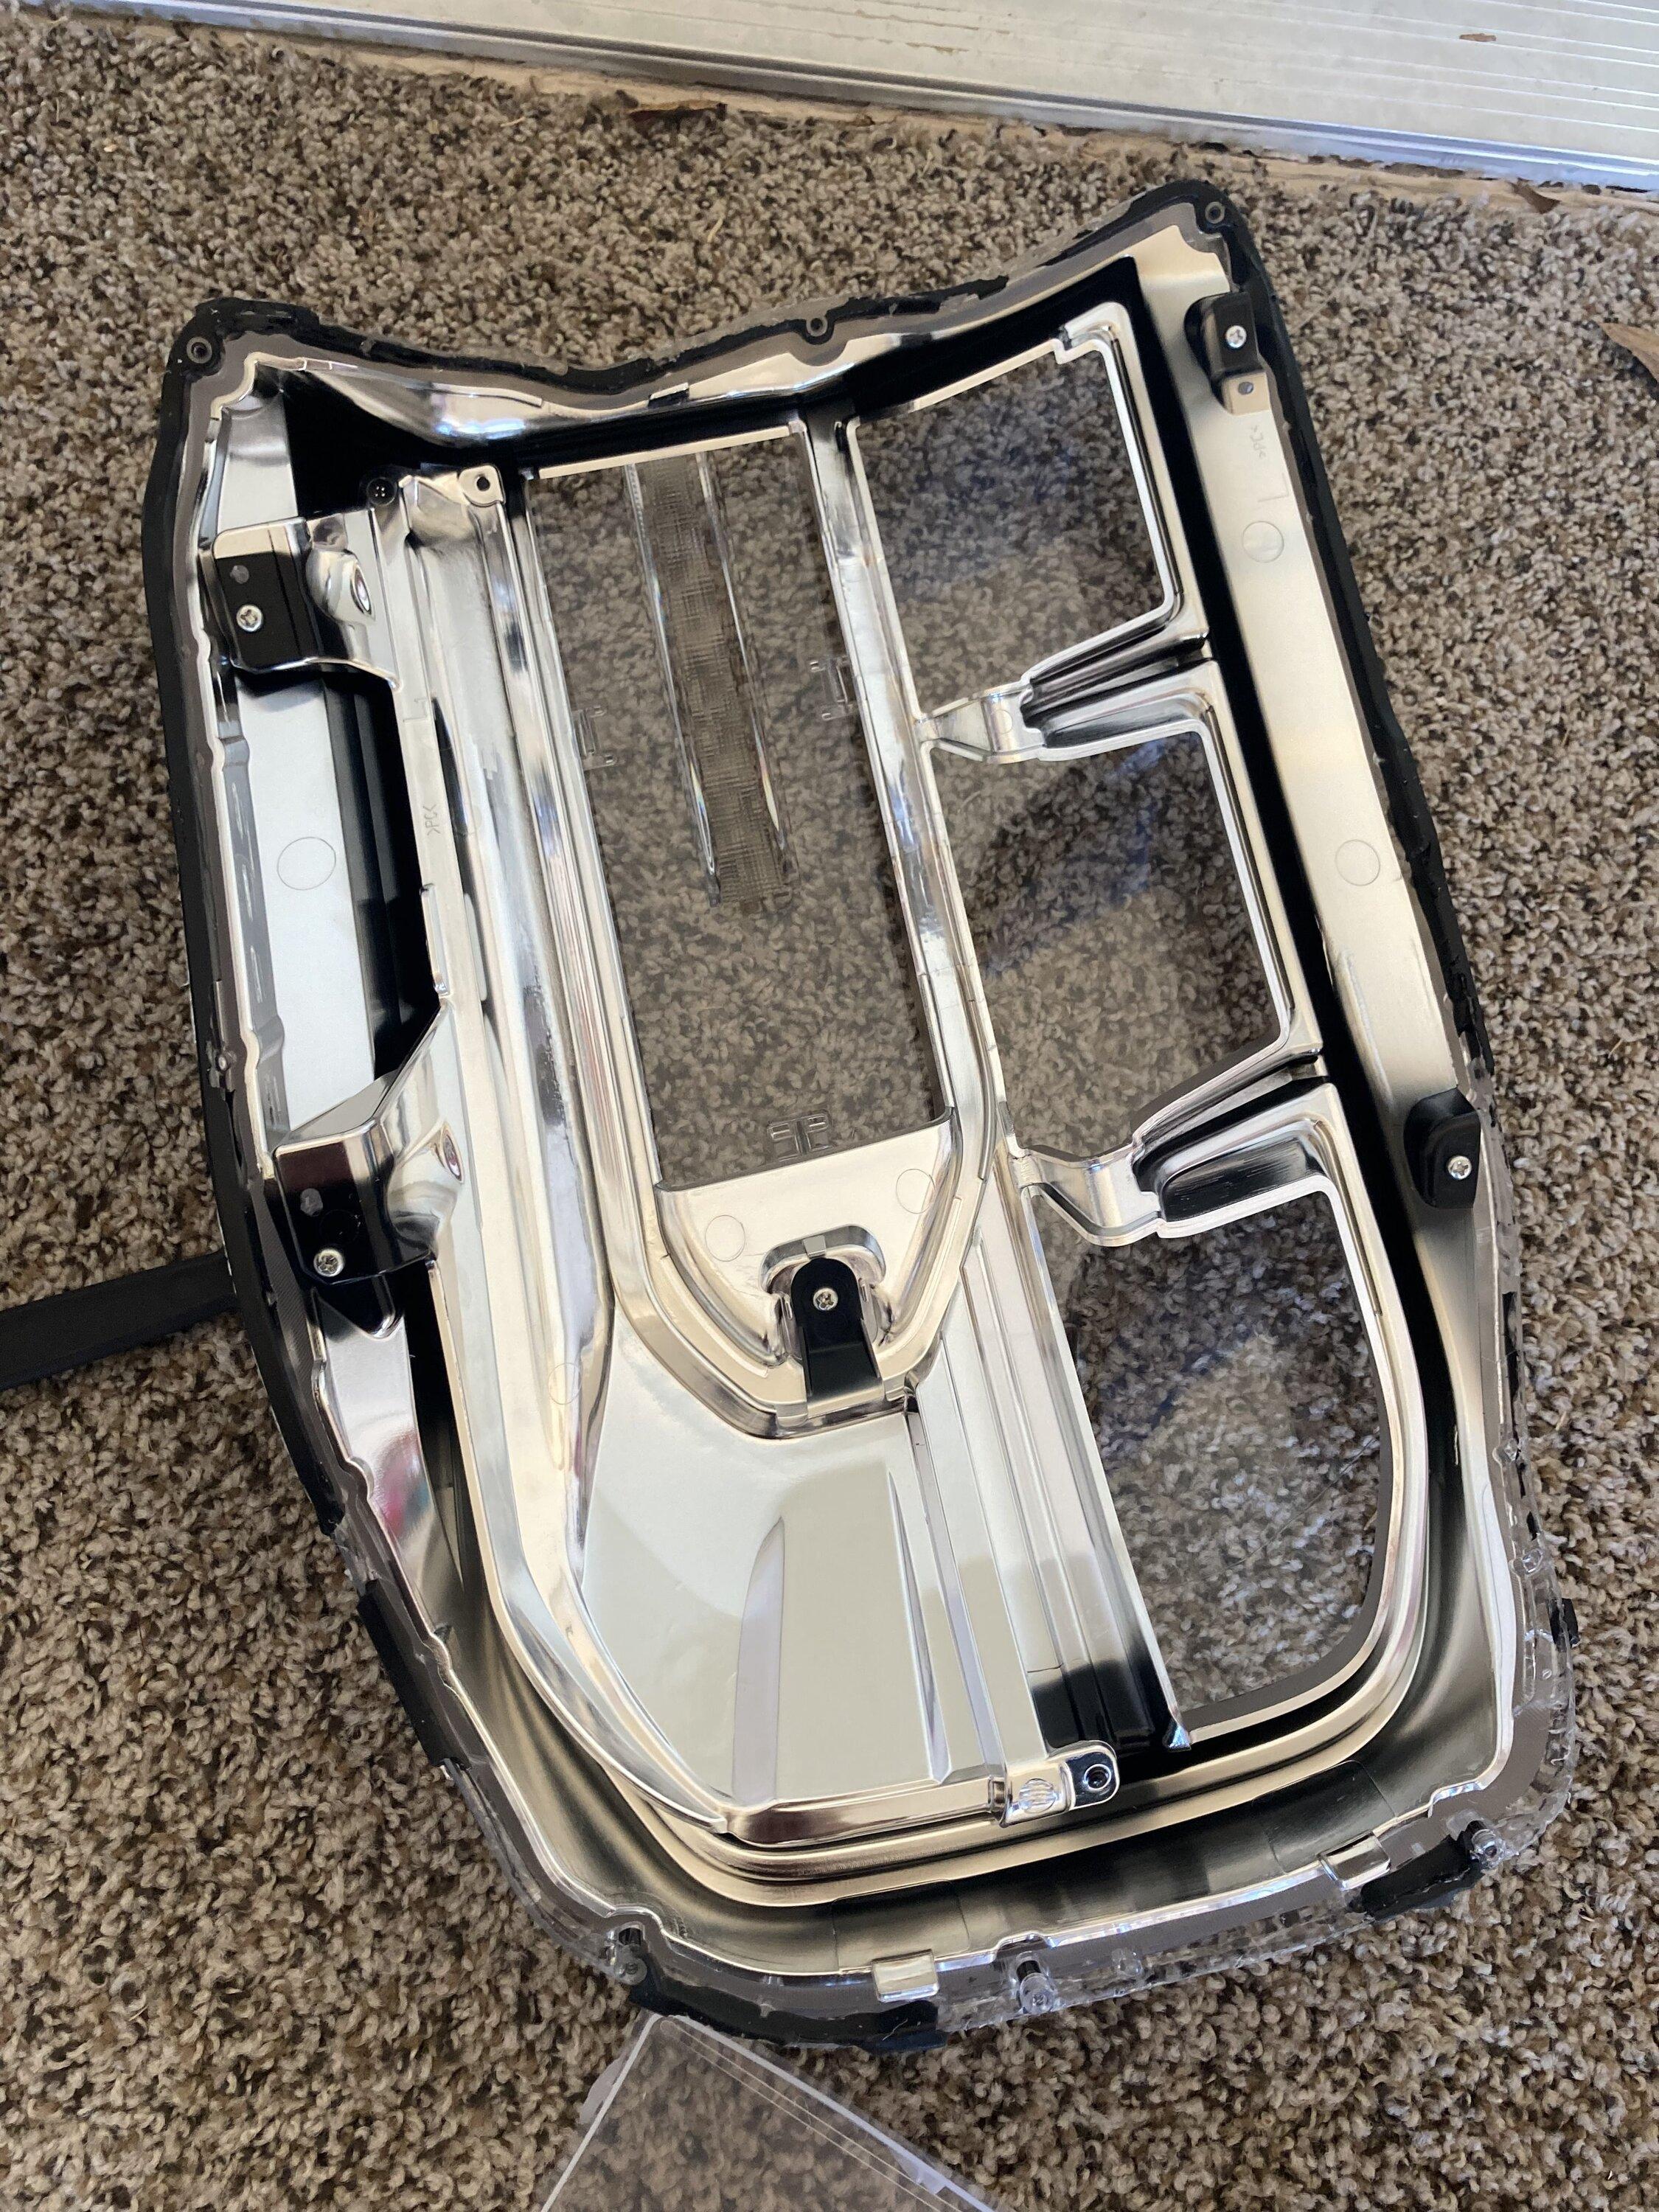
Five screws are holding the plastic trim to the lens. Separate that and put it into a tub of ZEP Degreaser. I would recommend getting two gallons.
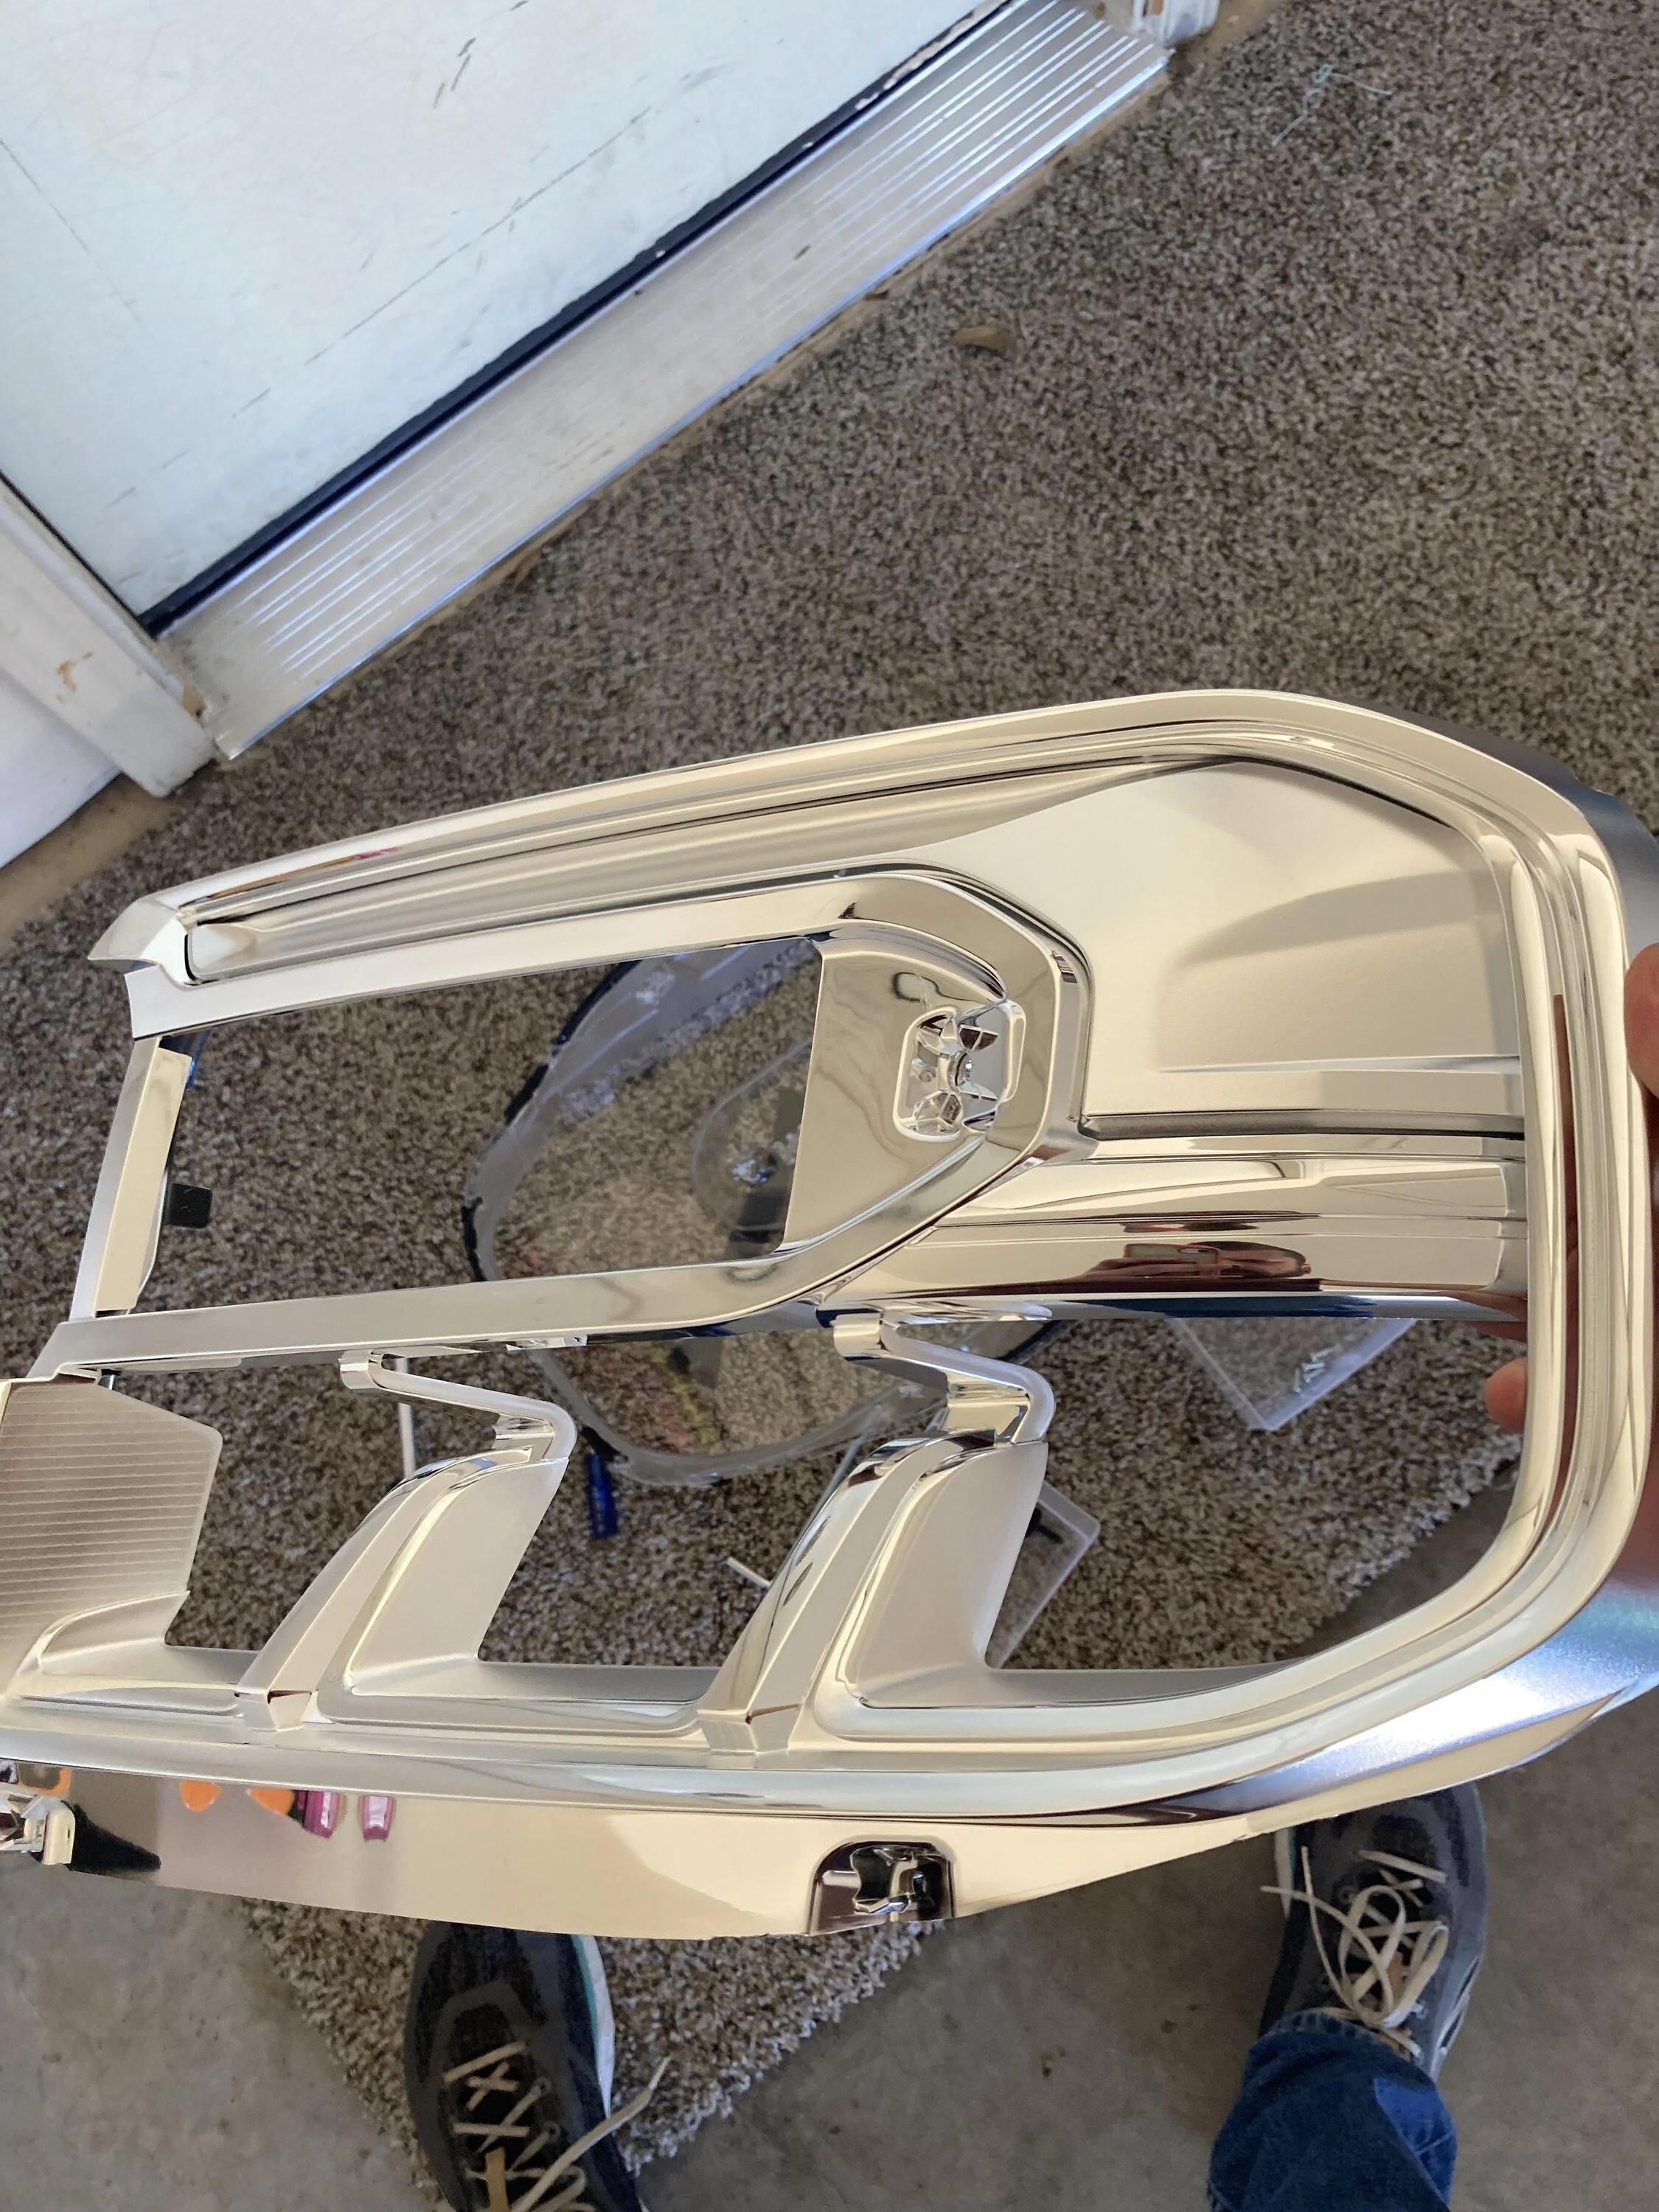

I would recommend 30 minutes per piece. Once all the chrome has been stripped, wash the ZEP off. Double-check to make sure all the nooks have been stripped. Let the plastic dry, and once it's dry, reassemble.
Before you seal the headlight up, make sure the inner lens is not dirty. I set my lenses down so no dust would get into them. I would advise you to put the housing back into the oven to make it pliable. I put some waterproof sealant in the headlight to help protect it.
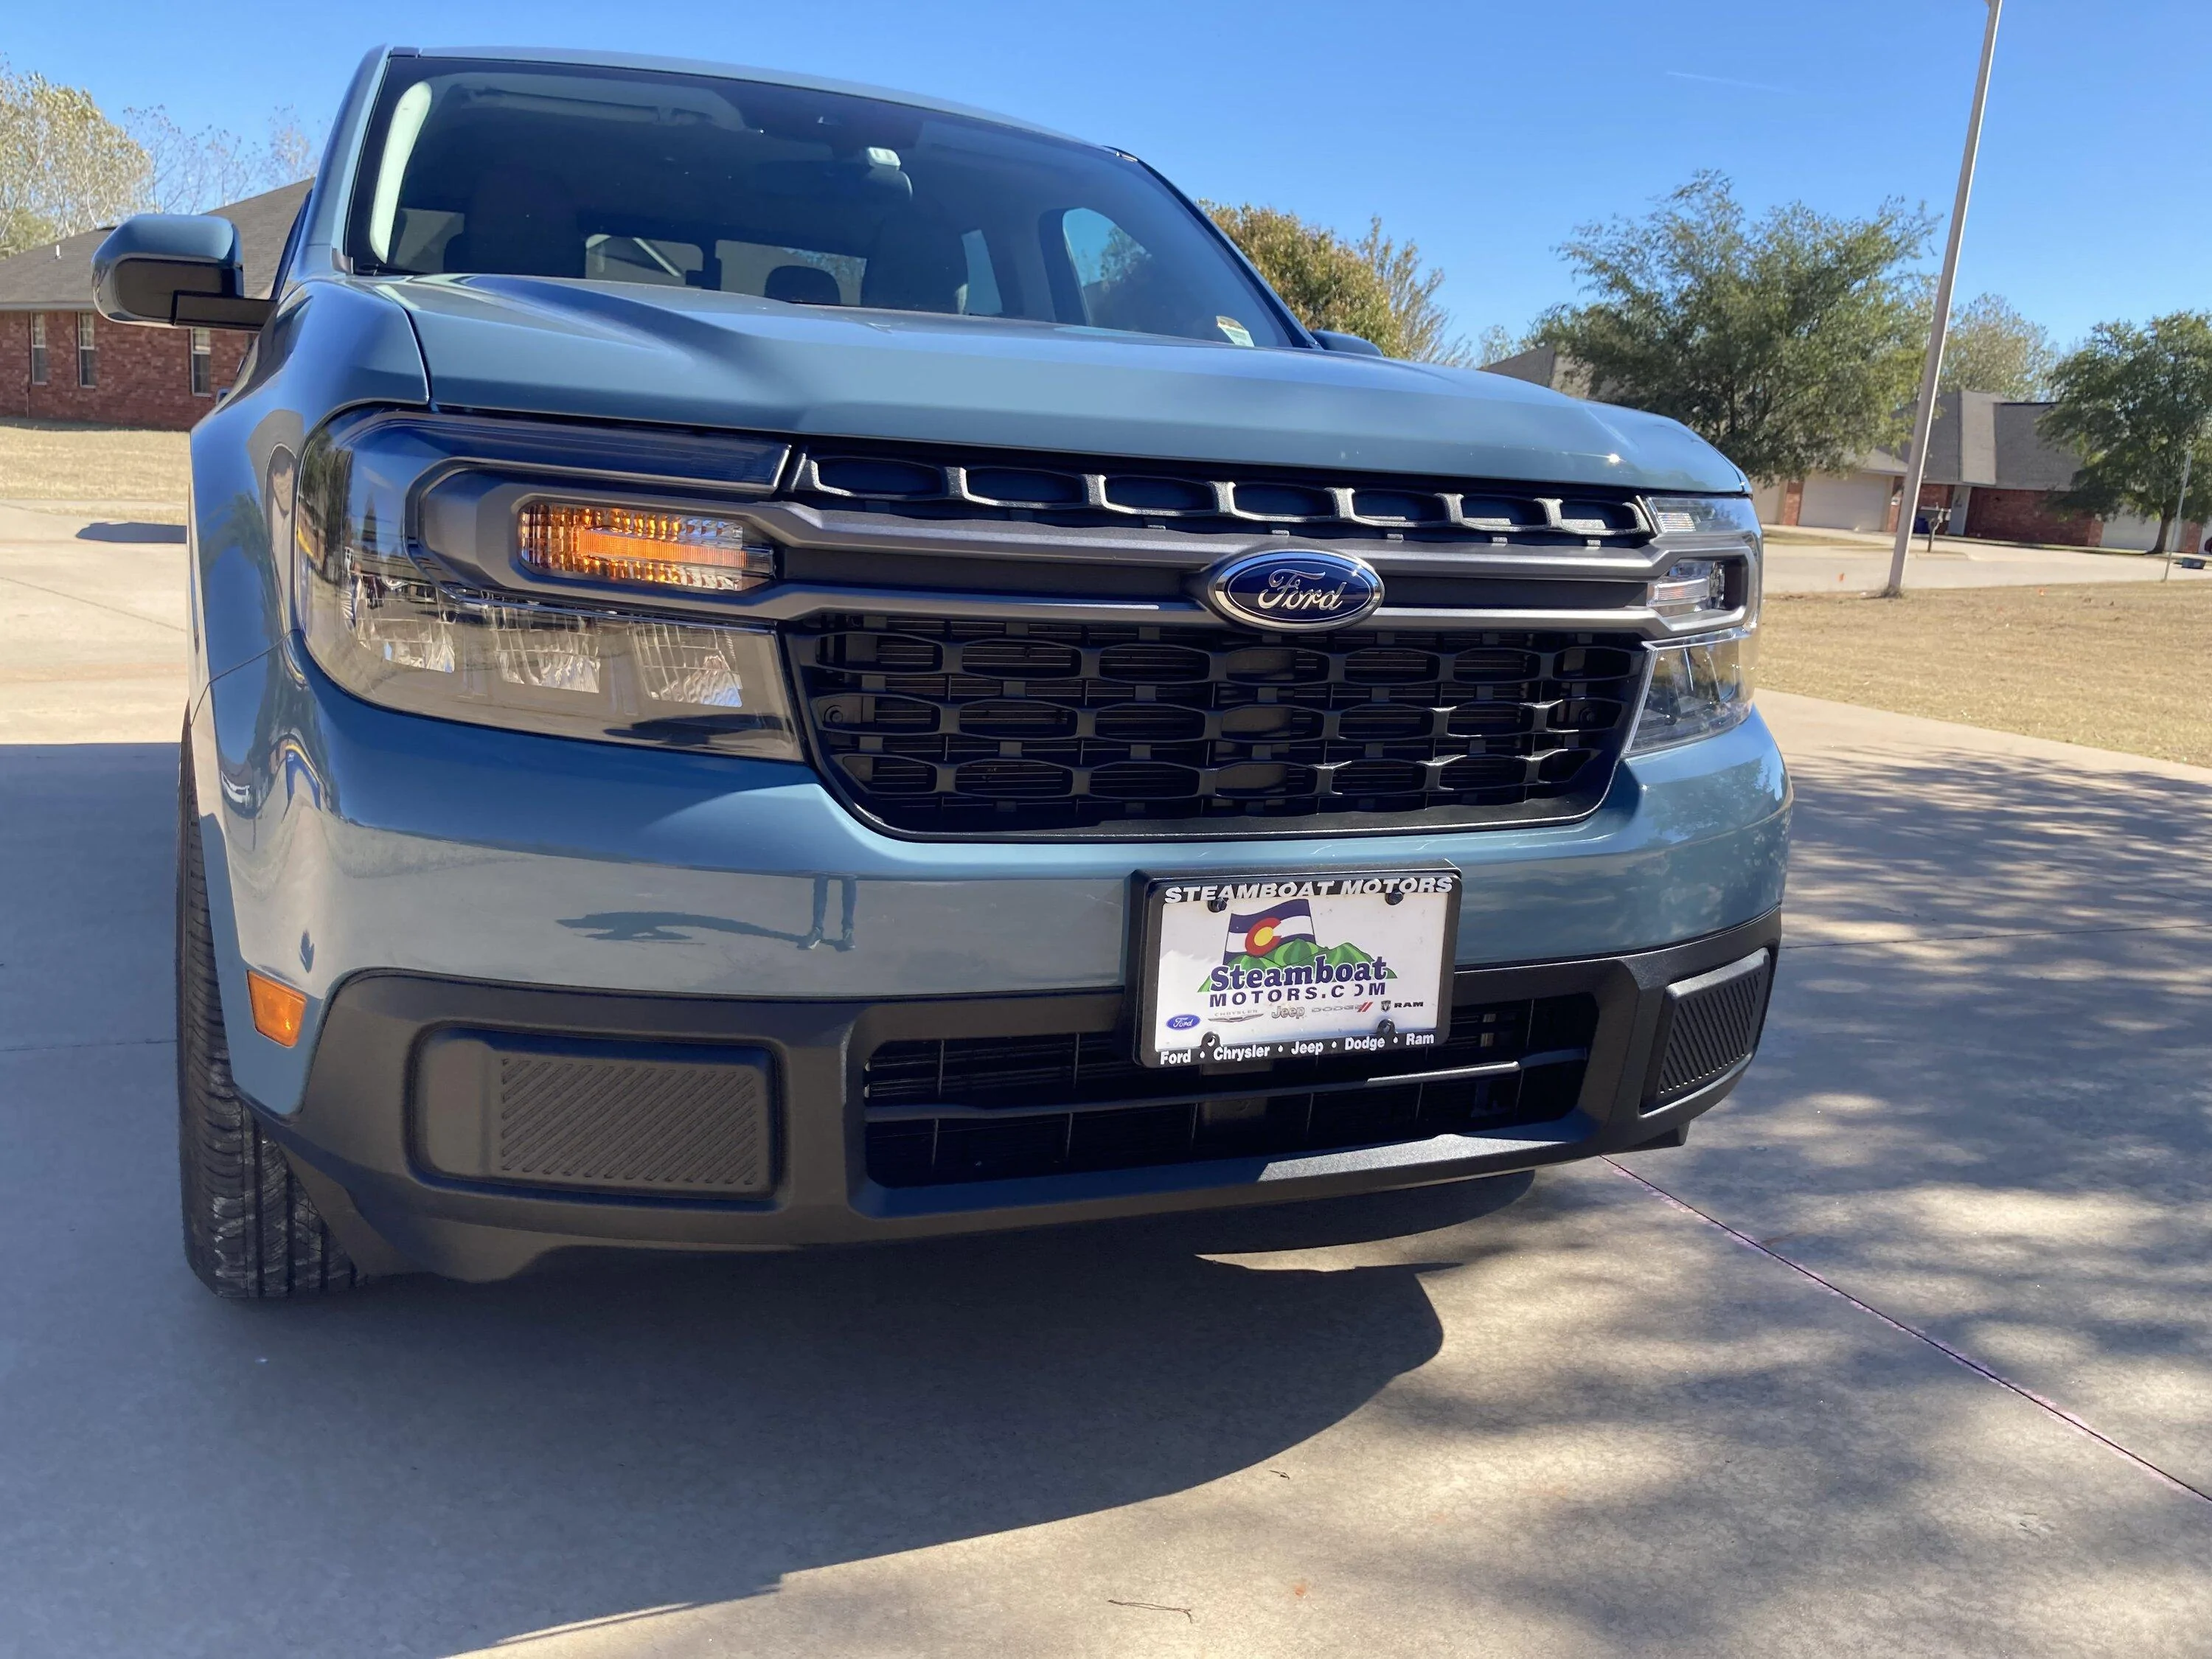
Once that is done, pop them in your Maverick, bolt it all up, and you have BAP'ed headlights!
I hope you all found this helpful. The process took me two days, mainly due to my lack of planning and timing. This is something that could easily be accomplished within a day. It's not difficult to do, but it is tedious.
I recently took apart my Maverick and decided to BAP my headlights. This is a very tedious process, but if you are patient, it is something that you can do. I hope this post contains information that will make more forum members more confident in BAP'ing their headlights, as I did.
Before going into the process, I will say that this is a tedious process. There is lots of patience required to separate the headlights. I am by no means a professional mechanic, but I have experience rebuilding cars.
The first step you will need to do is disassemble the front end of your Maverick. Several different videos discuss how to disassemble your front end. I found MrBoom_5.0's video very helpful.
MrBoom_5.0 Front End Disassembly Video
I did not take the whole front end off, just enough so I could access the headlights. You will need to remove the amber turn signal bulb (1/4 turn) and the electrical connection to the headlight. There is also a white piece of plastic that holds the wires to the headlights that will need to be removed. It should look like this when all of this is done:
Now for the fun part. With the headlights removed, remove the six screws. You will need to soften the sealant inside the headlights. The most popular method is putting your headlight into the oven. I watched a few videos detailing this method before attempting it myself. Knowing my oven does not heat up well, I settled on 280 degrees Fahrenheit for 15 minutes. If my oven were more efficient/warmer, I would do 270 degrees. I did not feel comfortable going much higher than 280. I put a piece of parchment paper on a baking tray to help protect the headlight (I did not do this initially, as you can see in the photo below). I would advise you to put something down on the bottom grate.
Preheat the oven without the headlight and pop it in once it hits your temperature.
You will want gloves to remove your headlight and a flathead screwdriver to separate the lens. My best advice is to separate the headlight from the outer lip first, then the inner lip. Remove the plastic tabs holding the headlight together. Pay close attention to the corners. This is where it can get tricky. If you feel things are getting difficult to separate, put your headlight back into the oven. I did this on my first headlight two times (10 minutes each time I put it back in) and only once with the second. Once you separate the outer lip, you can work on the inner seal.
With a bit of patience, your headlight will separate.
Five screws are holding the plastic trim to the lens. Separate that and put it into a tub of ZEP Degreaser. I would recommend getting two gallons.
I would recommend 30 minutes per piece. Once all the chrome has been stripped, wash the ZEP off. Double-check to make sure all the nooks have been stripped. Let the plastic dry, and once it's dry, reassemble.
Before you seal the headlight up, make sure the inner lens is not dirty. I set my lenses down so no dust would get into them. I would advise you to put the housing back into the oven to make it pliable. I put some waterproof sealant in the headlight to help protect it.
Once that is done, pop them in your Maverick, bolt it all up, and you have BAP'ed headlights!
I hope you all found this helpful. The process took me two days, mainly due to my lack of planning and timing. This is something that could easily be accomplished within a day. It's not difficult to do, but it is tedious.
Sponsored


