
All the tradesmen and women who work nukes are worth their price and then some.W
Good welders are worth their price.
Whoever welder that I hope they know how to run a grinder.
")
Sponsored
All the tradesmen and women who work nukes are worth their price and then some.W
Good welders are worth their price.
Whoever welder that I hope they know how to run a grinder.
One of the top 5 mods found on this site.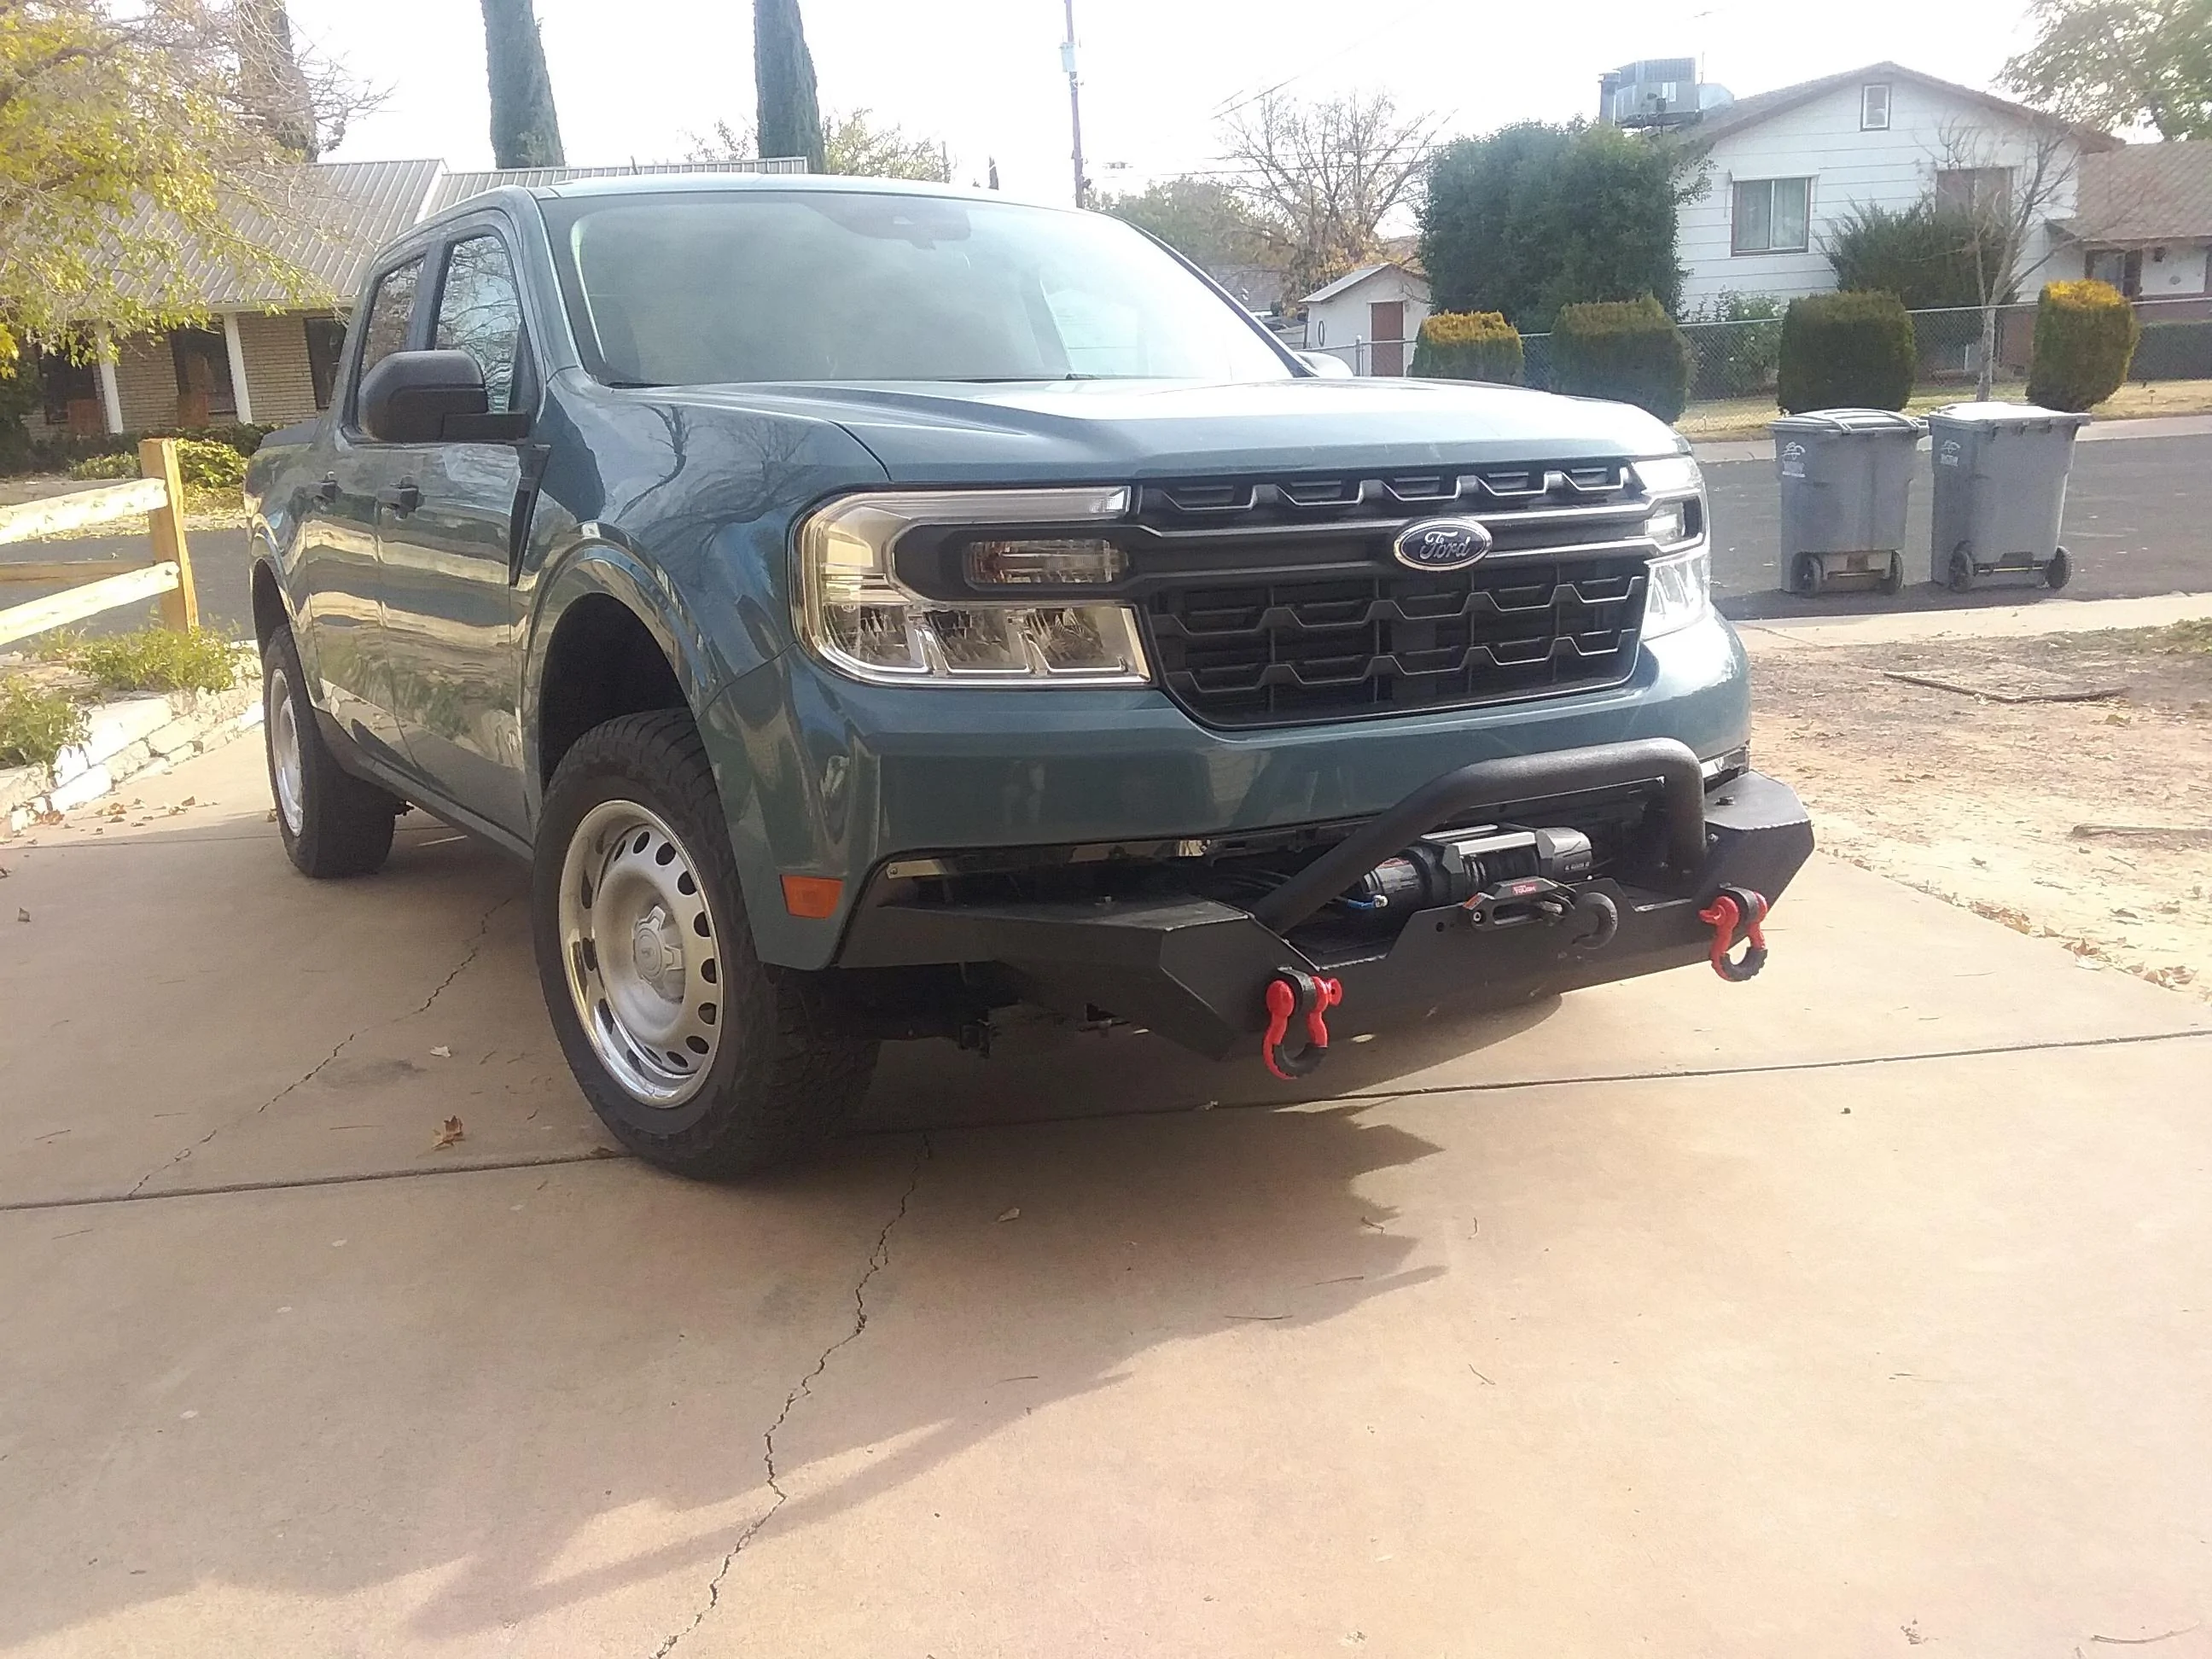
Right off, let me address the obvious question: "why would you put a winch on a hybrid? "
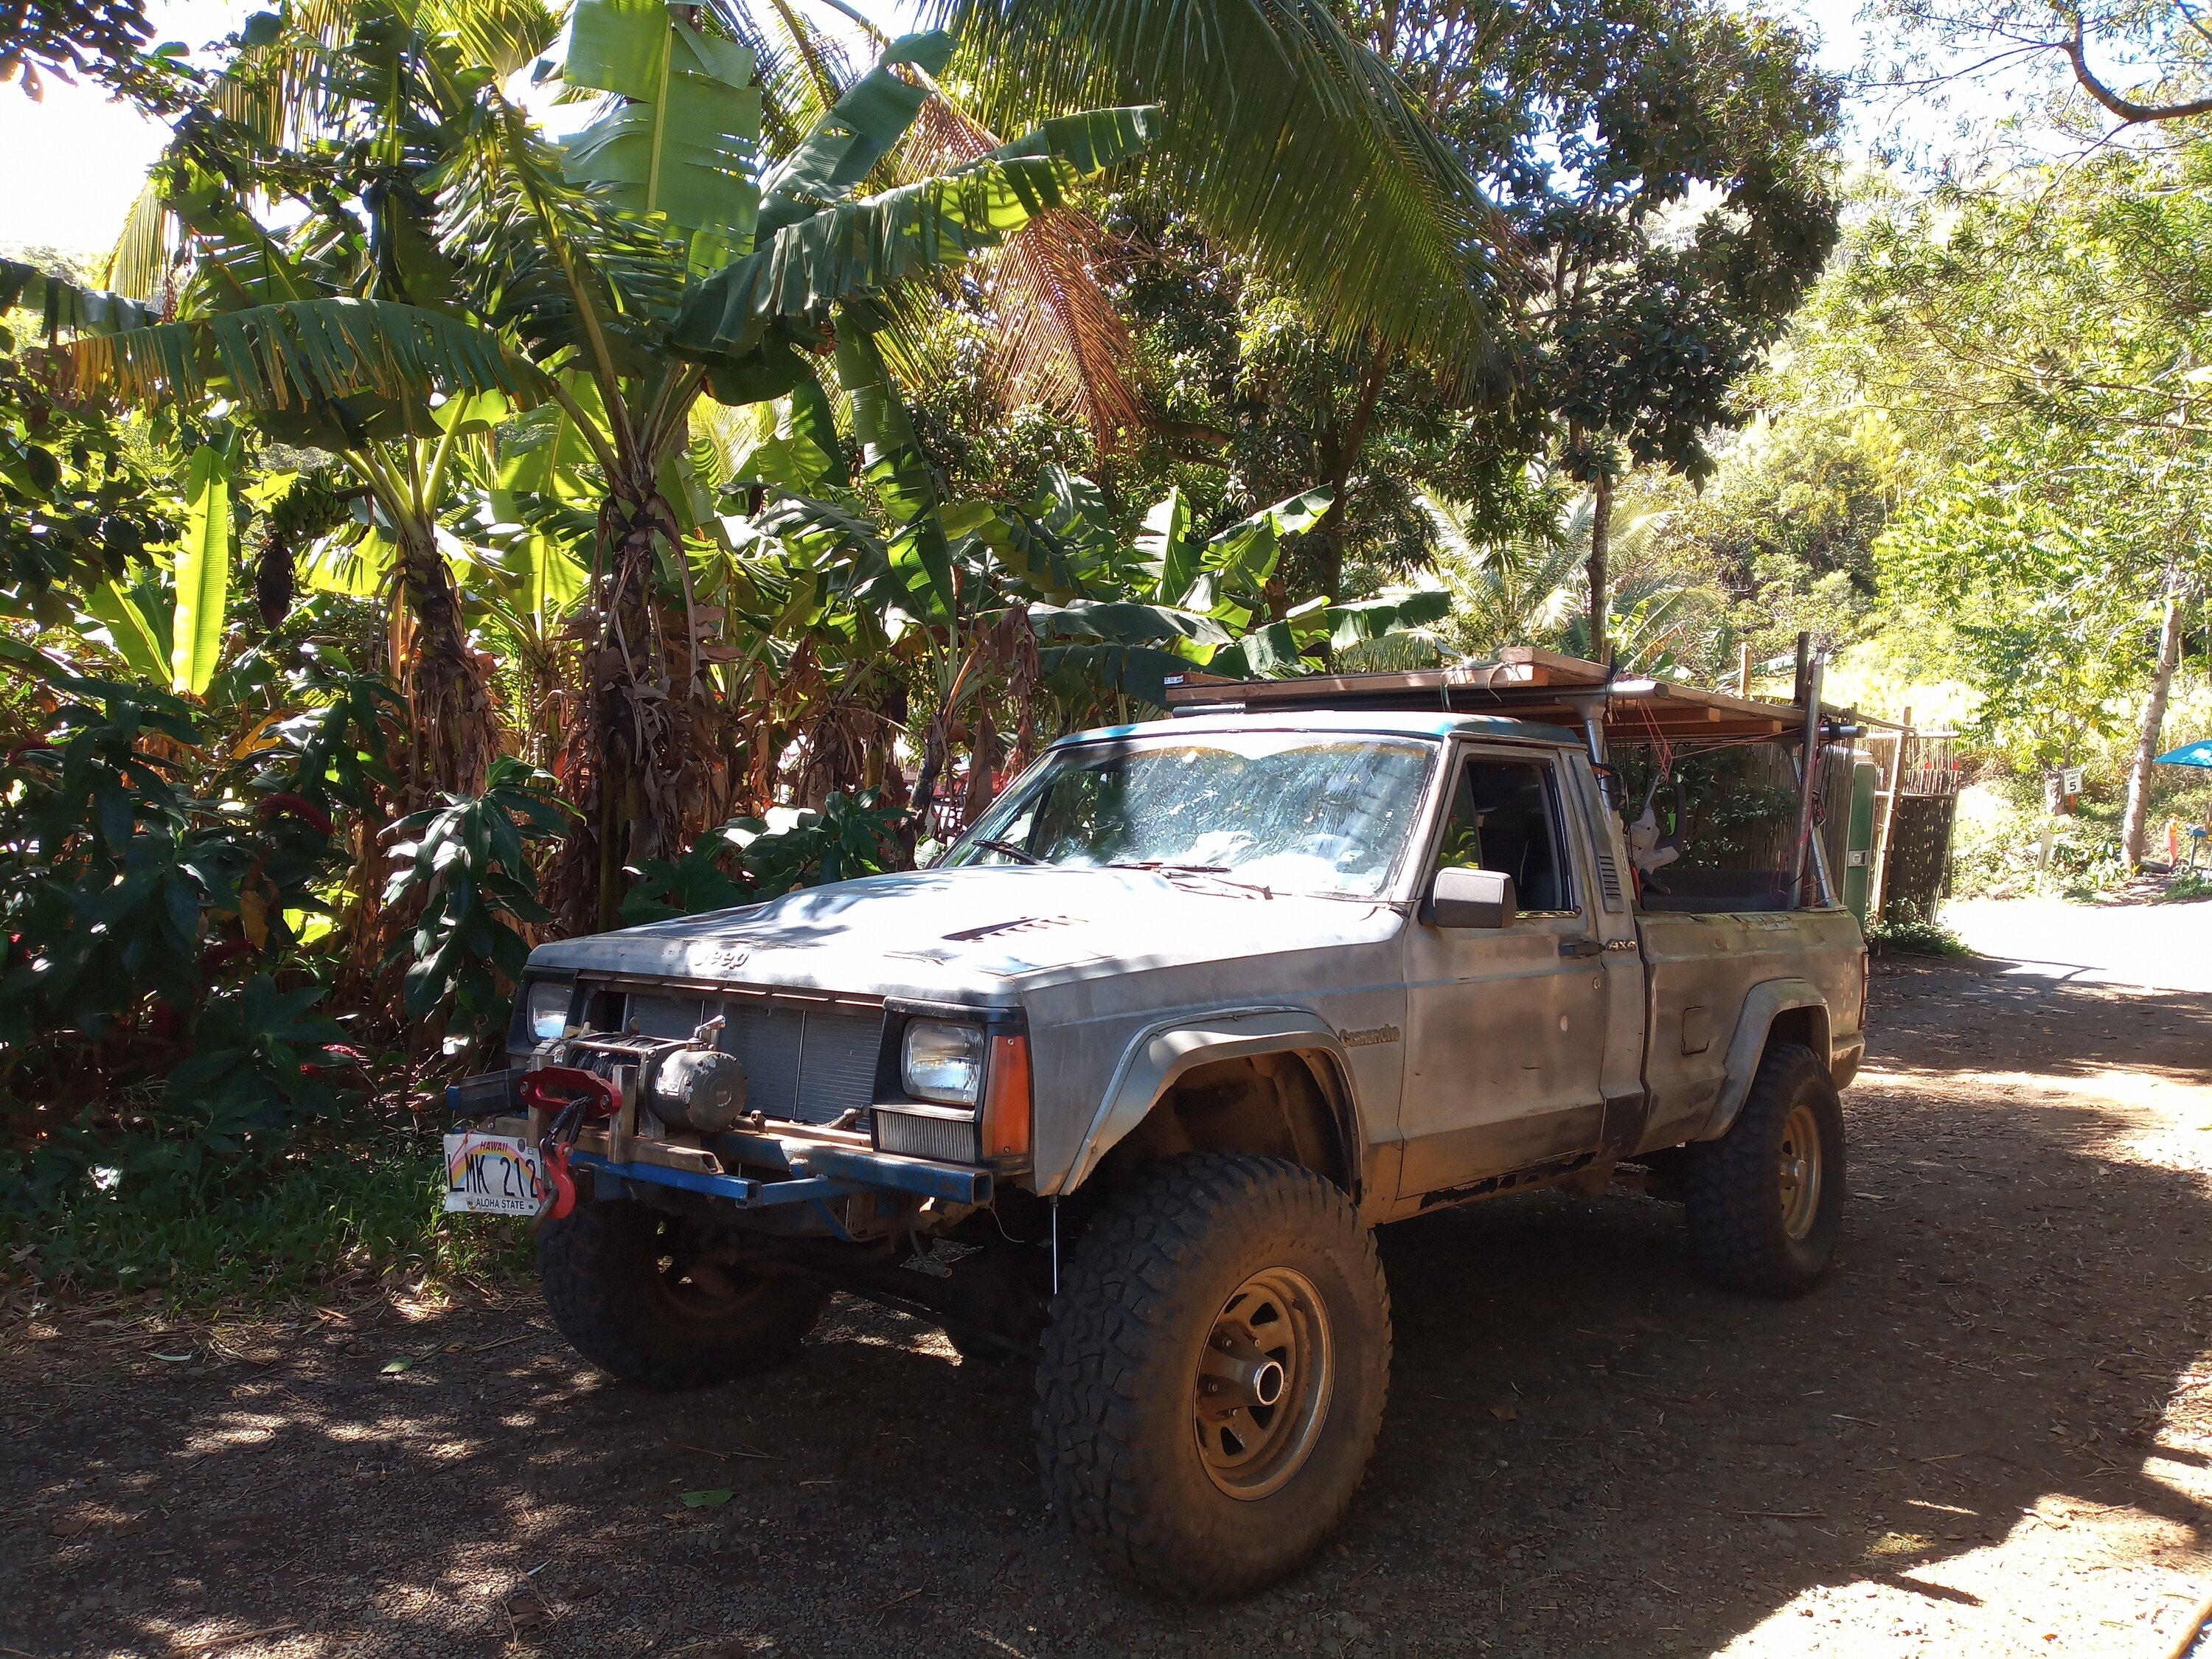
...because it will get stuck off road more than a 4wd ecobost. 98% of my driving is on pavement ,so I bought a hybrid ,but I have modified to go off pavement. I found a mid-90's Jeep bumper on e-bay for around $130 to modify to fit the Mav.
I was asked to show pictures of the build, so here they are:
The whole front facia needs to be removed. Once removed, you will see that the body painted bumper / grill surround are a separate piece from the black plastic "diaper " (I hate plastic cars) . These two pieces easily separate by pulling the metal tabs attaching them together. Save this diaper and tabs for reinstall if you loose your nerve, or come to you senses and want to return it to stock.
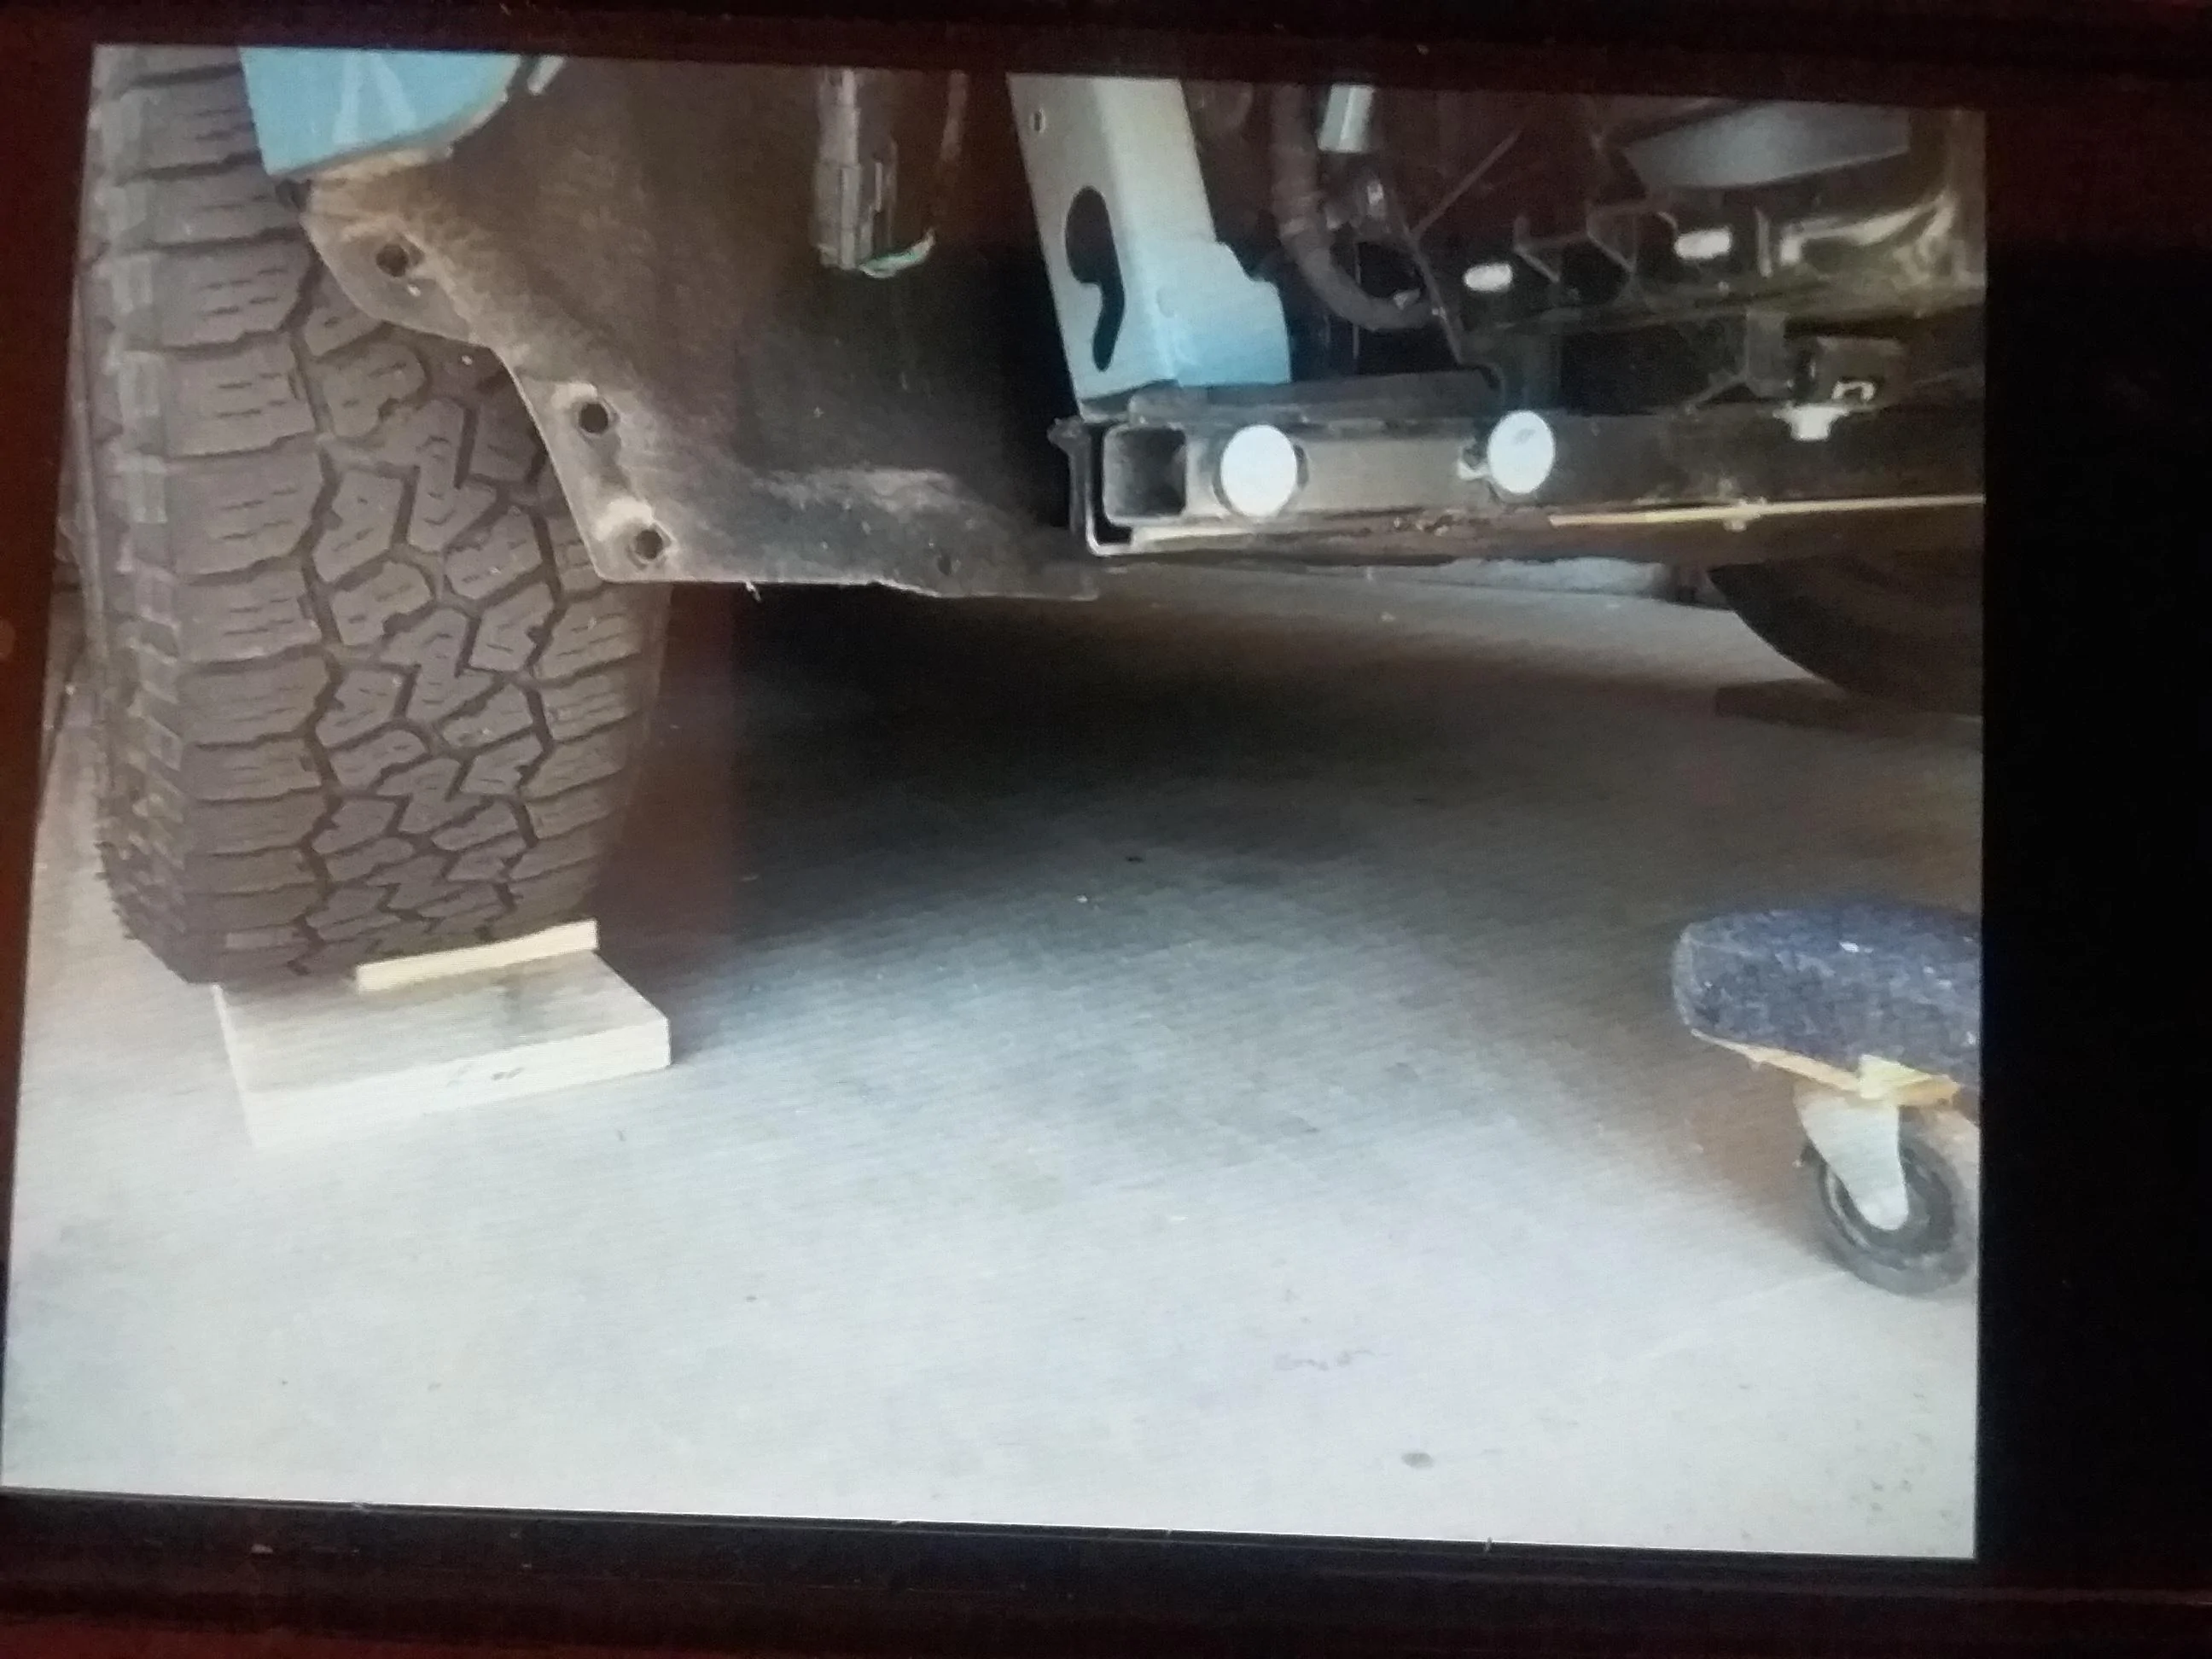
Right below these two bolts attaching this bar across the bottom of the front are the 1" stamped holes used to tie down your Mav when it was shipped from Mexico. These two tie-down holes will be the primary bumper attachment points.
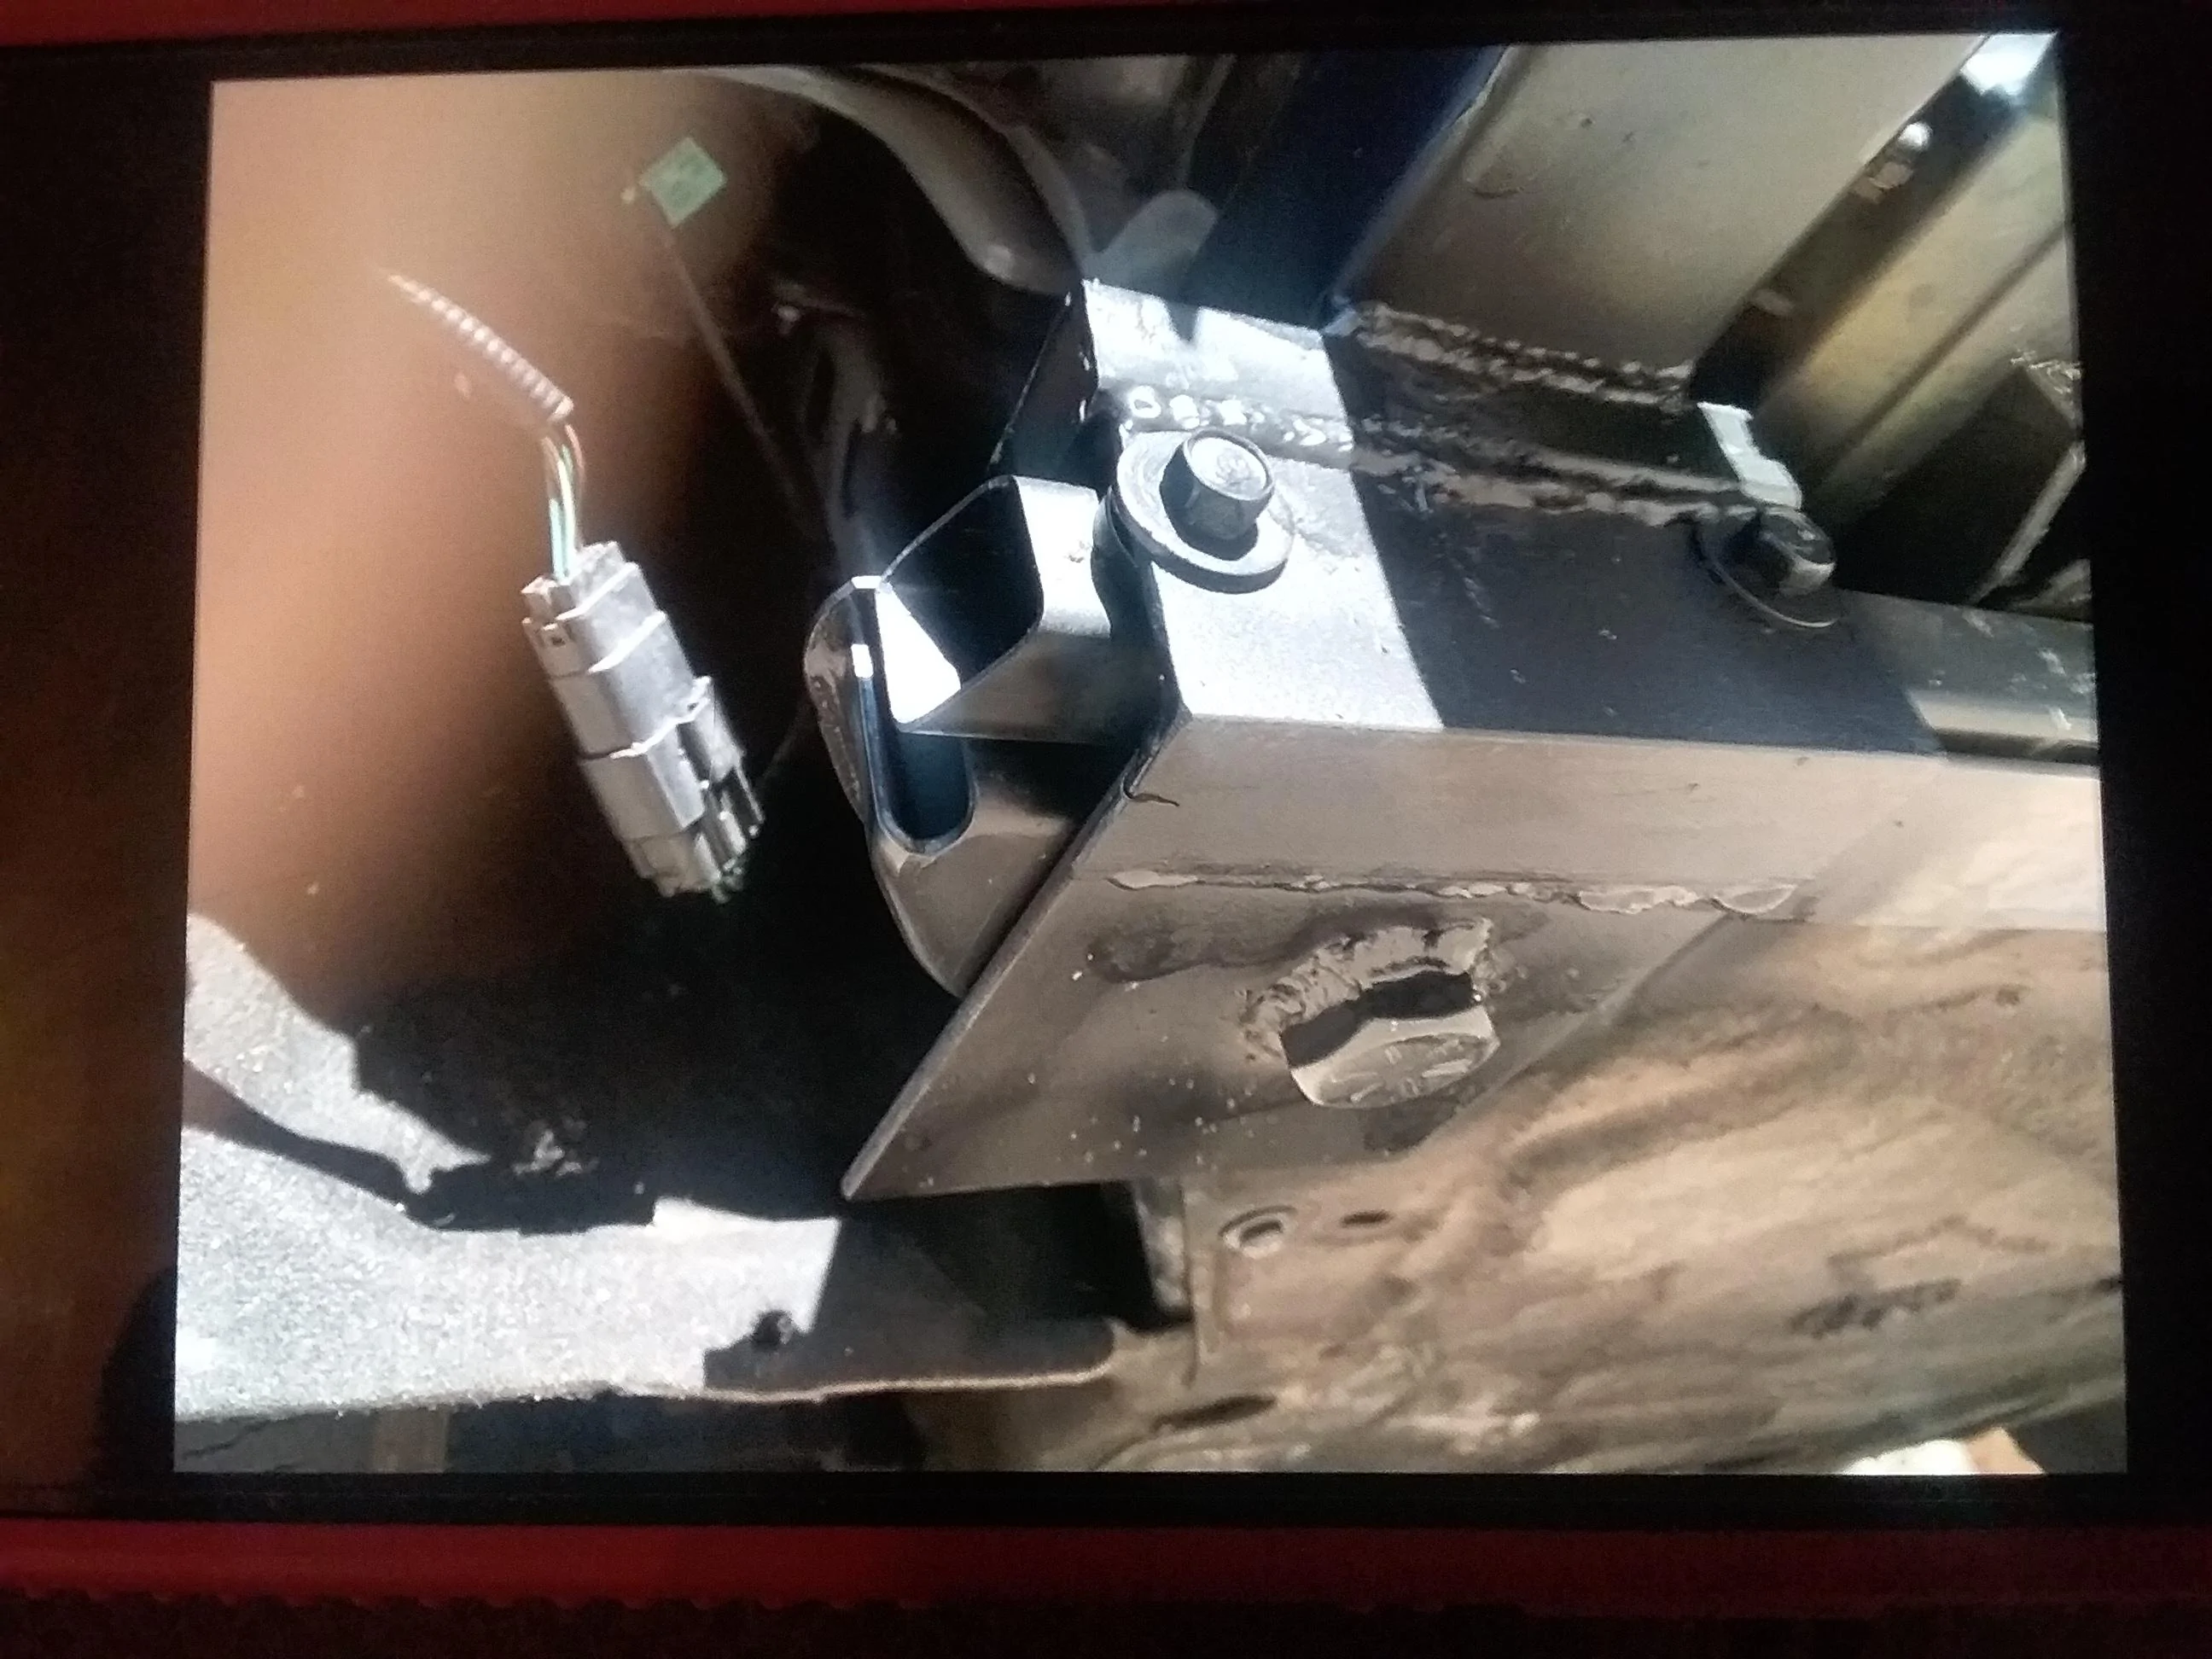
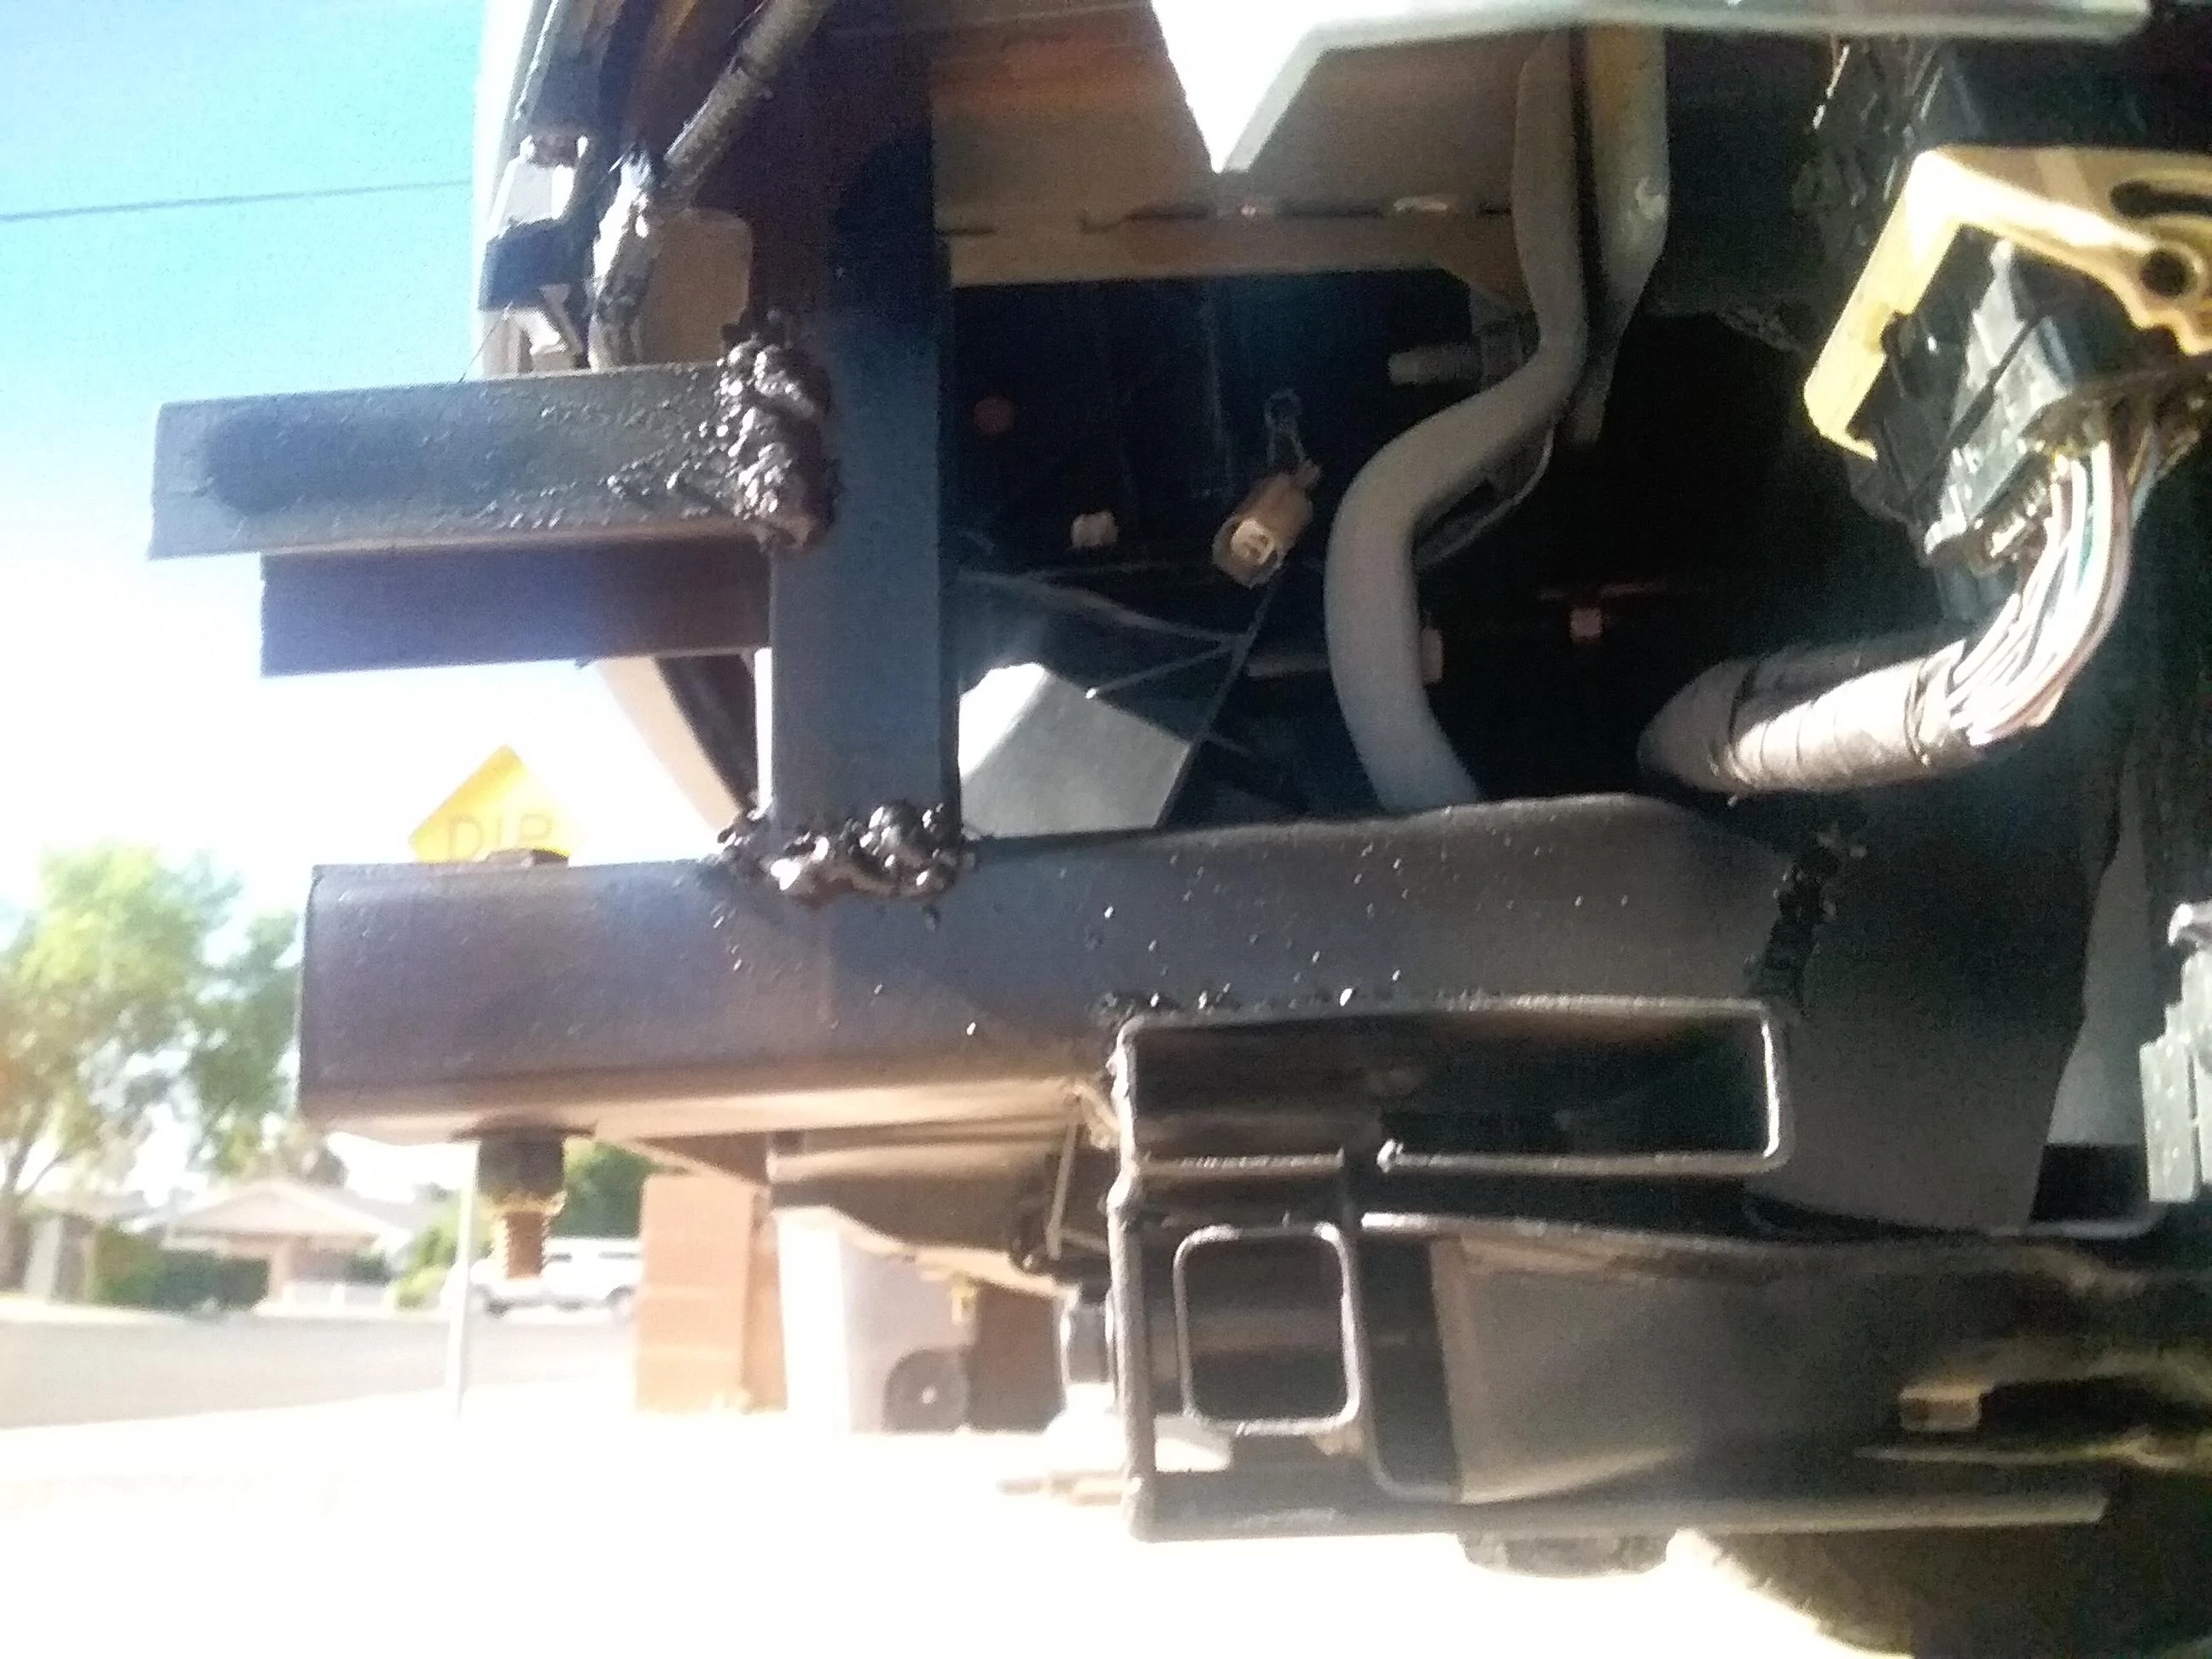
A 1" bolt is welded to a piece of angle so that it will tightly fill the shipping tie-down hole. A piece of flat square stock with a slot cut into it to accommodate the "fin" at the top of this crossmember is welded to the angle iron so that the crossmember is sandwiched between.
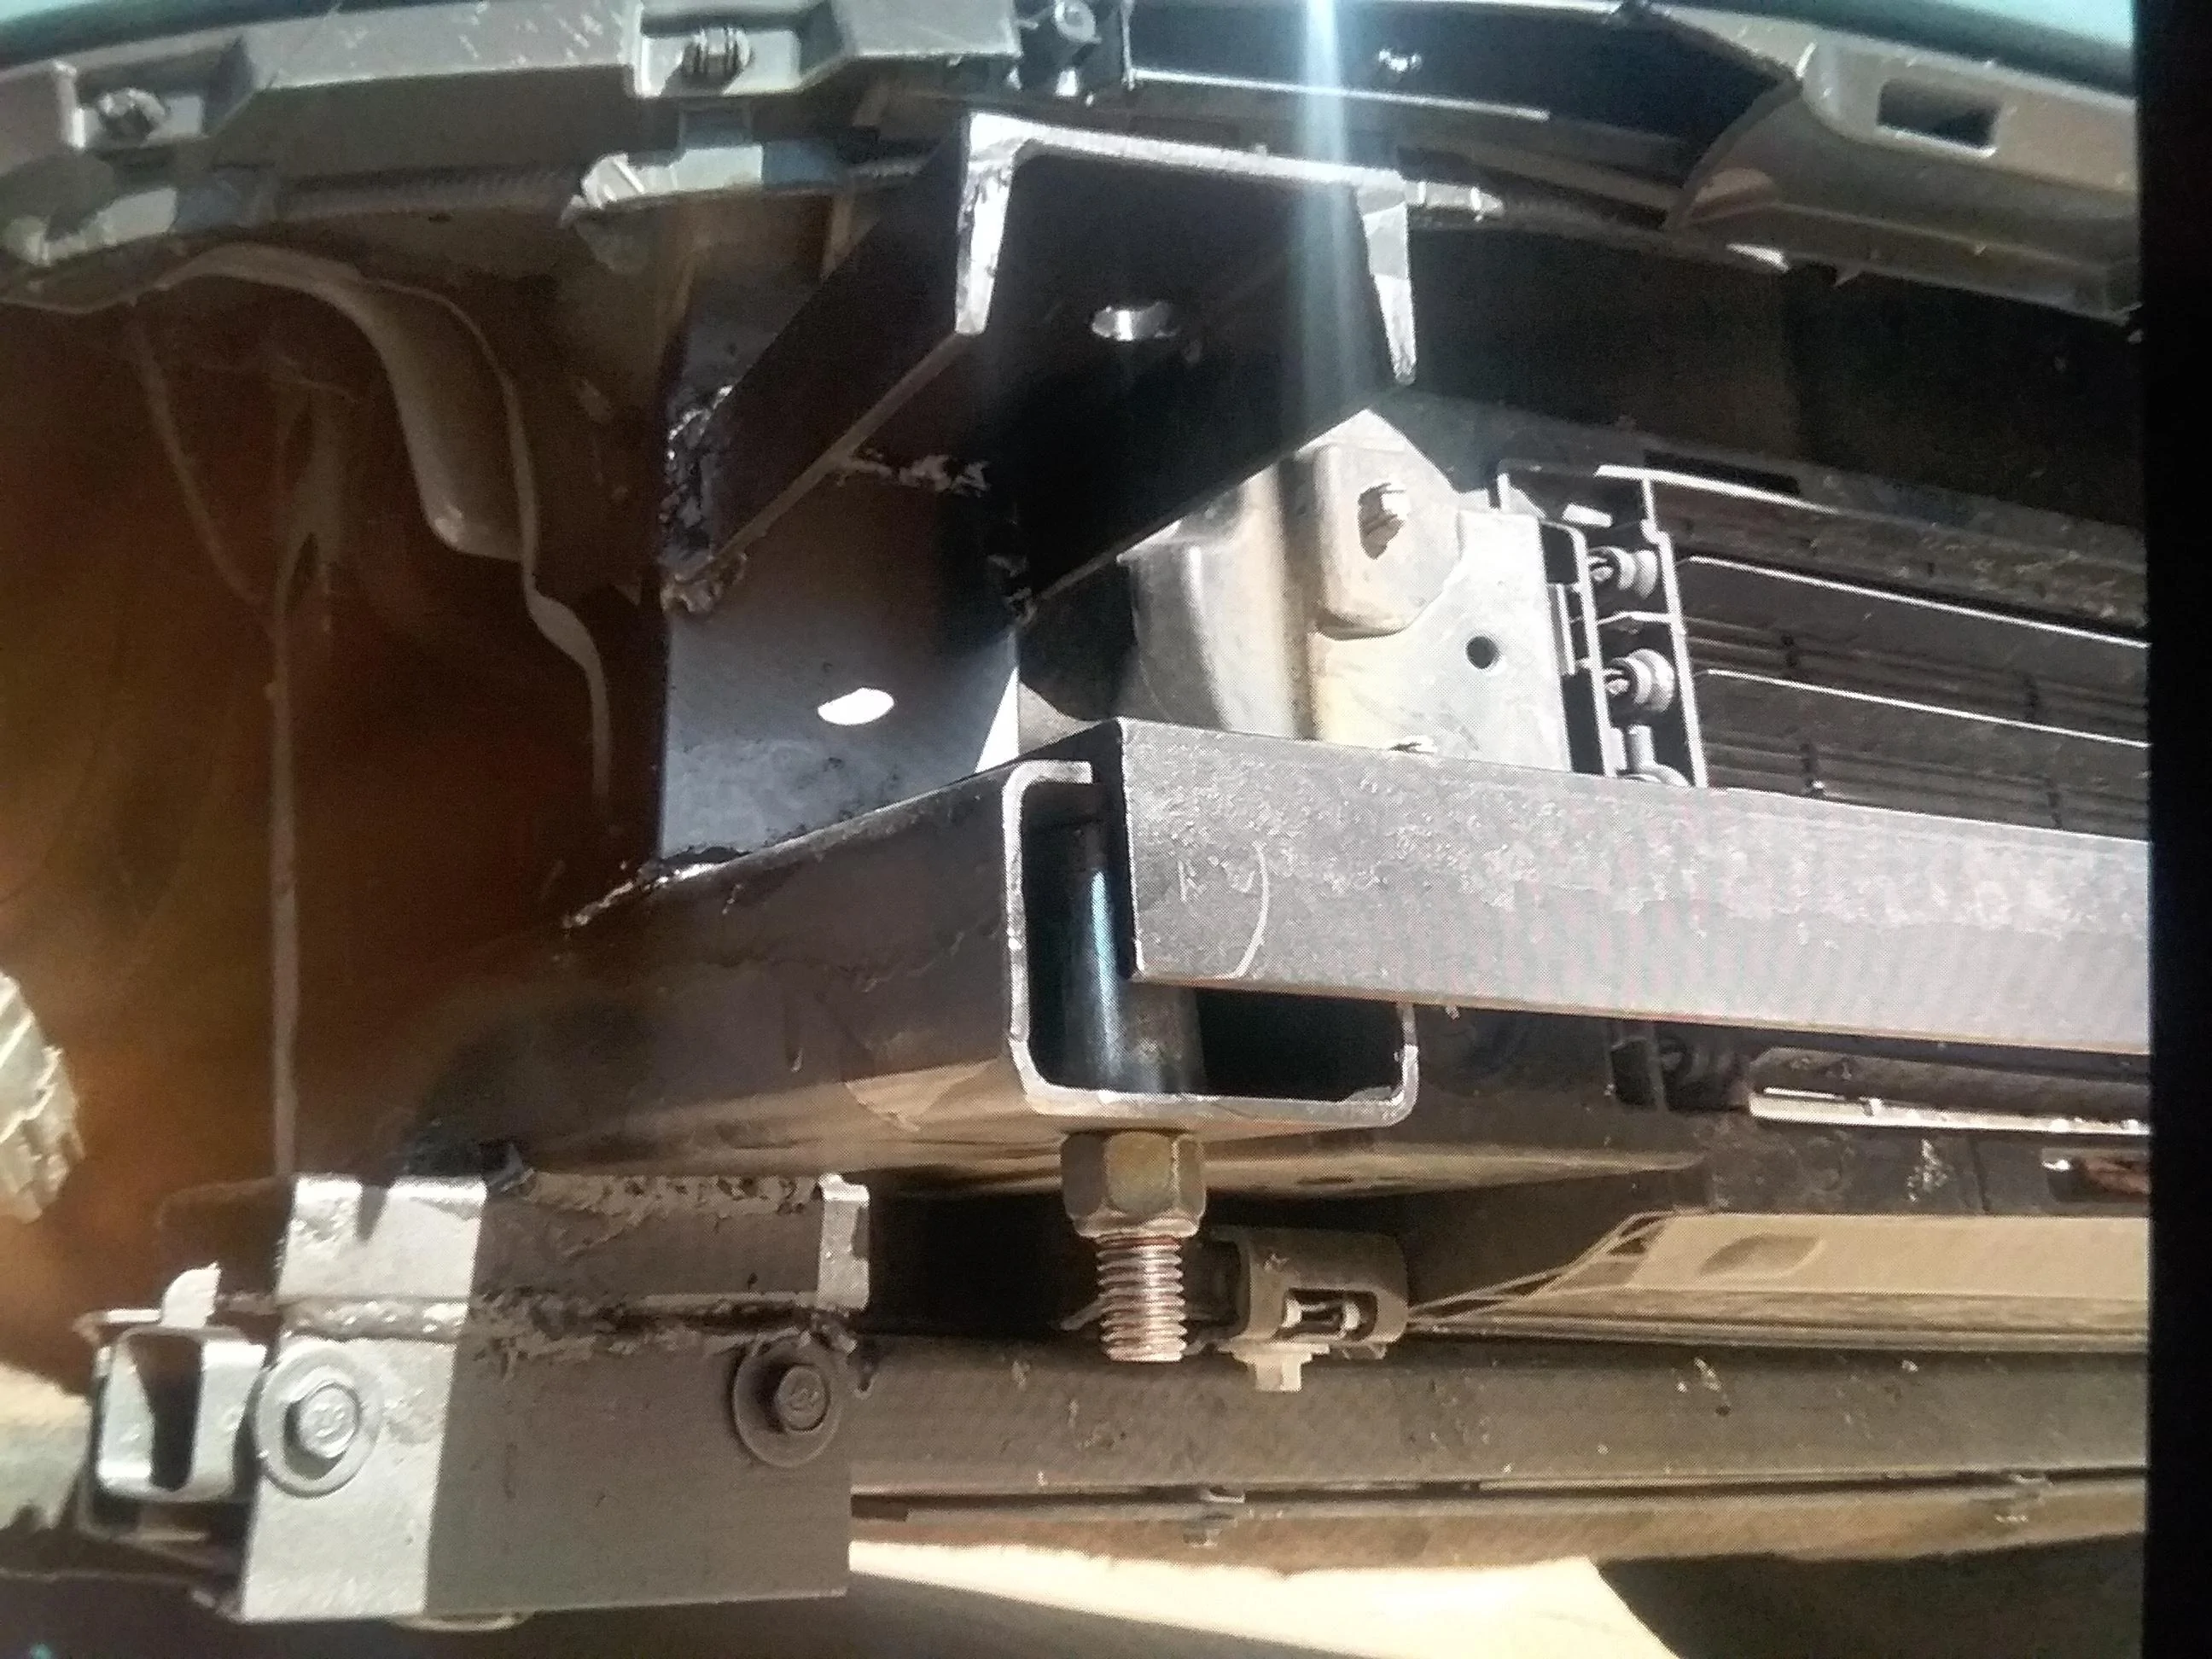
This shipping hole sandwich is repeated on the the side. From here you stack the necessary brackets to hold the bumper. These are made from 4" channel or 4" sq tubing.
The channel bolts to holes hanging from the bottom of the steel stock bumper (nothing was originally attached there - how lucky was that.)
The 4" sq tubing is either bolted or welded to the slanted body piece directly behind (I was lazy and threw a welded on it)
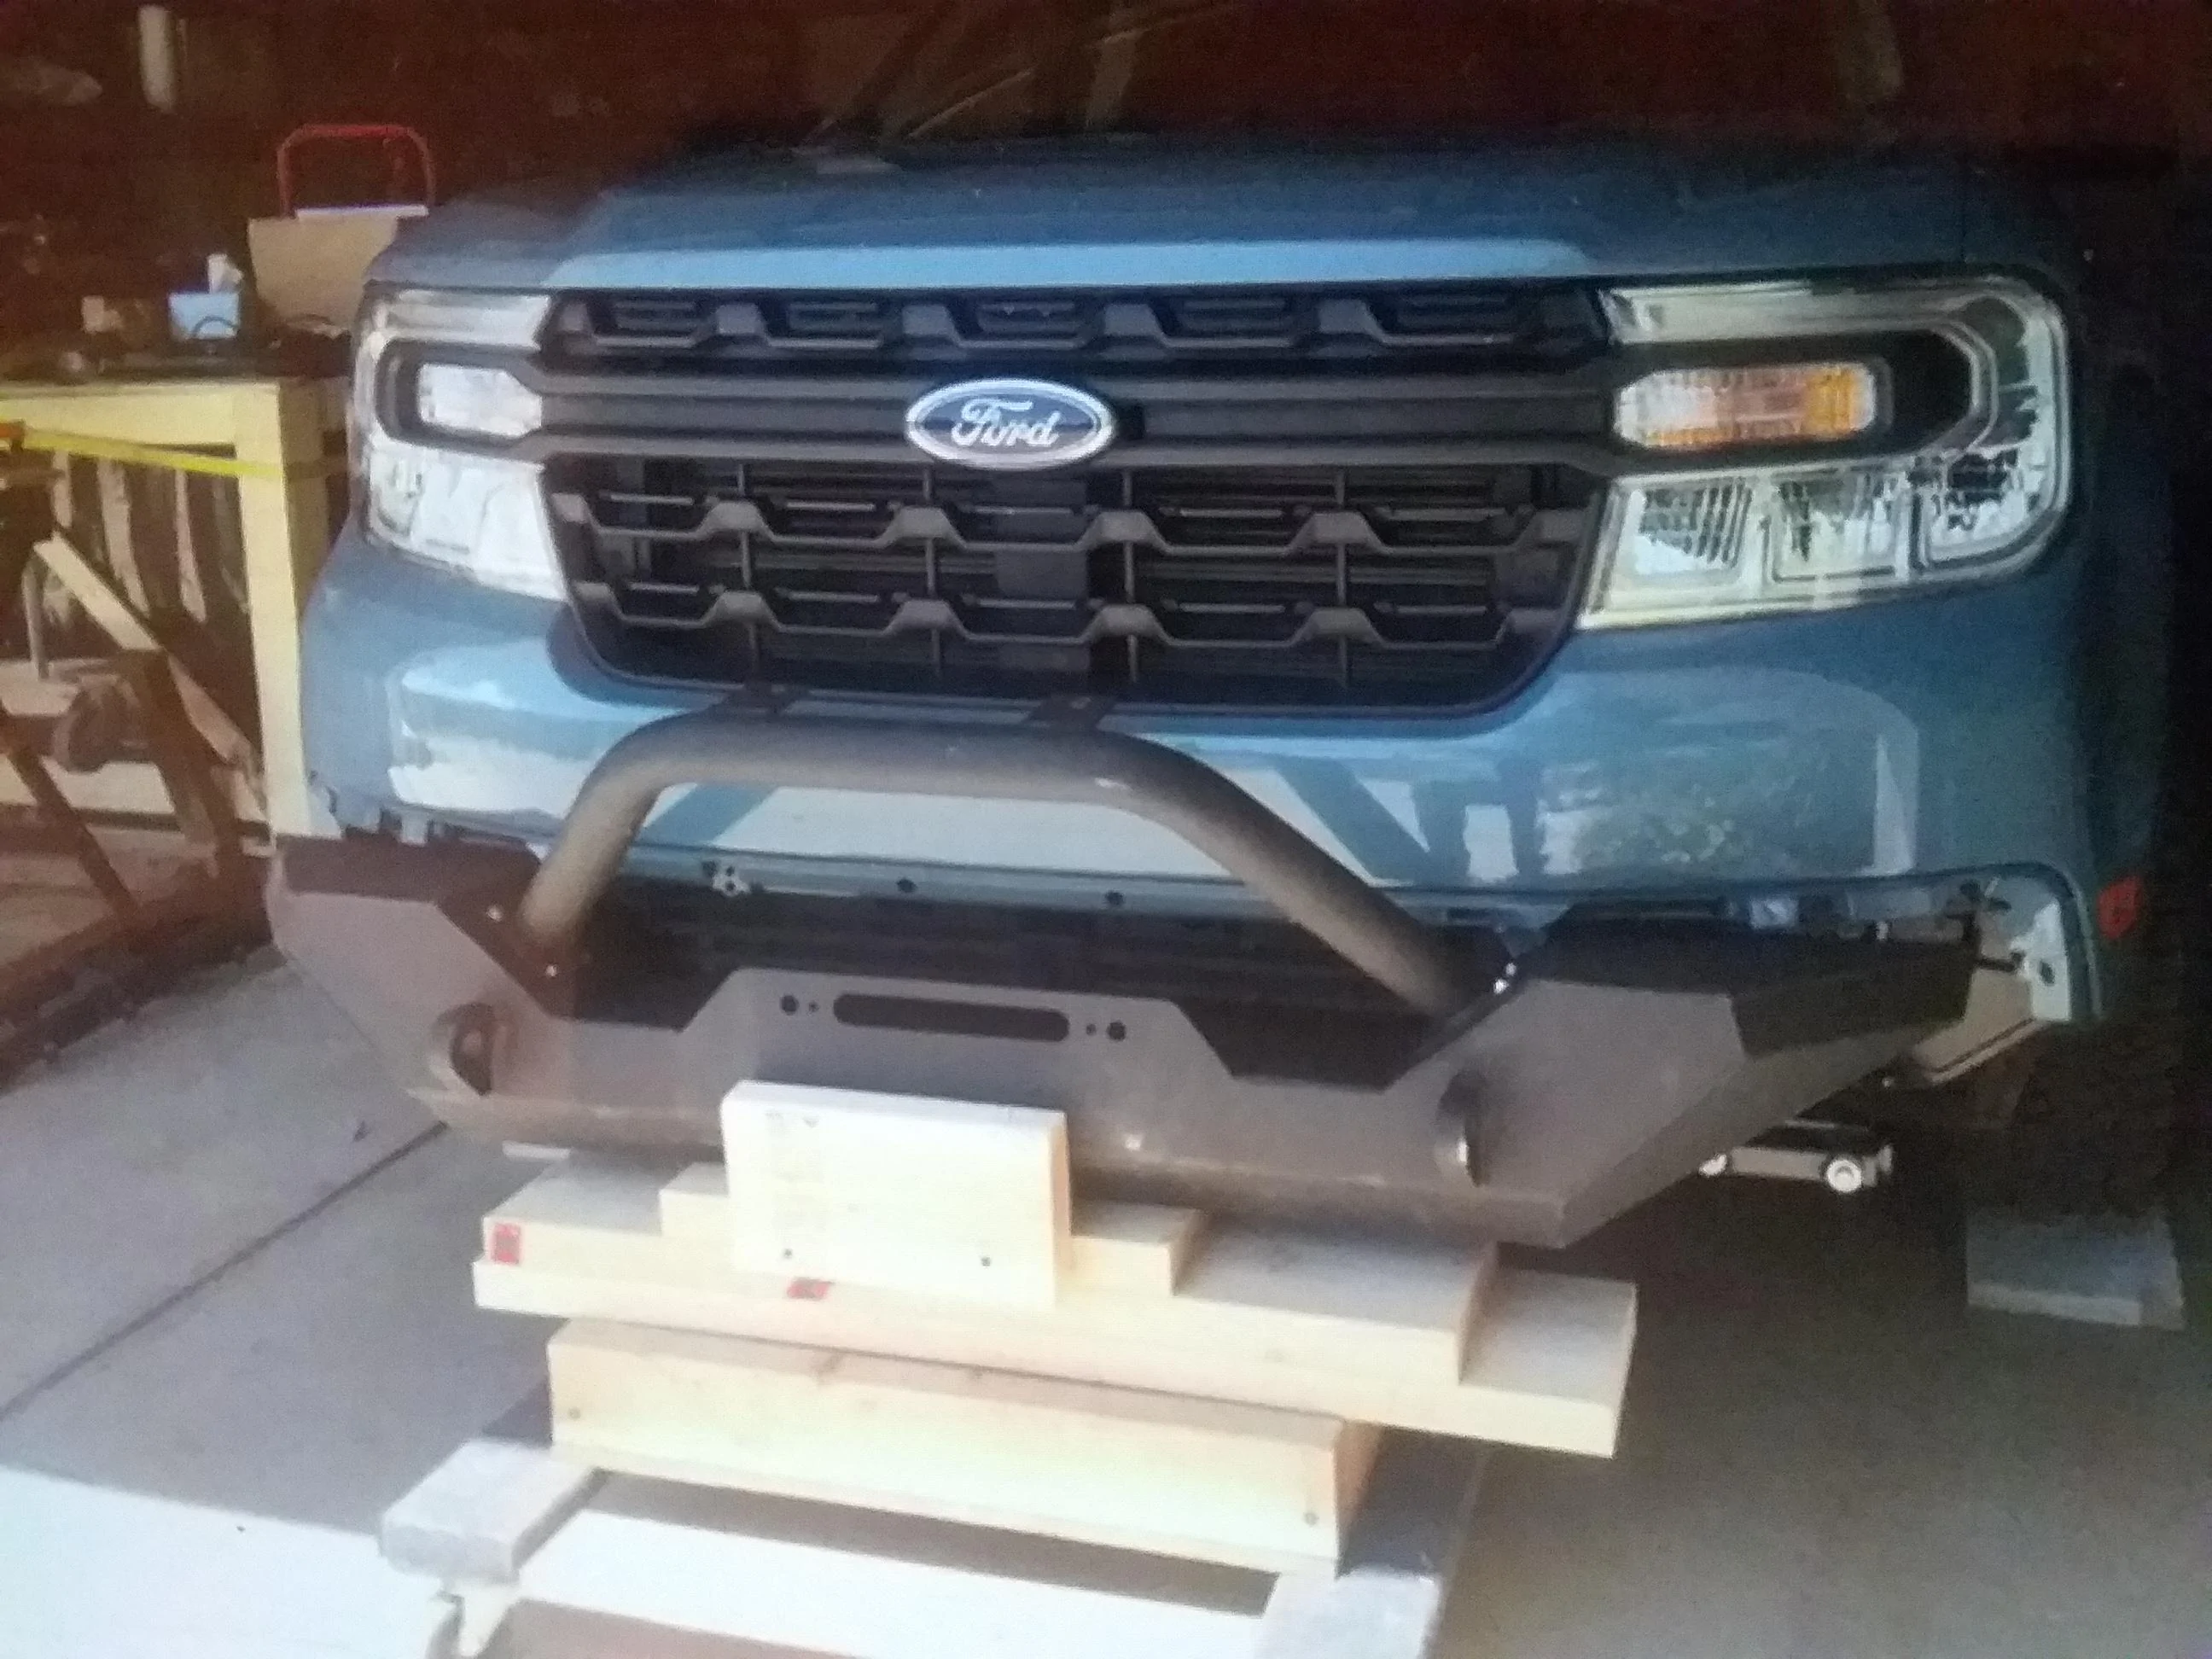
This top piece of channel is the attachment point for the upper portion of the bumper you can see the exposed bolt in picture of mounted bumper. Also the 2" angle iron showing in previous picture has two holes drilled to match up with two holes in new bumper lower section.
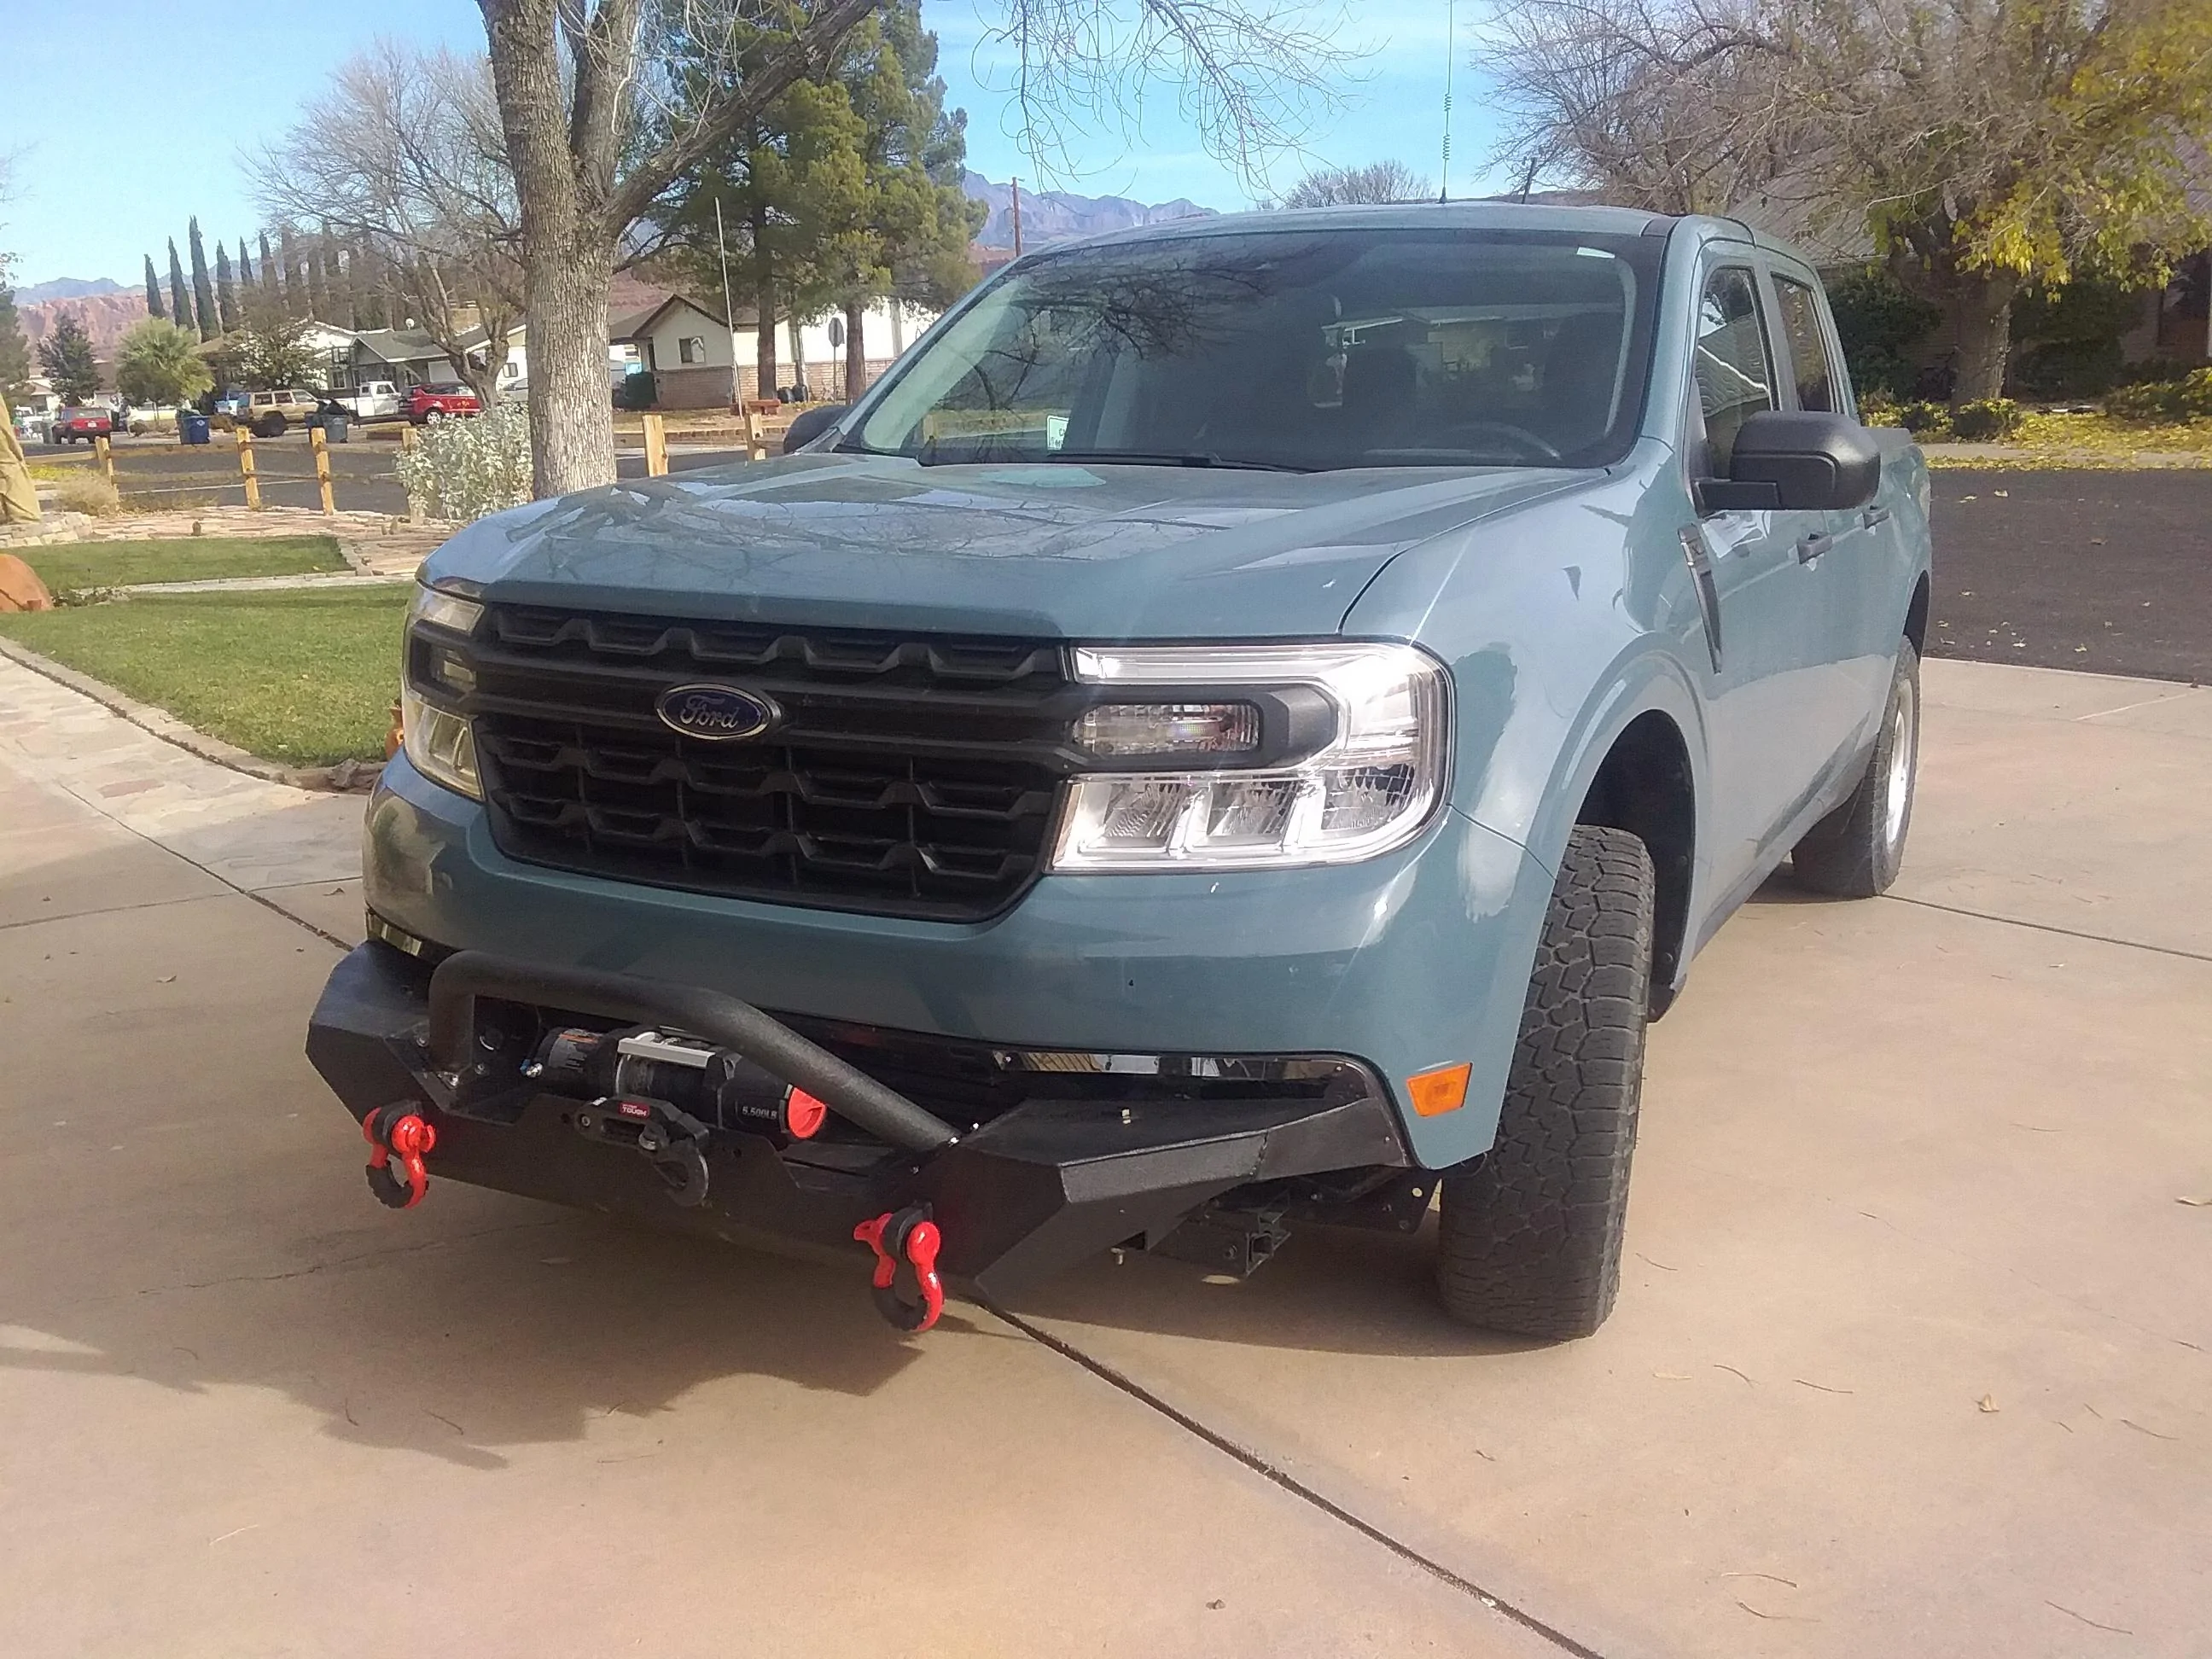
Mock up cardboard pieces to blend in Jeep bumper to opening. Cut these out of 16 ga scrap. A small black-chrome bolt attaches to flange at bottom of facia opening.
WARNING: THIS PROJECT WILL REQUIRE FABRICATION SKILLS. THE ABOVE IS NOT A STEP BY STEP INSTRUCTION. BUT JUST SOME TIPS TO SHOW THAT IT CAN BE DONE.
Welds are a little rough.
Right off, let me address the obvious question: "why would you put a winch on a hybrid? "
...because it will get stuck off road more than a 4wd ecobost. 98% of my driving is on pavement ,so I bought a hybrid ,but I have modified to go off pavement. I found a mid-90's Jeep bumper on e-bay for around $130 to modify to fit the Mav.
I was asked to show pictures of the build, so here they are:
The whole front facia needs to be removed. Once removed, you will see that the body painted bumper / grill surround are a separate piece from the black plastic "diaper " (I hate plastic cars) . These two pieces easily separate by pulling the metal tabs attaching them together. Save this diaper and tabs for reinstall if you loose your nerve, or come to you senses and want to return it to stock.
Right below these two bolts attaching this bar across the bottom of the front are the 1" stamped holes used to tie down your Mav when it was shipped from Mexico. These two tie-down holes will be the primary bumper attachment points.
A 1" bolt is welded to a piece of angle so that it will tightly fill the shipping tie-down hole. A piece of flat square stock with a slot cut into it to accommodate the "fin" at the top of this crossmember is welded to the angle iron so that the crossmember is sandwiched between.
This shipping hole sandwich is repeated on the the side. From here you stack the necessary brackets to hold the bumper. These are made from 4" channel or 4" sq tubing.
The channel bolts to holes hanging from the bottom of the steel stock bumper (nothing was originally attached there - how lucky was that.)
The 4" sq tubing is either bolted or welded to the slanted body piece directly behind (I was lazy and threw a welded on it)
This top piece of channel is the attachment point for the upper portion of the bumper you can see the exposed bolt in picture of mounted bumper. Also the 2" angle iron showing in previous picture has two holes drilled to match up with two holes in new bumper lower section.
Mock up cardboard pieces to blend in Jeep bumper to opening. Cut these out of 16 ga scrap. A small black-chrome bolt attaches to flange at bottom of facia opening.
WARNING: THIS PROJECT WILL REQUIRE FABRICATION SKILLS. THE ABOVE IS NOT A STEP BY STEP INSTRUCTION. BUT JUST SOME TIPS TO SHOW THAT IT CAN BE DONE.
Booyah
Right off, let me address the obvious question: "why would you put a winch on a hybrid? "
...because it will get stuck off road more than a 4wd ecobost. 98% of my driving is on pavement ,so I bought a hybrid ,but I have modified to go off pavement. I found a mid-90's Jeep bumper on e-bay for around $130 to modify to fit the Mav.
I was asked to show pictures of the build, so here they are:
The whole front facia needs to be removed. Once removed, you will see that the body painted bumper / grill surround are a separate piece from the black plastic "diaper " (I hate plastic cars) . These two pieces easily separate by pulling the metal tabs attaching them together. Save this diaper and tabs for reinstall if you loose your nerve, or come to you senses and want to return it to stock.
Right below these two bolts attaching this bar across the bottom of the front are the 1" stamped holes used to tie down your Mav when it was shipped from Mexico. These two tie-down holes will be the primary bumper attachment points.
A 1" bolt is welded to a piece of angle so that it will tightly fill the shipping tie-down hole. A piece of flat square stock with a slot cut into it to accommodate the "fin" at the top of this crossmember is welded to the angle iron so that the crossmember is sandwiched between.
This shipping hole sandwich is repeated on the the side. From here you stack the necessary brackets to hold the bumper. These are made from 4" channel or 4" sq tubing.
The channel bolts to holes hanging from the bottom of the steel stock bumper (nothing was originally attached there - how lucky was that.)
The 4" sq tubing is either bolted or welded to the slanted body piece directly behind (I was lazy and threw a welded on it)
This top piece of channel is the attachment point for the upper portion of the bumper you can see the exposed bolt in picture of mounted bumper. Also the 2" angle iron showing in previous picture has two holes drilled to match up with two holes in new bumper lower section.
Mock up cardboard pieces to blend in Jeep bumper to opening. Cut these out of 16 ga scrap. A small black-chrome bolt attaches to flange at bottom of facia opening.
WARNING: THIS PROJECT WILL REQUIRE FABRICATION SKILLS. THE ABOVE IS NOT A STEP BY STEP INSTRUCTION. BUT JUST SOME TIPS TO SHOW THAT IT CAN BE DONE.


I've probably used it 30 or 40 times over 4 years with zero issues other than my solenoid box having a crack and filling with water and needing replaced. Home made mount on a home made bumper with 6 bolts going through 3 holes on each side in the front stamped structure. Also this truck has a ton of rust. Still holds together. Even did anchor pulls where I was winching but my rear bumper was tied to another vehicle pulling.In no way would I put a winch on a unibody vehicle, you are just asking for trouble.
I've wondered the same thing. Why not just put one of those base plate kits on especially since they attach further back on the frame member that the FX4 hooks bolt into. I get that the FX4 has an added anchor point welded in but the base plate kits I've seen have reinforcement pieces bolted on to that frame piece. Seems like it would be a heck of a lot easier to fabricate an attachment for the base plate than it would to fabricate what is essentially a base plate.What's the difference between a winch and flat towing?
