- Joined
- Jan 4, 2022
- Threads
- 2
- Messages
- 23
- Reaction score
- 52
- Location
- Chicago
- Website
- wookiesinthewoods.com
- Vehicle(s)
- 22 Maverick, 19 Cayman GTS
- Engine
- 2.0L EcoBoost
- Thread starter
- #1
Not a video guy but couldn't find any good info on removing the side panel. Always hardwire My V1 in whatever cars I have. Most vids just say it pops off, which is all good but I'm pretty meticulous and don't want to introduce any rattles or have poor panel fitment after install. I've had VWs mostly for the past 10 years so not as familiar with how Ford does interior trim.
So here's a little DIY that hopefully can help others.
Tools needed:
The actual wiring there's plenty of videos out there and pretty standard.
Panel in question:

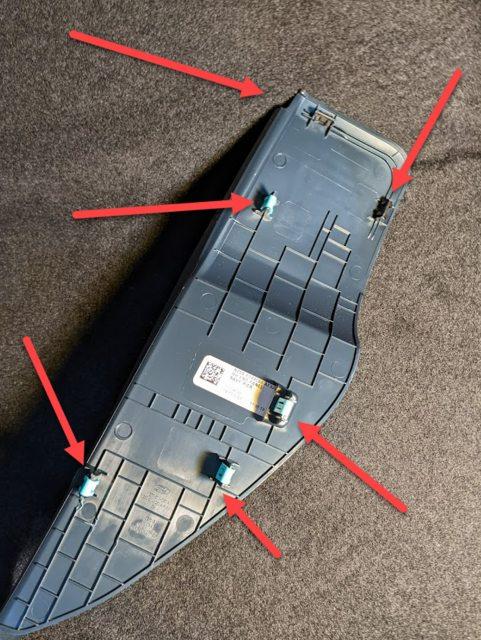
Here's all the mounting clip locations.
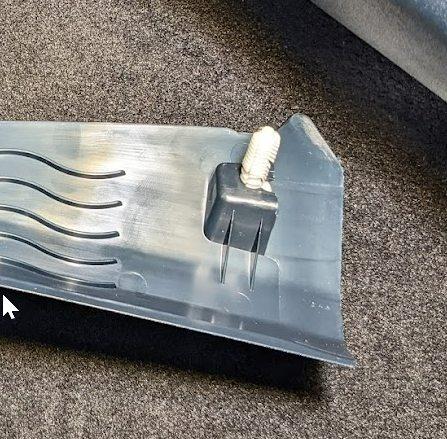
Plus one plug at the very bottom shown here:
Here's the panel with the trim off with mouting locations noted:
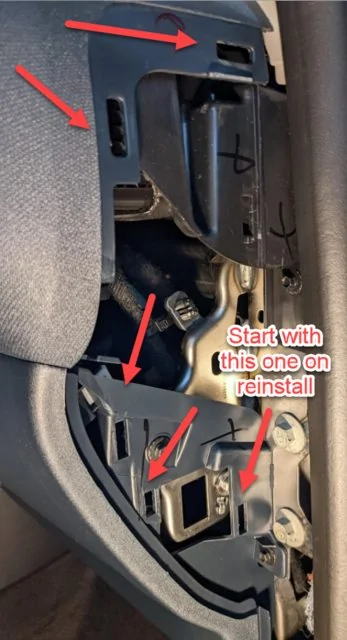
Note: this white plug will likely stay on the kickpanel mounting location on removal, remove it from the kick panel and slide it into it's slot for install later as shown here:
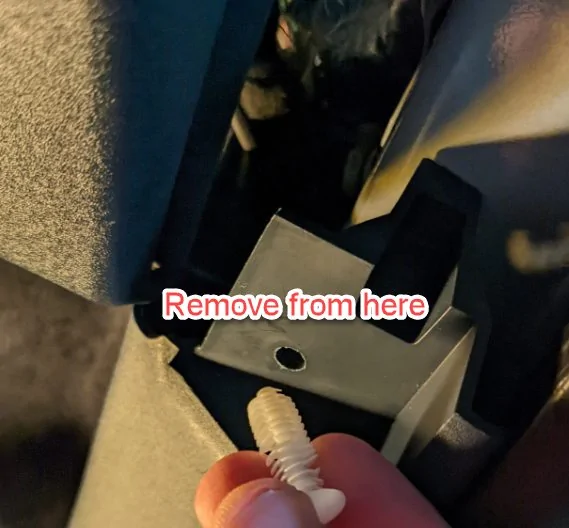
The pronged end of the panel tools helps preserve the white fastener best you can.
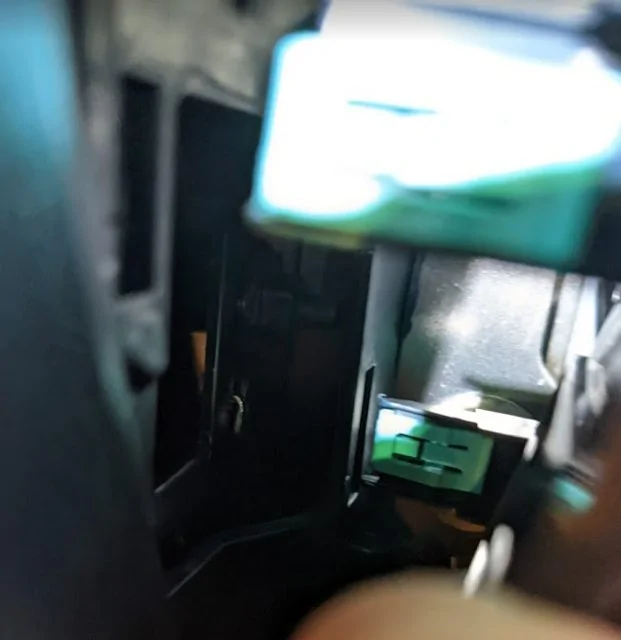
Then do wiring for whatever project you are doing.
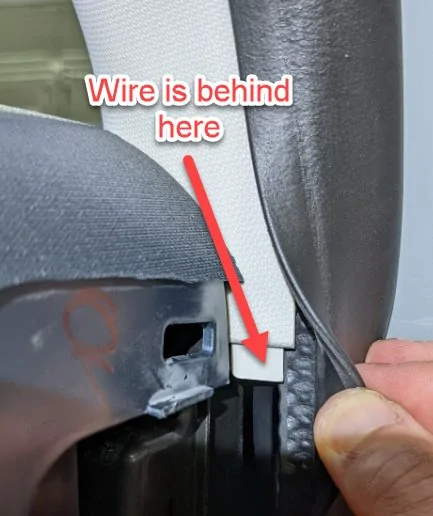
Make sure your wire(s) are behind the white panel here for proper fitment.
Here's a shot of that forward most (front of the vehicle) clip that if you line that guy up right, reinstall and getting a tight fit of all clips. I had originally started trying to do this by getting the panel under the door weatherstripping but was proving difficult. So if you're on top of the rubber stripping, that's fine for now. Also line up, maybe 1 set of the 'teeth' of the white lower fastener but don't press it in yet.
Once that clip is in do the rest of the upper clips, you may not get a ton of feedback that they are in there but as long as the panel is flush and doesn't jiggle if you bang on it, they're in.
Use your panel tool/finger to work the weatherstripping back over the edge.
Press the white fastener in last. This are mostly single use fasteners for ease of assembly at the plant. If it doesn't fit as tight as you want someone may be able to chime in with the part number. I just put a 1cm square of 3M automotive foam tape behind the panel at that location and actually sits a bit more flush that it did when new as those white ones never get that tight.
Looking good!
Thanks and hope this helps someone. I haven't written a DIY since the original release of the MKV GTI in 2006.
So here's a little DIY that hopefully can help others.
Tools needed:
- Plastic Panel removal tools I've used a Profit for years, super versatile and non marring. ProFit Panel tool
- Longer removal tool for a rear clip and lower white plastic fastener, I got mine at Harbor Freight but something like this: Panel Kit
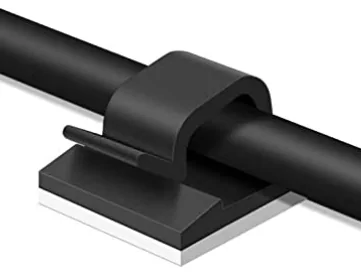
- Fuse tap Kit. I used Fuse #3 thanks to the help of some videos by CKH:
The actual wiring there's plenty of videos out there and pretty standard.
Panel in question:
Here's all the mounting clip locations.
Plus one plug at the very bottom shown here:
Here's the panel with the trim off with mouting locations noted:
Note: this white plug will likely stay on the kickpanel mounting location on removal, remove it from the kick panel and slide it into it's slot for install later as shown here:
The pronged end of the panel tools helps preserve the white fastener best you can.
Then do wiring for whatever project you are doing.
Make sure your wire(s) are behind the white panel here for proper fitment.
Here's a shot of that forward most (front of the vehicle) clip that if you line that guy up right, reinstall and getting a tight fit of all clips. I had originally started trying to do this by getting the panel under the door weatherstripping but was proving difficult. So if you're on top of the rubber stripping, that's fine for now. Also line up, maybe 1 set of the 'teeth' of the white lower fastener but don't press it in yet.
Once that clip is in do the rest of the upper clips, you may not get a ton of feedback that they are in there but as long as the panel is flush and doesn't jiggle if you bang on it, they're in.
Use your panel tool/finger to work the weatherstripping back over the edge.
Press the white fastener in last. This are mostly single use fasteners for ease of assembly at the plant. If it doesn't fit as tight as you want someone may be able to chime in with the part number. I just put a 1cm square of 3M automotive foam tape behind the panel at that location and actually sits a bit more flush that it did when new as those white ones never get that tight.
Looking good!
Thanks and hope this helps someone. I haven't written a DIY since the original release of the MKV GTI in 2006.
Sponsored