- First Name
- James
- Joined
- Aug 30, 2023
- Threads
- 1
- Messages
- 3
- Reaction score
- 15
- Location
- Herald, CA
- Vehicle(s)
- 2023 Ford Maverick
- Engine
- 2.5L Hybrid
- Thread starter
- #1
Hi all,
So I didn't really take pictures as I went, but I took some pictures after the fact and with some additional text I think this is a pretty straightforward install.
I received my 2023 Ford Maverick Hybrid XLT in August 2023 and this was actually not the truck I ordered, but a similar spec'd truck that had been passed on by another customer. This truck did not have the factory tow hitch or wiring installed, so I installed both the hitch and wiring knowing I'd want to install a 7 pin connector so I could use the Diode Dynamics HitchMount C1R LED pod. Outlined below is the parts/steps/tips on the install.
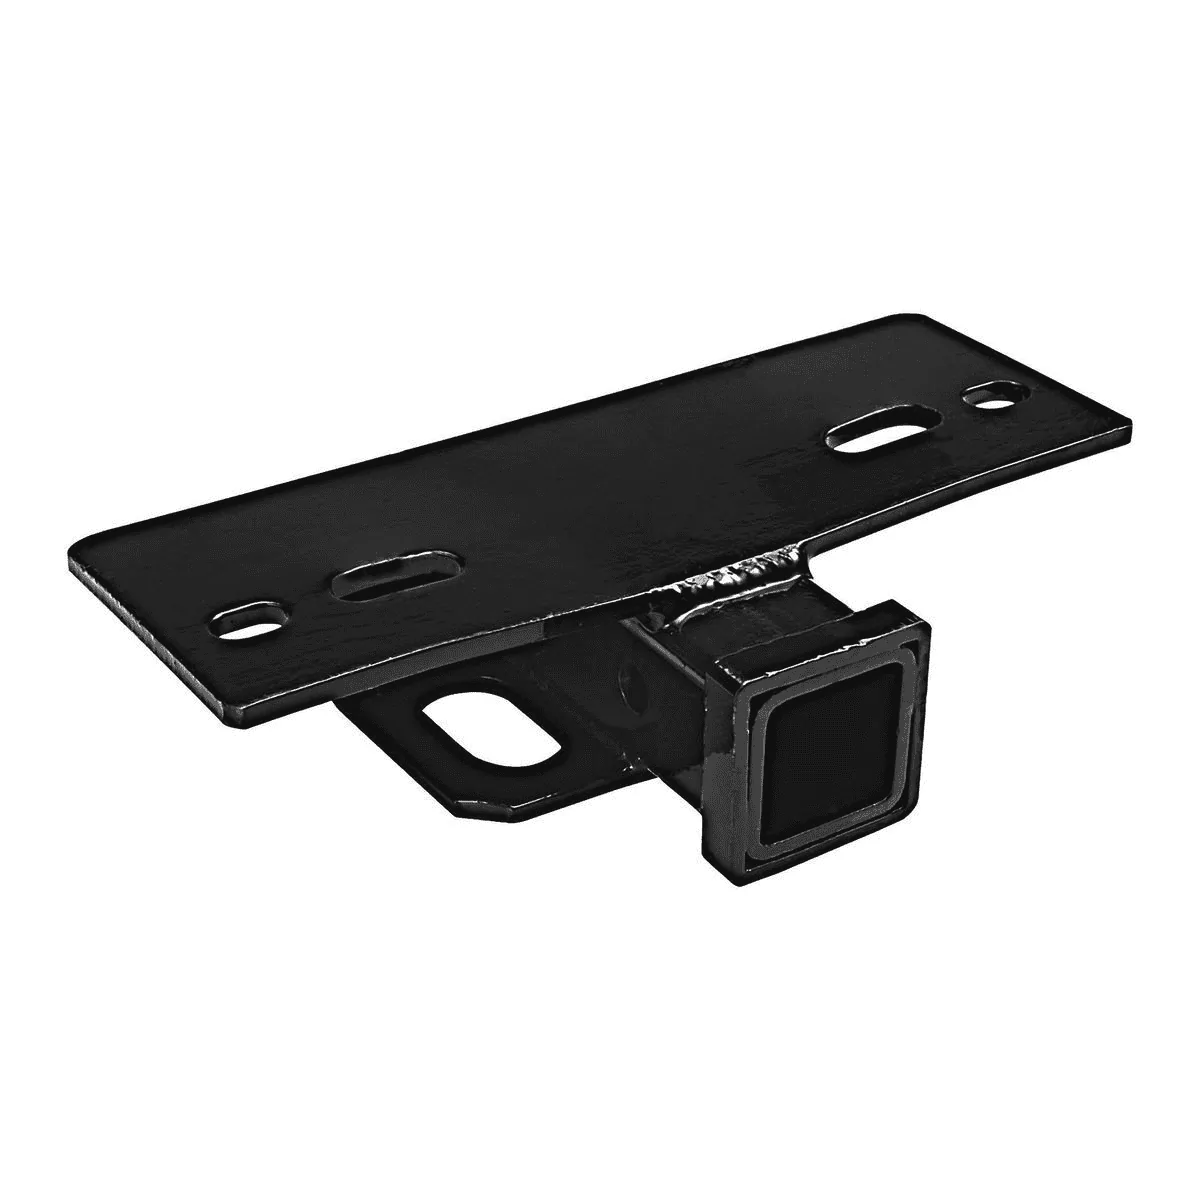
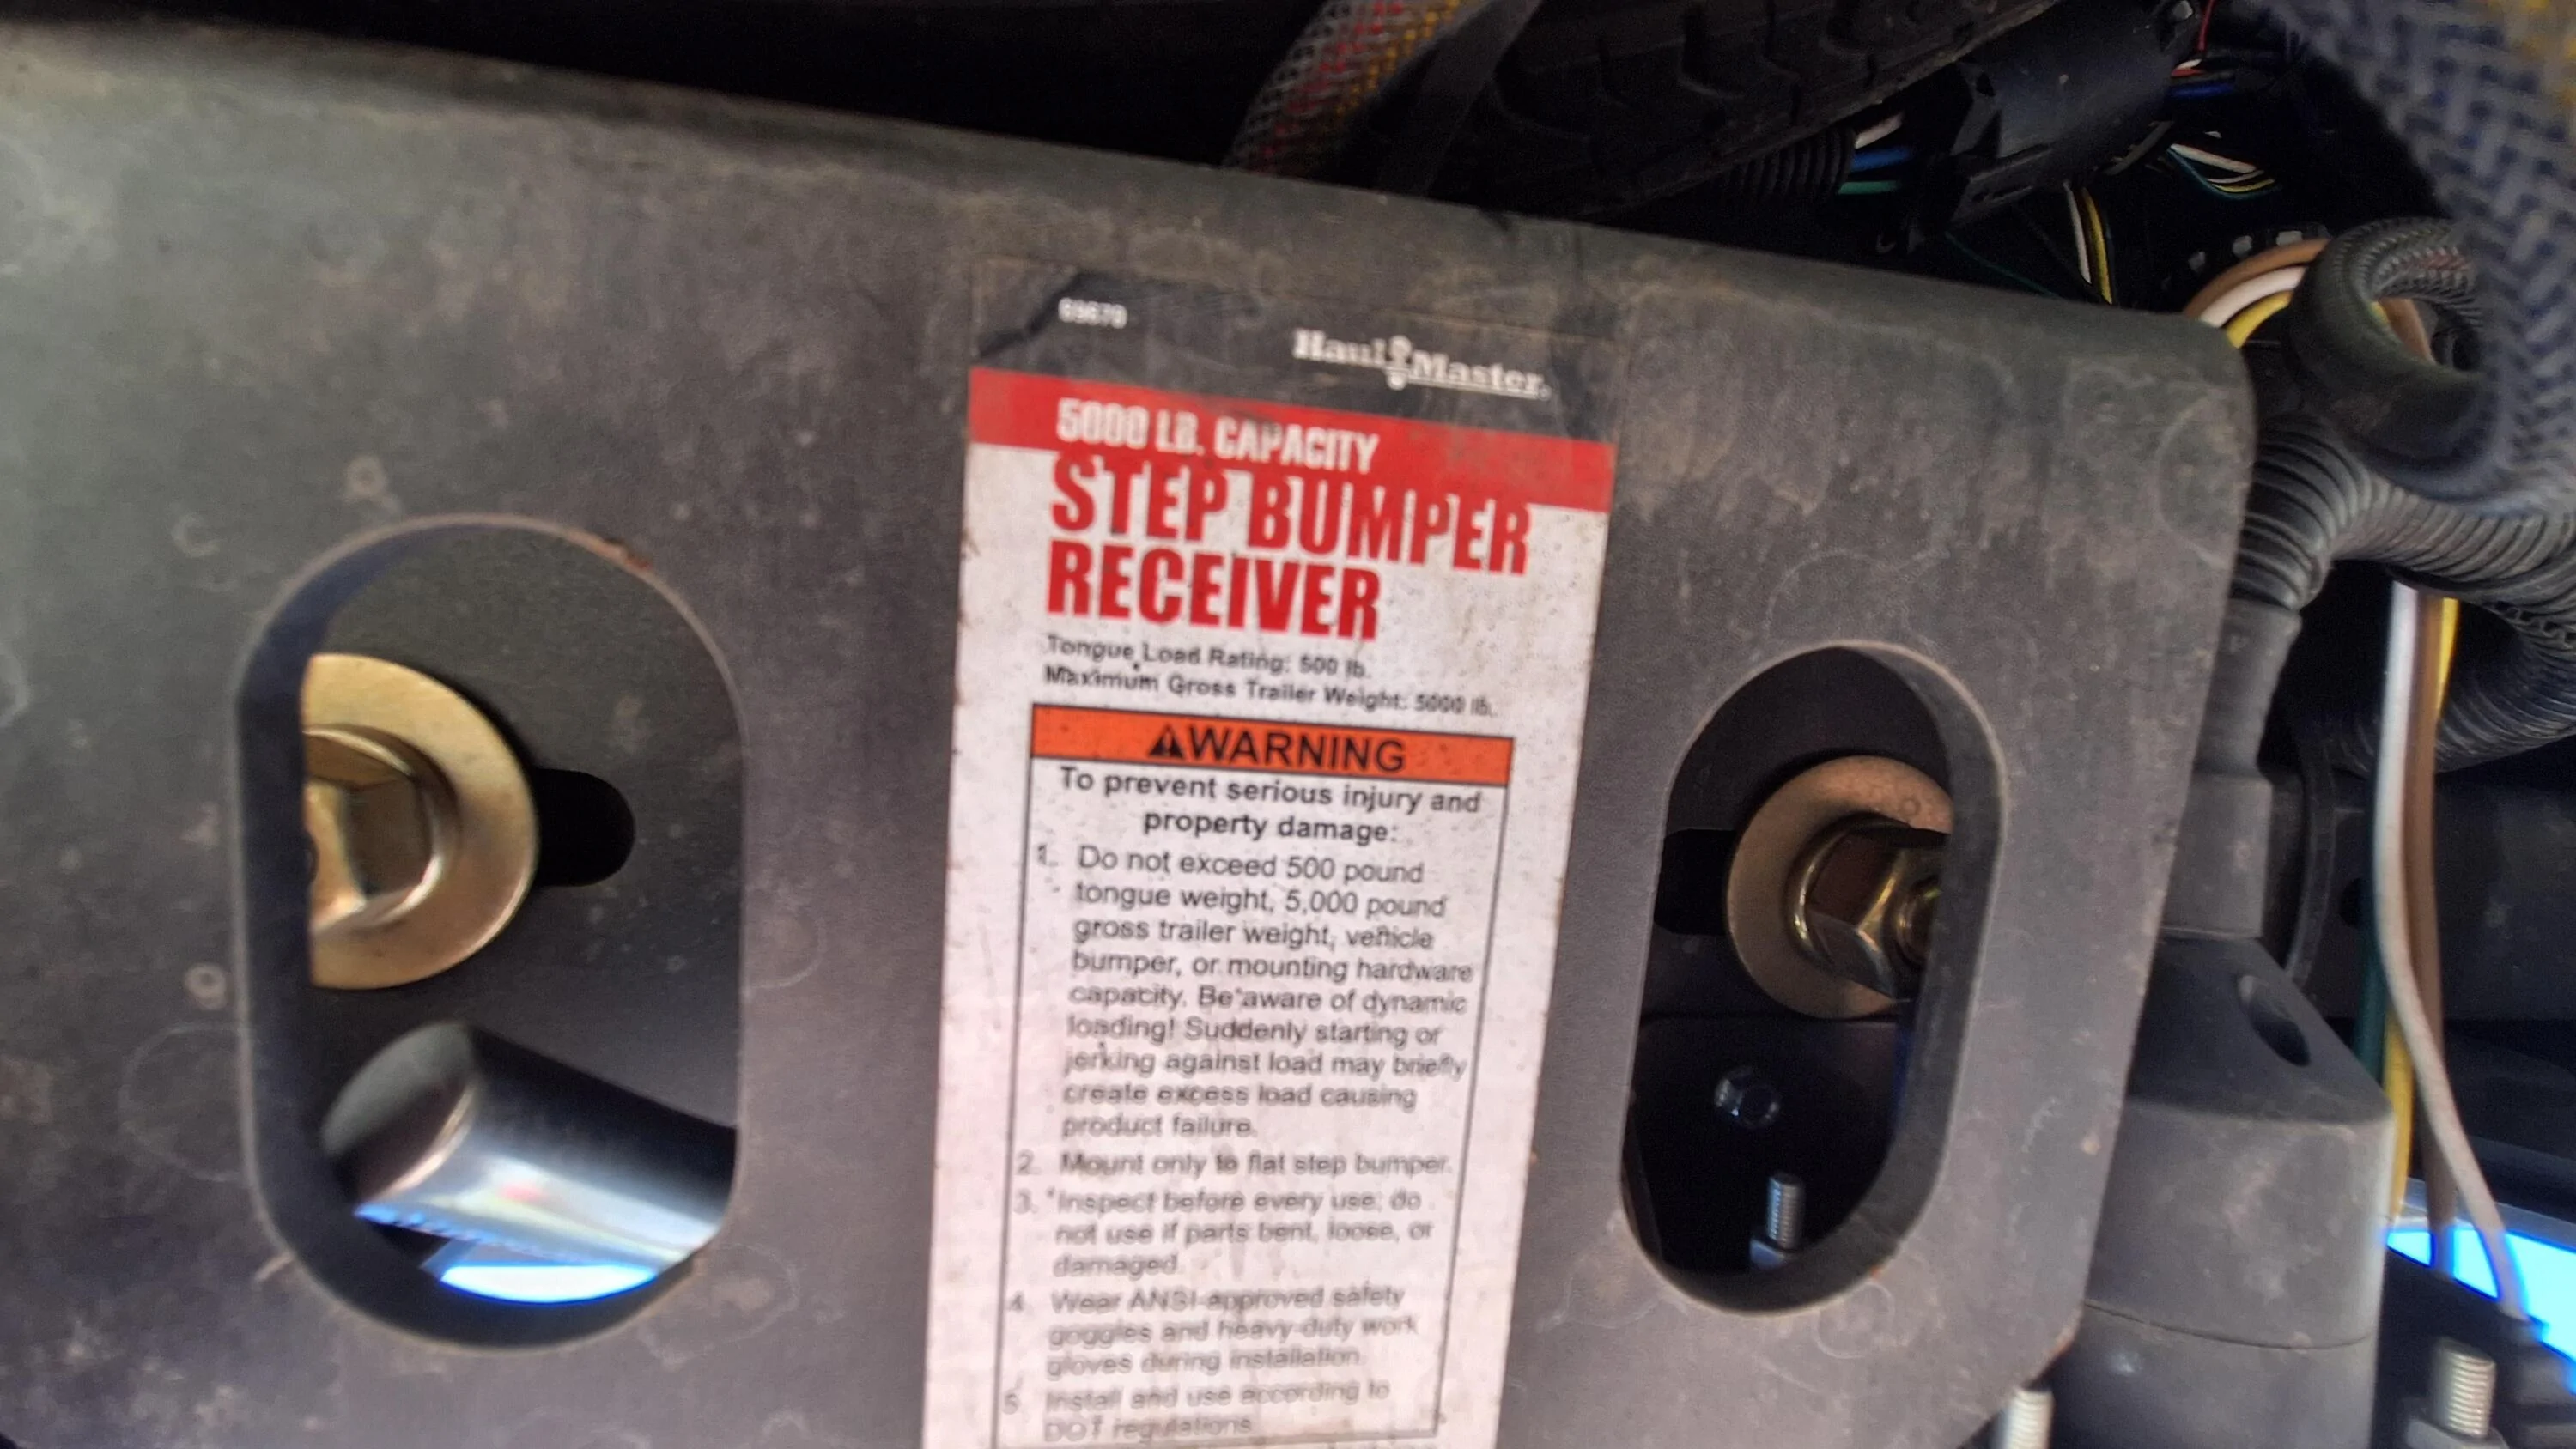
First off, I went to Harbor Freight and bought myself this 5000lb rated step bumper receiver (https://www.harborfreight.com/5000-lb-step-bumper-receiver-69670.html?_br_psugg_q=hitch+step). 5000lbs is overkill compared to the Hybrid towing capacity, but the bolt holes are in line compared to the 3500 lb receiver so it's a bit easier to install. Then I went to the hardware store and I bought the largest Grade 8 bolts/washers/lock washers/nuts that would fit in the preexisting holes of the receiver so there wouldn't be any play once mounted.
I removed the plastic back bumper and tailgate so I'd have good access to the factory metal bumper (there's already a good tutorial on this site for this). Then I centered and lined up the hitch to the factory metal bumper and drilled an appropriately sized hole in the bumper for this hitch. One of the factory holes in the bumper lines up nicely with one of the holes on the hitch, so I only had to drill 1 through hole (going through both top and bottom of the square tubing) in the bumper. Note if you're going to install a led pod, this hitch is capped in the back of the receiver so you'll need to drill a hole for the wiring to pass through. It'll be easier to do this before you mount it to the bumper. Remember to clean and paint the bare steel you exposed from drilling the receiver and the bumper before mounting.
 Harbor Freight receiver
 You'll get better clearance when you remount the plastic bumper facia if you install the bolts with the head on the top side and nuts on the bottom side.
 If you're going to install the same 7 pin connector, it would be a good idea to mount the L-bracket with the self tapping screws before you mount the receiver to the bumper as well.
Next, I recommend you get your spare tire out of the way and mount the trailer wiring relay. I used the Curt 56477 T connector system (http://tinyurl.com/4w54s93x). There's plenty of youtube videos and other tutorials out there on how to install this. But basically you just plug the T-connectors in line with your turn/brake signals in your rear taillights. I attached the ground wire to an existing grounding spot on the frame and tapped into the 12v+ accessory wire in the bed for the positive wire connection.
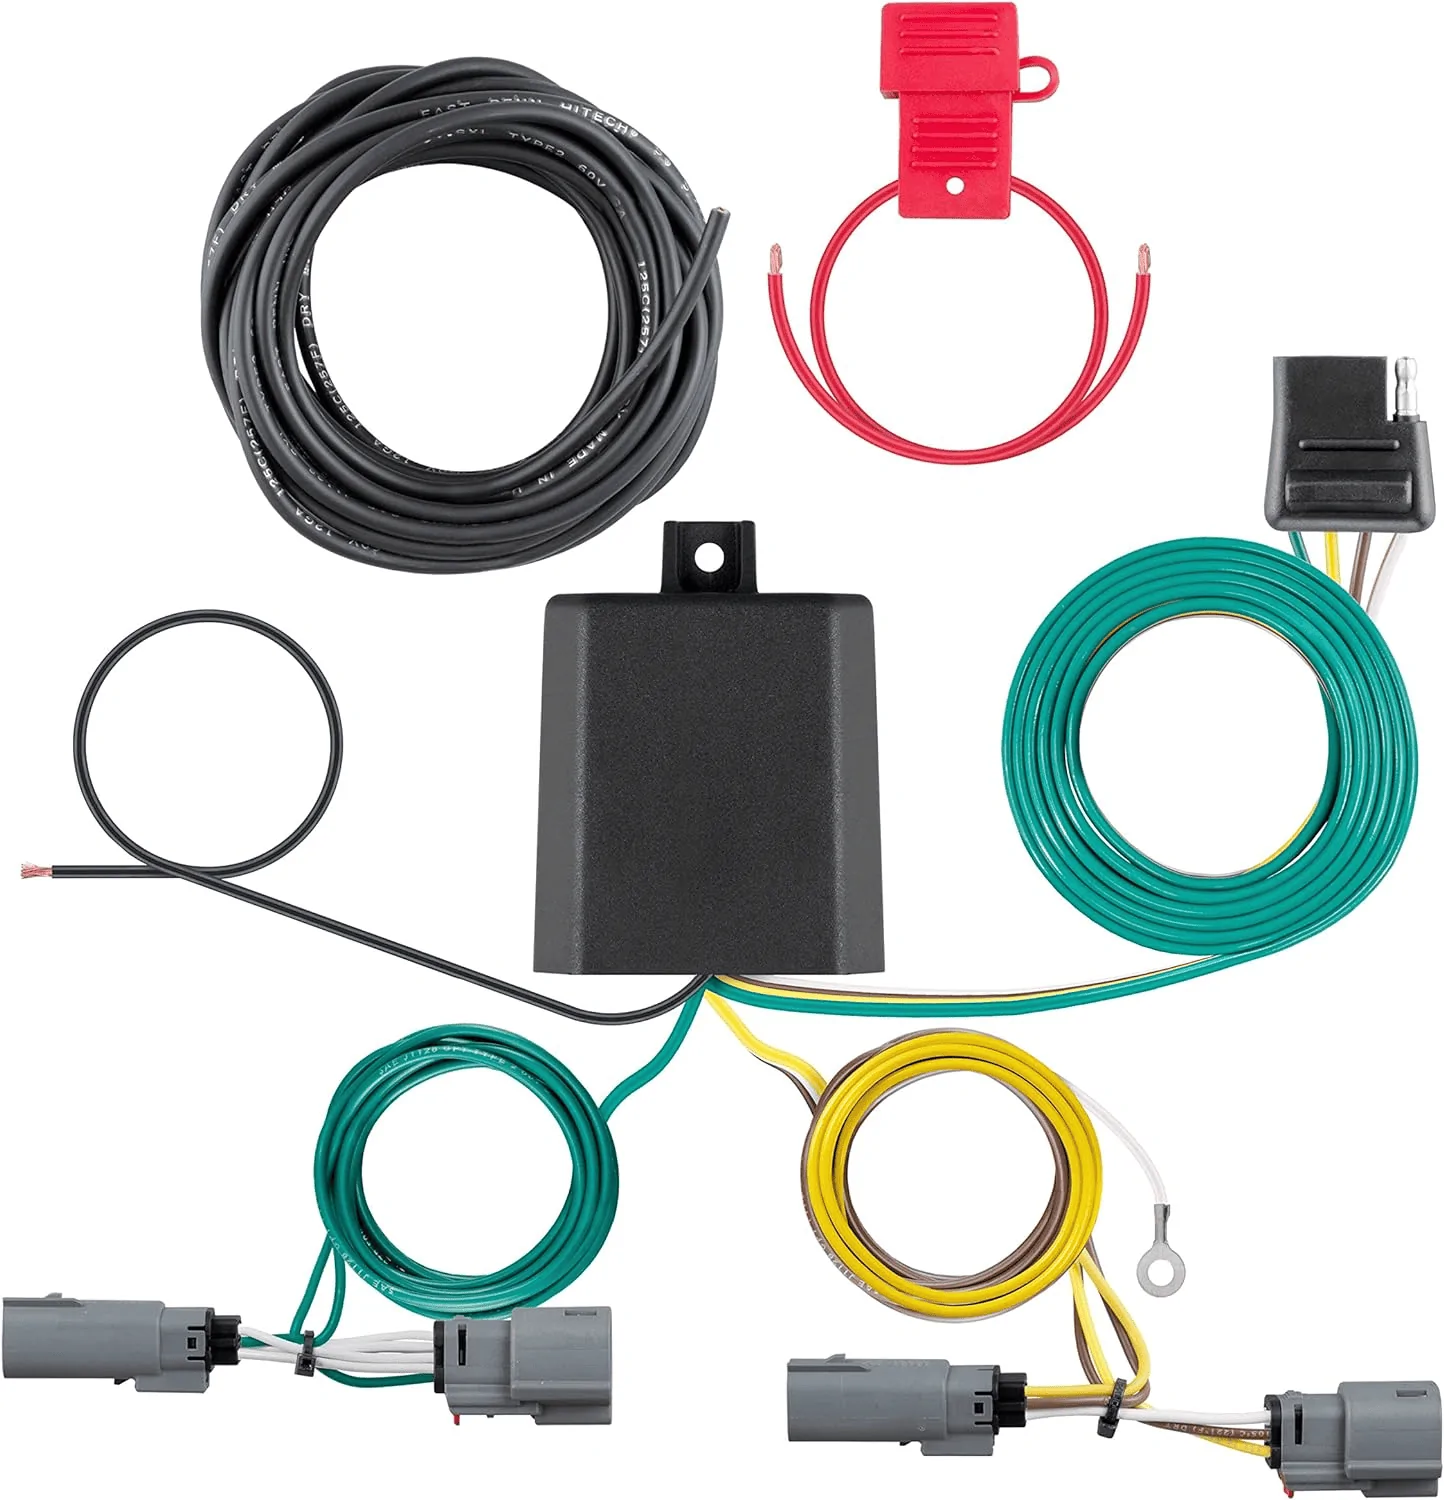
For any wire tapping I used the appropriately sized Posi-Tap connectors (http://tinyurl.com/37jy3y9a) with a little squirt of dielectric grease.
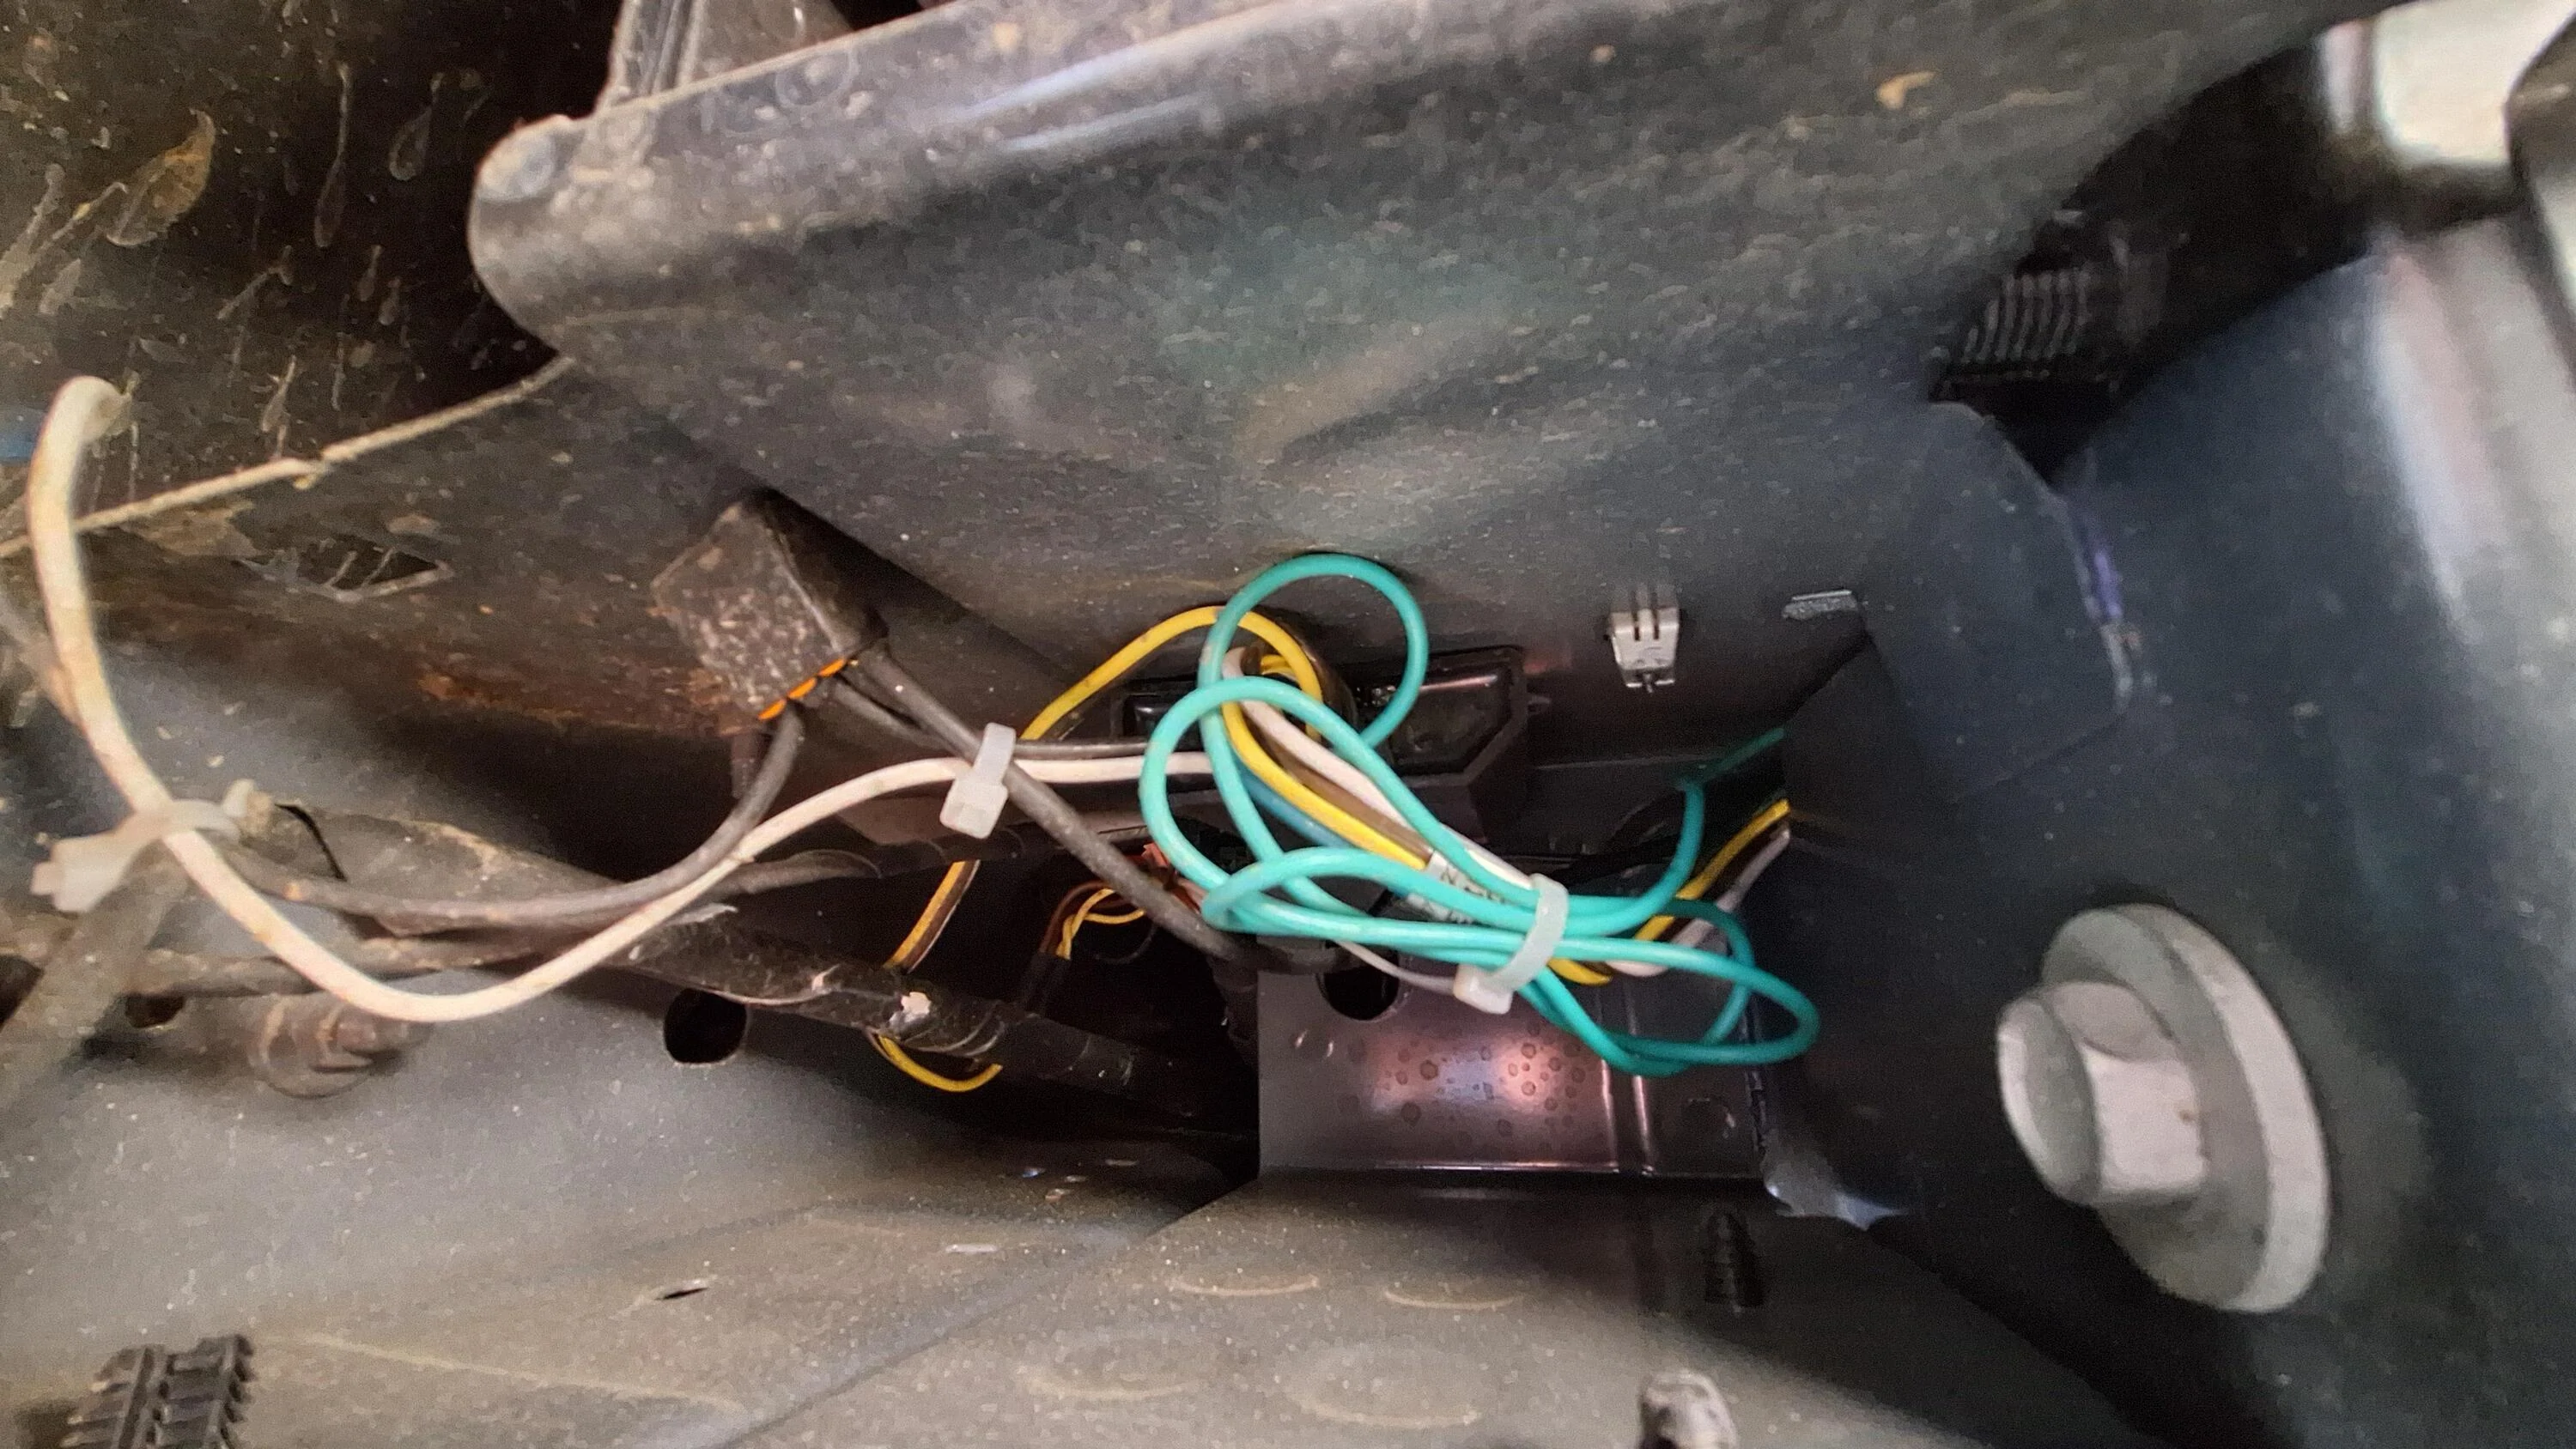 Not a great picture, but I mounted the relay on the passenger side because the in-line connector to the turn signal is really short on that side. I mounted it high and away from any sources of heat to the truck body with VHB double sided tape and some zip ties on everything for extra insurance.
Once that was mounted, I cut off the 4 pin connector and used these solder seal butt connectors (http://tinyurl.com/33p6c5hv) to splice the green, yellow, brown, and white wires to the corresponding wires on the USCAR connector (http://tinyurl.com/3c2krny5). I like these connectors because all it takes is a heat gun to solder, heat shrink and hot melt glue the connection making it secure and water tight.
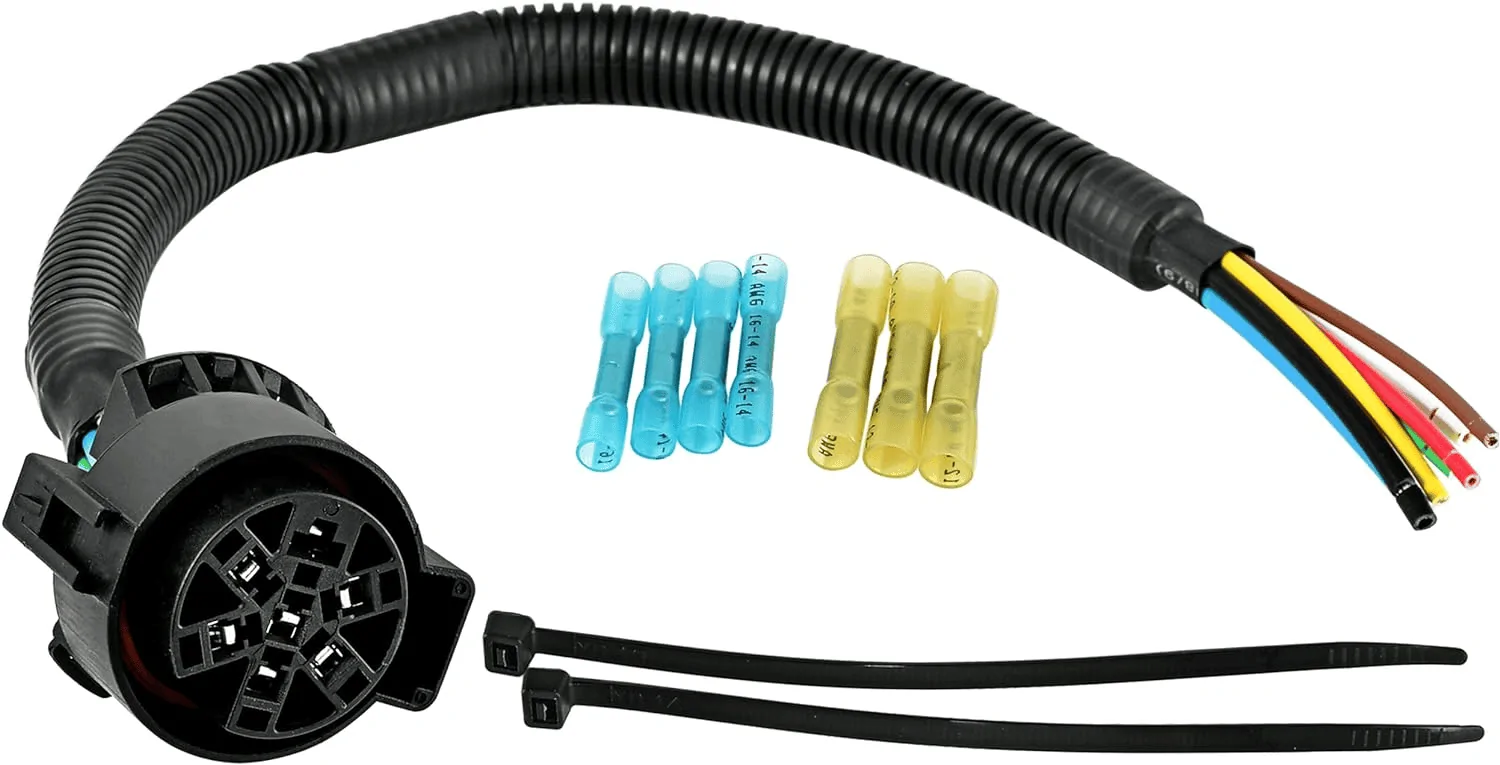
The Diode Dynamics HitchMount LED pod uses a USCAR in-line connector so this necessary if you want to use that LED pod. You already have the turn & brake signals + ground from the Curt 4 pin connector, so the only wires remaining going to the 7 pin is the red wire for reverse, the black wire for 12v+ and the blue wire for a brake controller. I used the Posi-tap connectors to again tap into the reverse wire from one of the tail lights and the 12v accessory wire in the truck bed for the black wire. I left the blue wire unconnected for now. If I do get a trailer that would require a brake controller I could get one of those wireless ones or I could connect to this wire and run it up to the driver's compartment.
 This pic shows the solder connectors and the in-line USCAR connector to the LED pod. Zip tie everything secure and take up excess slack in the wires.
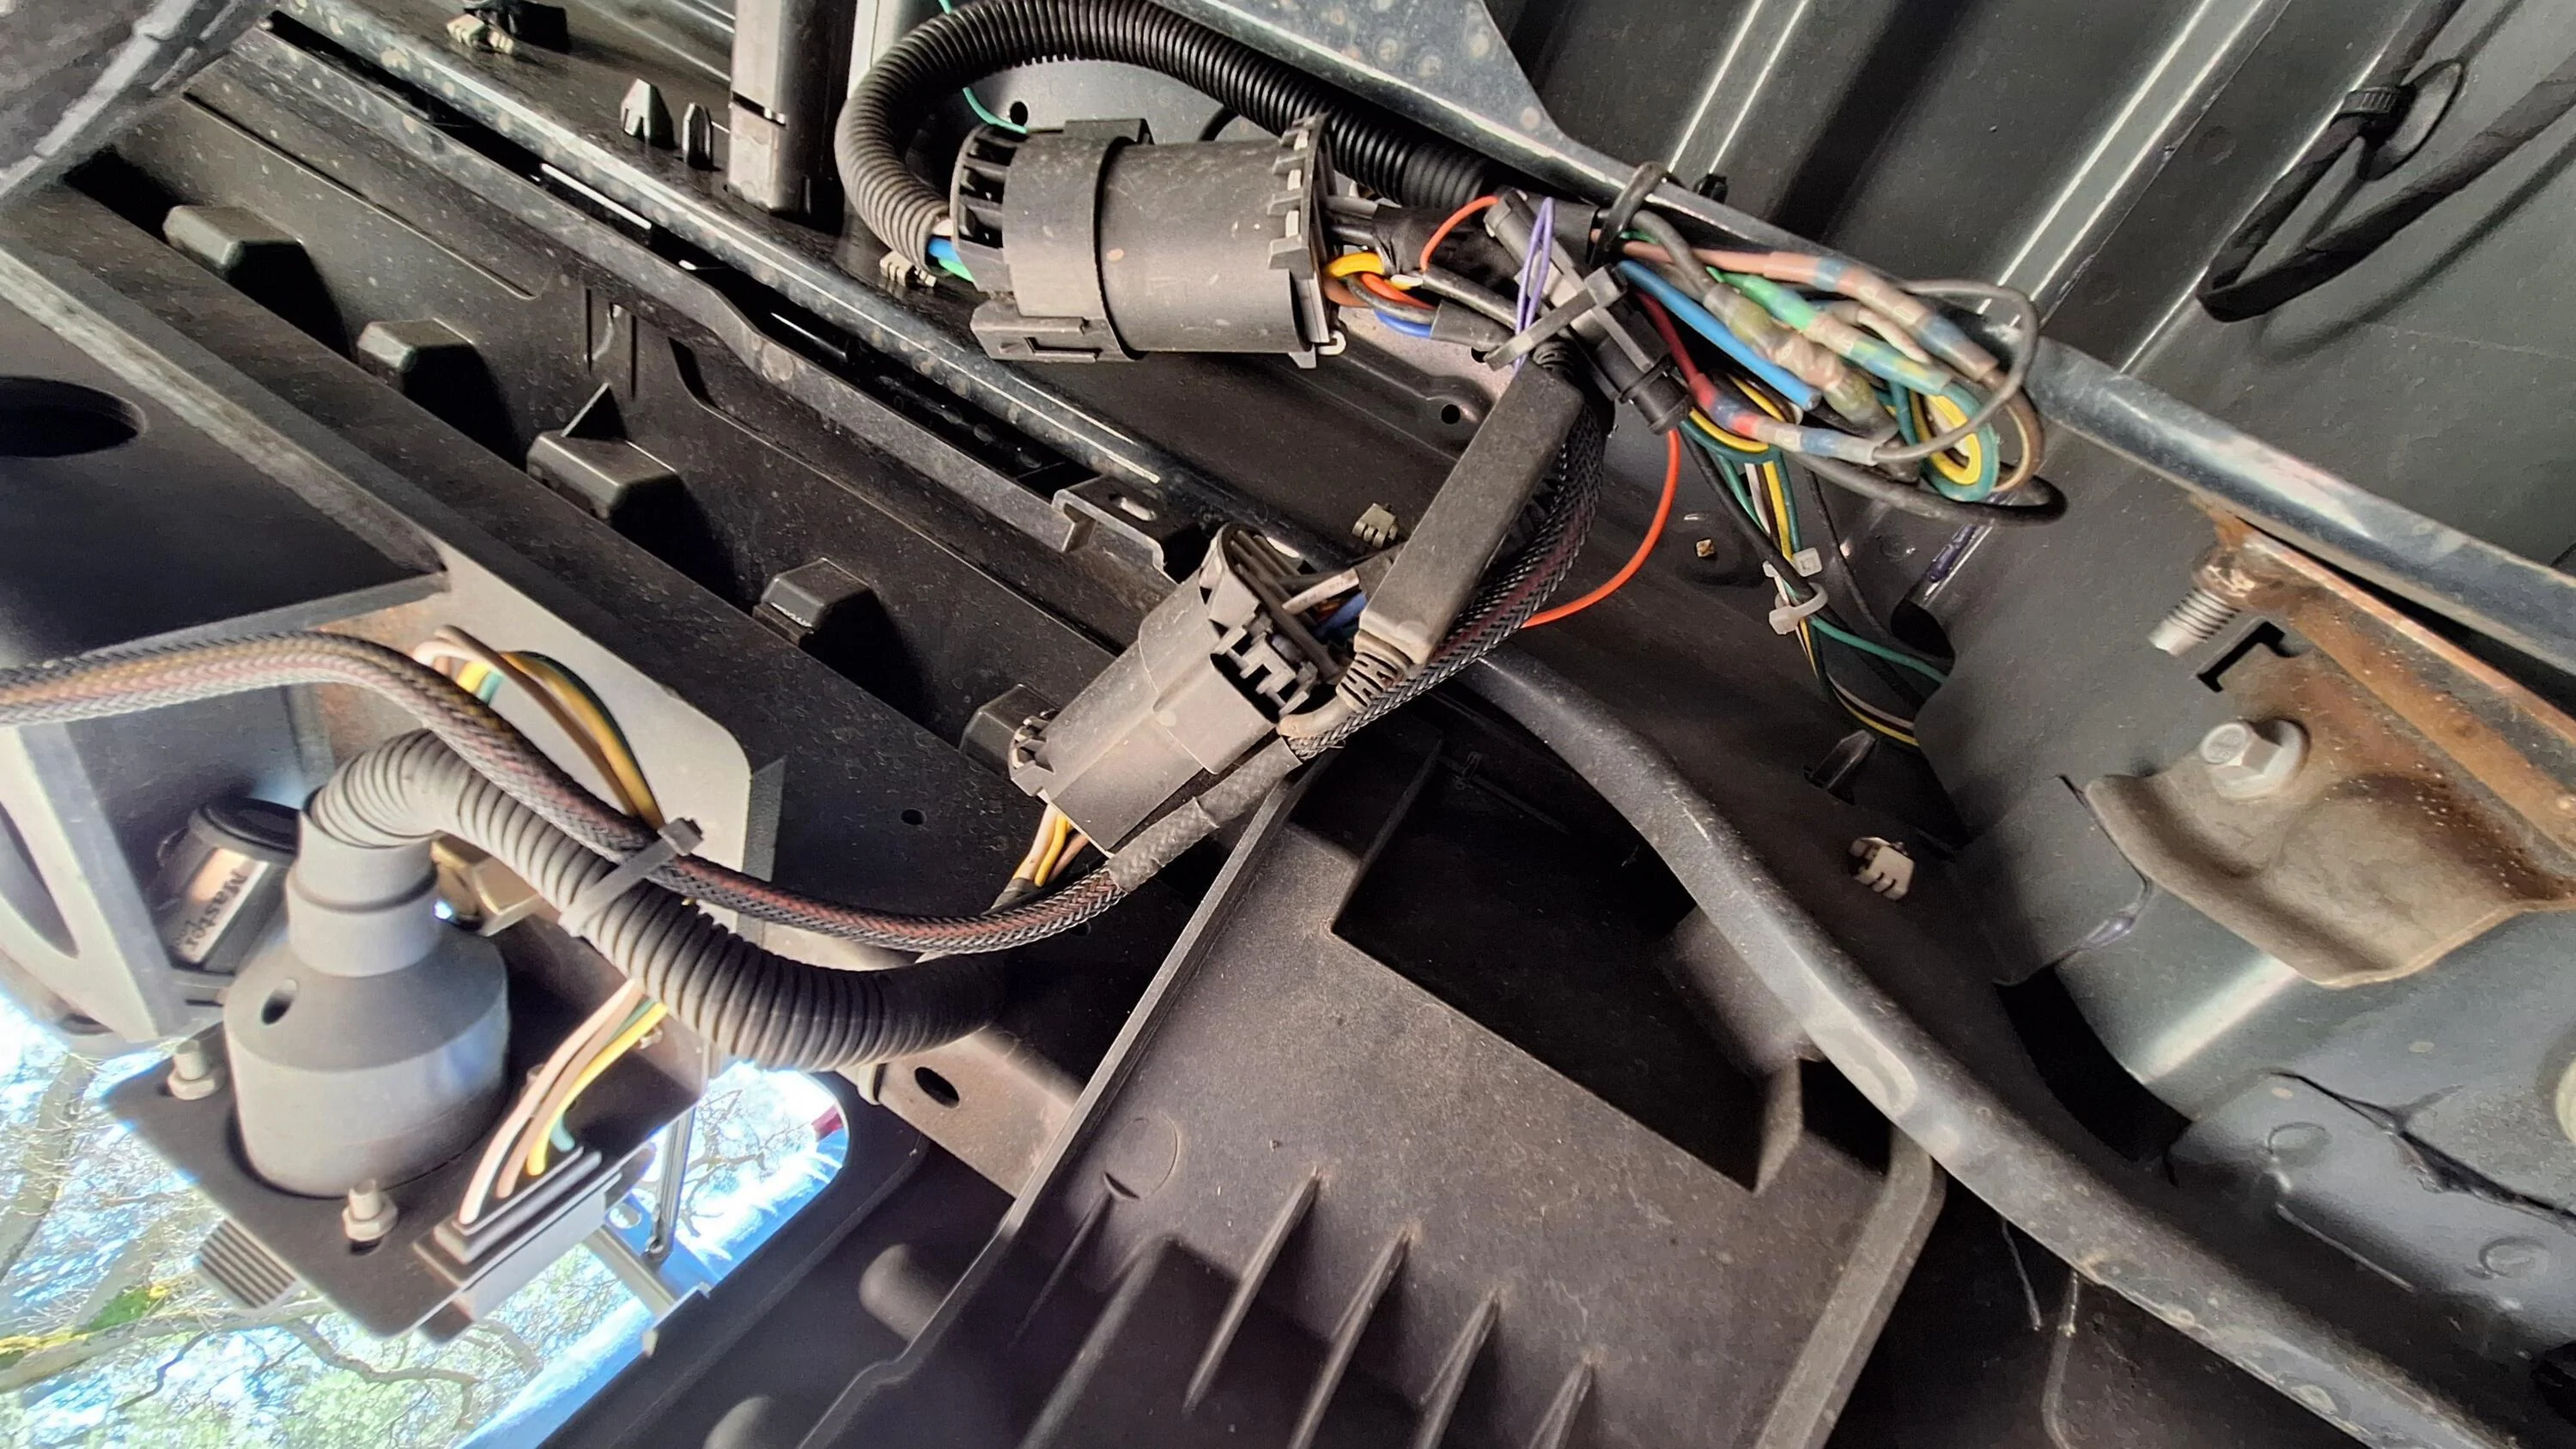
Next, I wanted to regain the 4 pin trailer connector as well as a 7 pin in case I want to build a teardrop trailer one of these days. For that I used this dual output connector from Curt (http://tinyurl.com/4mnyf3e5). It plugs into the USCAR socket so it's just plug and play at this point.
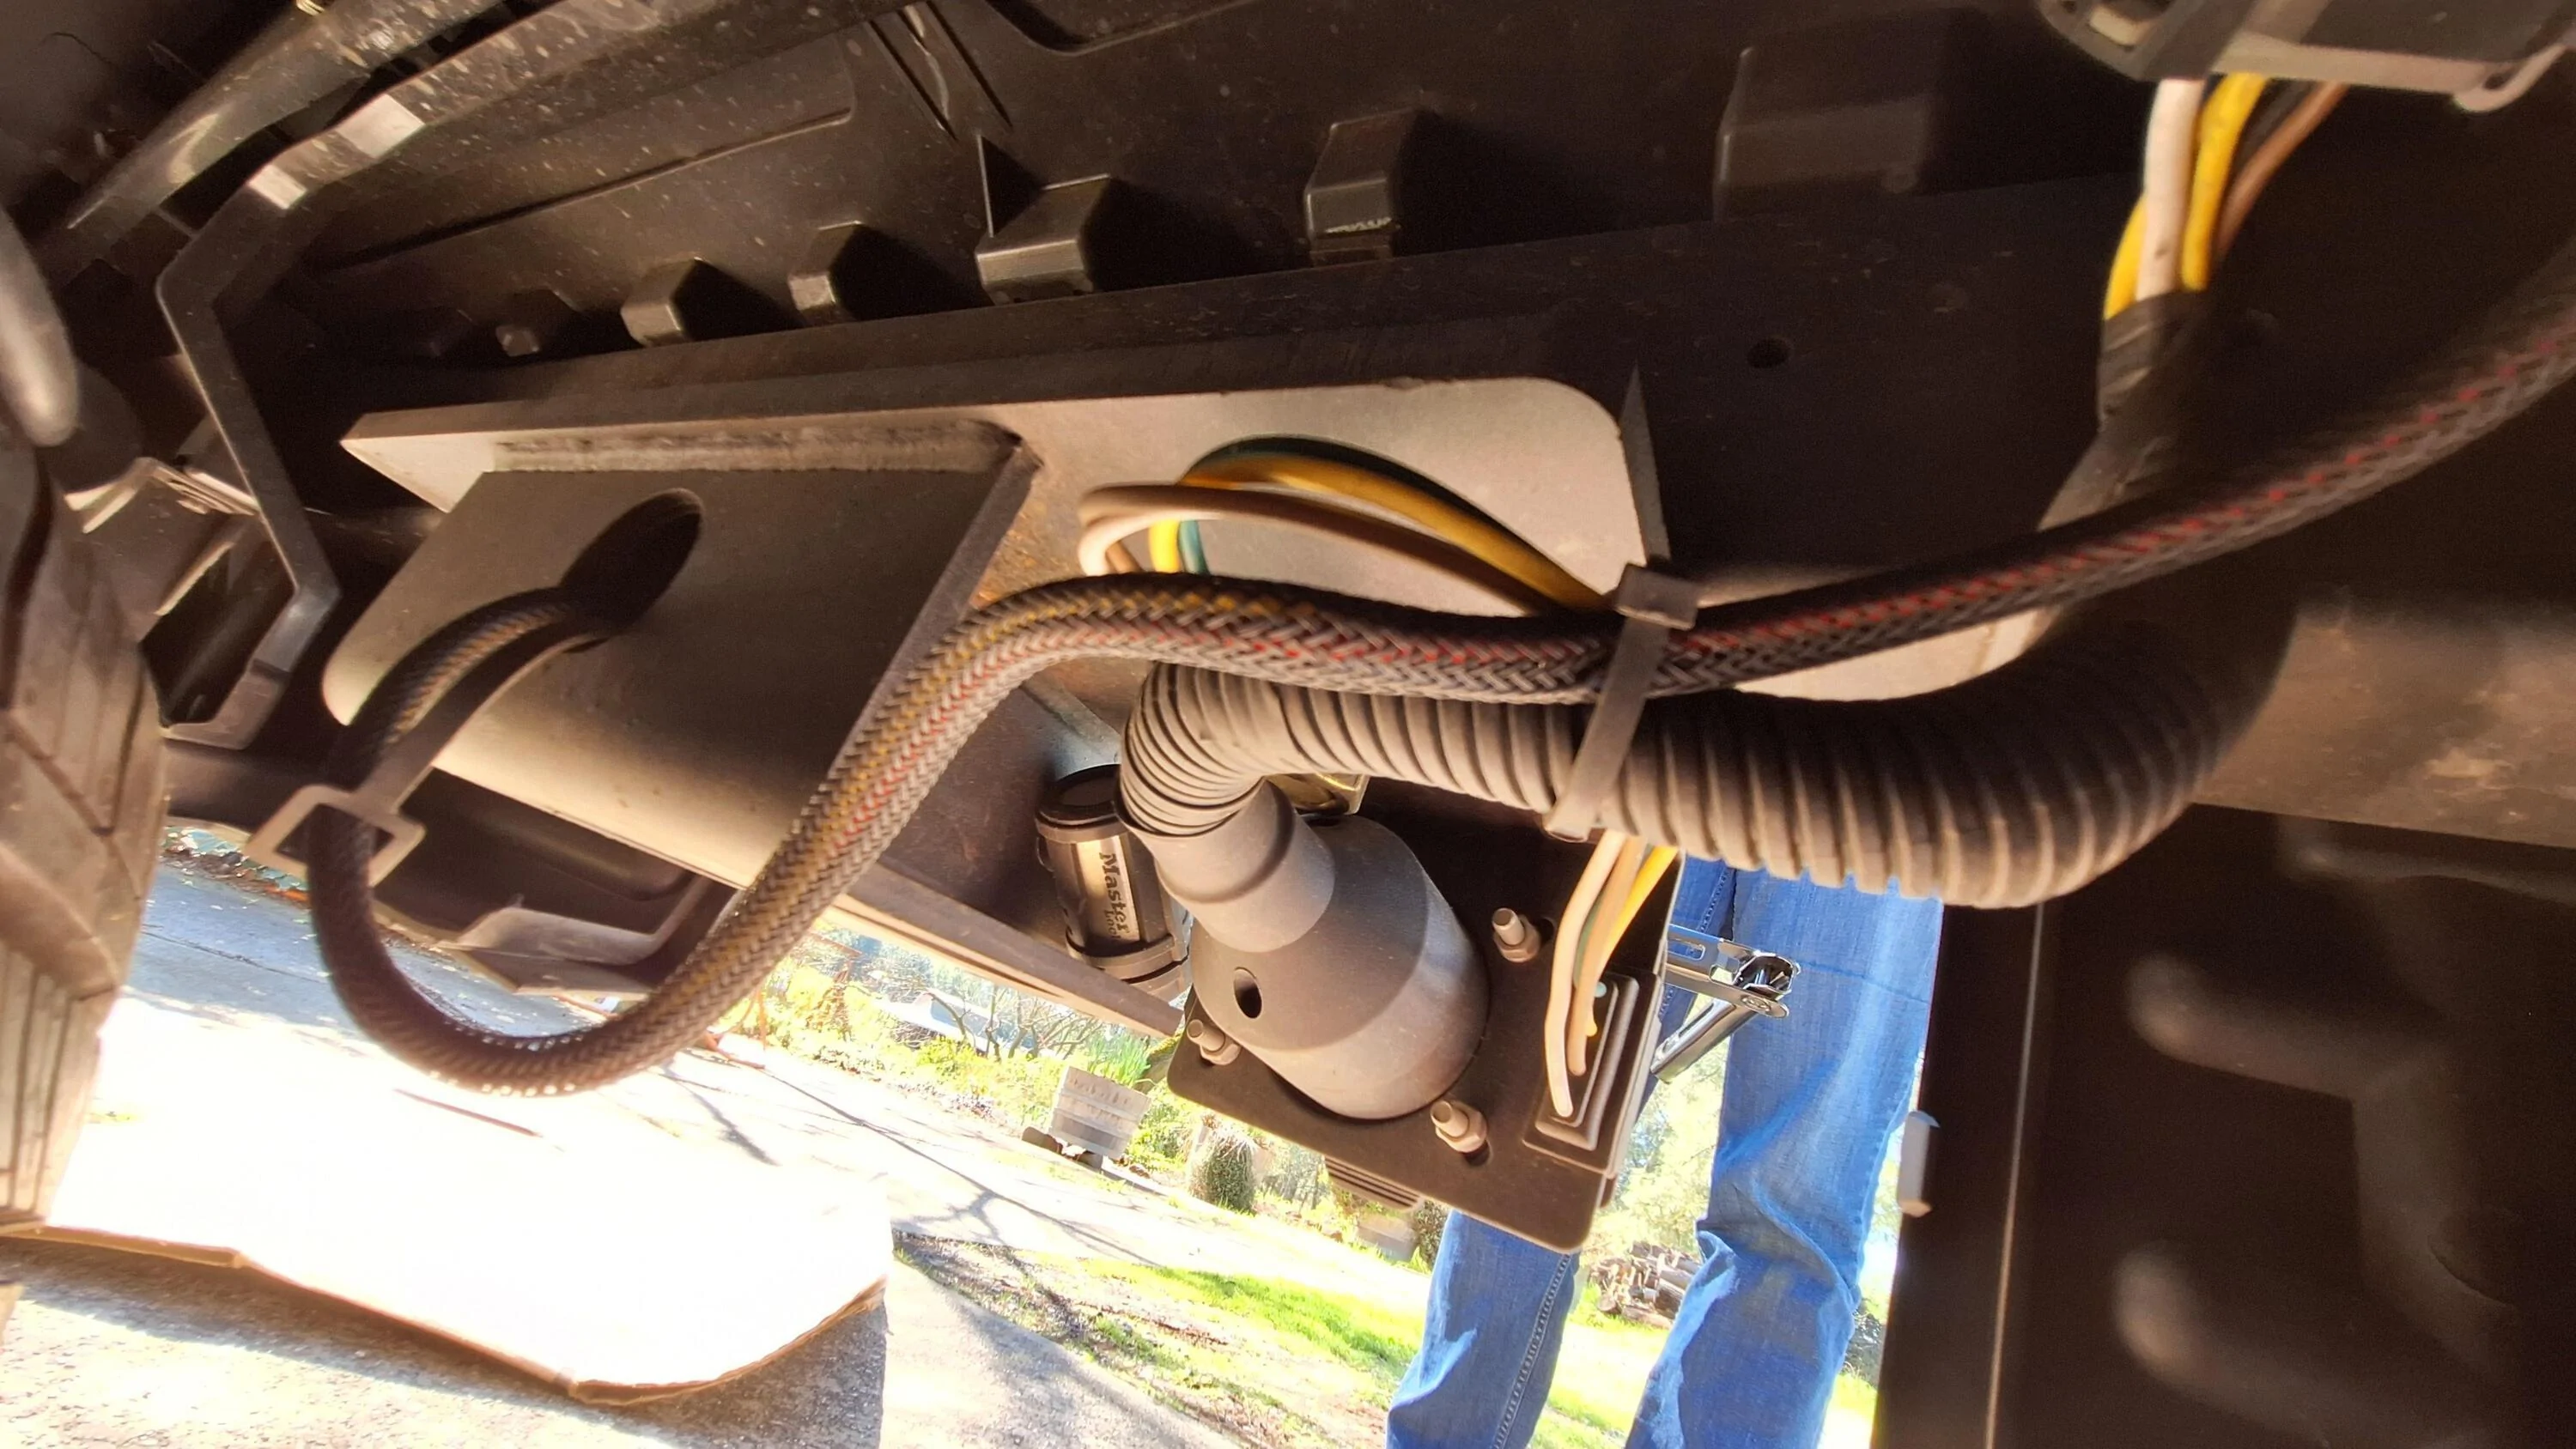
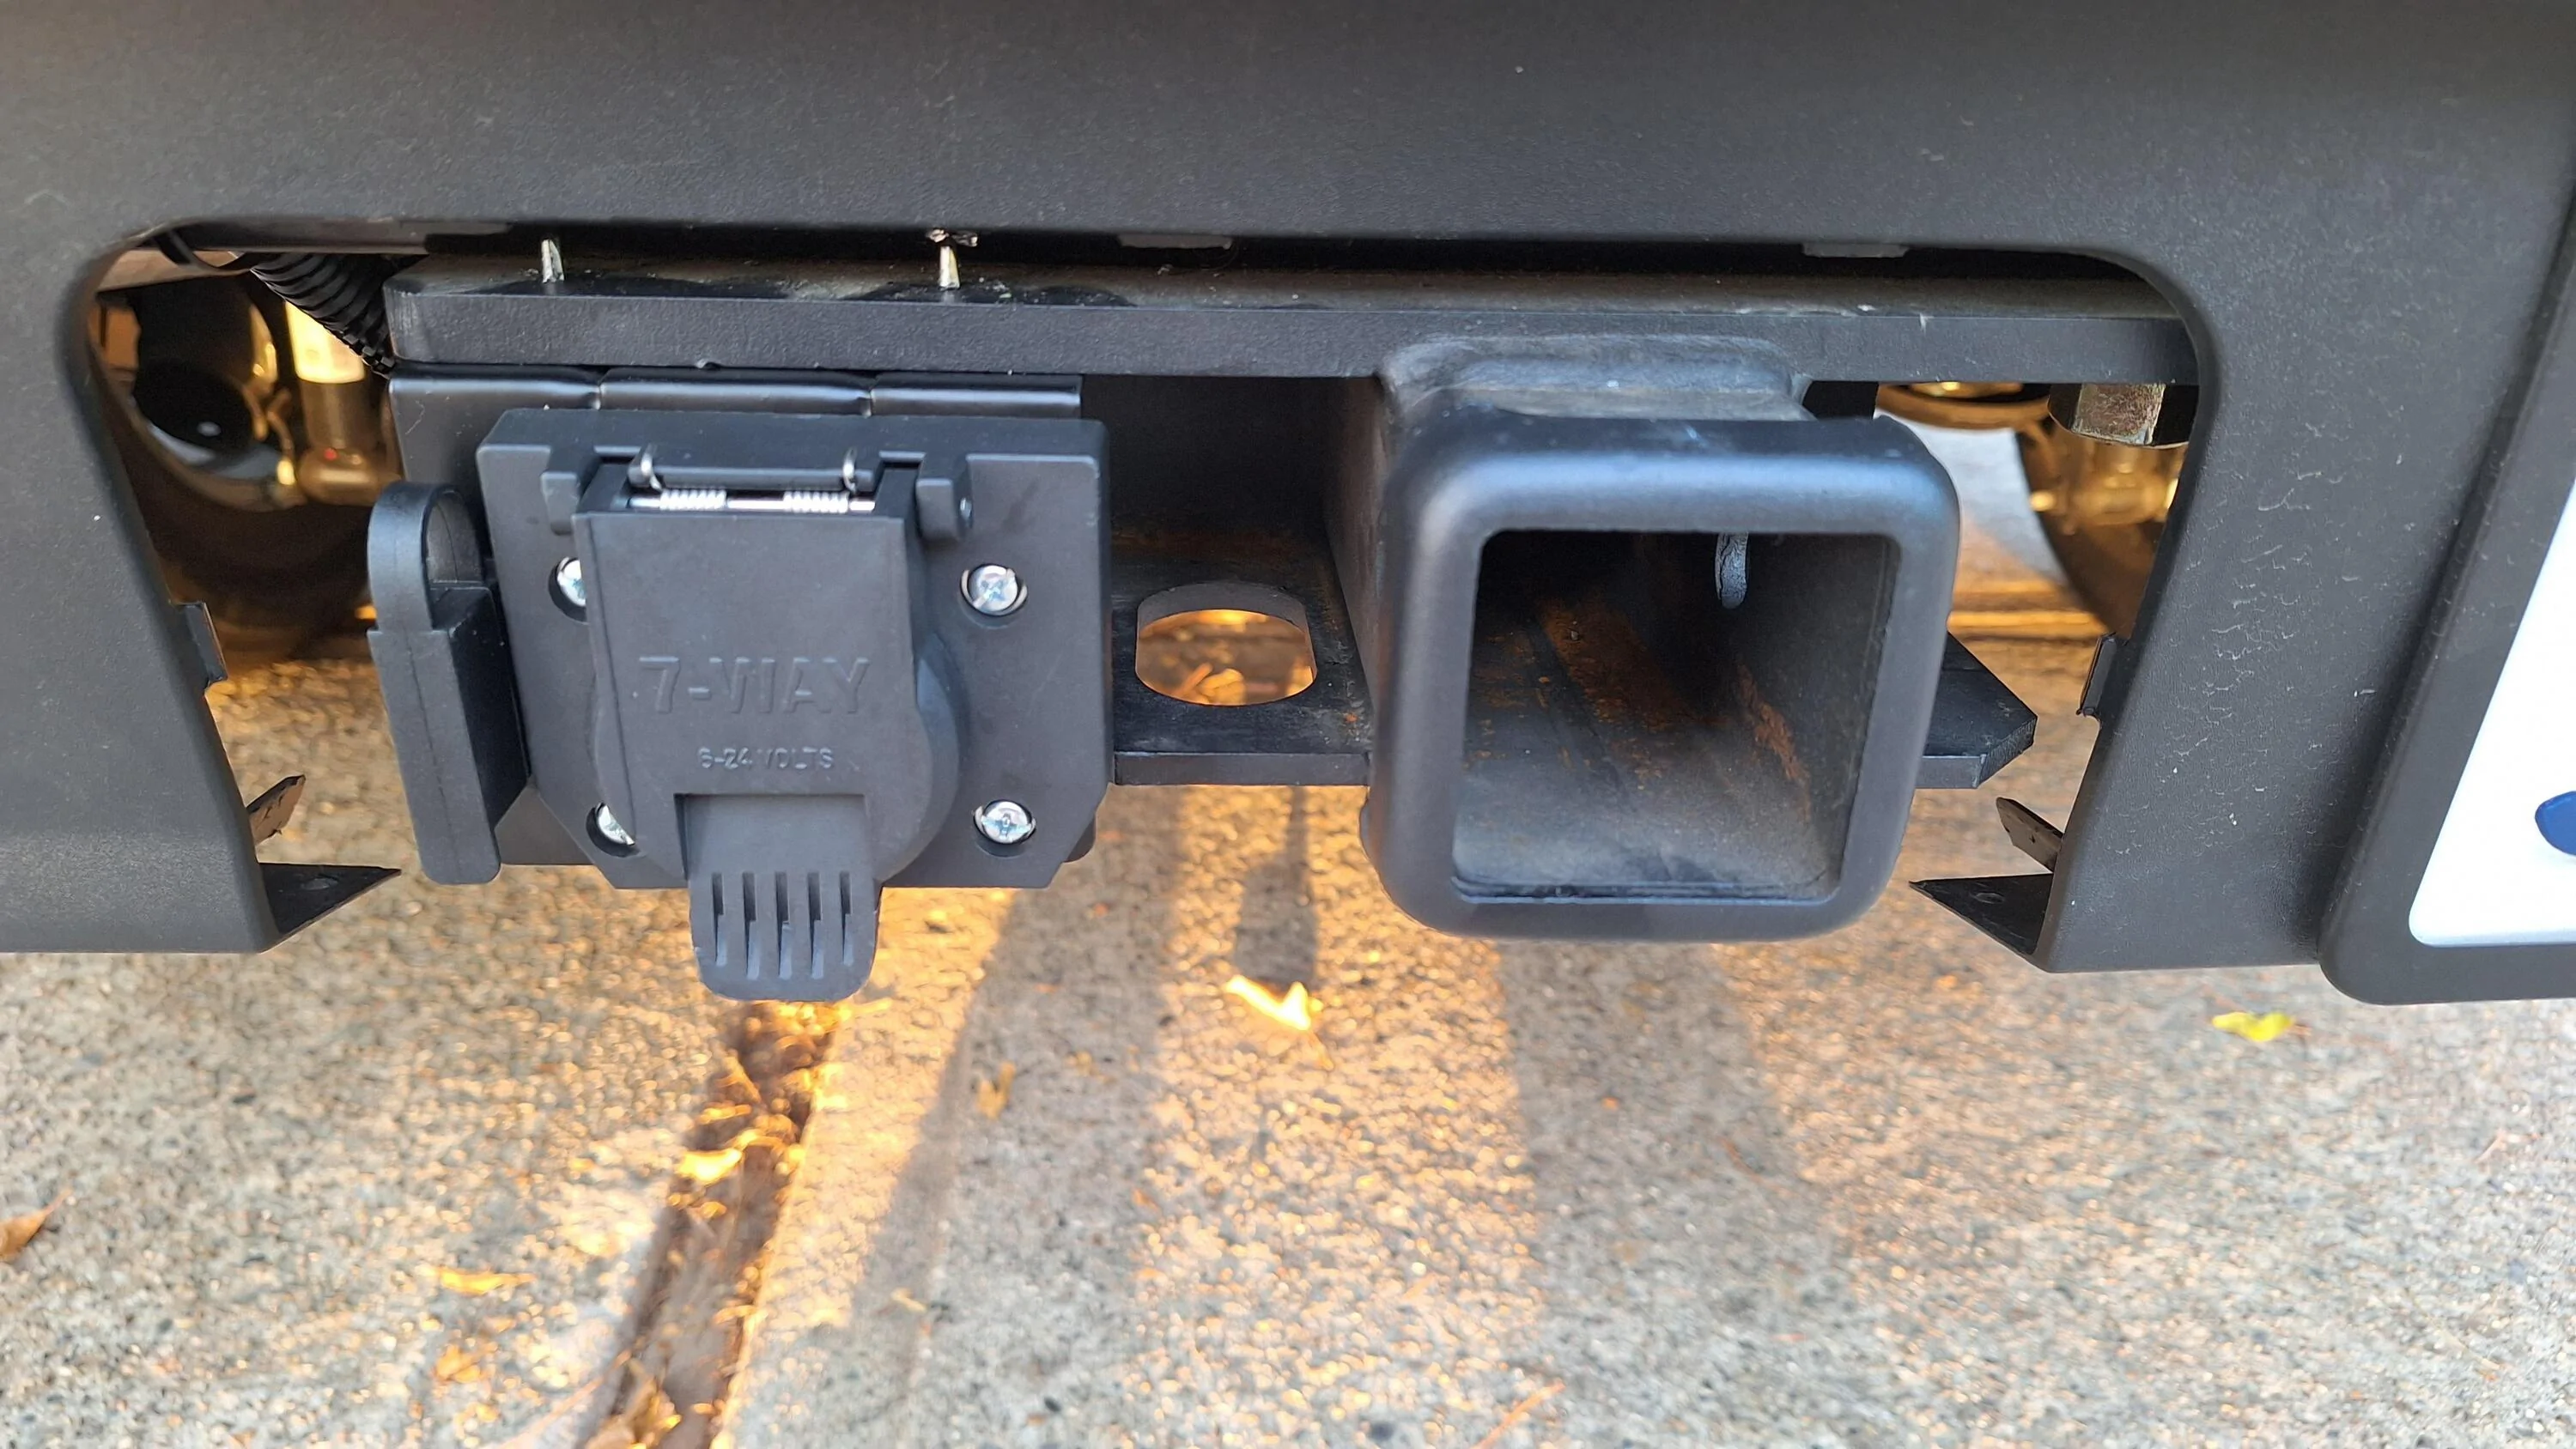 4 pin and 7 pin trailer connectors next to the hitch receiver. Plenty of room for both in the plastic cutout of the bumper facia.
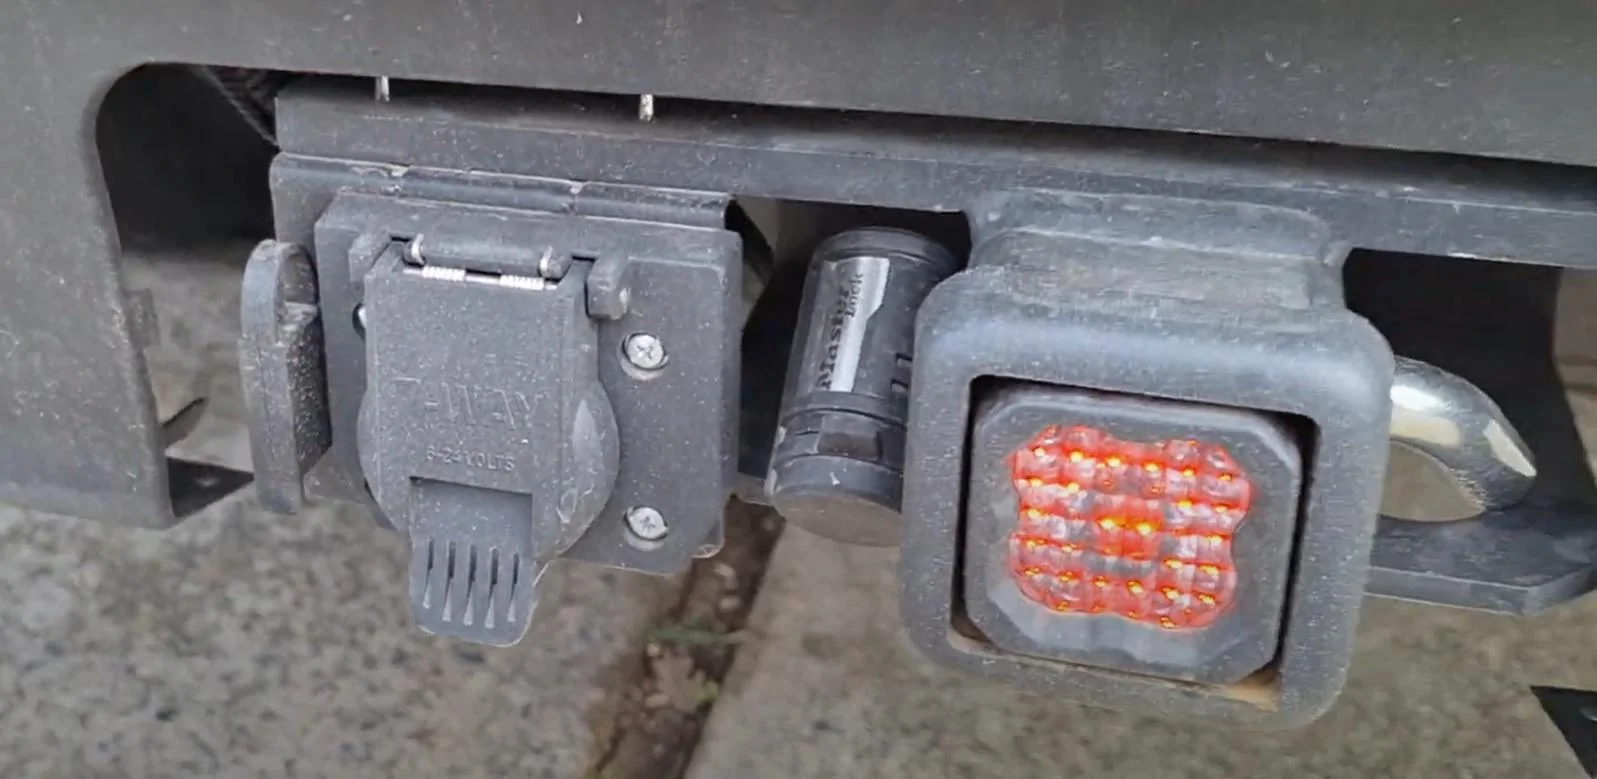
At this point you just connect the inline USCAR connector for the Diode Dynamics HitchMount LED, run your wire through the back of the receiver (that you drilled earlier), plug that into the back of the LED pod, and slide the pod into the receiver. I used the C1R version that gives you the reverse+brake functionality (https://www.diodedynamics.com/hitchmount-led-pod-reverse-kit.html). Using the Curt 56477 relay I've outlined here, you don't need any of the special Ford Maverick/F150 adapters from Diode Dynamics. They just give you the ability to use in-line connectors to the taillights which you already did with the Curt relay. I've been running this setup since I installed everything early October and I've never had any issues with the Maverick thinking it's in tow mode or throwing any sort of errors with the additional load from the HitchMount LED pod. It's been fully functional and it looks great.
I've since added a locking pin for the LED pod since it would be pretty easy to steal. Clearance is too tight for the straight locks. You'll need to use one where the lock comes out at a 90 degree angle from the pin, like this one (http://tinyurl.com/4vh5uyz9).
Hopes this helps and is straightforward.
Cheers,
James
So I didn't really take pictures as I went, but I took some pictures after the fact and with some additional text I think this is a pretty straightforward install.
I received my 2023 Ford Maverick Hybrid XLT in August 2023 and this was actually not the truck I ordered, but a similar spec'd truck that had been passed on by another customer. This truck did not have the factory tow hitch or wiring installed, so I installed both the hitch and wiring knowing I'd want to install a 7 pin connector so I could use the Diode Dynamics HitchMount C1R LED pod. Outlined below is the parts/steps/tips on the install.
First off, I went to Harbor Freight and bought myself this 5000lb rated step bumper receiver (https://www.harborfreight.com/5000-lb-step-bumper-receiver-69670.html?_br_psugg_q=hitch+step). 5000lbs is overkill compared to the Hybrid towing capacity, but the bolt holes are in line compared to the 3500 lb receiver so it's a bit easier to install. Then I went to the hardware store and I bought the largest Grade 8 bolts/washers/lock washers/nuts that would fit in the preexisting holes of the receiver so there wouldn't be any play once mounted.
I removed the plastic back bumper and tailgate so I'd have good access to the factory metal bumper (there's already a good tutorial on this site for this). Then I centered and lined up the hitch to the factory metal bumper and drilled an appropriately sized hole in the bumper for this hitch. One of the factory holes in the bumper lines up nicely with one of the holes on the hitch, so I only had to drill 1 through hole (going through both top and bottom of the square tubing) in the bumper. Note if you're going to install a led pod, this hitch is capped in the back of the receiver so you'll need to drill a hole for the wiring to pass through. It'll be easier to do this before you mount it to the bumper. Remember to clean and paint the bare steel you exposed from drilling the receiver and the bumper before mounting.
Next, I recommend you get your spare tire out of the way and mount the trailer wiring relay. I used the Curt 56477 T connector system (http://tinyurl.com/4w54s93x). There's plenty of youtube videos and other tutorials out there on how to install this. But basically you just plug the T-connectors in line with your turn/brake signals in your rear taillights. I attached the ground wire to an existing grounding spot on the frame and tapped into the 12v+ accessory wire in the bed for the positive wire connection.
For any wire tapping I used the appropriately sized Posi-Tap connectors (http://tinyurl.com/37jy3y9a) with a little squirt of dielectric grease.
Once that was mounted, I cut off the 4 pin connector and used these solder seal butt connectors (http://tinyurl.com/33p6c5hv) to splice the green, yellow, brown, and white wires to the corresponding wires on the USCAR connector (http://tinyurl.com/3c2krny5). I like these connectors because all it takes is a heat gun to solder, heat shrink and hot melt glue the connection making it secure and water tight.
The Diode Dynamics HitchMount LED pod uses a USCAR in-line connector so this necessary if you want to use that LED pod. You already have the turn & brake signals + ground from the Curt 4 pin connector, so the only wires remaining going to the 7 pin is the red wire for reverse, the black wire for 12v+ and the blue wire for a brake controller. I used the Posi-tap connectors to again tap into the reverse wire from one of the tail lights and the 12v accessory wire in the truck bed for the black wire. I left the blue wire unconnected for now. If I do get a trailer that would require a brake controller I could get one of those wireless ones or I could connect to this wire and run it up to the driver's compartment.
Next, I wanted to regain the 4 pin trailer connector as well as a 7 pin in case I want to build a teardrop trailer one of these days. For that I used this dual output connector from Curt (http://tinyurl.com/4mnyf3e5). It plugs into the USCAR socket so it's just plug and play at this point.
At this point you just connect the inline USCAR connector for the Diode Dynamics HitchMount LED, run your wire through the back of the receiver (that you drilled earlier), plug that into the back of the LED pod, and slide the pod into the receiver. I used the C1R version that gives you the reverse+brake functionality (https://www.diodedynamics.com/hitchmount-led-pod-reverse-kit.html). Using the Curt 56477 relay I've outlined here, you don't need any of the special Ford Maverick/F150 adapters from Diode Dynamics. They just give you the ability to use in-line connectors to the taillights which you already did with the Curt relay. I've been running this setup since I installed everything early October and I've never had any issues with the Maverick thinking it's in tow mode or throwing any sort of errors with the additional load from the HitchMount LED pod. It's been fully functional and it looks great.
I've since added a locking pin for the LED pod since it would be pretty easy to steal. Clearance is too tight for the straight locks. You'll need to use one where the lock comes out at a 90 degree angle from the pin, like this one (http://tinyurl.com/4vh5uyz9).
Hopes this helps and is straightforward.
Cheers,
James
Sponsored
Last edited: