
- First Name
- Lance
- Joined
- Dec 5, 2023
- Threads
- 3
- Messages
- 26
- Reaction score
- 47
- Location
- Ann Arbor, MI
- Vehicle(s)
- Maverick XL Hybrid HPR
- Engine
- 2.5L Hybrid
- Thread starter
- #1
The sound on my 2024 XL Hybrid was way better than expected, and it seemed to be loosening up even more as I used it (currently 2,000 miles). But, not being able to leave anything alone, I decided to upgrade the speakers and add a subwoofer which it seemed to need. Based on lots of previous threads, I went with the:
PowerBass OE65C-FD speakers and tweeters for the front. $129.99 on Amazon;
Rockville SS8P Subwoofer for behind the rear seat. $109.95 on Amazon, with the install kit; and
Sound Ordinance P-40B 4" 2-way speakers for the rear. $29.99 on Crutchfield, with free Metra 75-5603 harnesses.
The tweeters were super easy. Pop the covers from the center and lift towards the pillar. You don't need to remove the A-Pillar trim if you push something under the dash cover to hold it up while you're working. Push the three retaining tabs and pop out the factory tweeter. Plug in the new tweeter, and press back into the factory hole. The only trick is the 2 little indents which need to point straight forward towards the windshield. Then test and pop the covers back down.
The door speakers weren't much harder. There's lots of good videos explaining how to remove the door panels, but basically you remove the cover behind the door handle and pry up the window switches from the arm rest side and then unhook the plug(s) and pop them out. From there, you remove the 8mm door handle bolt and two 7mm bolts under the window switches. Then there's three more 7mm screws along the bottom of the door, including one hiding behind the little red reflector at the rear of the door. The door speakers are held in with 7mm screws, and the new speakers fit perfectly and connect back to the factory harness just like the tweeters. Test and then reassemble both doors.
The front speakers and tweeters are about a 40% improvement over stock, but they still lack mid-bass and bass. I found them a little tinny, so I dropped the treble two notches in the system settings.
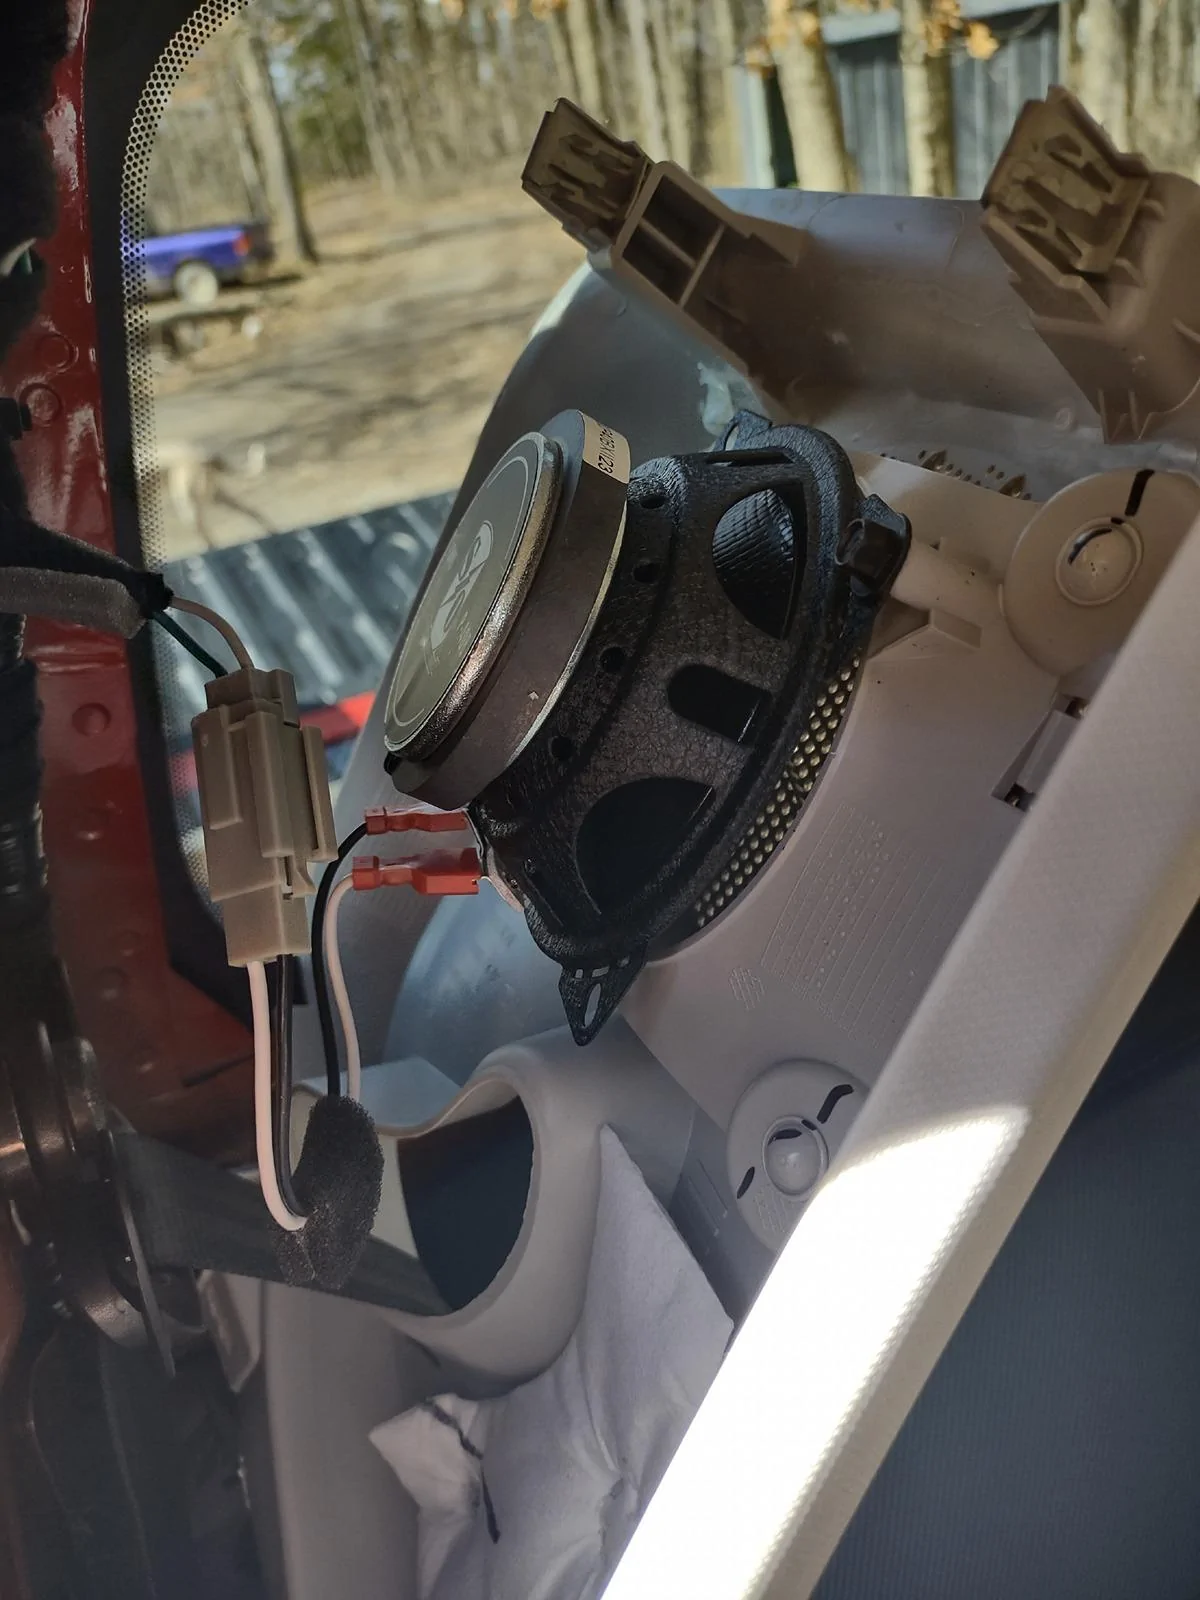
For the rears, which I probably wouldn't have done except I needed to tap the line(s) for the subwoofer, were a little more difficult than the fronts. Again, there's lots of videos showing how to remove the rear trim pieces and it's not that hard, but it's a lot of back and forth to each side of the truck while the seat is up, and down and up again. Plus you have to battle the long rear window piece which is awkward and has the middle seat belt running through it. The best way to deal with it is to pull it off and then move it up and over the rear seat so its out of the way. The only difficult piece is the top most grill where the speakers are mounted, because the mount on the rear most corner is woefully weak. Even with care, plan on breaking this mount -- but a little plastic weld or epoxy will fix it right up. You'll see when its off, that this is a poorly designed mount that was probably never intended to be removed. And by the time you get to this point, you'll need a break anyway - so leave the epoxy to set up and just walk away. Fortunately, these top most pieces are held on with a 7mm bolt, so they'll still be plenty secure no matter what you do.
The rear speakers bolt right in like the fronts with no clearance issues using two 7mm screws. But before you install the speakers, push on the Metra harnesses. Then tap the wires in the harness(es) so you don't have to alter the factory wires. I only tapped the left rear speakers, but there's inputs on the subwoofer for both left and right speakers if you want to tap both sides. IMO it sounds just fine with only the left (or right) tapped. Run lengths of primary wire to the butterfly bracket (or wherever you decide to mount the subwoofer). I used 16 ga. wire. Then test the rear speakers and reinstall the trim pieces. I'd say the rear speakers are only a 10% improvement over stock, but I like having 2-way speakers with tweeters in rear too versus just the 4" factory cone.
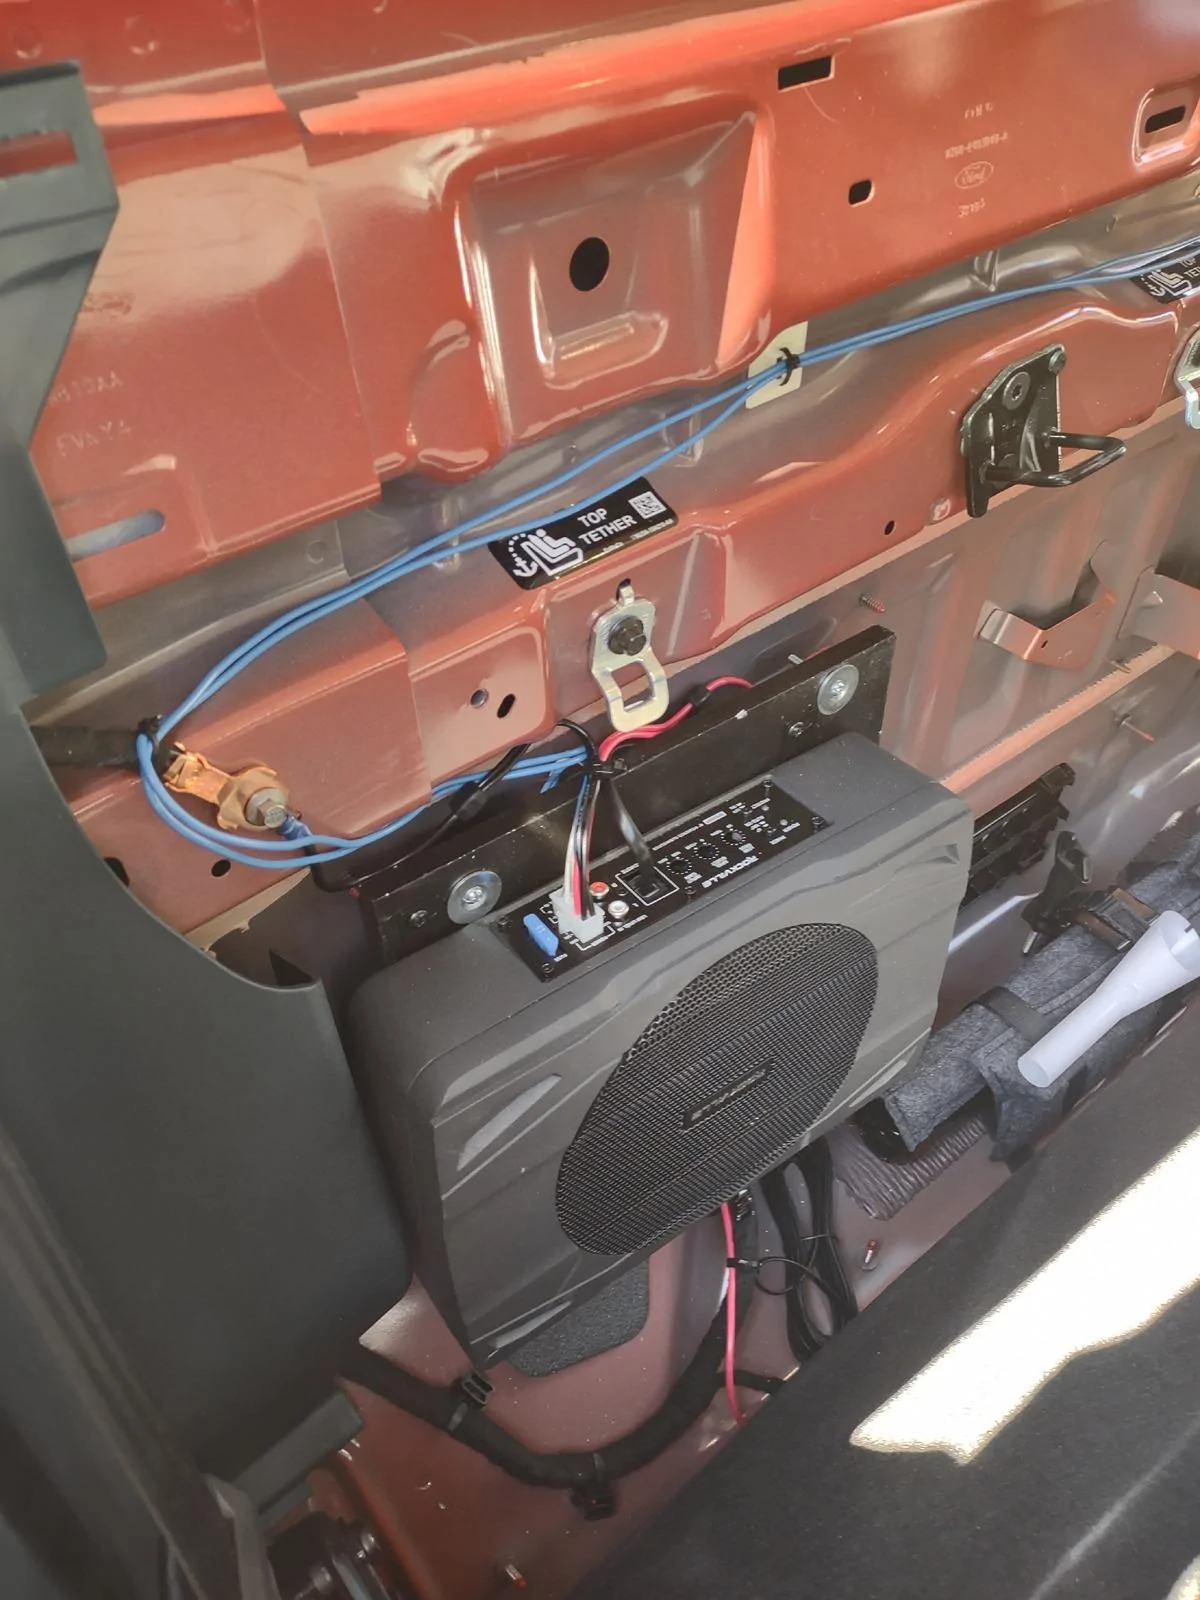
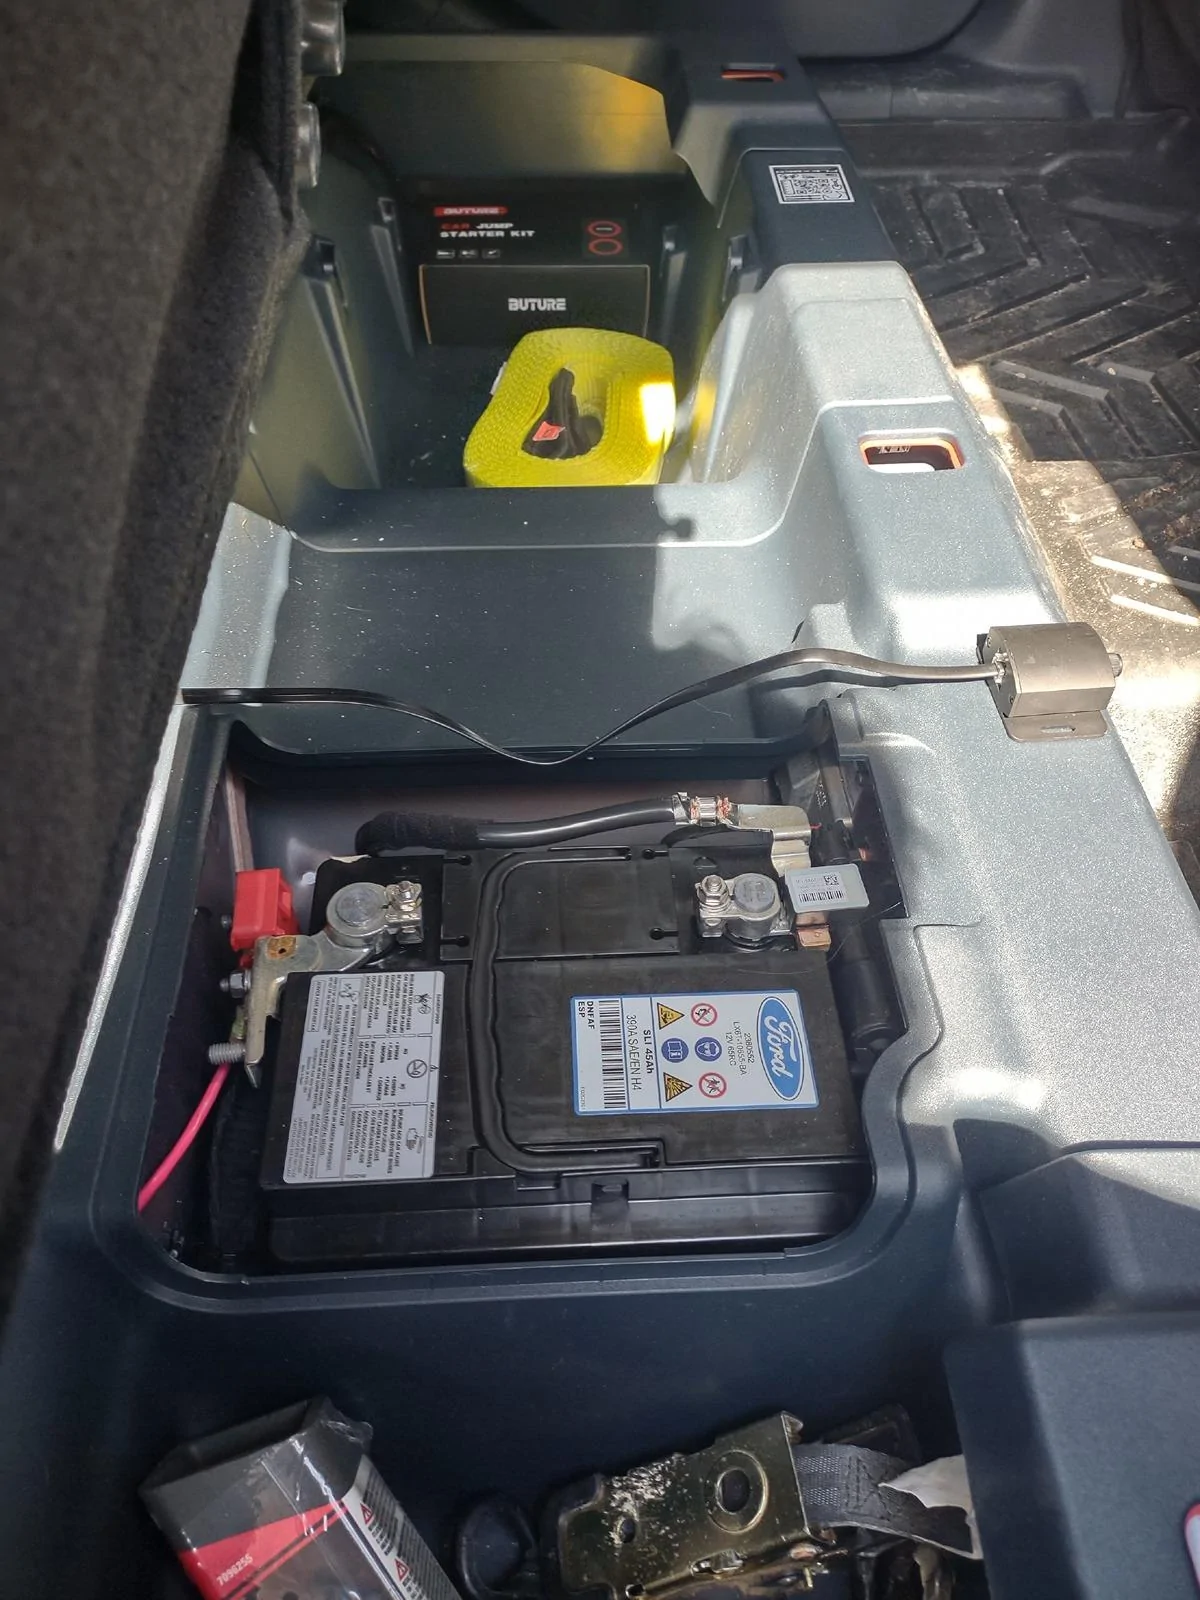
Finally, wire the subwoofer. It's pretty easy in the XL hybrid because there's an unused butterfly bracket already mounted on the rear of the cab behind the seat and because the battery box is right there. I mounted my subwoofer to an 11" x 11" piece of 3/8" plywood. I made a cardboard template and transferred and drilled the holes on the plywood, and then mounted the plywood to the butterfly bracket with #8 bolts and washers. The subwoofer comes with mounting screws and I used those to attach the subwoofer to the plywood. I ran the tap wires from the rear speaker(s) to the subwoofer plug and connected the wires together using 12-24 ga. Wago Lever Nuts (from Menards). These connectors are nice because they hold well even using different sized wires and can be removed and refastened as needed. The ground wire is long enough to attach to the grounding point right above the butterfly bracket. And I added about a 12" length of 10 ga. wire to the power lead to reach the positive terminal on the battery. Finally, I mounted the subwoofer control box to the trim under the front of the rear seat (just foward of the battery box) so I can adjust the bass from the driver's seat by reaching back to turn the knob. Others found the SS8P to fit nicely behind the seat, and it works just fine in my Maverick as well.
This is a long-winded explanation, but I hope it helps someone who's on the fence about whether to upgrade their speakers or not. It's very worth it, and I believe it now sounds every bit as good as the 21 speaker B&O sound system in my 2022 Expedition. The subwoofer makes a huge difference, like 50-60% better than stock. So, all combined, this $275 upgrade, yields about 100% improvement in sound quality and output over stock and adds the much needed low end to the system (front and rear).
Final thoughts. I considered adding sound dampening to the doors and rear and side walls, but there's not that much metal that's exposed. Ford did a good job sealing the cab and filling the cavities behind the panels, etc., and now that's it's done I don't feel it needs any dampening. I also considered adding an amp and DSP unit, but it certainly doesn't need it. There's no real distortion at 2/3d's of max volume and even at half volume it's too loud for me to sit in the cab with the doors open. Finally, if you order the rear speakers from Crutchfield like I did, add some wire taps or wire loom to your order to bring the order total up to $35 to get the free shipping!
PowerBass OE65C-FD speakers and tweeters for the front. $129.99 on Amazon;
Rockville SS8P Subwoofer for behind the rear seat. $109.95 on Amazon, with the install kit; and
Sound Ordinance P-40B 4" 2-way speakers for the rear. $29.99 on Crutchfield, with free Metra 75-5603 harnesses.
The tweeters were super easy. Pop the covers from the center and lift towards the pillar. You don't need to remove the A-Pillar trim if you push something under the dash cover to hold it up while you're working. Push the three retaining tabs and pop out the factory tweeter. Plug in the new tweeter, and press back into the factory hole. The only trick is the 2 little indents which need to point straight forward towards the windshield. Then test and pop the covers back down.
The door speakers weren't much harder. There's lots of good videos explaining how to remove the door panels, but basically you remove the cover behind the door handle and pry up the window switches from the arm rest side and then unhook the plug(s) and pop them out. From there, you remove the 8mm door handle bolt and two 7mm bolts under the window switches. Then there's three more 7mm screws along the bottom of the door, including one hiding behind the little red reflector at the rear of the door. The door speakers are held in with 7mm screws, and the new speakers fit perfectly and connect back to the factory harness just like the tweeters. Test and then reassemble both doors.
The front speakers and tweeters are about a 40% improvement over stock, but they still lack mid-bass and bass. I found them a little tinny, so I dropped the treble two notches in the system settings.
For the rears, which I probably wouldn't have done except I needed to tap the line(s) for the subwoofer, were a little more difficult than the fronts. Again, there's lots of videos showing how to remove the rear trim pieces and it's not that hard, but it's a lot of back and forth to each side of the truck while the seat is up, and down and up again. Plus you have to battle the long rear window piece which is awkward and has the middle seat belt running through it. The best way to deal with it is to pull it off and then move it up and over the rear seat so its out of the way. The only difficult piece is the top most grill where the speakers are mounted, because the mount on the rear most corner is woefully weak. Even with care, plan on breaking this mount -- but a little plastic weld or epoxy will fix it right up. You'll see when its off, that this is a poorly designed mount that was probably never intended to be removed. And by the time you get to this point, you'll need a break anyway - so leave the epoxy to set up and just walk away. Fortunately, these top most pieces are held on with a 7mm bolt, so they'll still be plenty secure no matter what you do.
The rear speakers bolt right in like the fronts with no clearance issues using two 7mm screws. But before you install the speakers, push on the Metra harnesses. Then tap the wires in the harness(es) so you don't have to alter the factory wires. I only tapped the left rear speakers, but there's inputs on the subwoofer for both left and right speakers if you want to tap both sides. IMO it sounds just fine with only the left (or right) tapped. Run lengths of primary wire to the butterfly bracket (or wherever you decide to mount the subwoofer). I used 16 ga. wire. Then test the rear speakers and reinstall the trim pieces. I'd say the rear speakers are only a 10% improvement over stock, but I like having 2-way speakers with tweeters in rear too versus just the 4" factory cone.
Finally, wire the subwoofer. It's pretty easy in the XL hybrid because there's an unused butterfly bracket already mounted on the rear of the cab behind the seat and because the battery box is right there. I mounted my subwoofer to an 11" x 11" piece of 3/8" plywood. I made a cardboard template and transferred and drilled the holes on the plywood, and then mounted the plywood to the butterfly bracket with #8 bolts and washers. The subwoofer comes with mounting screws and I used those to attach the subwoofer to the plywood. I ran the tap wires from the rear speaker(s) to the subwoofer plug and connected the wires together using 12-24 ga. Wago Lever Nuts (from Menards). These connectors are nice because they hold well even using different sized wires and can be removed and refastened as needed. The ground wire is long enough to attach to the grounding point right above the butterfly bracket. And I added about a 12" length of 10 ga. wire to the power lead to reach the positive terminal on the battery. Finally, I mounted the subwoofer control box to the trim under the front of the rear seat (just foward of the battery box) so I can adjust the bass from the driver's seat by reaching back to turn the knob. Others found the SS8P to fit nicely behind the seat, and it works just fine in my Maverick as well.
This is a long-winded explanation, but I hope it helps someone who's on the fence about whether to upgrade their speakers or not. It's very worth it, and I believe it now sounds every bit as good as the 21 speaker B&O sound system in my 2022 Expedition. The subwoofer makes a huge difference, like 50-60% better than stock. So, all combined, this $275 upgrade, yields about 100% improvement in sound quality and output over stock and adds the much needed low end to the system (front and rear).
Final thoughts. I considered adding sound dampening to the doors and rear and side walls, but there's not that much metal that's exposed. Ford did a good job sealing the cab and filling the cavities behind the panels, etc., and now that's it's done I don't feel it needs any dampening. I also considered adding an amp and DSP unit, but it certainly doesn't need it. There's no real distortion at 2/3d's of max volume and even at half volume it's too loud for me to sit in the cab with the doors open. Finally, if you order the rear speakers from Crutchfield like I did, add some wire taps or wire loom to your order to bring the order total up to $35 to get the free shipping!
Sponsored
