
- Thread starter
- #1
Update- The intercooler worked great!
I did some high elevation and temps with a heavy travel trailer (Rpod 180- 3,800 GVWR). It was was 3 people, their stuff, and a weeks worth of food to Crater Lake. We were in some of the worst towing conditions for multiple hours.
I used the OBDLink MX+ scanner to monitor the temps and the CVF intercooler was amazing. It may even have saved the truck from damage!
Even in the worst of it, (low speeds for hours, climbing steep grades, 5,000 Ft elevation, 110 F temperatures) the intake rarely went over 135 F!
Definitely helped keep the power in the truck available if/when I needed it.
Doing the install again,
- I'd open up more of the bumper to let air flow on idle (maybe cut slits so it can rise from the bottom)
- Put in some wire mesh/screen over the whole bumper opening for bugs (there were a TON of bugs behind the old intercooler)
- Likely drill/cut holes for water drainage. Not sure if it's needed at this point
----------
Hey MTC,
I installed a @CVF-Jason CVF Intercooler (link) on my 22 Ecoboost Lariat. It's a bit different than the tremor install video I saw on youtube (link) and thought I'd share the steps. Sorry it's not a video as there was a lot of trail/error to get it working. Let me know your thoughts!
Tools Needed:
Steps:


 <-- ignore these

I did some high elevation and temps with a heavy travel trailer (Rpod 180- 3,800 GVWR). It was was 3 people, their stuff, and a weeks worth of food to Crater Lake. We were in some of the worst towing conditions for multiple hours.
I used the OBDLink MX+ scanner to monitor the temps and the CVF intercooler was amazing. It may even have saved the truck from damage!
Even in the worst of it, (low speeds for hours, climbing steep grades, 5,000 Ft elevation, 110 F temperatures) the intake rarely went over 135 F!
Definitely helped keep the power in the truck available if/when I needed it.
Doing the install again,
- I'd open up more of the bumper to let air flow on idle (maybe cut slits so it can rise from the bottom)
- Put in some wire mesh/screen over the whole bumper opening for bugs (there were a TON of bugs behind the old intercooler)
- Likely drill/cut holes for water drainage. Not sure if it's needed at this point
----------
Hey MTC,
I installed a @CVF-Jason CVF Intercooler (link) on my 22 Ecoboost Lariat. It's a bit different than the tremor install video I saw on youtube (link) and thought I'd share the steps. Sorry it's not a video as there was a lot of trail/error to get it working. Let me know your thoughts!
Tools Needed:
- Flat Head screwdriver
- Needle Nose pliers
- Trim removal tool
- Remove wheel well cloth
- Non-black permanent marker
- Mark where to cut
- 7mm, 10mm, & 13 mm sockets/wrench
- T-30 Trox bit
- Drimmel, angle grinder, and/or other tool to cut plastic
- I also used cable/moon cutters
Steps:
- Separate the cloth wheel well from the bumper (pic #1)
- Several trim clips (red) and 2-3x 7mm bolts (green). You don't need to fully remove the front mud flap, just enough to detach it from the bumper
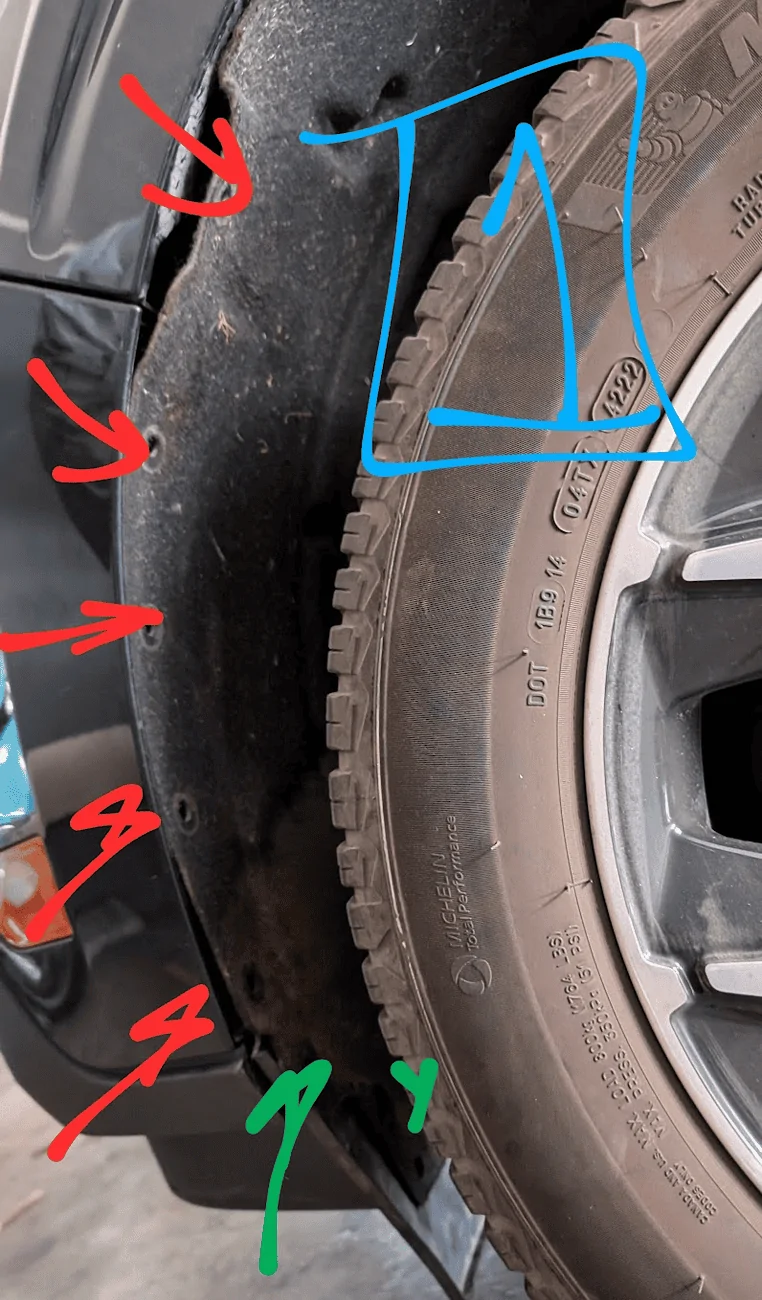
- Several trim clips (red) and 2-3x 7mm bolts (green). You don't need to fully remove the front mud flap, just enough to detach it from the bumper
- Remove the 3x 10mm screws that hold the bumper in pace
- Shown as red on picture #2
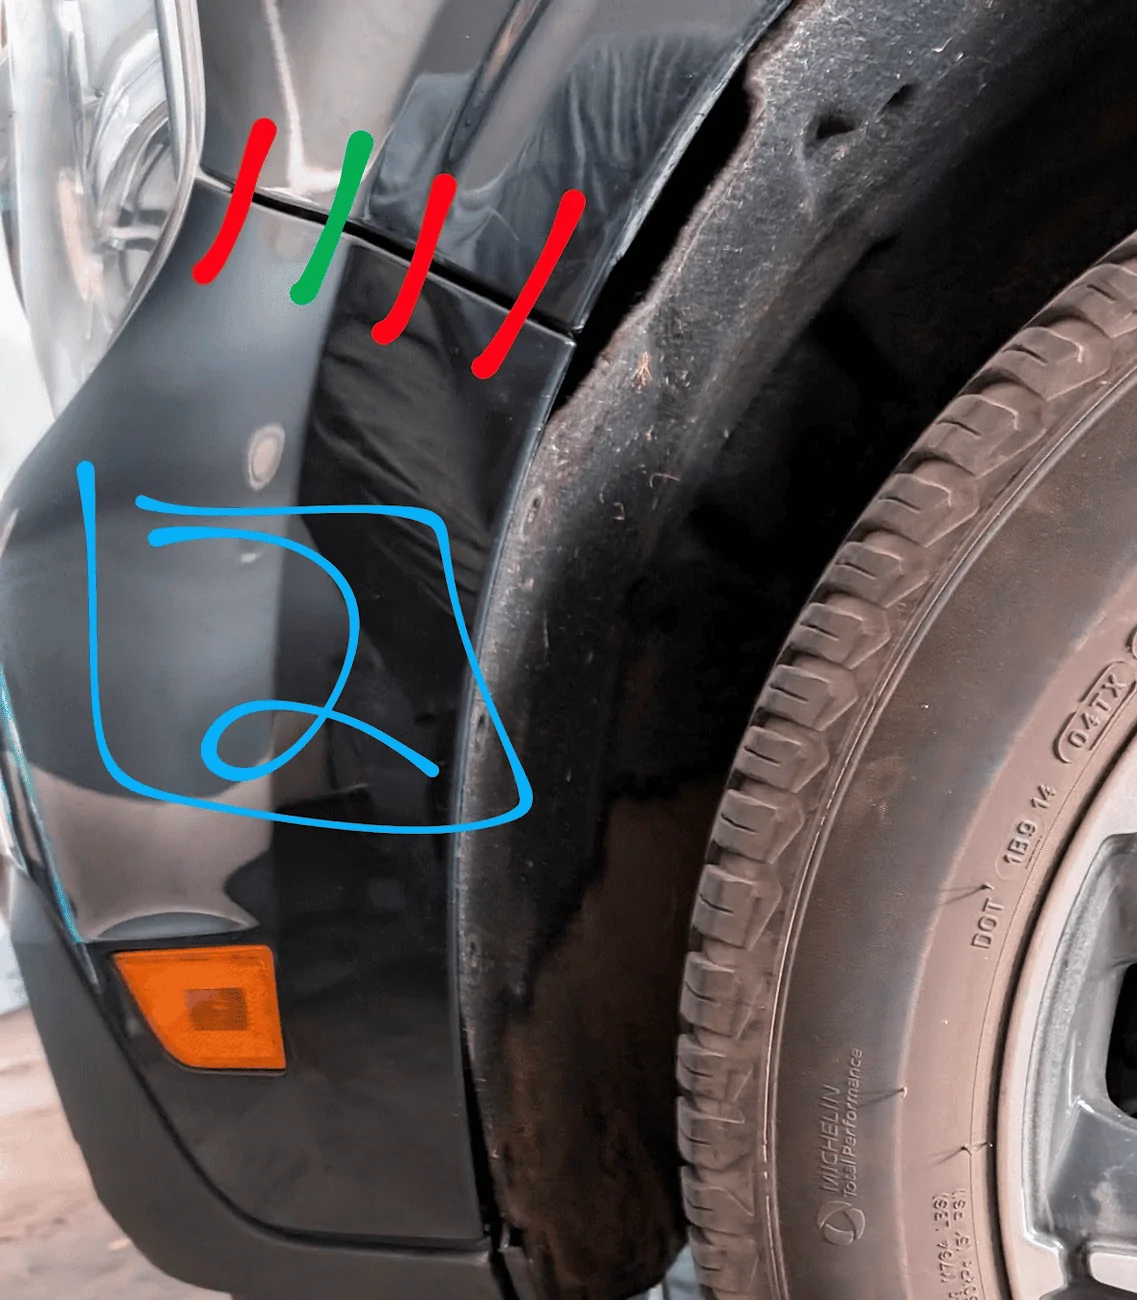
- Shown as red on picture #2
- Then use needle nose pliers to remove plastic clips
- Green on pic #2
- You’re just loosening the clips and getting them ready. The bumper won’t come off yet as there are other screws holding it in place
- Use a T30 torx bit to remove both the bumper screws as well as the ones holding the undercarriage cloth or the front skid plate.
- You’ll need to remove some of the screws further under the car so you can get to the exiting intercooler/hoses
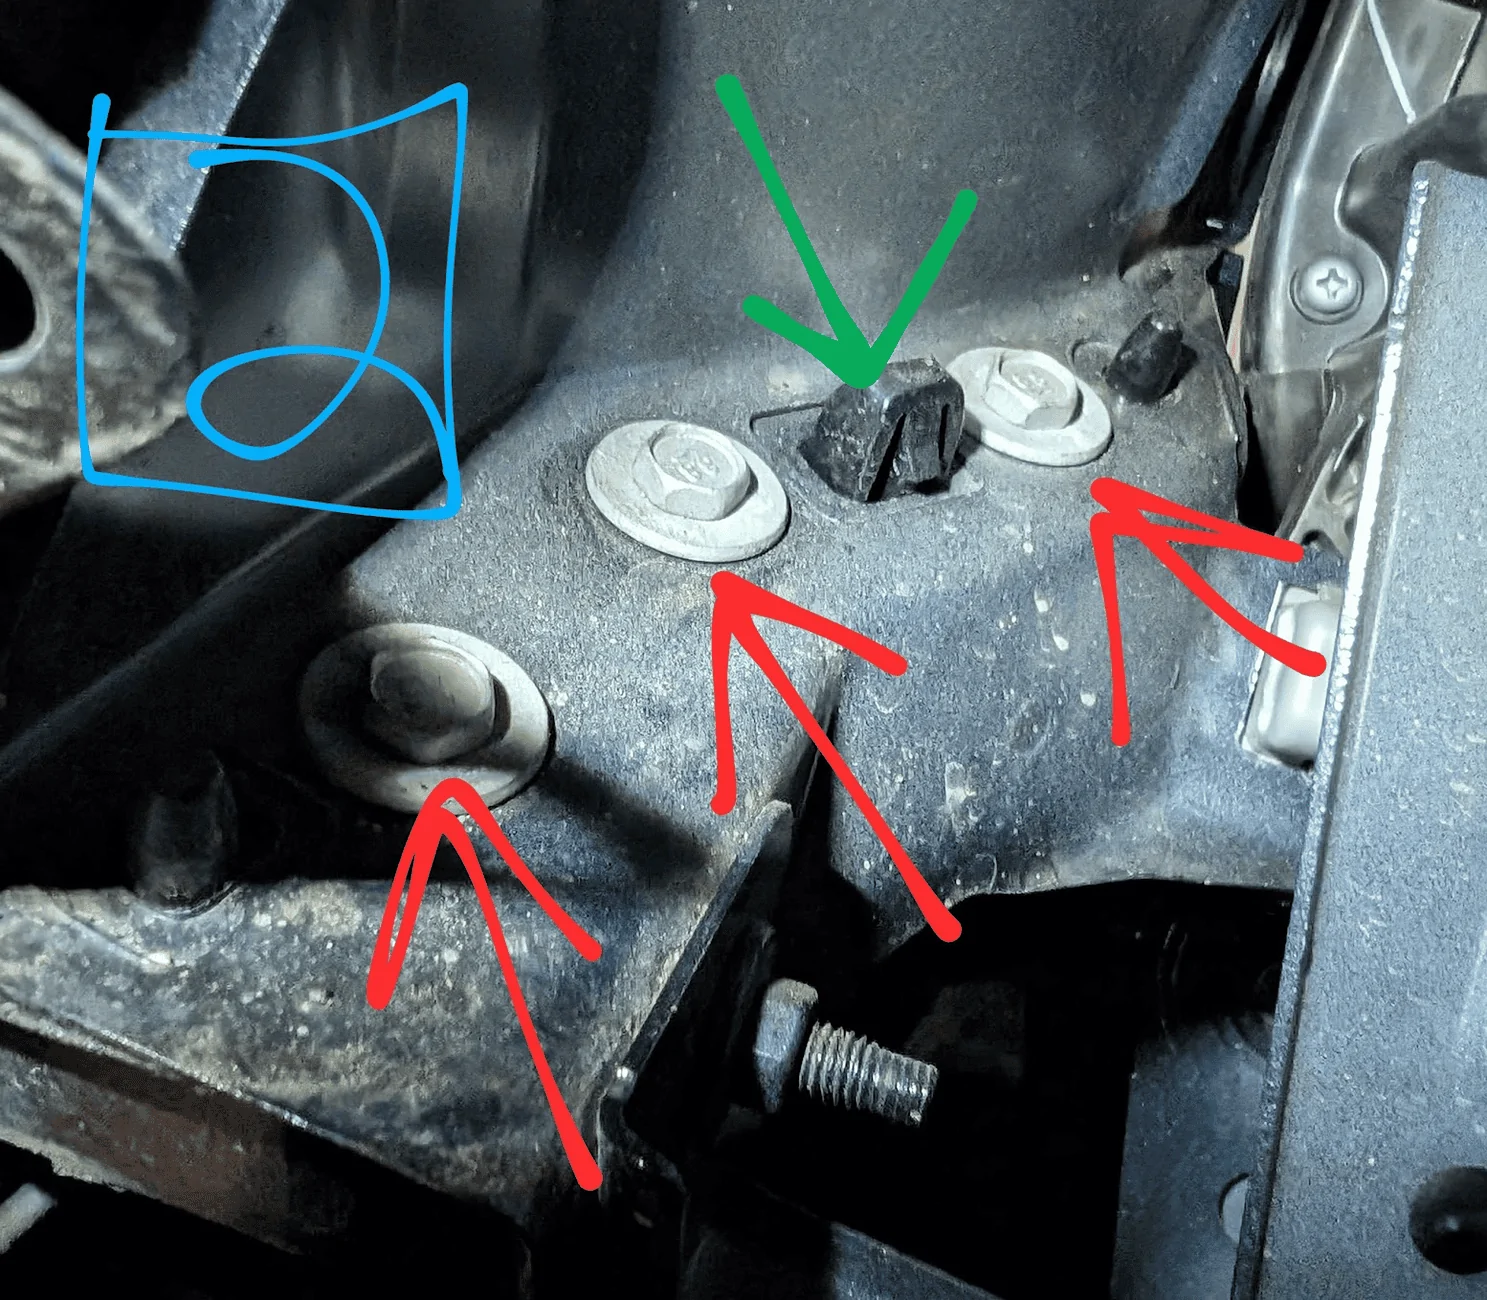
- Remove 4x 10mm bolts in the engine bay that hold the bumper
- Bolts are shown in pic #3. Green bolts also have a clips that hold the bumper
- Bolts are shown in pic #3. Green bolts also have a clips that hold the bumper
- Release the 2 clips that hold the bumper in place
- Shown in pick #3 as green
- Be careful here as you need to detach both before the bummer will move. I tried to do 1 then the other and ended up snapping 1 off.
- Slowly pull the bumper forward
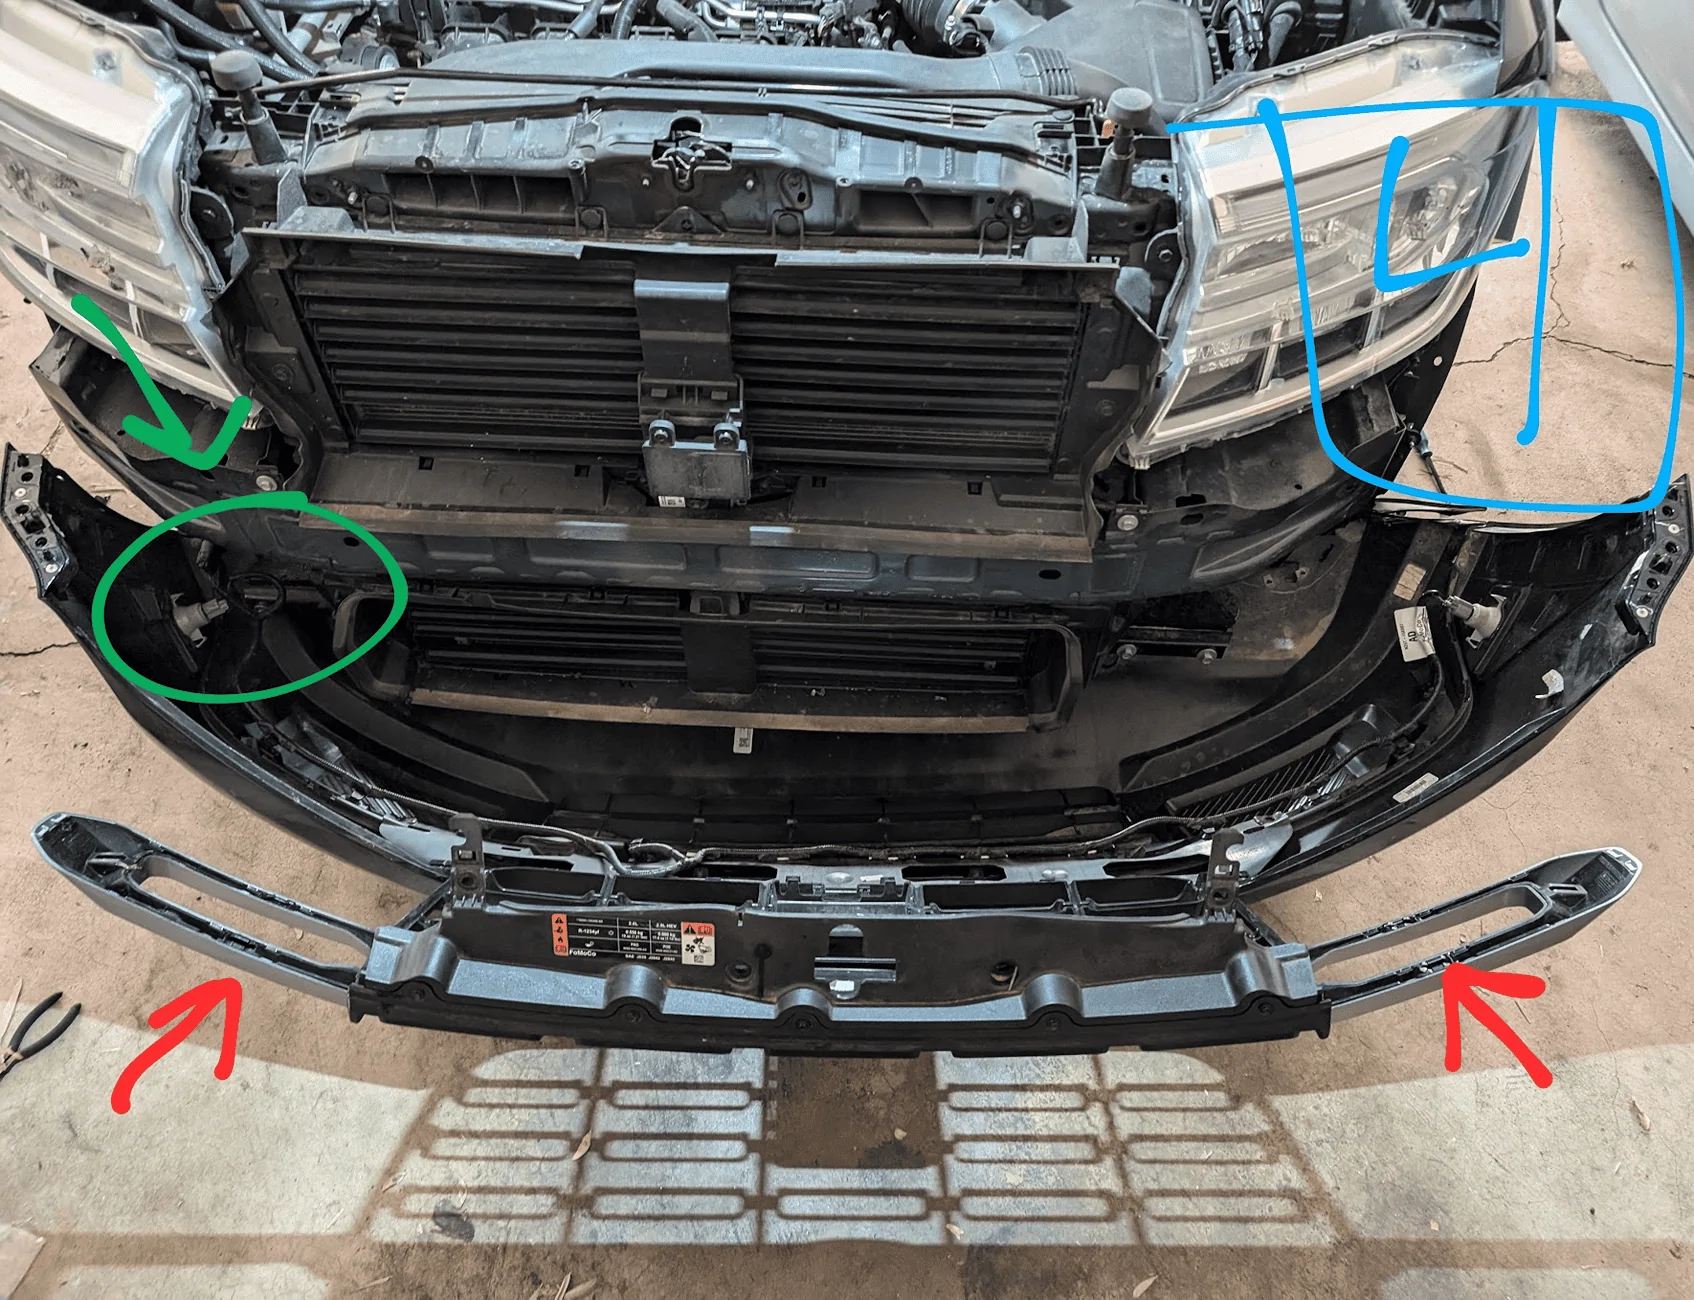
- It’s 1 massive piece that includes the silver hoops on the headlights. There are several clips that hold this area on. There are 3 on each headlight shown as red on pics #4. They will snap off, but be careful to to twist this plastic piece as it can break
- NOTE: you may need to disconnect a wiring harness on the passenger before pulling off the bumper. It’s shown as green on pic #4. I believe this is a part of the adaptive cruise control (Lariat trim & copilot 360).
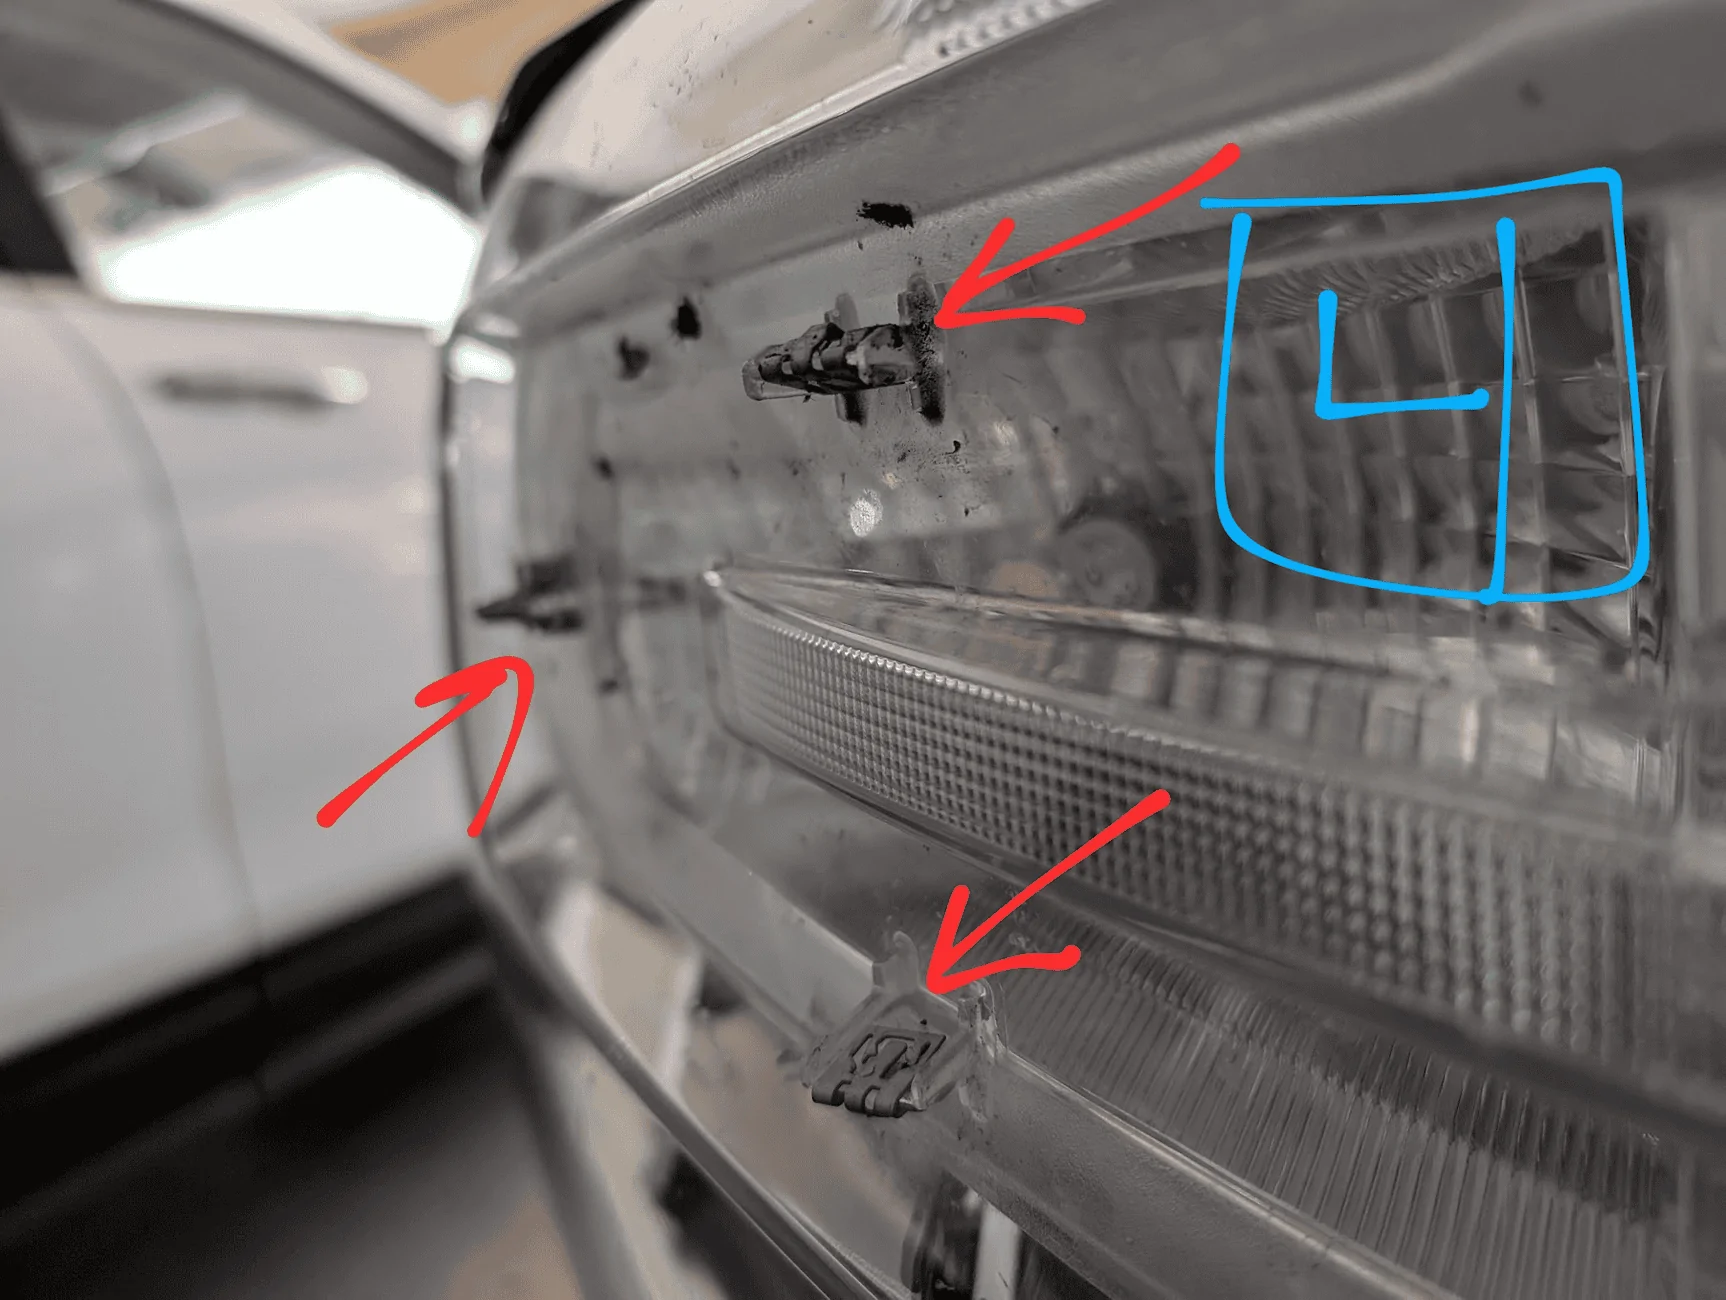
- Remove the front trim/funnel for the active aero
- 2 clips and 2 snaps. Passenger side is shown as red on pic #5
- NOTE: the top 2 clips open UP as shown in pic #5
- I was not able to find a way to reuse this piece as it wouldn’t fit
- Pull forward the vertical active aero control arm, then pull out the the blades themselves
- The control arm releases the blades and so you can just pull the blades forward to snap them out (shown in pic #6)
- You’ll need to remove all 4 blades in front of the intercooler as shown in pic #6
- Now is where you start cutting. The front aero component is a solid piece from the top radiator to the bottom intercooler. Unfortunately, you can’t just take pieces off, you have to cut them out. I tried to remove as little as possible to maintain the crumple zones and existing air flow as much as possible.
- I used Dremel and cable/moon cutters to cut the plastic, but it’s a real pain. The plastic is thick and it easily melts when cut. This gums up the blade and sprays plastic bits all over. An angle grinder might be better, but there are tight areas you need to cut. Keep in mind that most of this won’t be seen later, so it doesn’t have to be perfect
- Driver side
- Cut the so it’s semi-flush with the existing intercooler, shown as red on pic #7. This plastic is thick so go slow.
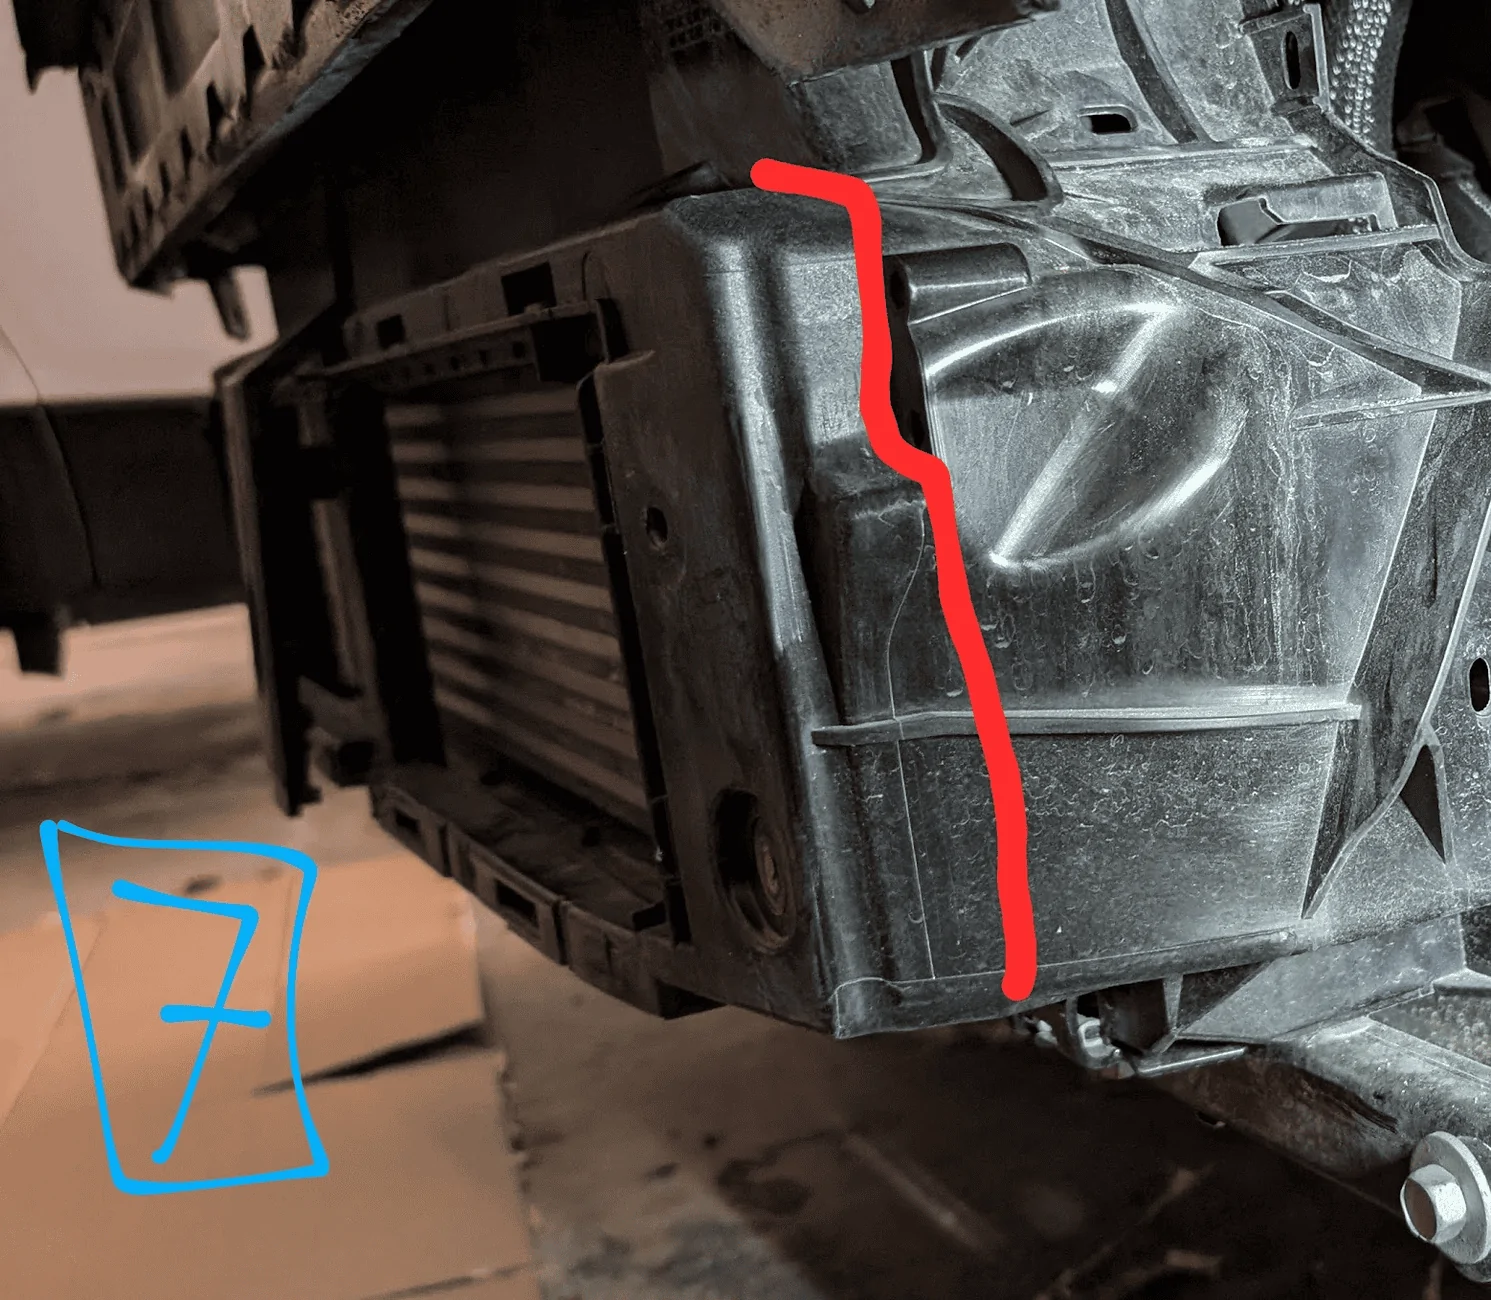
- Cut the so it’s semi-flush with the existing intercooler, shown as red on pic #7. This plastic is thick so go slow.
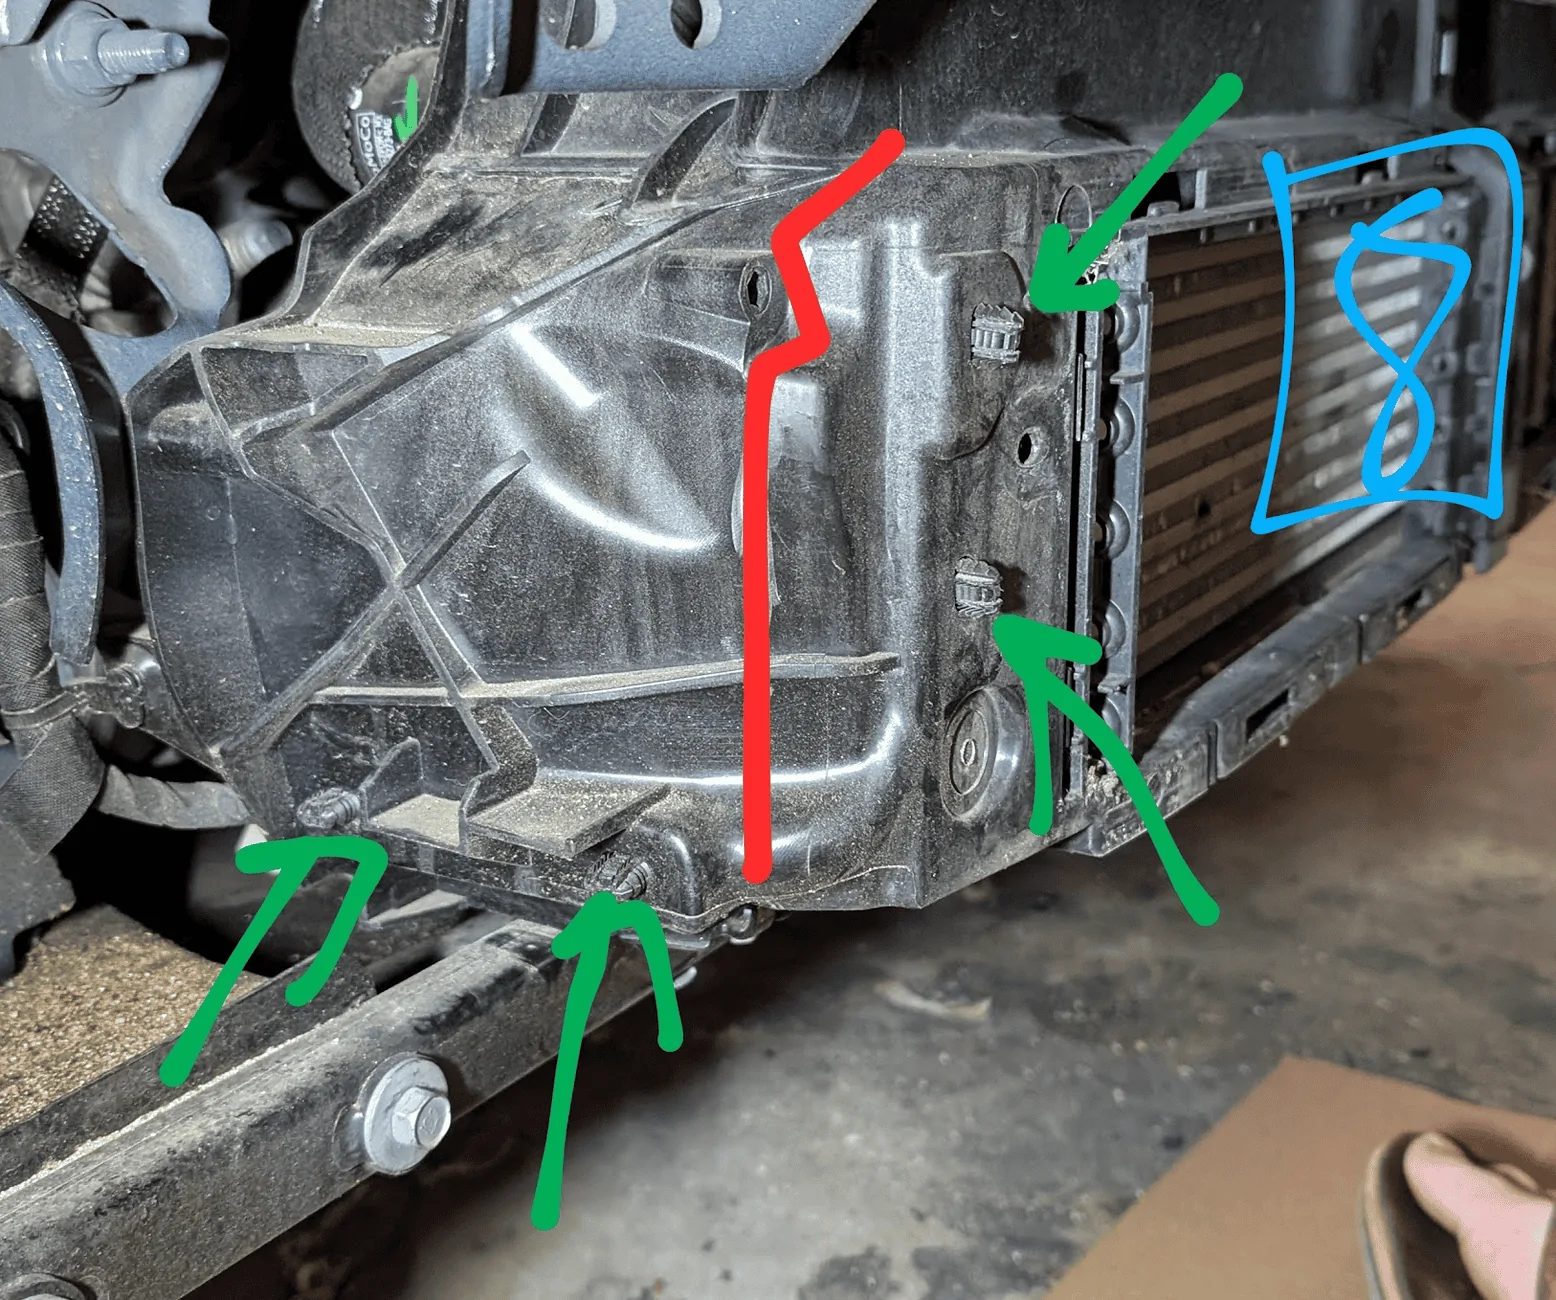
- Passenger Side
- FIRST: disconnect the cable clipped into the plastic. You’ll want to reach in (as best you can) and push the cable out of the way so you don’t cut it. The clips and wire are shown as green on pic #8
- Next, cut the plastic semi-flush with the existing intercooler, shown as red on pic #8. I frequently checked where the wire was as I was cutting so I didn’t damage it.
- Top/Bottom
- Cut the plastic at the top/bottom to connect what you’ve deleted on both sides. You can use your cutting tool and/or the cable/moon cutters as the plastic is thinner. Pic #9 shows what to cut and what it looks like after.
- Once removed, it should be semi-flush with the front of the current intercooler. You’ll also need to cut off the active aero control arm to line up with the other cuts.
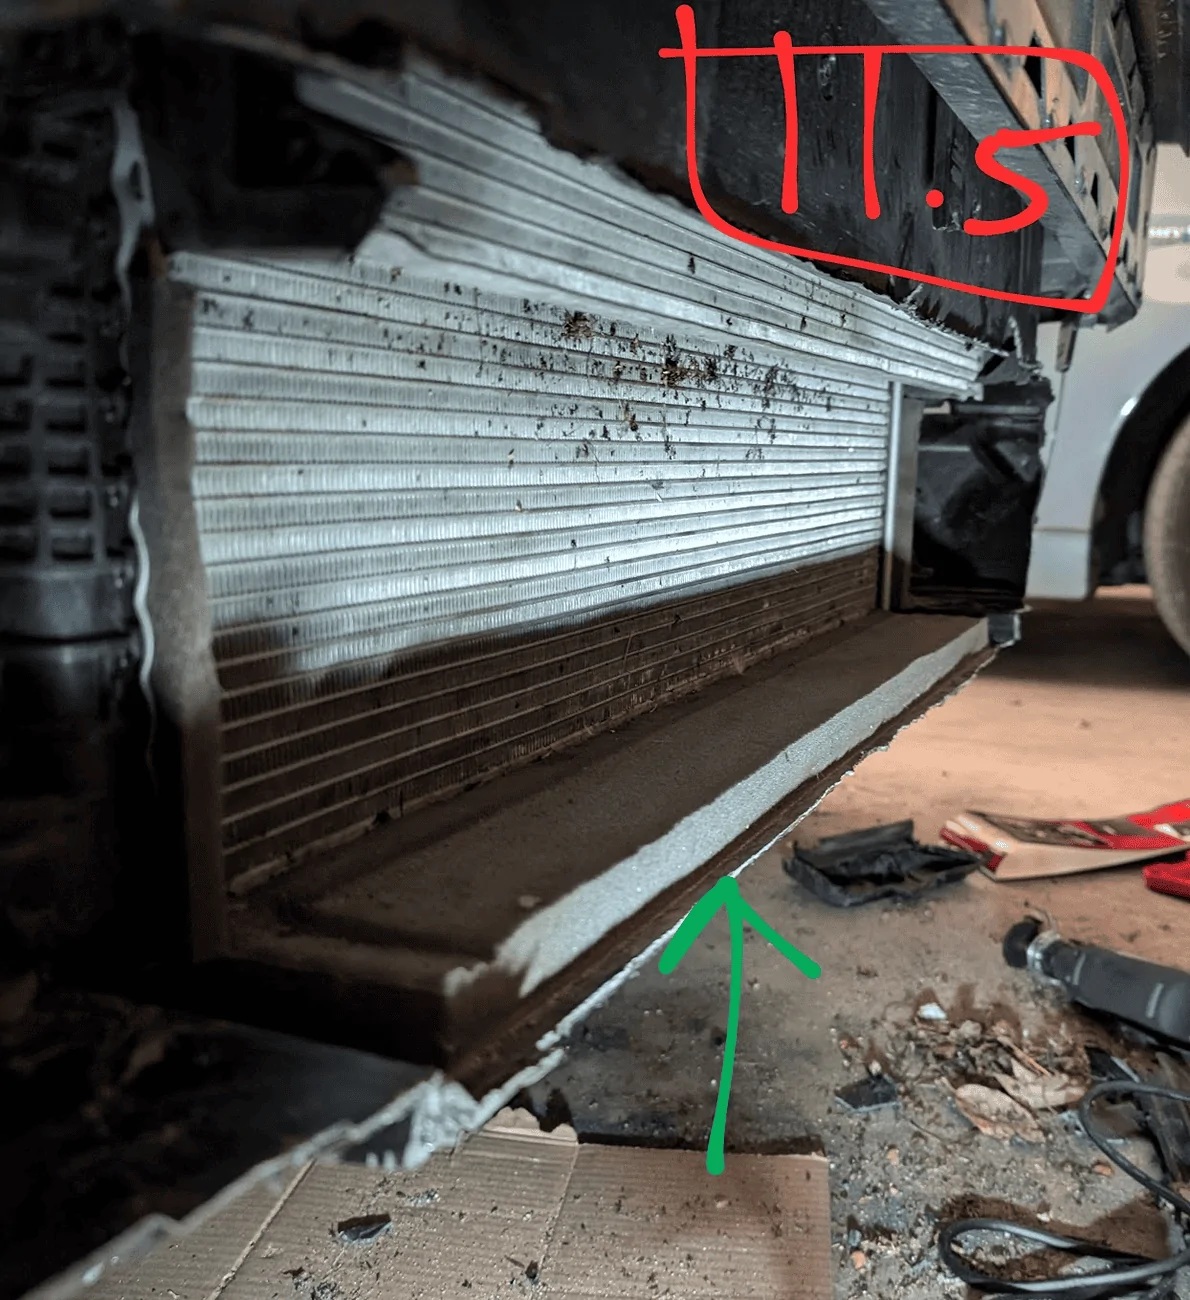
- I chose to keep part of the existing foam/aero piece in place, shown in green on pic #11.5 once the old intercooler is out
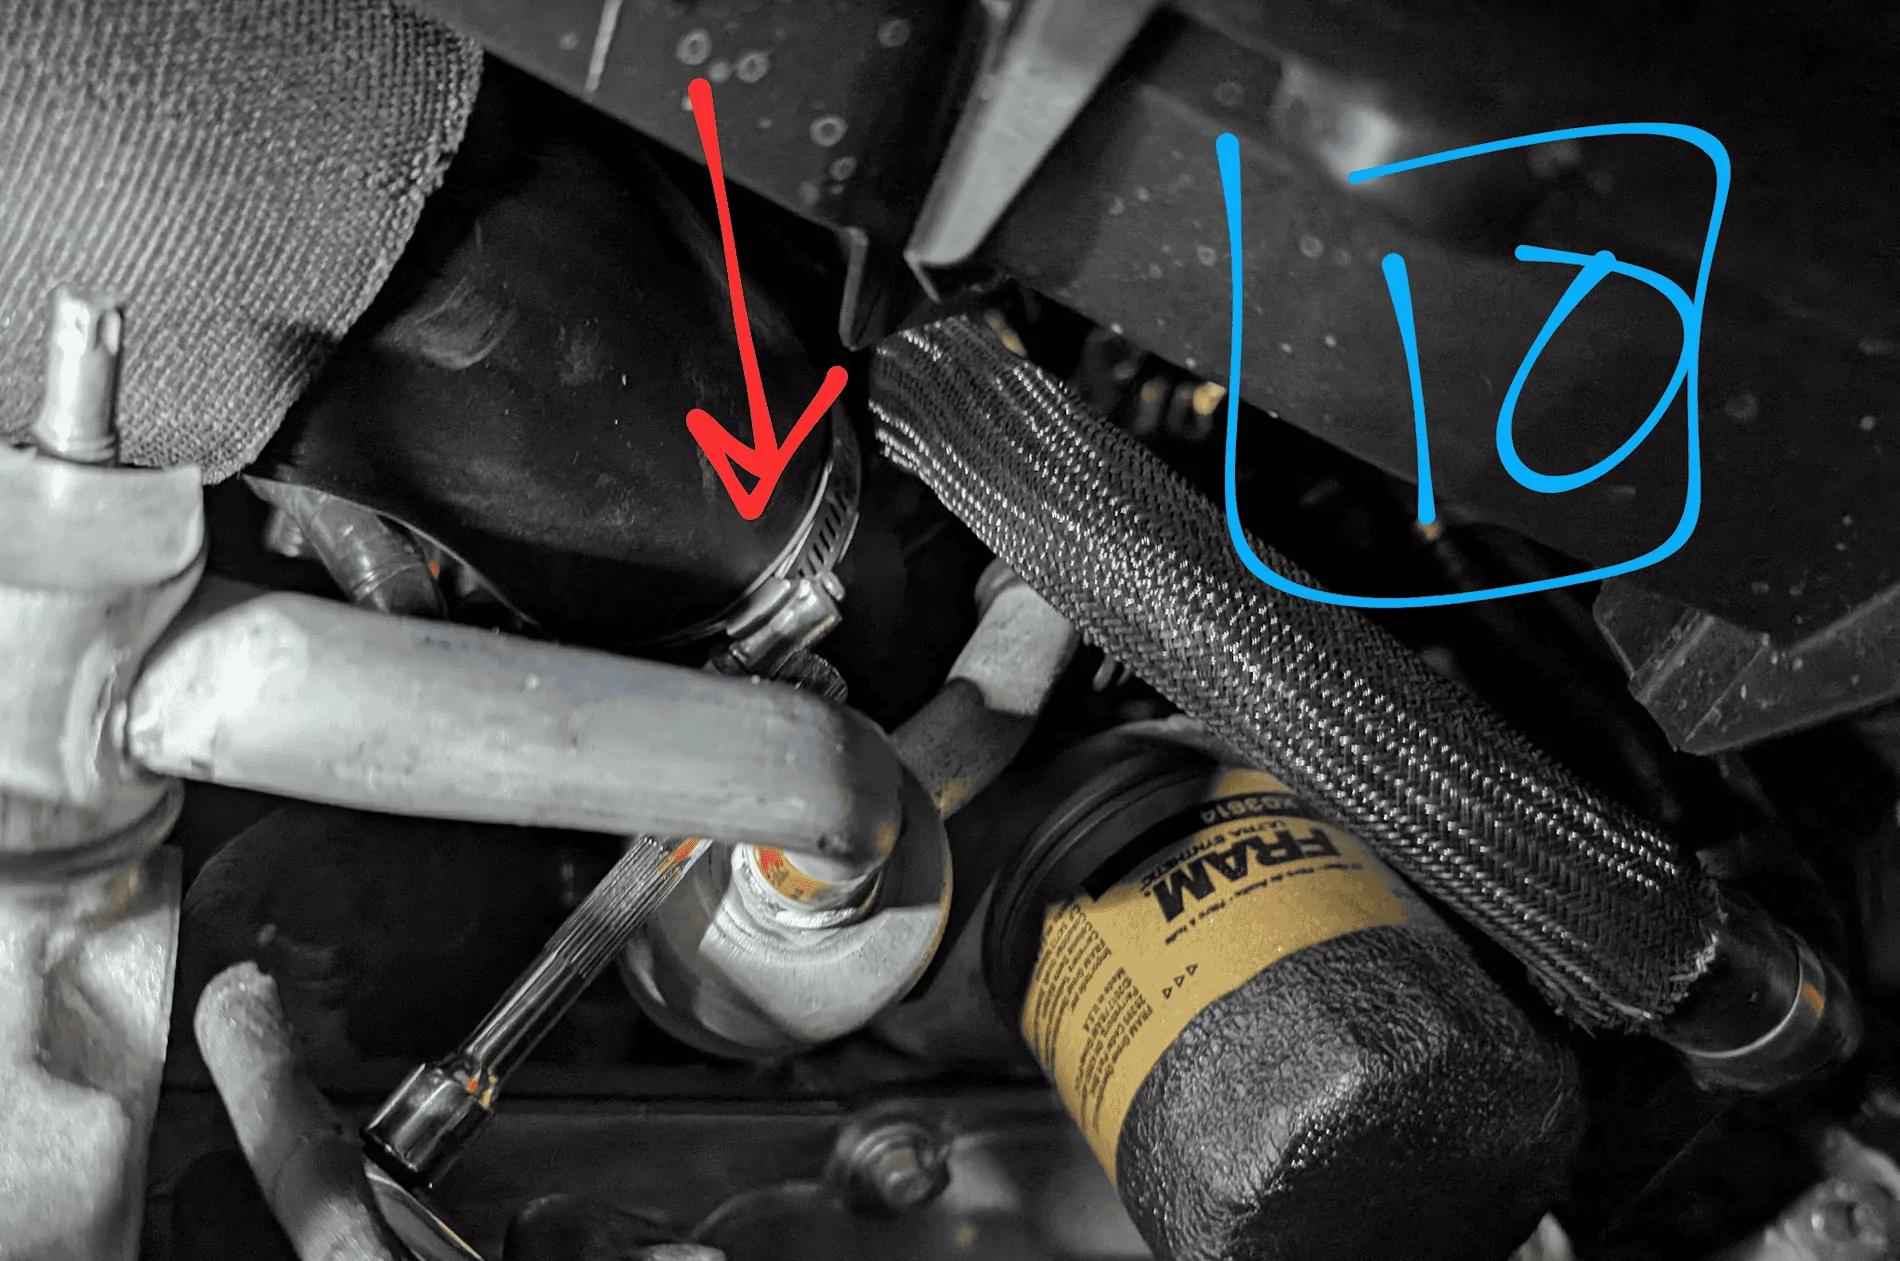
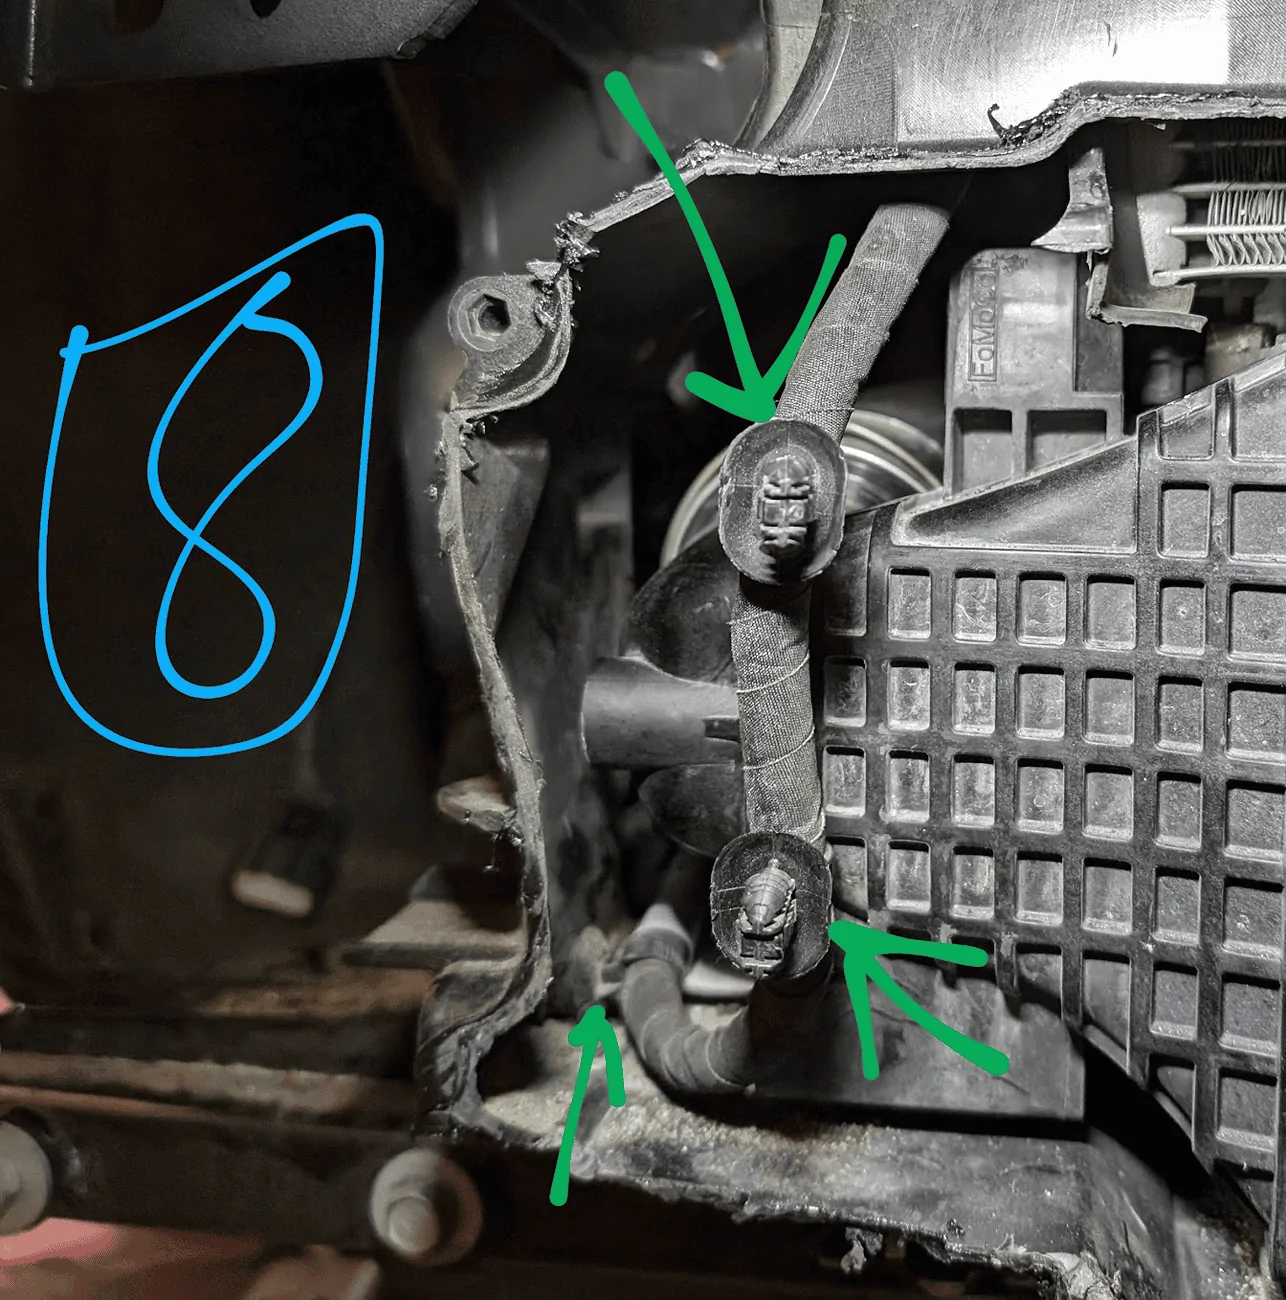
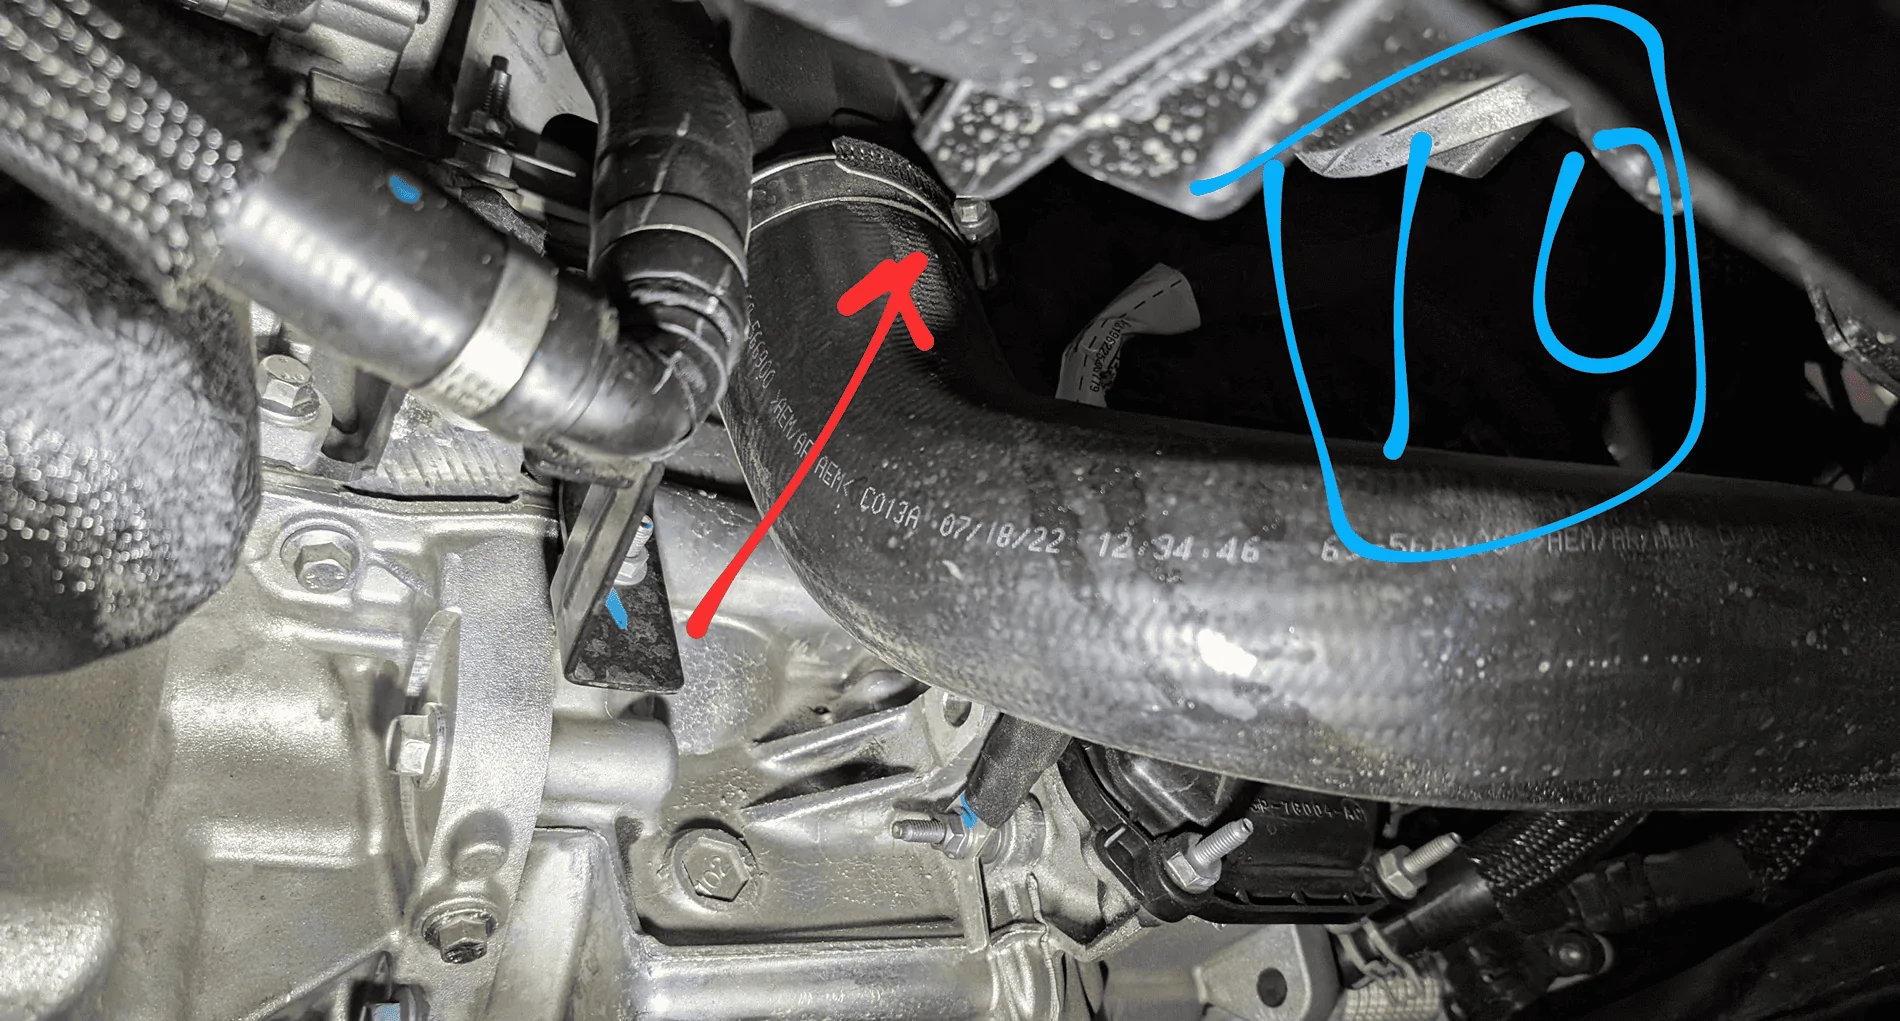
- Remove the hoses from the intake (not intercooler)
- With this procedure, you won’t have access to the sides of the existing intercooler as I wanted to leave more of the existing system. Instead of disconnecting only the intercooler, I removed the hose clamps upstream and removed both the hoses and intercooler. If you want, you can cut out more plastic and likely remove only the intercooler.
- The hoses are shown in pic #10. 1 of them is by the fuel filter, and the other by the crankcase

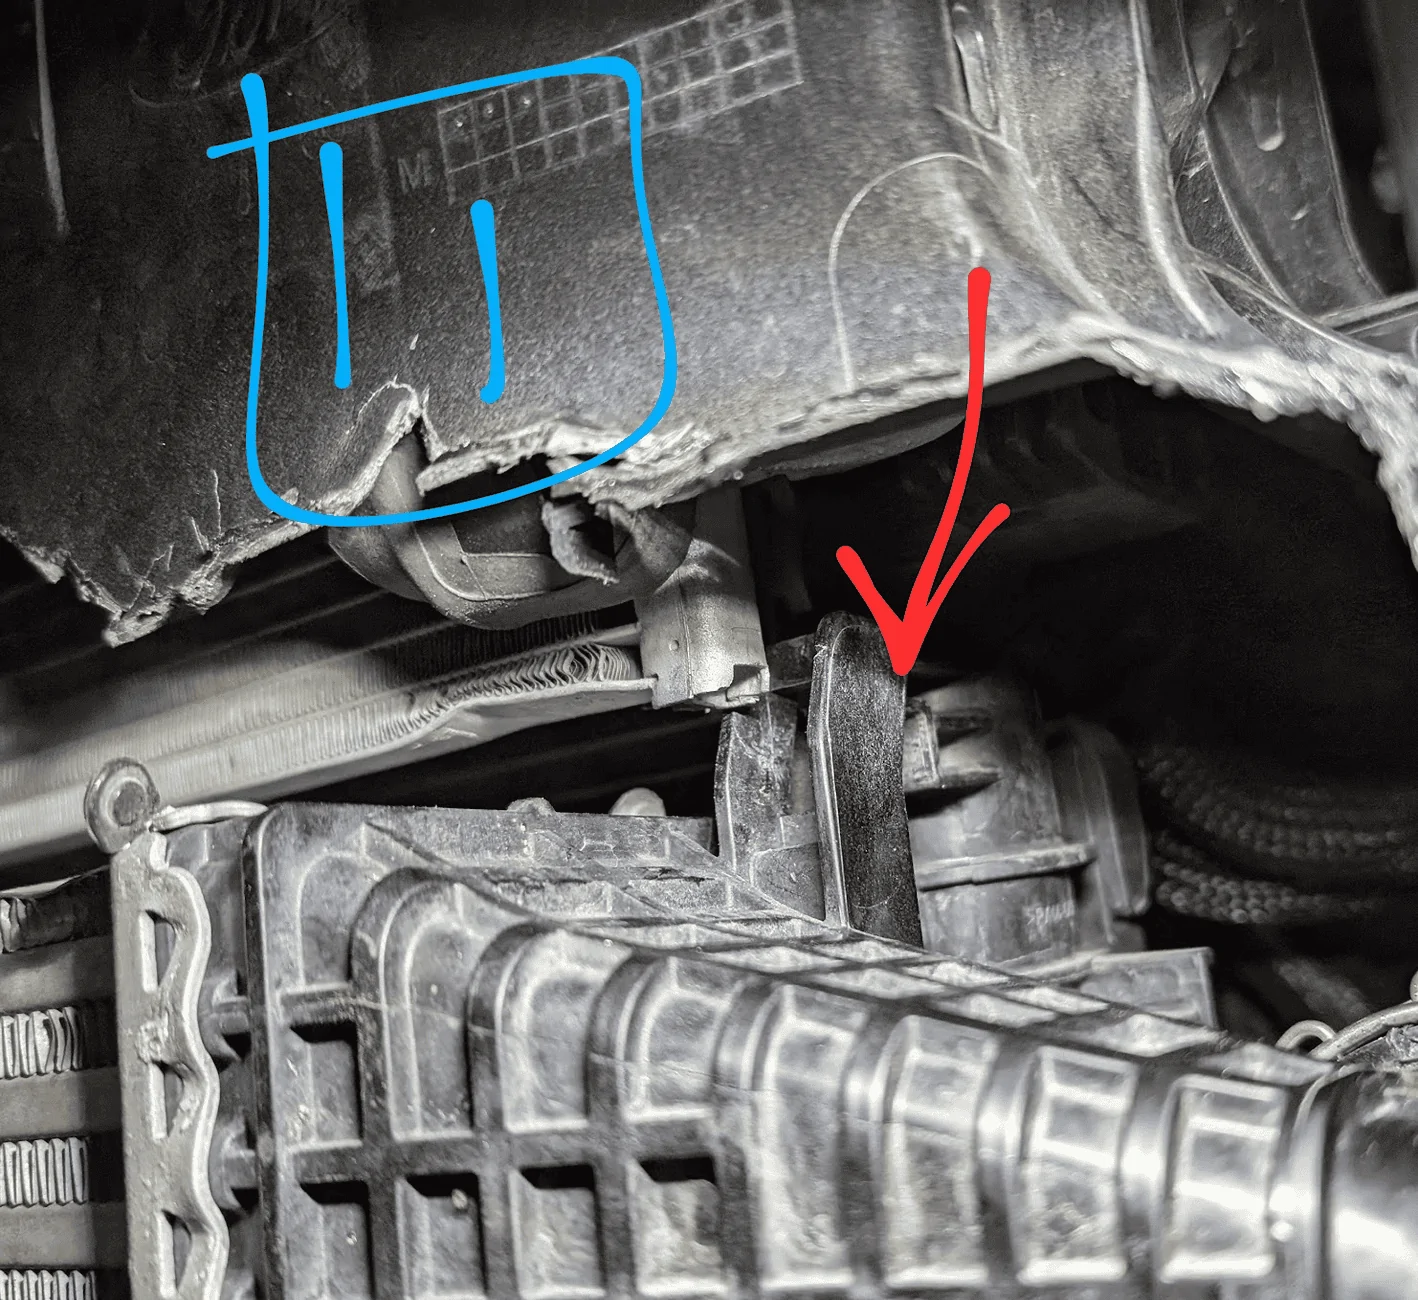
- Now shimmy the old intercooler out of place
- There are 2x clips at the bottom and 2x u-shaped brackets at the top that hold it in place. The driver side is shown in pic #11. The top is not a clamp and it should come off if you lift up and slide it side-to-side
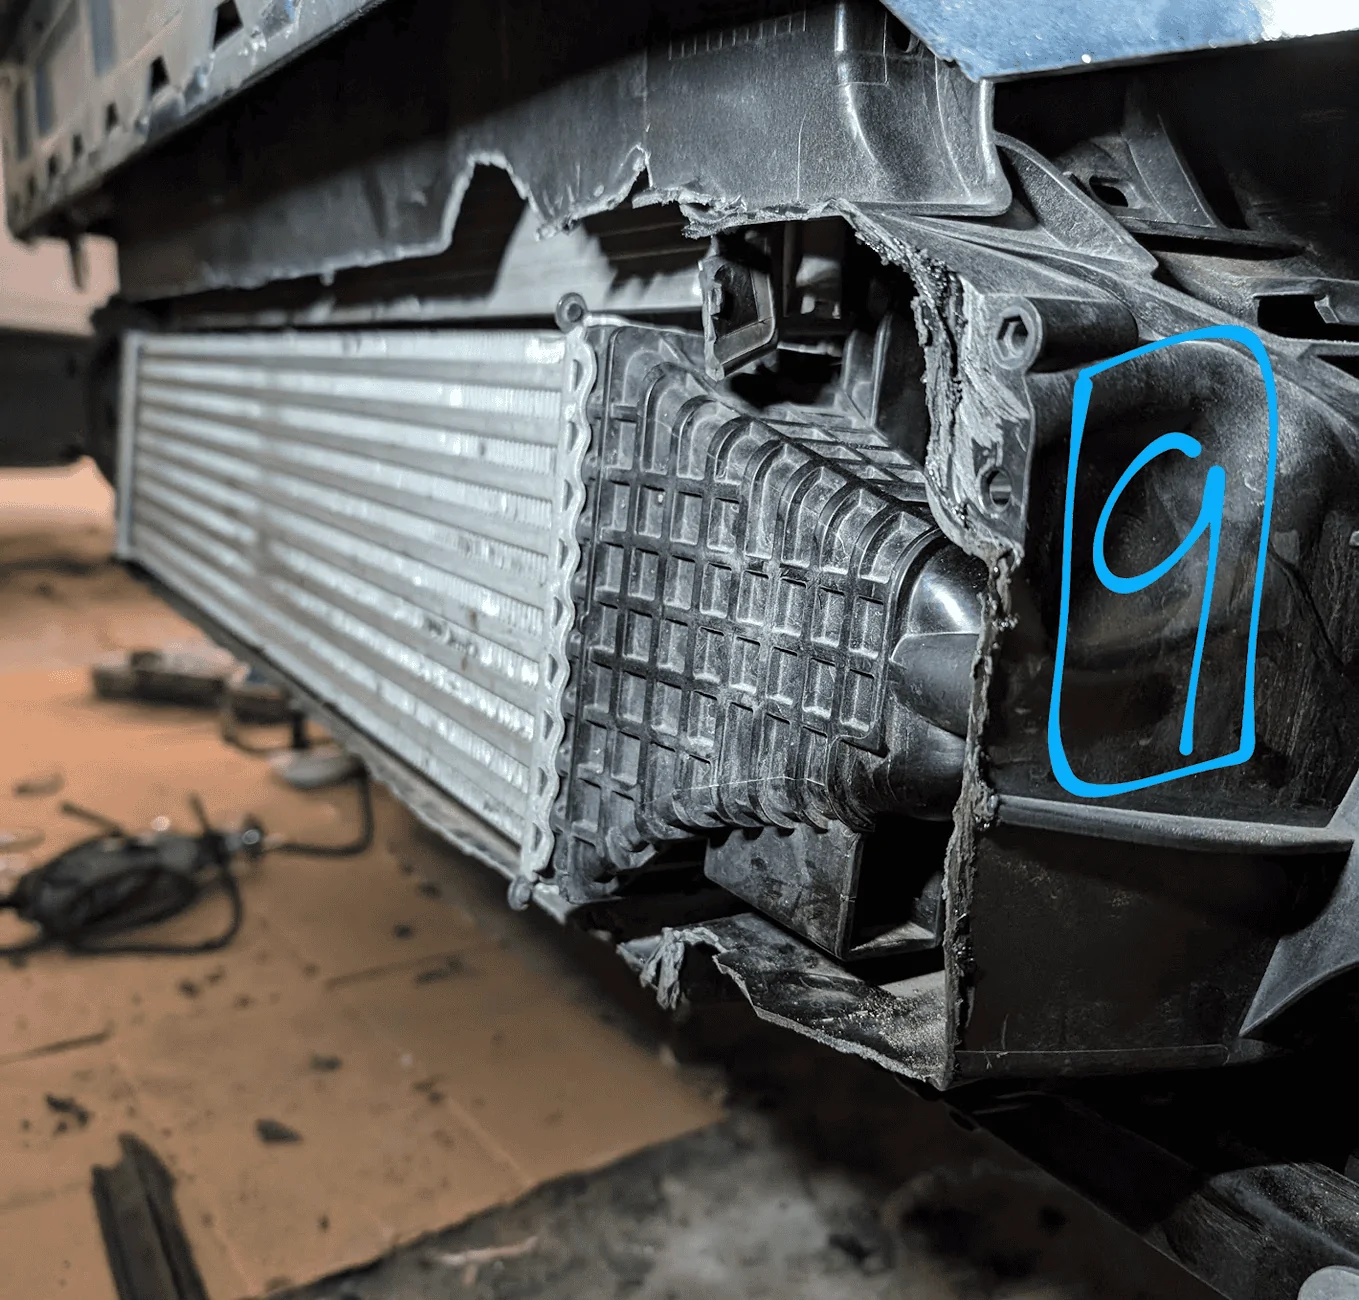
- Pic # 11.5 shows what it looks like with the intercooler removed. I chose leave the foam/plastic piece at the bottom (green arrow), it fits nicely under the new intercooler
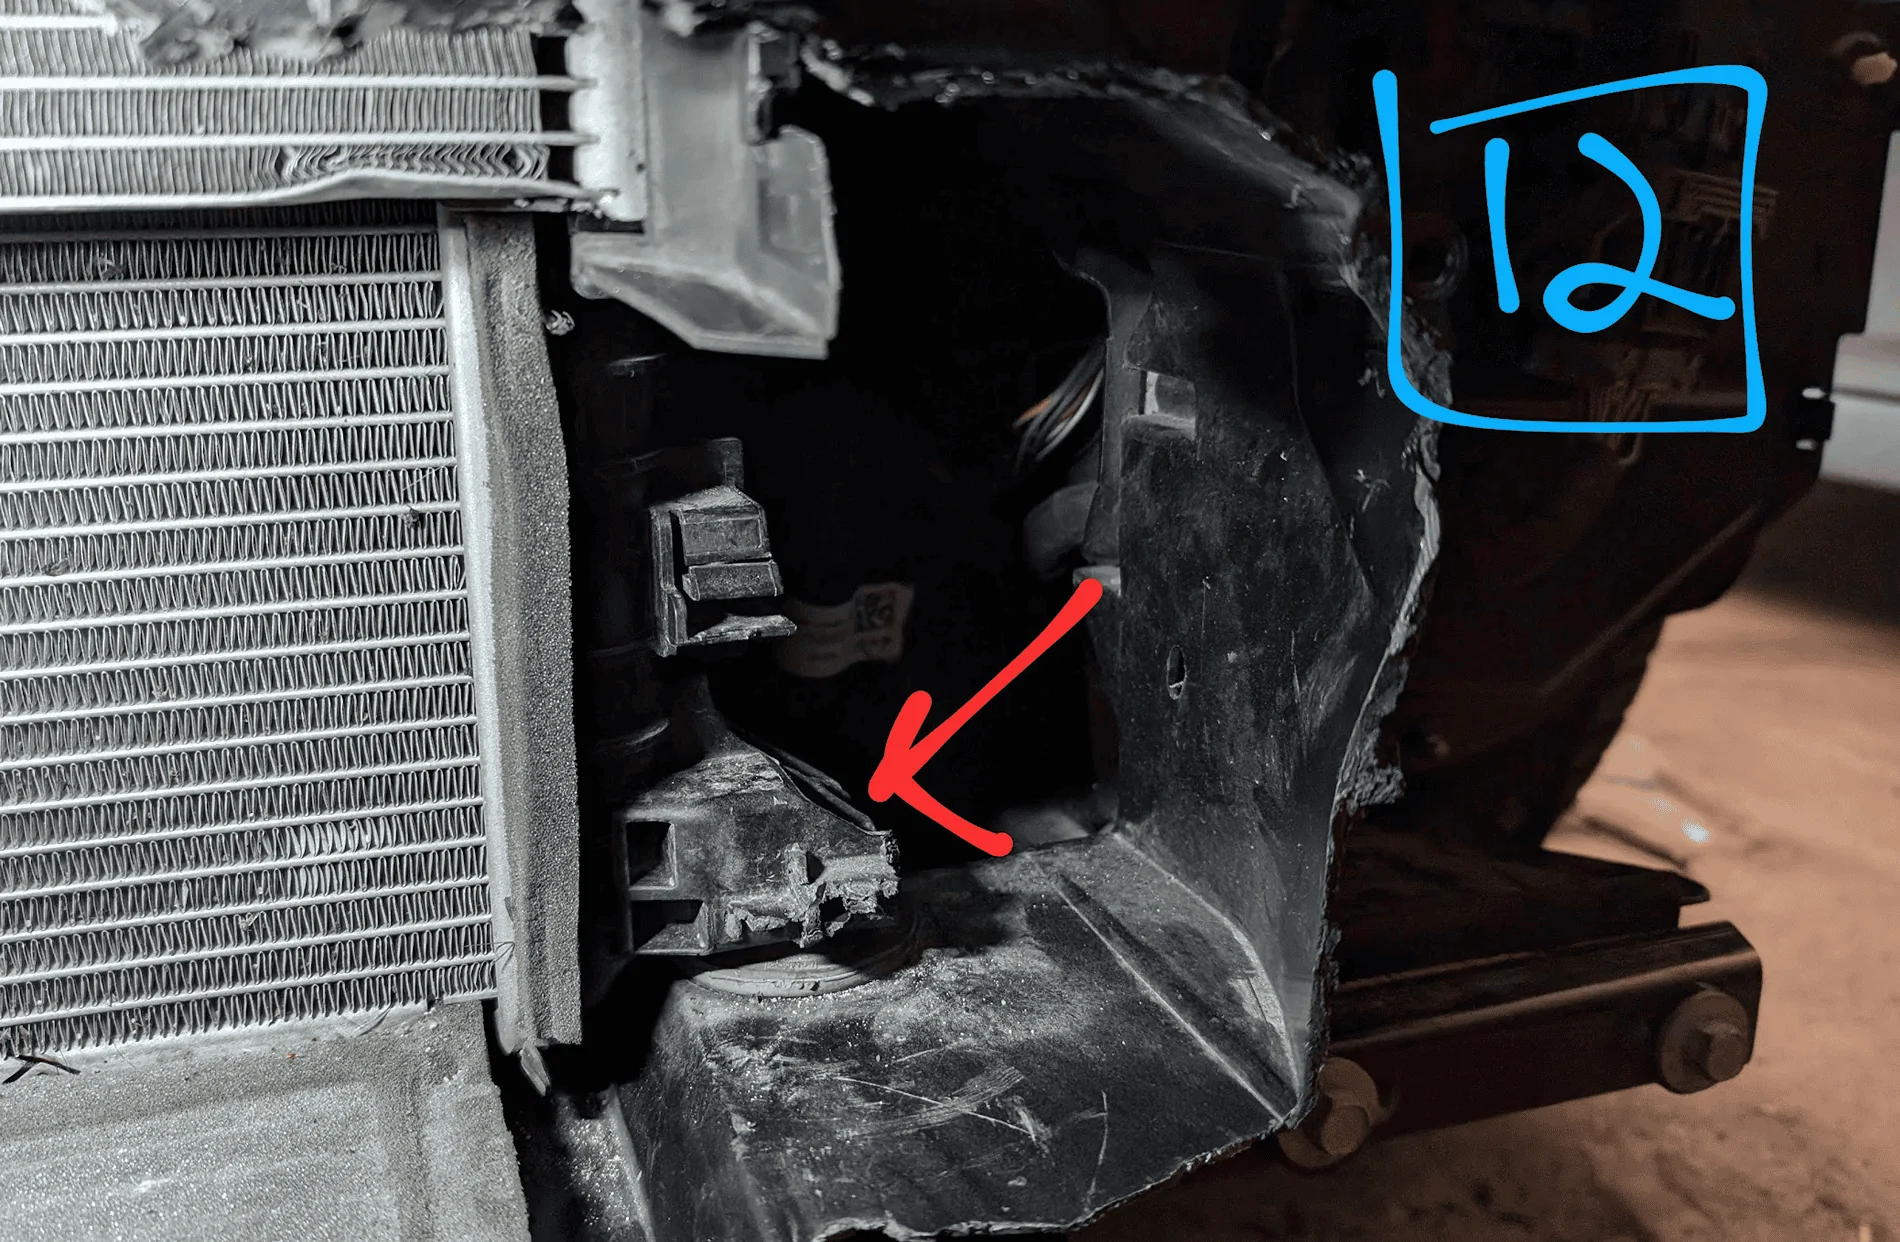
- Once the old intercooler is out, cut the 2 plastic brackets flush with the radiator
- Pic #12 shows the finished product after it’s cut off.
- My truck was super dirty and full of bugs under/behind the old intercooler
- Install the support beam on the new intercooler
- Use the 3x provided screws
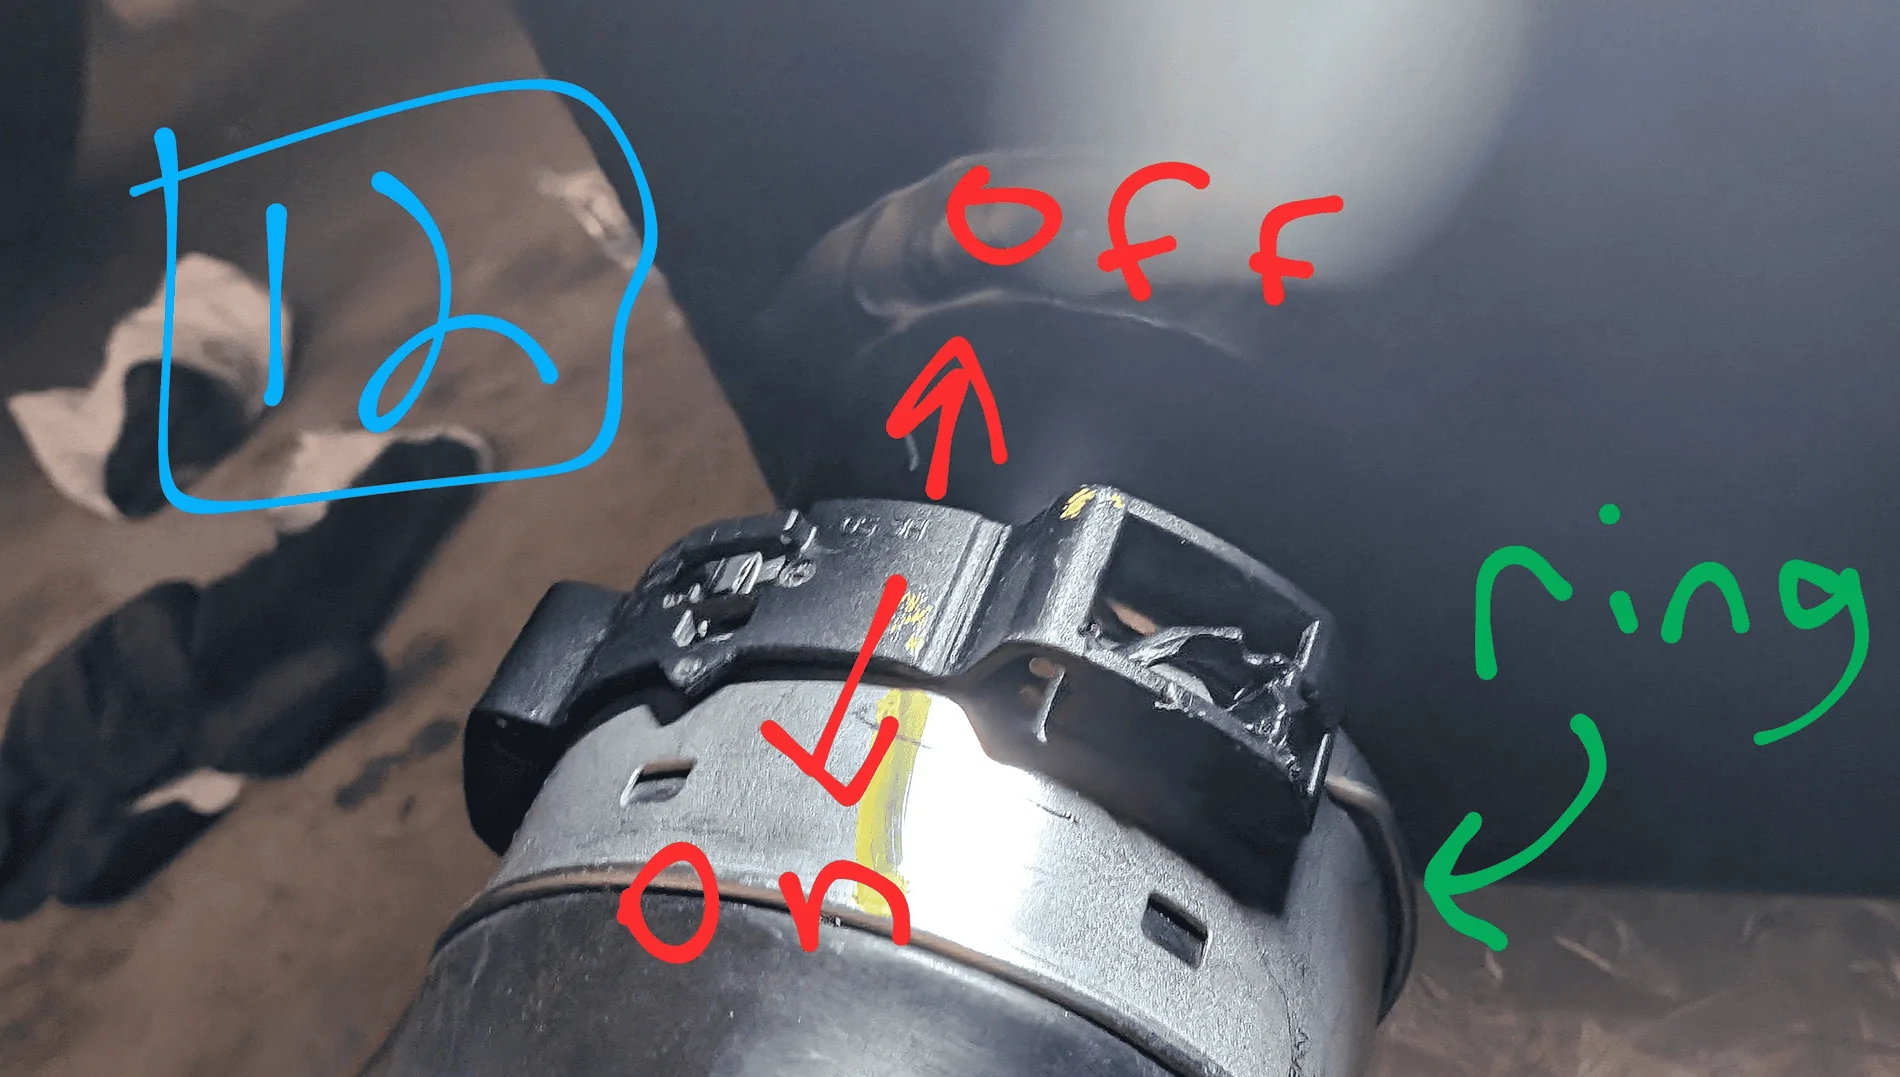
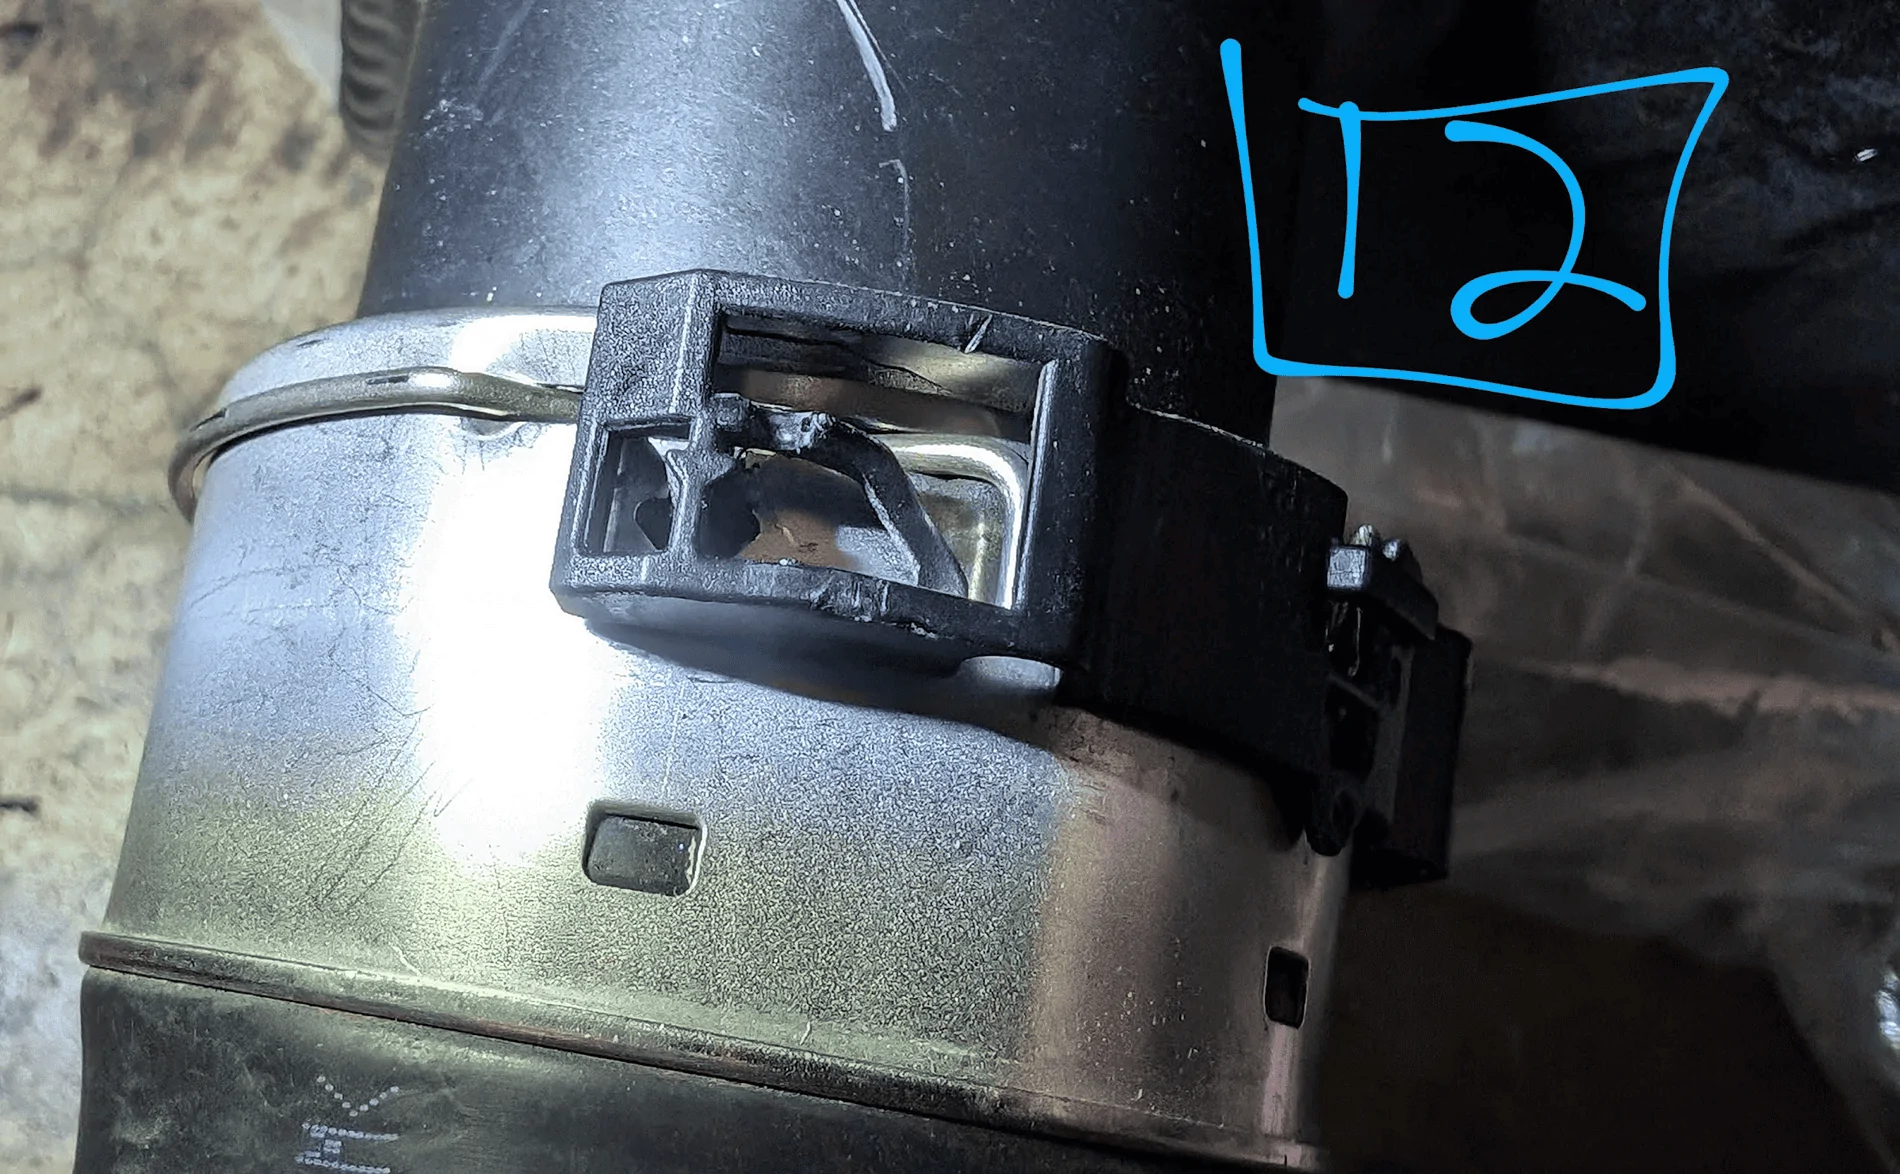
- Put the hoses on the new intercooler
- The hose clamps are a bit tricky. The metal ring fits into 3 slots (1 on top, 2 on the sides) and holds the hose in place, but allows it to rotate. The black plastic slides forward/backward to lock the rings in place.
- Pic #12 shows the clip/ring up close (sorry, messed up the #s)
- Loosely mount the new intercooler
- Rotate the hoses so they match the final position in the truck
- Slowly work the hoses back through the truck. This will take some shimmying and back-and-forth to get them through.
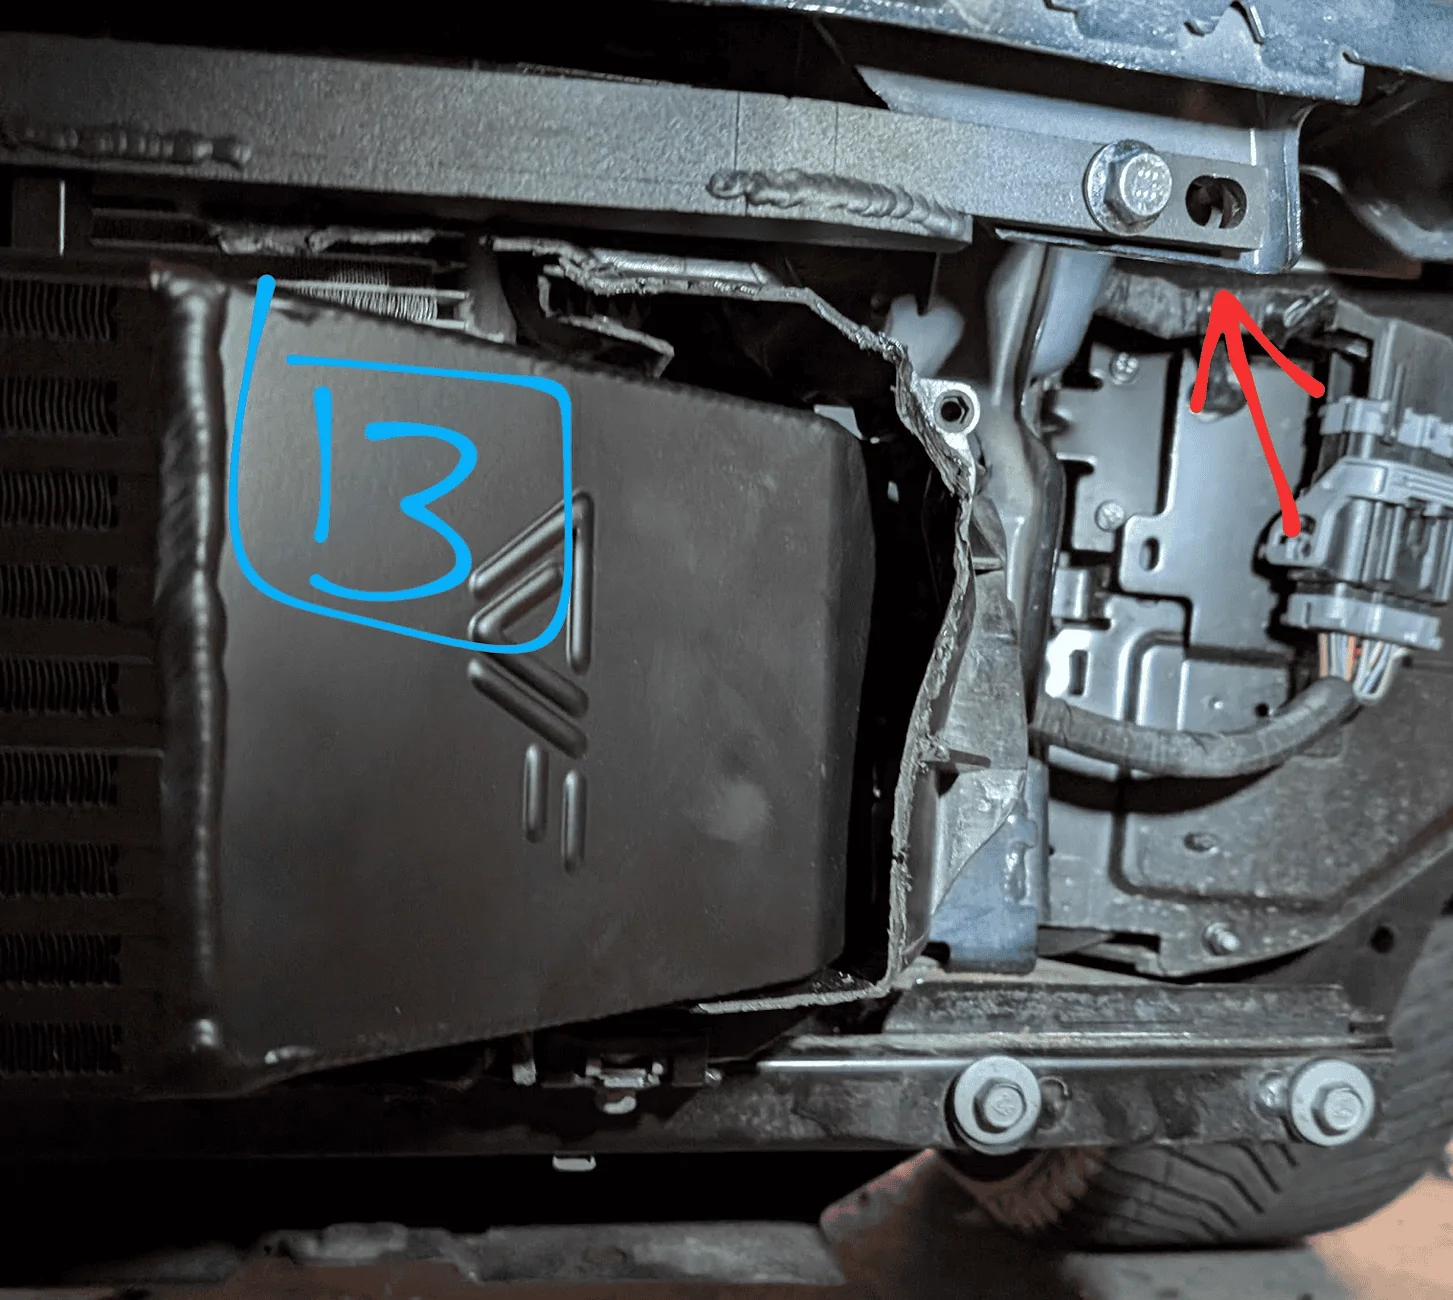
- Then use the 4 bolts provided to attach the support beam & intercooler to the truck. Keep these bolt loose (for now)
- Pic #13 shows the 1 of the bolts installed
- Re-attach the hoses to the engine
- This was a major pain as there is not much space back there. Plus you’ll want to keep the hose & clamps in the same position as when it was taken off. These clamps are a bit different as they have a metal hoop under the screw clamp that seals off the hose
- Tighten the bolts on the support bracket
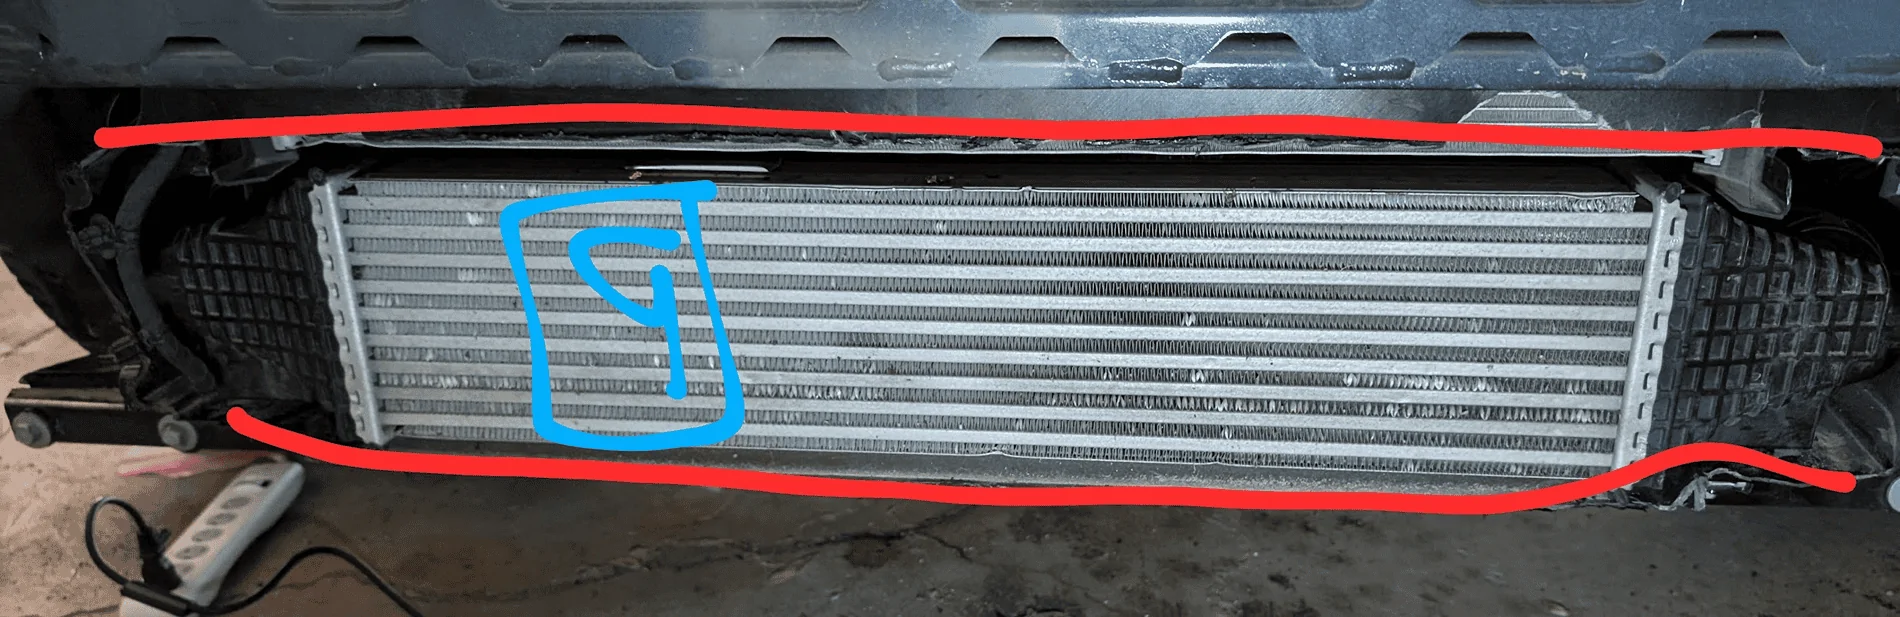
- Mount the new intercooler in place. Pic #14 shows what mine looked like.

- Mount the new intercooler in place. Pic #14 shows what mine looked like.
- Re-attach the cable
- The 1 you moved in step 10C. You can use the same clip holes, but I pushed it back a bit and didn’t mount in the same holes.
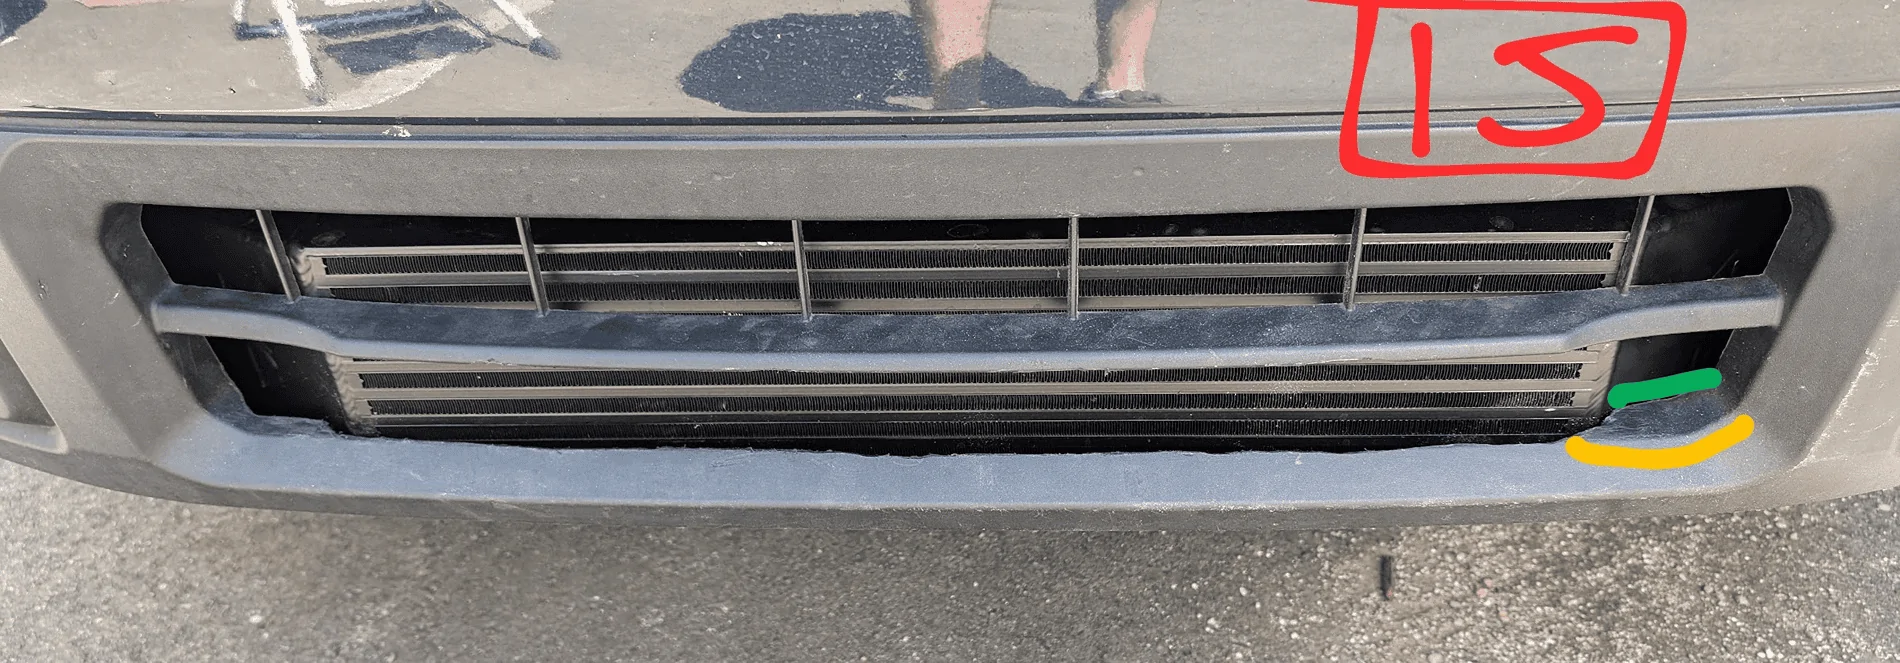
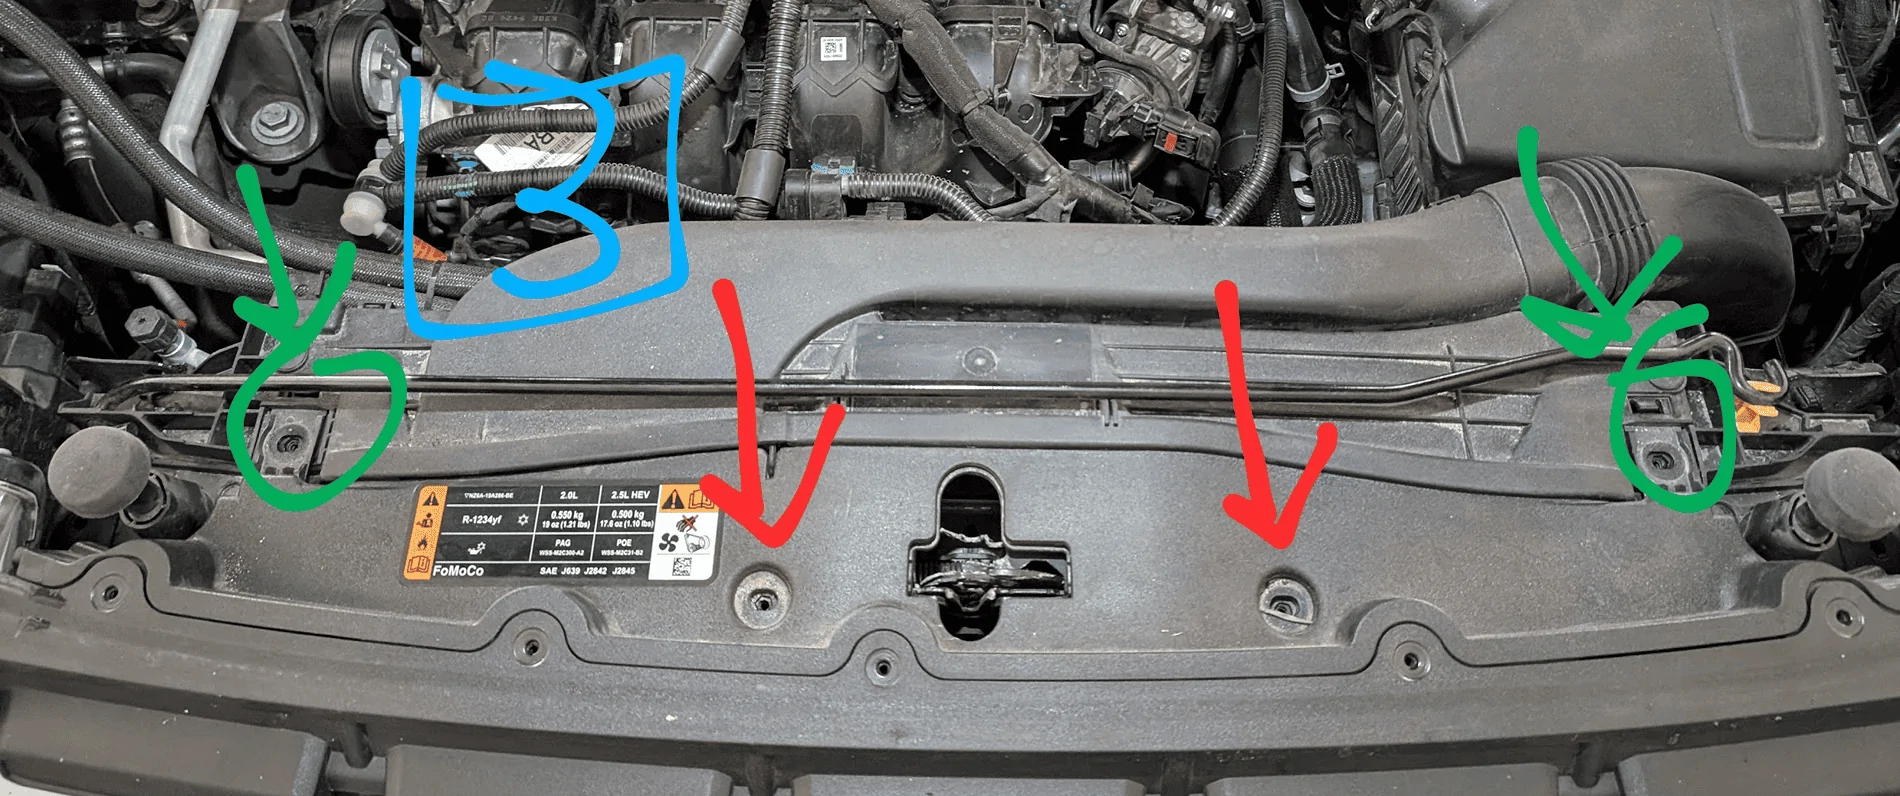
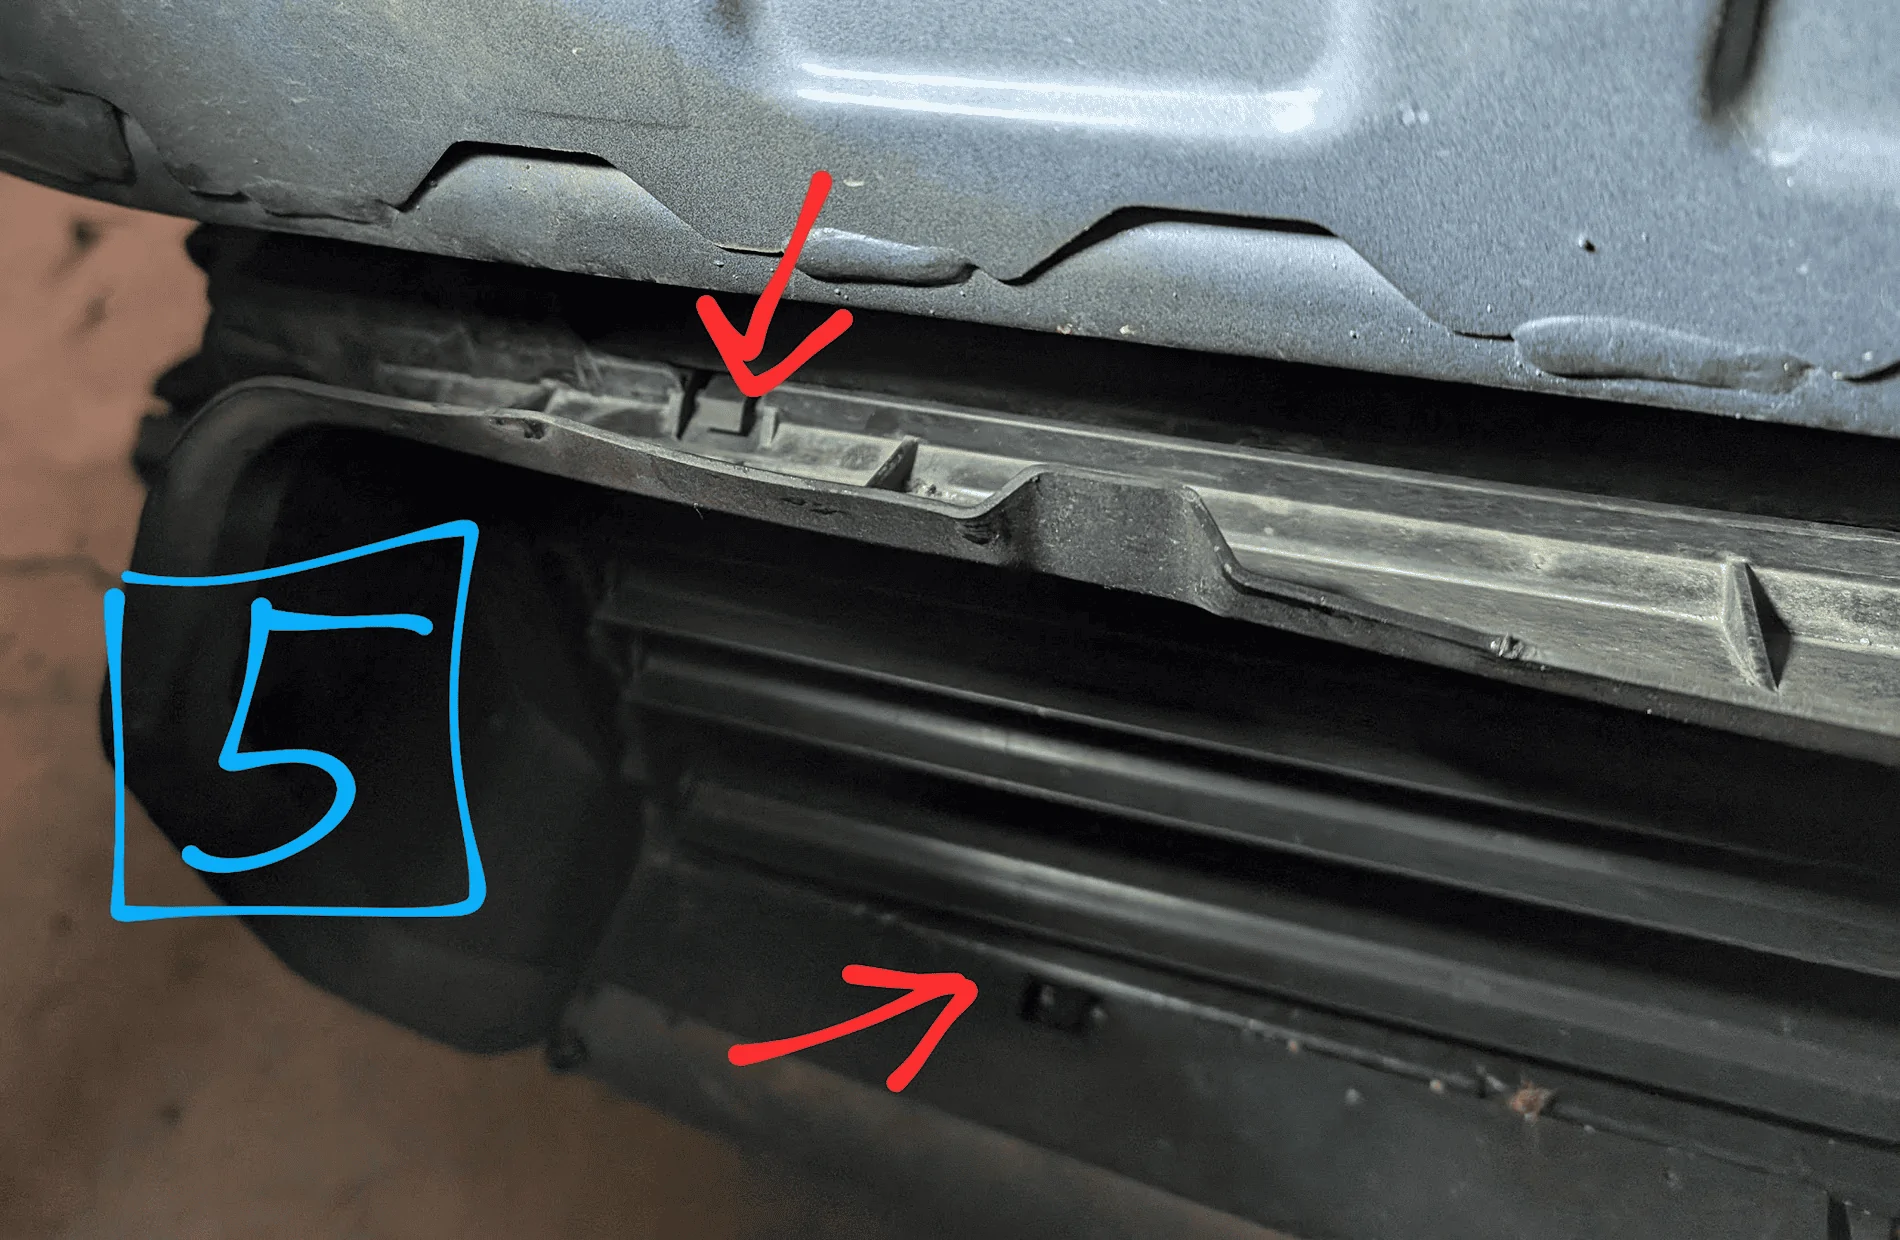
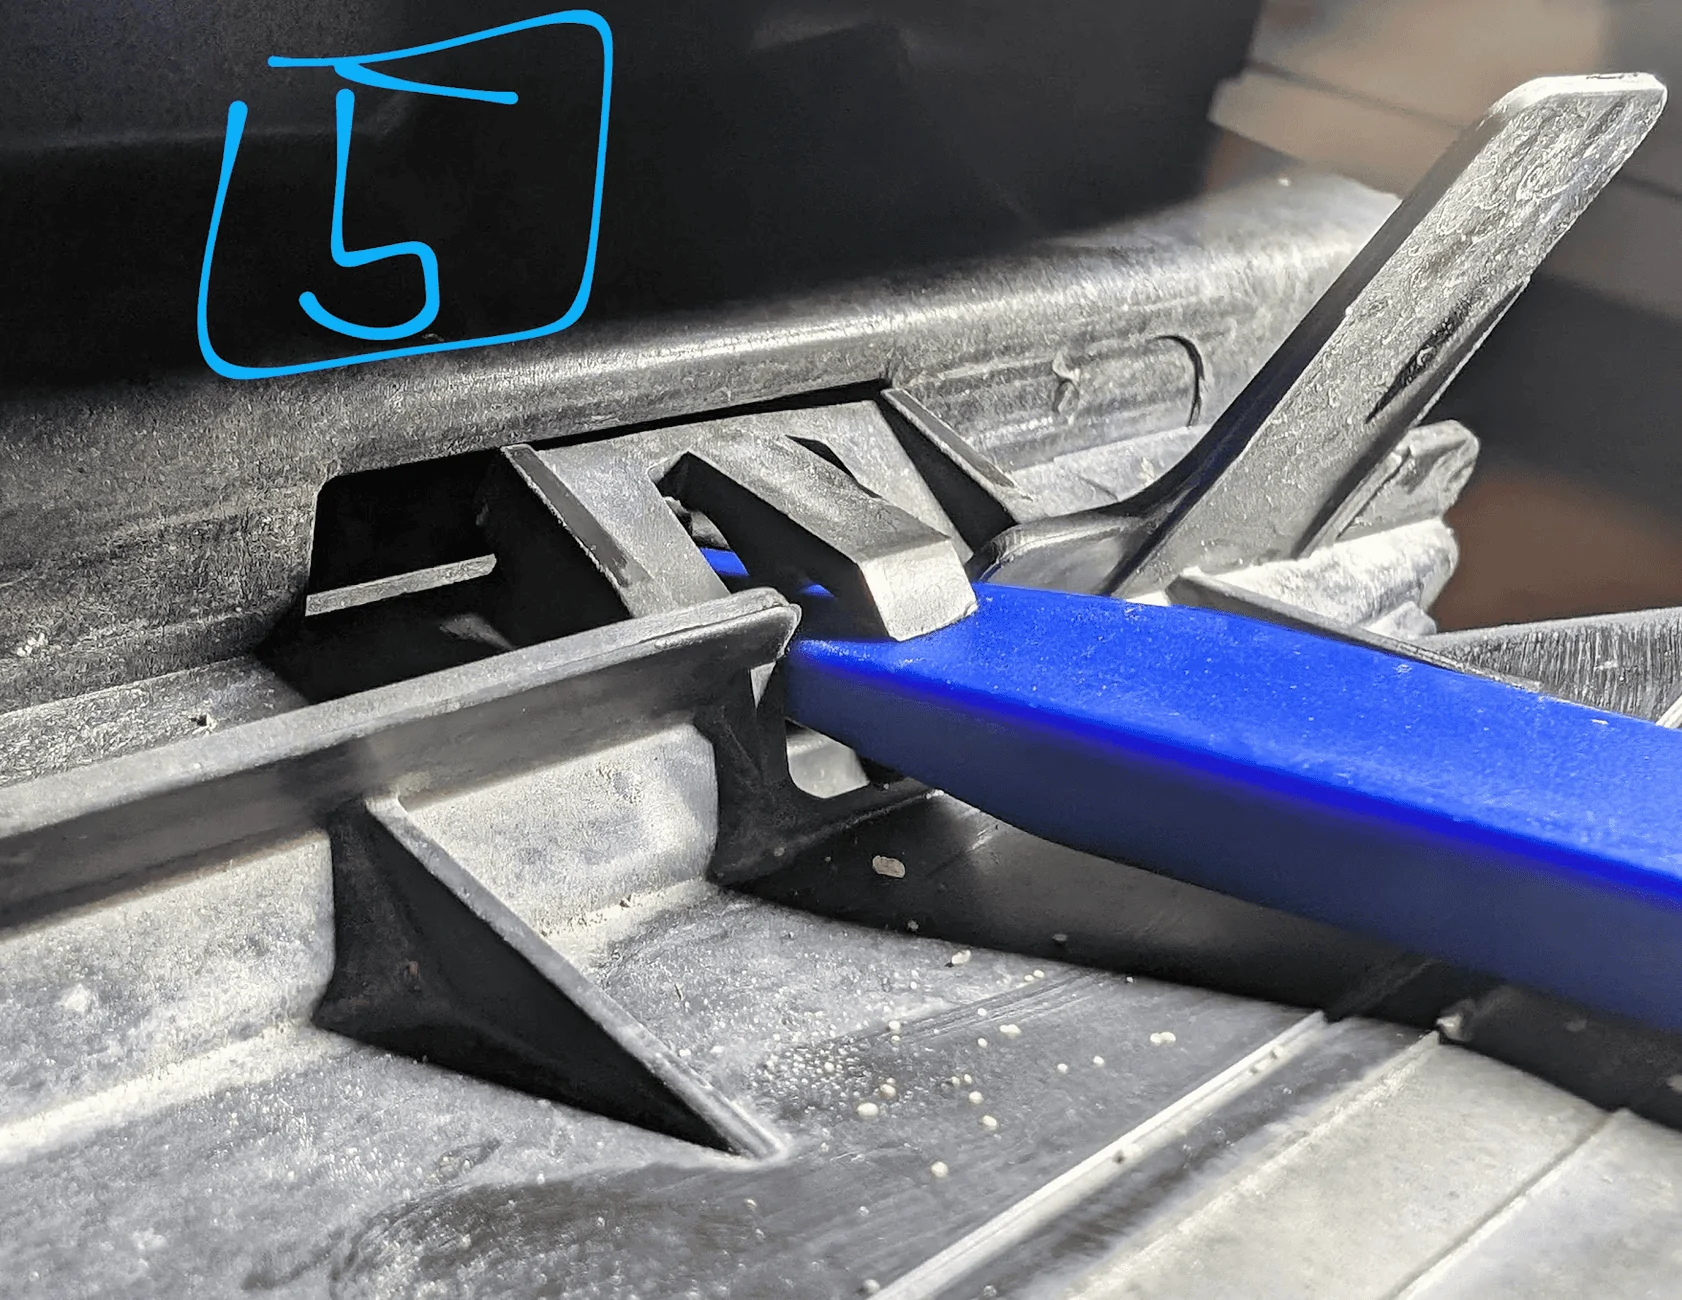
- Expand the lower opening in the front bumper
- You’ll need to cut away some of the bumper so it will fit over the intercooler. I recommend attaching the 2 clips and screws at the top of the bummer to the truck, (arrows in pic #3). This way you can see how it fits with the new system, and how much you need to trim. You’ll need to remove enough so the holes in the bumper line up with the frame, as well as allow for hot air to flow out when stopped
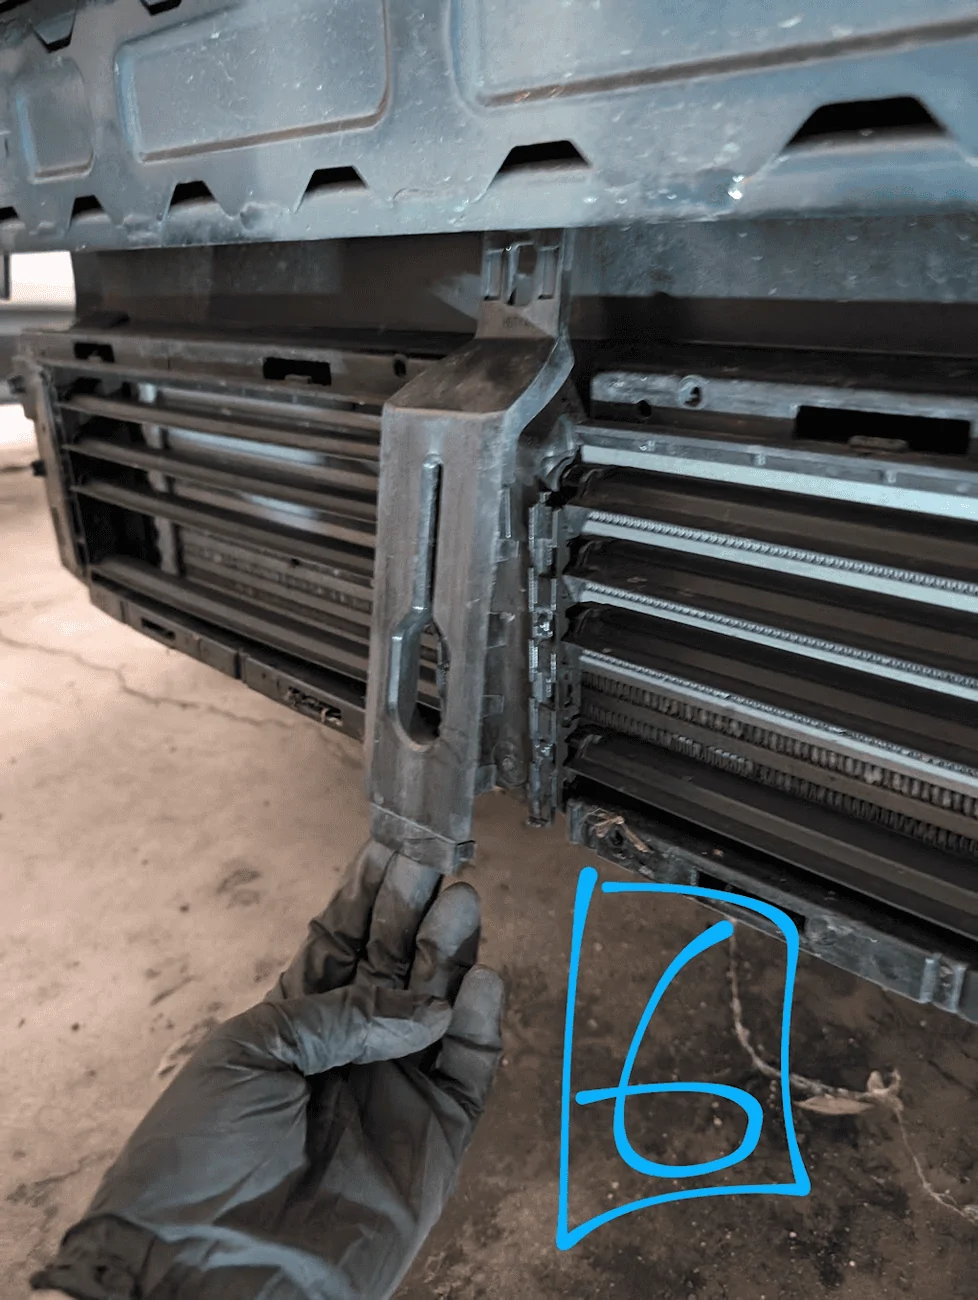
- Pic #15 shows how much I cut away with green being the original & yellow the edge/corner I cut to. I only needed to mess with the lower opening and cut up to the existing corner edge of the bumper (I’m going to straighten and clean it up later)

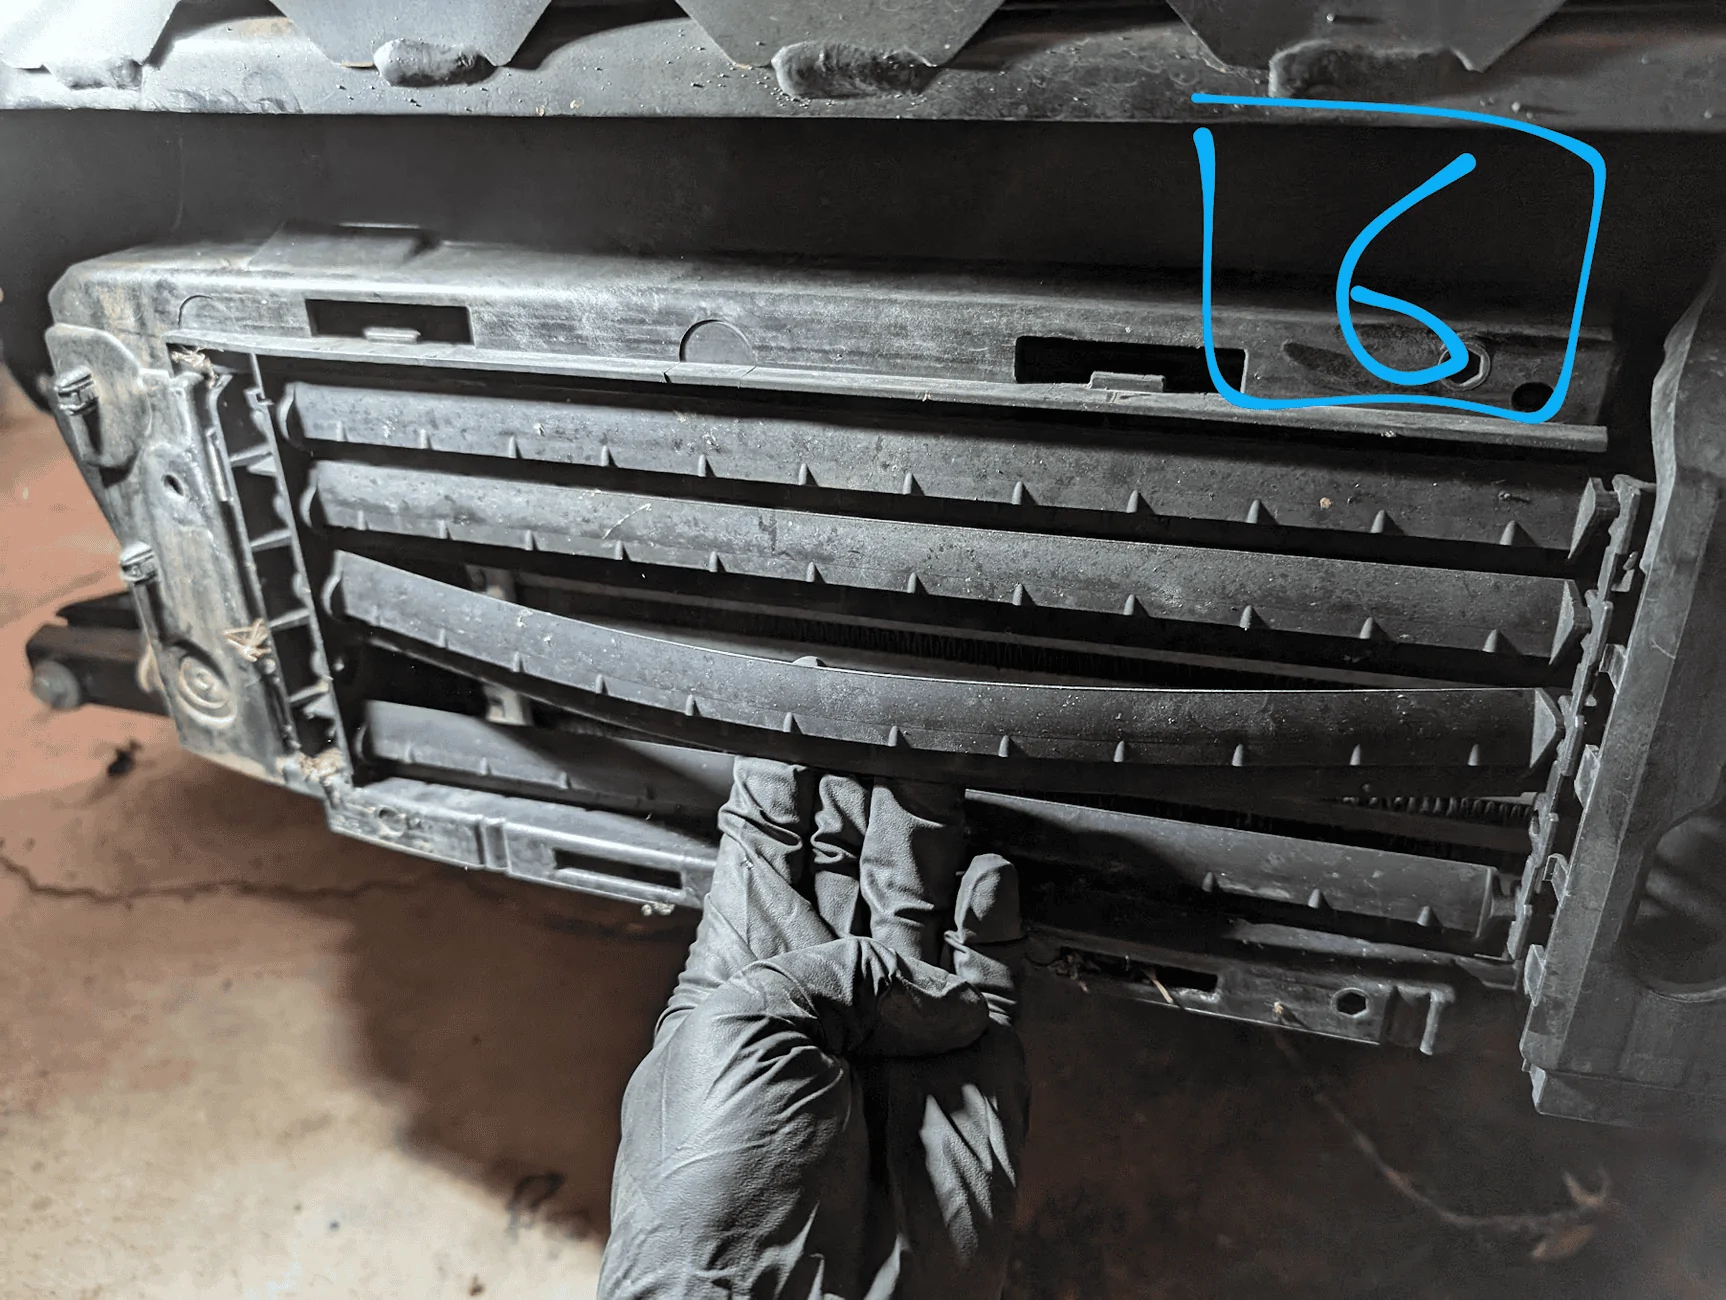
- Remount the bumper
- Re-attach the cable on the passenger side pic #4
- Tighten the 4 screws at the top from pic #3 (if you haven’t already)
- Re-mount the T-30 torx screws on the underside of the bumper
- Clip and screw the sides of the bumper from pic #2
- Push on the loops around the headlights so the clips engage (pic #4)
- Re-attach the wheel well cloth (pic #1)
- Done!
Sponsored
Last edited:
