- First Name
- Mike
- Joined
- Dec 10, 2023
- Threads
- 3
- Messages
- 21
- Reaction score
- 105
- Location
- Wisconsin, USA
- Vehicle(s)
- 2024 Maverick XLT FX4
- Engine
- 2.0L EcoBoost
- Thread starter
- #1
I'd been looking for a use for the cubby in the Maverick and nothing stood out. I saw a lot of different phone mounts people sold for in the cubbies but I thought a lot of them looked a little too gawdy, so I came up with something of my own.
For starters, I'm aware that there are much more viable solutions, and many more talented people have created 3D-printed solutions that would work just as well. But I'm a noob at woodworking and I like learning and experimenting. I also just wanted to share to maybe inspire others to make something of their own and come up with something more elegant than what I did lol.
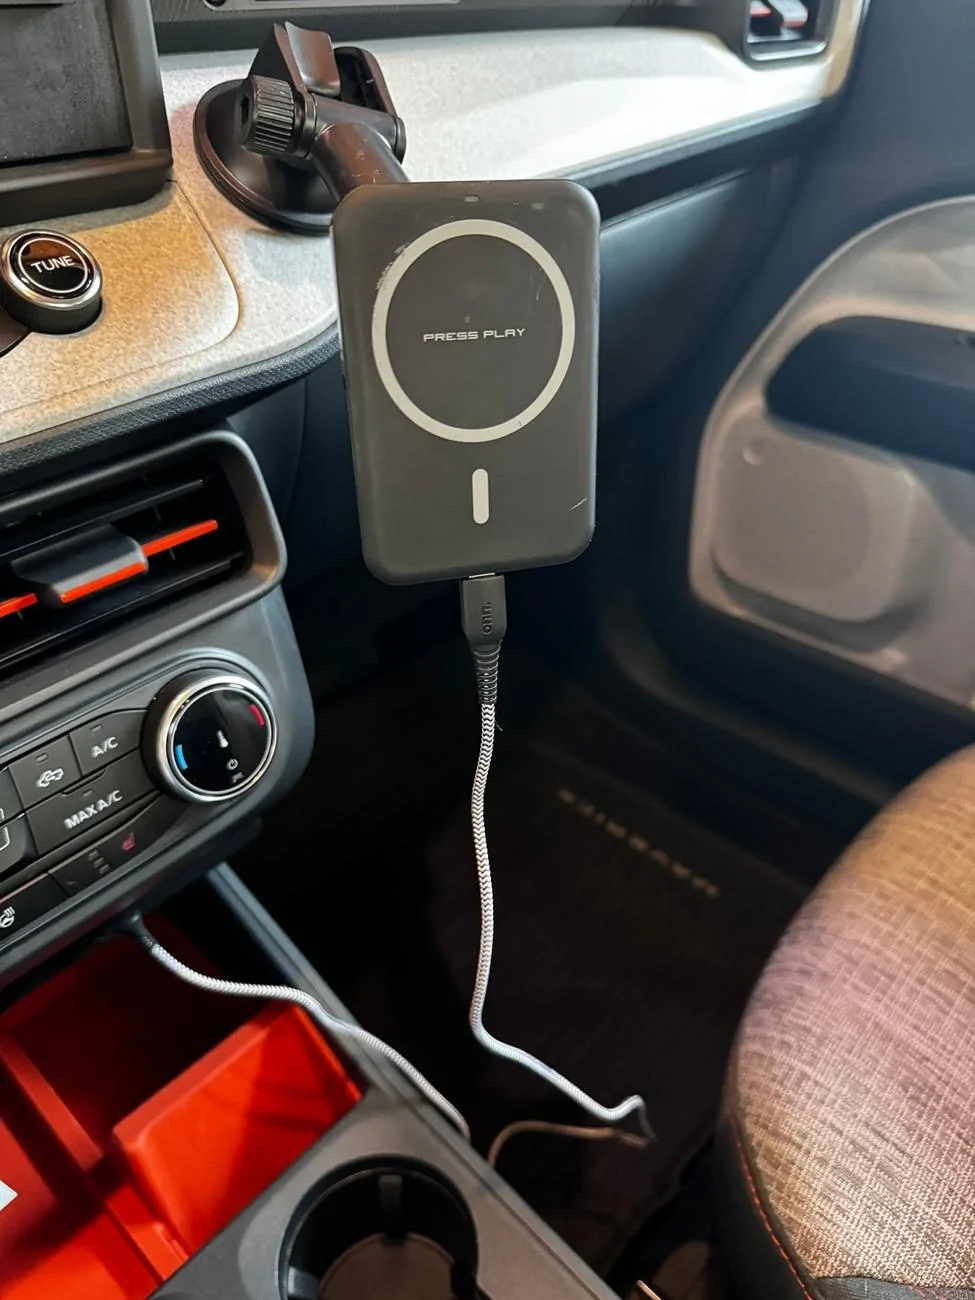
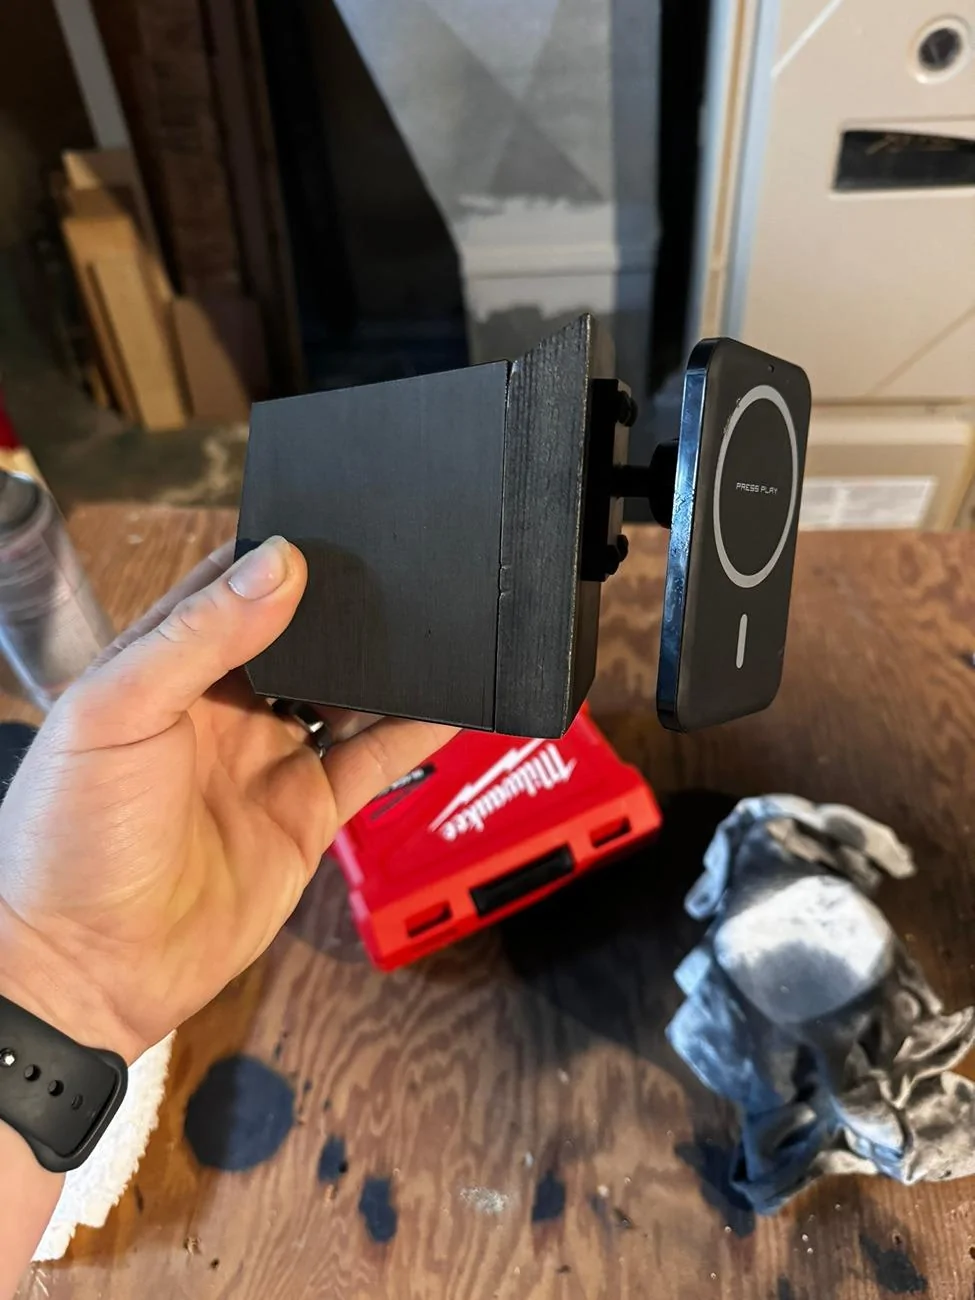
This write-up isn't iPhone specific but I have one so this is the route I ended up going. I found a charger at TJ Maxx for a whopping $8 that charges with magsafe. It works great but it's ugly and sticks out into my space way too much. It has a ball adapter on the back of the charger unit so it works perfectly for what I planned to do, and if you ended up going this route that's what you'd need as well, something with a ball adapter and connector for the backside of this unit.
A quick google search for something to fill the cubby with brought me to this Etsy page:
https://www.etsy.com/listing/1492710733/the-cubby-cup-ford-maverick-22232425
A 3D printed "cubby cup" that fits perfectly in the cubby. I've seen users post their own creations and have seen many online but I wanted something simple. So I bought one with a flat face and no frills from the US seller above and couldn't be happier. But I didn't like how sunk-in it looked and I felt that mounting a phone mount directly to the cup would result in the phone being too close to the dash and not allow for much rotation. And if I got something with an arm that extends out, then I wouldn't be able to make it as flush as possible and like it "belongs" on the dash. I also didn't like the idea of drilling too many holes in the 3D-printed cup, because I wasn't sure how fragile it would be and I didn't want to compromise it's structural integrity.
While I was experimenting with what I wanted to use to attach to the cubby cup, I took measurements of the "ball" on the end of my existing phone mount and looked around for a fixed mount I could use, and ended up finding this:
https://www.amazon.com/dp/B0CTM1DHNK
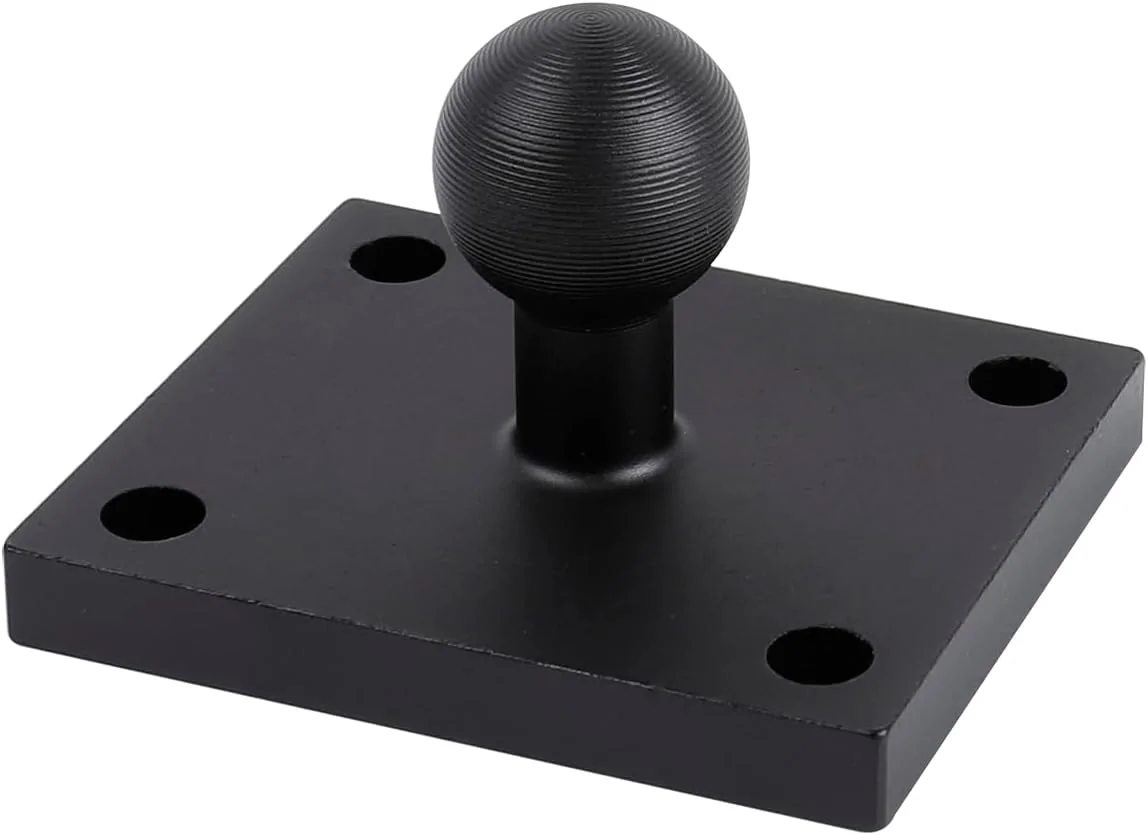
It's an aluminum ball adapter with a 17mm ball (which is exactly what my existing ball is) and is originally meant for Garmin GPSs, but works perfectly for what I needed it to do. I decided I would go with this to mount the Magsafe charger to.
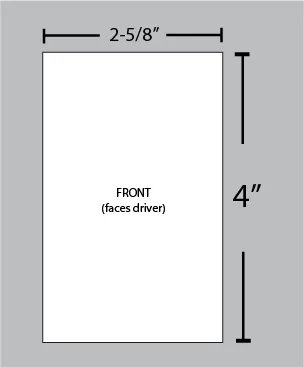
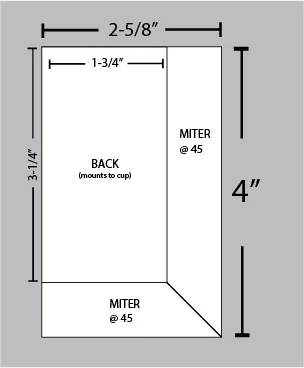
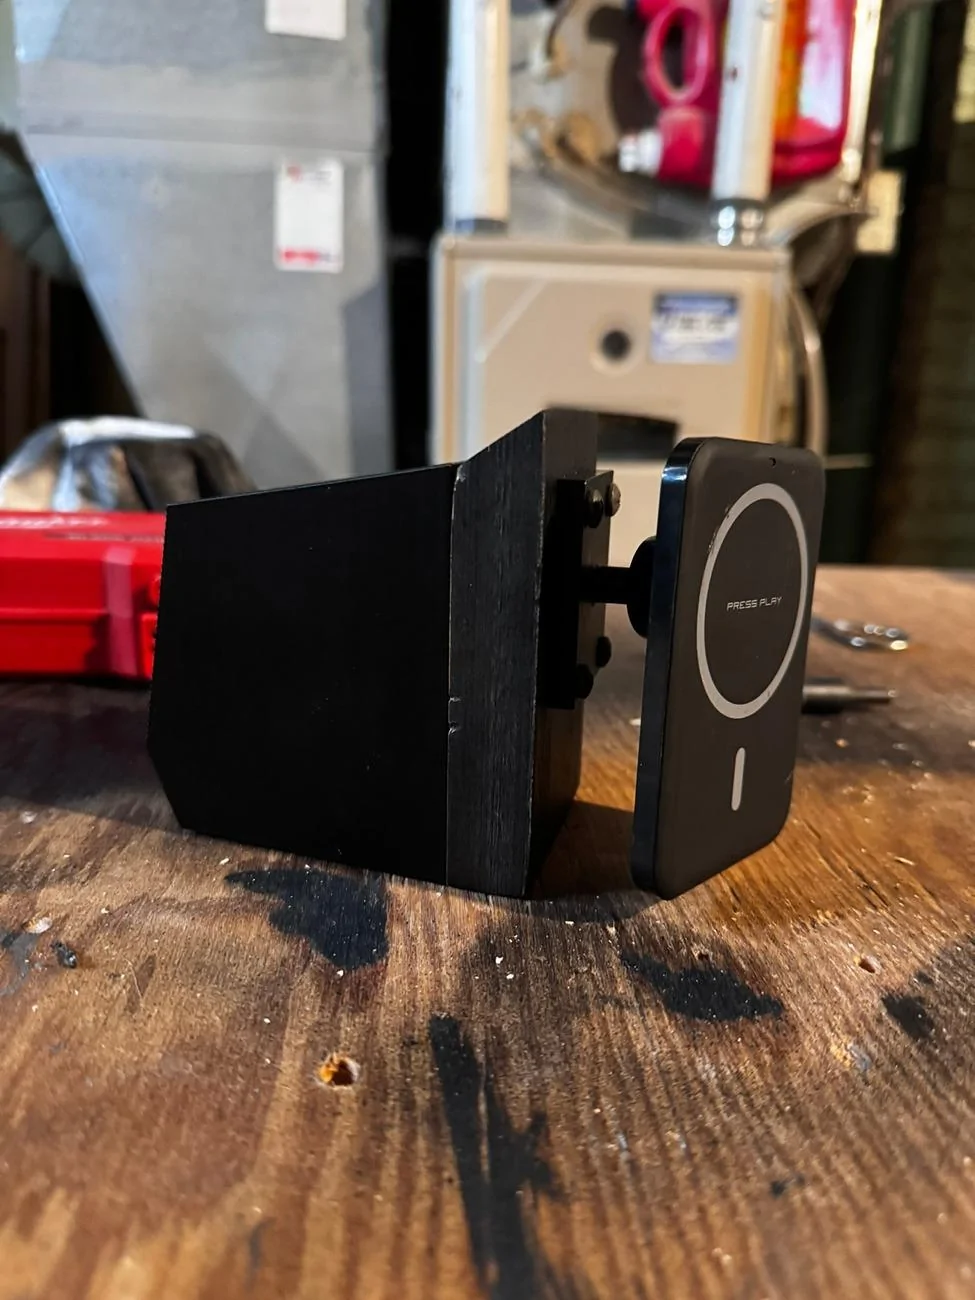
I found a piece of 3/4" pine laying around at work and took measurements of the space that was left in the cubby, and I worked out how I could miter the sides so that it would sit against the cubby cup and end up coming out flush with the plastic bezel for the radio. This is what I ended up cutting, using a miter saw to cut length and width and a table saw for the miters:
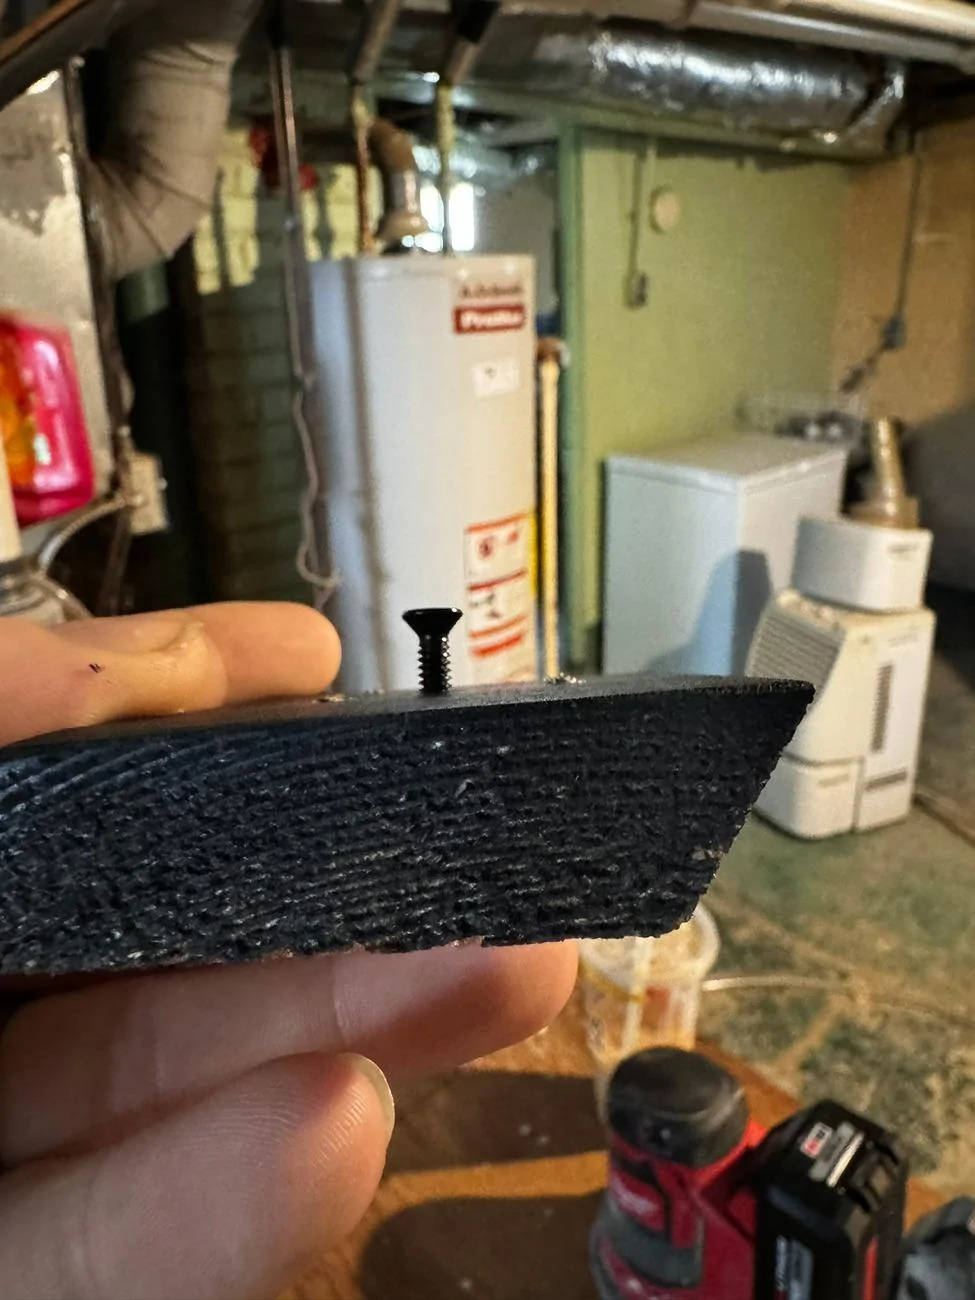
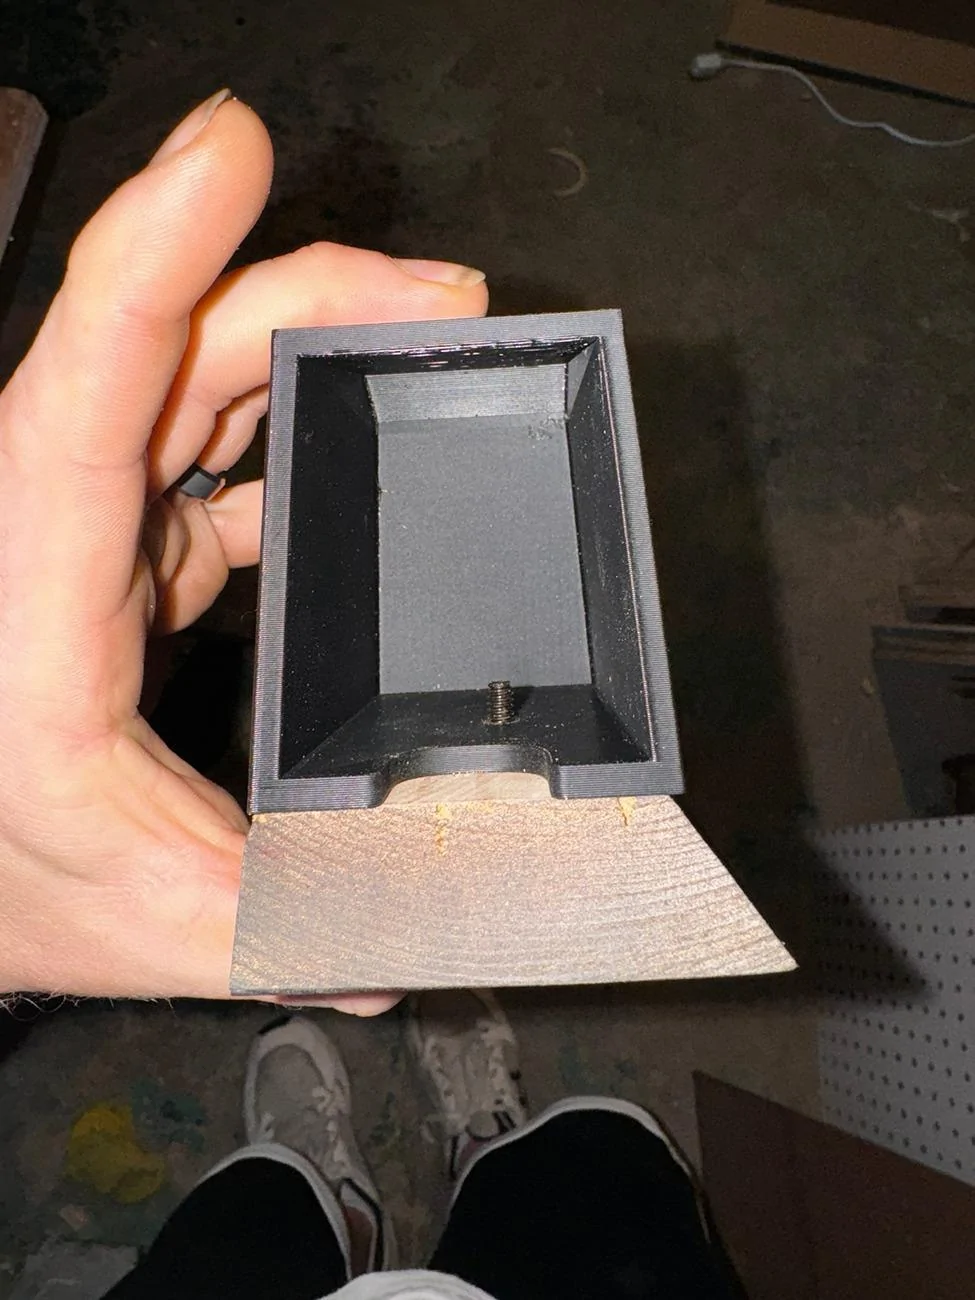
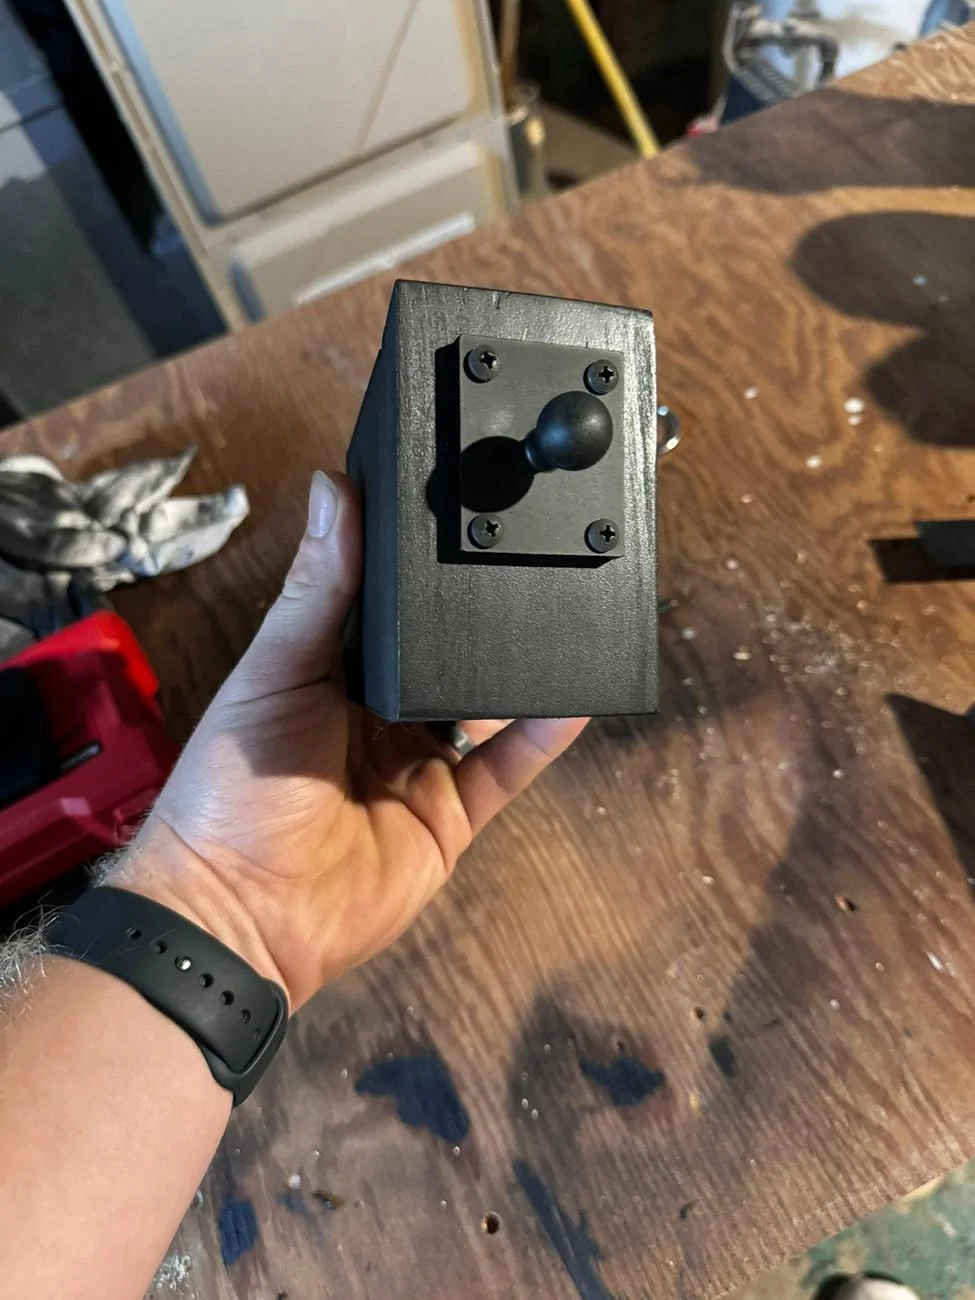
I decided I was fine with it not being perfect in regards to being exact measurements, then sanded it, painted it black and pre-drilled through the wood into the cup, and fastened it with an 8-32 counter-sunk machine screw and a nylon lock nut. I then used four #8 x 3/4" screws to fasten the adapter to the wood and it looked like this:
I wanted to use more than one screw to fasten the wood to the cubby cup, but I liked that the counter-sunk screw ended up being concealed behind the plate and I didn't want to put too many holes into the cup. If I did this again (which I likely will), I would try to find screws that look like the hex screws that Ford used all over the interior for the adapter to give it more of a matching aesthetic. I would also use a different wood, something with more grain to it that will absorb paint/stain better, or maybe just omit the 3D cup altogether and cut my own full piece of wood that slides in.
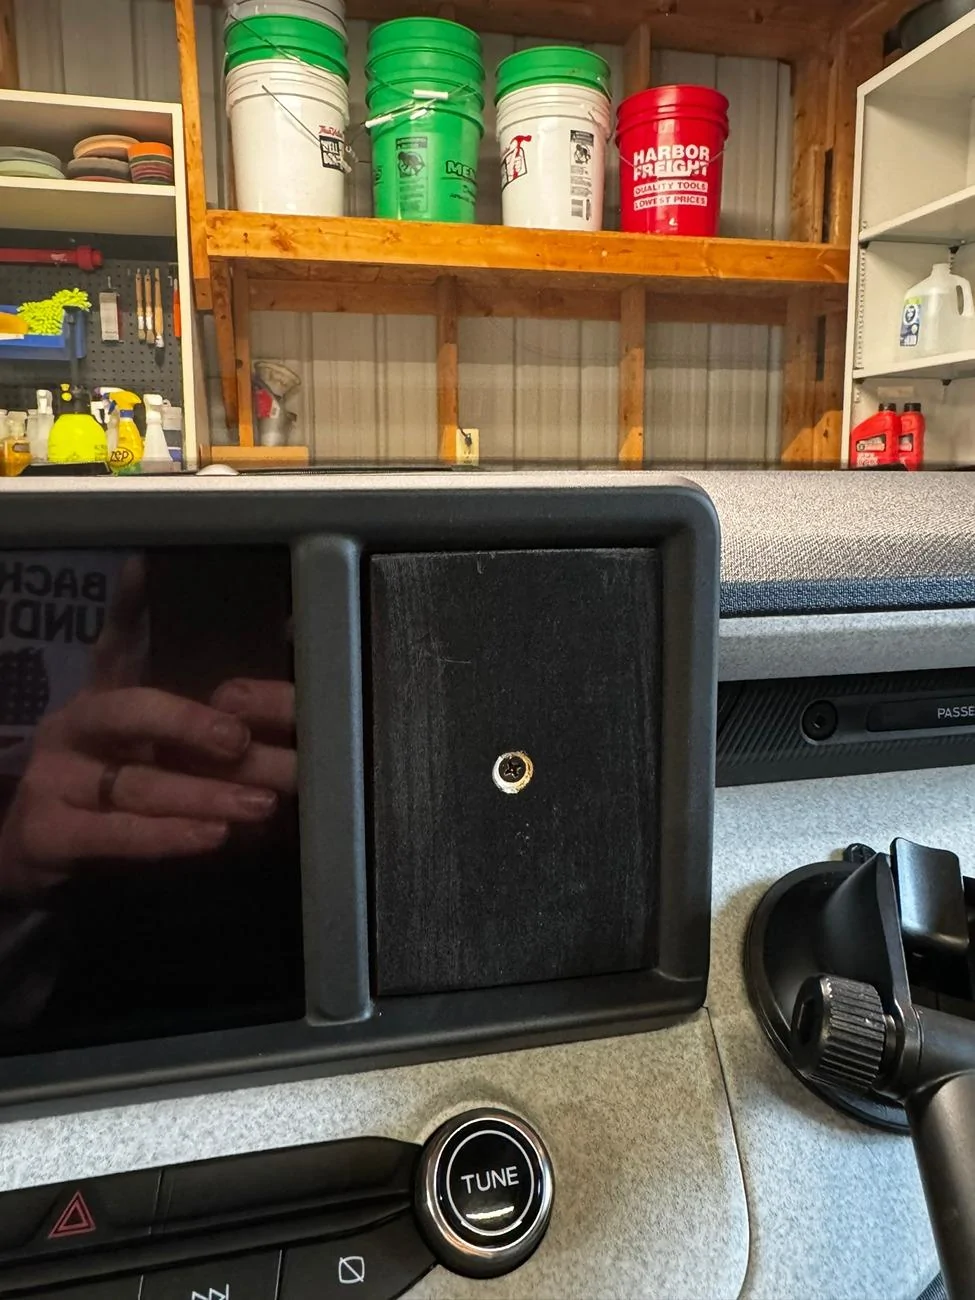
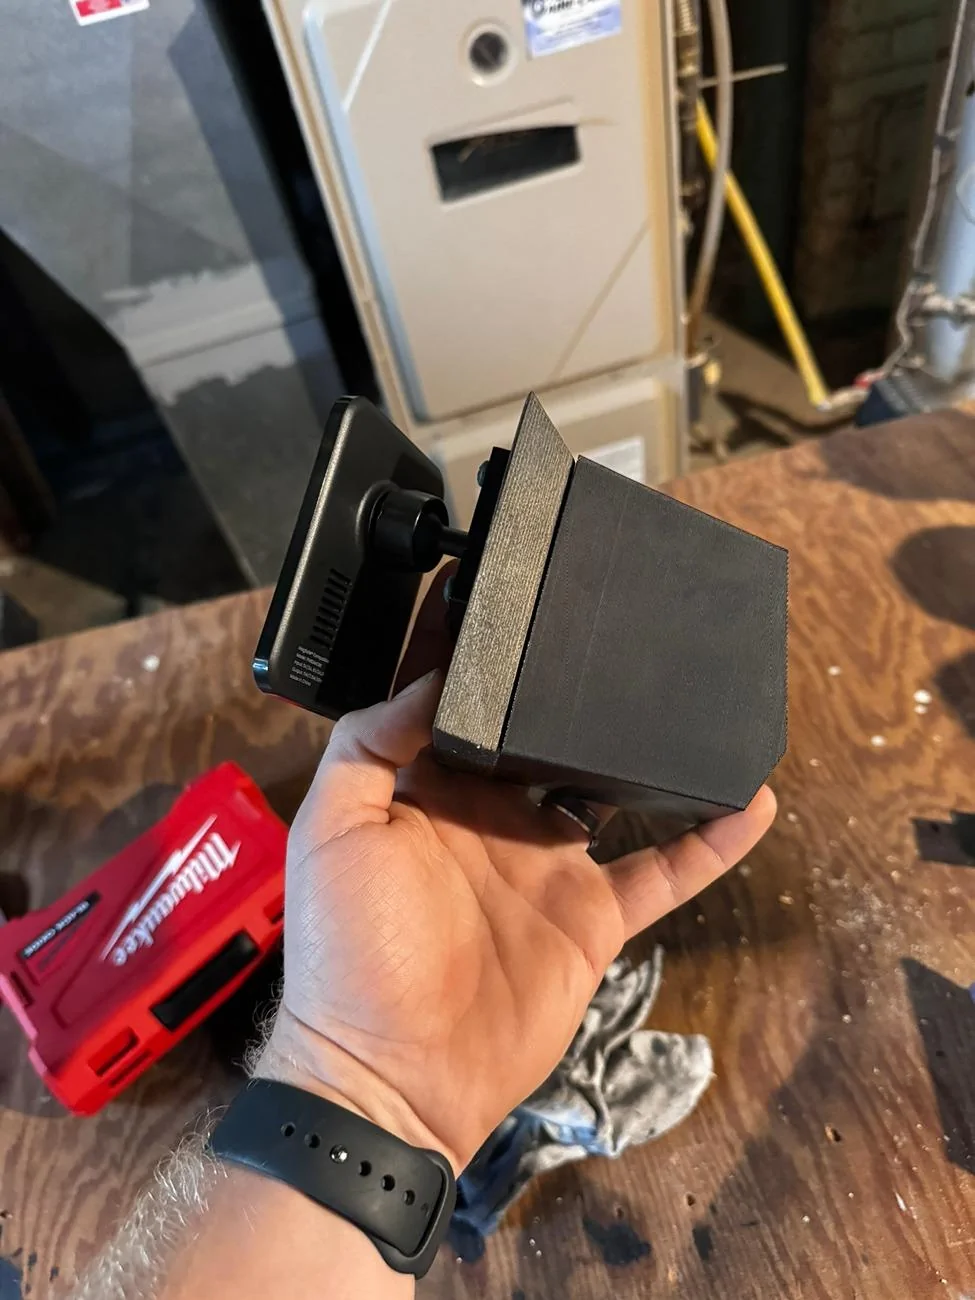
Final result:


I wish I would have taken more pictures, but I hadn't thought of the idea of doing a write-up or thinking that anyone might care until I was almost done lol.
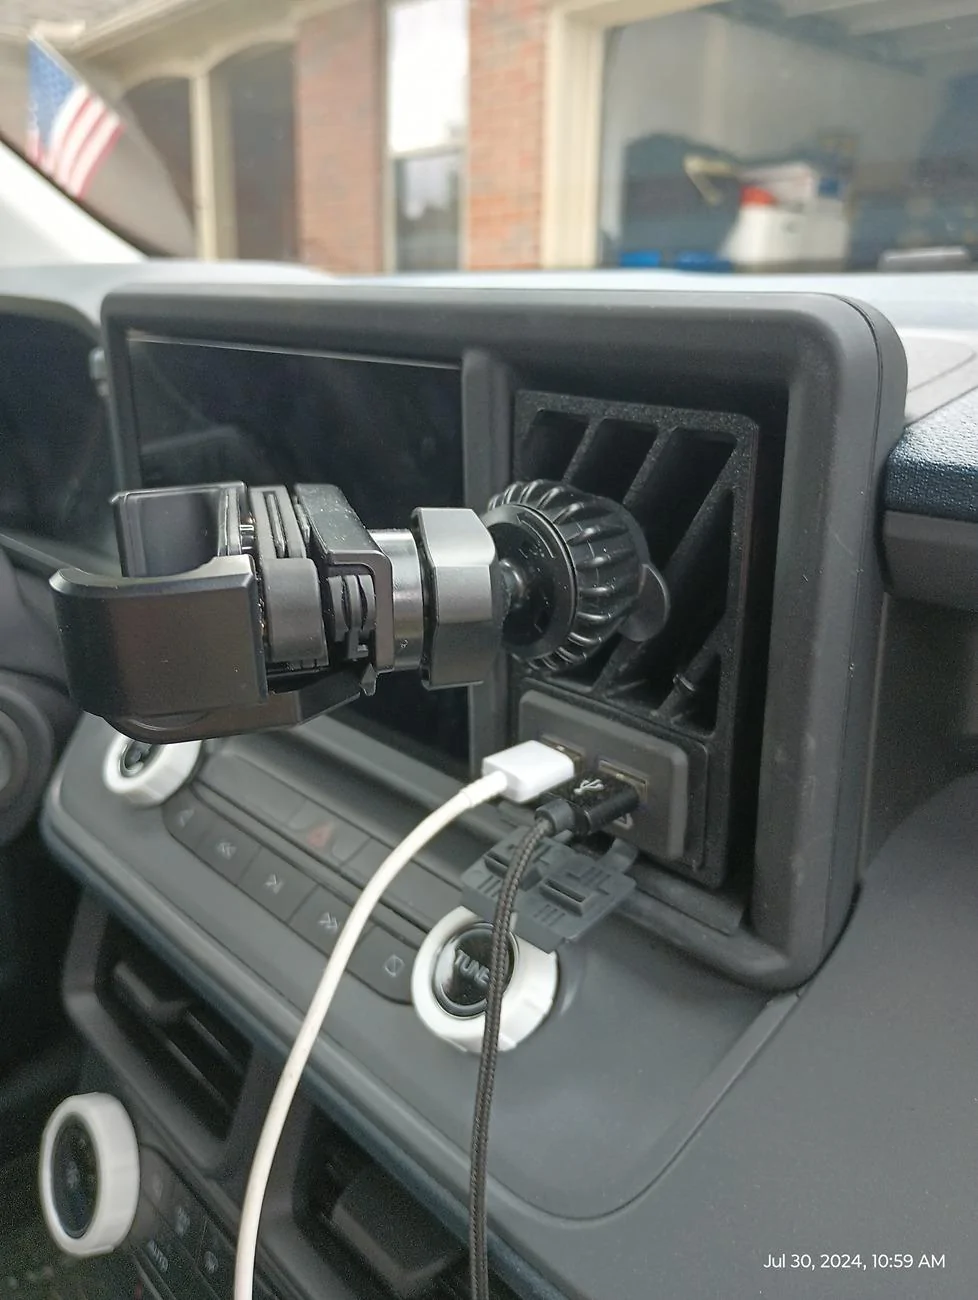
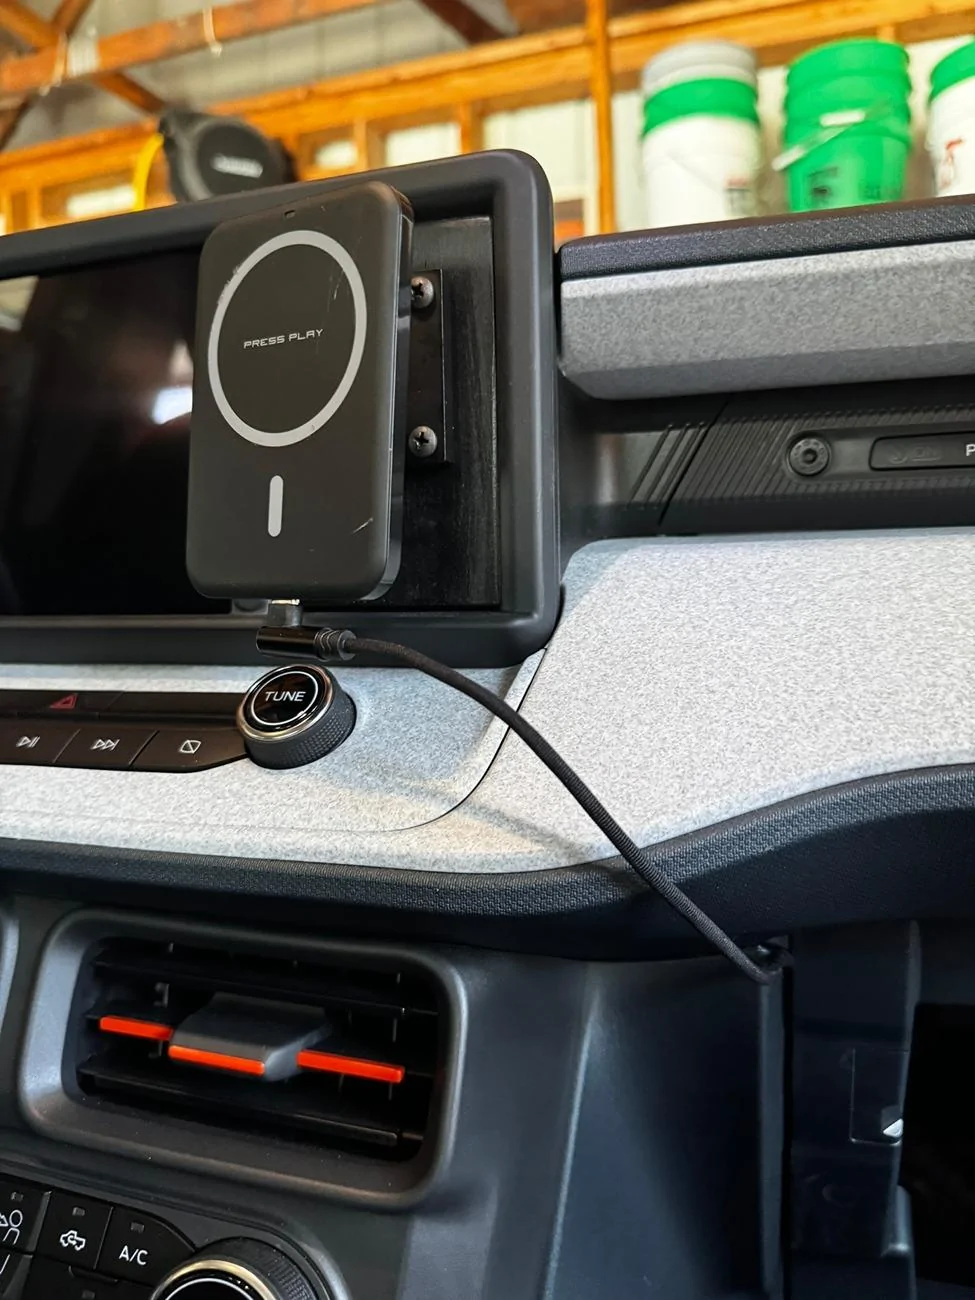
I took it one step further and experimented with tucking the wire that connects to the magsafe charger. Since the charger ends up coming close to the Tune knob and doesn't give much in the way of wiggle room for a straight cable, I opted to go with a right angle USB C cable I had laying around and tucked it into the dash.
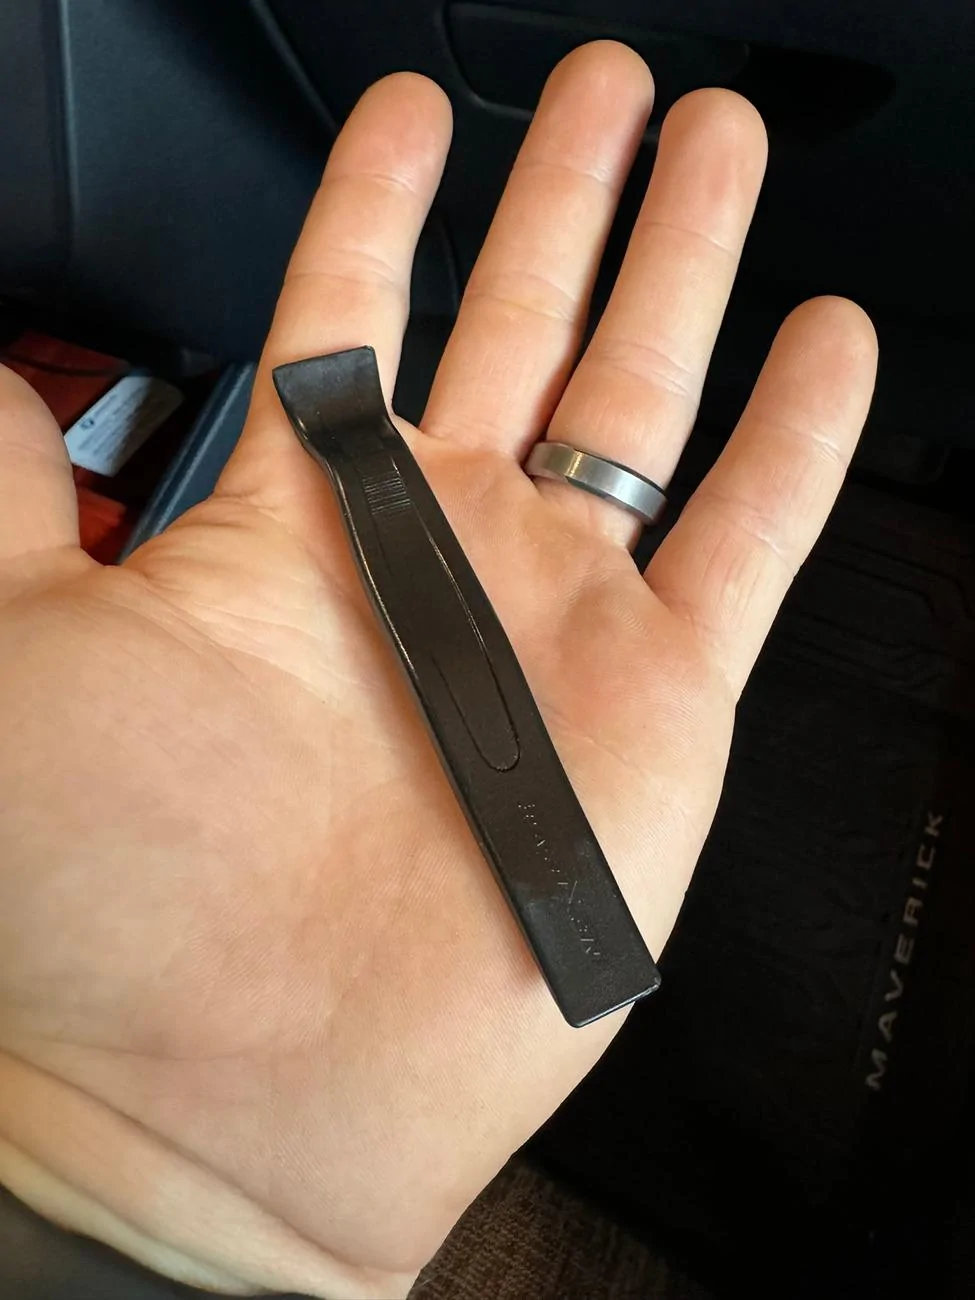
In order to achieve this, I needed to use a spudger tool that came with my Garmin dash cam to pry away at the plastic down the passenger side of the AC controls and the crevice between that and the glove box.
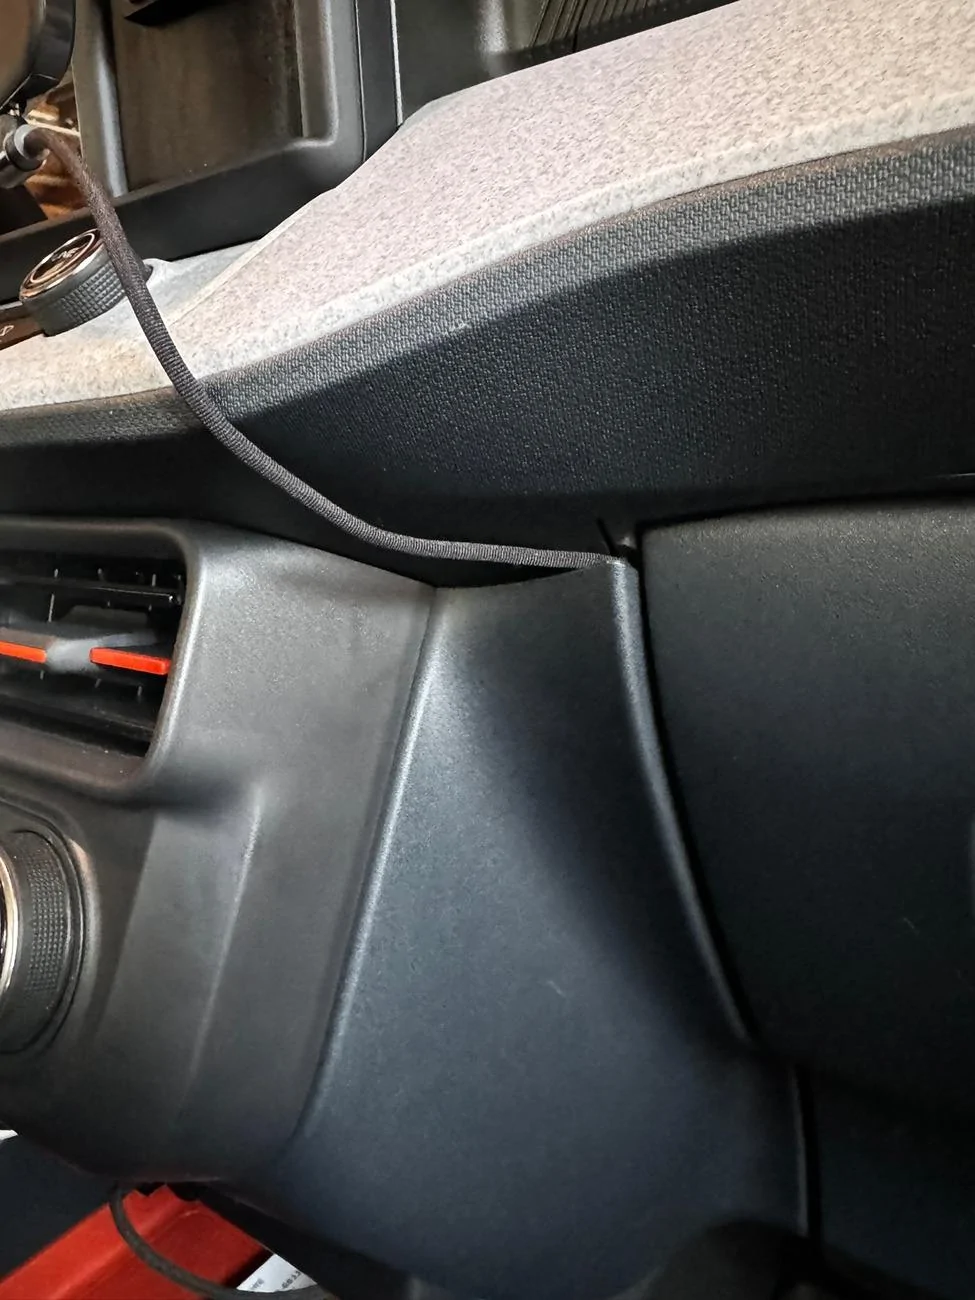
I had to remove these two screws from the glove box after I dropped it down, in order to give me enough flexibility in the plastic piece directly to the left, but then I just snaked the cable from underneath up through it and forced it in with the end of the spudger. The bolts holding this piece in are Torx T-25.

And now it's done, and I am satisfied (until I finish my plan for what I'd do differently).
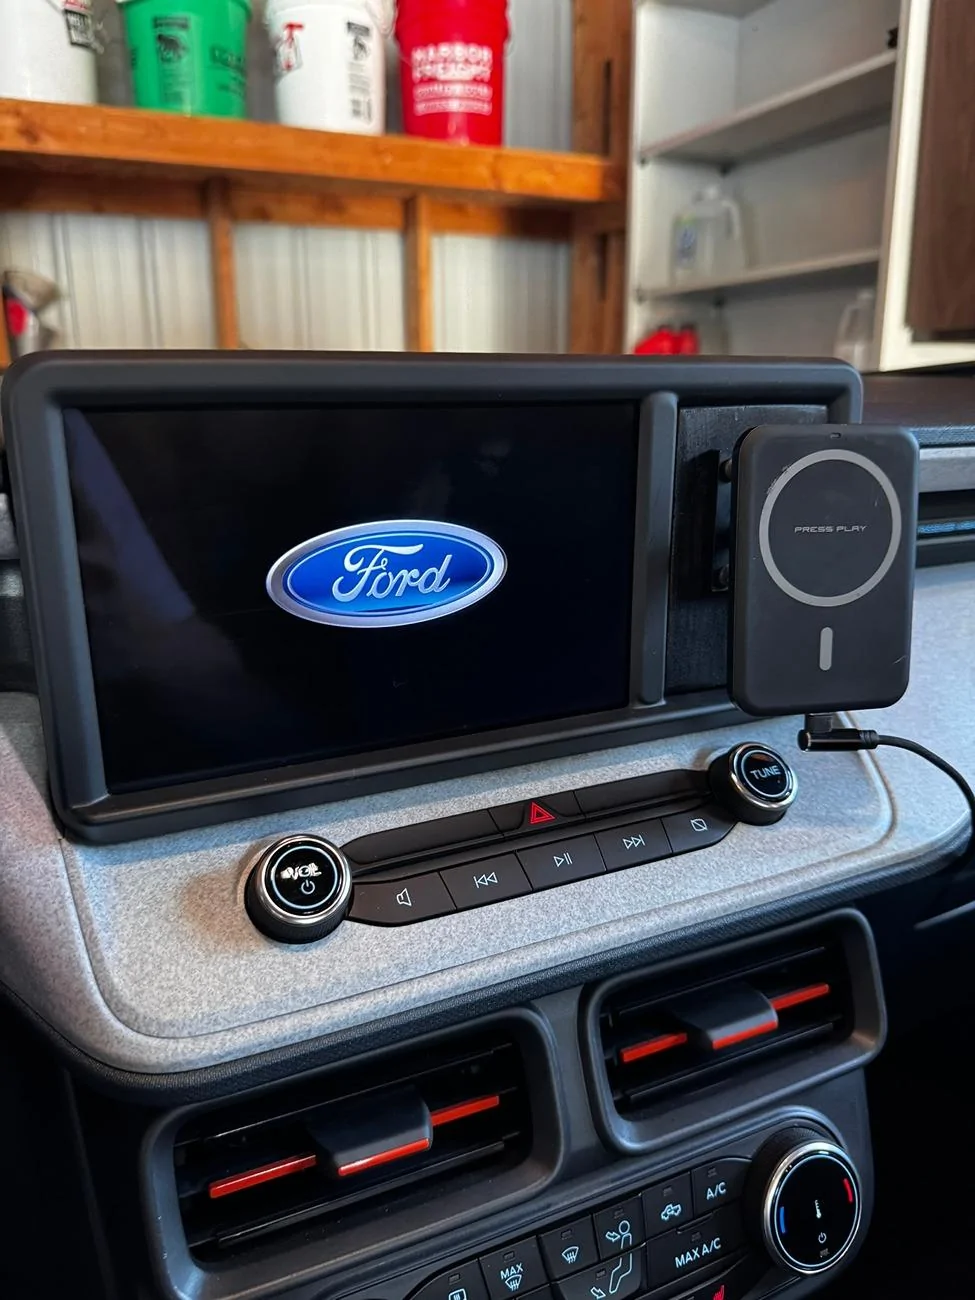
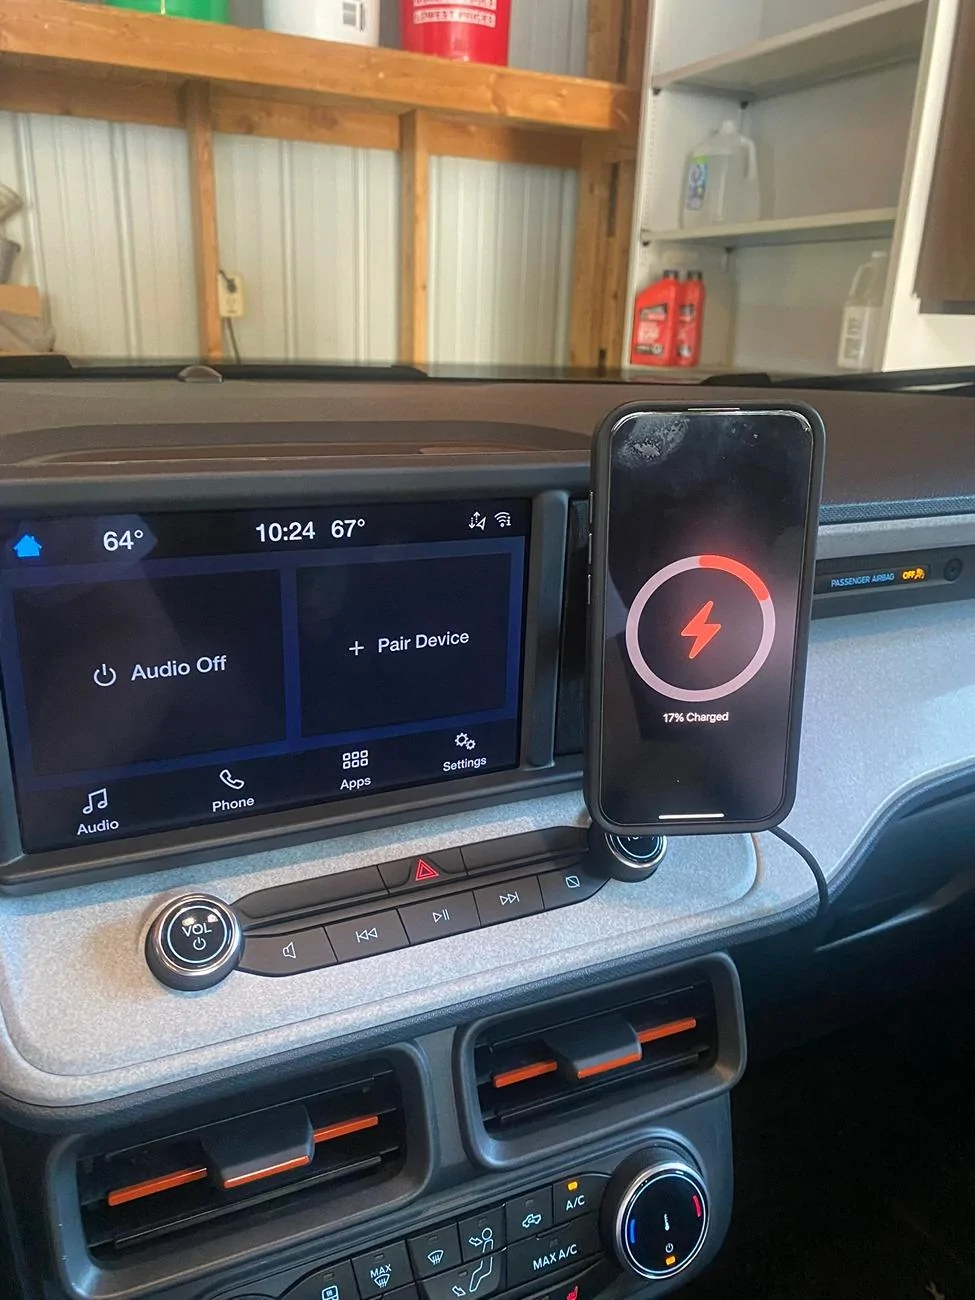
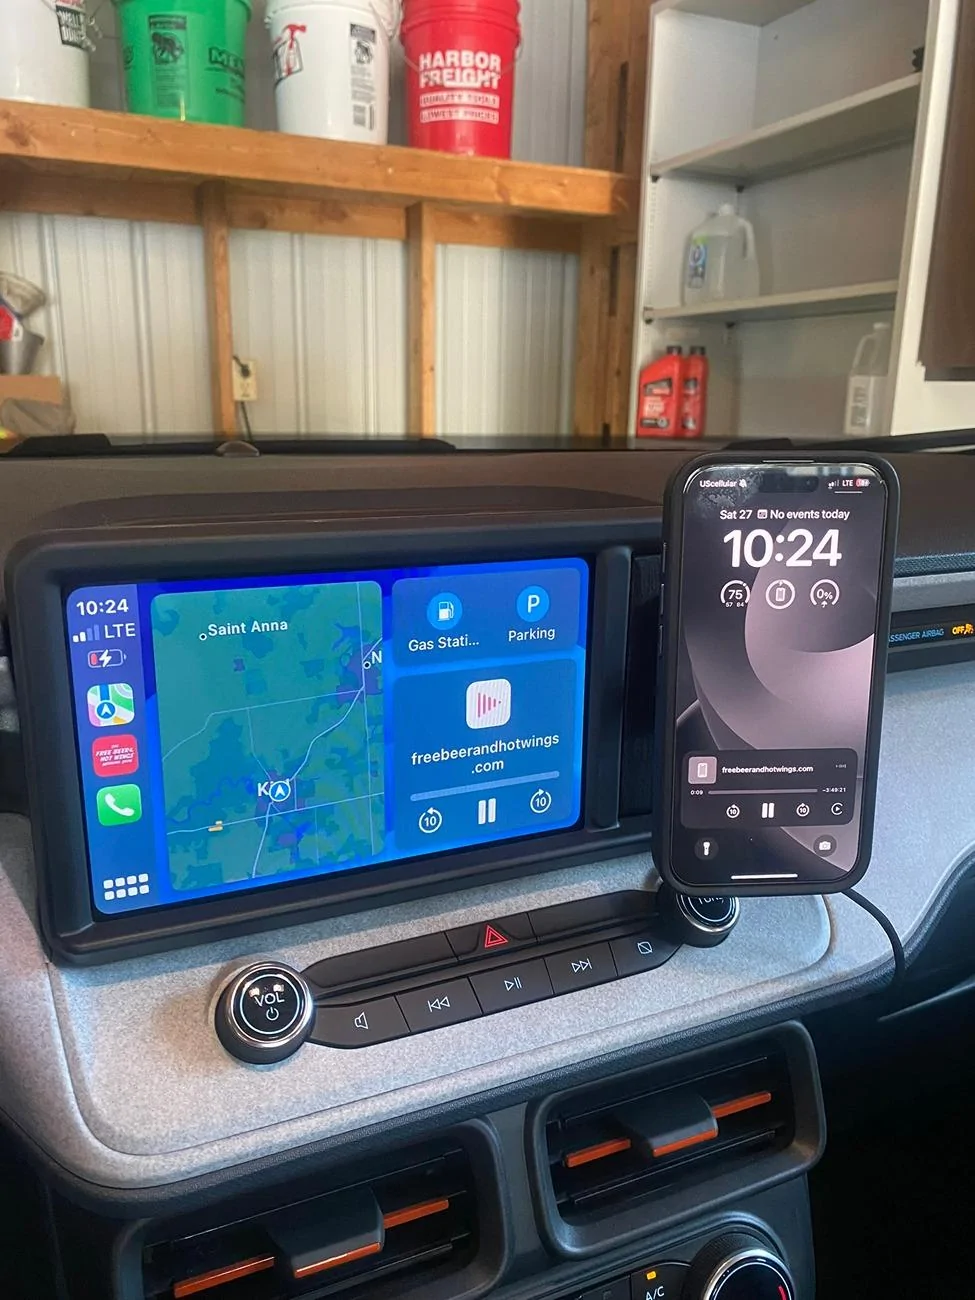
I took the truck for a drive and the cup stays in the cubby without an issue. The cup itself seems to push itself "down" just a bit with the weight of the wood and phone on the end, and so it seems to lodge itself ever so slightly against the ridge inside the cubby where the rubber fill-in piece used to sit, so it works out nicely. What I like about this is that the cup is still fully functional, and you could stow away anything you'd like in there (as Adam Sandler would say, "you can put your weed in there").
Total list of materials:
-Magsafe charger ($8 at TJ Maxx)
-Cubby Cup ($22 at the time on Etsy)
-17mm ball adapter ($10 at the time on Amazon)
-(1) 8-32 x 1-1/4" counter-sunk machine screw ($.50 at local Ace Hardware)
-(1) 8-32 nylock nut ($.50 at local Ace Hardware)
-(1) 1/8" drill bit
-(1) 3/16" drill bit
-(1) drill with phillips bit
-(1) piece of 3/4" pine wood
-(1) can of satin spray paint
-(4) #8 x 3/4" pan-head Phillips screws
Because I had some of my materials at the house and from work already, this project cost me $41 plus tax and about 3 hours of my time total, not including time spent waiting for paint to dry. If you would need paint, more screws, drill bits and wood, this could easily run you $50-65, more if you don't have the tools.
Hopefully this helps someone else with an idea they might have to make something cooler than this!
For starters, I'm aware that there are much more viable solutions, and many more talented people have created 3D-printed solutions that would work just as well. But I'm a noob at woodworking and I like learning and experimenting. I also just wanted to share to maybe inspire others to make something of their own and come up with something more elegant than what I did lol.
This write-up isn't iPhone specific but I have one so this is the route I ended up going. I found a charger at TJ Maxx for a whopping $8 that charges with magsafe. It works great but it's ugly and sticks out into my space way too much. It has a ball adapter on the back of the charger unit so it works perfectly for what I planned to do, and if you ended up going this route that's what you'd need as well, something with a ball adapter and connector for the backside of this unit.
A quick google search for something to fill the cubby with brought me to this Etsy page:
https://www.etsy.com/listing/1492710733/the-cubby-cup-ford-maverick-22232425
A 3D printed "cubby cup" that fits perfectly in the cubby. I've seen users post their own creations and have seen many online but I wanted something simple. So I bought one with a flat face and no frills from the US seller above and couldn't be happier. But I didn't like how sunk-in it looked and I felt that mounting a phone mount directly to the cup would result in the phone being too close to the dash and not allow for much rotation. And if I got something with an arm that extends out, then I wouldn't be able to make it as flush as possible and like it "belongs" on the dash. I also didn't like the idea of drilling too many holes in the 3D-printed cup, because I wasn't sure how fragile it would be and I didn't want to compromise it's structural integrity.
While I was experimenting with what I wanted to use to attach to the cubby cup, I took measurements of the "ball" on the end of my existing phone mount and looked around for a fixed mount I could use, and ended up finding this:
https://www.amazon.com/dp/B0CTM1DHNK
It's an aluminum ball adapter with a 17mm ball (which is exactly what my existing ball is) and is originally meant for Garmin GPSs, but works perfectly for what I needed it to do. I decided I would go with this to mount the Magsafe charger to.
I found a piece of 3/4" pine laying around at work and took measurements of the space that was left in the cubby, and I worked out how I could miter the sides so that it would sit against the cubby cup and end up coming out flush with the plastic bezel for the radio. This is what I ended up cutting, using a miter saw to cut length and width and a table saw for the miters:
I decided I was fine with it not being perfect in regards to being exact measurements, then sanded it, painted it black and pre-drilled through the wood into the cup, and fastened it with an 8-32 counter-sunk machine screw and a nylon lock nut. I then used four #8 x 3/4" screws to fasten the adapter to the wood and it looked like this:
I wanted to use more than one screw to fasten the wood to the cubby cup, but I liked that the counter-sunk screw ended up being concealed behind the plate and I didn't want to put too many holes into the cup. If I did this again (which I likely will), I would try to find screws that look like the hex screws that Ford used all over the interior for the adapter to give it more of a matching aesthetic. I would also use a different wood, something with more grain to it that will absorb paint/stain better, or maybe just omit the 3D cup altogether and cut my own full piece of wood that slides in.
Final result:
I wish I would have taken more pictures, but I hadn't thought of the idea of doing a write-up or thinking that anyone might care until I was almost done lol.
I took it one step further and experimented with tucking the wire that connects to the magsafe charger. Since the charger ends up coming close to the Tune knob and doesn't give much in the way of wiggle room for a straight cable, I opted to go with a right angle USB C cable I had laying around and tucked it into the dash.
In order to achieve this, I needed to use a spudger tool that came with my Garmin dash cam to pry away at the plastic down the passenger side of the AC controls and the crevice between that and the glove box.
I had to remove these two screws from the glove box after I dropped it down, in order to give me enough flexibility in the plastic piece directly to the left, but then I just snaked the cable from underneath up through it and forced it in with the end of the spudger. The bolts holding this piece in are Torx T-25.
And now it's done, and I am satisfied (until I finish my plan for what I'd do differently).
I took the truck for a drive and the cup stays in the cubby without an issue. The cup itself seems to push itself "down" just a bit with the weight of the wood and phone on the end, and so it seems to lodge itself ever so slightly against the ridge inside the cubby where the rubber fill-in piece used to sit, so it works out nicely. What I like about this is that the cup is still fully functional, and you could stow away anything you'd like in there (as Adam Sandler would say, "you can put your weed in there").
Total list of materials:
-Magsafe charger ($8 at TJ Maxx)
-Cubby Cup ($22 at the time on Etsy)
-17mm ball adapter ($10 at the time on Amazon)
-(1) 8-32 x 1-1/4" counter-sunk machine screw ($.50 at local Ace Hardware)
-(1) 8-32 nylock nut ($.50 at local Ace Hardware)
-(1) 1/8" drill bit
-(1) 3/16" drill bit
-(1) drill with phillips bit
-(1) piece of 3/4" pine wood
-(1) can of satin spray paint
-(4) #8 x 3/4" pan-head Phillips screws
Because I had some of my materials at the house and from work already, this project cost me $41 plus tax and about 3 hours of my time total, not including time spent waiting for paint to dry. If you would need paint, more screws, drill bits and wood, this could easily run you $50-65, more if you don't have the tools.
Hopefully this helps someone else with an idea they might have to make something cooler than this!
Sponsored
Last edited: