
- First Name
- Lane
- Joined
- Jul 20, 2023
- Threads
- 15
- Messages
- 421
- Reaction score
- 999
- Location
- Central Wisconsin
- Website
- photos.app.goo.gl
- Vehicle(s)
- 2023 Area 51 Hybrid XL, 2006 VW Jetta Smyth UTE
- Engine
- 2.5L Hybrid
- Thread starter
- #1
--> $20 for one bracket, $35 for two. Add $5 flat shipping for whatever you buy (see my signature at the bottom of this message for the other things I make).
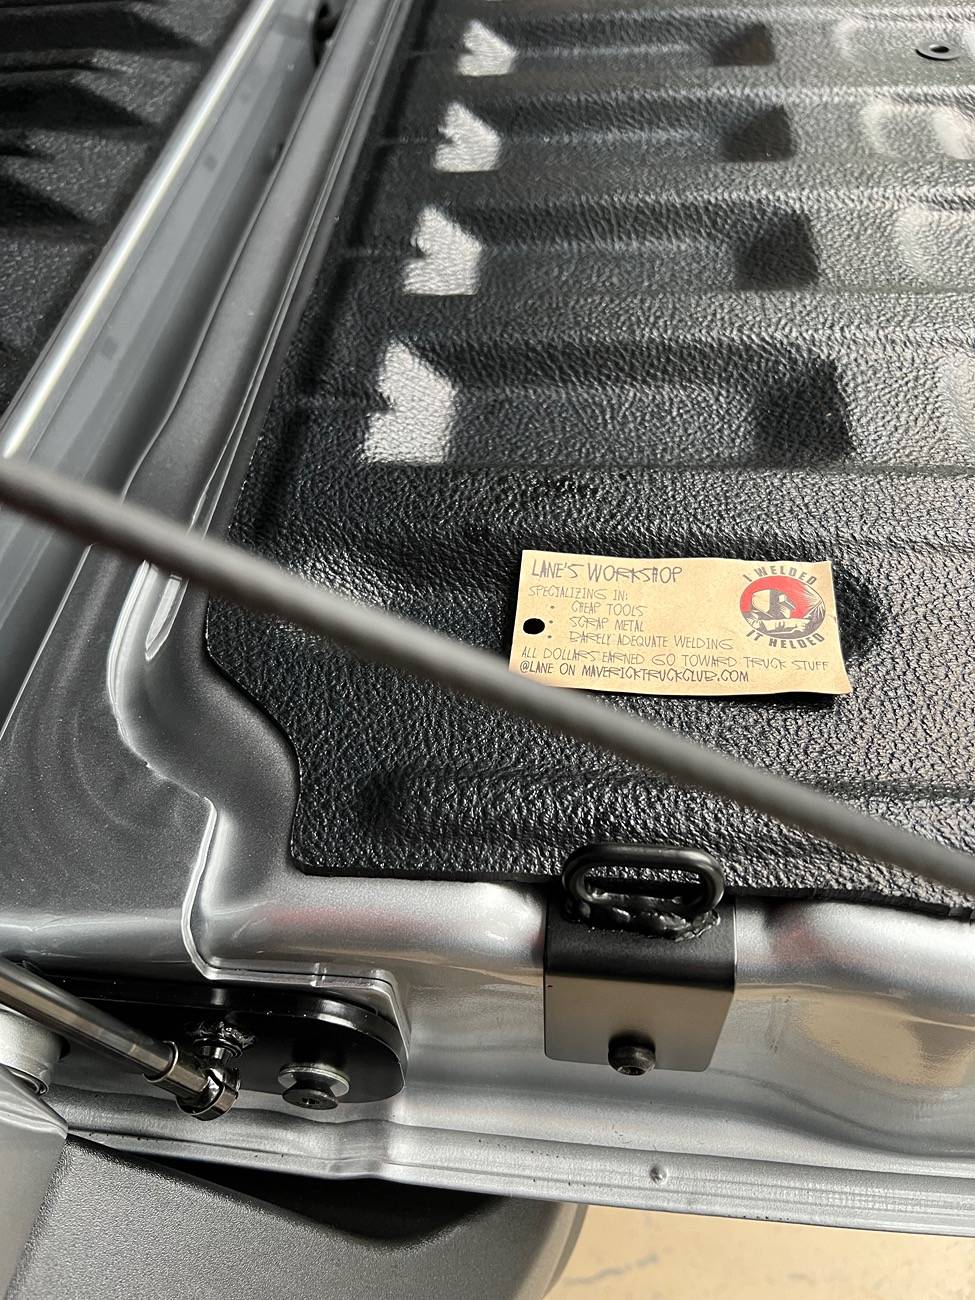
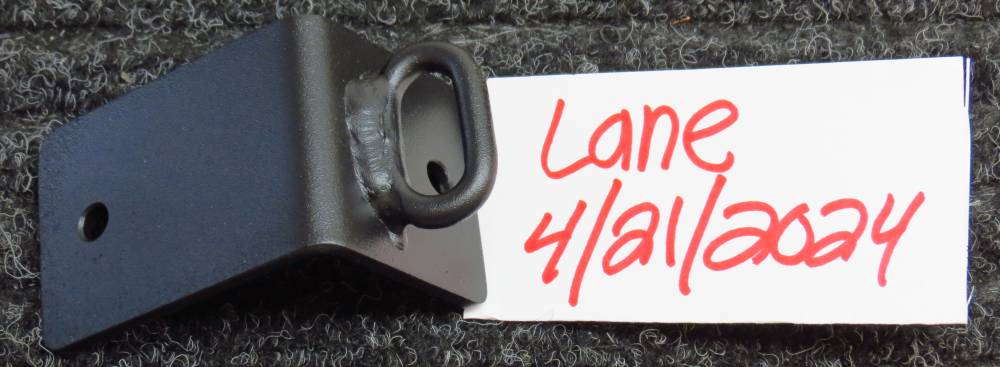
Like many here, I added a tailgate strut and then the tailgate won't close with the stock tiedown bracket in place. So I made one out of scrap metal I had in a bin and posted it in my build thread here, and others asked if I'd be interested in making a few more. I have a few of these available.
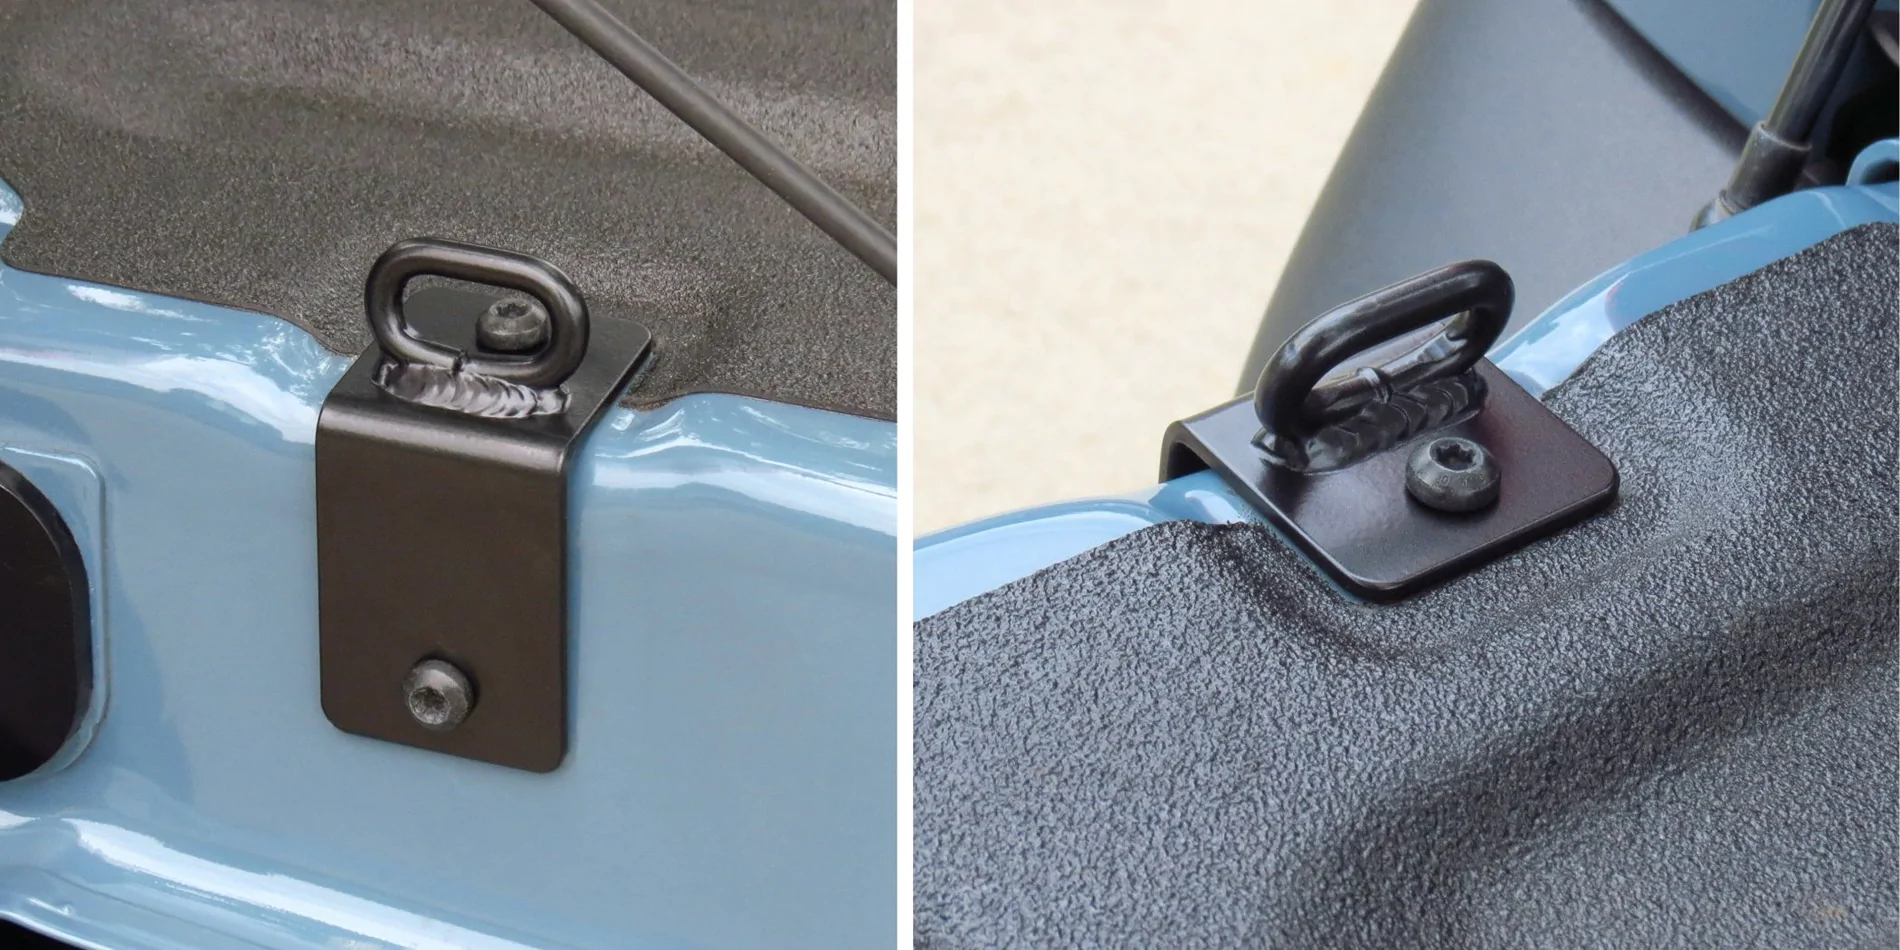
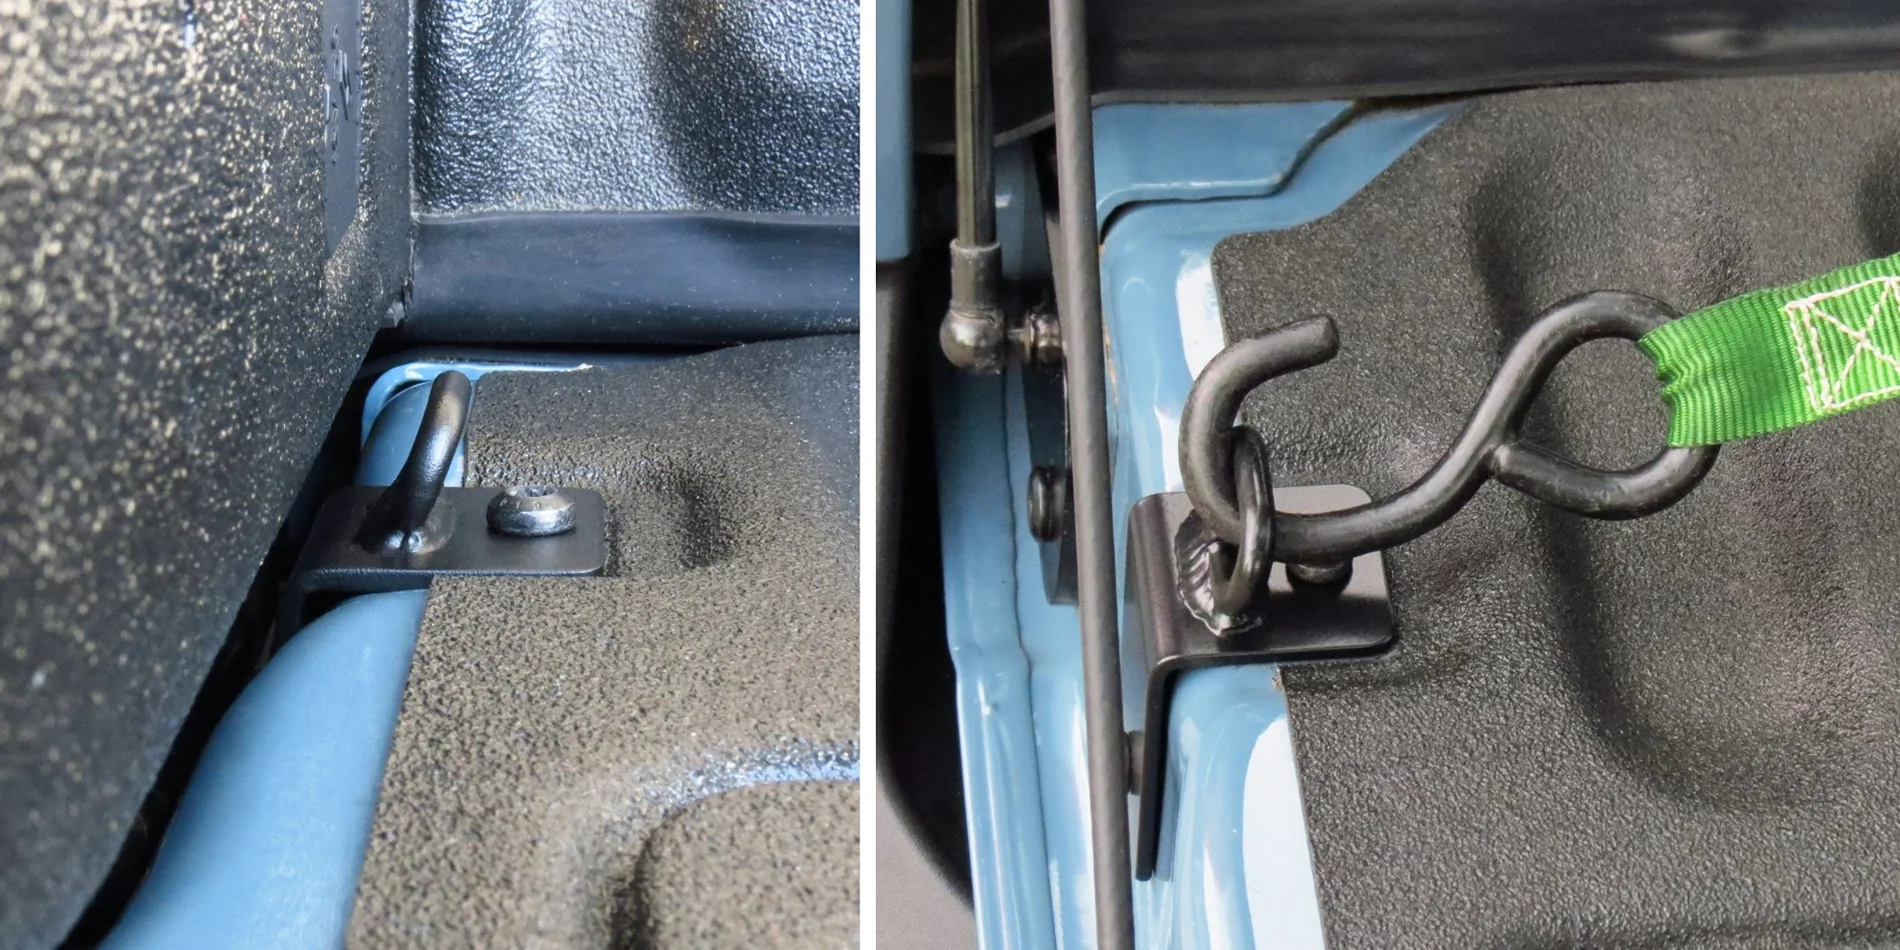
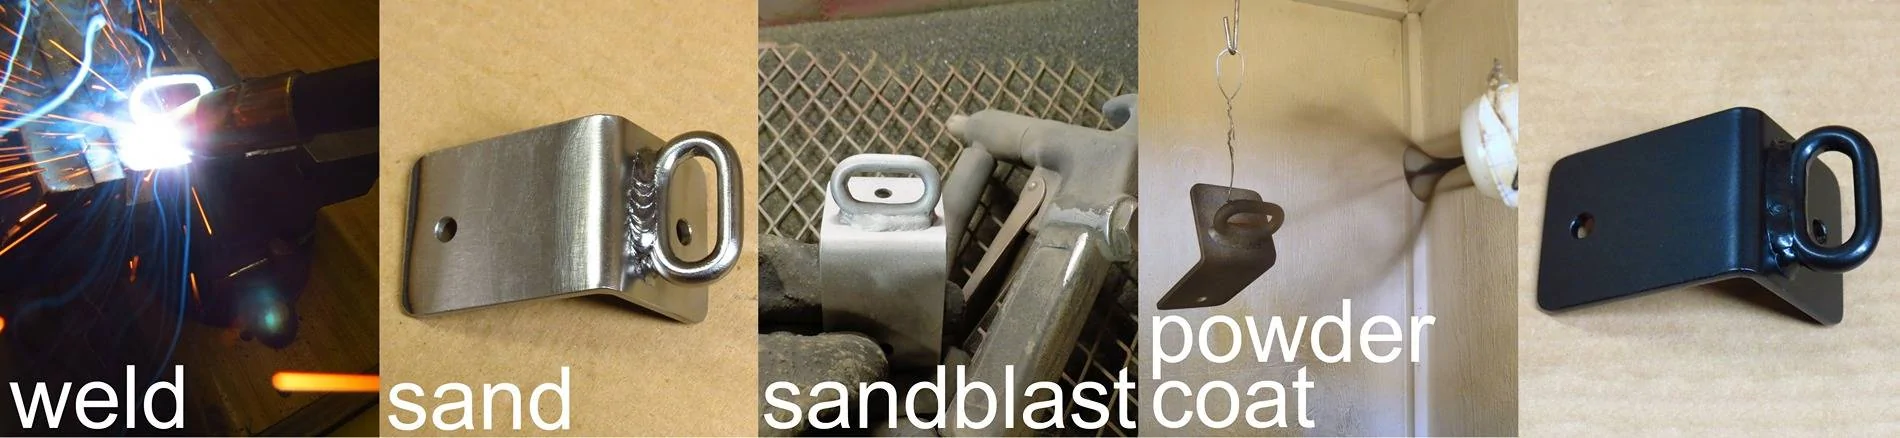
The steel is thicker than it needs to be, 1/8". Cut, bent, drilled & chamfered, corners radiused, welded, sanded, and powdercoated in either of two finishes for $20 each. Add $5 for a flat shipping cost and that covers anything else that you may want to purchase at the same time as well (see my signature for the other items I make & offer.
Because I make these one at a time by hand, my welding may not look as perfect as one that comes out of a factory in China. But it is well-built and solid and it works like it should, and of course, it's made in the USA. In addition, the materials that I use to make the brackets are made in the USA as well - the steel bar stock, chain links, and powdercoating powders.
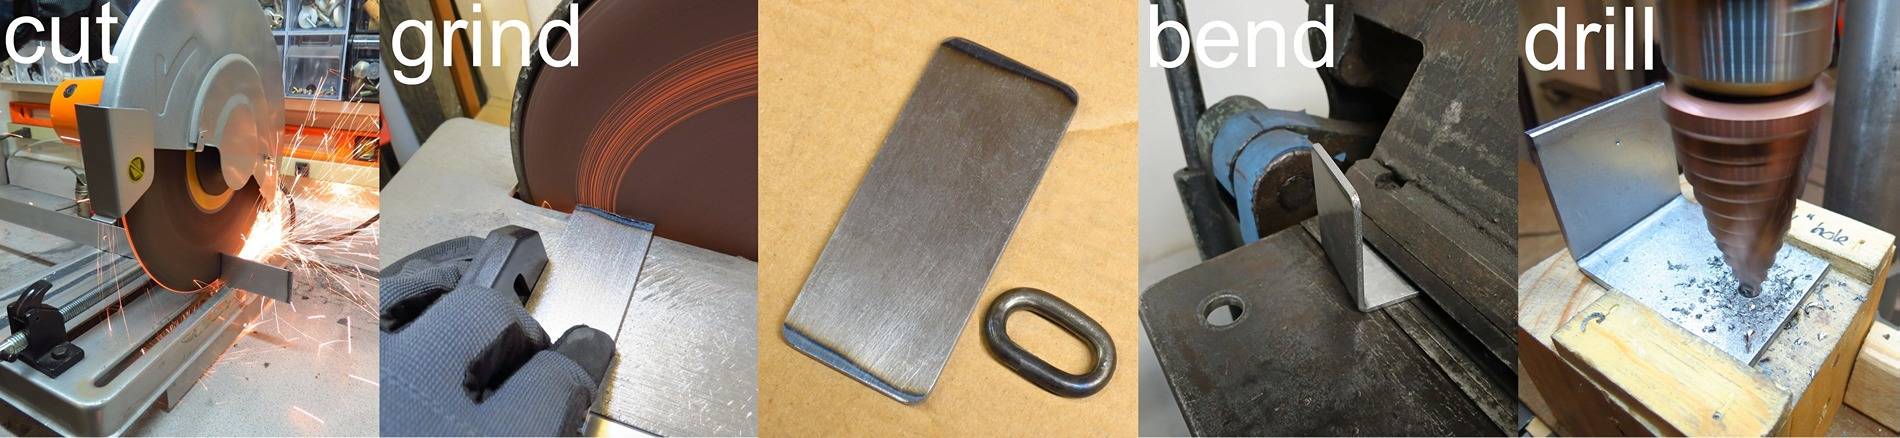

PayPal is strongly preferred, but if you don't have PayPal and need me to list one for purchase on eBay, I can do that as well. If you have an interest, please send me a private message (don't post to this thread). The amount is limited. Be aware that I'm not a fabricator. I make things because I enjoy making things. And because some accessories just cost too much, and they shouldn't.
My thanks go to @Dean S (his thread here) who came up with this outstanding minimalist design and shared it with us.
Like many here, I added a tailgate strut and then the tailgate won't close with the stock tiedown bracket in place. So I made one out of scrap metal I had in a bin and posted it in my build thread here, and others asked if I'd be interested in making a few more. I have a few of these available.
The steel is thicker than it needs to be, 1/8". Cut, bent, drilled & chamfered, corners radiused, welded, sanded, and powdercoated in either of two finishes for $20 each. Add $5 for a flat shipping cost and that covers anything else that you may want to purchase at the same time as well (see my signature for the other items I make & offer.
On my truck, I have the factory Ford spray-in bedliner which DOES NOT get sprayed on the gate surface where the bracket mounts.
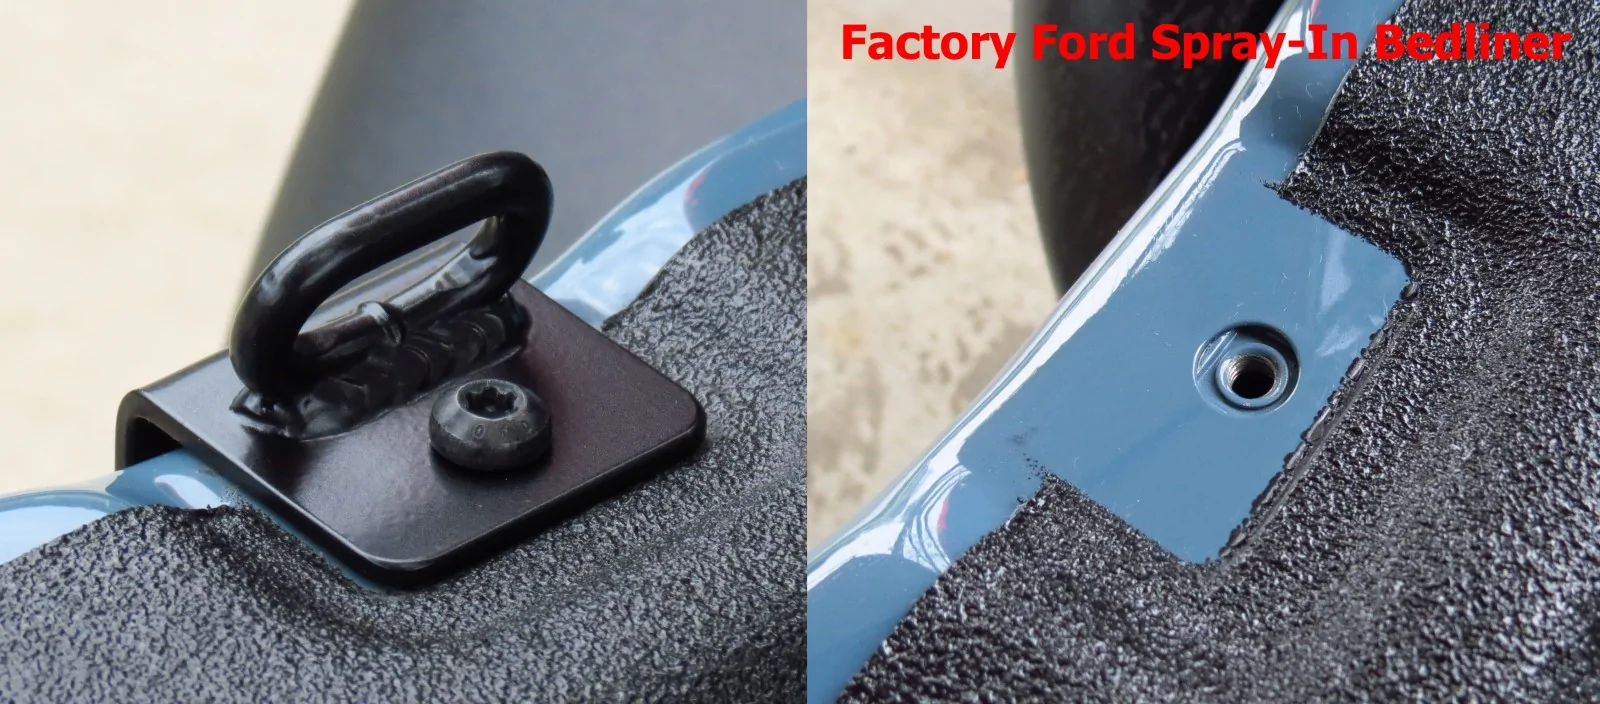
I use my truck and this configuration as a drilling template for the bracket's bolt holes. They are pretty exact and they don't offer much wiggle room. Each bracket is fitted to my gate as I build it to be certain the fit is right.
Some companies offering aftermarket spray-in bedliners remove the brackets first, and then spray the liner. If the liner isn't sprayed too thick in that area, my bracket has good odds of fitting over it without issue.
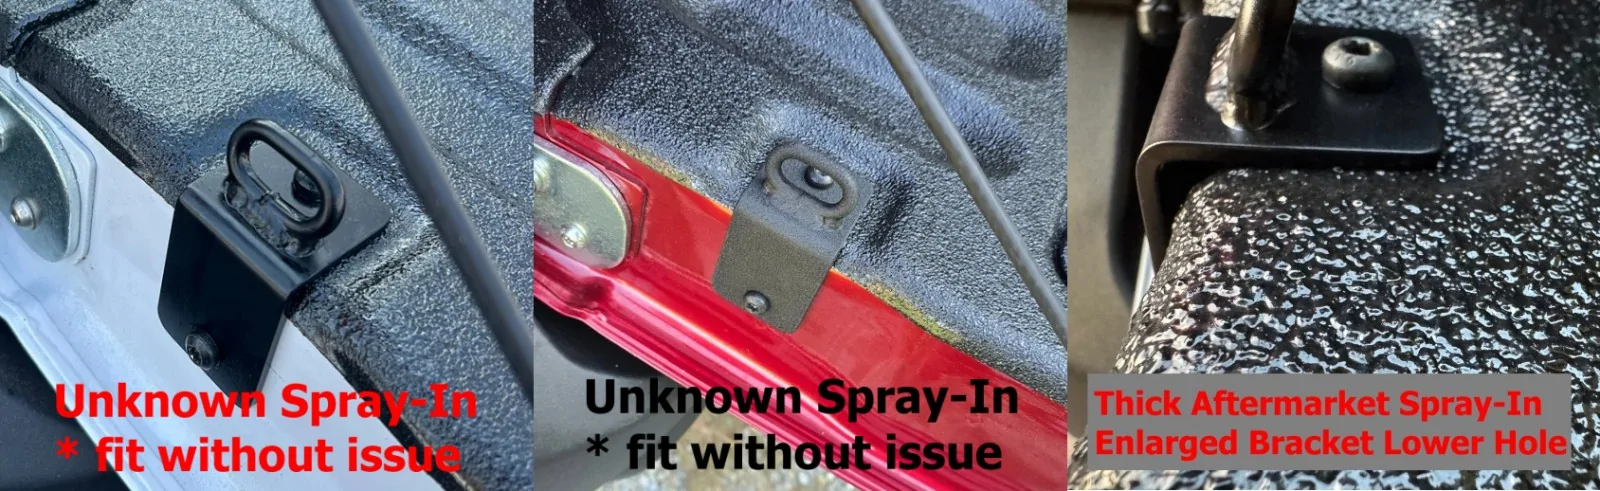
But if it's sprayed thick in that location, you may have to make some adjustments for it to fit. That may include masking the area of the bracket's top footprint and using coarse sandpaper to remove some of the bedliner's texture/thickness in that area. You can also drill the bracket's lower hole one size larger, or elongate it with a rotary tool.
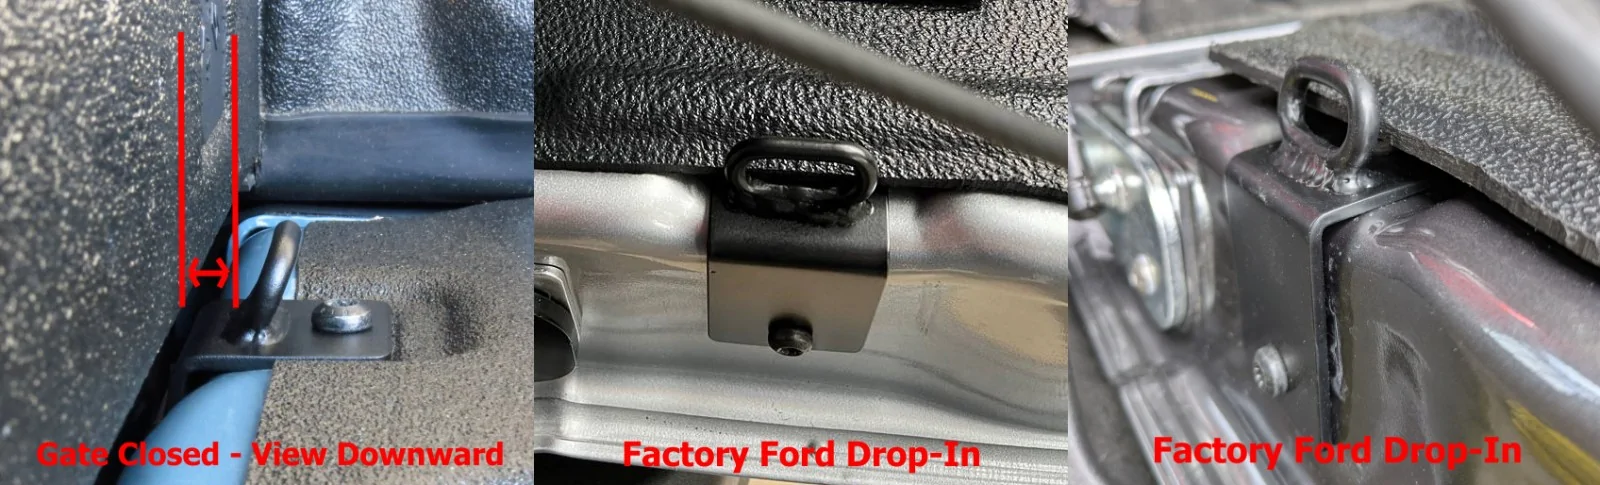
If you have a drop-in bedliner - the placement and angle of the loop on the bracket allow enough space between the bed side and the loop when the gate is closed to accommodate the thickness of the bedliner on that side wall. On the gate itself, the bracket cannot be mounted over the top of the plastic liner due to its thickness. When the bracket is mounted to the gate, the side of the gate's plastic liner will butt right up against the loop in most cases with no issue. It is often a pretty tight fit though.
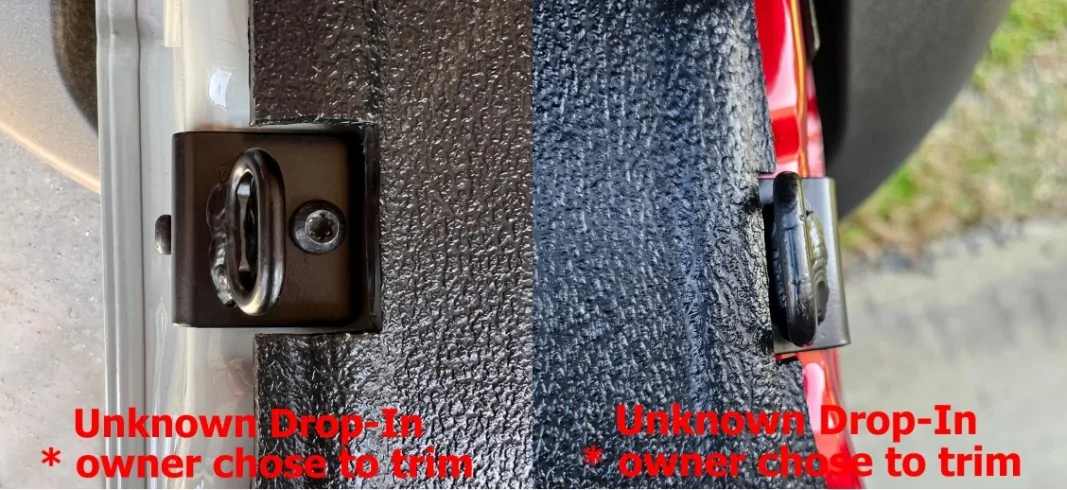
In some cases, owners have wanted more space around the loop or didn't want as tight of a fit against it and have chosen to slightly notch the gate liner's plastic around the bracket.
To summarize - In most cases, my bracket fits most bedliner brands/types with no issues. But in some cases, adjustments or modifications may be required. I am mentioning it so that you are aware.
I use my truck and this configuration as a drilling template for the bracket's bolt holes. They are pretty exact and they don't offer much wiggle room. Each bracket is fitted to my gate as I build it to be certain the fit is right.
Some companies offering aftermarket spray-in bedliners remove the brackets first, and then spray the liner. If the liner isn't sprayed too thick in that area, my bracket has good odds of fitting over it without issue.
But if it's sprayed thick in that location, you may have to make some adjustments for it to fit. That may include masking the area of the bracket's top footprint and using coarse sandpaper to remove some of the bedliner's texture/thickness in that area. You can also drill the bracket's lower hole one size larger, or elongate it with a rotary tool.
If you have a drop-in bedliner - the placement and angle of the loop on the bracket allow enough space between the bed side and the loop when the gate is closed to accommodate the thickness of the bedliner on that side wall. On the gate itself, the bracket cannot be mounted over the top of the plastic liner due to its thickness. When the bracket is mounted to the gate, the side of the gate's plastic liner will butt right up against the loop in most cases with no issue. It is often a pretty tight fit though.
In some cases, owners have wanted more space around the loop or didn't want as tight of a fit against it and have chosen to slightly notch the gate liner's plastic around the bracket.
To summarize - In most cases, my bracket fits most bedliner brands/types with no issues. But in some cases, adjustments or modifications may be required. I am mentioning it so that you are aware.
Because I make these one at a time by hand, my welding may not look as perfect as one that comes out of a factory in China. But it is well-built and solid and it works like it should, and of course, it's made in the USA. In addition, the materials that I use to make the brackets are made in the USA as well - the steel bar stock, chain links, and powdercoating powders.
PayPal is strongly preferred, but if you don't have PayPal and need me to list one for purchase on eBay, I can do that as well. If you have an interest, please send me a private message (don't post to this thread). The amount is limited. Be aware that I'm not a fabricator. I make things because I enjoy making things. And because some accessories just cost too much, and they shouldn't.
My thanks go to @Dean S (his thread here) who came up with this outstanding minimalist design and shared it with us.
Sponsored
Last edited: