
- First Name
- Cole
- Joined
- Oct 25, 2021
- Threads
- 1
- Messages
- 24
- Reaction score
- 54
- Location
- Rhode Island
- Vehicle(s)
- 1988 Pontiac Fiero Formula, 2007 Nissan Titan
- Engine
- 2.5L Hybrid
- Thread starter
- #1
Just picked up my Maverick and didn't make it through the week without starting to make some upgrades  . One of the first things I wanted to do was order some upgraded floor mats. I only ordered my Mav with the carpeted mats, which upon inspection are very thin. On top of that, there were no mats for the back seats at all. The factory Ford rubber mats are $200, so I decided to do some looking around. I ended up ordering a set of TGBROS rubber mats from Amazon for $105. Here's the link if interested:
Amazon - TGBROS Custom Fit for Floor Mats 2022-2023 Ford Maverick (for Hybrid Model)
These mats fit great and while not as flexible as the Ford rubber mats, they aren't as hard/scratchy as WeatherTech floor liners. The only issue was that the snaps for the driver's and passenger's mat were too large to snap onto the factory mounting points. After looking the stock mats next to the new mats, I decided to try and move the stock mat retainers from the factory mats to the aftermarket ones and it worked! Its very easy to do and only takes about 15 minutes! All you will need is a razor blade or box cutter and 1 or 2 small flathead screwdrivers. Some might also find a small pick useful.
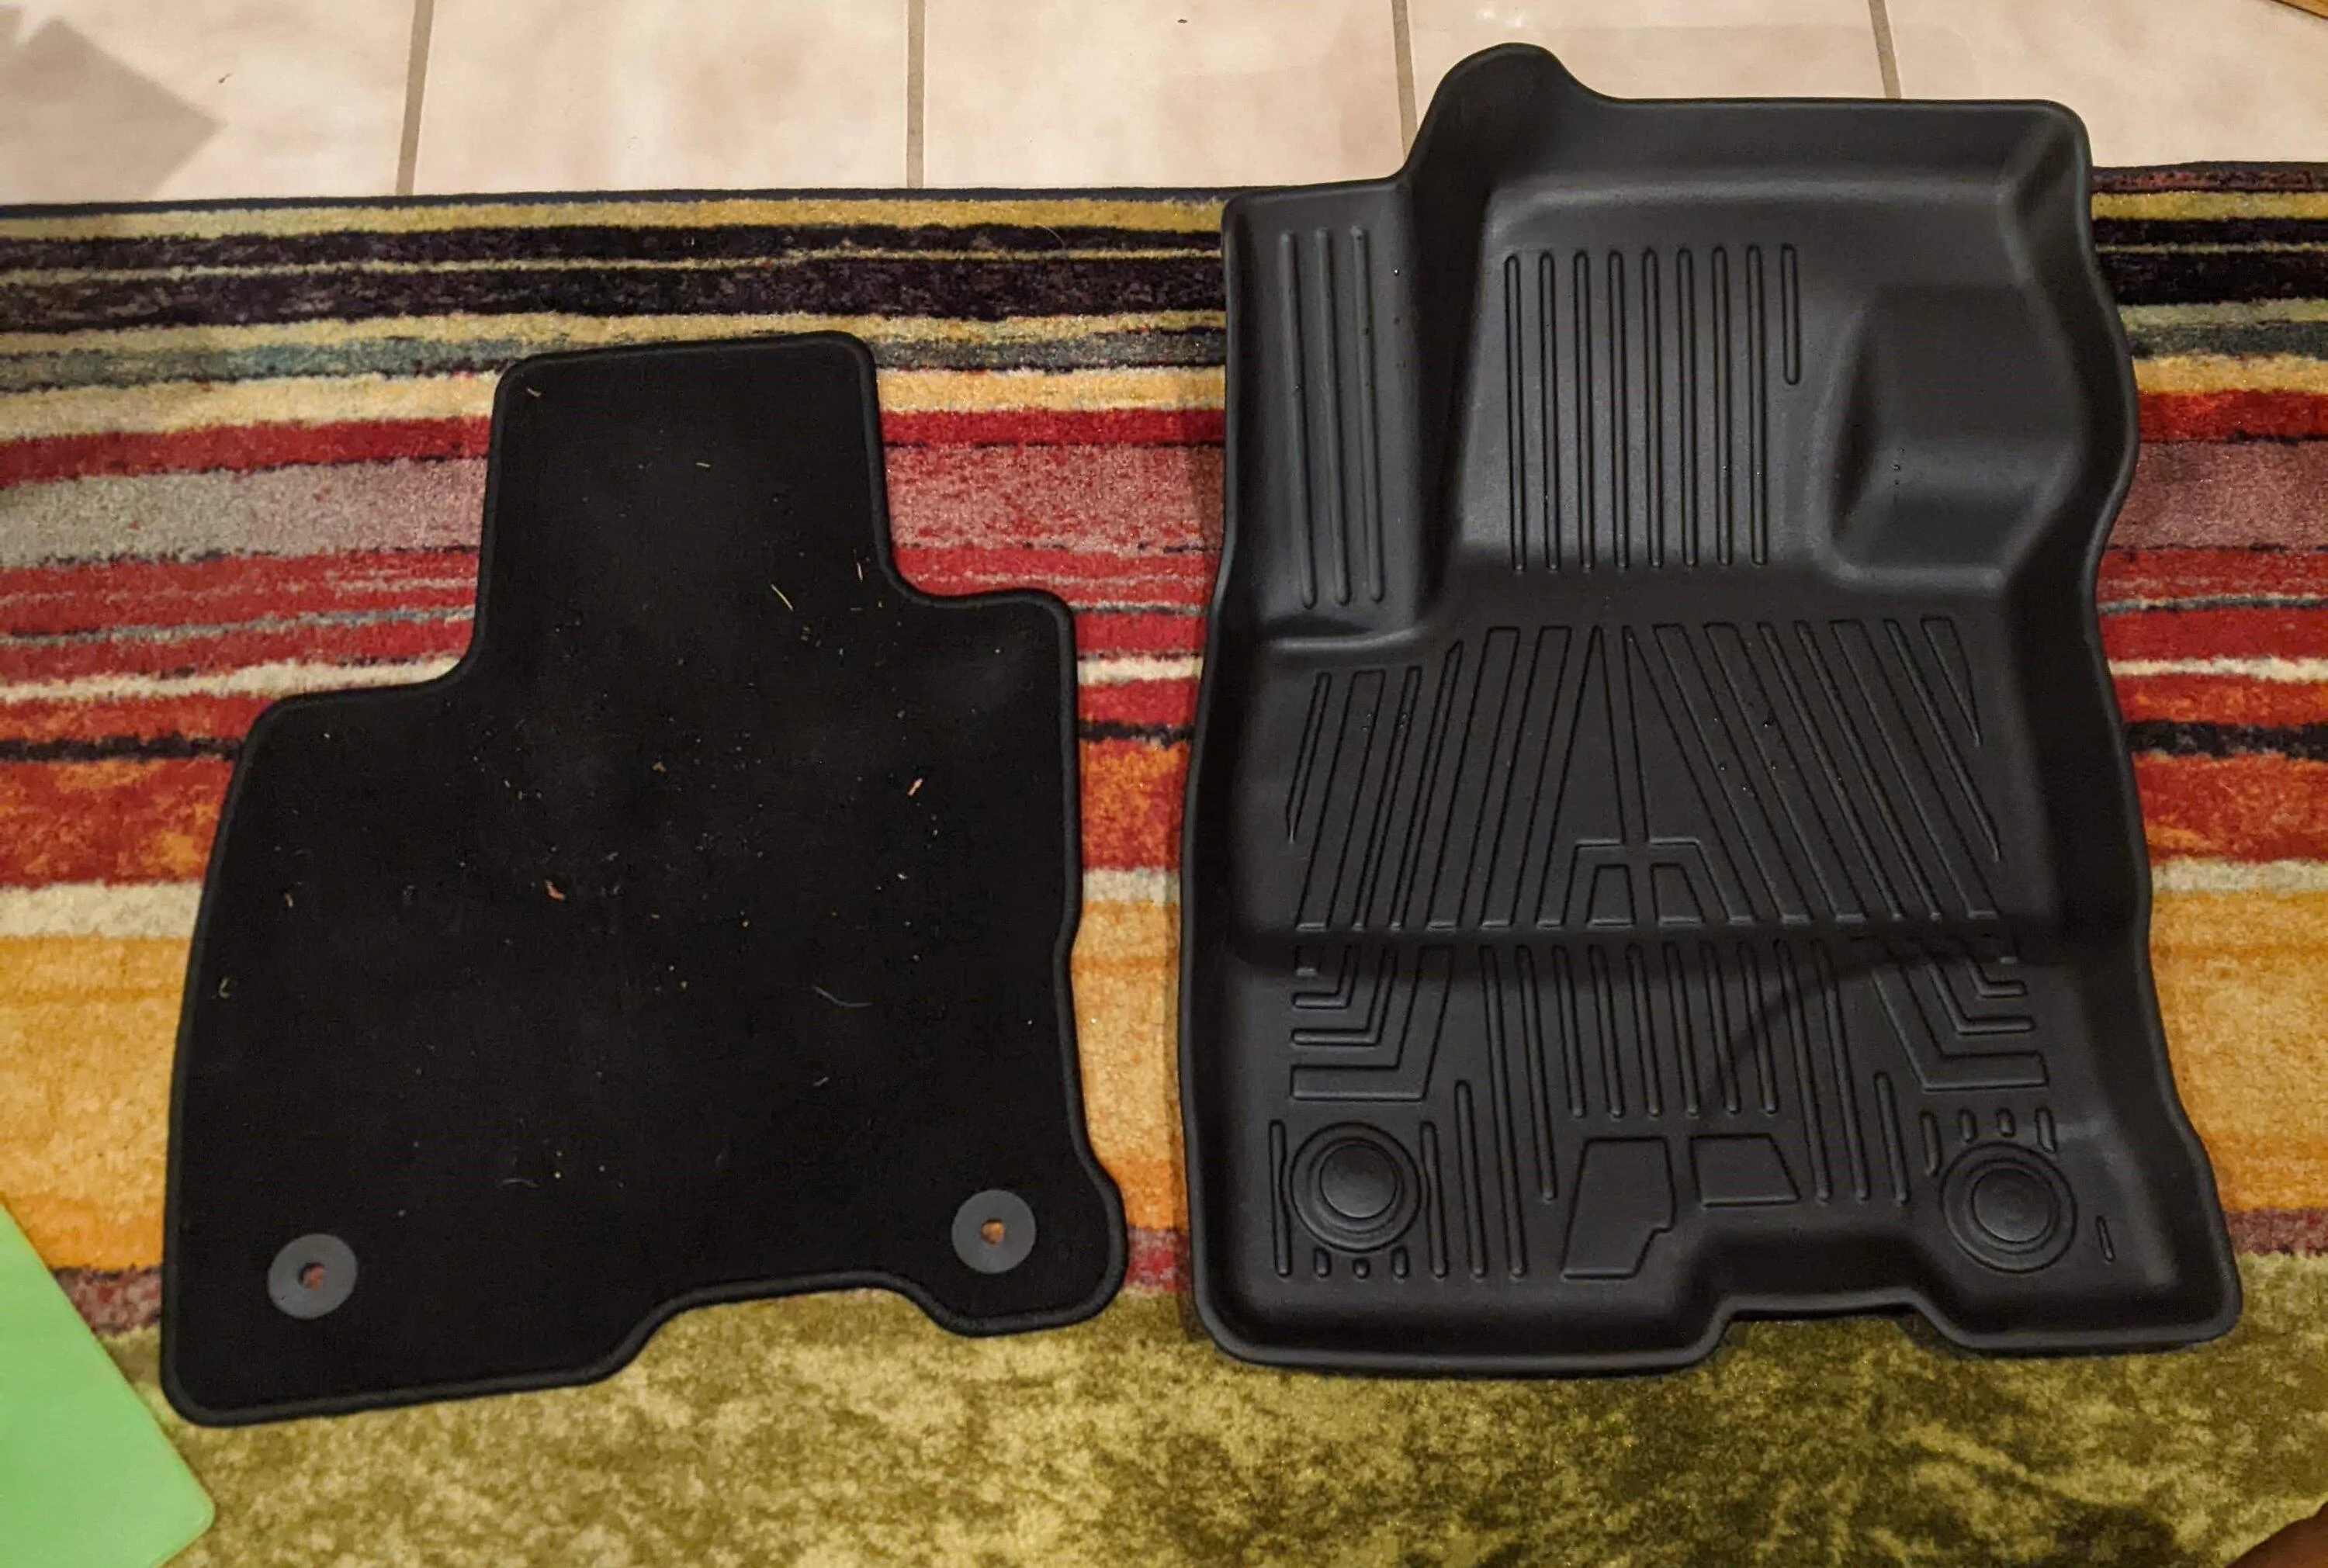
The driver's side mat has two retainers and the passenger's side only has one, so in all you will have to remove 6 retainers (3 from your OEM mats, 3 from your new mats). As you can see, these mats cover a lot more of the floor than the OEM carpeted mats. In both cases, the mat retainers are made of two pieces that snap through the mat itself.
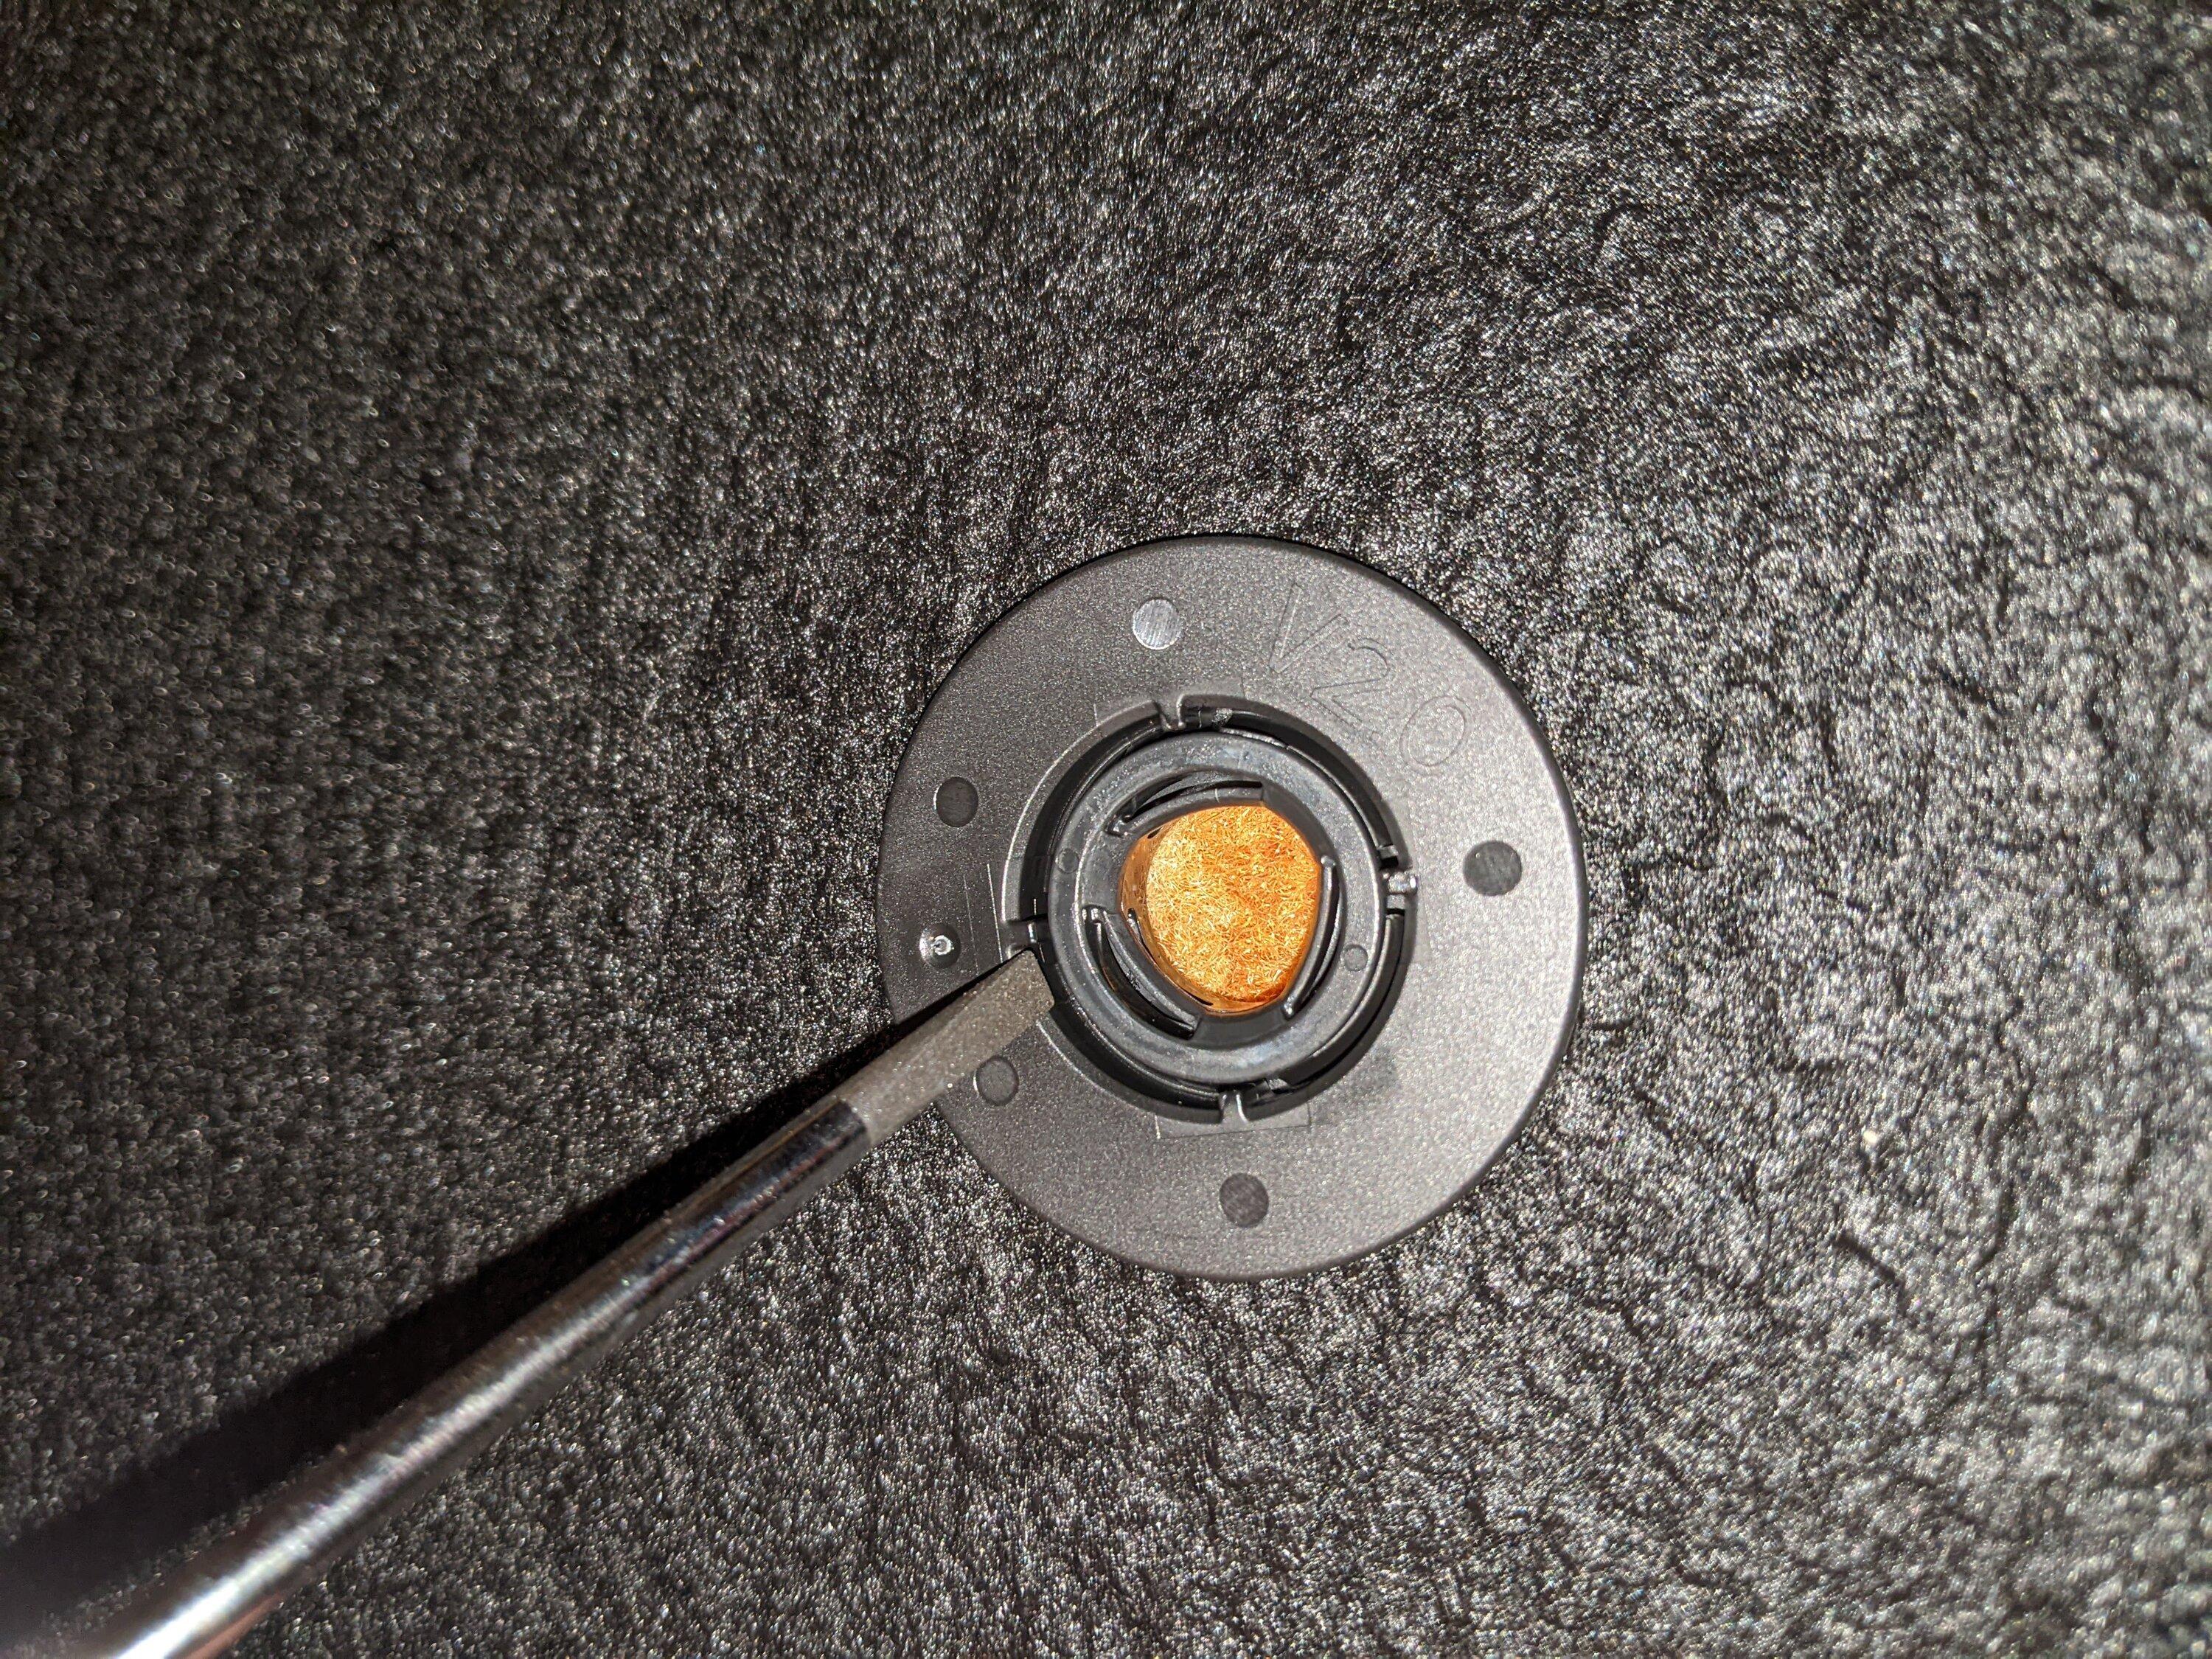
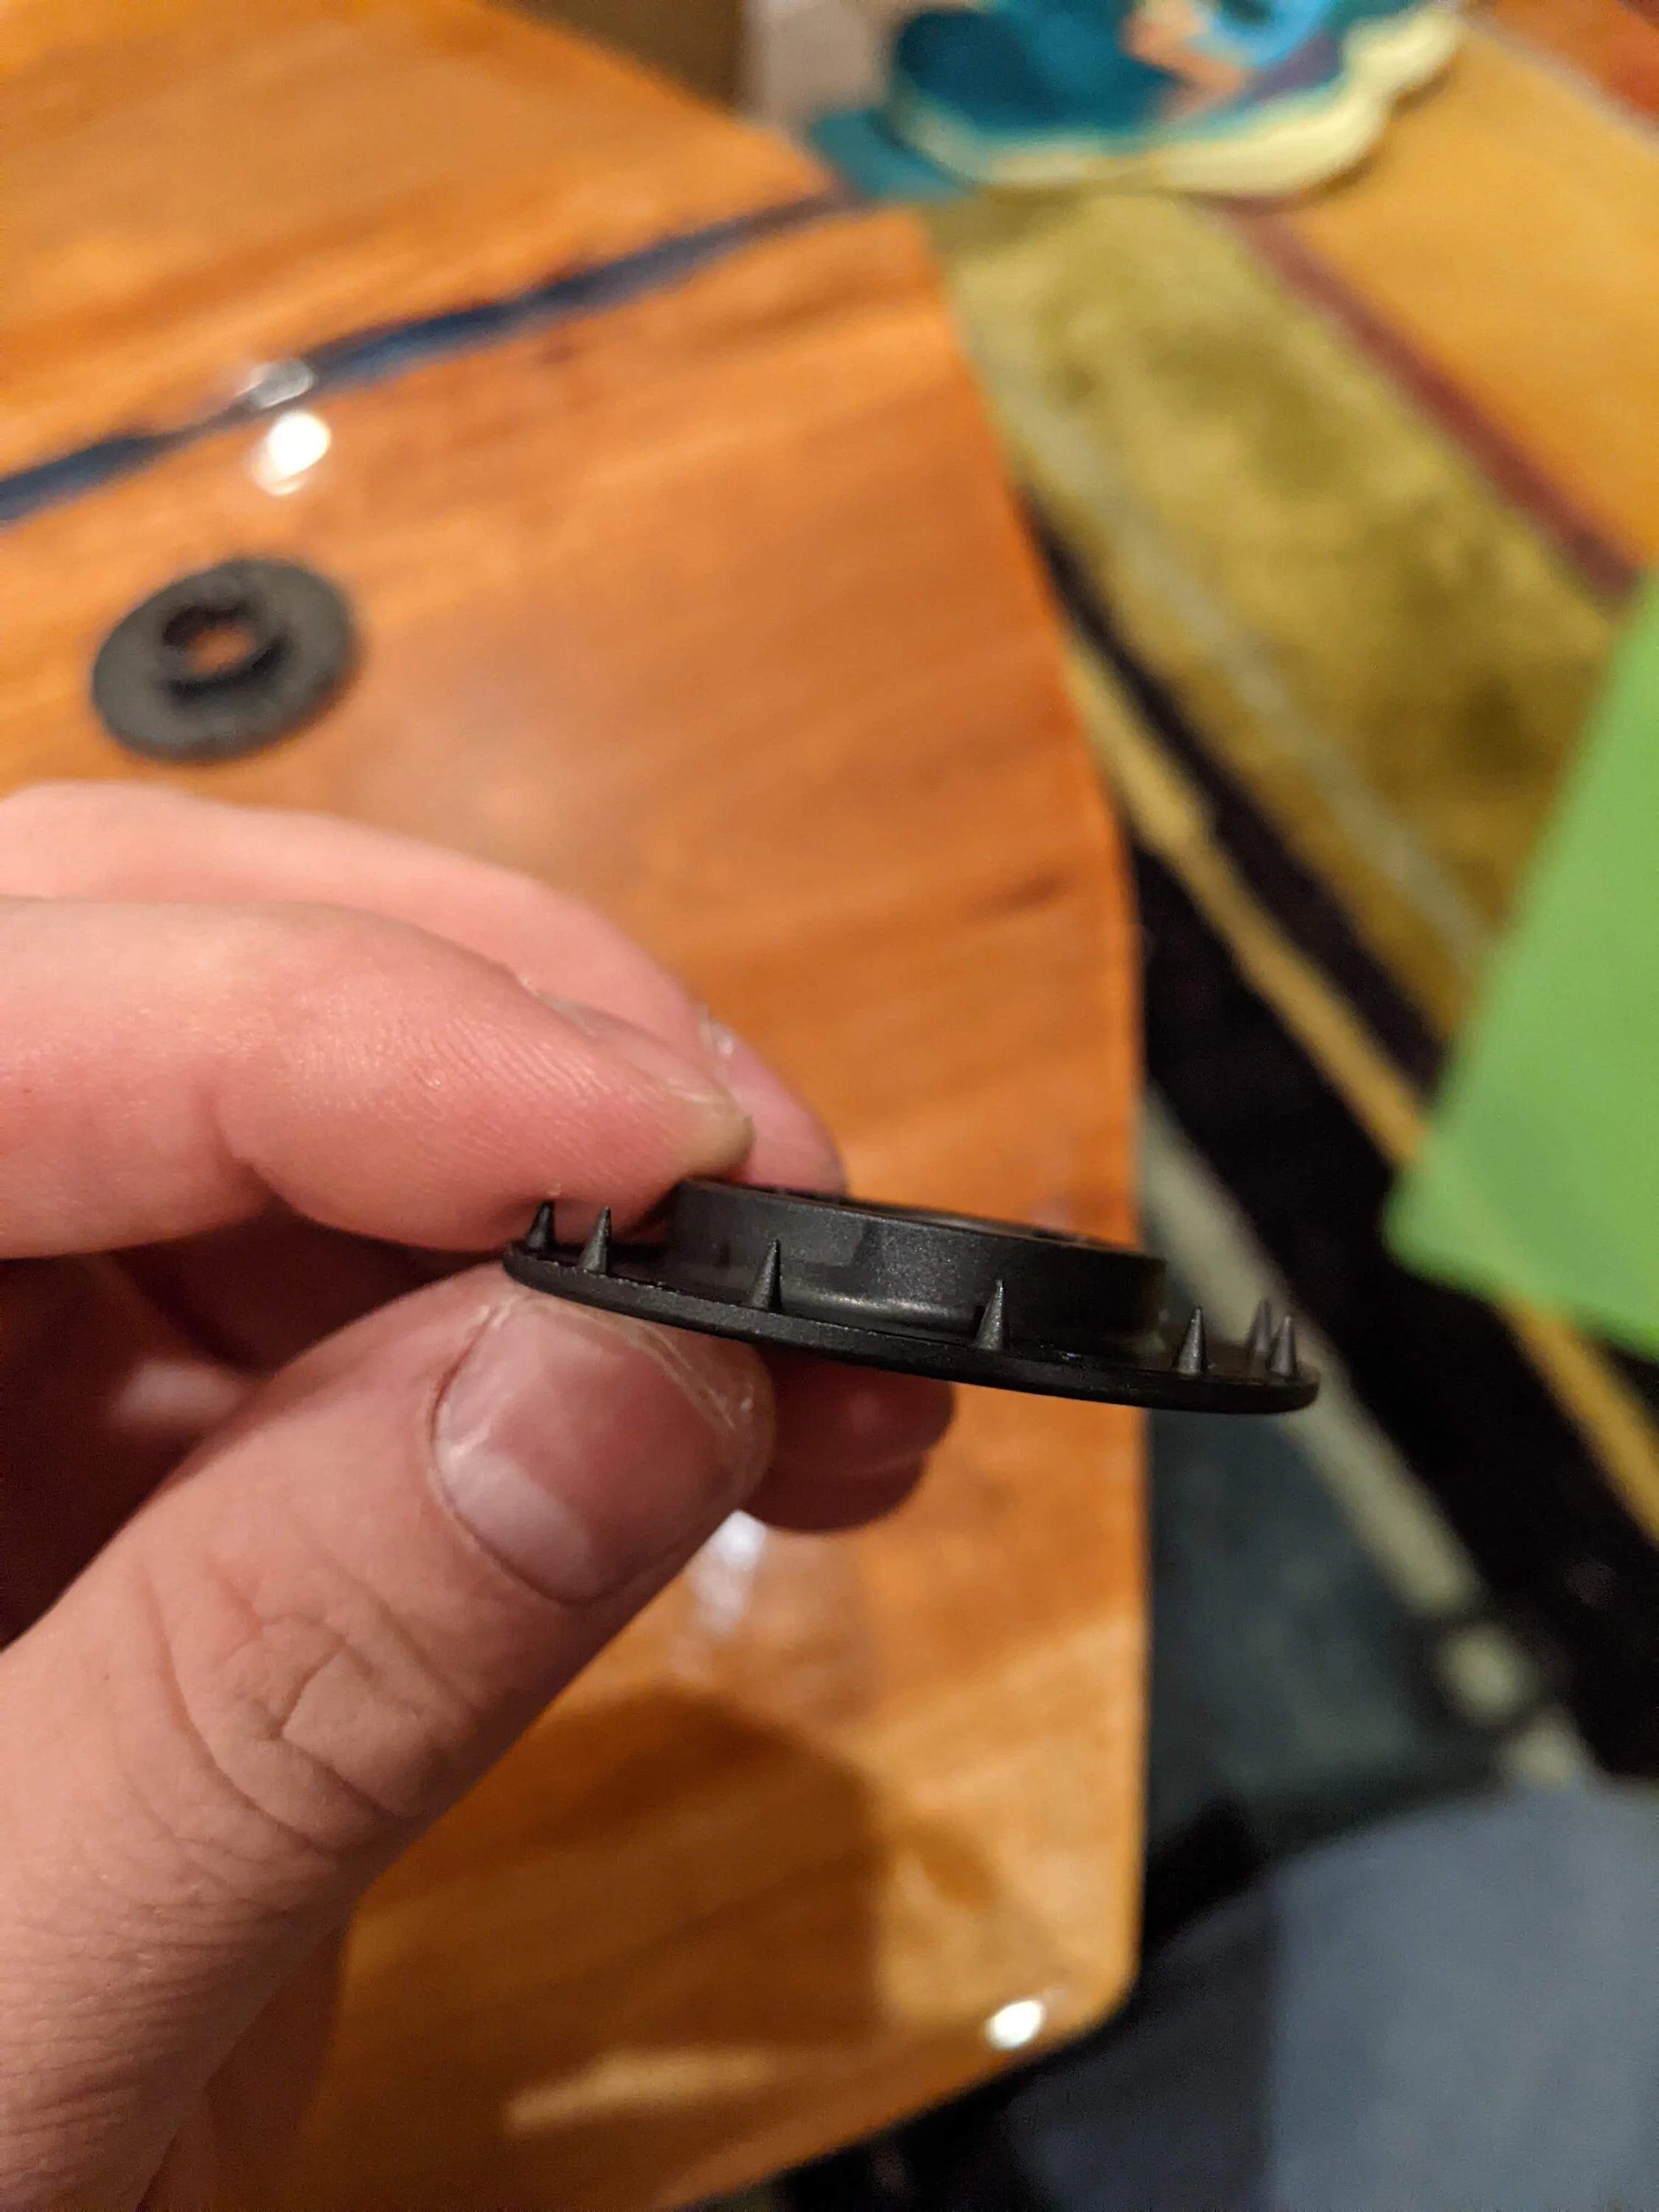
Starting with the OEM mats, flip the mat over and look at the bottom of the retainer. You will see four posts on the inside of the outer ring. Using a screwdriver or a pick, pry between this post and the inner ring. The Ford retainers snap together very tight, so you may have to work at it. Using two screwdrivers and going from opposite angles may help you.
Once loose, you will be able to separate the upper and lower part of the retainer.
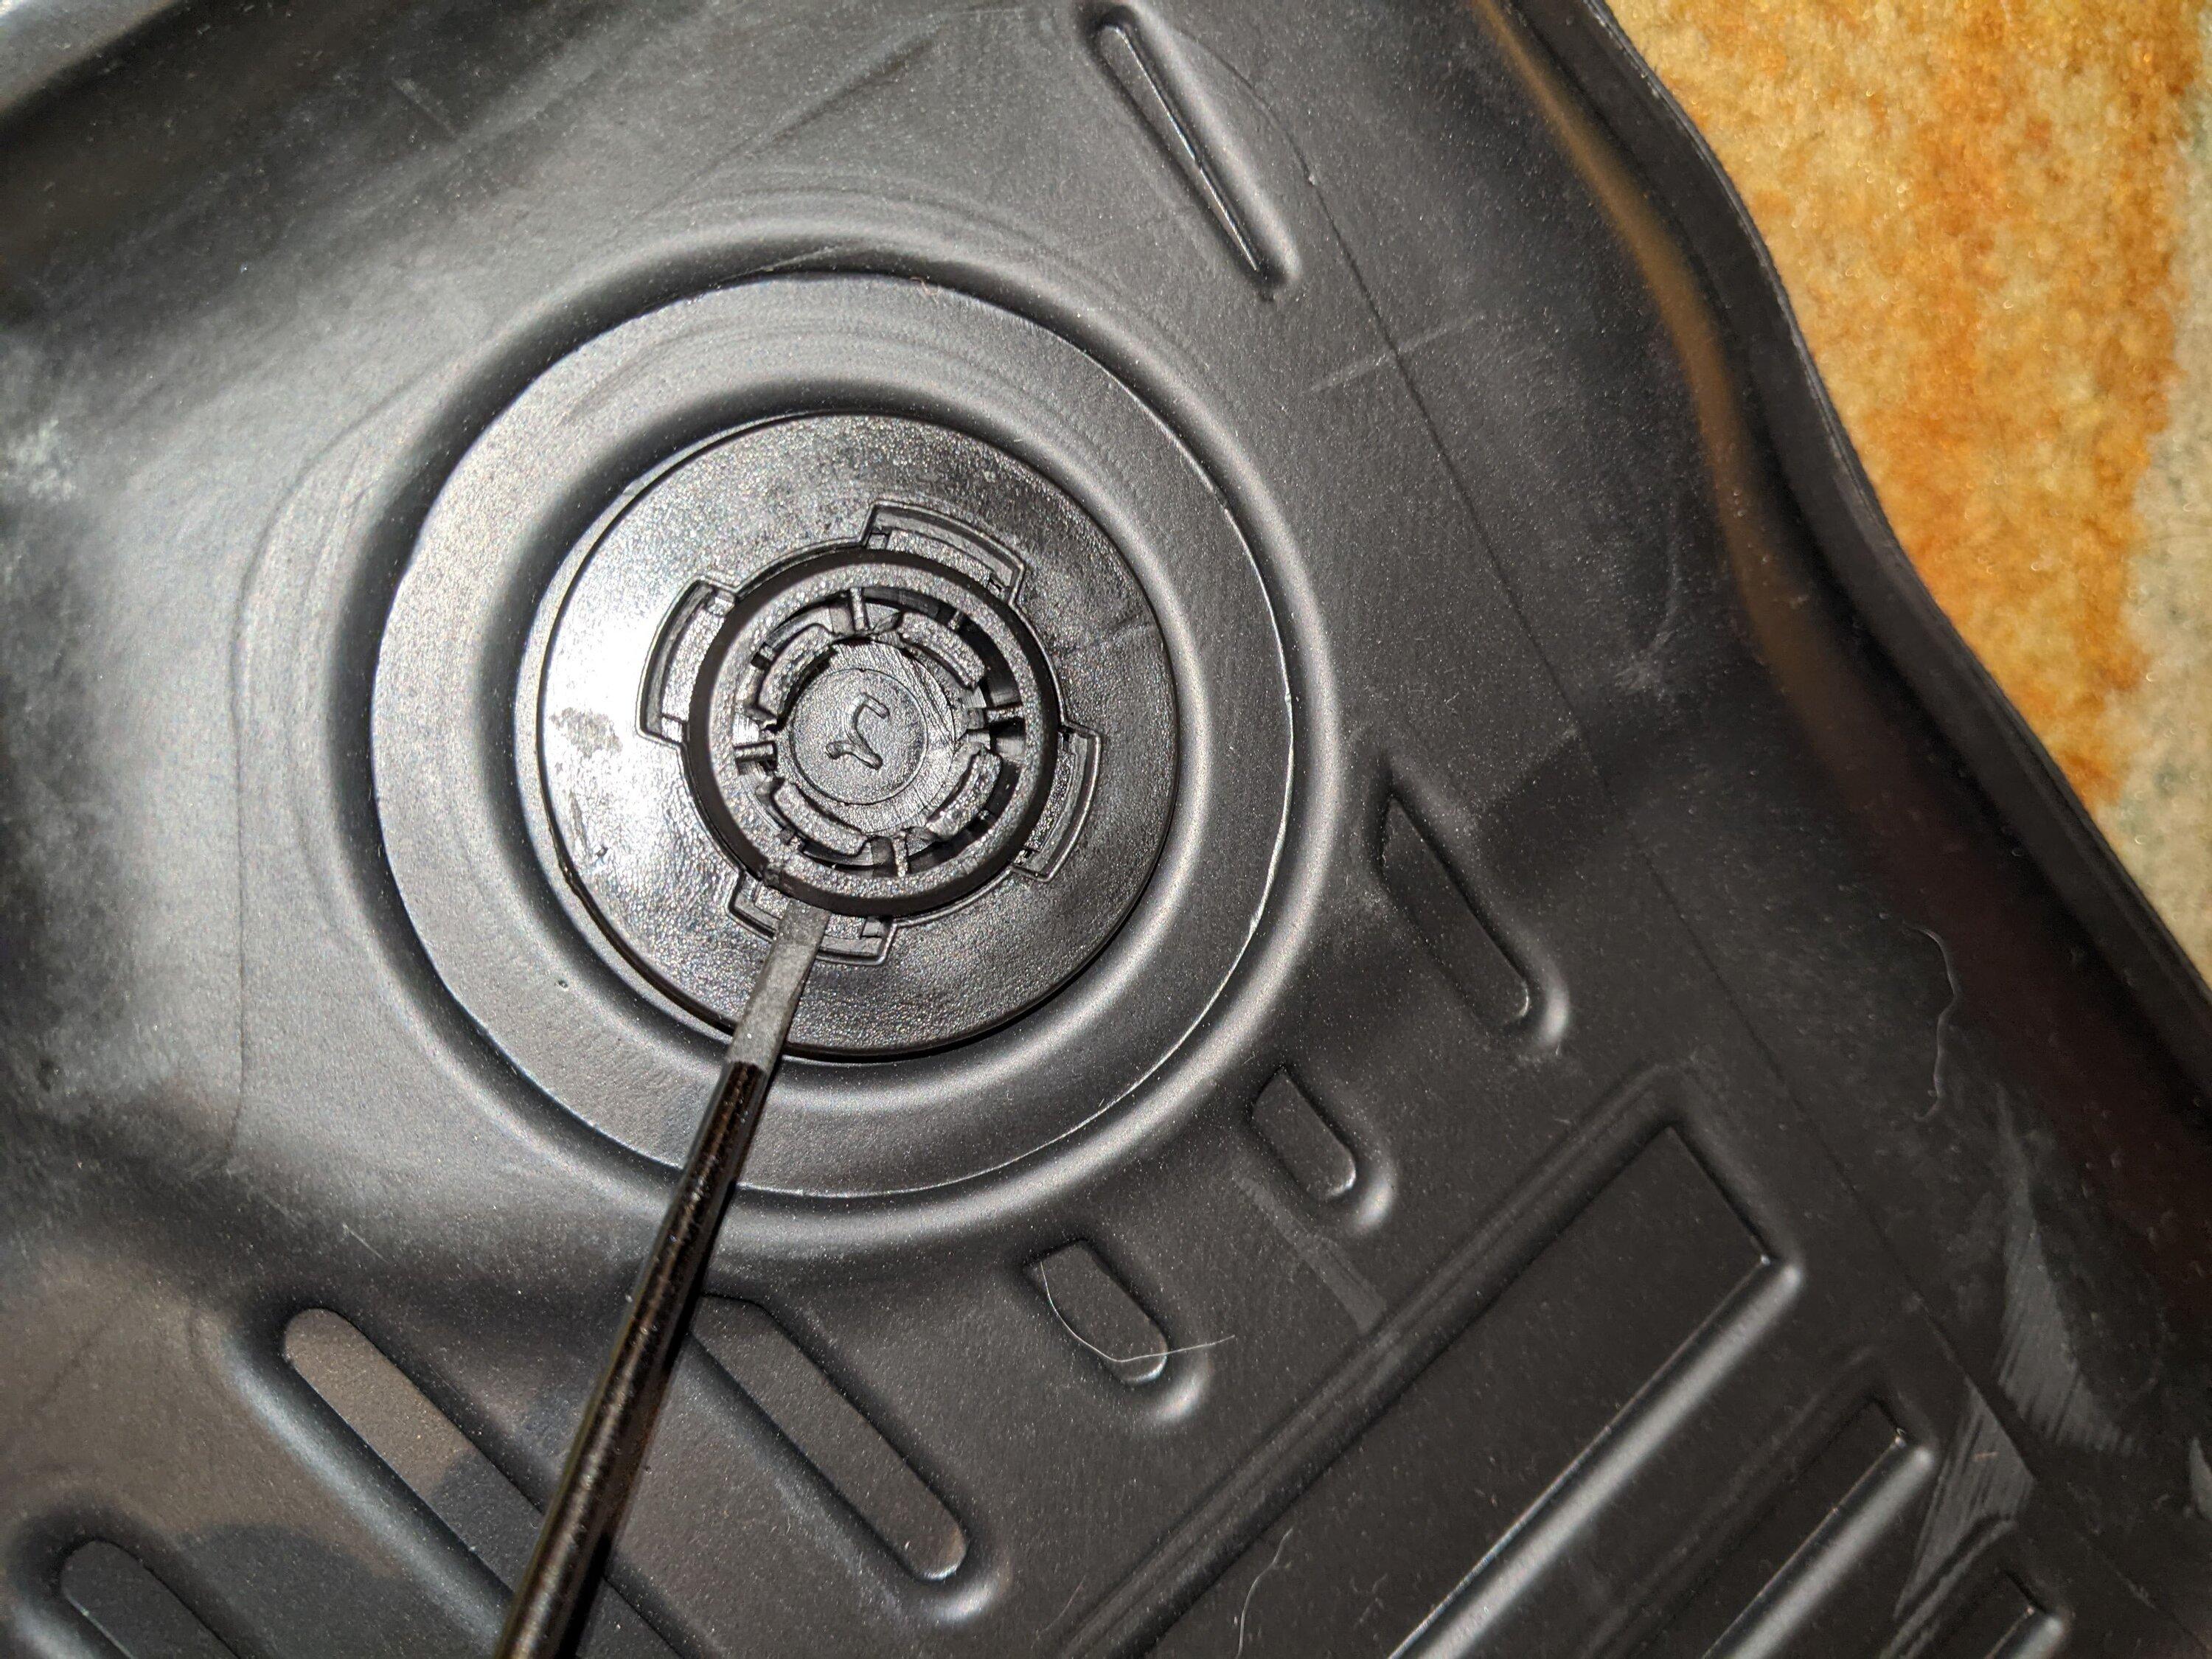
The retainers in the aftermarket mats are much easier to remove. You will see the four clips that hold the retainer together. Insert the screwdriver between the clip and the inner ring. You can also insert another screwdriver between the mat and the retainer to pry up and pop the pieces apart.
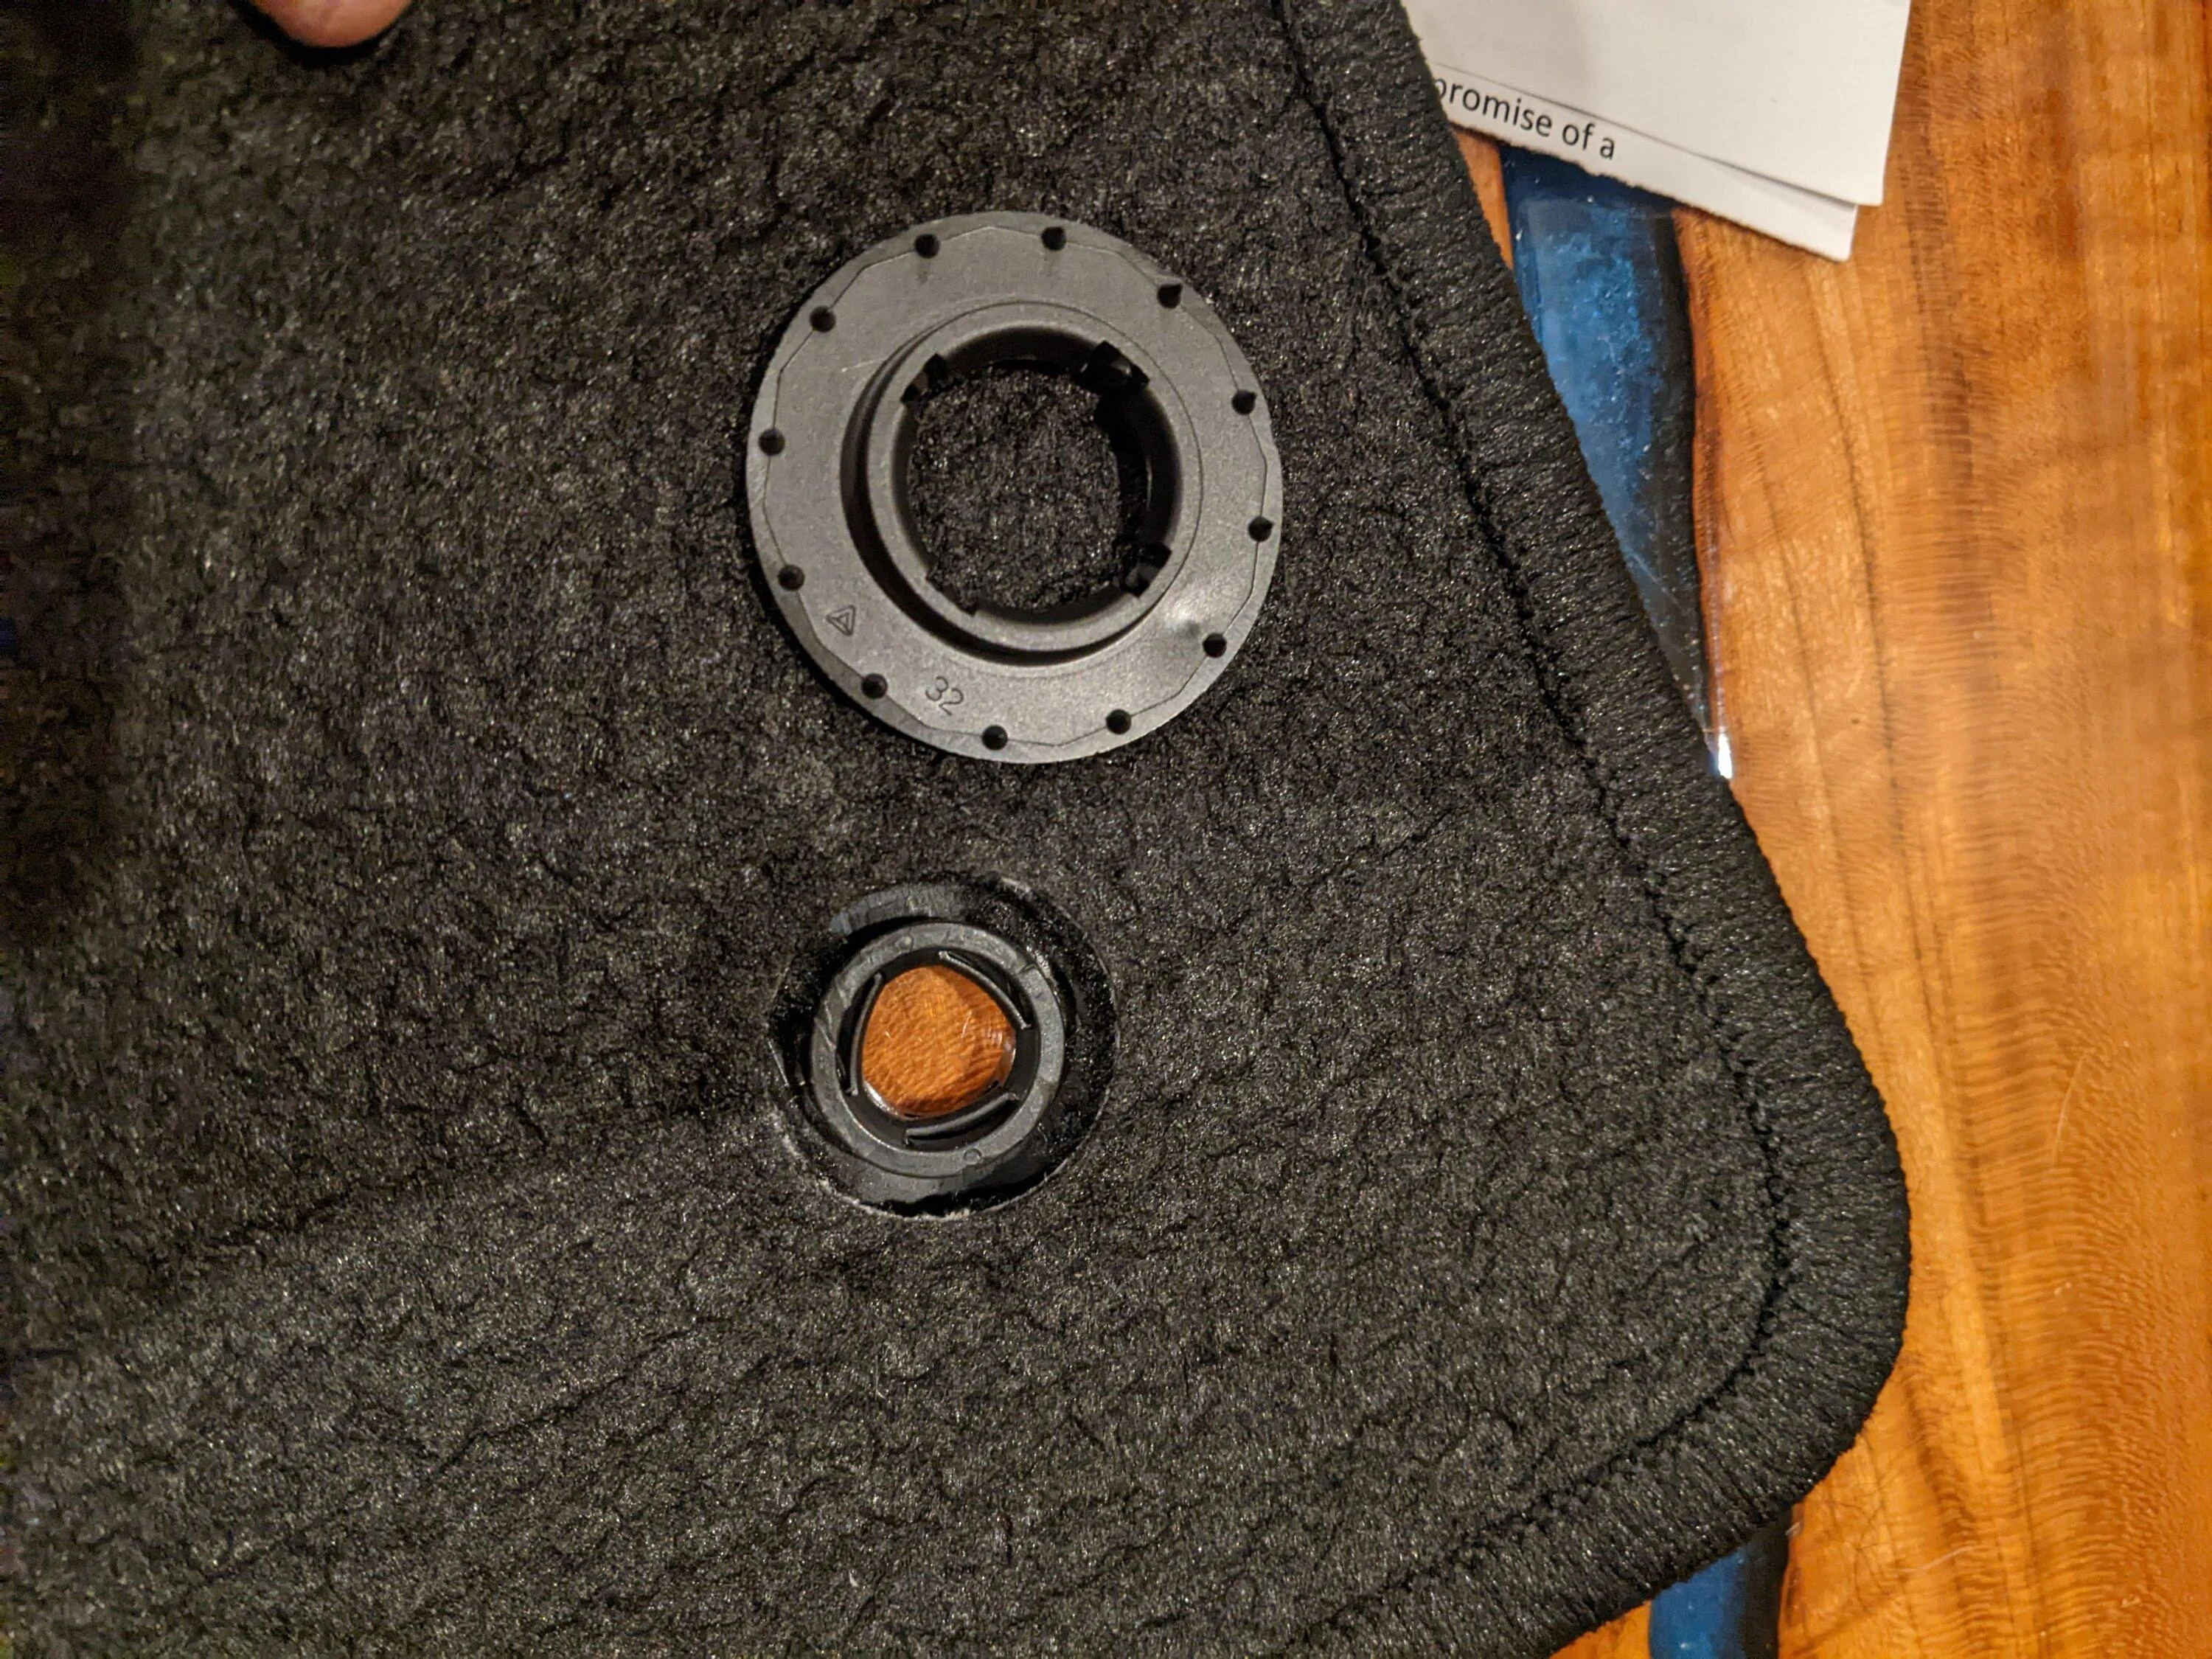
At this point, you have all of the retainers out. The holes in the mats themselves are the same size, so there is no need to cut into your new mats. However, you will notice that the factory mat retainers have little teeth on them that were designed to hold onto the carpet. These teeth will need to be removed before you snap them into the rubber mats.
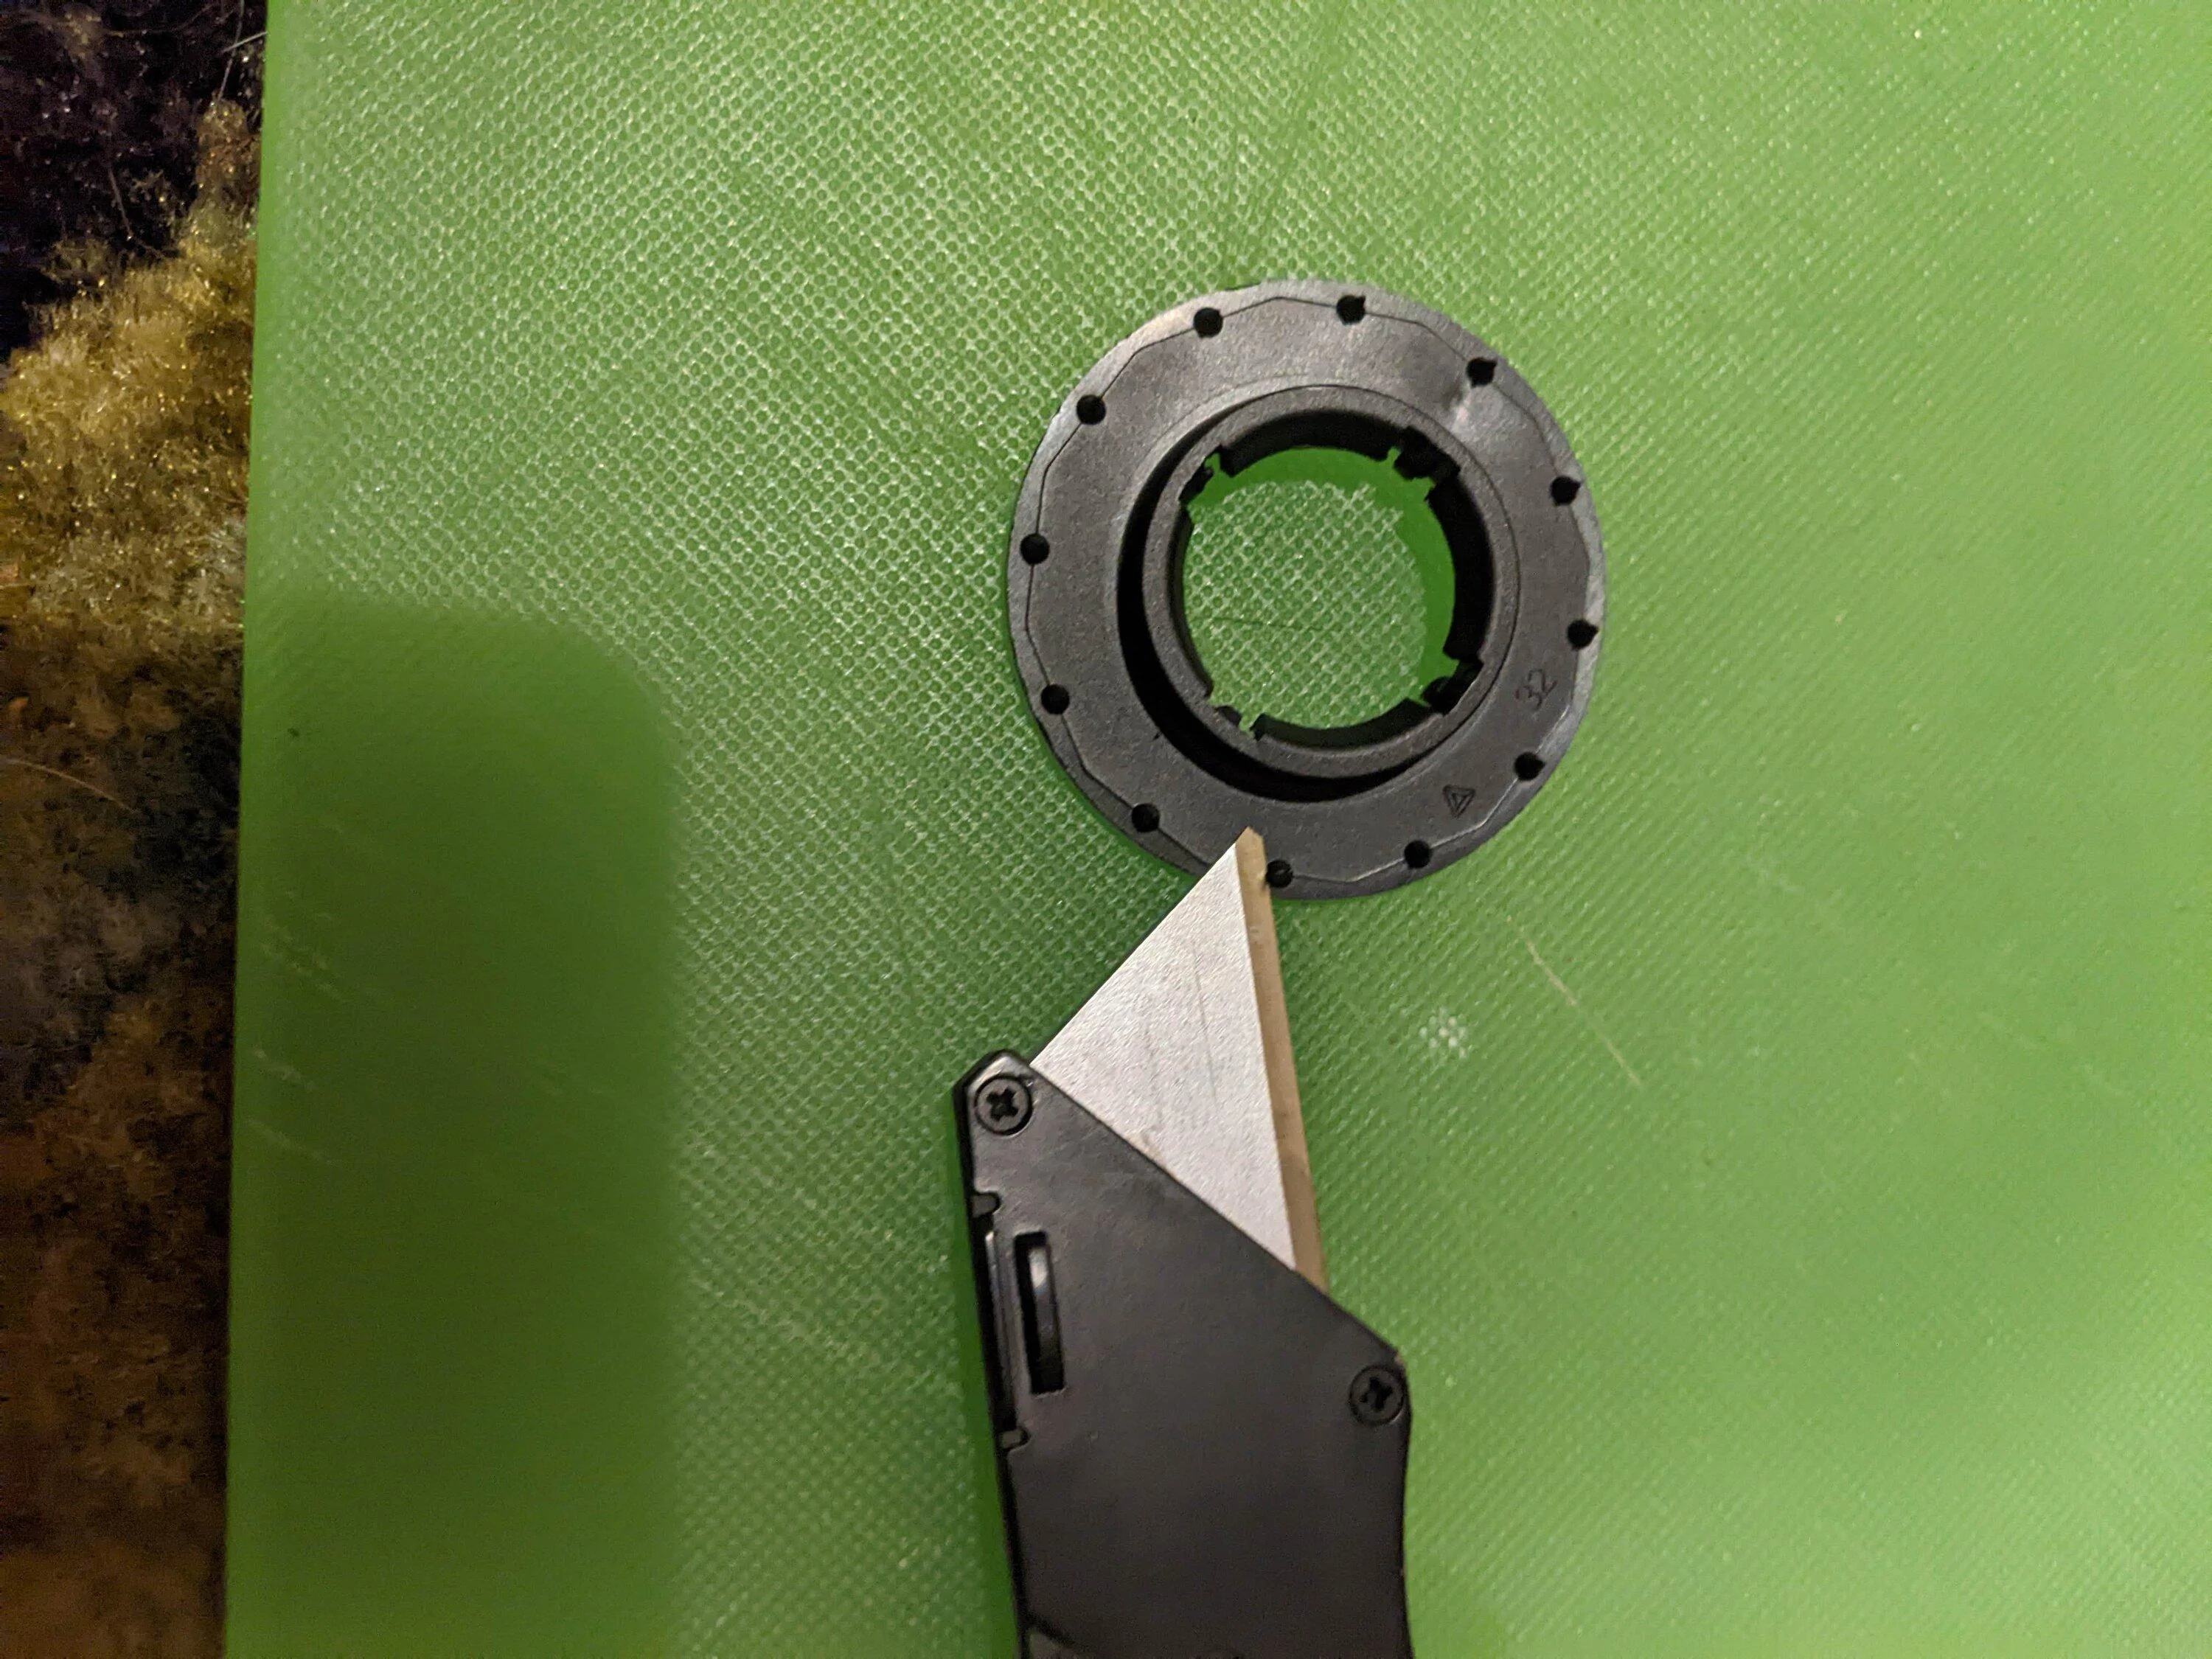
To remove the teeth, carefully slice them off with a razor. It doesn't have to be perfectly flush, just enough to allow the two halves of the retainer to snap together. Once the teeth are removed, place the two halves of the OEM retainer through the hole in your new floor mats and firmly squeeze the two together. Make sure you put them in the right way up! The finished product looks like this:
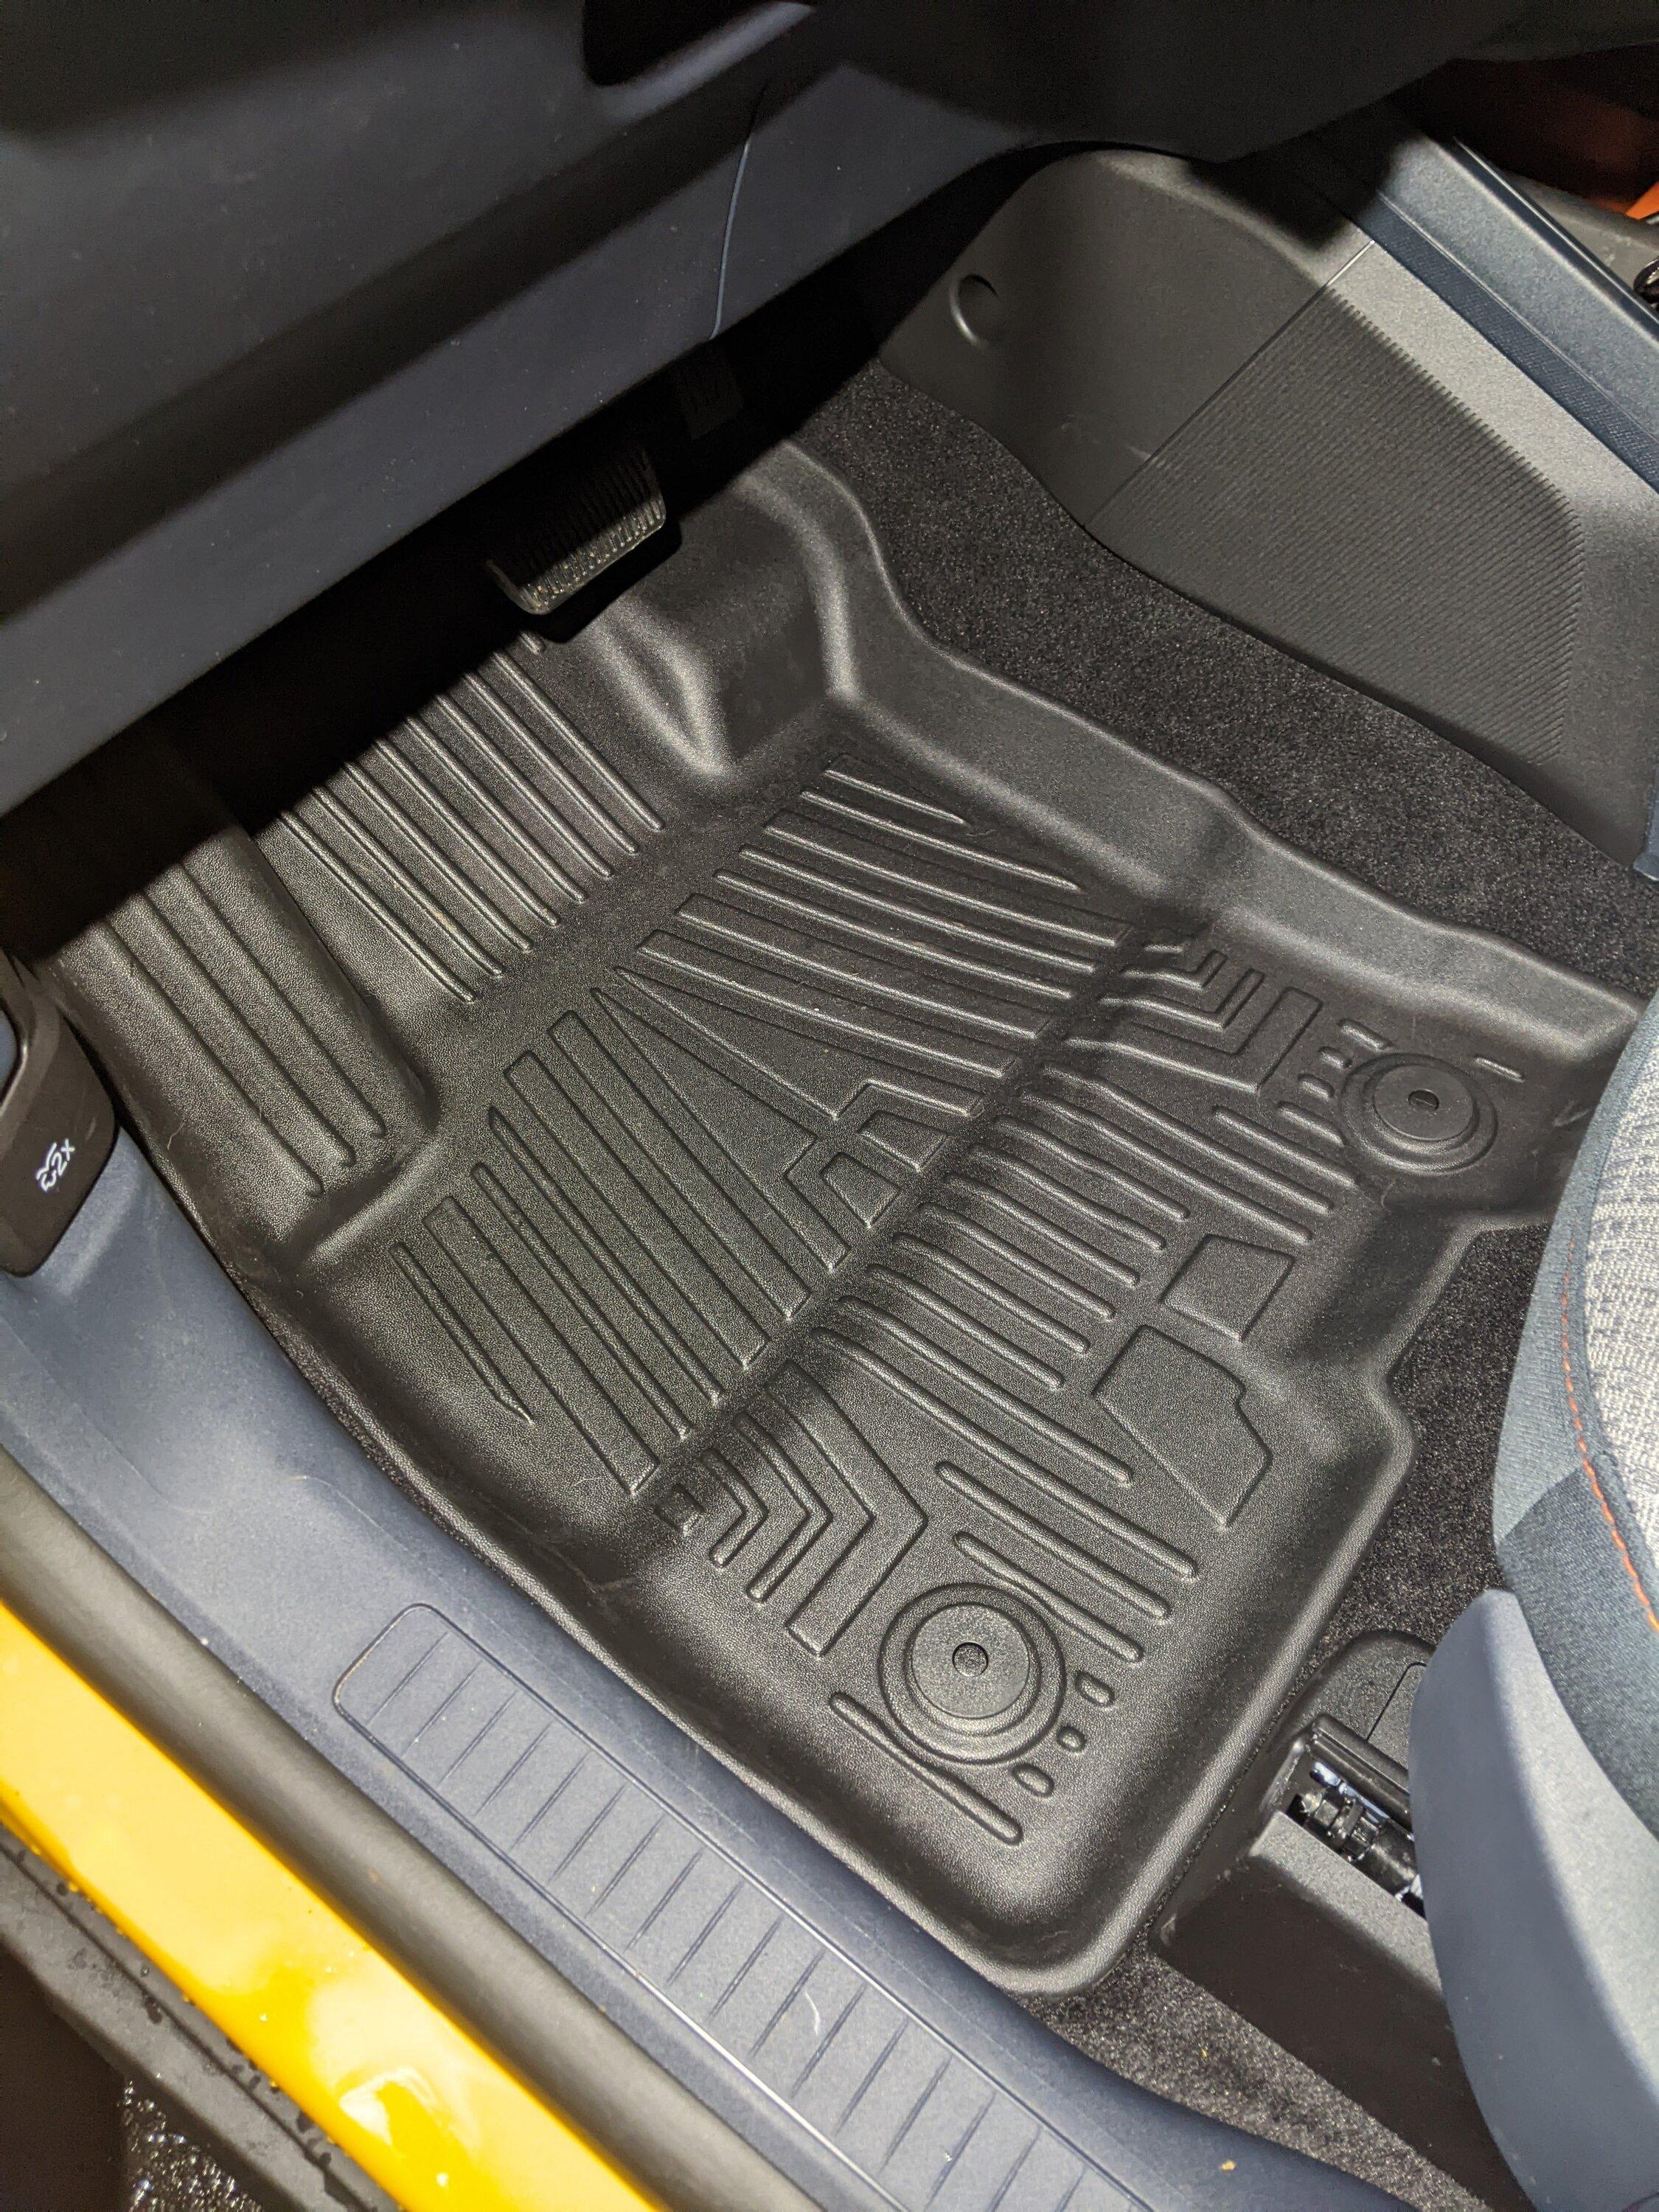
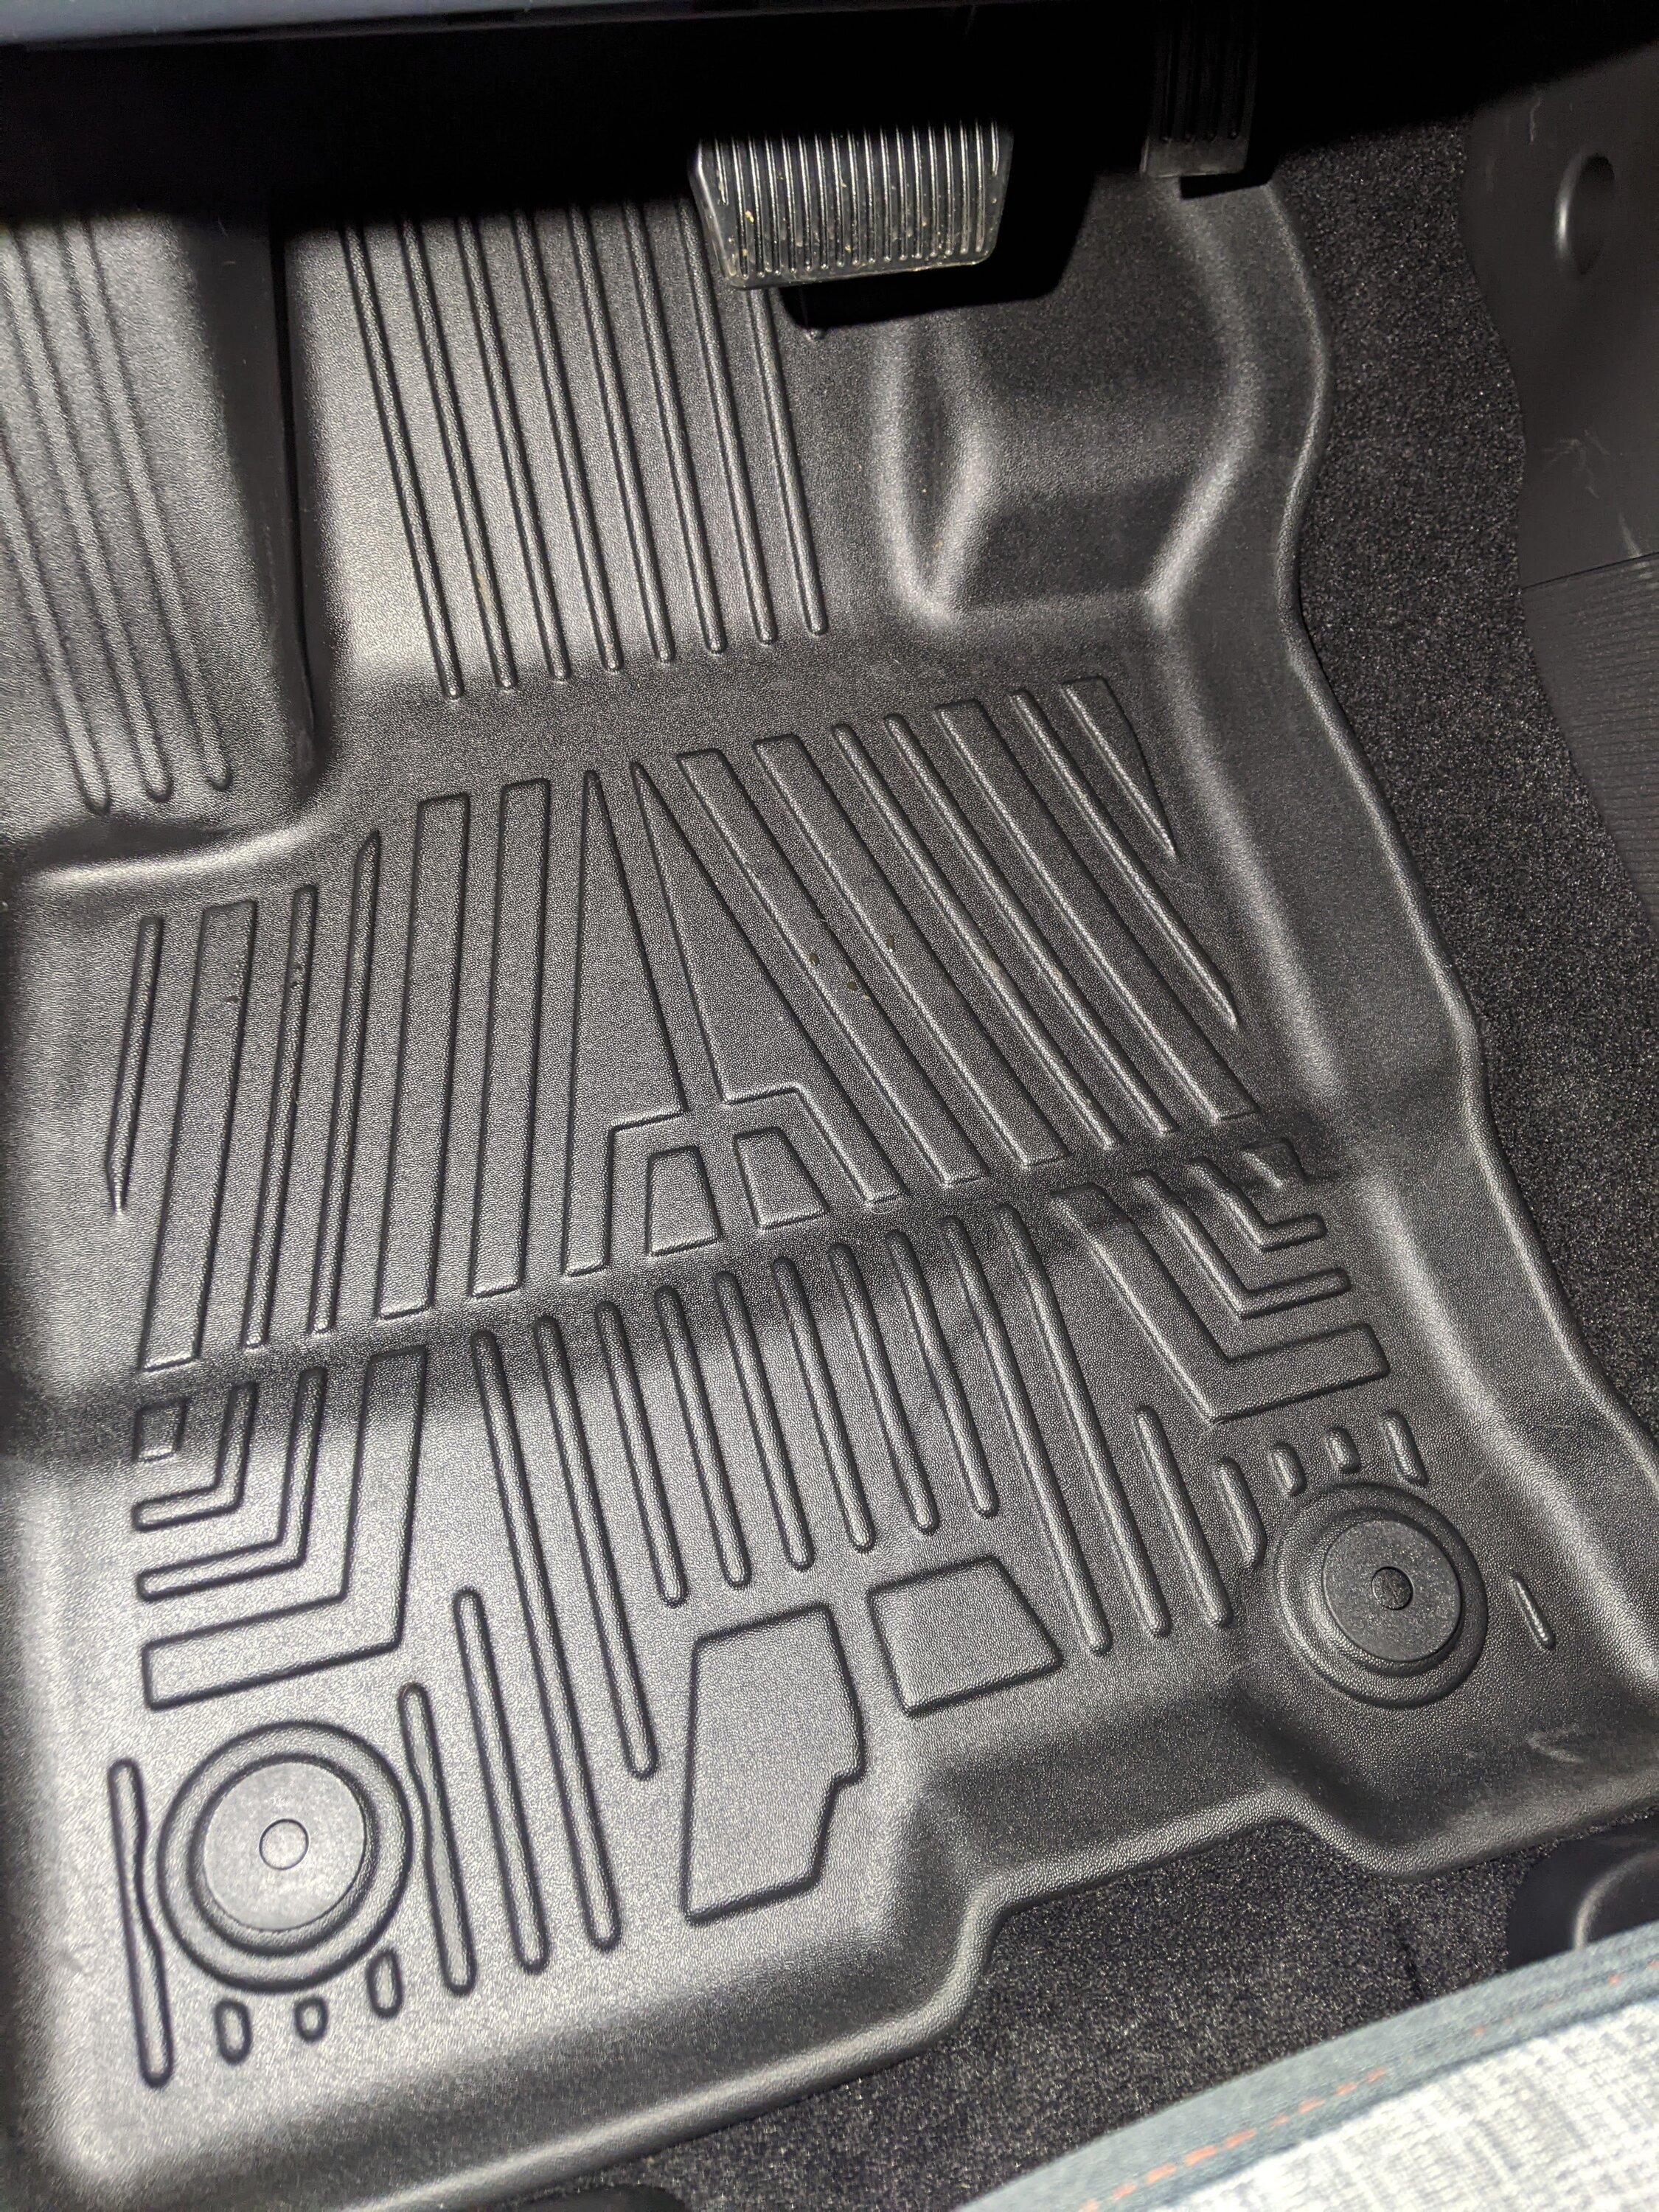
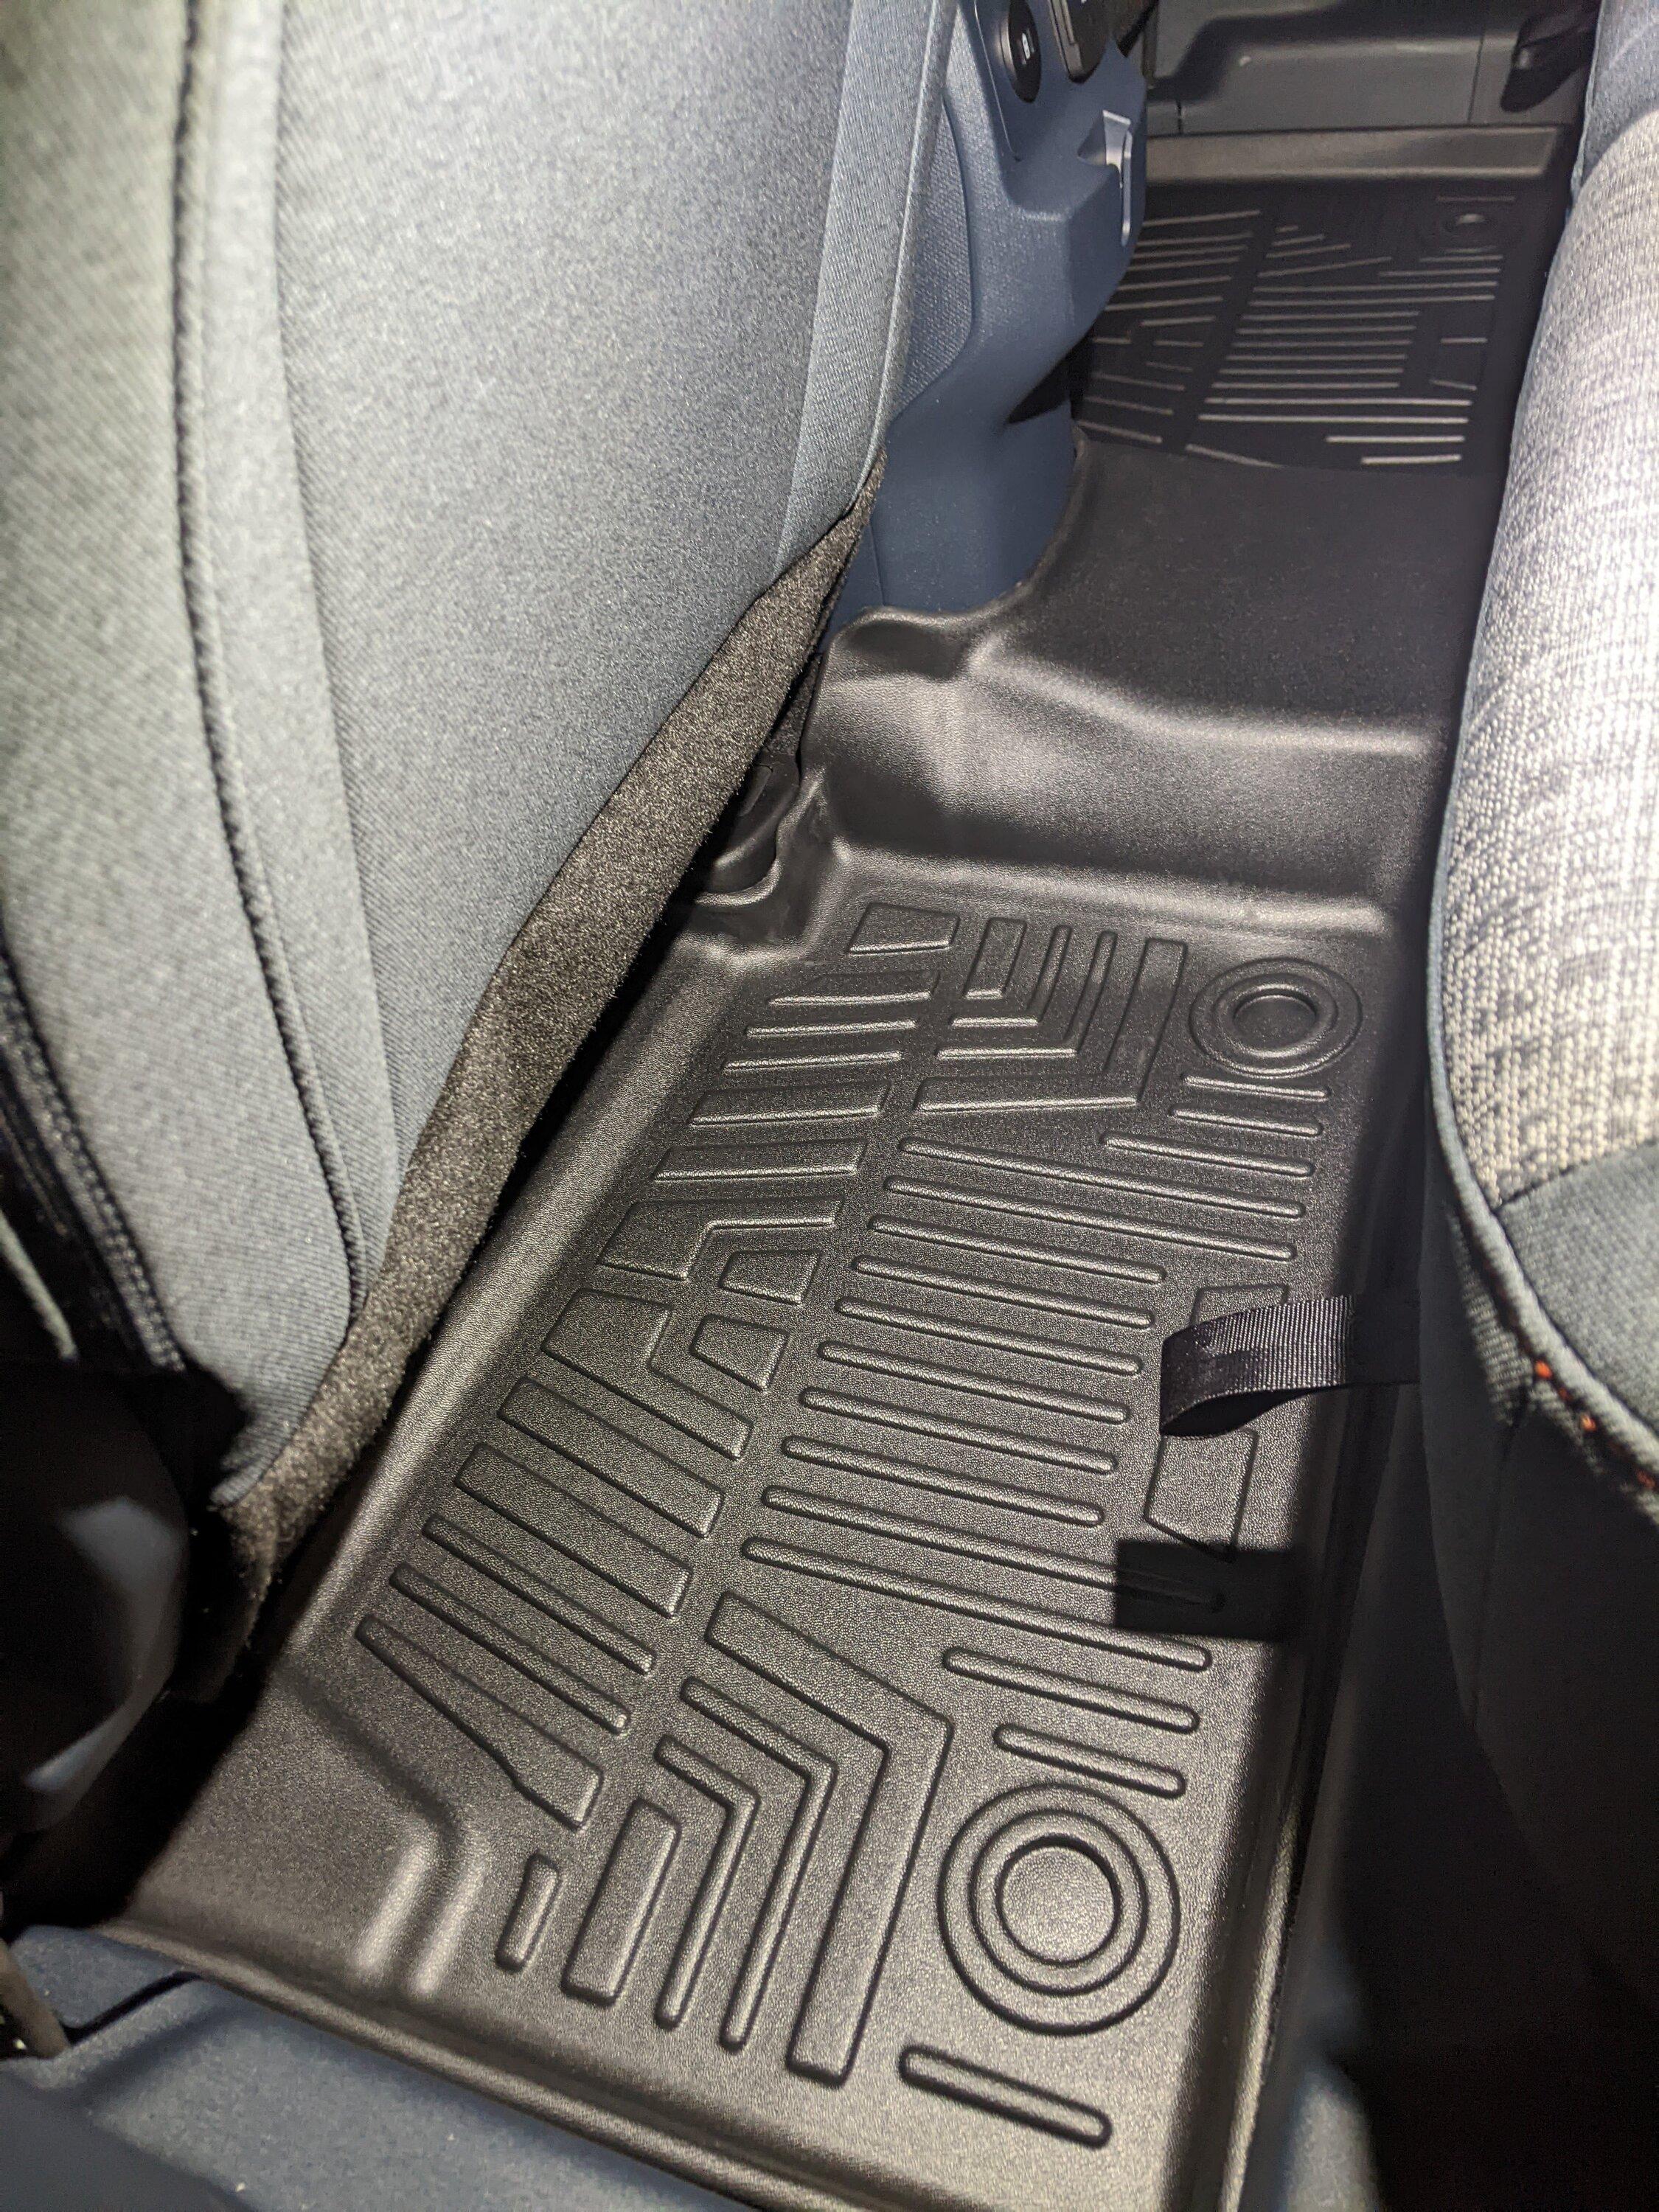
Your new mats will now lock in place just like your original mats and will not slide or get curled up under your pedals! While there are no retainers for the rear mats, I've included a picture just so you can see what they look like. Hope this helps you find some mats you like and save some money!
. One of the first things I wanted to do was order some upgraded floor mats. I only ordered my Mav with the carpeted mats, which upon inspection are very thin. On top of that, there were no mats for the back seats at all. The factory Ford rubber mats are $200, so I decided to do some looking around. I ended up ordering a set of TGBROS rubber mats from Amazon for $105. Here's the link if interested:Amazon - TGBROS Custom Fit for Floor Mats 2022-2023 Ford Maverick (for Hybrid Model)
These mats fit great and while not as flexible as the Ford rubber mats, they aren't as hard/scratchy as WeatherTech floor liners. The only issue was that the snaps for the driver's and passenger's mat were too large to snap onto the factory mounting points. After looking the stock mats next to the new mats, I decided to try and move the stock mat retainers from the factory mats to the aftermarket ones and it worked! Its very easy to do and only takes about 15 minutes! All you will need is a razor blade or box cutter and 1 or 2 small flathead screwdrivers. Some might also find a small pick useful.
The driver's side mat has two retainers and the passenger's side only has one, so in all you will have to remove 6 retainers (3 from your OEM mats, 3 from your new mats). As you can see, these mats cover a lot more of the floor than the OEM carpeted mats. In both cases, the mat retainers are made of two pieces that snap through the mat itself.
Starting with the OEM mats, flip the mat over and look at the bottom of the retainer. You will see four posts on the inside of the outer ring. Using a screwdriver or a pick, pry between this post and the inner ring. The Ford retainers snap together very tight, so you may have to work at it. Using two screwdrivers and going from opposite angles may help you.
Once loose, you will be able to separate the upper and lower part of the retainer.
The retainers in the aftermarket mats are much easier to remove. You will see the four clips that hold the retainer together. Insert the screwdriver between the clip and the inner ring. You can also insert another screwdriver between the mat and the retainer to pry up and pop the pieces apart.
At this point, you have all of the retainers out. The holes in the mats themselves are the same size, so there is no need to cut into your new mats. However, you will notice that the factory mat retainers have little teeth on them that were designed to hold onto the carpet. These teeth will need to be removed before you snap them into the rubber mats.
To remove the teeth, carefully slice them off with a razor. It doesn't have to be perfectly flush, just enough to allow the two halves of the retainer to snap together. Once the teeth are removed, place the two halves of the OEM retainer through the hole in your new floor mats and firmly squeeze the two together. Make sure you put them in the right way up! The finished product looks like this:
Your new mats will now lock in place just like your original mats and will not slide or get curled up under your pedals! While there are no retainers for the rear mats, I've included a picture just so you can see what they look like. Hope this helps you find some mats you like and save some money!
Sponsored

