- First Name
- Bob
- Joined
- Feb 19, 2025
- Threads
- 9
- Messages
- 105
- Reaction score
- 160
- Location
- Chilliwack BC Canada
- Vehicle(s)
- 2018 Nissan Leaf, 2018 Toyota Rav4, 2025 Maverick Lariat AWD
- Engine
- 2.5L Hybrid
- Thread starter
- #1
I am preparing for my trip across Canada starting sometime in the second week of June.
I will have a Roof Top Tent for accommodation and a 12 volt fridge, EcoFlow PowerStation.
I plan to do most of my cooking electrically as I will be travelling during the Fire Season for
most of the trip. The 400 watt plug is just not enough so the PowerStation will make things
much easier.
I was trying to post the photos individually so I could say what each was, but I seam to have
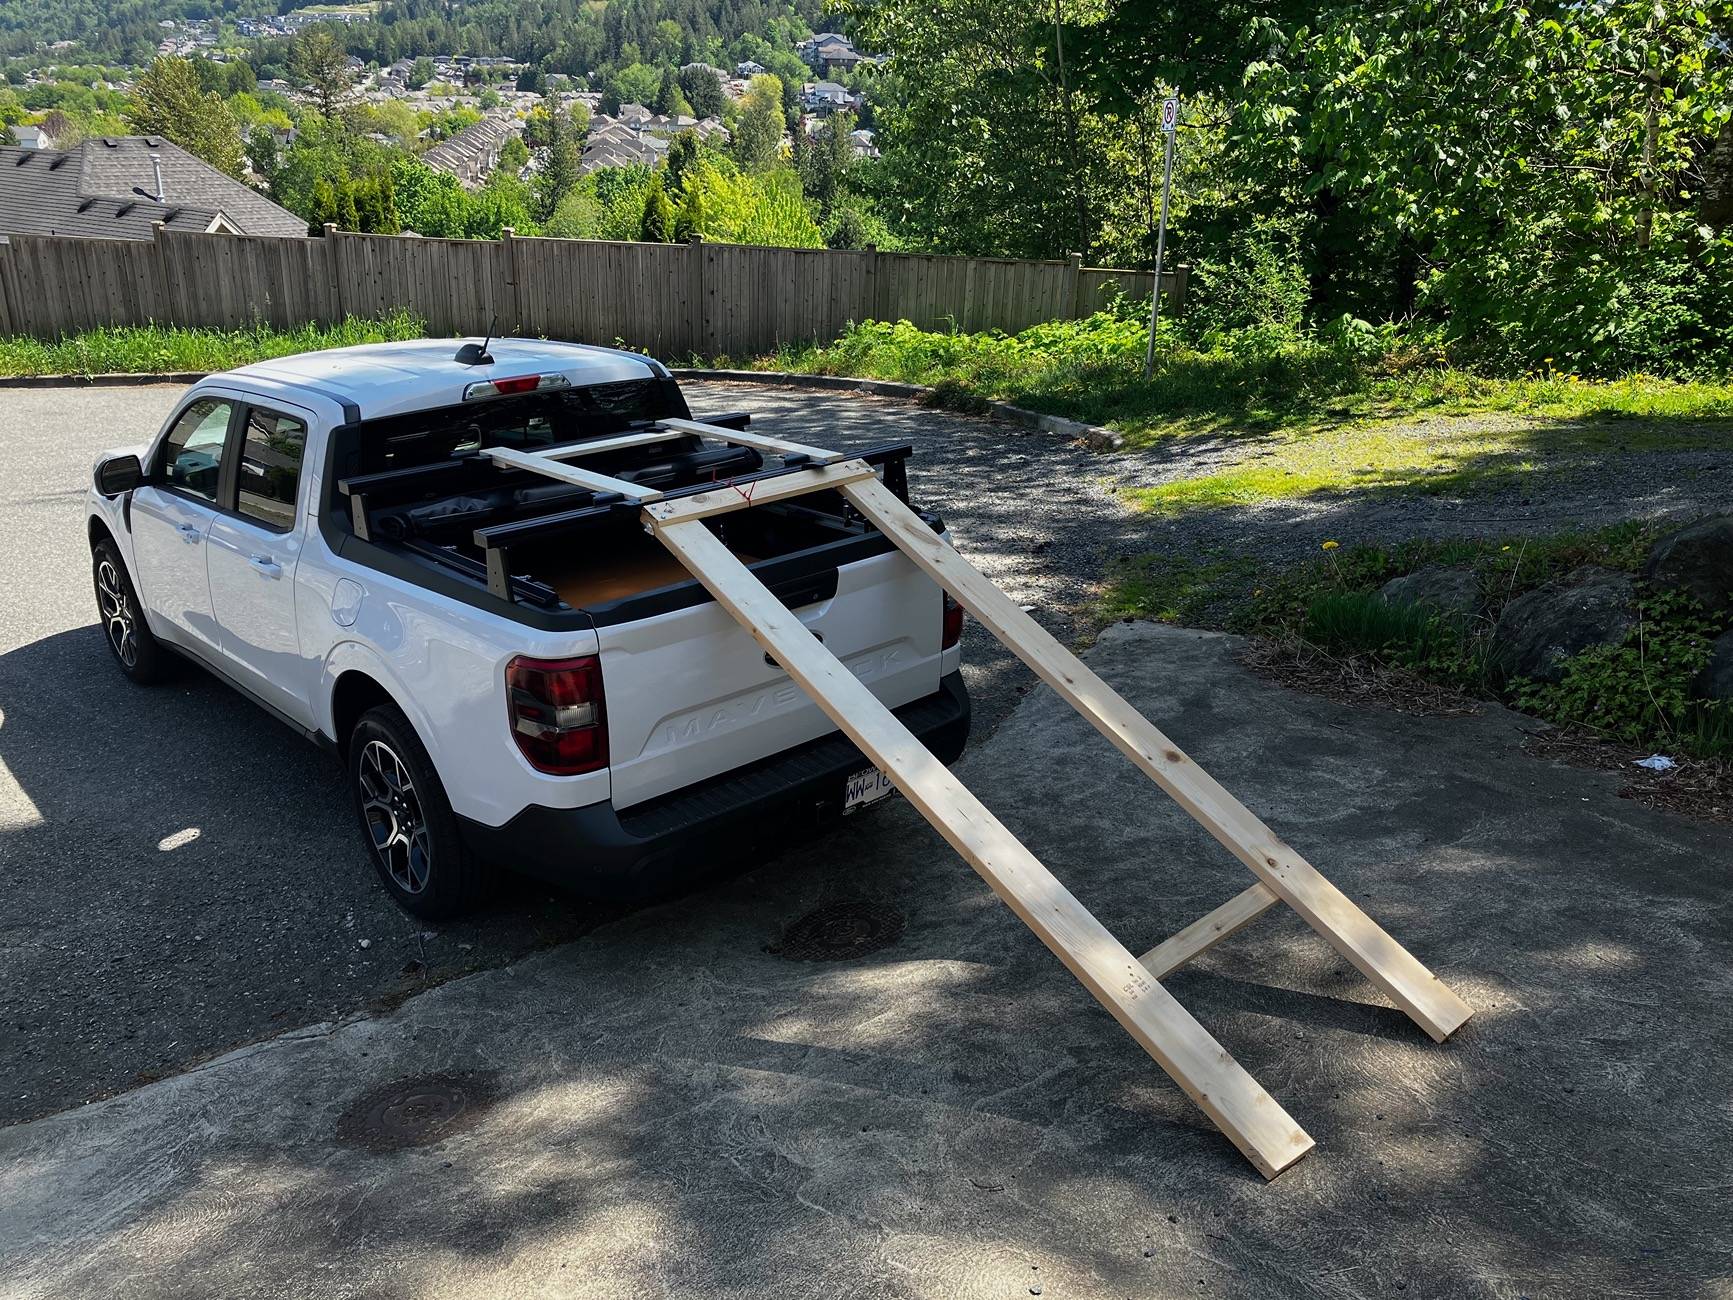
missed that lesson. So I will explain them here. The first three images are the rack I built to be
able to get this on the truck by myself.
The first image shows the rack with the ramps I made. The piece on the rack itself has two purposes,
It protects the rack while sliding the tent onto the Bed Rack, and it raises it to be even with the hold
down attachment points.
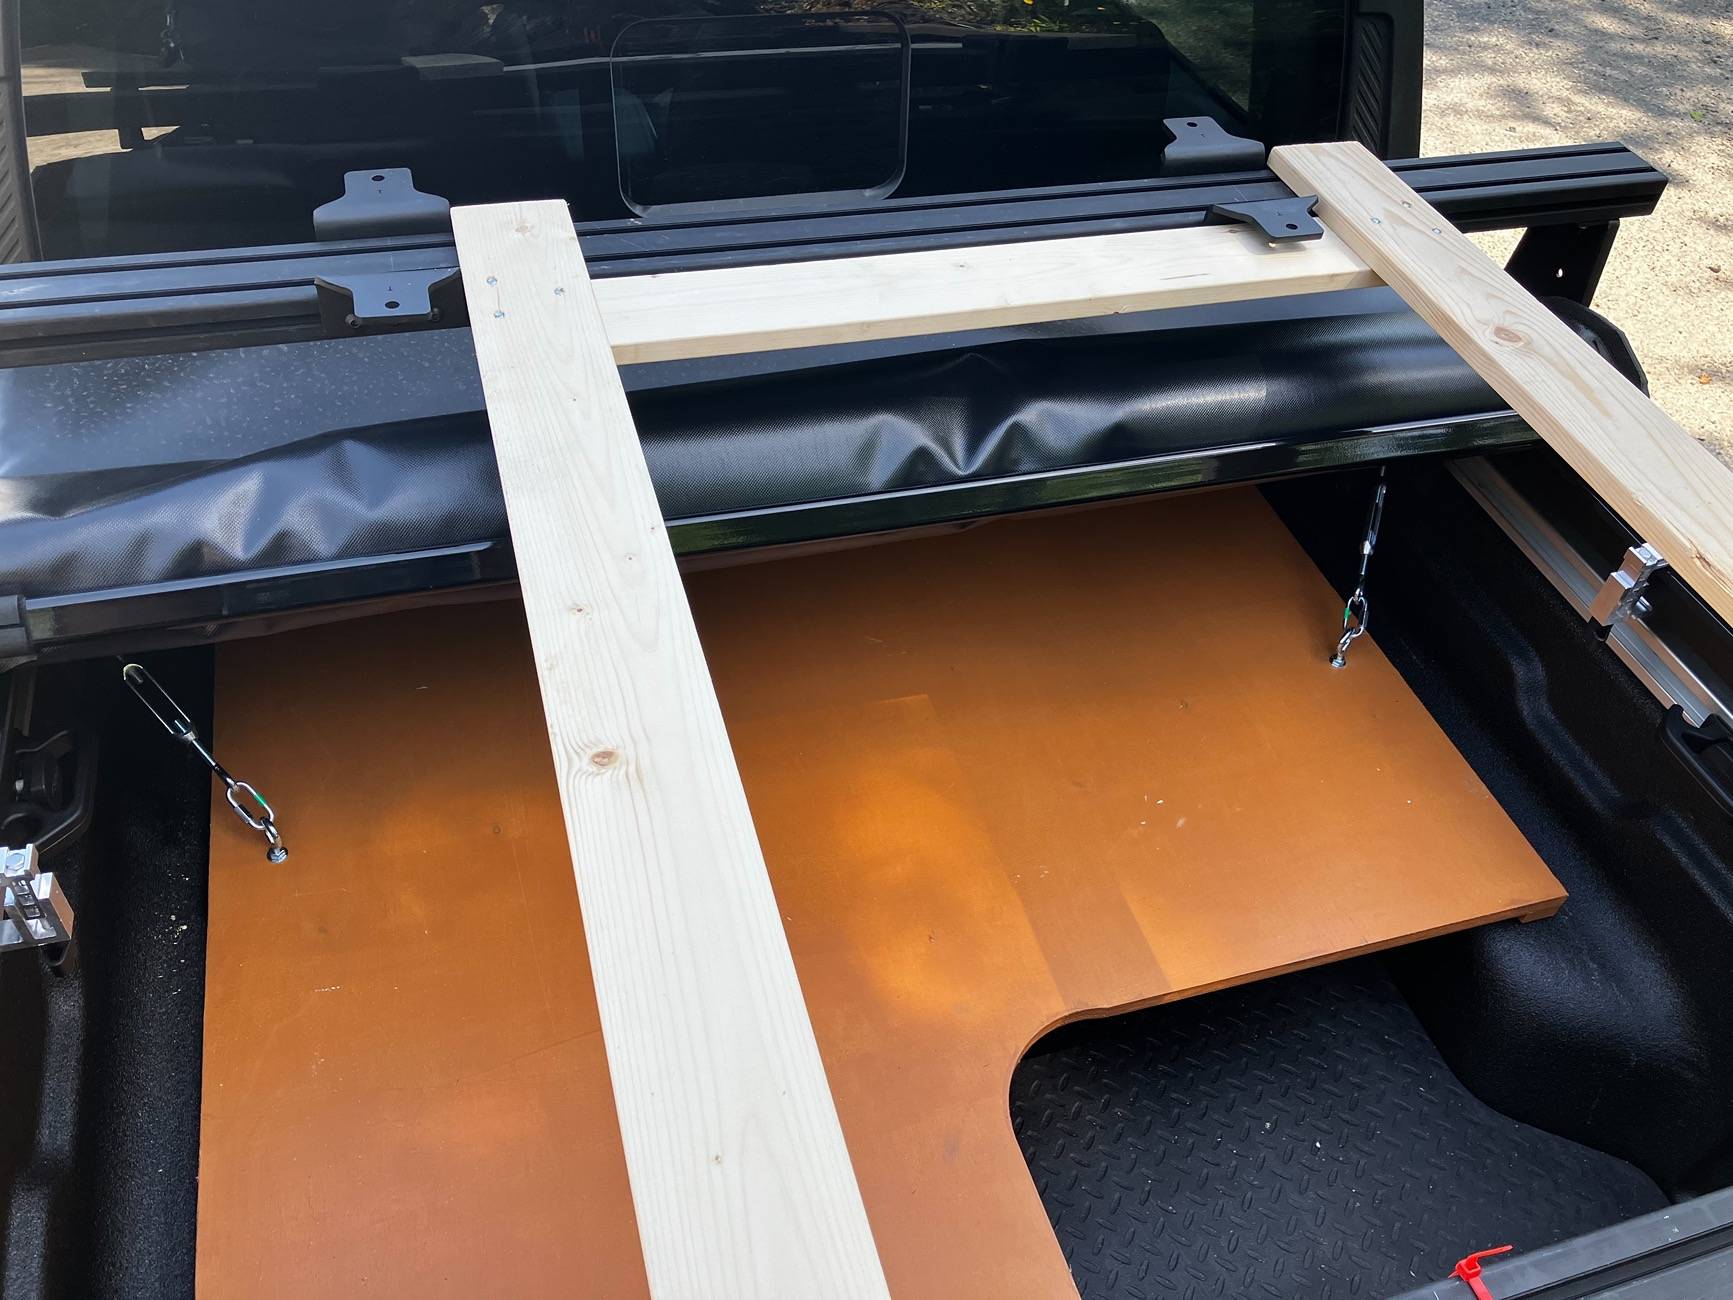
The second image shows a close up of this piece.
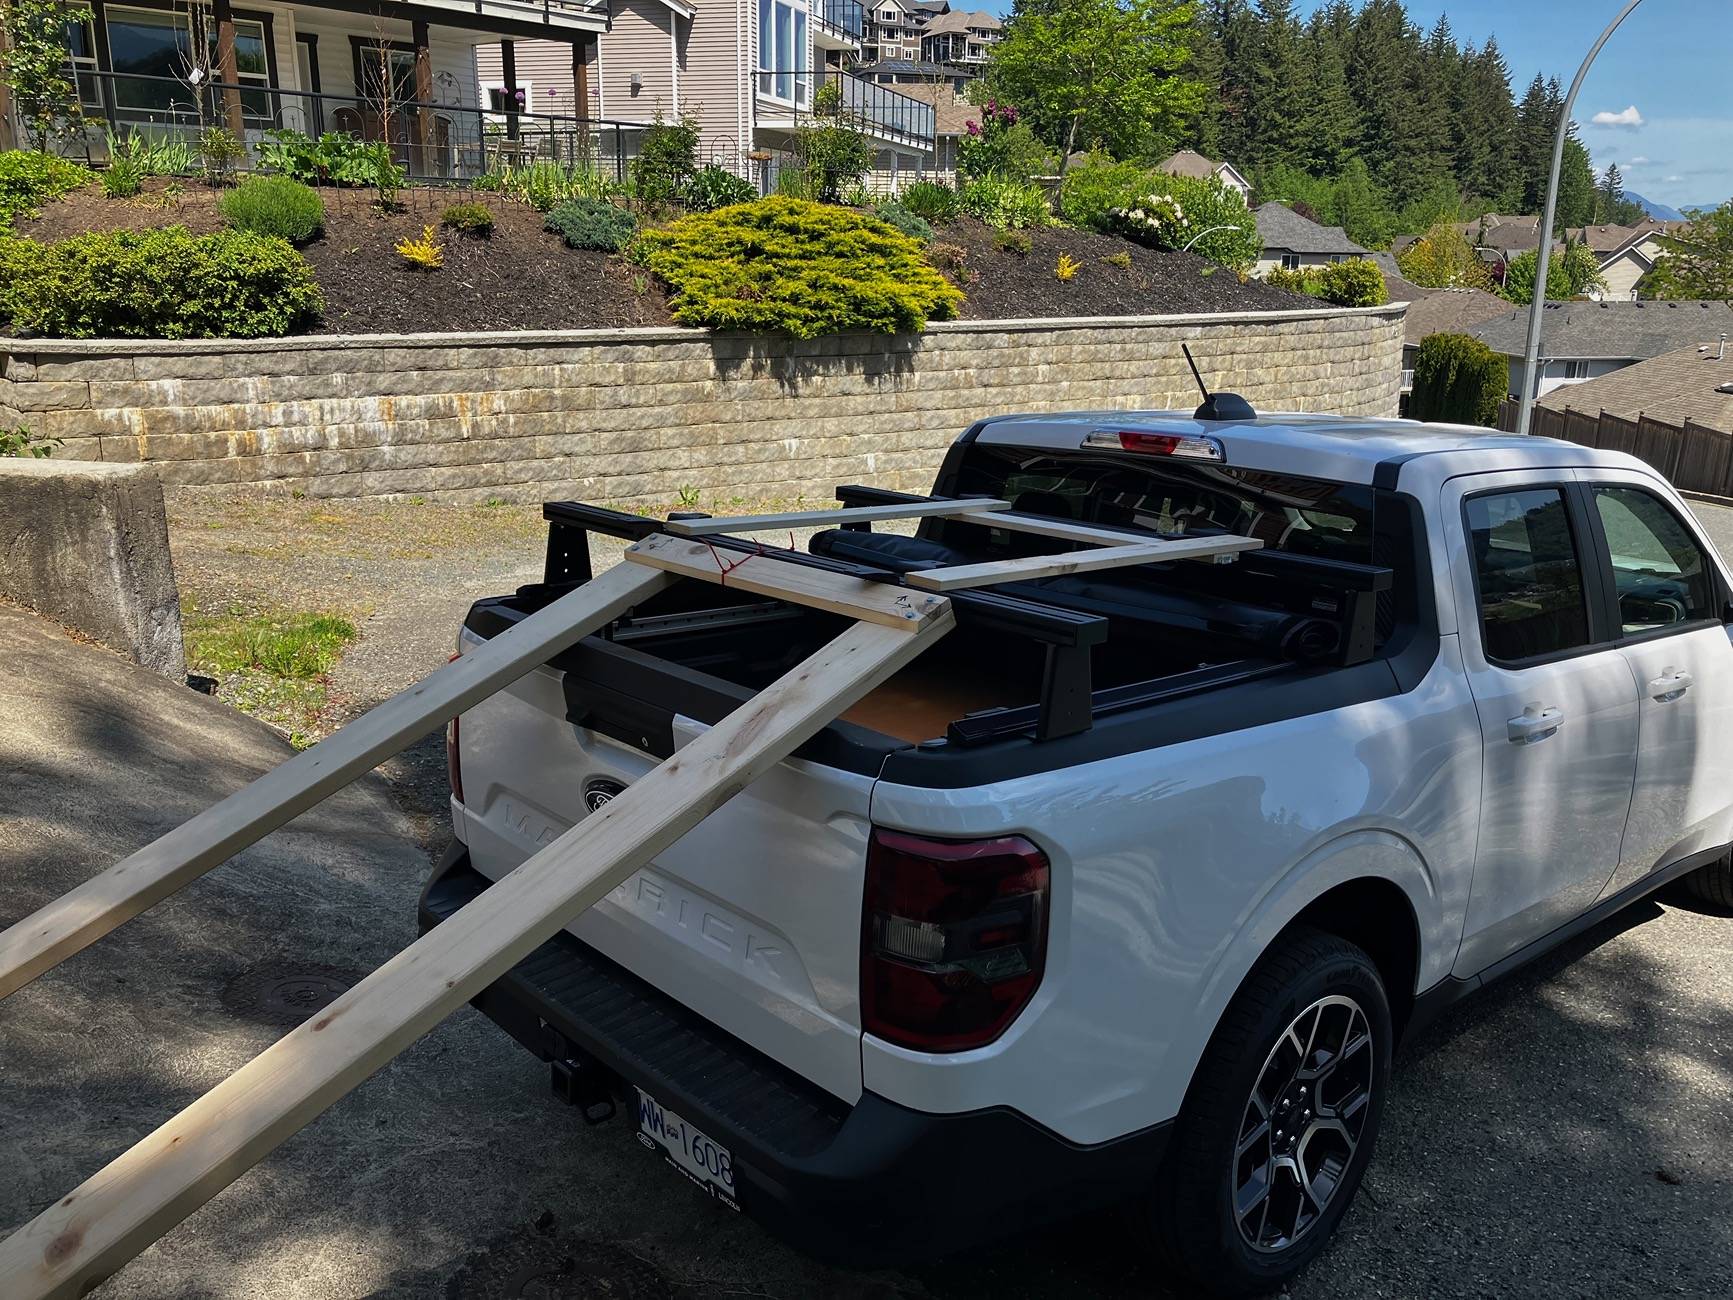
The third shows the ramps in place using the slope of my driveway to reduce the angle. I used paste
wax on the boards to reduce friction and it worked quite well. The one thing I learned was that I should
install the RTT before I install the two level bed loading as I had to get into the bed to lift the tent over the
rear bar and up on the rack.
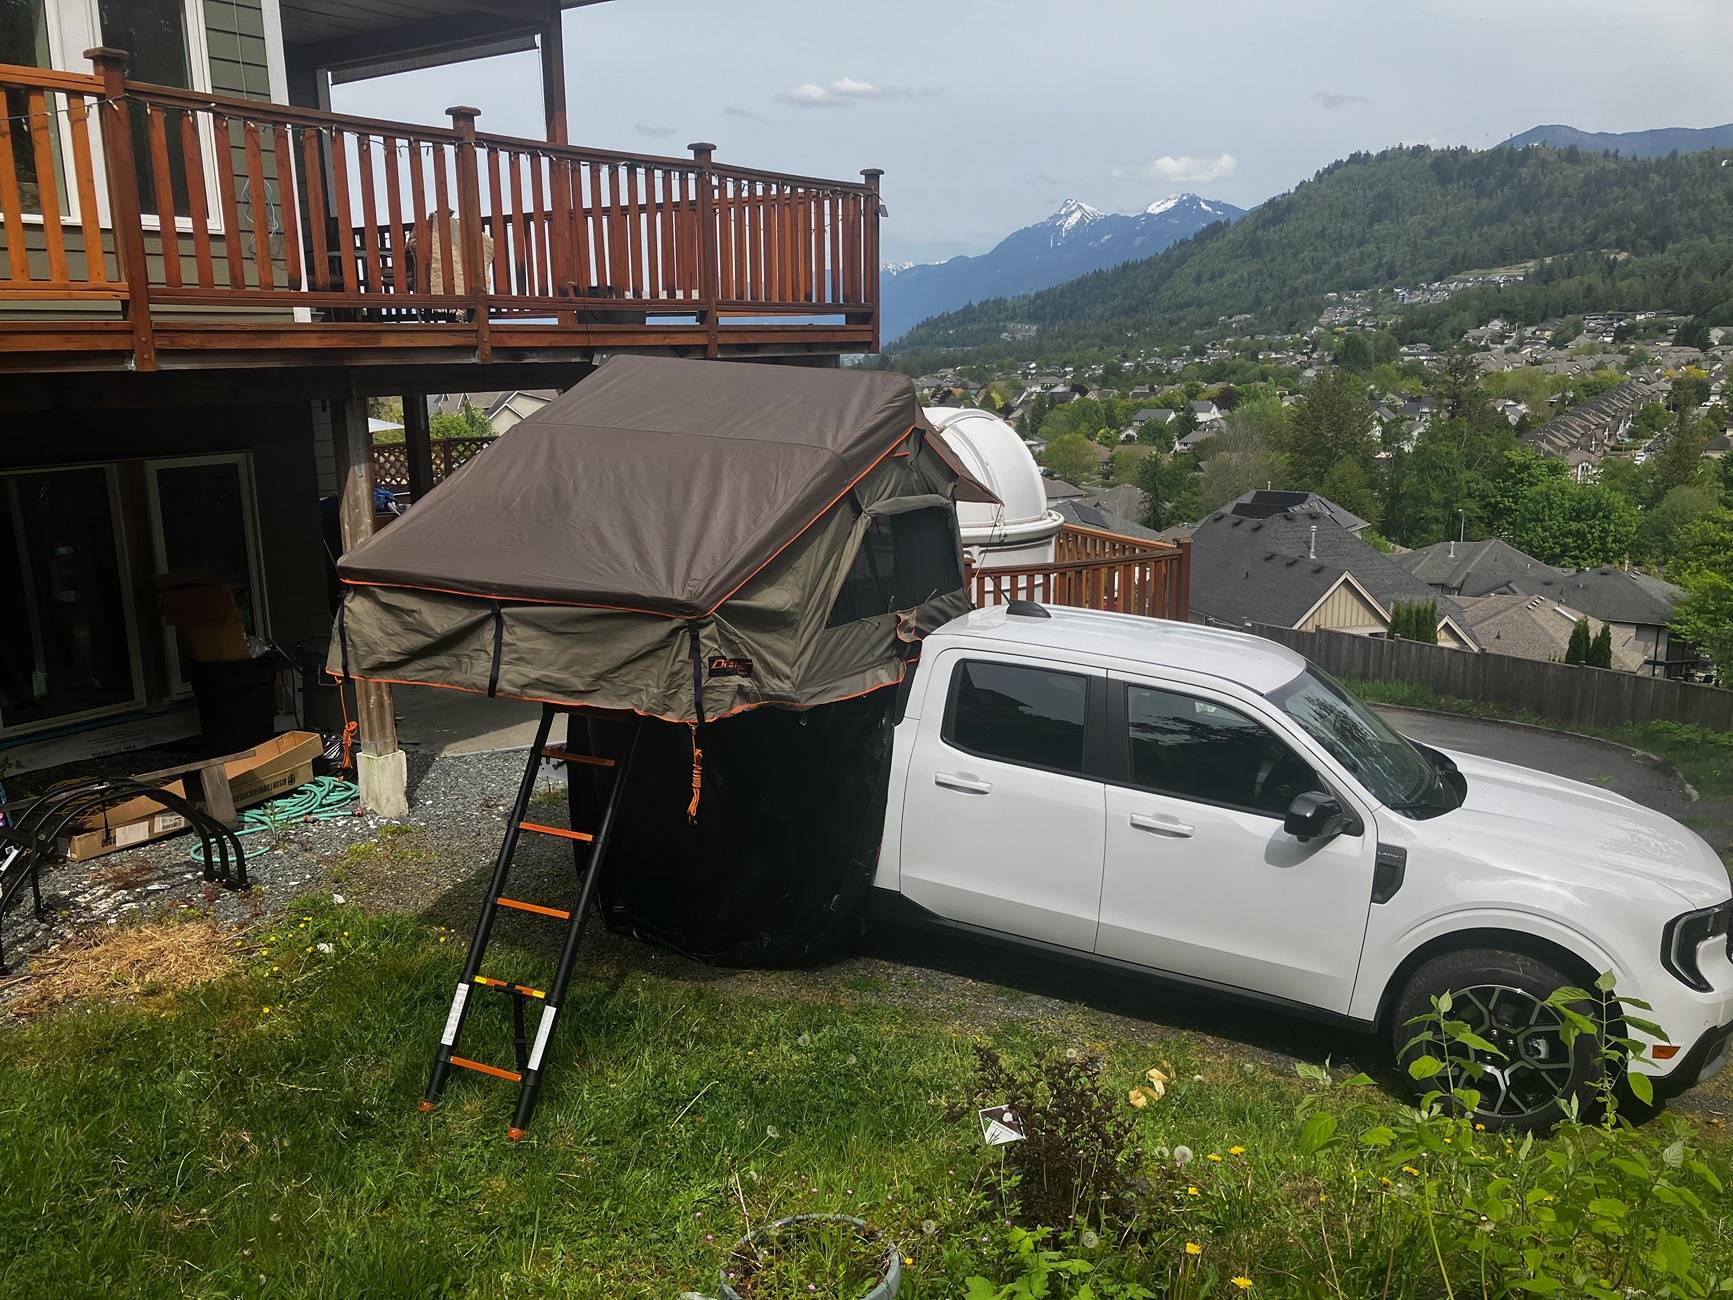
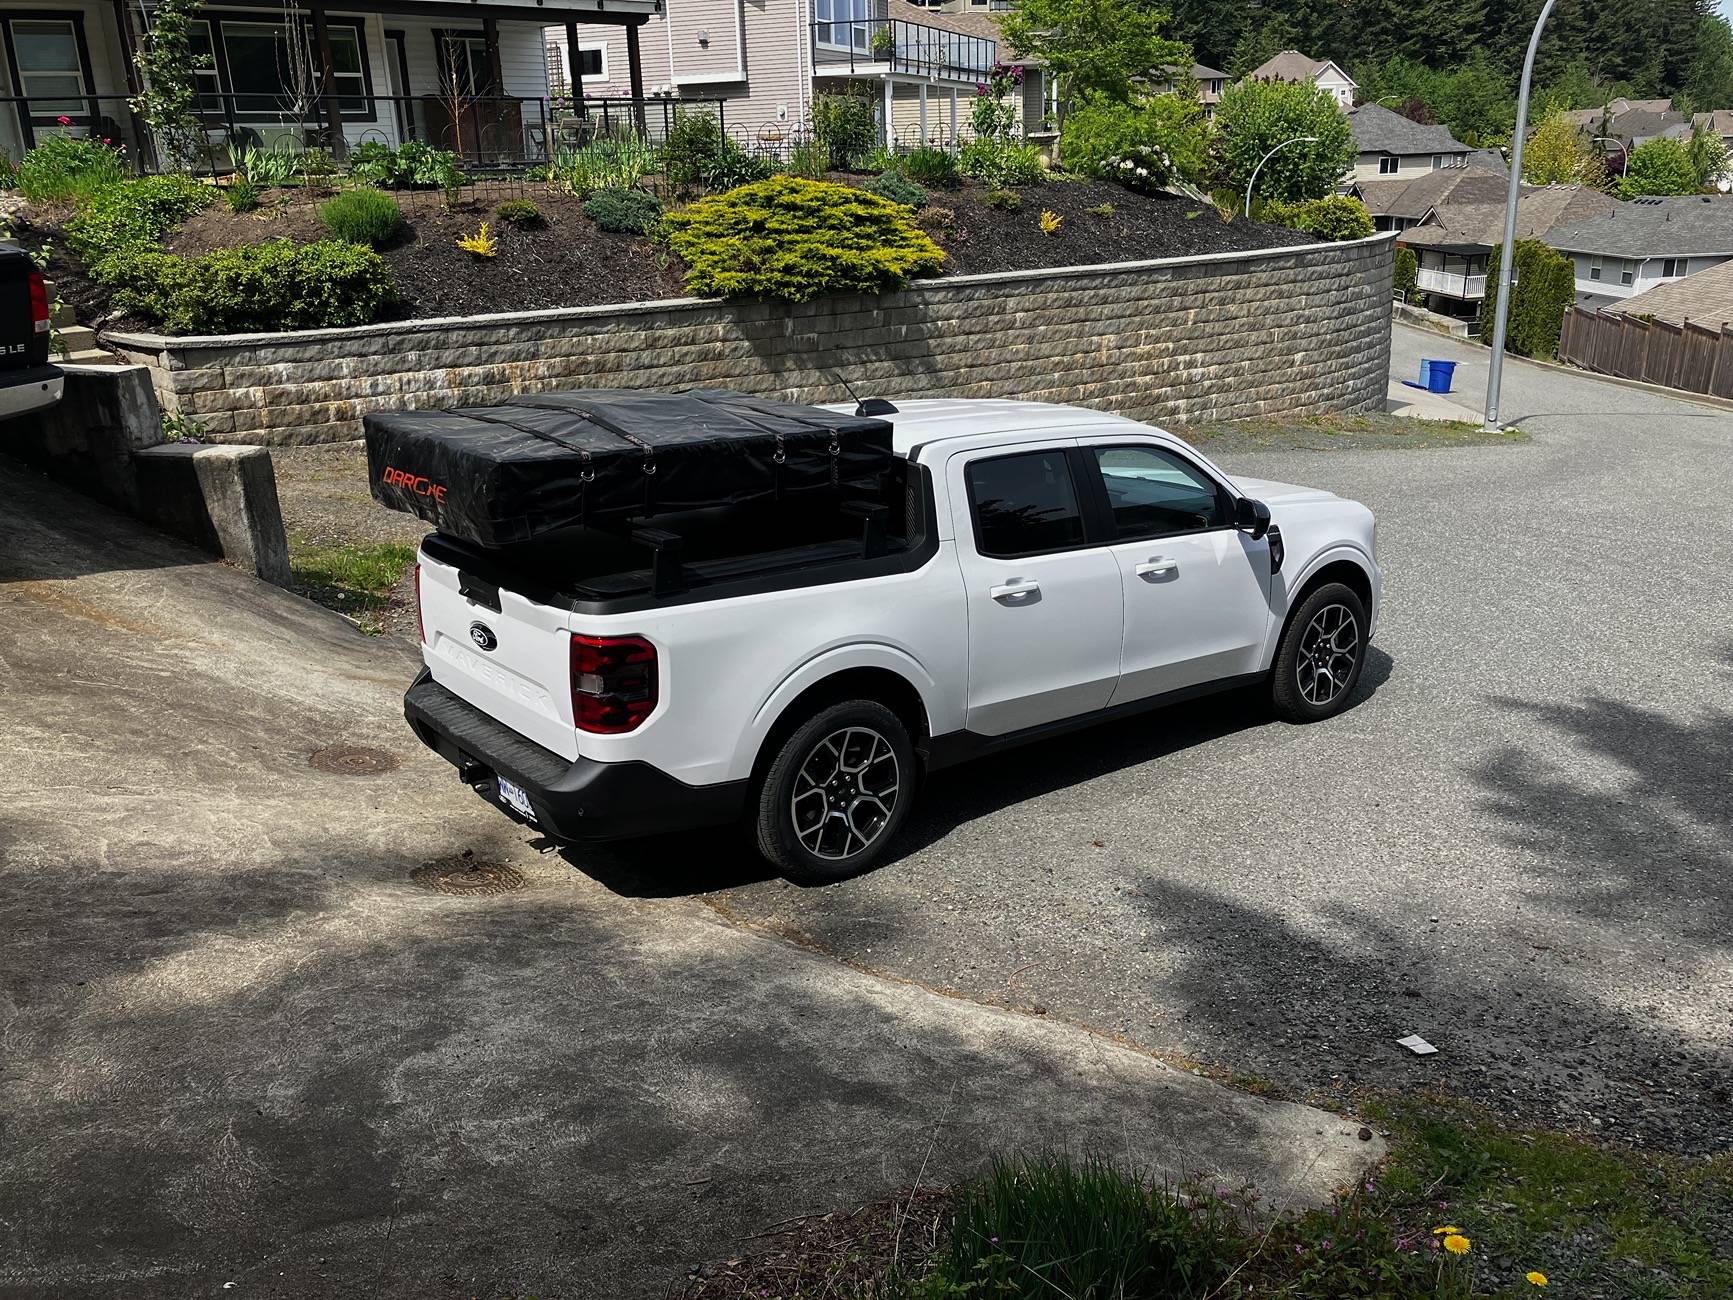
The other images are of the RTT on the truck in travel mode and opened up. Have not driven it yet on
the road, that will happen today or tomorrow.
BP
I will have a Roof Top Tent for accommodation and a 12 volt fridge, EcoFlow PowerStation.
I plan to do most of my cooking electrically as I will be travelling during the Fire Season for
most of the trip. The 400 watt plug is just not enough so the PowerStation will make things
much easier.
I was trying to post the photos individually so I could say what each was, but I seam to have
missed that lesson. So I will explain them here. The first three images are the rack I built to be
able to get this on the truck by myself.
The first image shows the rack with the ramps I made. The piece on the rack itself has two purposes,
It protects the rack while sliding the tent onto the Bed Rack, and it raises it to be even with the hold
down attachment points.
The second image shows a close up of this piece.
The third shows the ramps in place using the slope of my driveway to reduce the angle. I used paste
wax on the boards to reduce friction and it worked quite well. The one thing I learned was that I should
install the RTT before I install the two level bed loading as I had to get into the bed to lift the tent over the
rear bar and up on the rack.
The other images are of the RTT on the truck in travel mode and opened up. Have not driven it yet on
the road, that will happen today or tomorrow.
BP
Sponsored