
- First Name
- Don
- Joined
- Oct 8, 2021
- Threads
- 7
- Messages
- 66
- Reaction score
- 58
- Location
- Naples, FL
- Vehicle(s)
- 2018 F150 5.0L V8 STX / 2015 Explorer XLT 3.5L V6
- Engine
- 2.5L Hybrid
- Thread starter
- #1
I installed the SiriusXM Commander Touch.
This was almost toolless. I just needed a wire crimper for the Fusebox Taps.
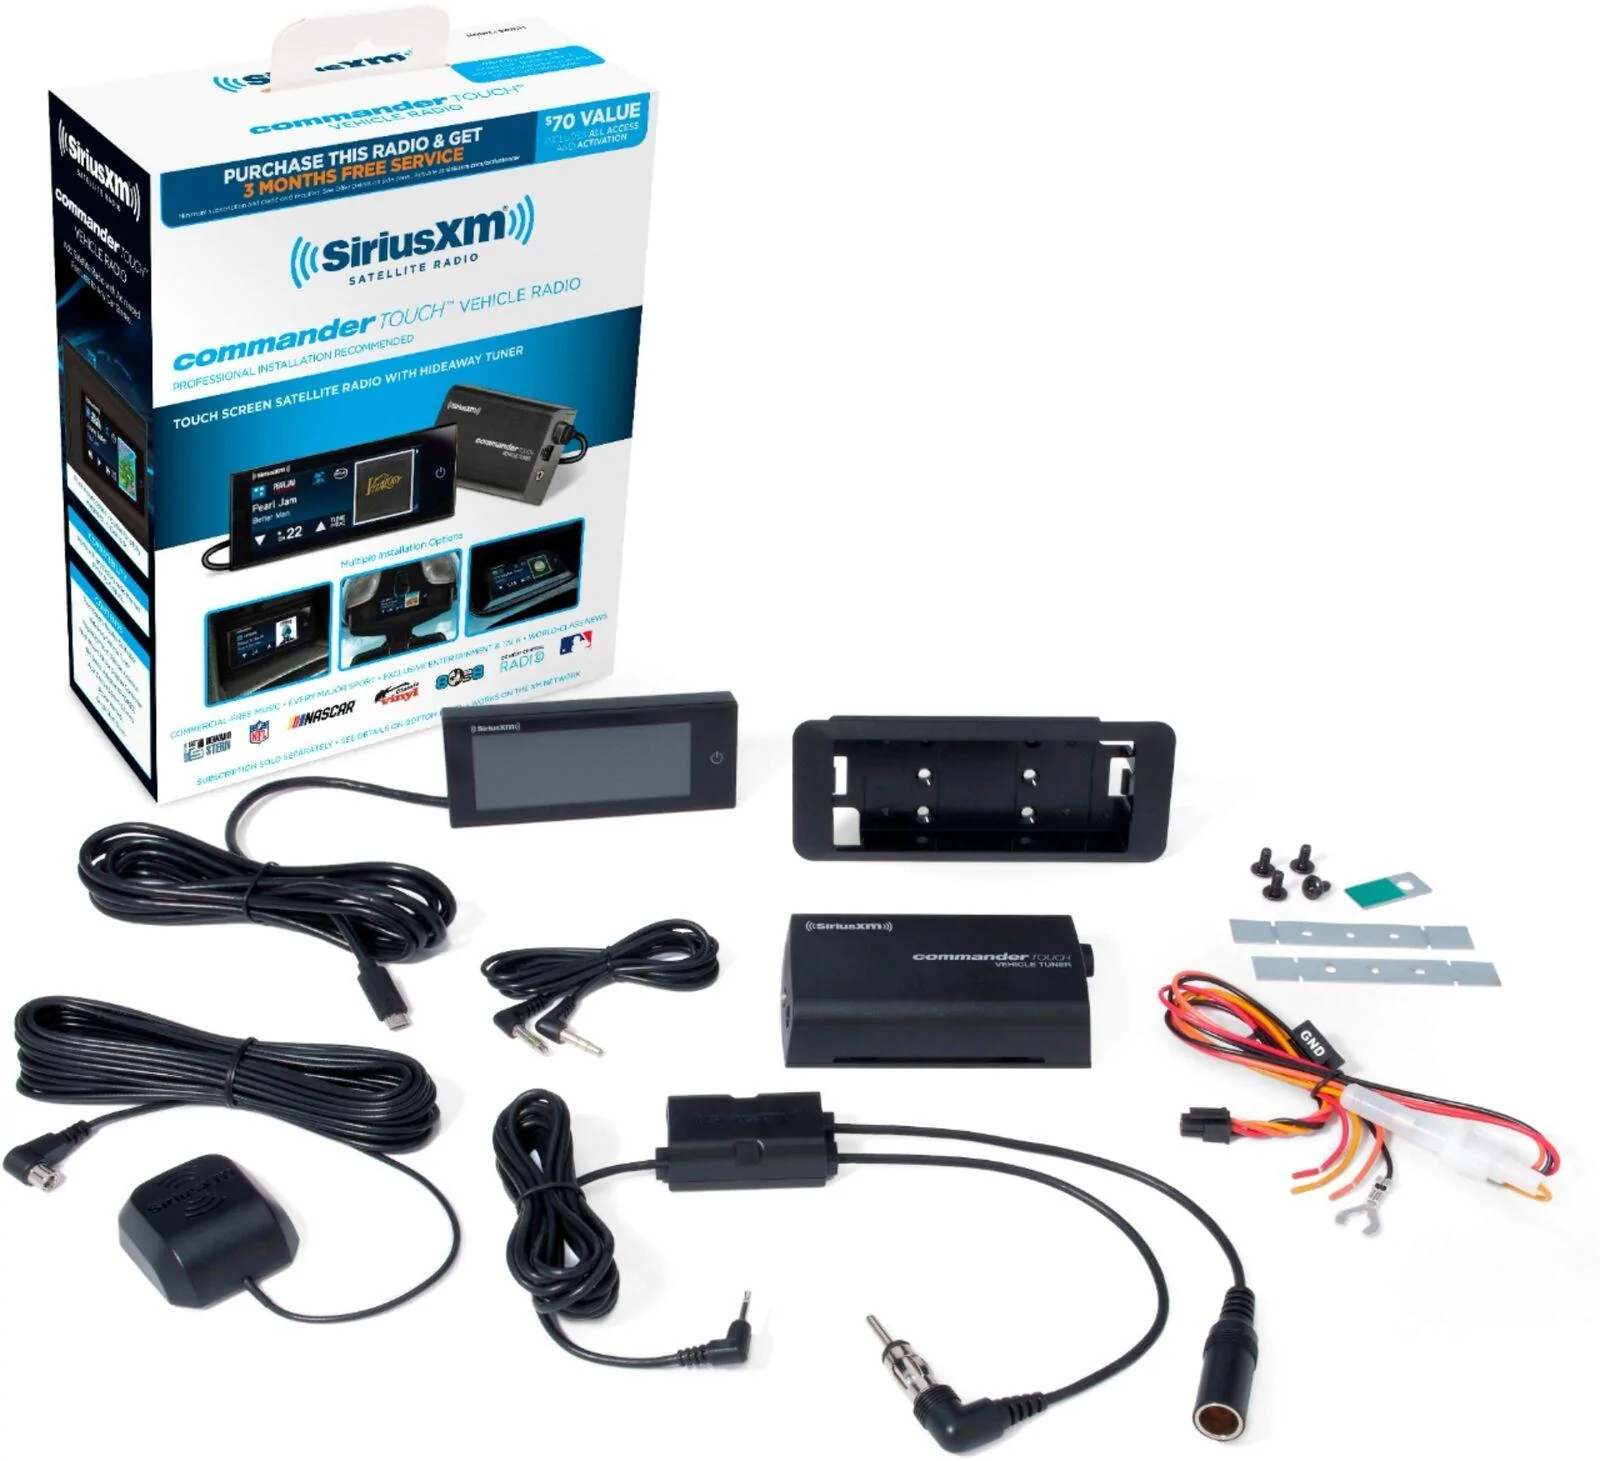
Items:
1) SiriusXM Commander Touch: EBAY Link, Amazon Link
- I was watching an Amazon listing for a few days and the price rose from ~$60 to ~$90
- Searched on Ebay and found it for ~$60
- SiriusXM Commander Touch Website
2) Ford Antenna Adaptors: Amazon Link(Option1 ), Amazon Link( Option 2 )
- Either one will work. For me Option 1 was available next day.
3) Fuse Taps x 3: Amazon Link, AutoZone(could be in-store)
- I got the 10-pack because I would then have extra.
4) Double-Sided Waterproof Tape: Amazon Link, Walmart Link(usually available in-store)
5) Wire Crimper: Amazon Link, Walmart Link(usually available in-store)
6) OPTIONAL Thumb drive to update the firmware. with Micro-USB adaptor
- I always keep one of these around for the older pieces of tech that are Micro-USB
- Directions to update the firmware (Simply unzip the files to the root of the thumb drive and plug into the bottom of the display)
- Firmware
Directions:
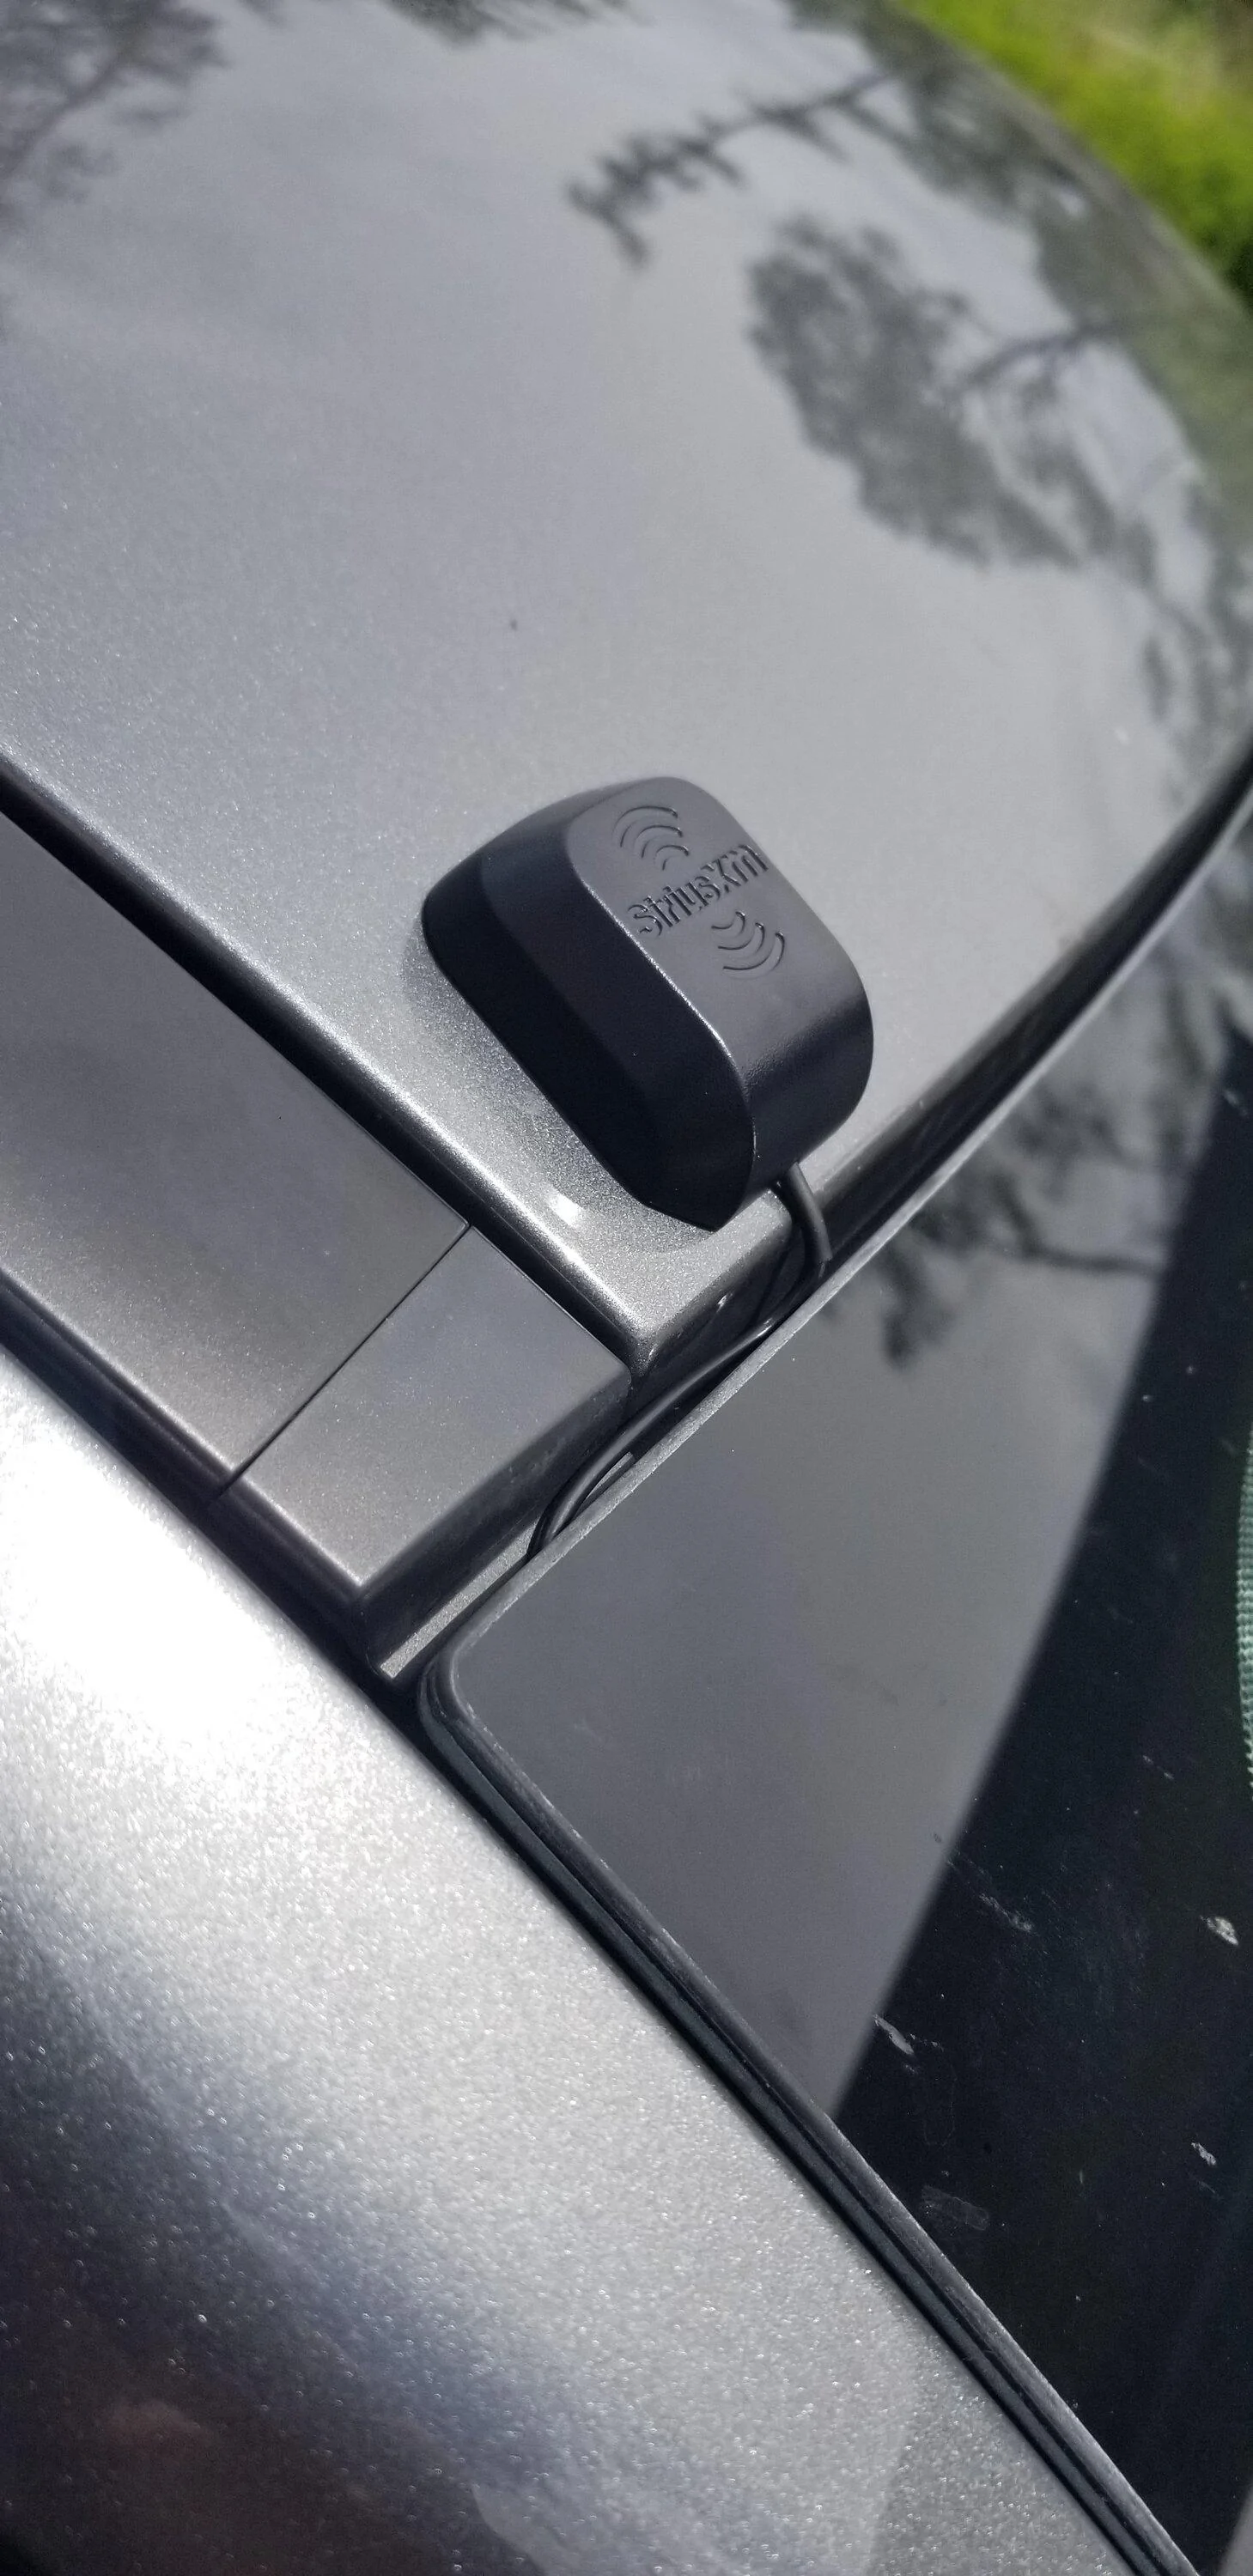
I started by opening the engine and passenger door looking for a good place to run the antenna. I knew the pax floor/firewall was where the fuse box was and where I was going to be pulling power.
I choose just above the pax side, above window .

This gave me an easy run to the pax floor area.
I was able to feed the antenna wire down along the window and use a plastic putty knife to hide the wire behind the windshield.

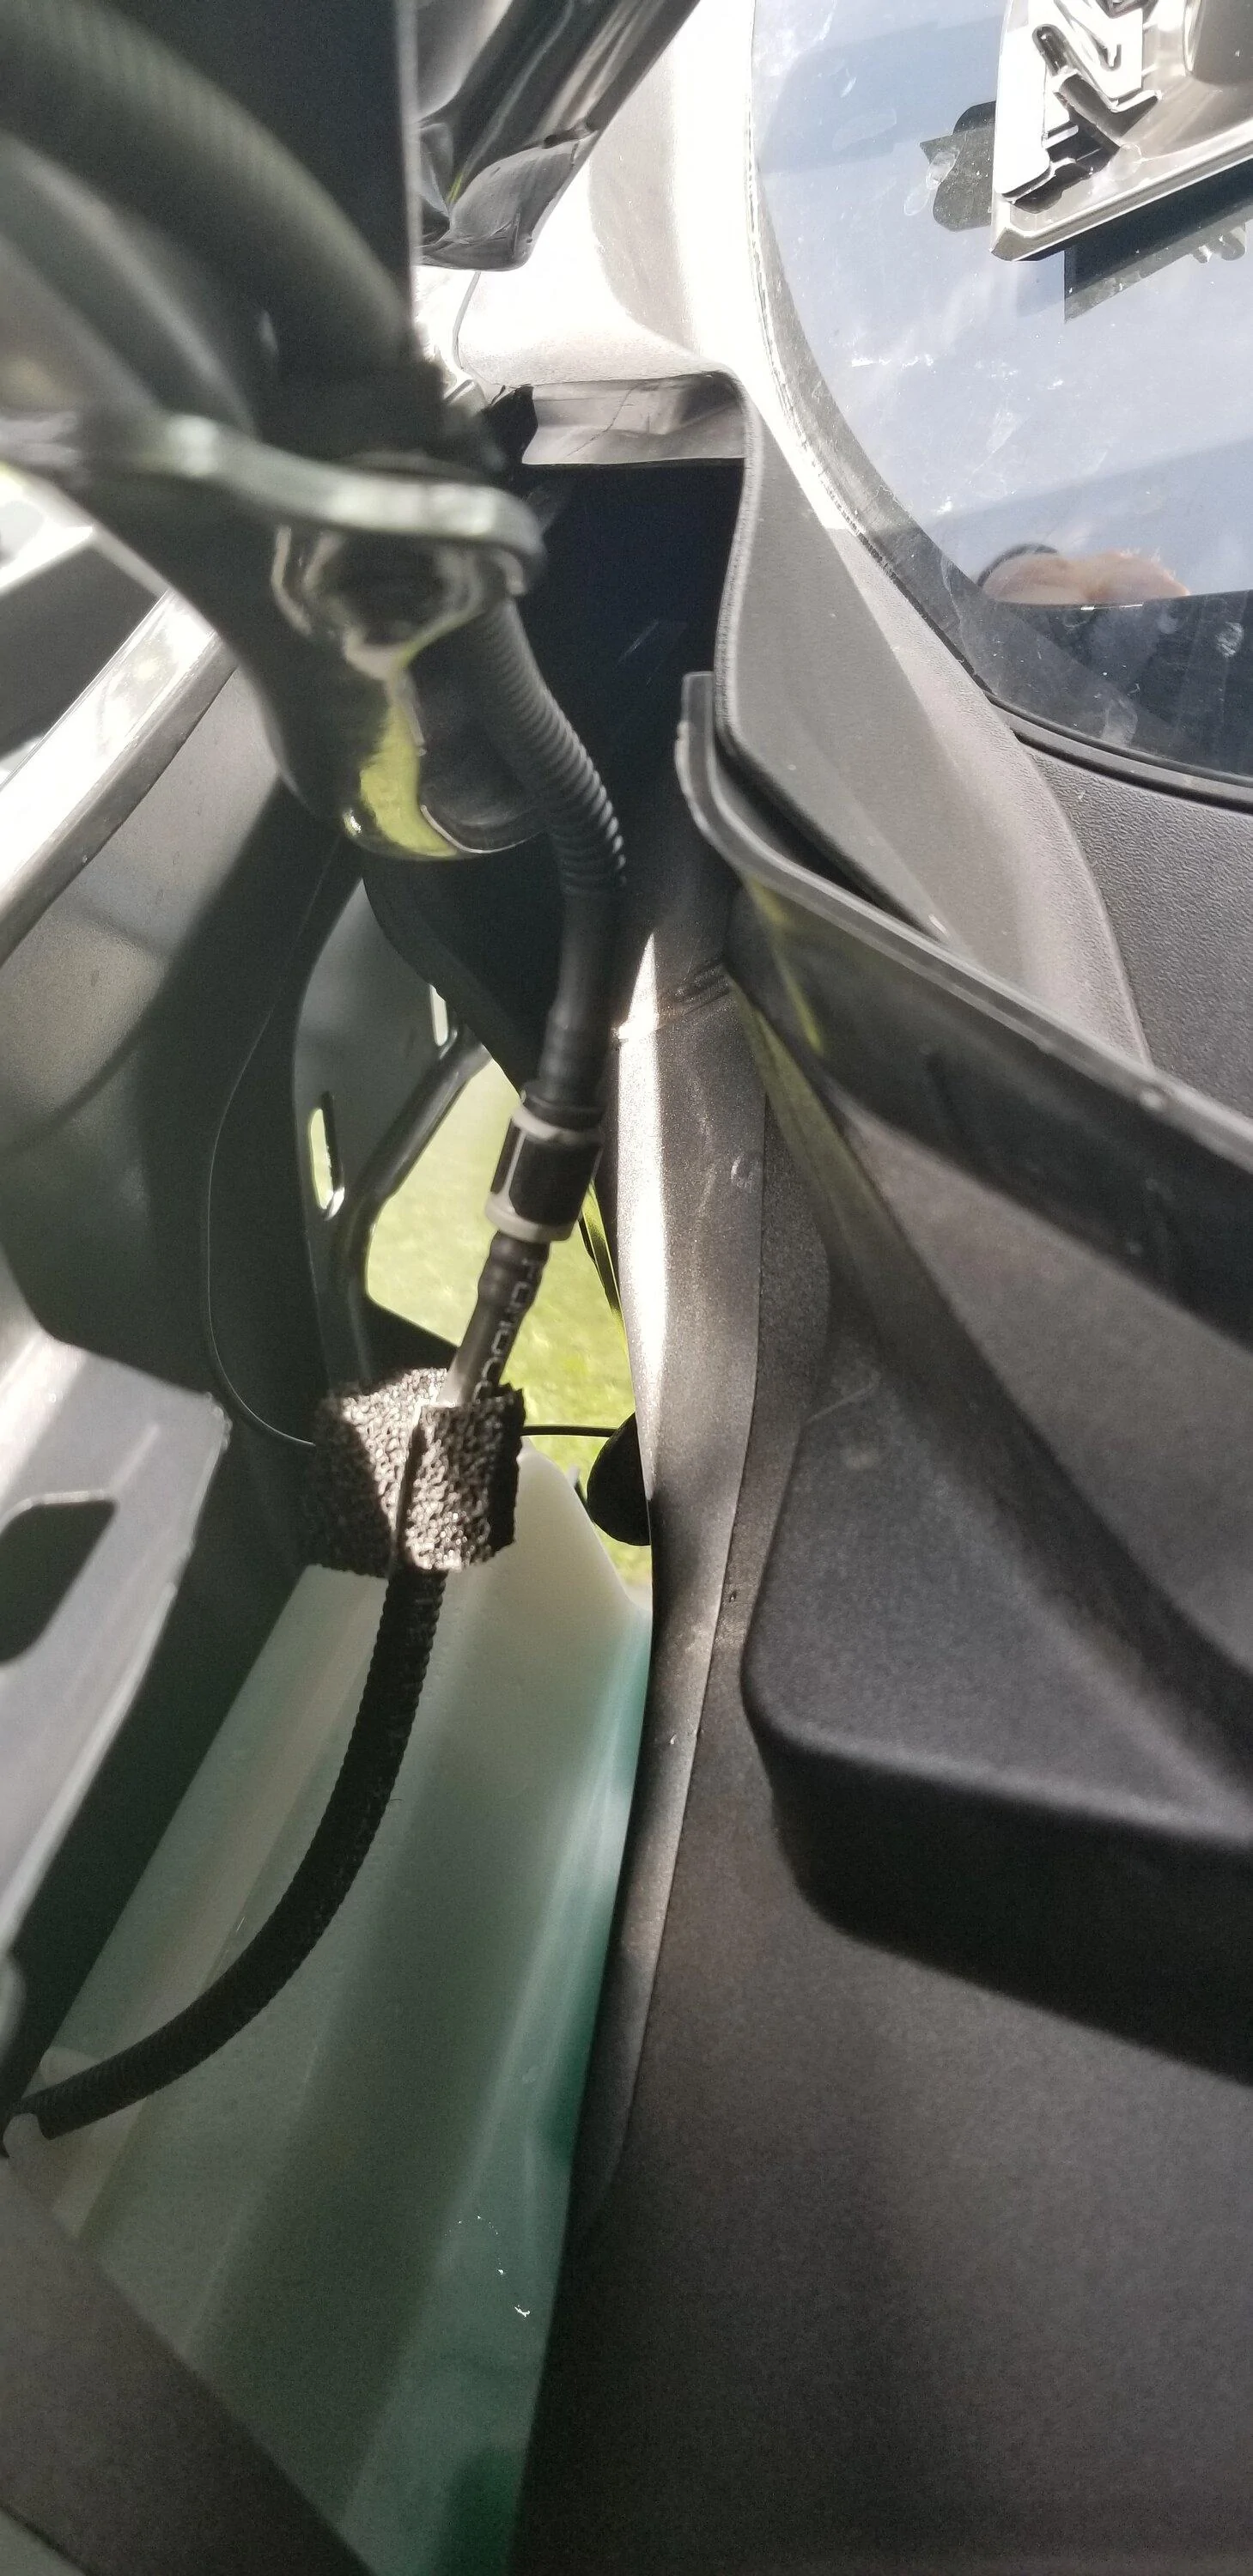
Overview of the under-hood/quarter panel
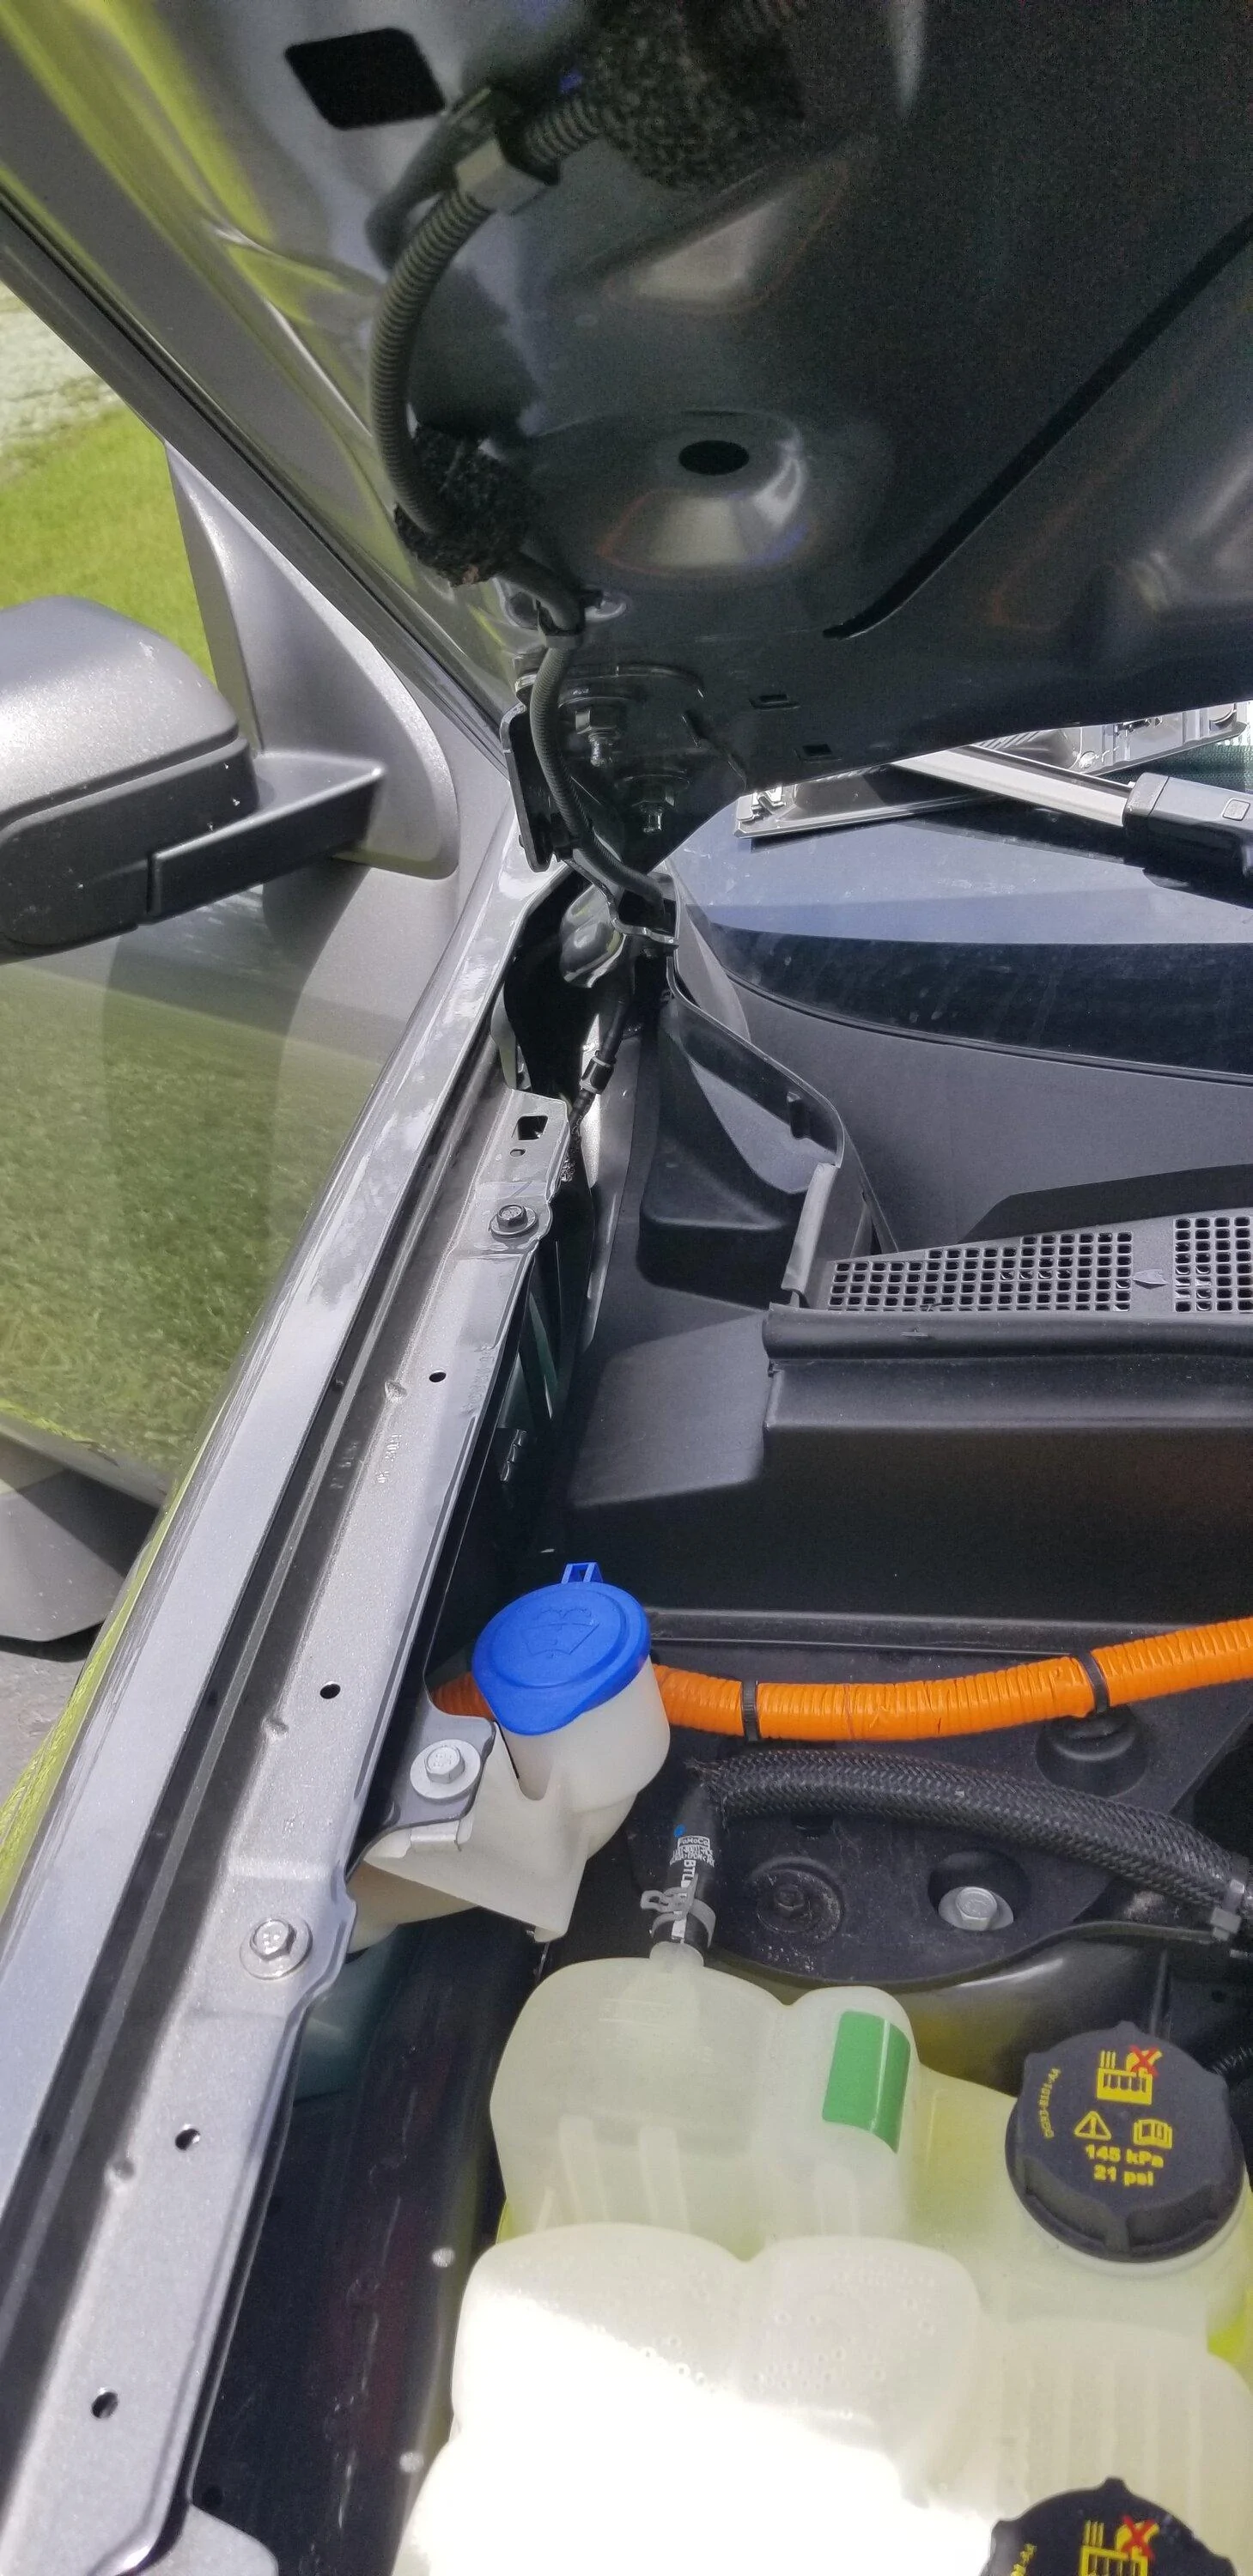
There was a small piece of trip just above the hood that I was able to easy pull off and route the wire under.
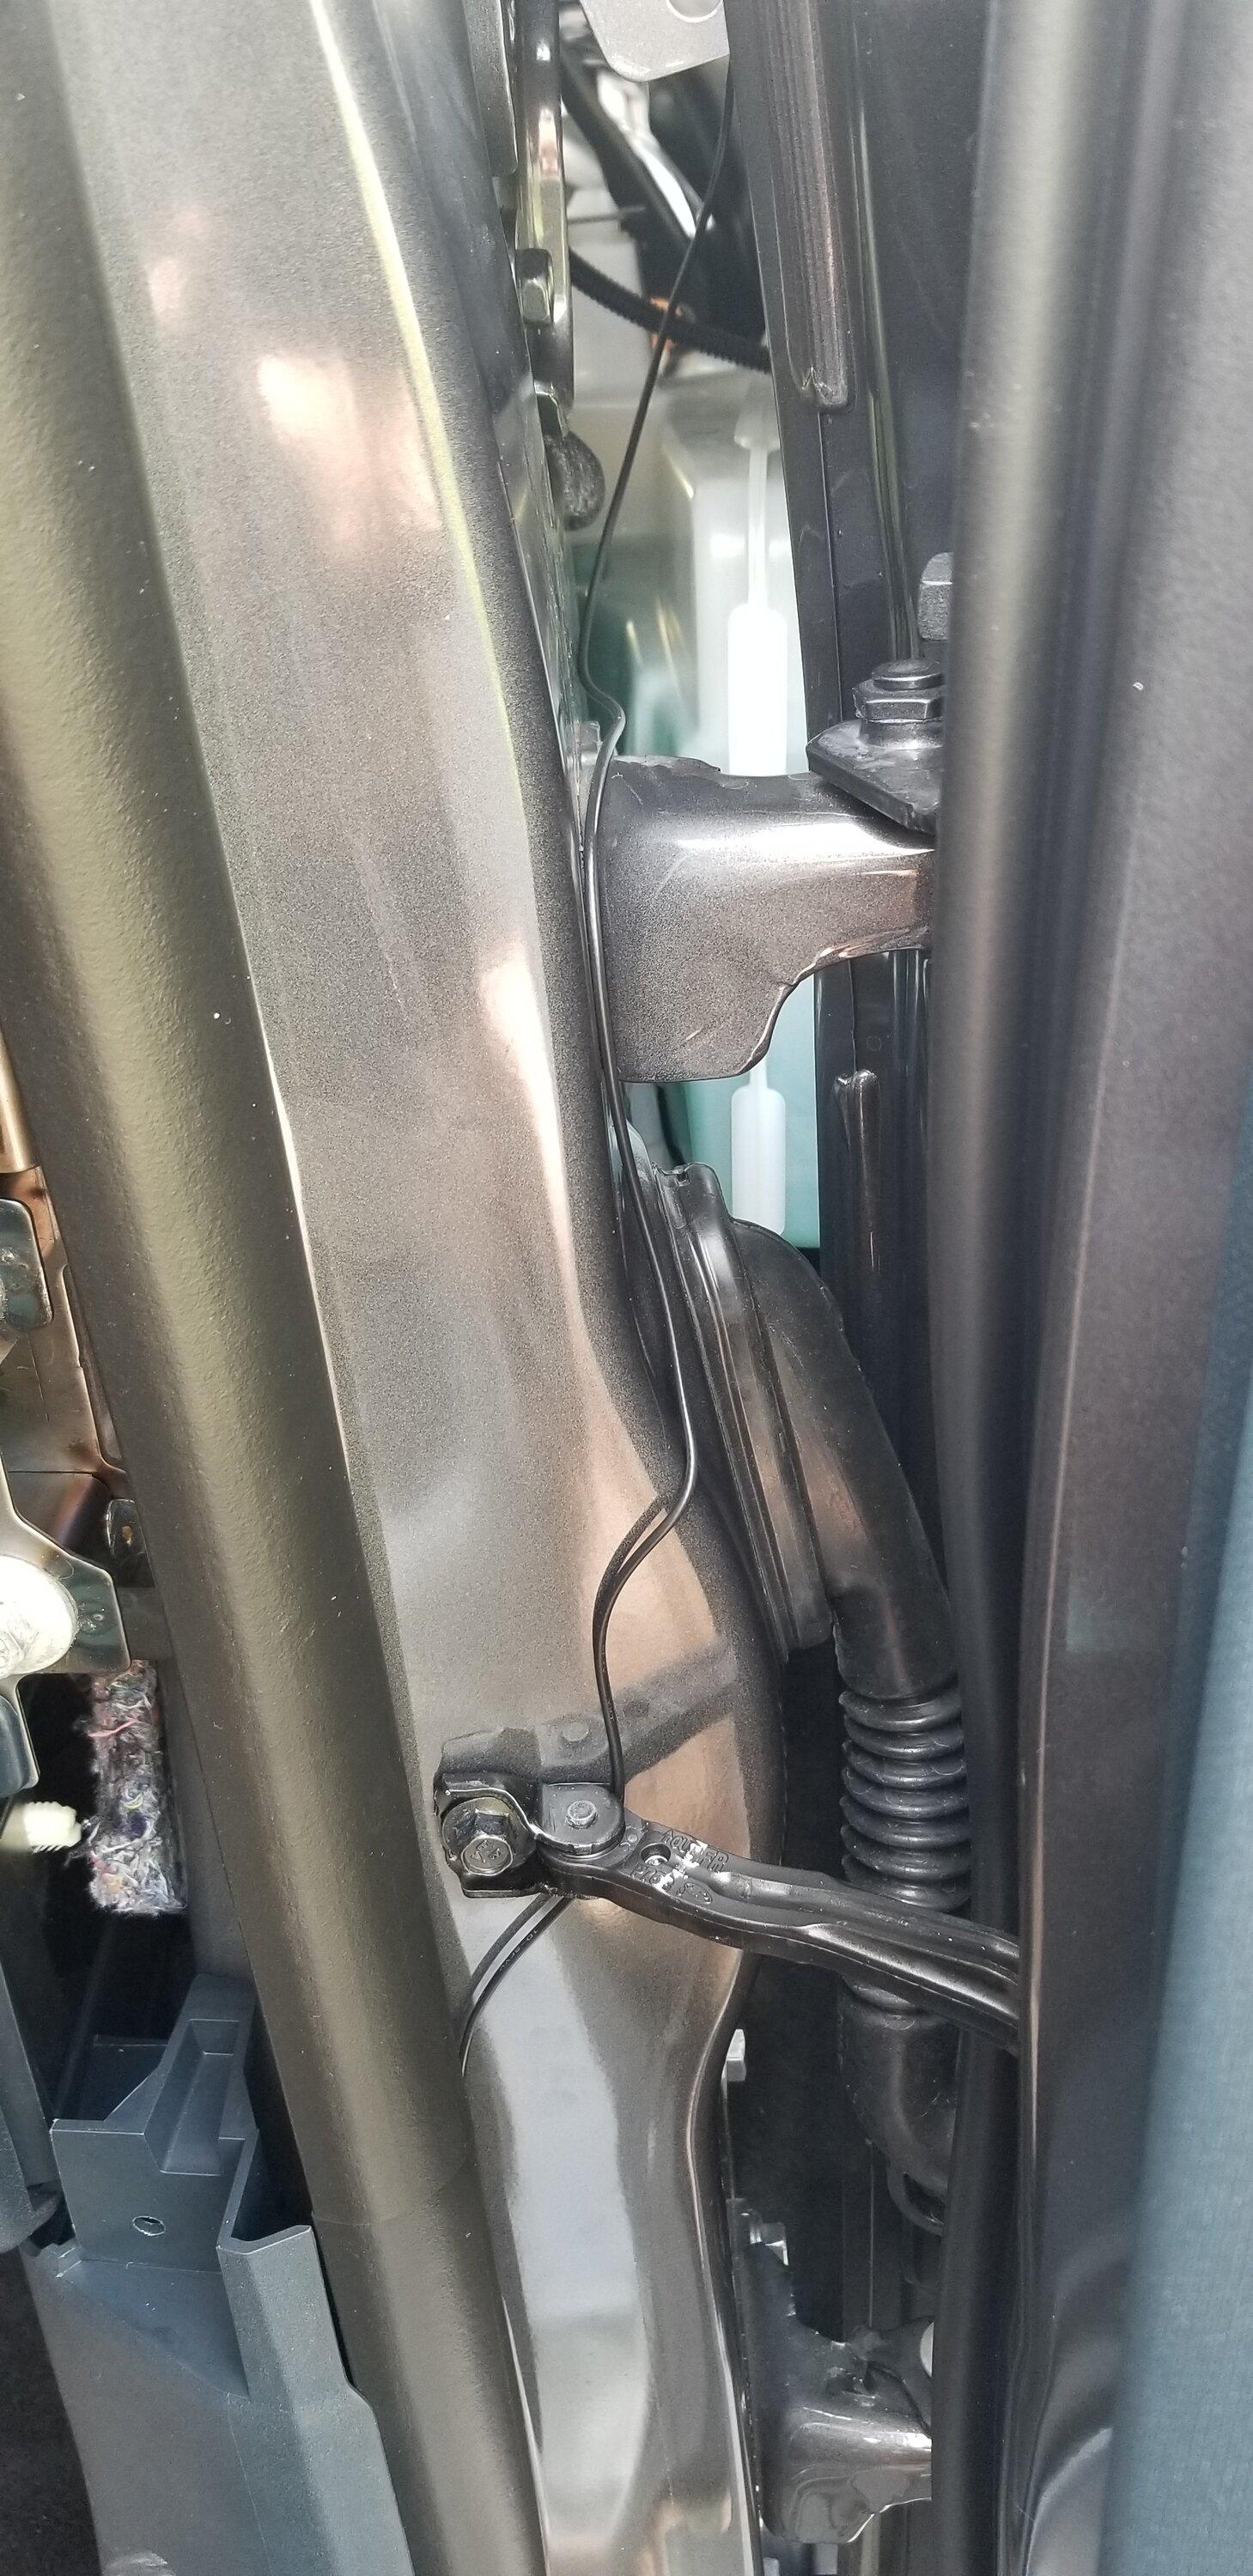
Shown here is under the hood along the inside of the pax front quarter panel. Just behind the washer fluid hose.
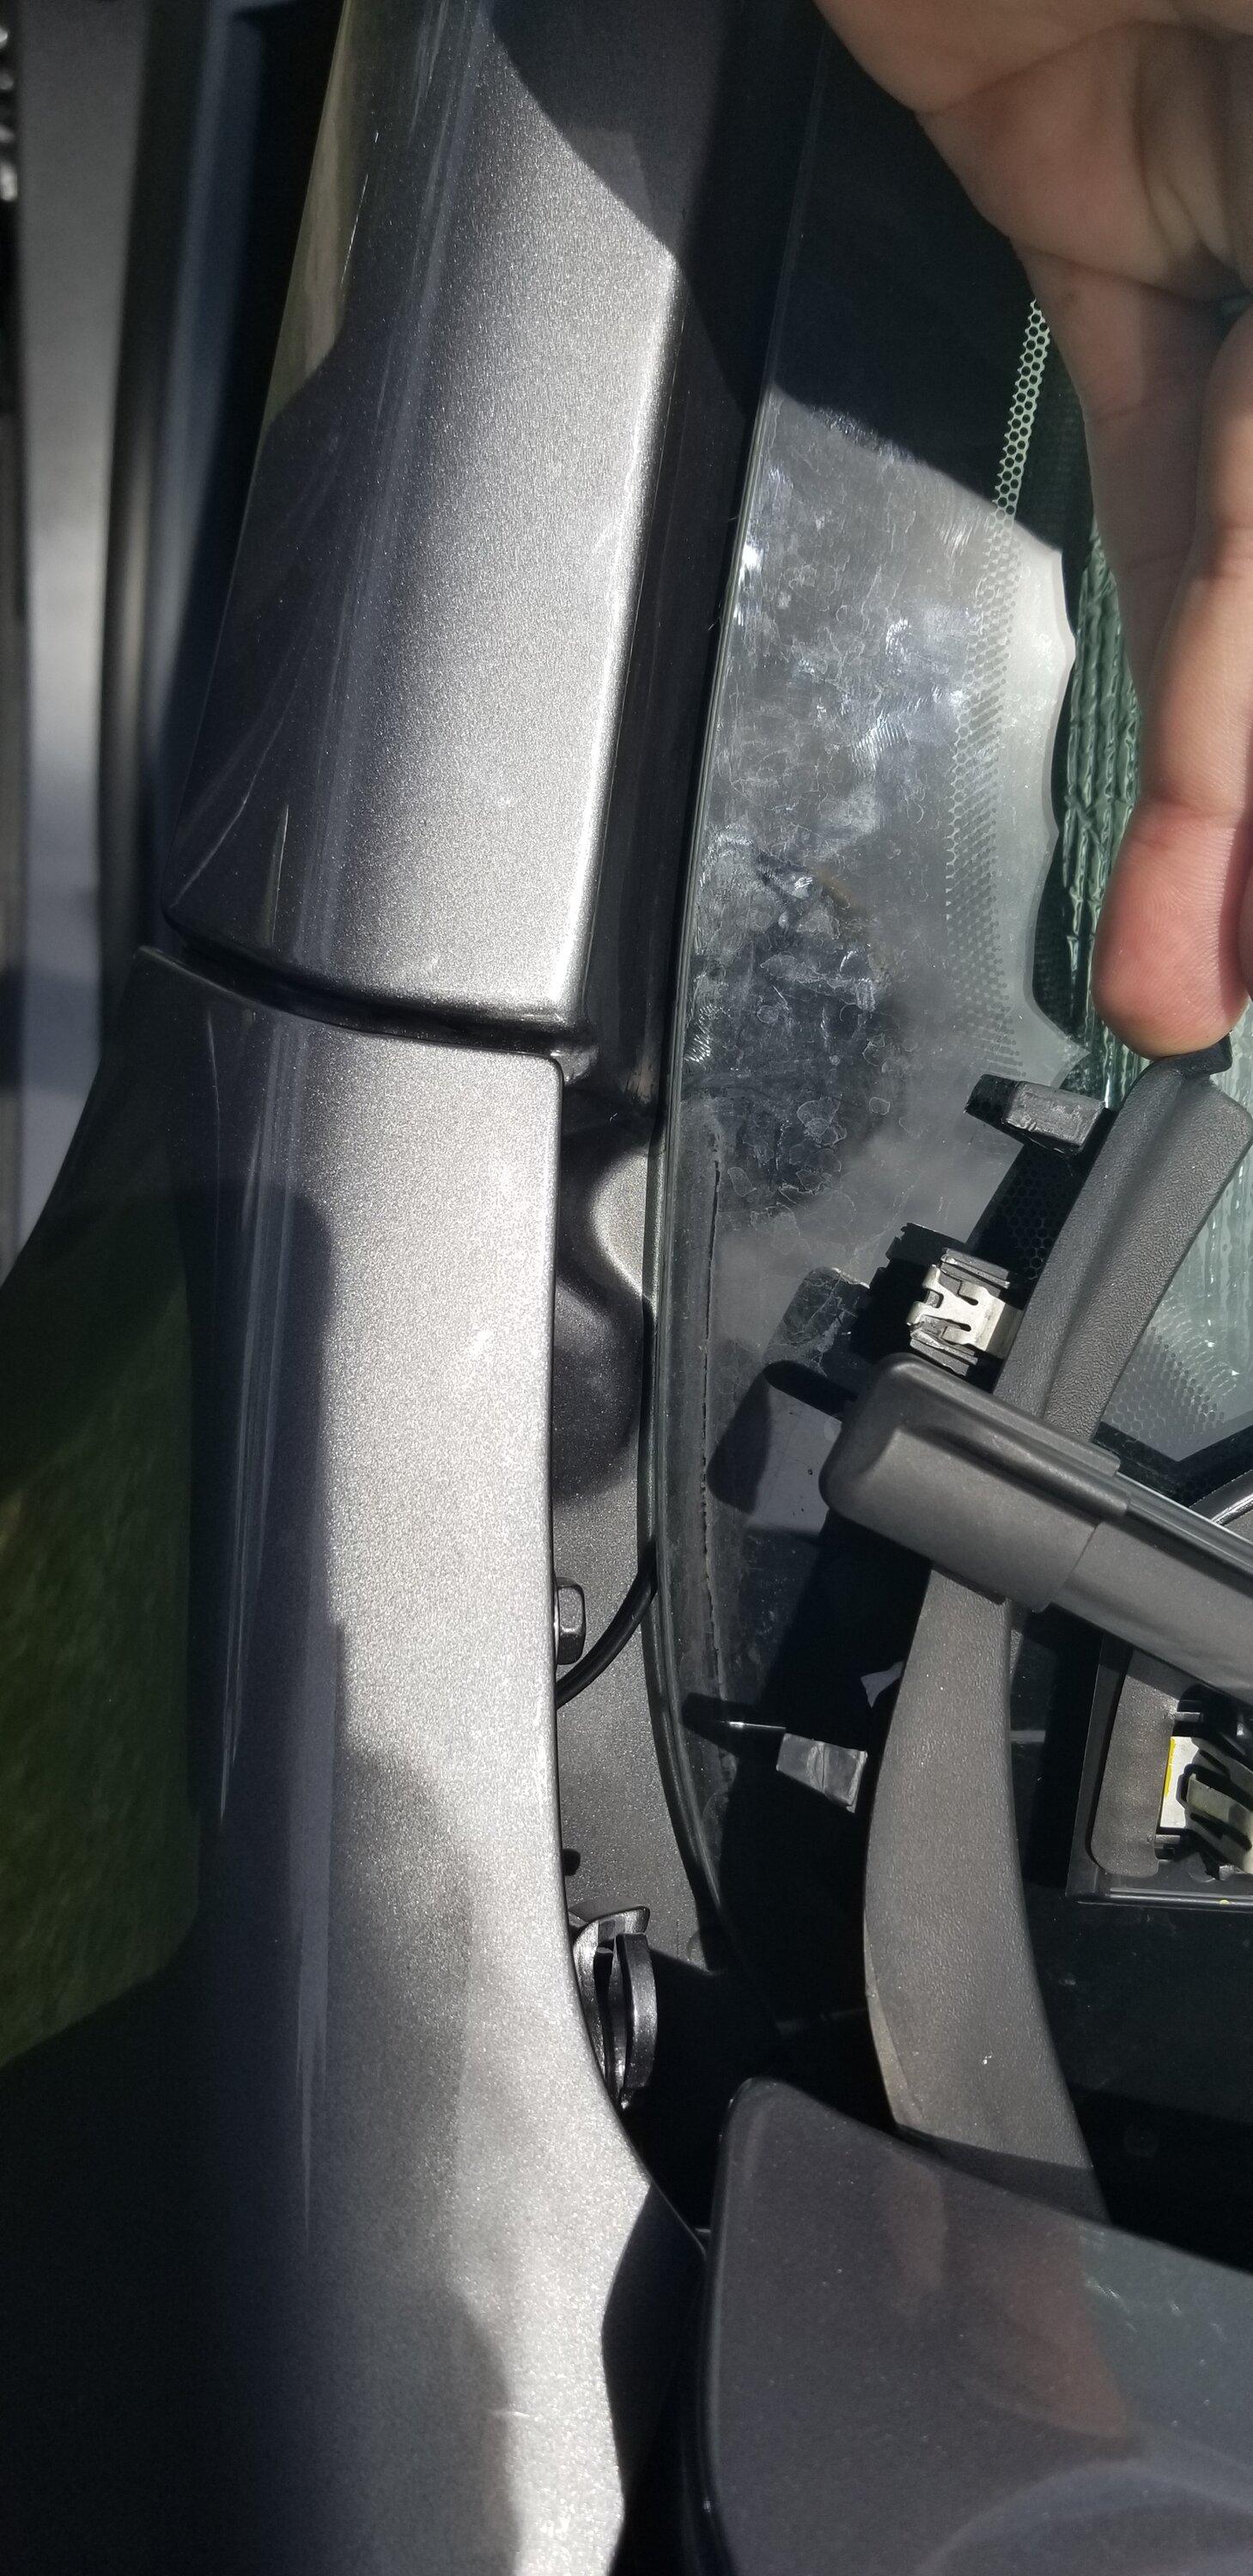
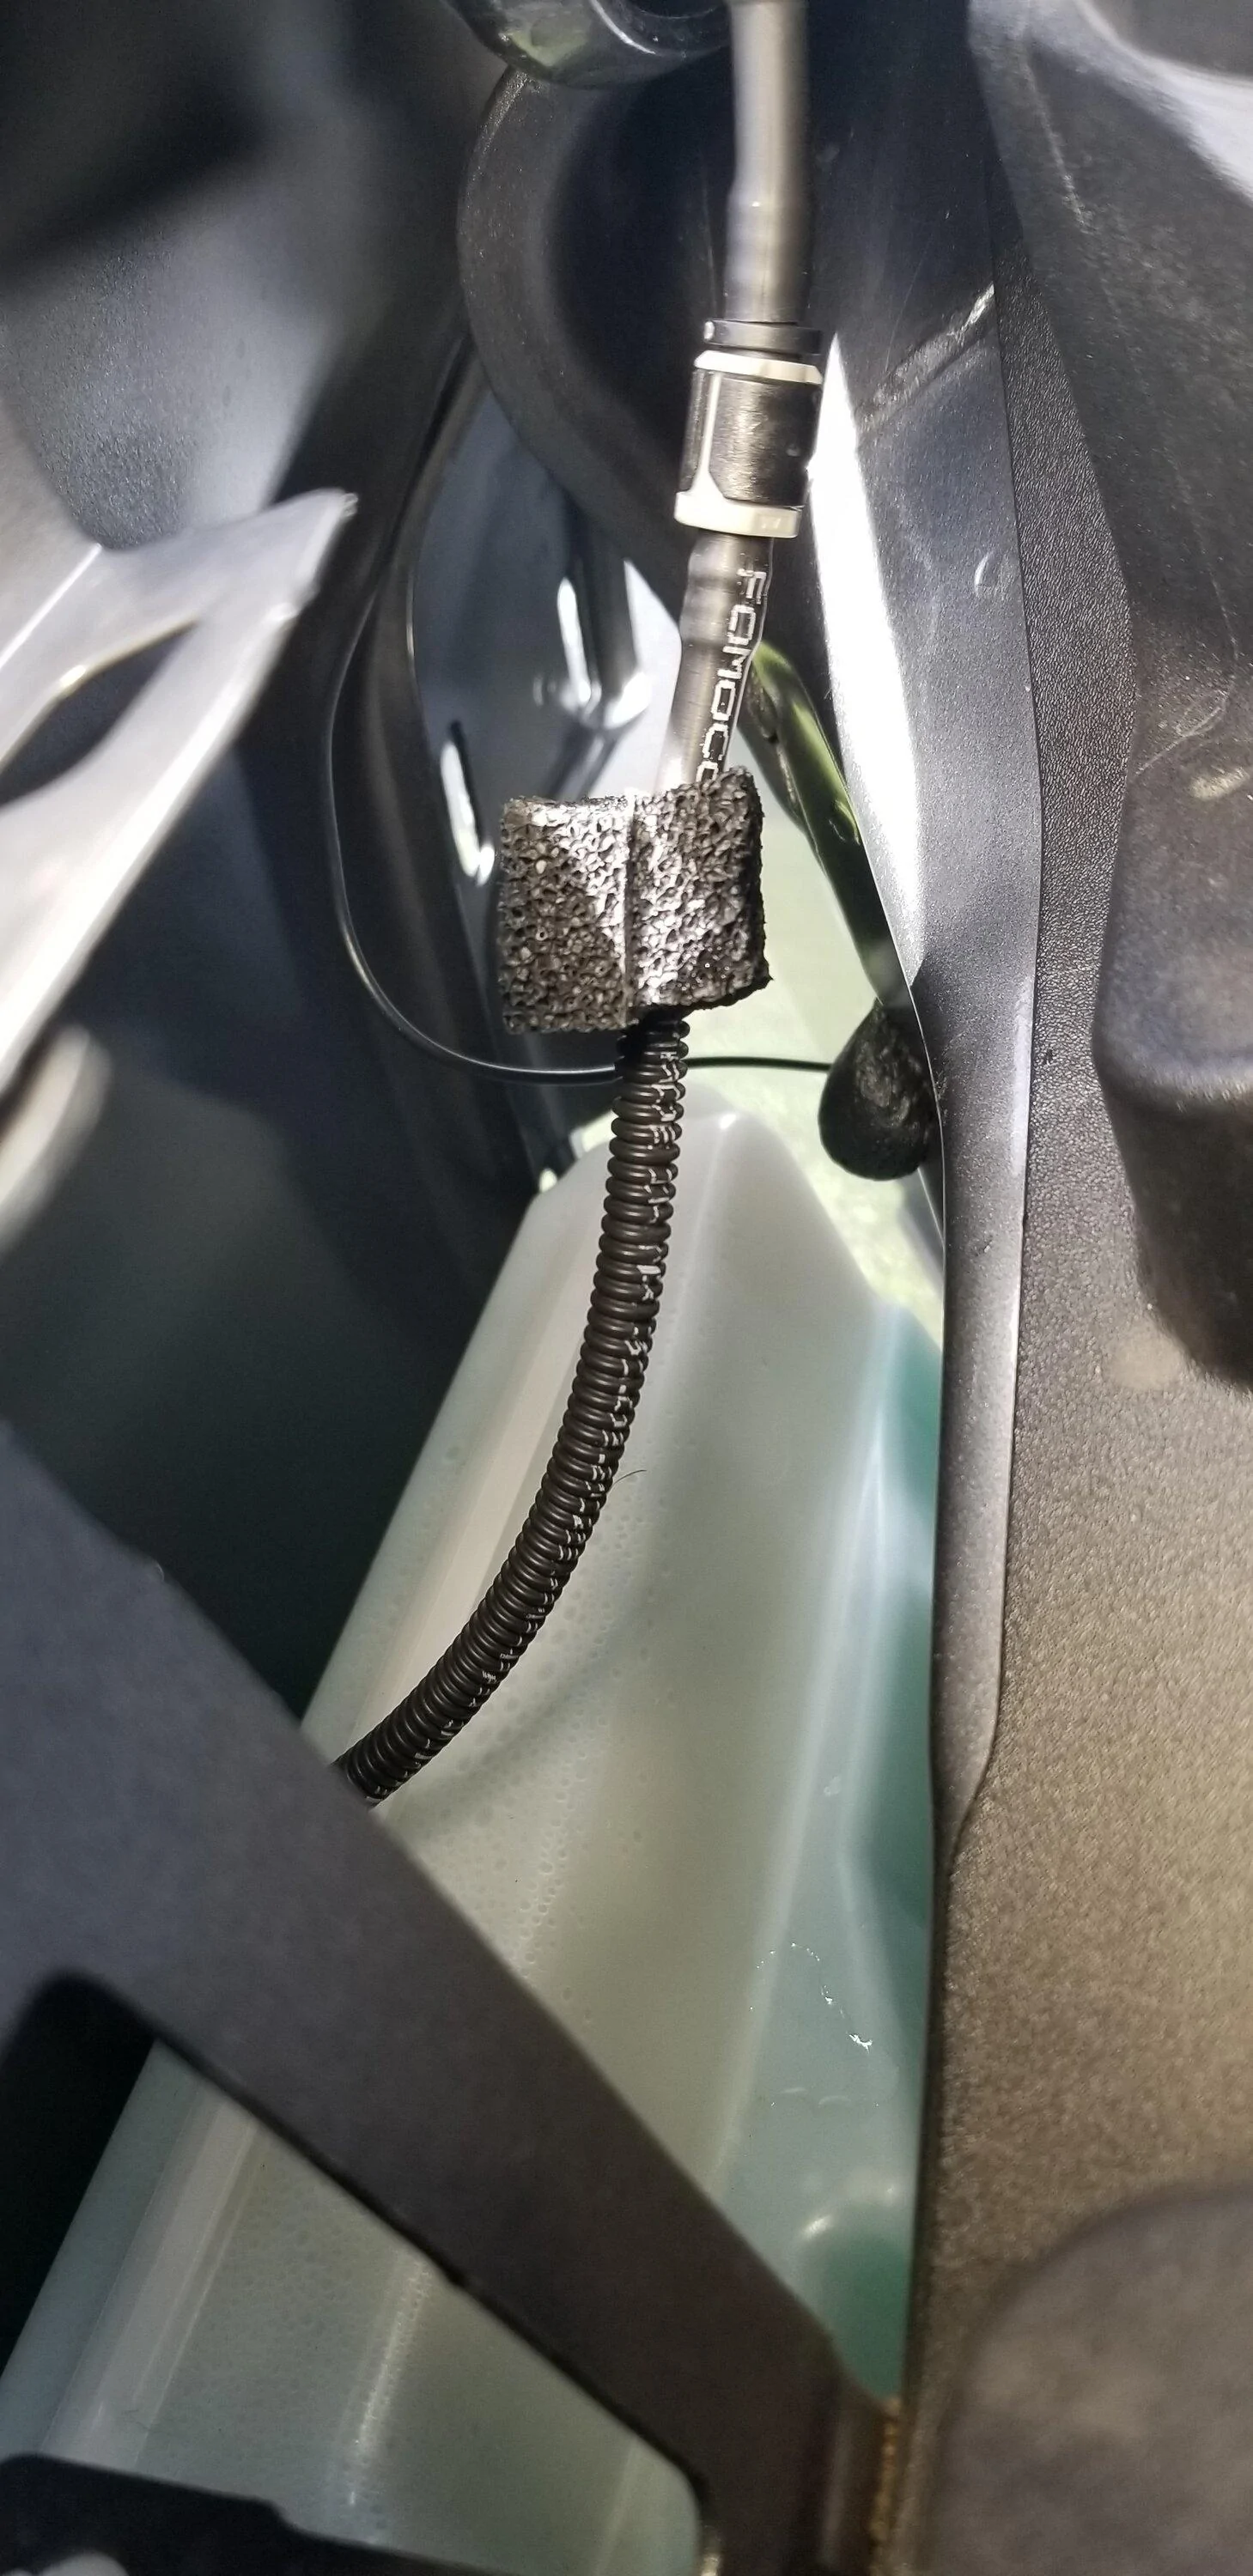
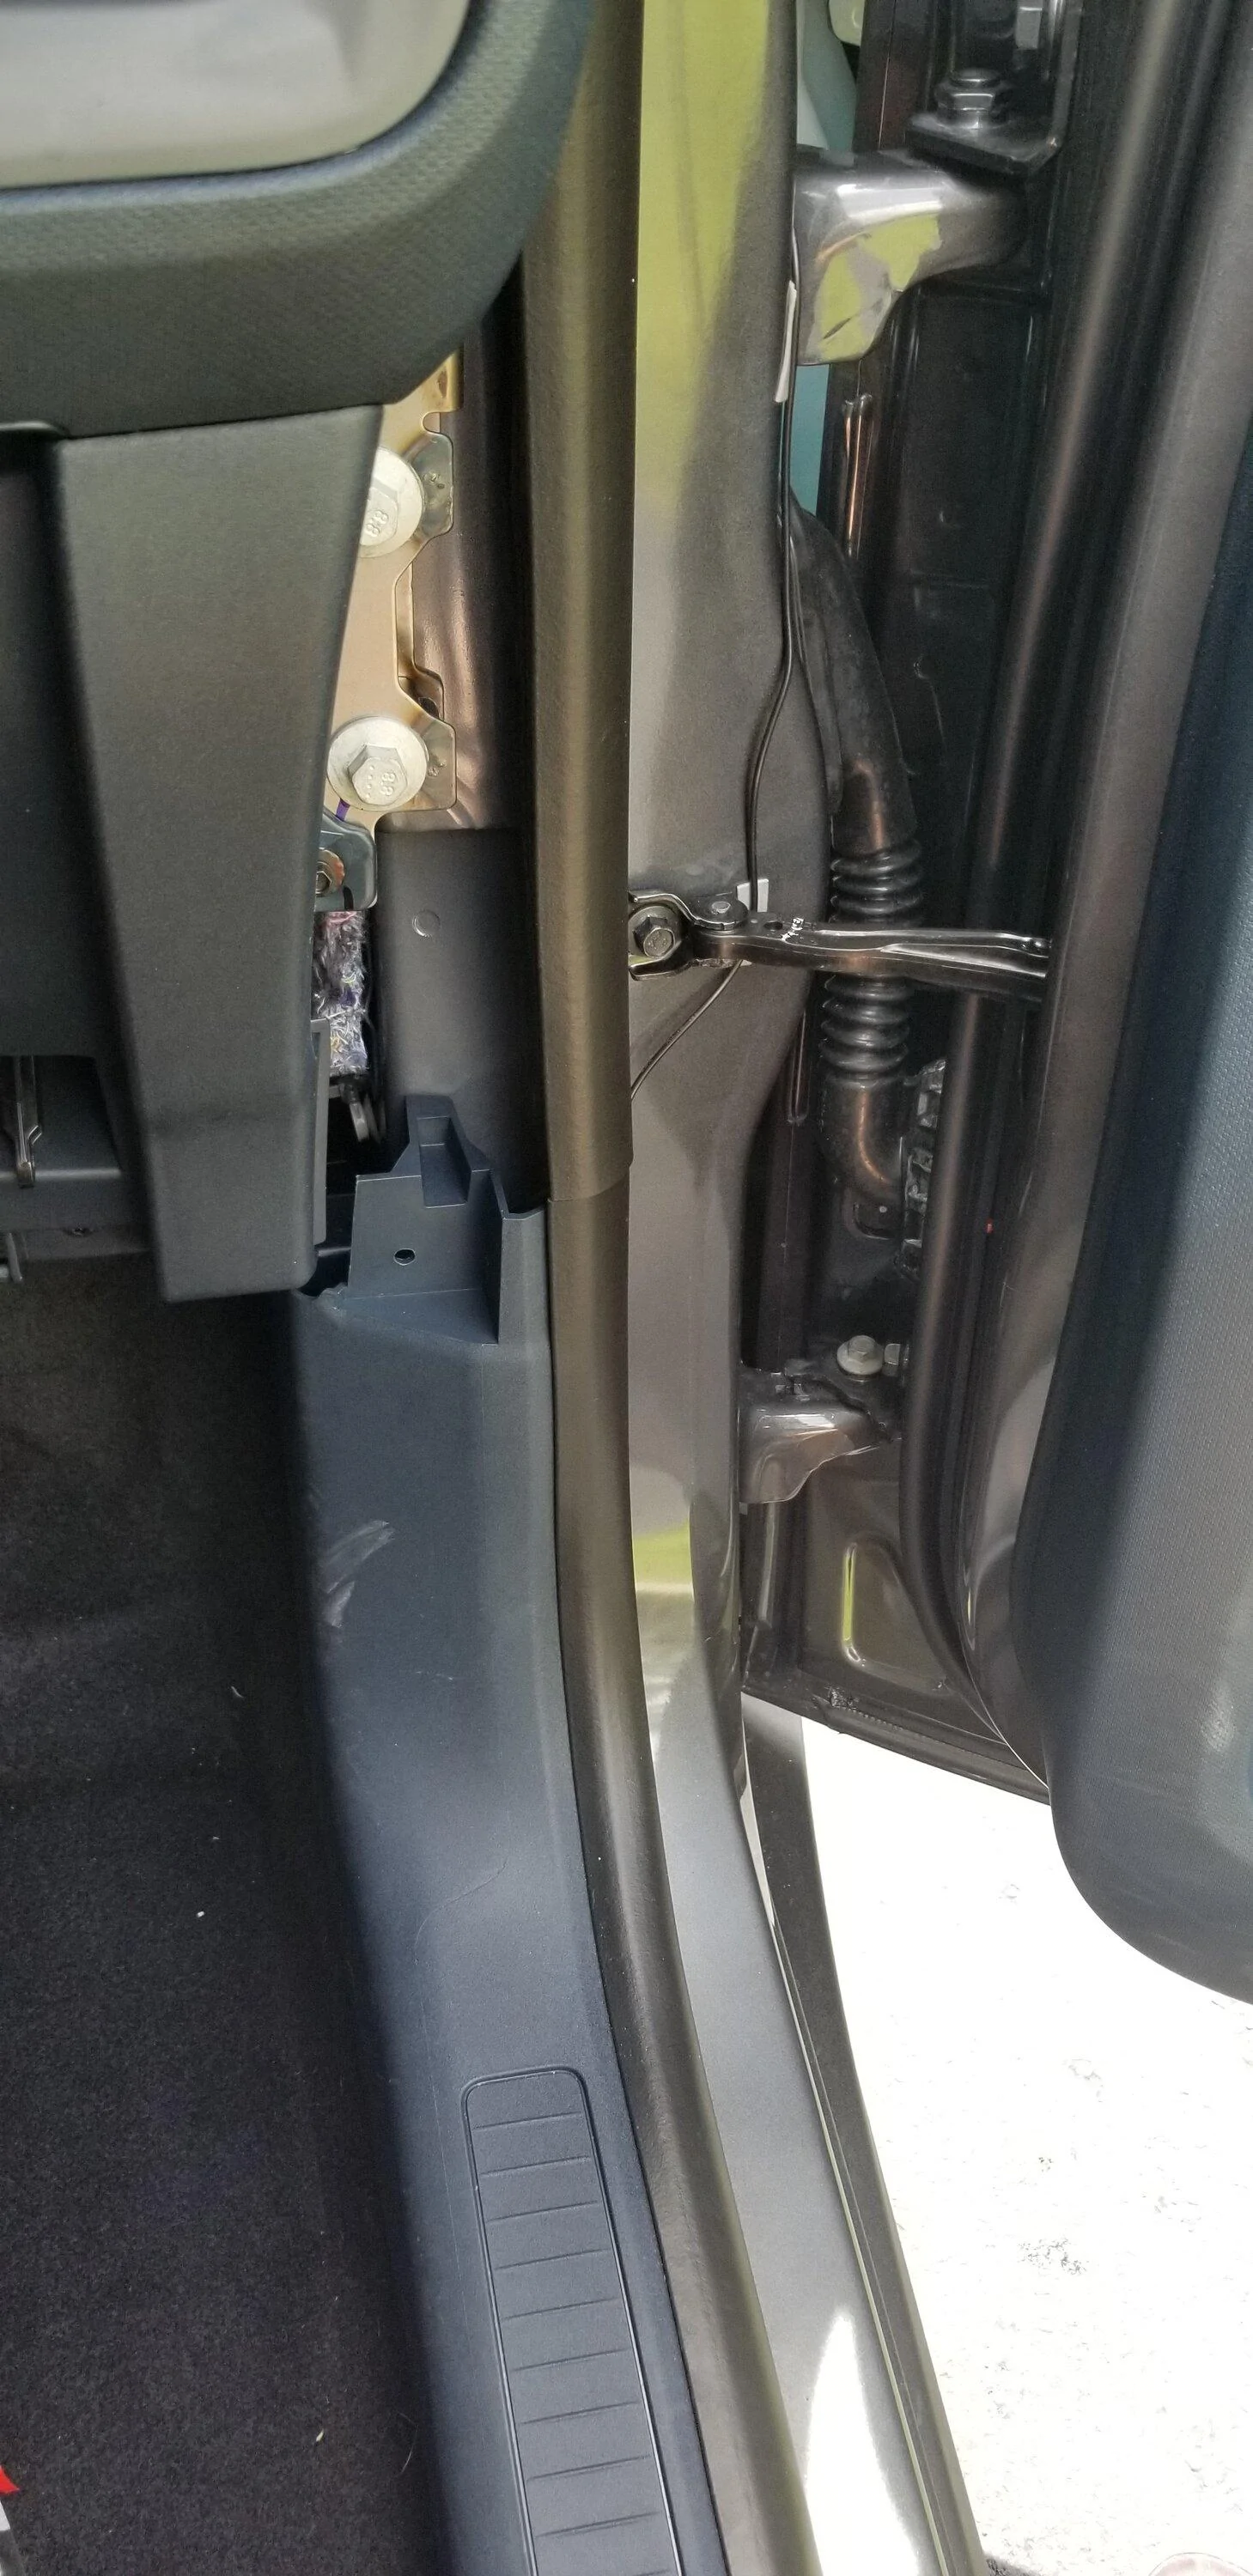
Just a closeup of the antenna wire as it is routed down from the windshield, along the inside of the quarter panel, against the inside of the door jam.
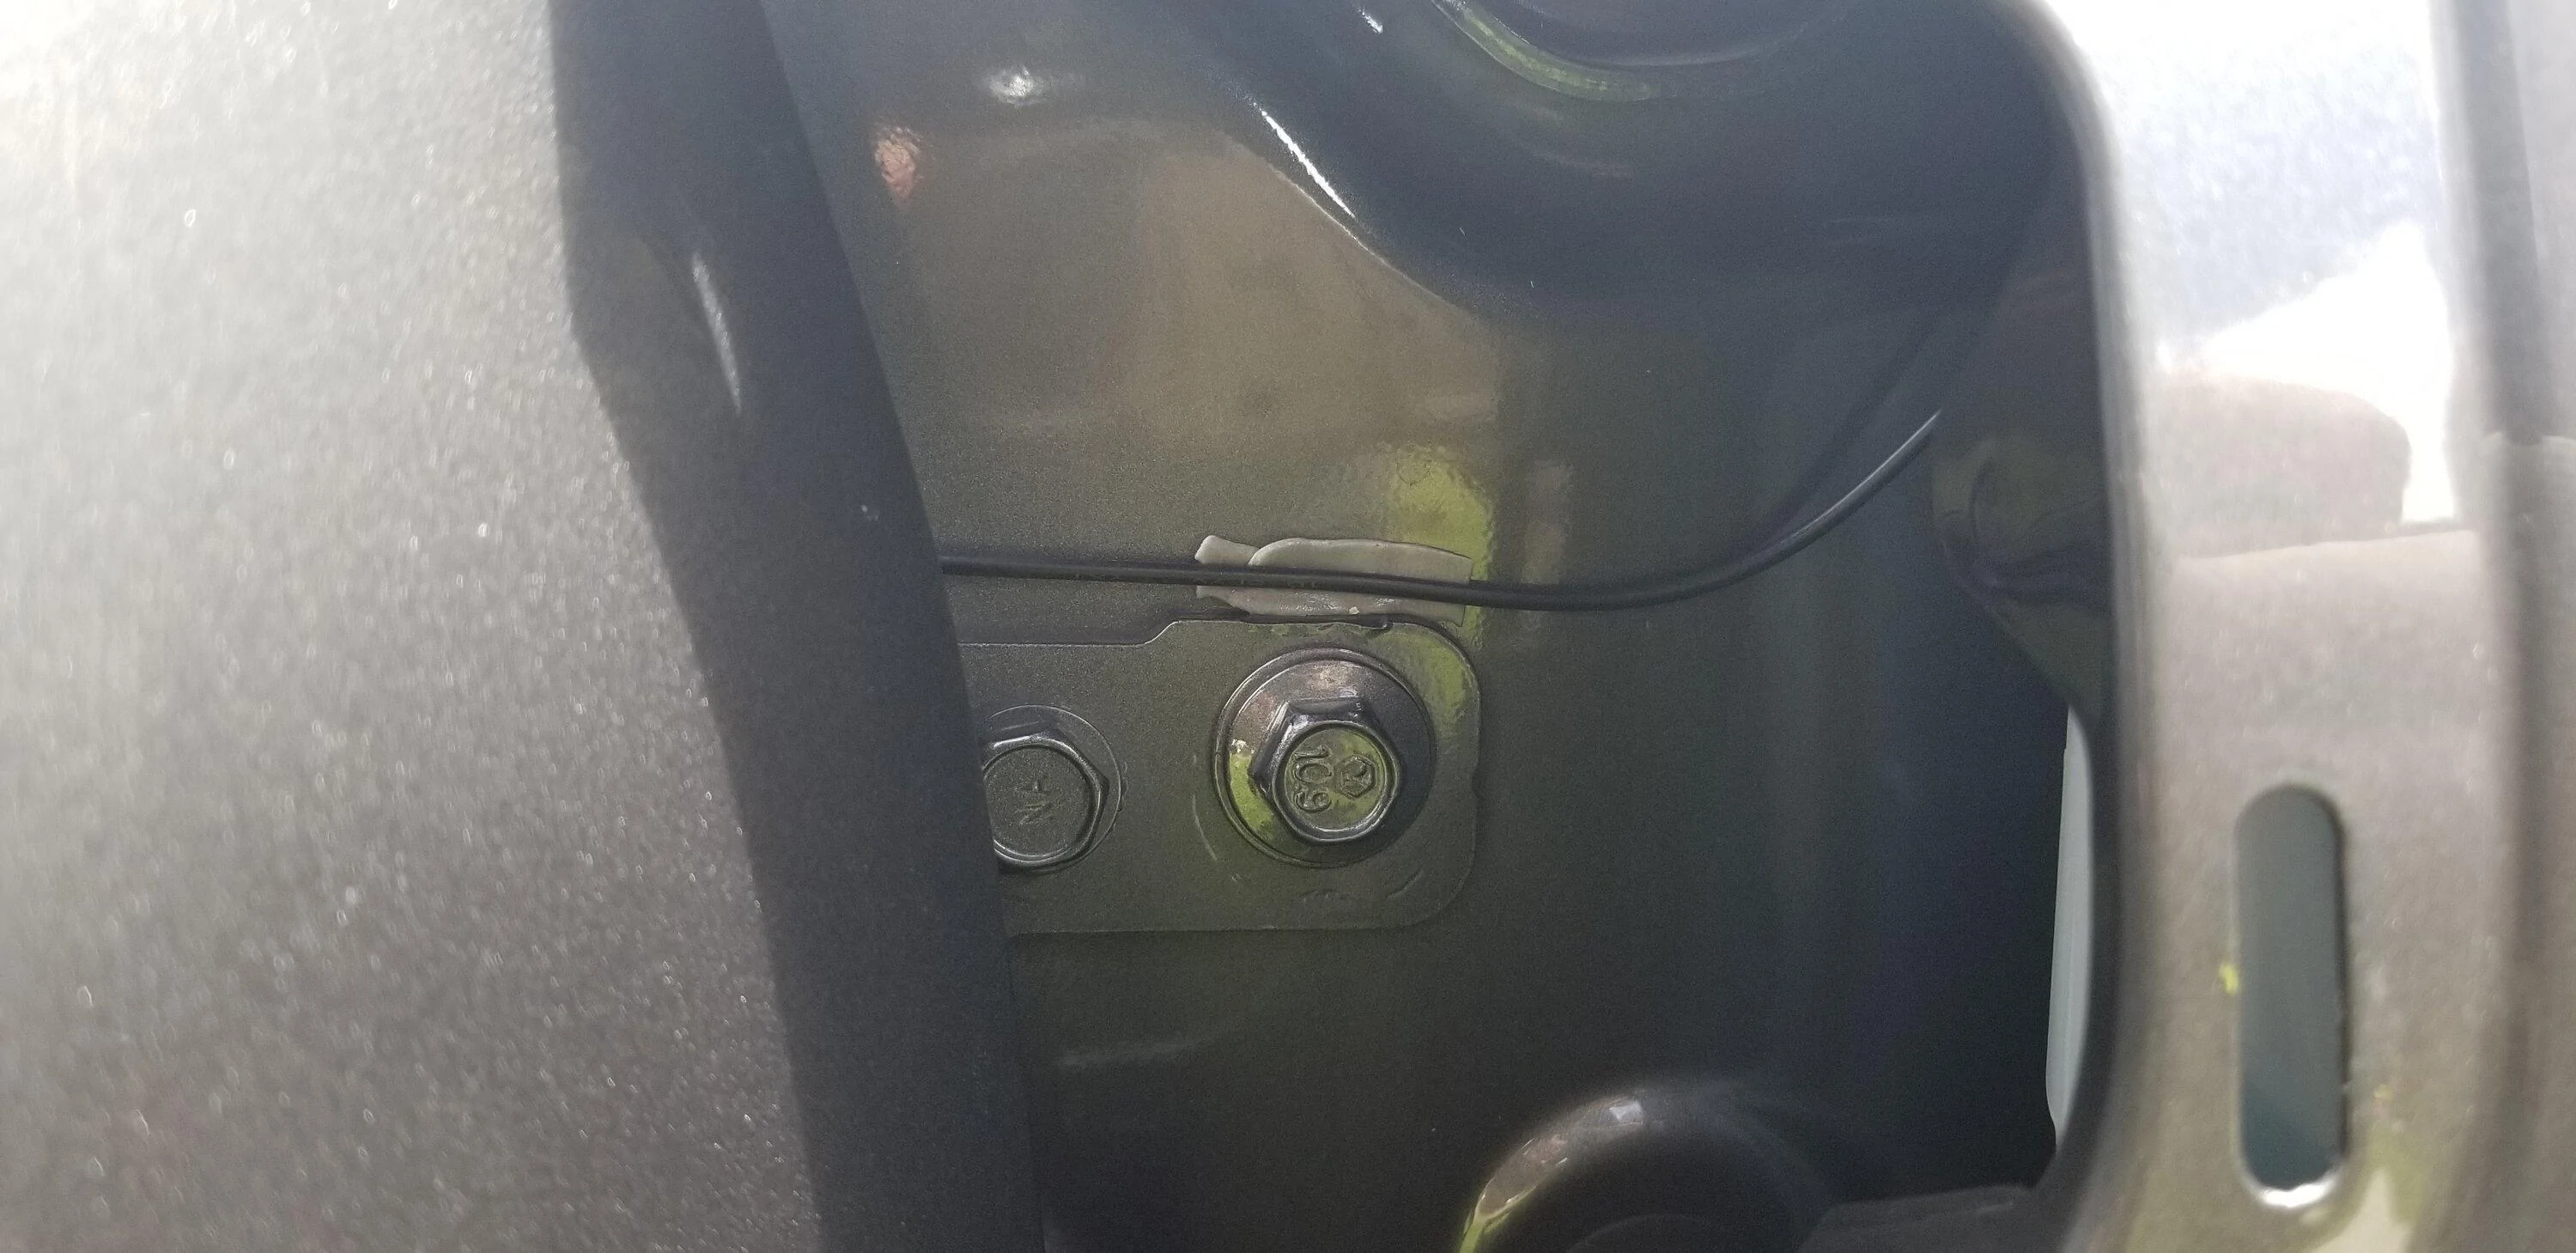
I debated running it inside the wiring harness gasket from the door to the body but then I saw a break in the weather stripping in the right spot.
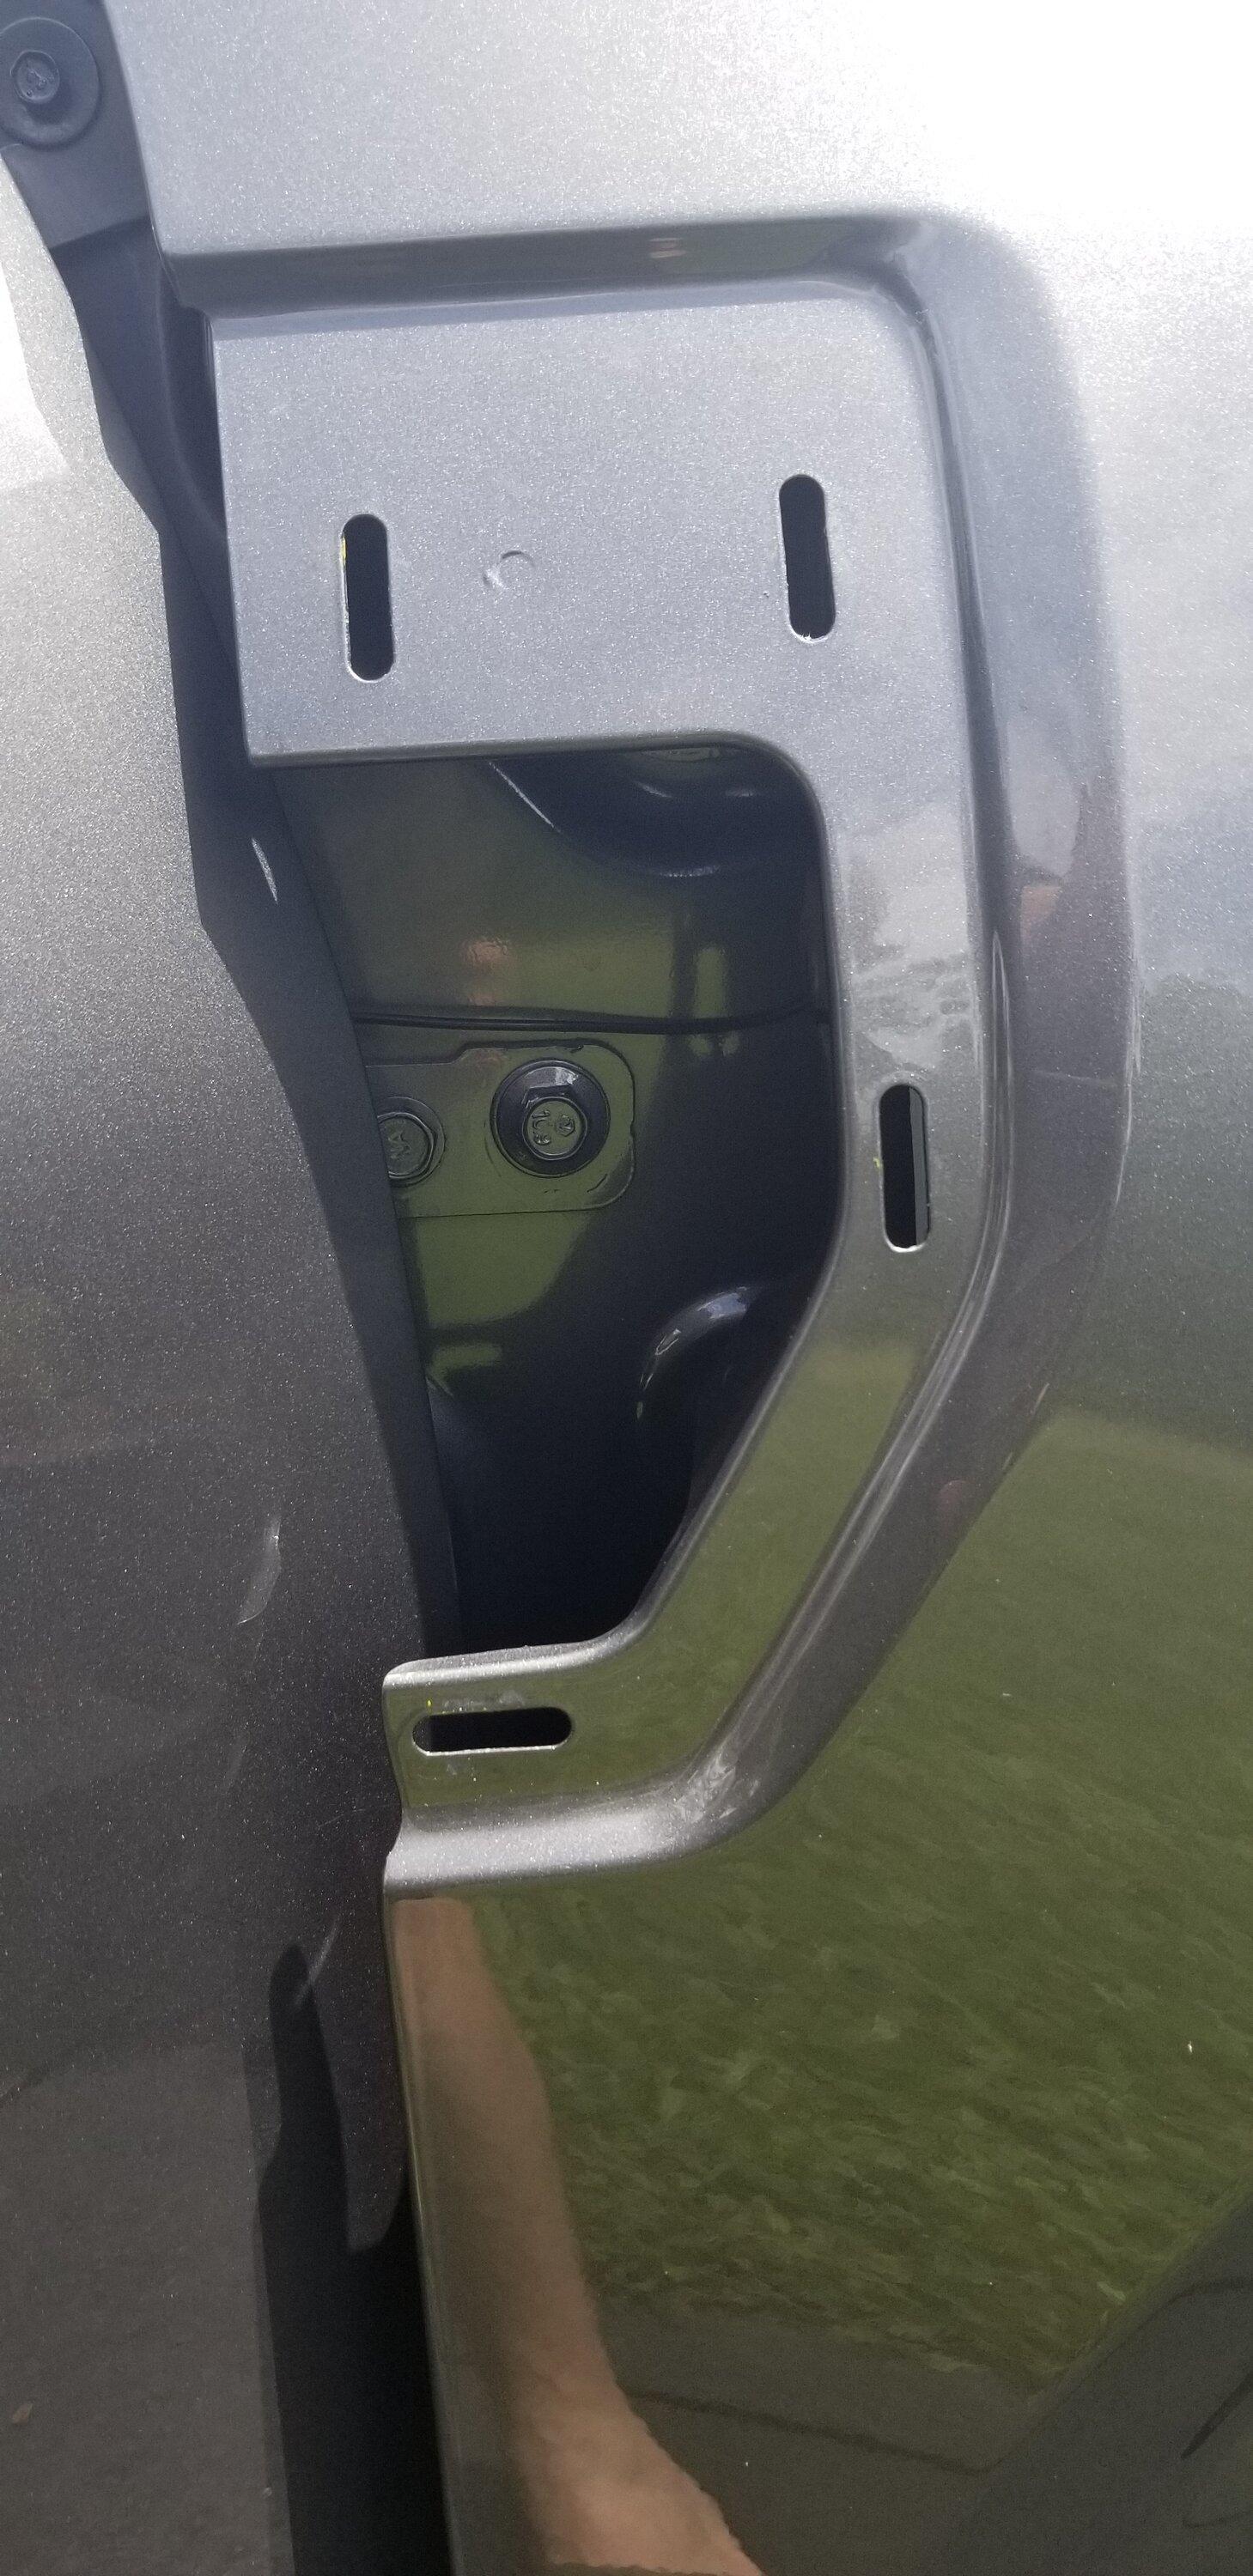
Pulled off the Model Badge(whatever it's called) to more easily get to the wire path
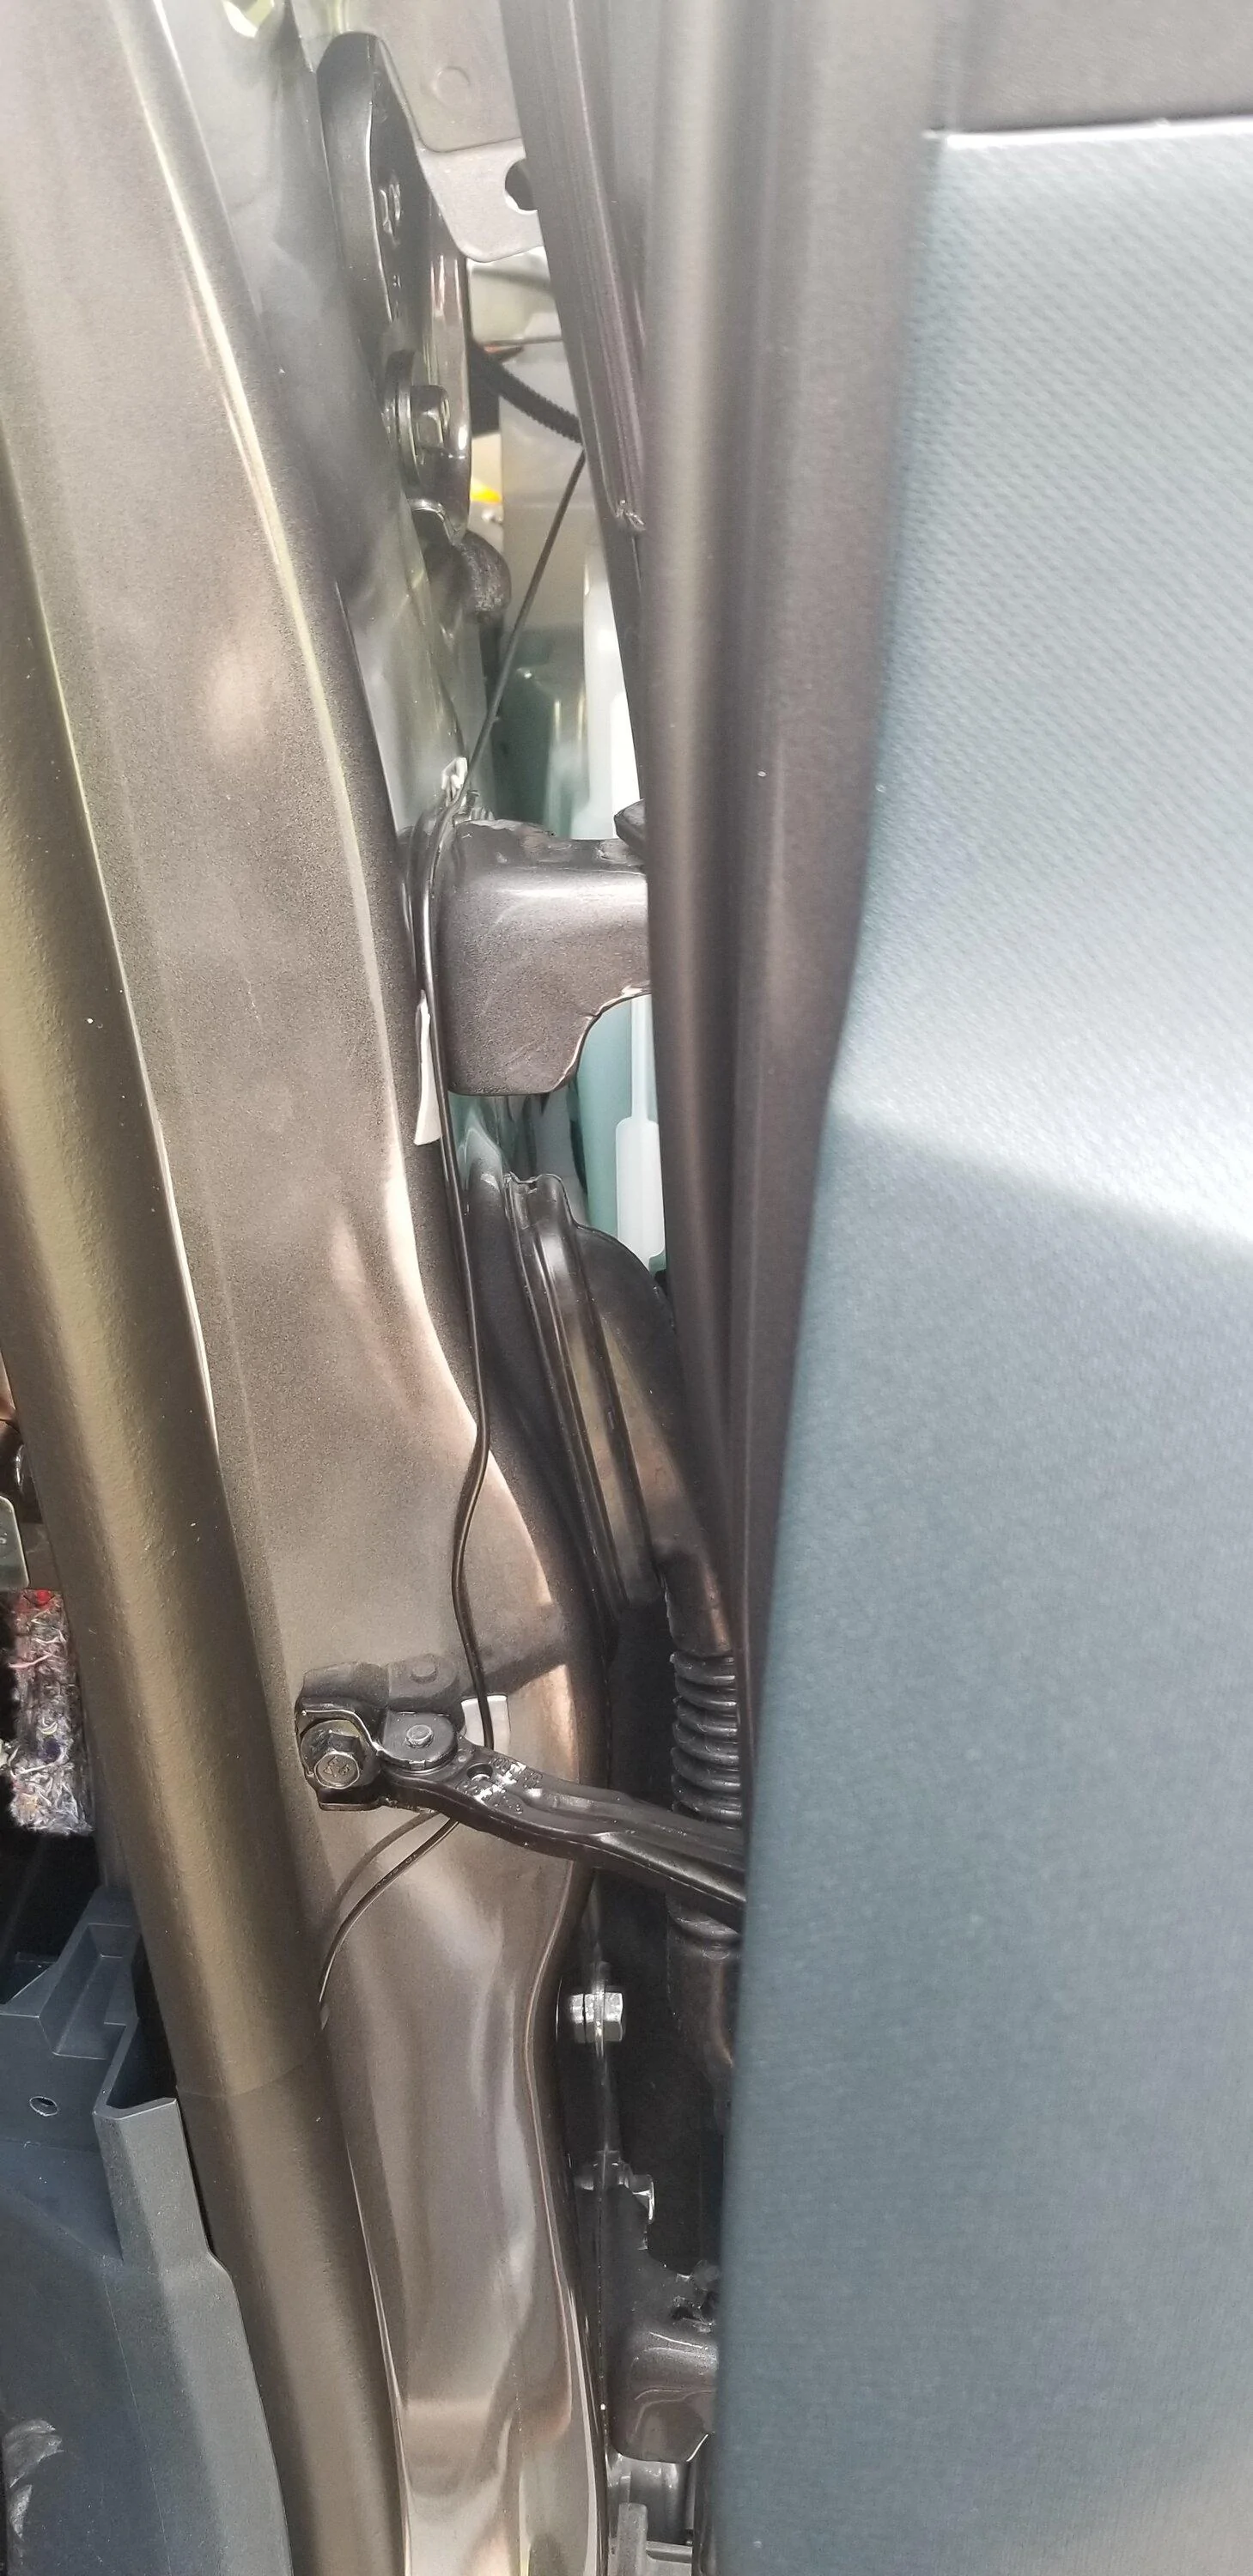
Overview of the door jam area with the antenna wire visible.
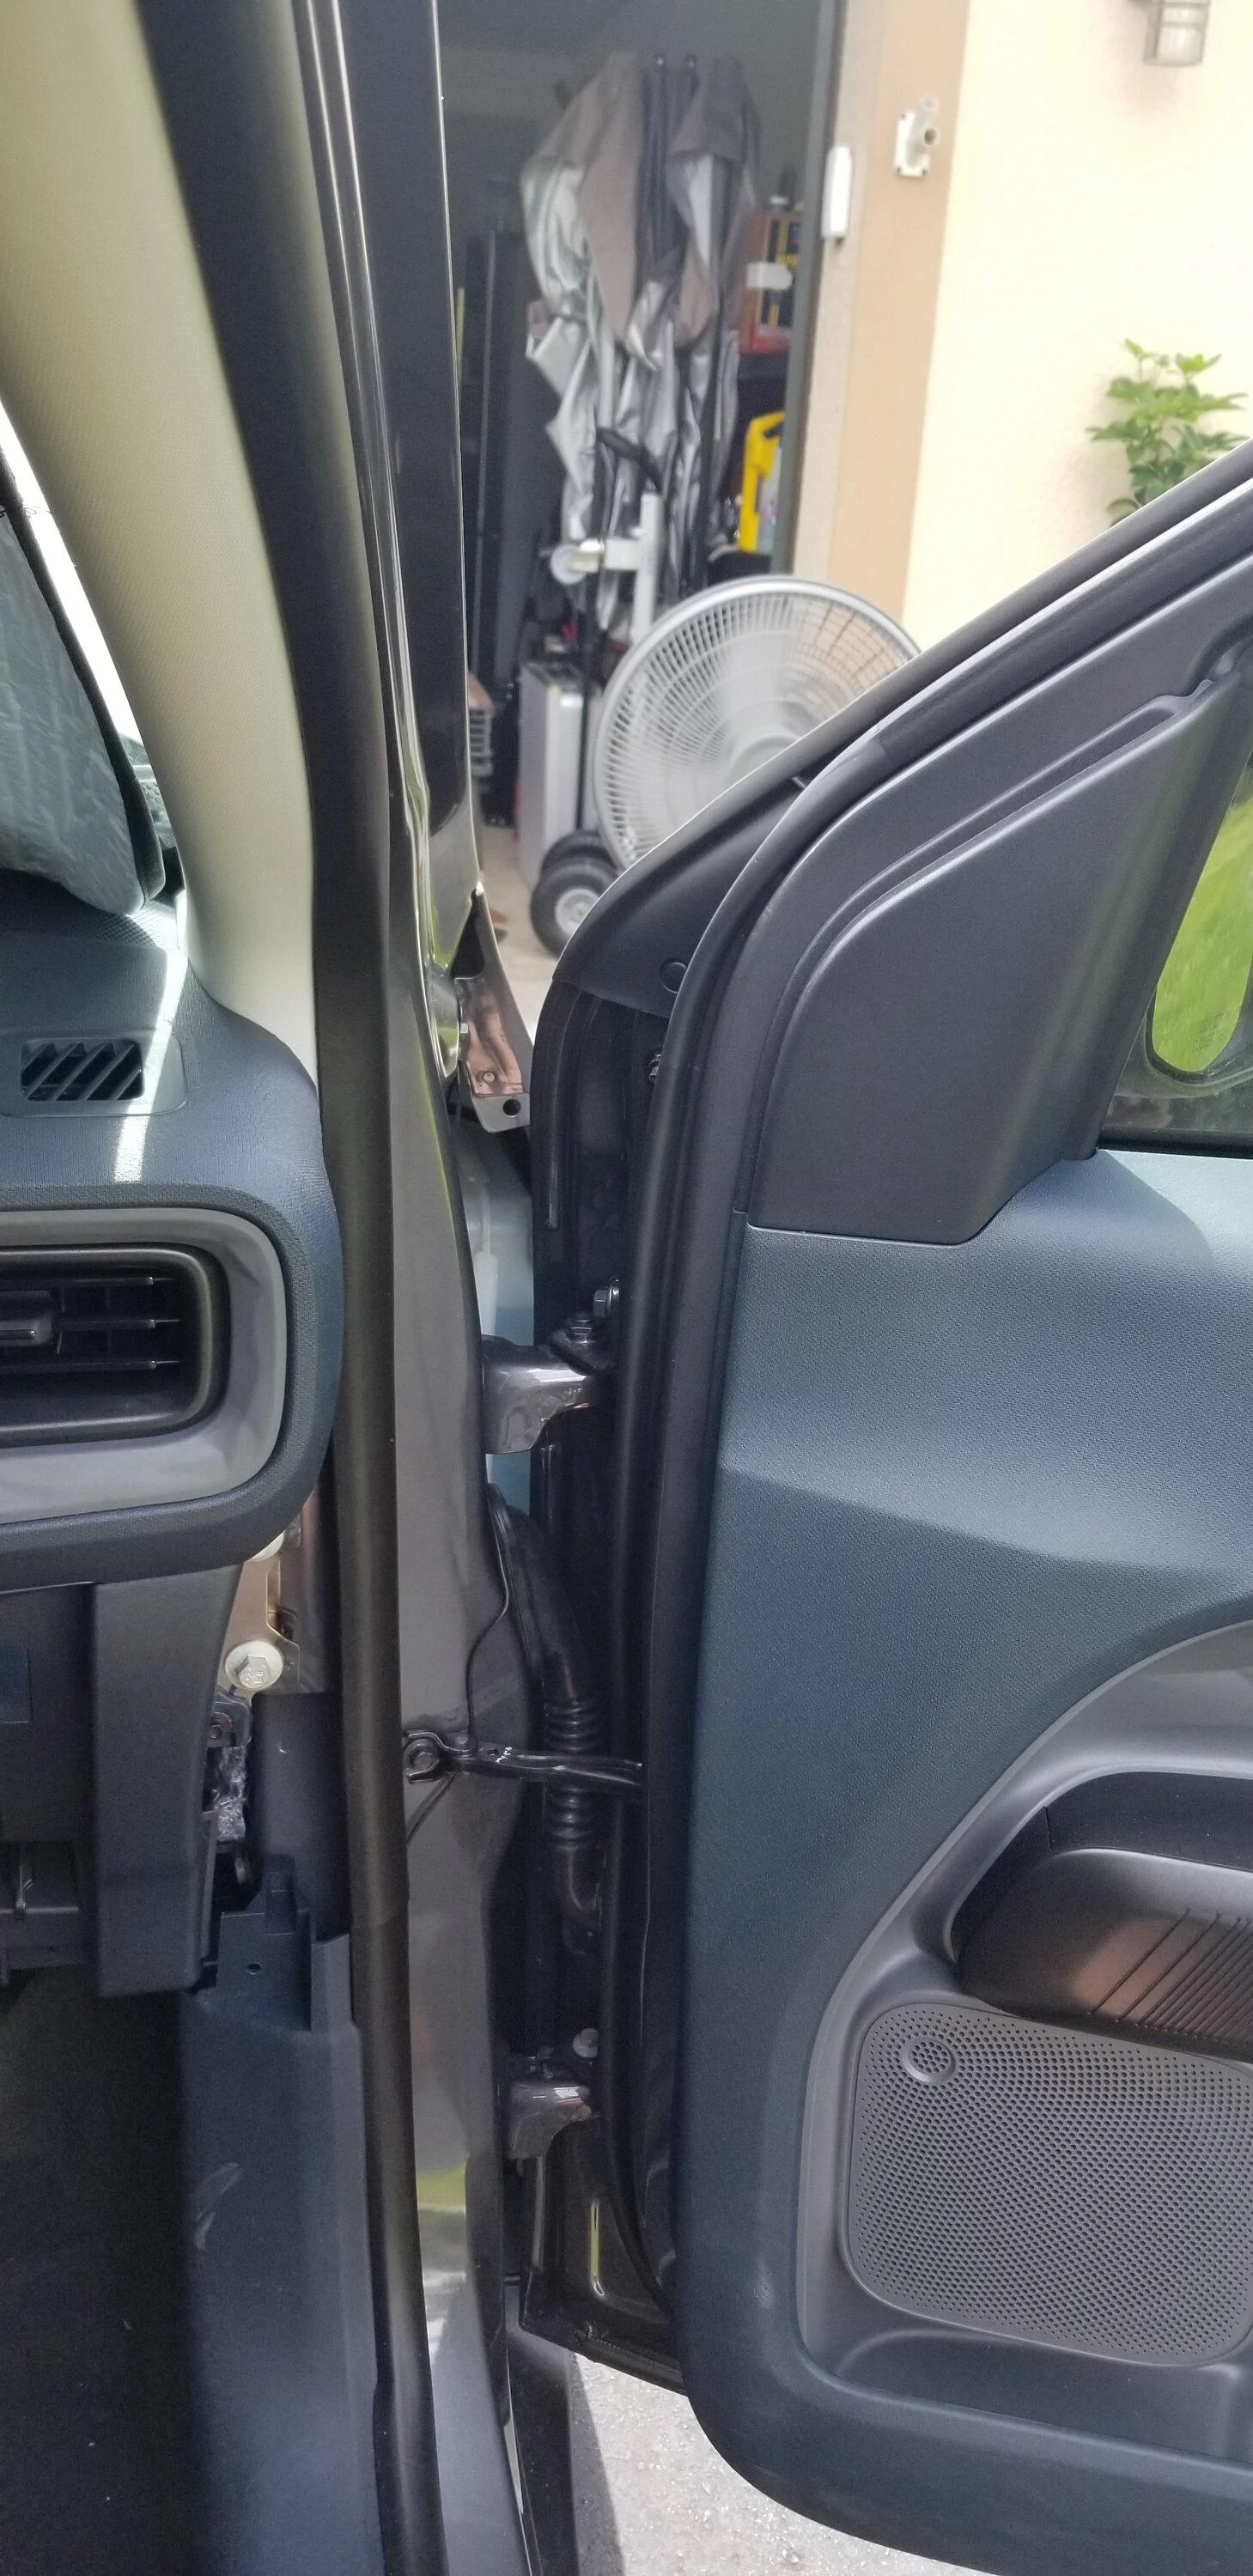
Routed the wire from above the door jam area down the jam to the break in the weather stripping
Decided to use little strips of double-sided tape to hold the wire routing in place.
Then brought the antenna wire through the weather stripping seam and behind the glove box.
Also, I removed the trim just to the right of the glove box. You just pull. It has 4 clips and at the base is a nonrenewable push-in clip. Mine was still usable upon reassembly. This made it easier to get my hand behind for routing the wire
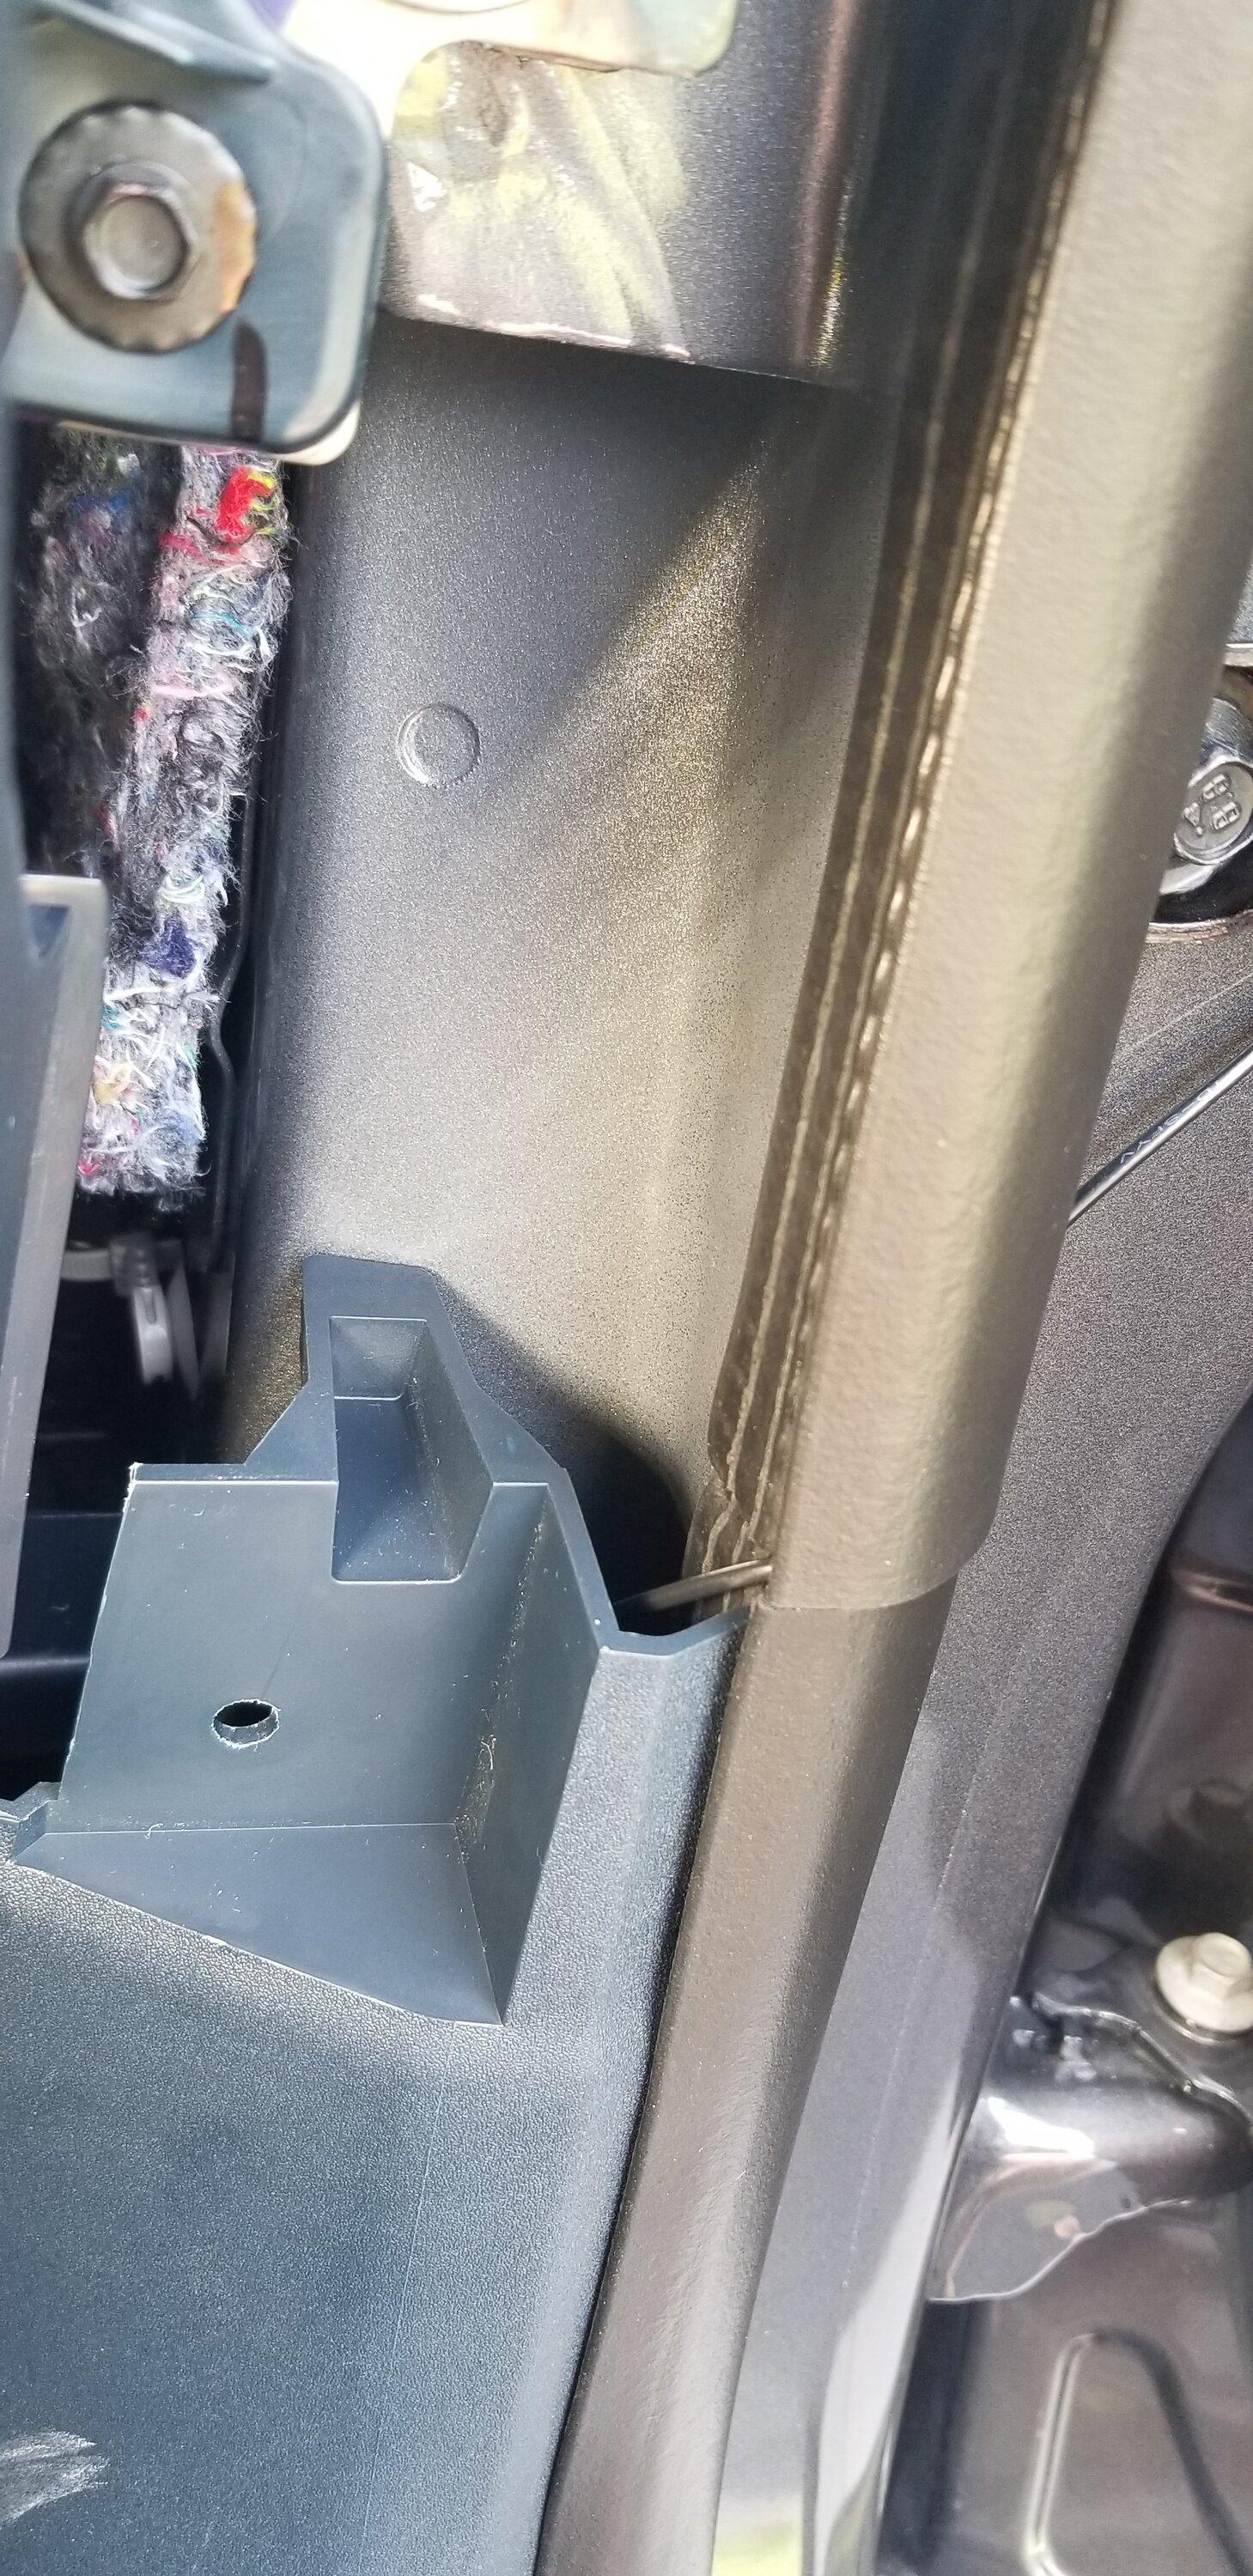
Final wire path!
You do not need to remove the glove box for this install but it was easier to see.
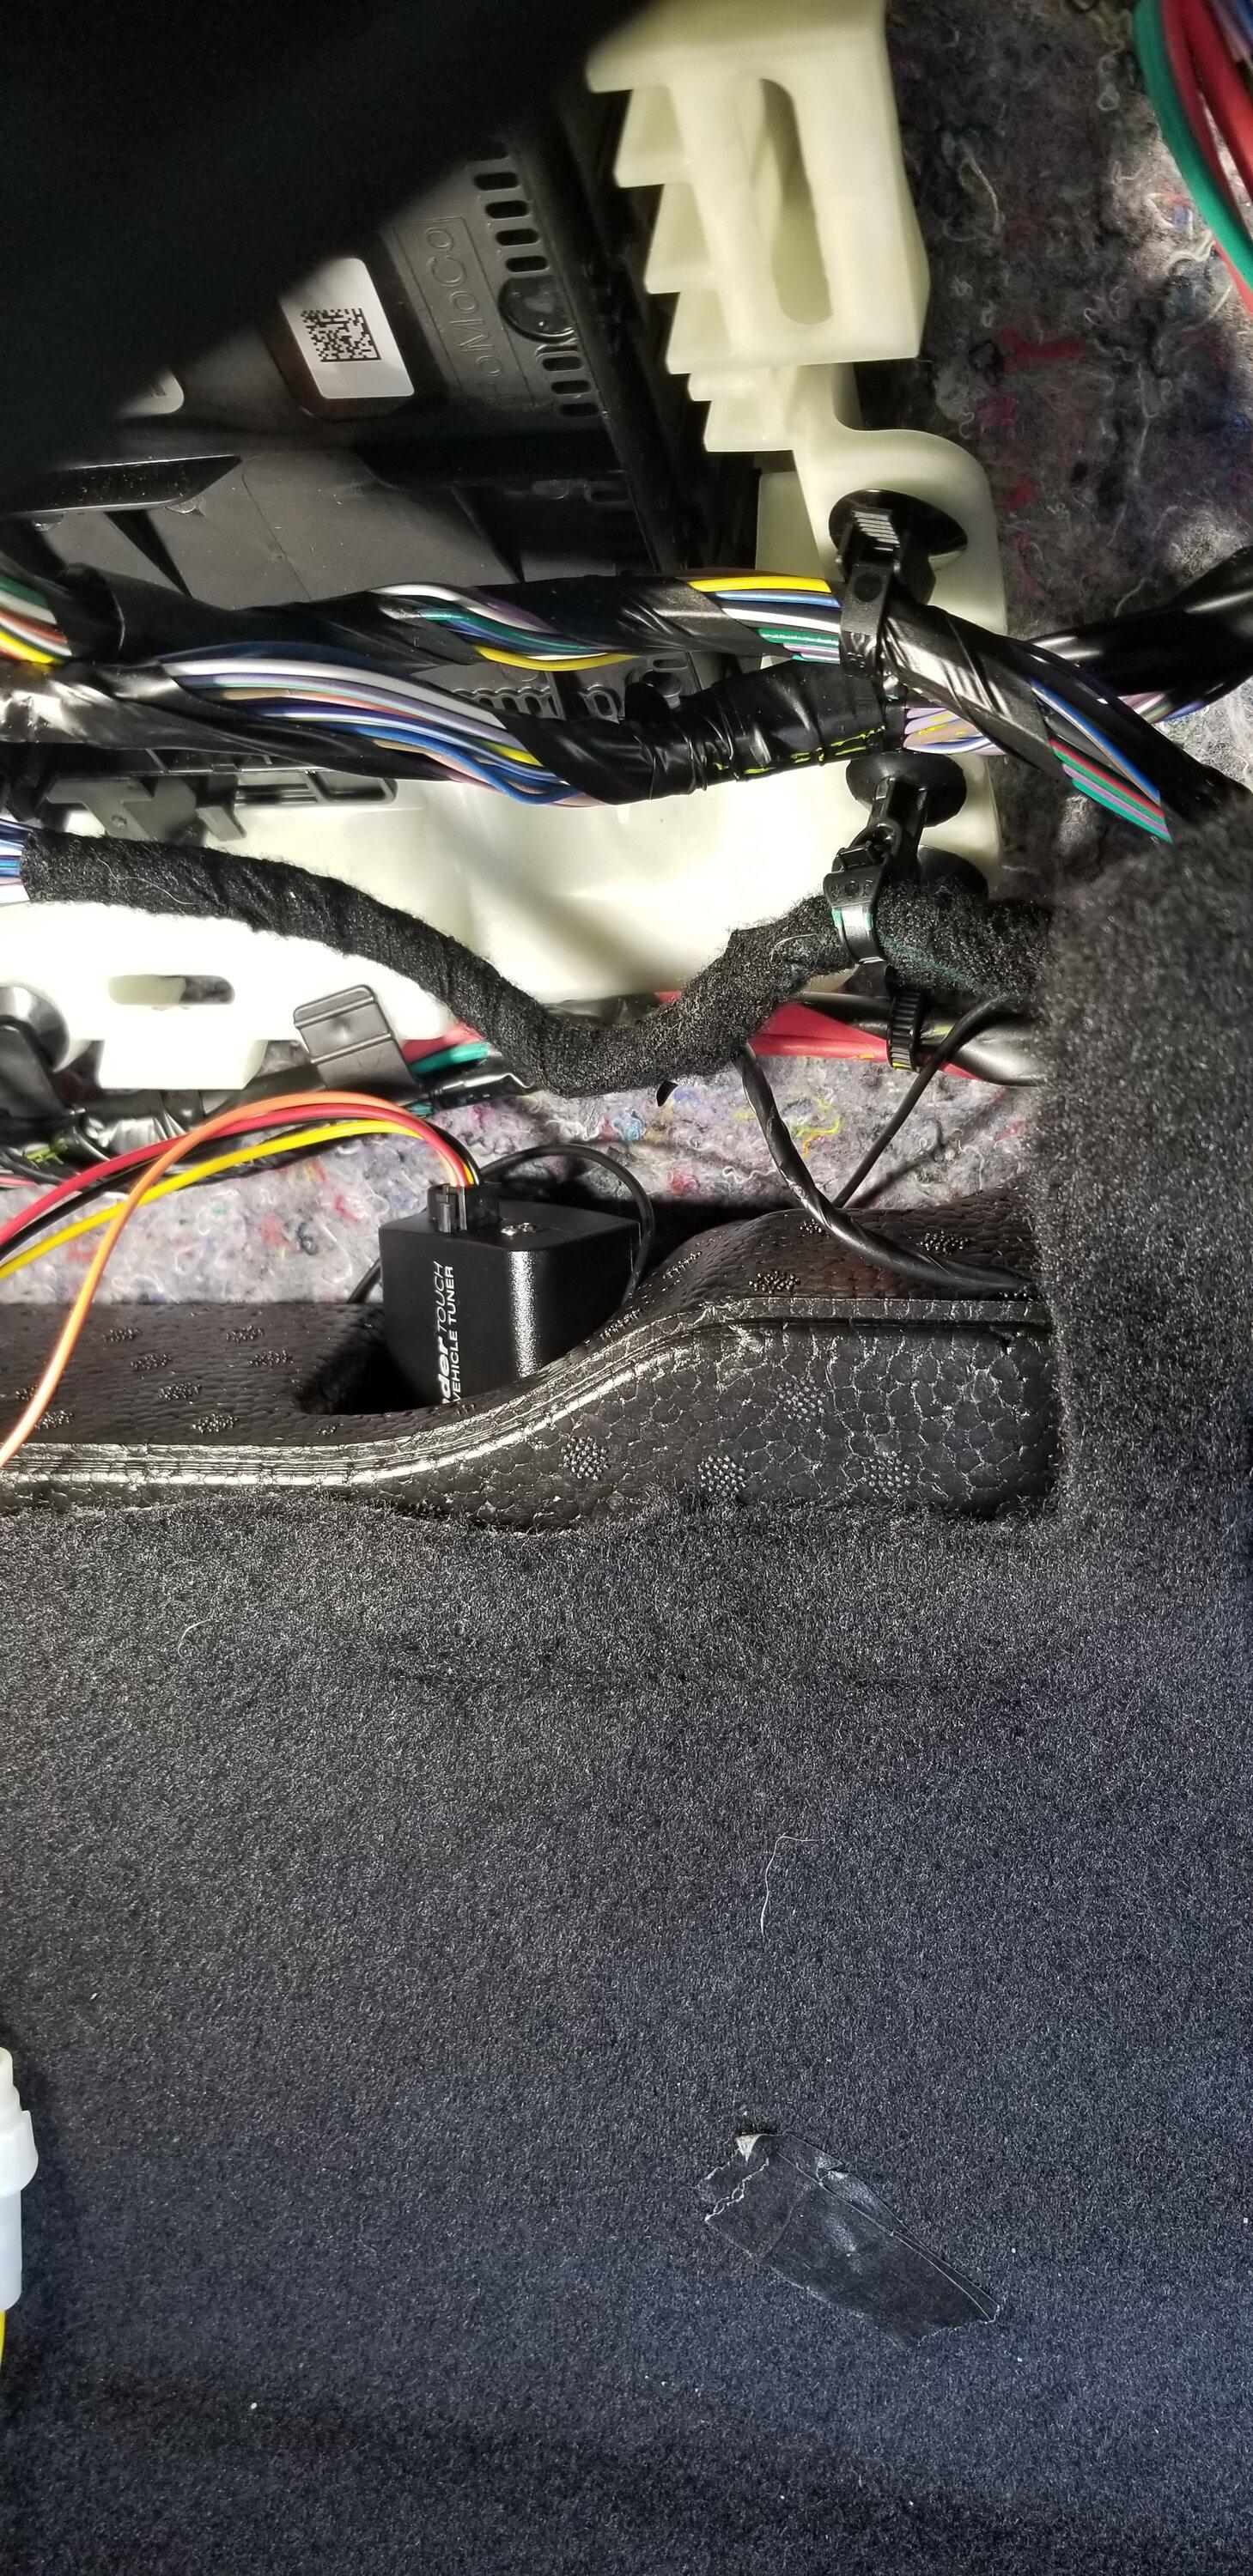
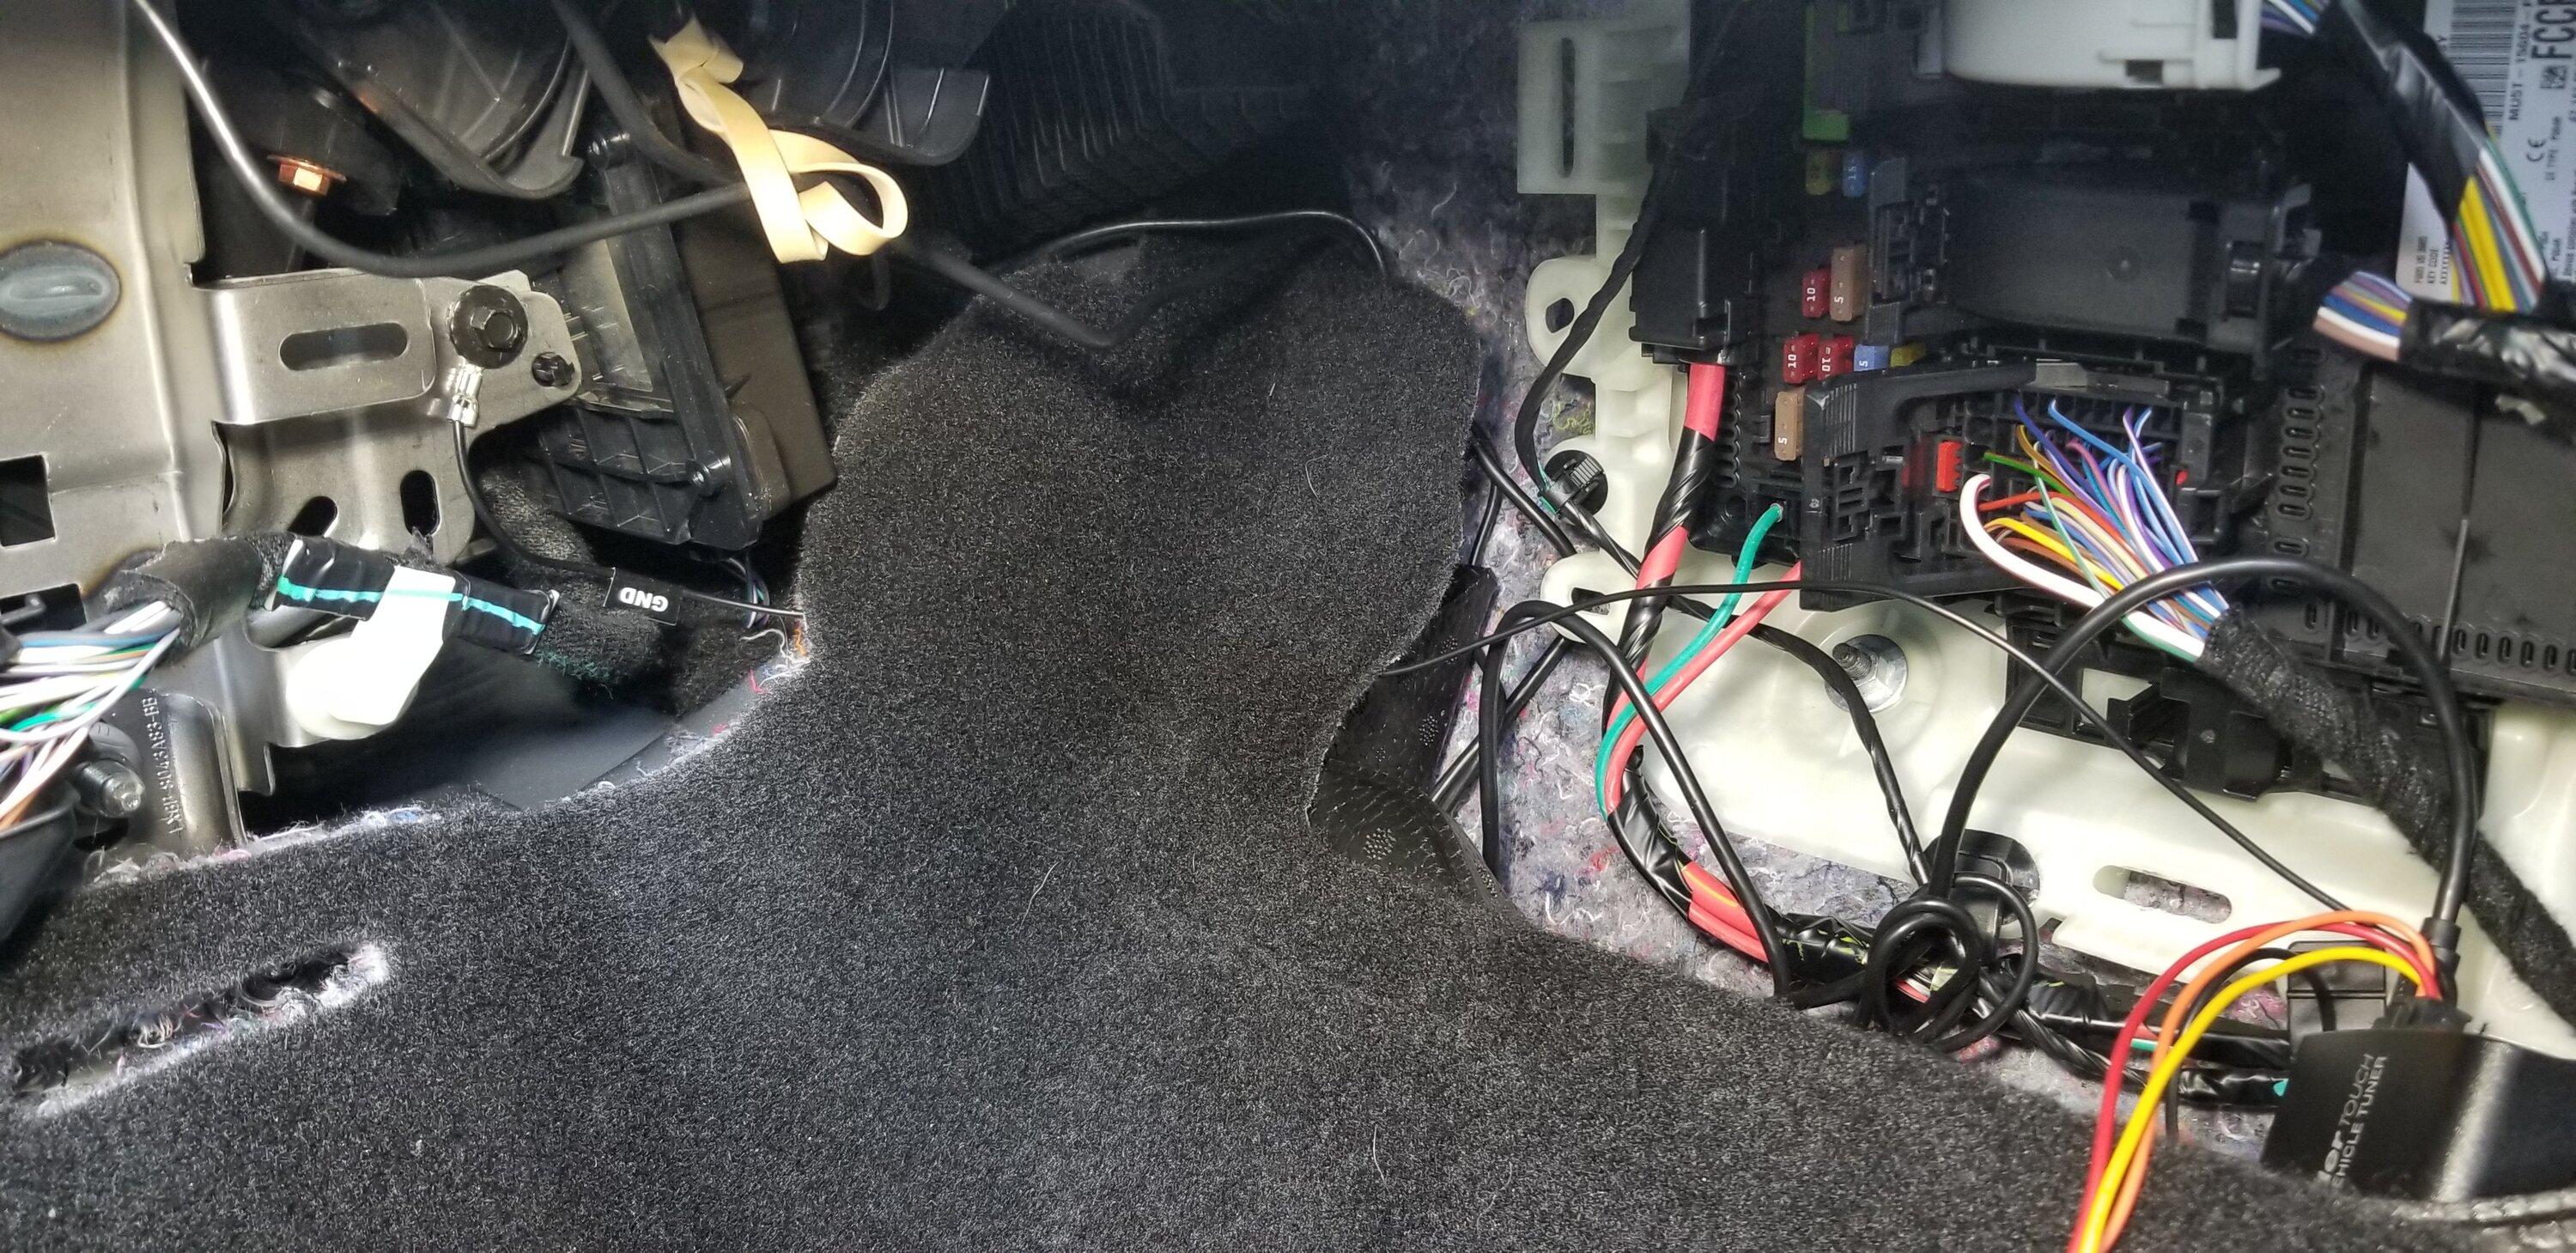
Just under the carpet is a foam block. This had a small hole in it that fits the commander module PERFECT!!!!
I was able to hide everything right in there like it was made for it.
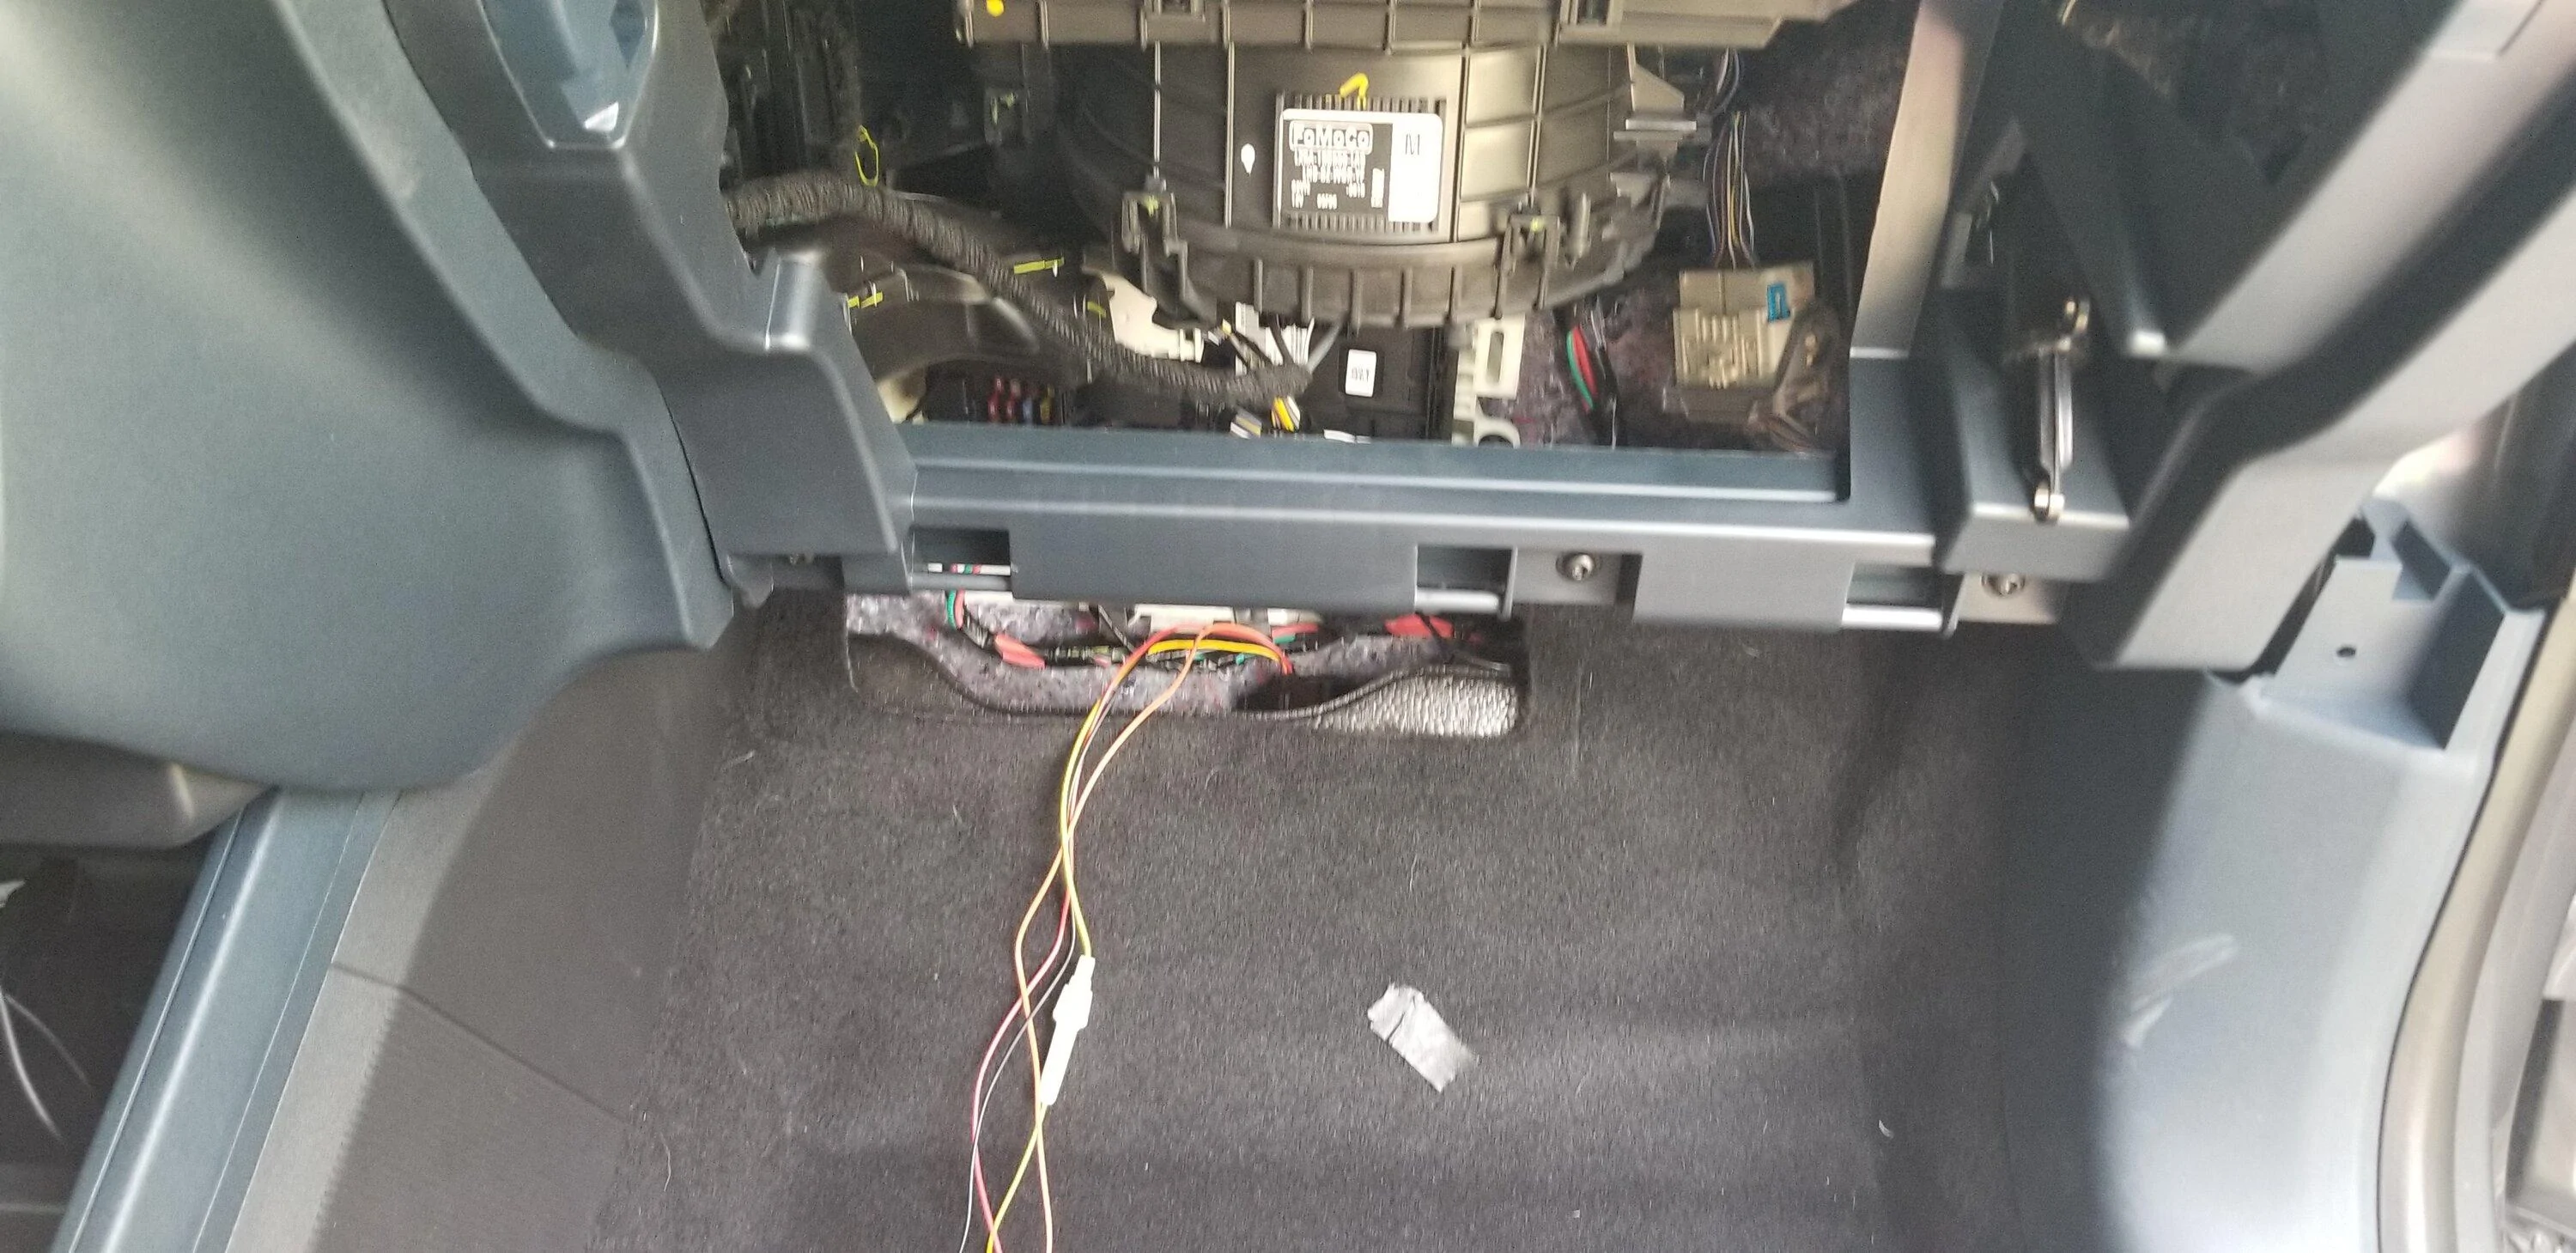
Fits just perfect!!
Now onto the Radio and FM antenna adaptor install.
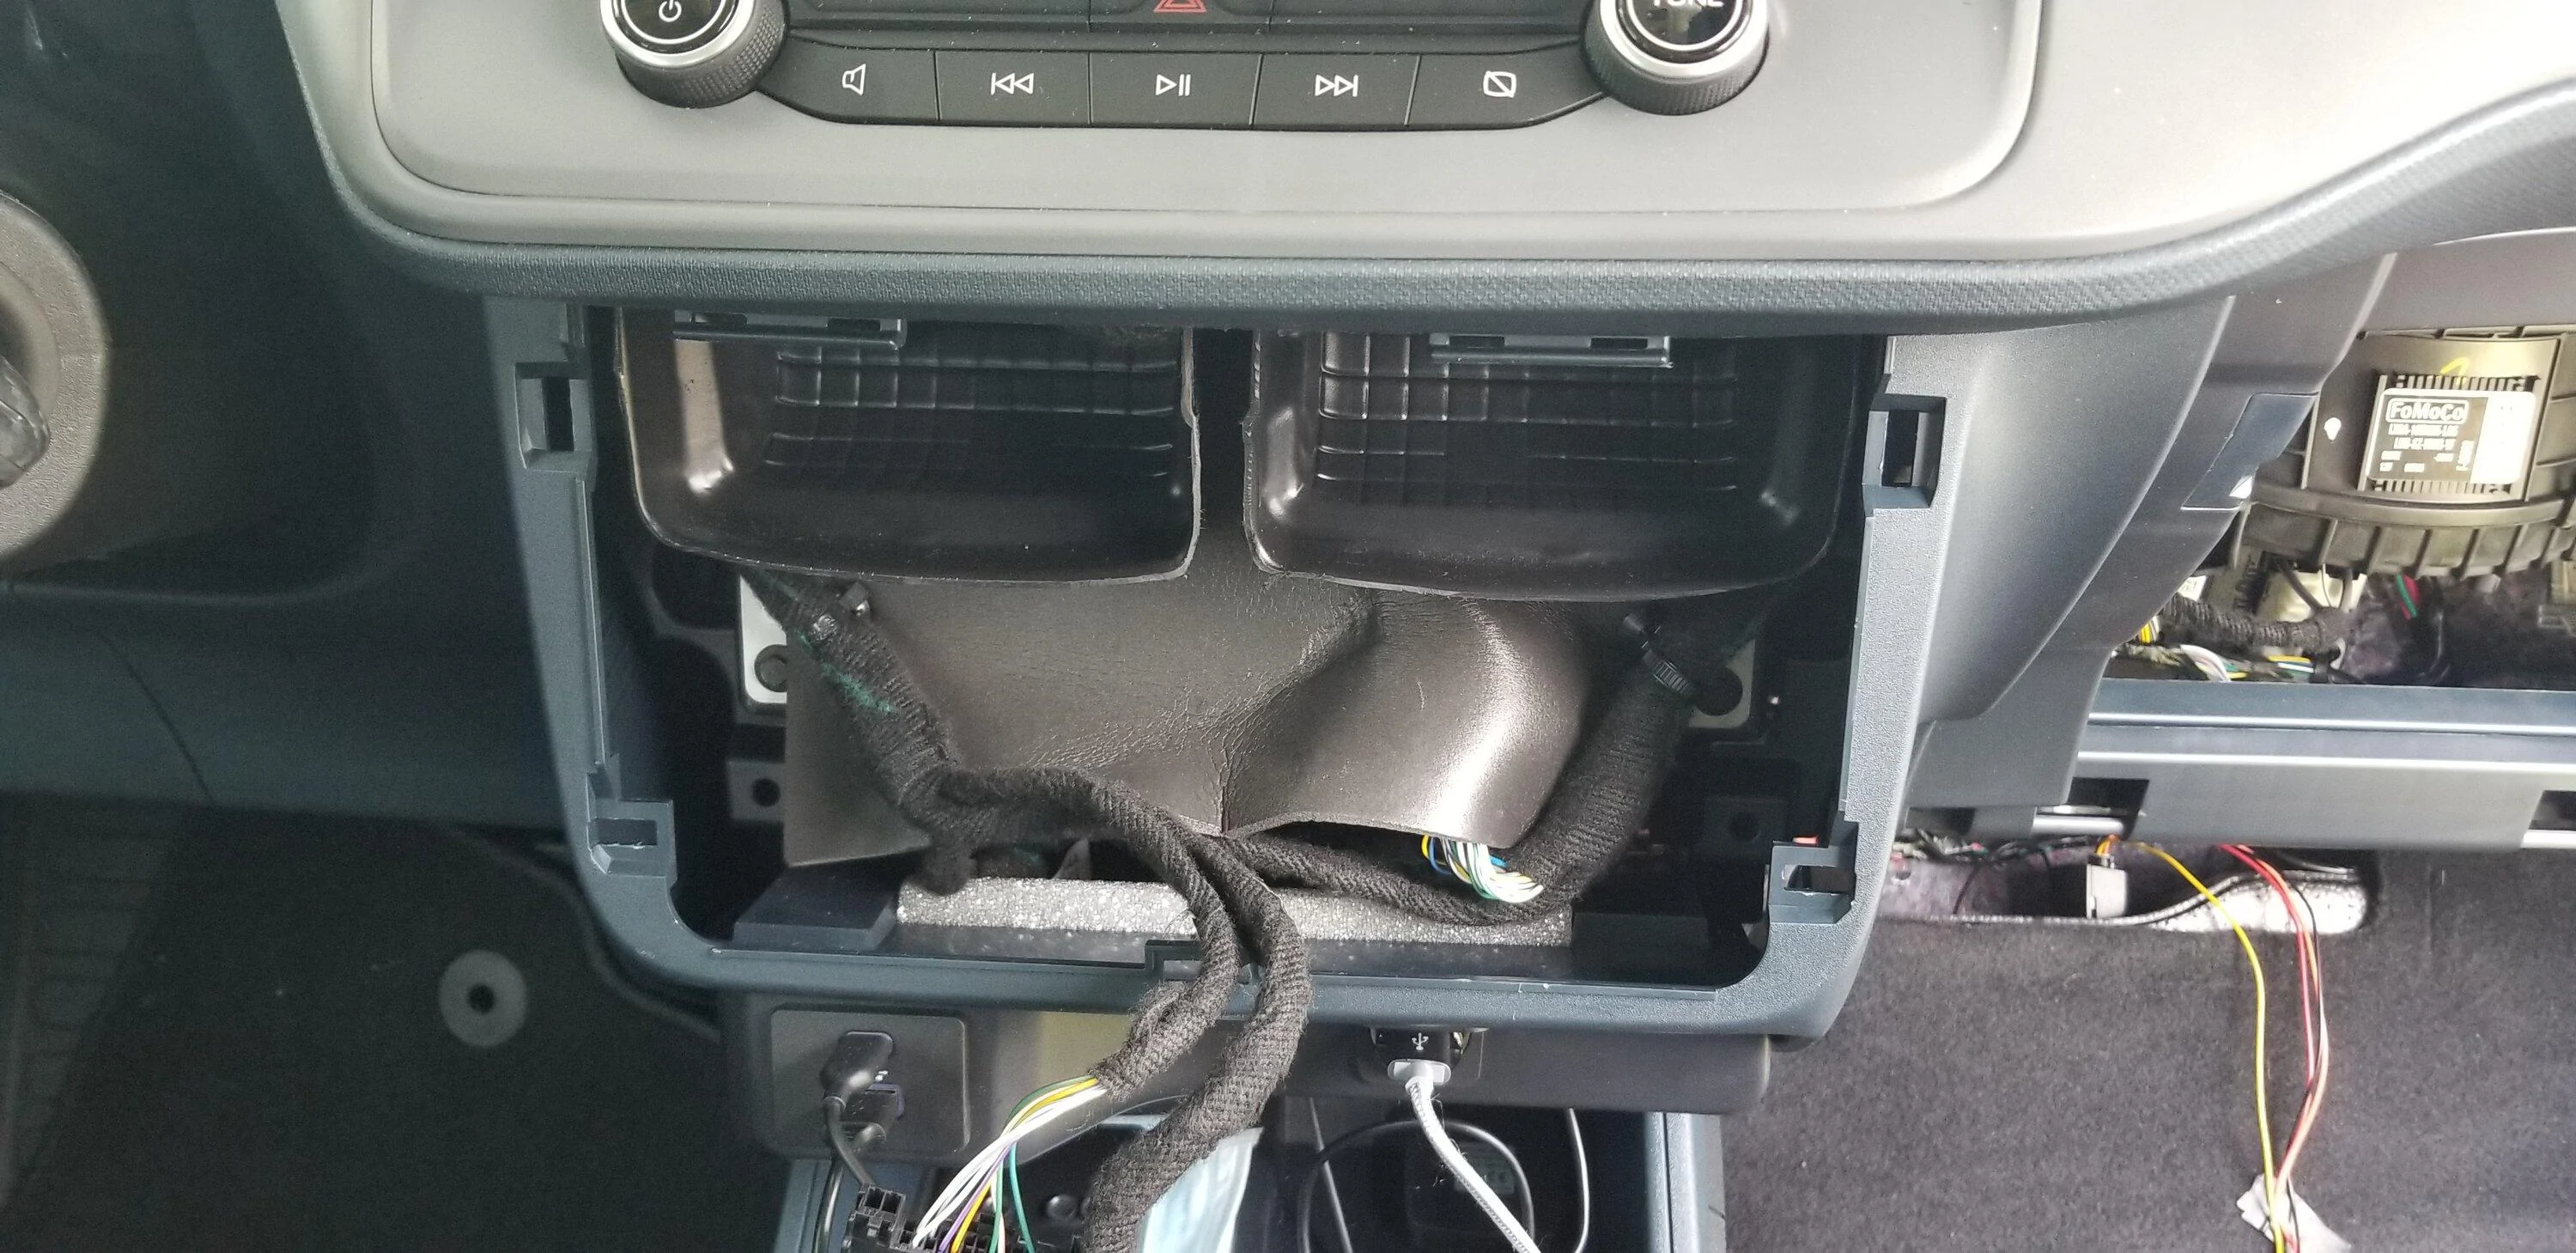
You will have to remove the A/C controls to get to the FM antenna plug on the Radio
To remove the face just grip each vent and pull out while wiggling up and down slightly.
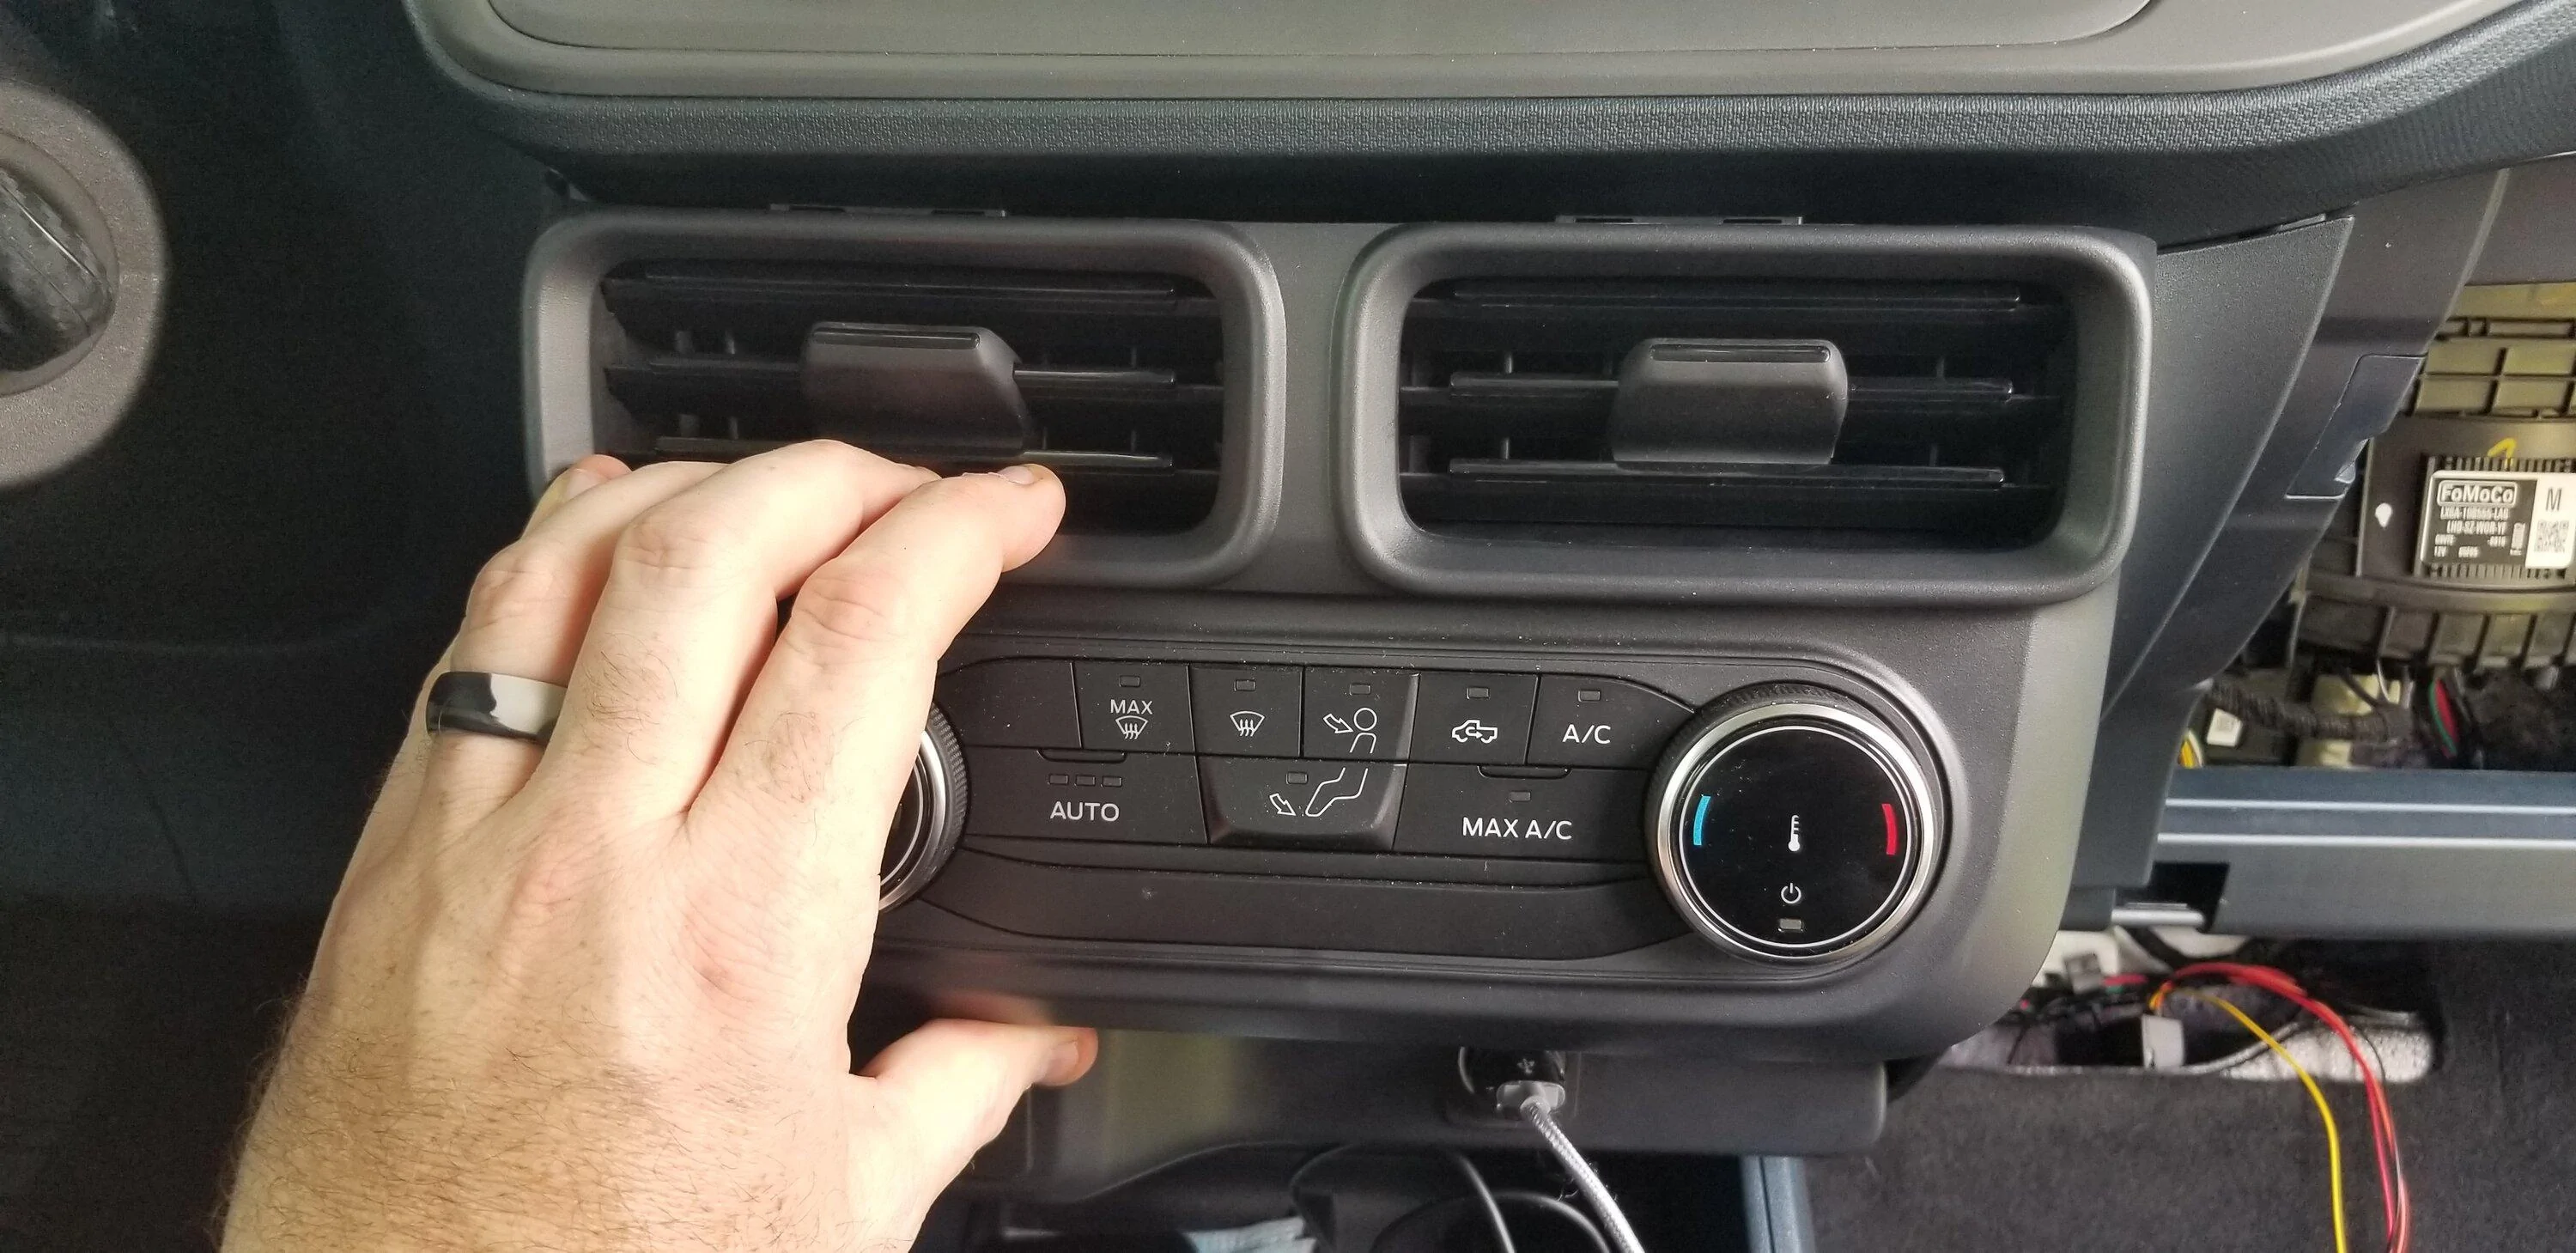
Takes a bit of strength but it will pop right out!
Disconnect the 2 plugs and set the controls aside
Even though the FM plugs are BLUE we will be using the BROWN plug.
Pinch the connector top to bottom and pull it out.
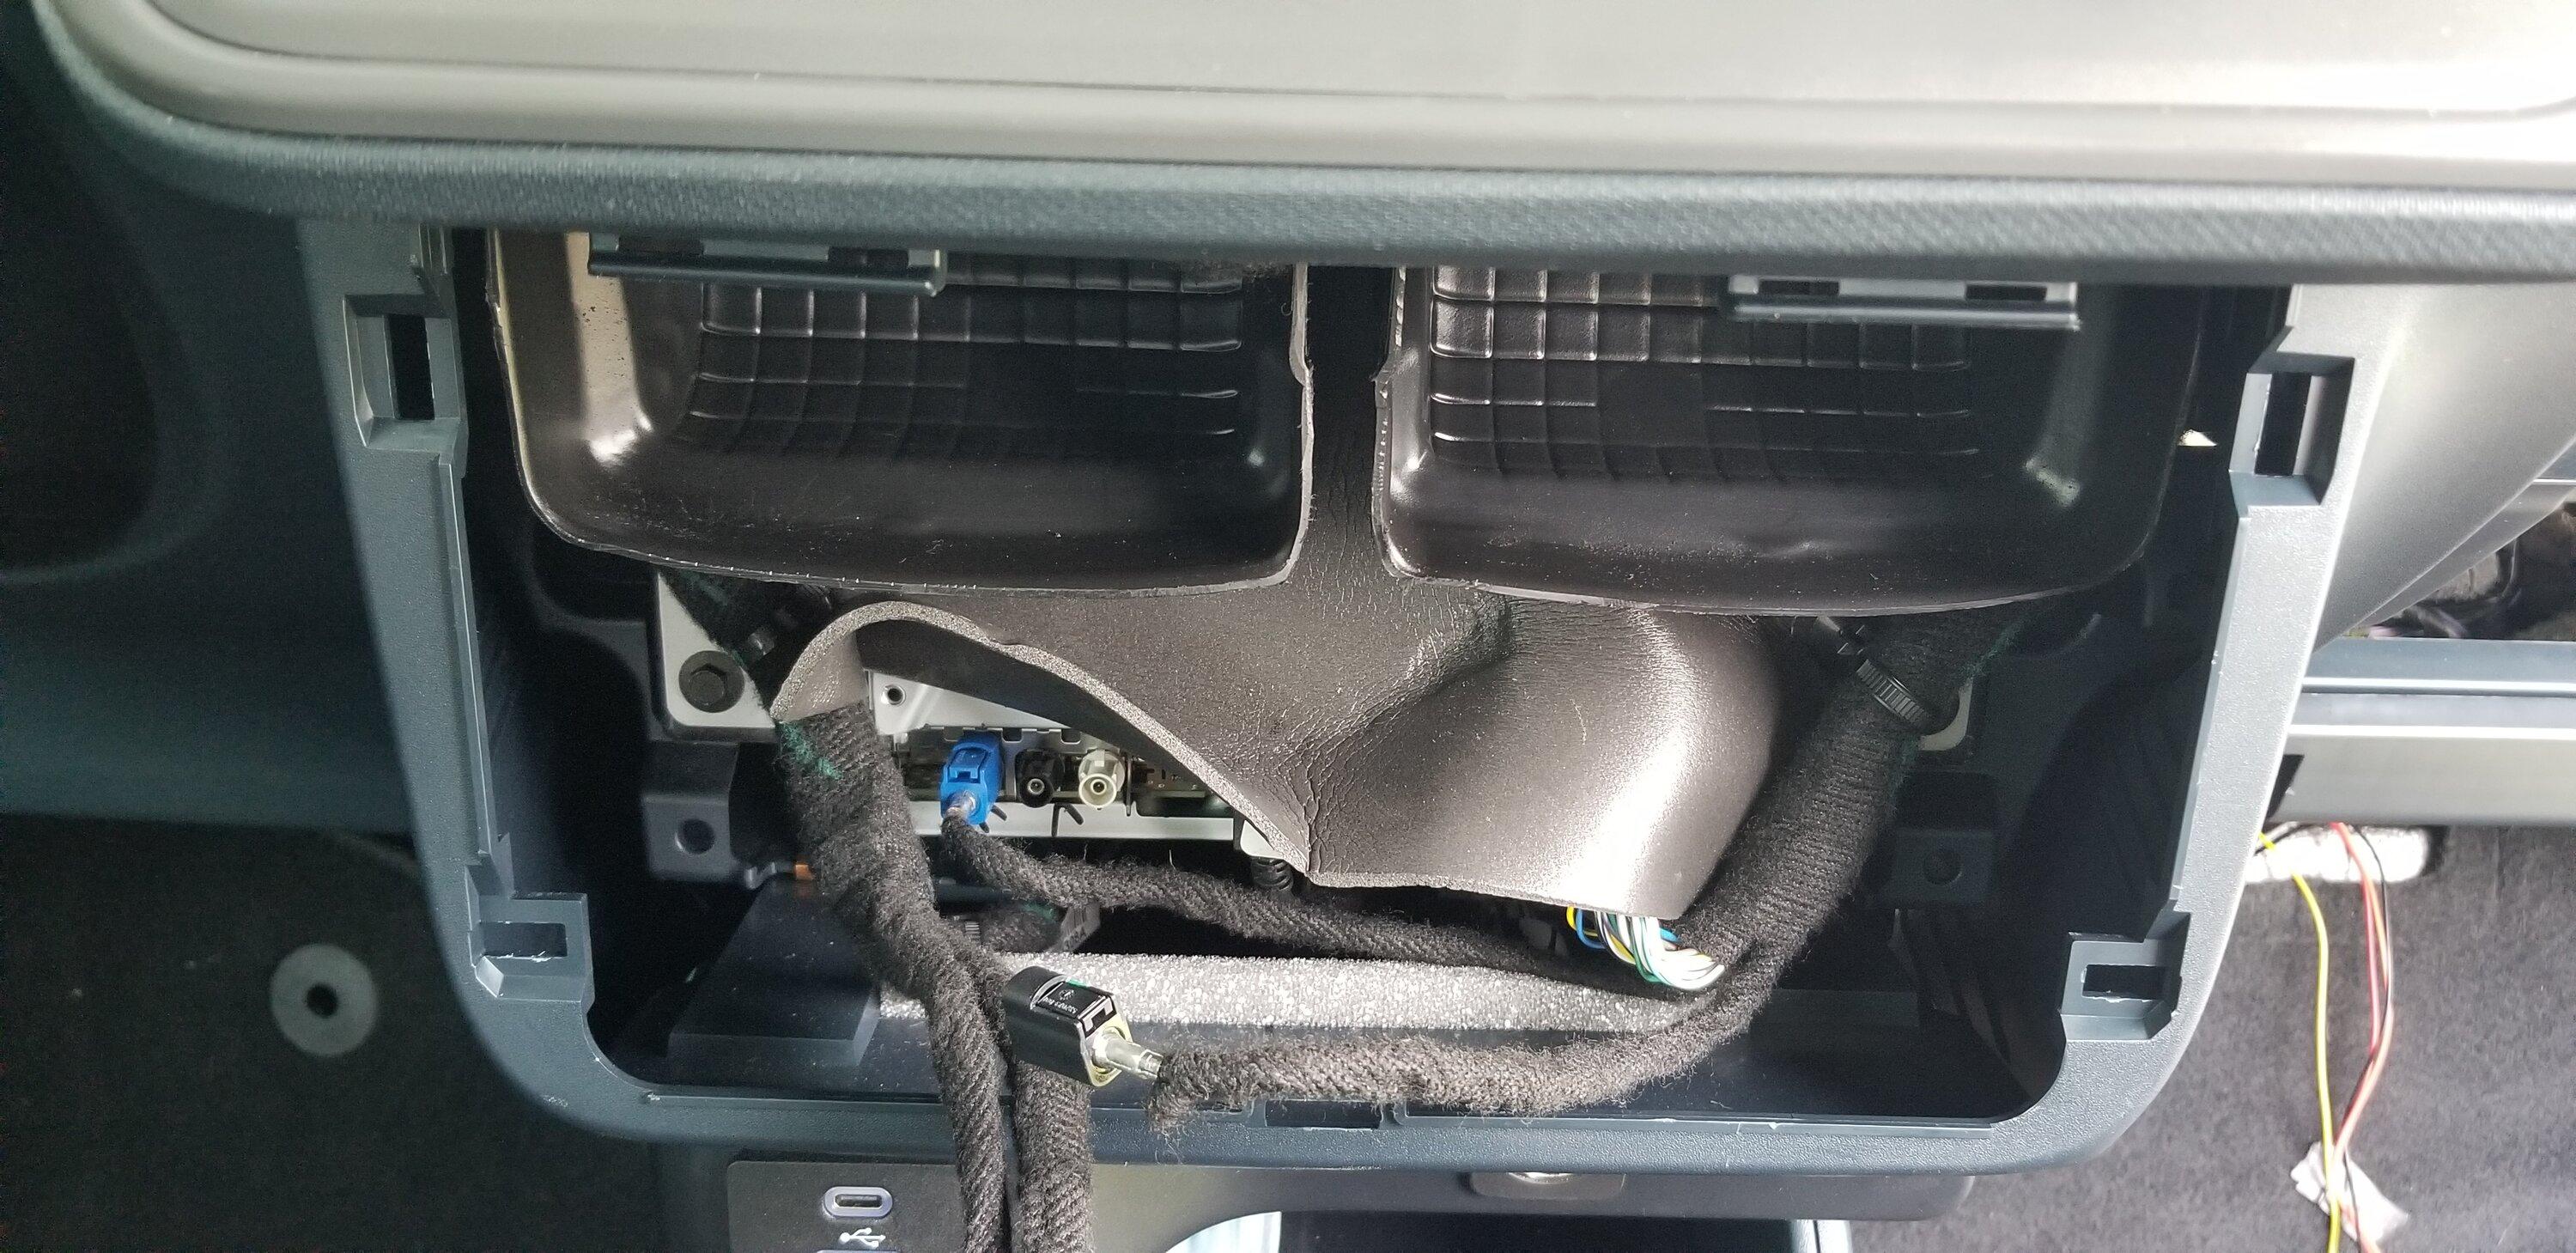
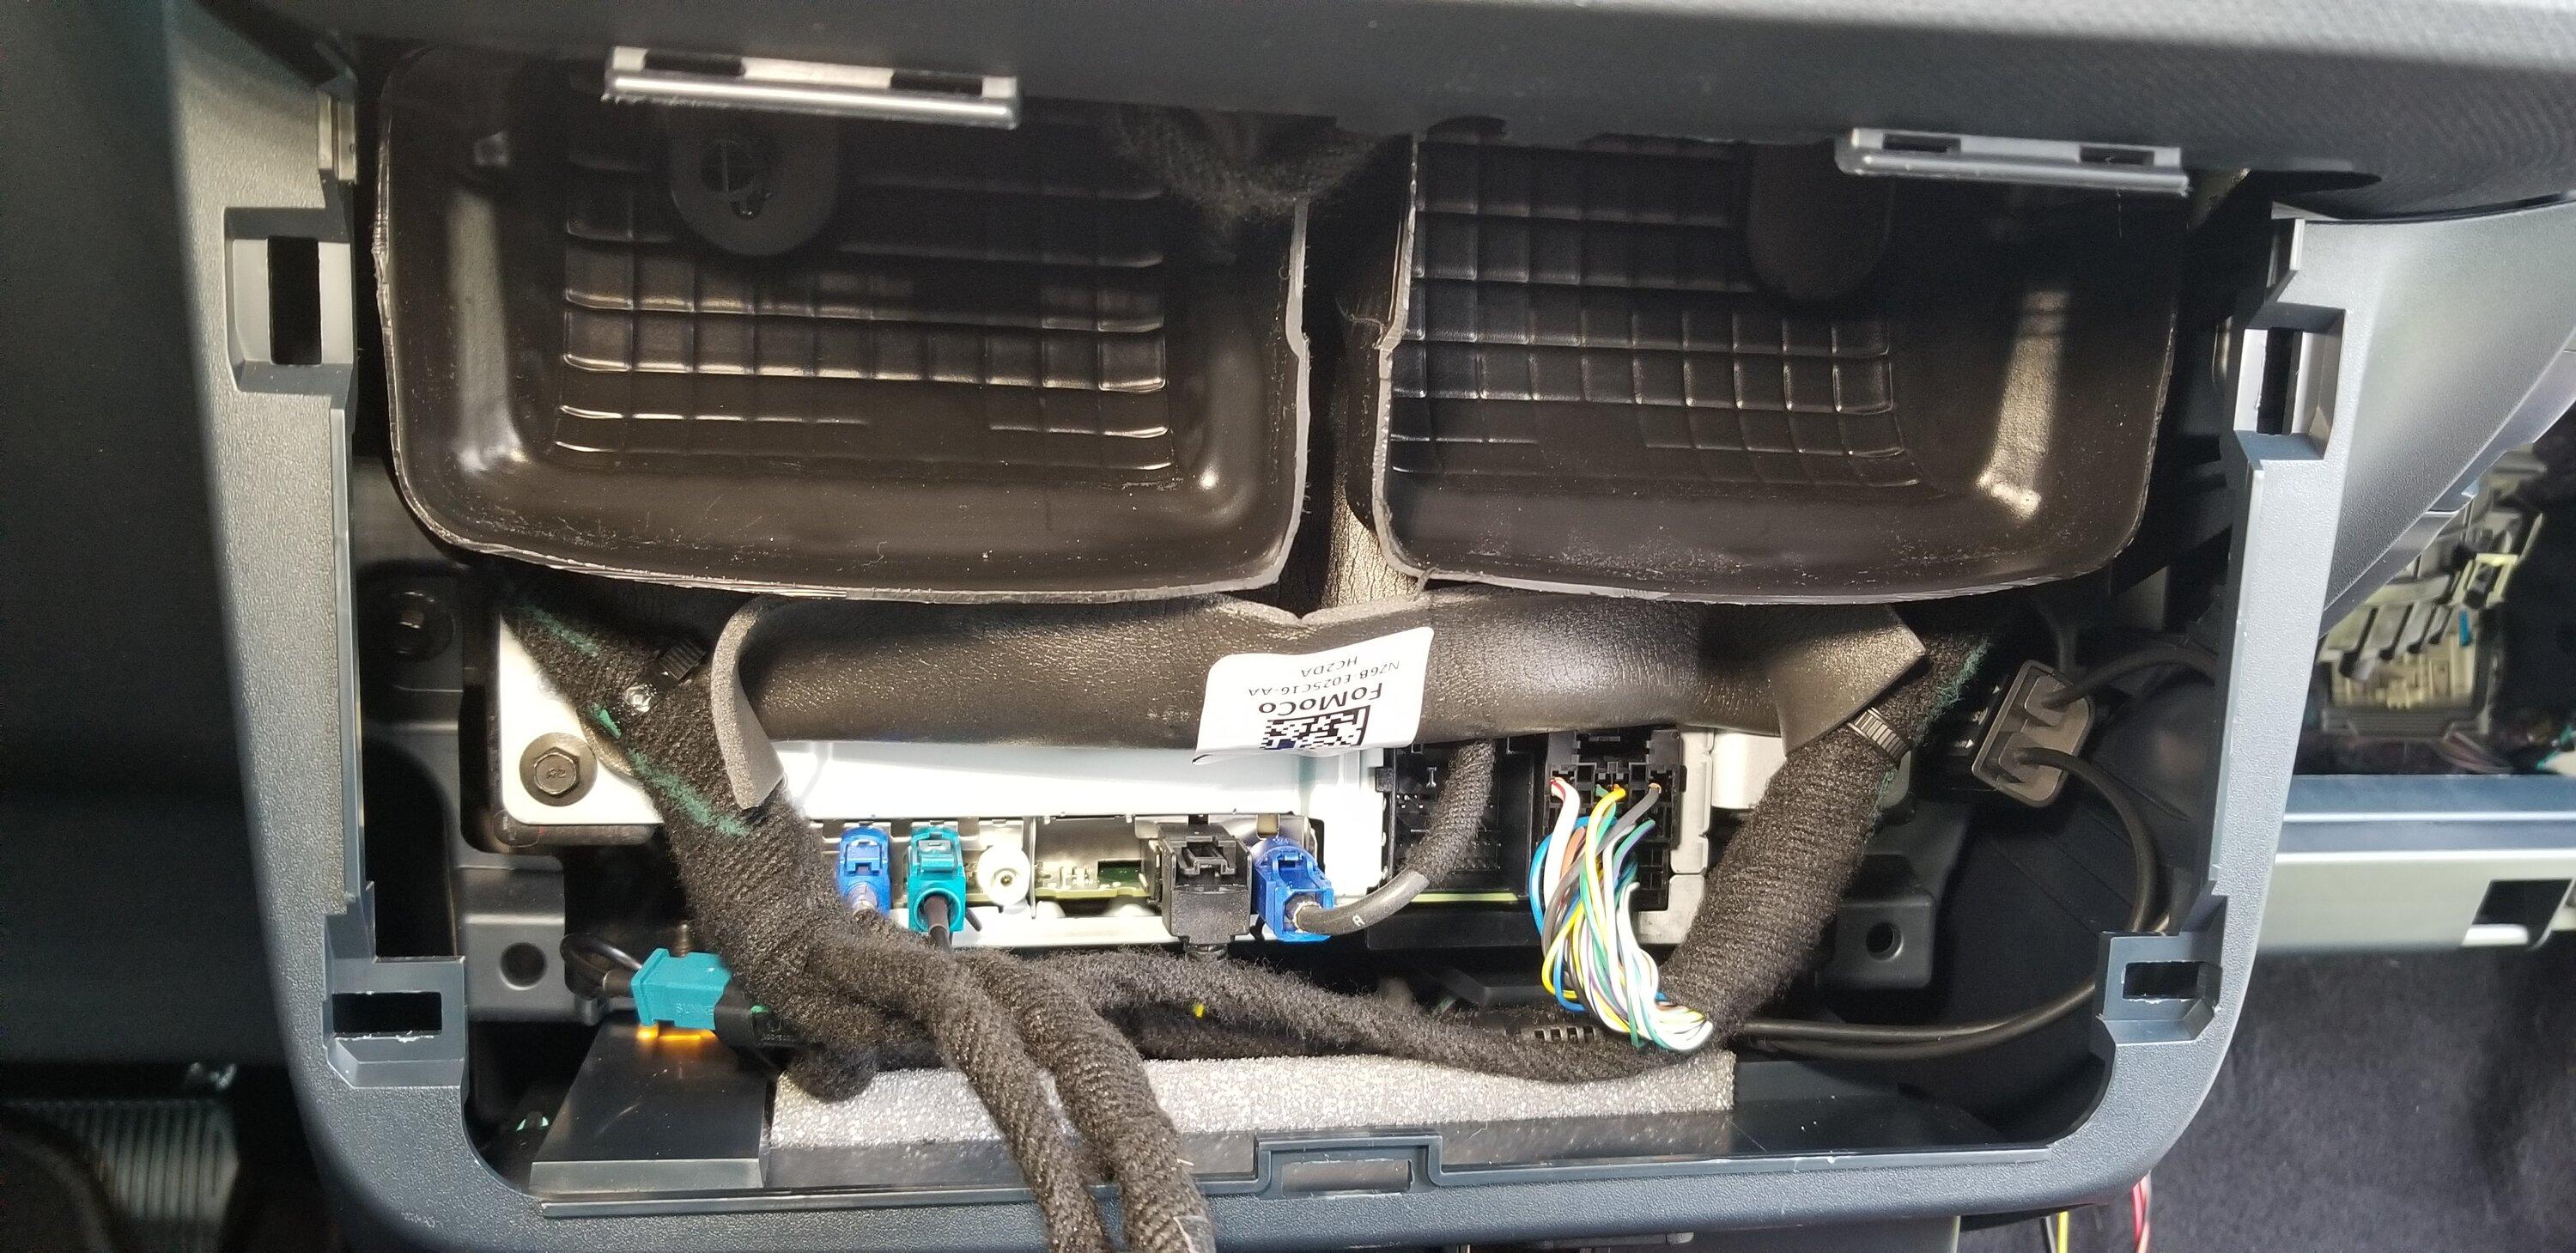
I plugged in the Commander FM antenna to the BROWN connector and the other end to the Plug I removed and tucked the wires under the factory harness.

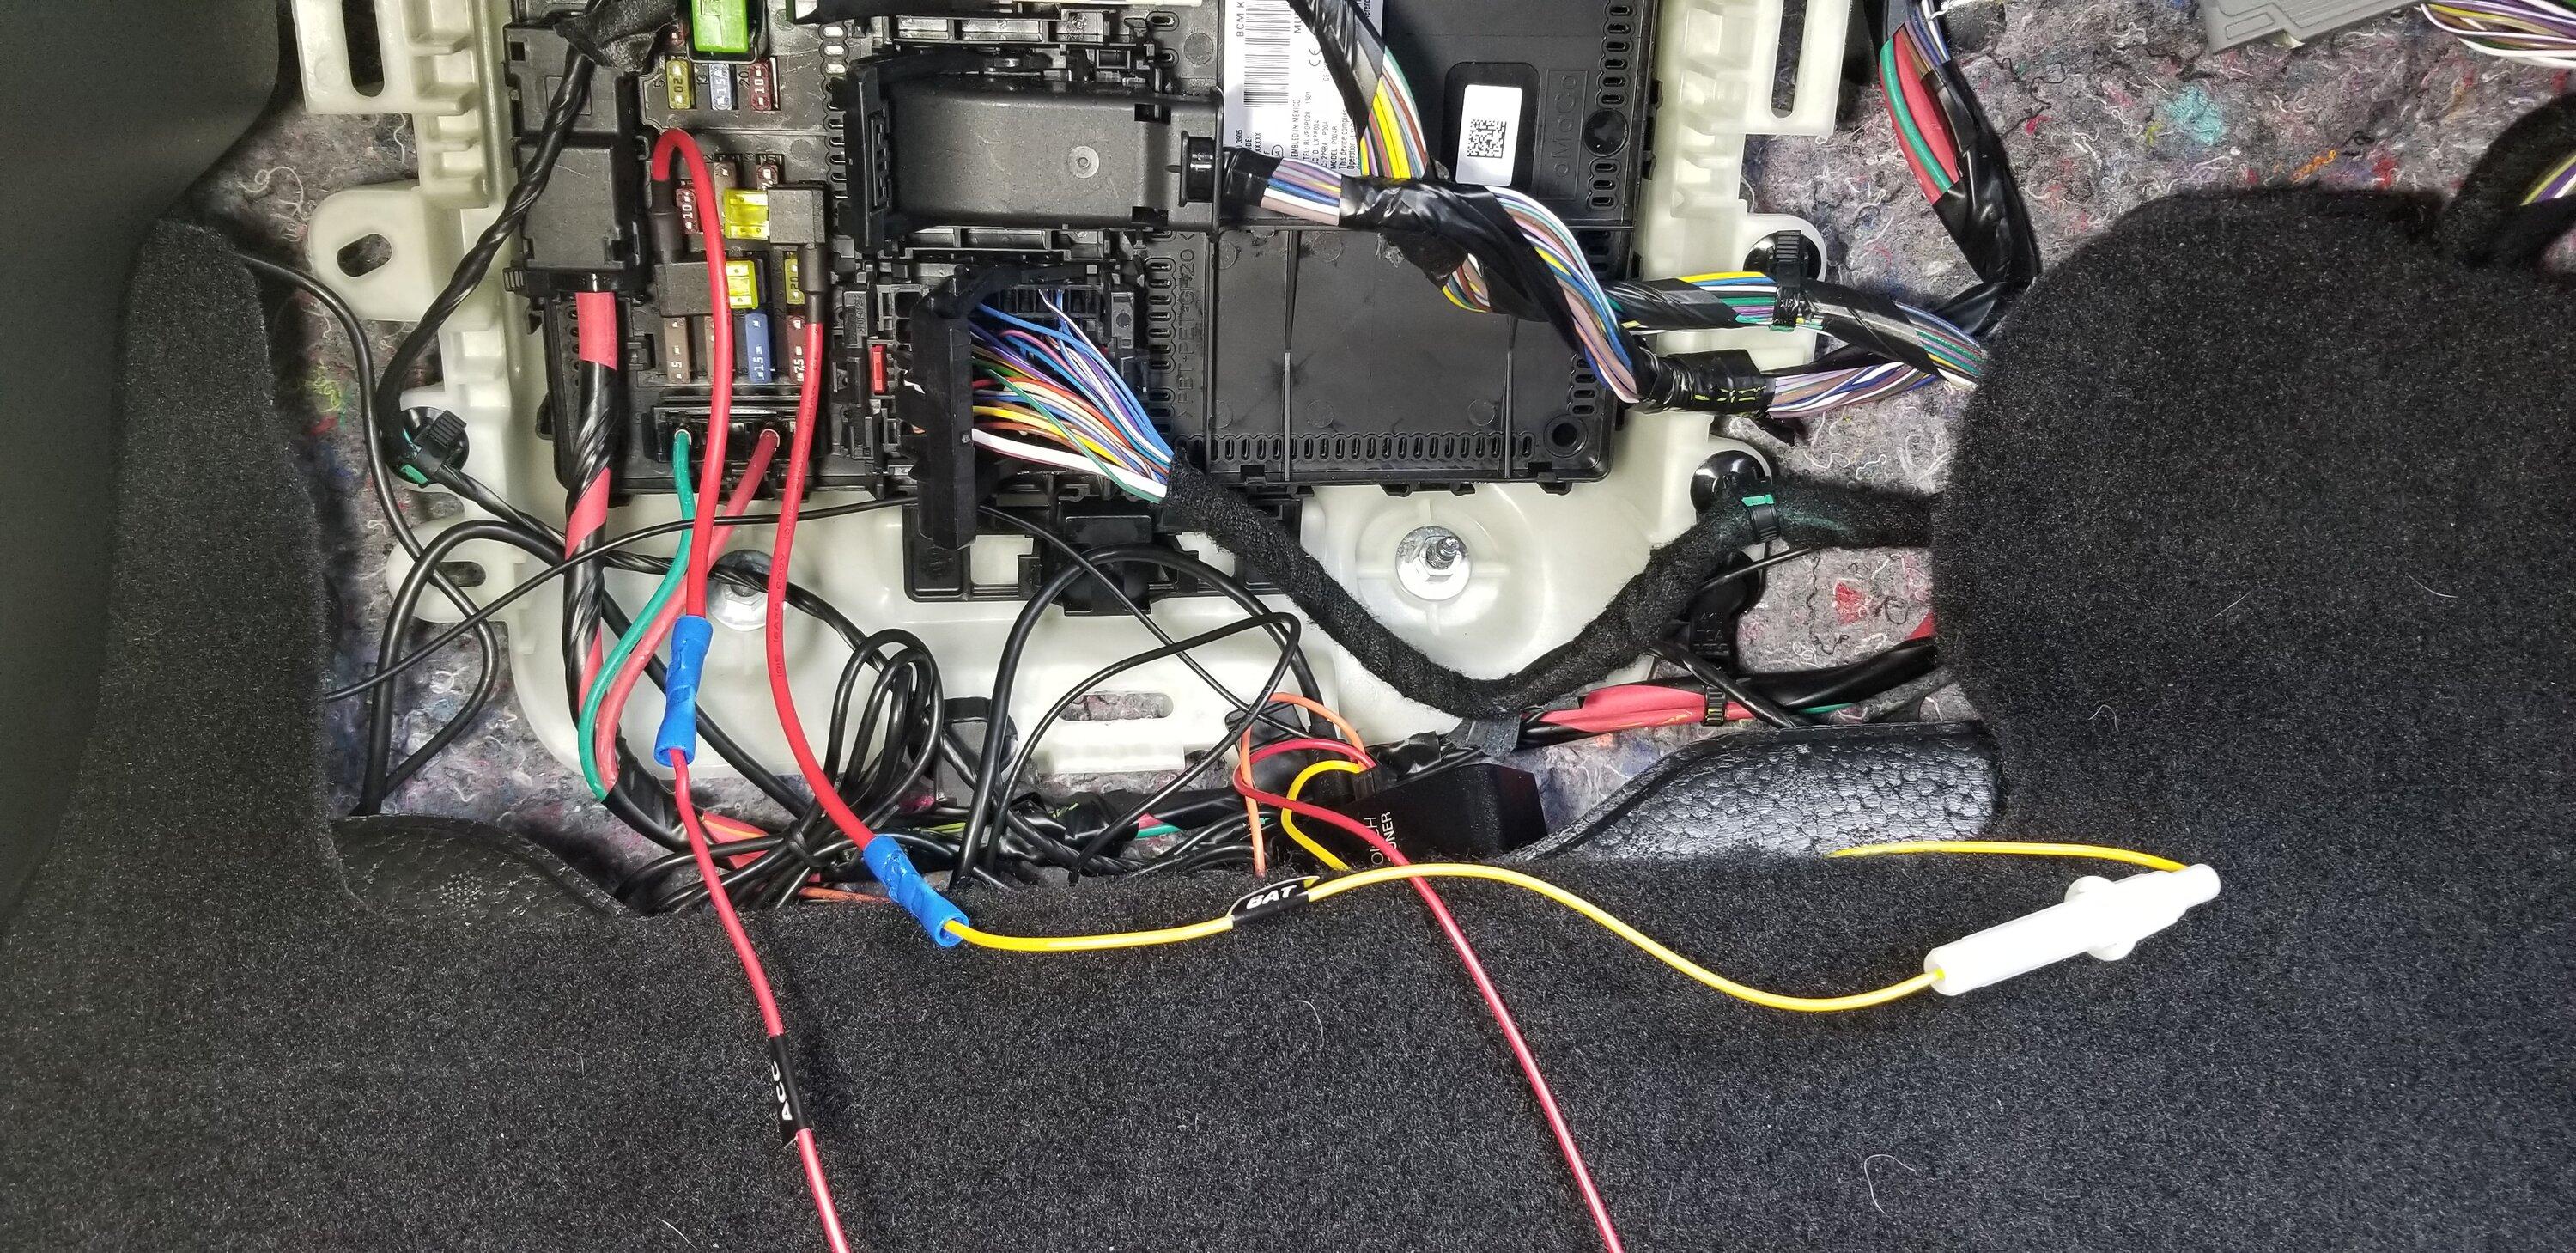
I was also able to tuck the FM Adaptor in the bottom right. This also allowed me to run the wire from the adaptor back behind the center console down and under the carpet back over to the pax fuse box are to the pocket in the foam flooring.
Pic of the FM antenna wire routing through the bottom right and back to the firewall and down to the fuse box area.
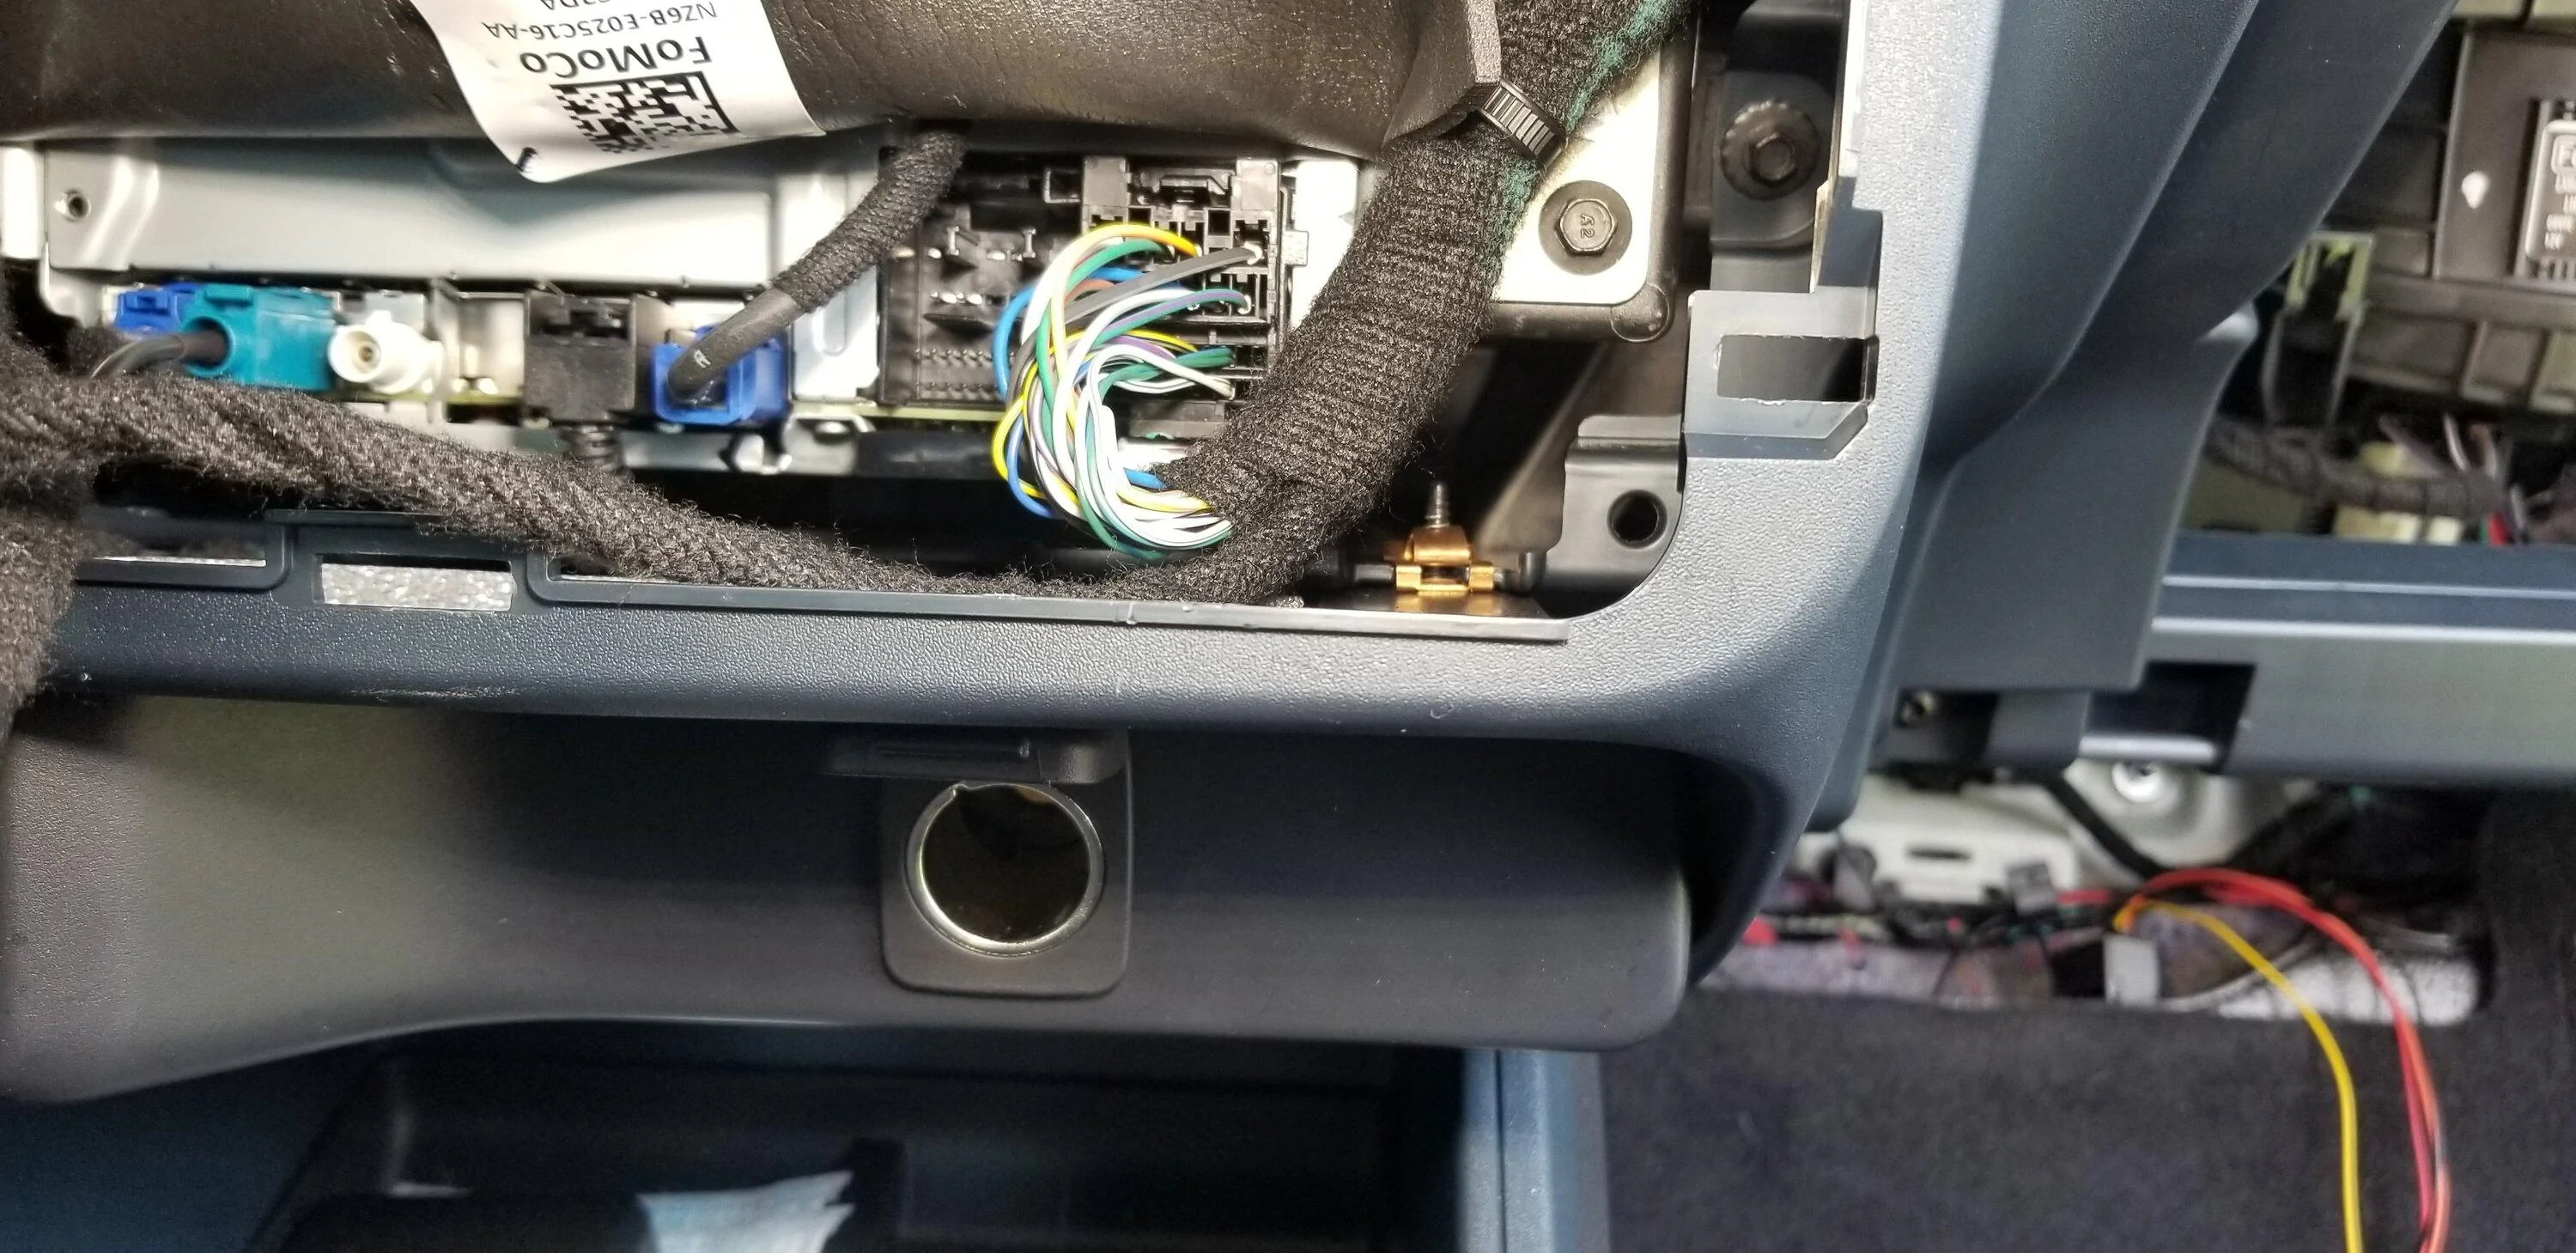
Next, I was able to pull down just a bit and then towards me to get the lower trim with the USBs and Cig Plug to pop off. The direction of the trim's clips are front to back and must be pulled towards you to remove.
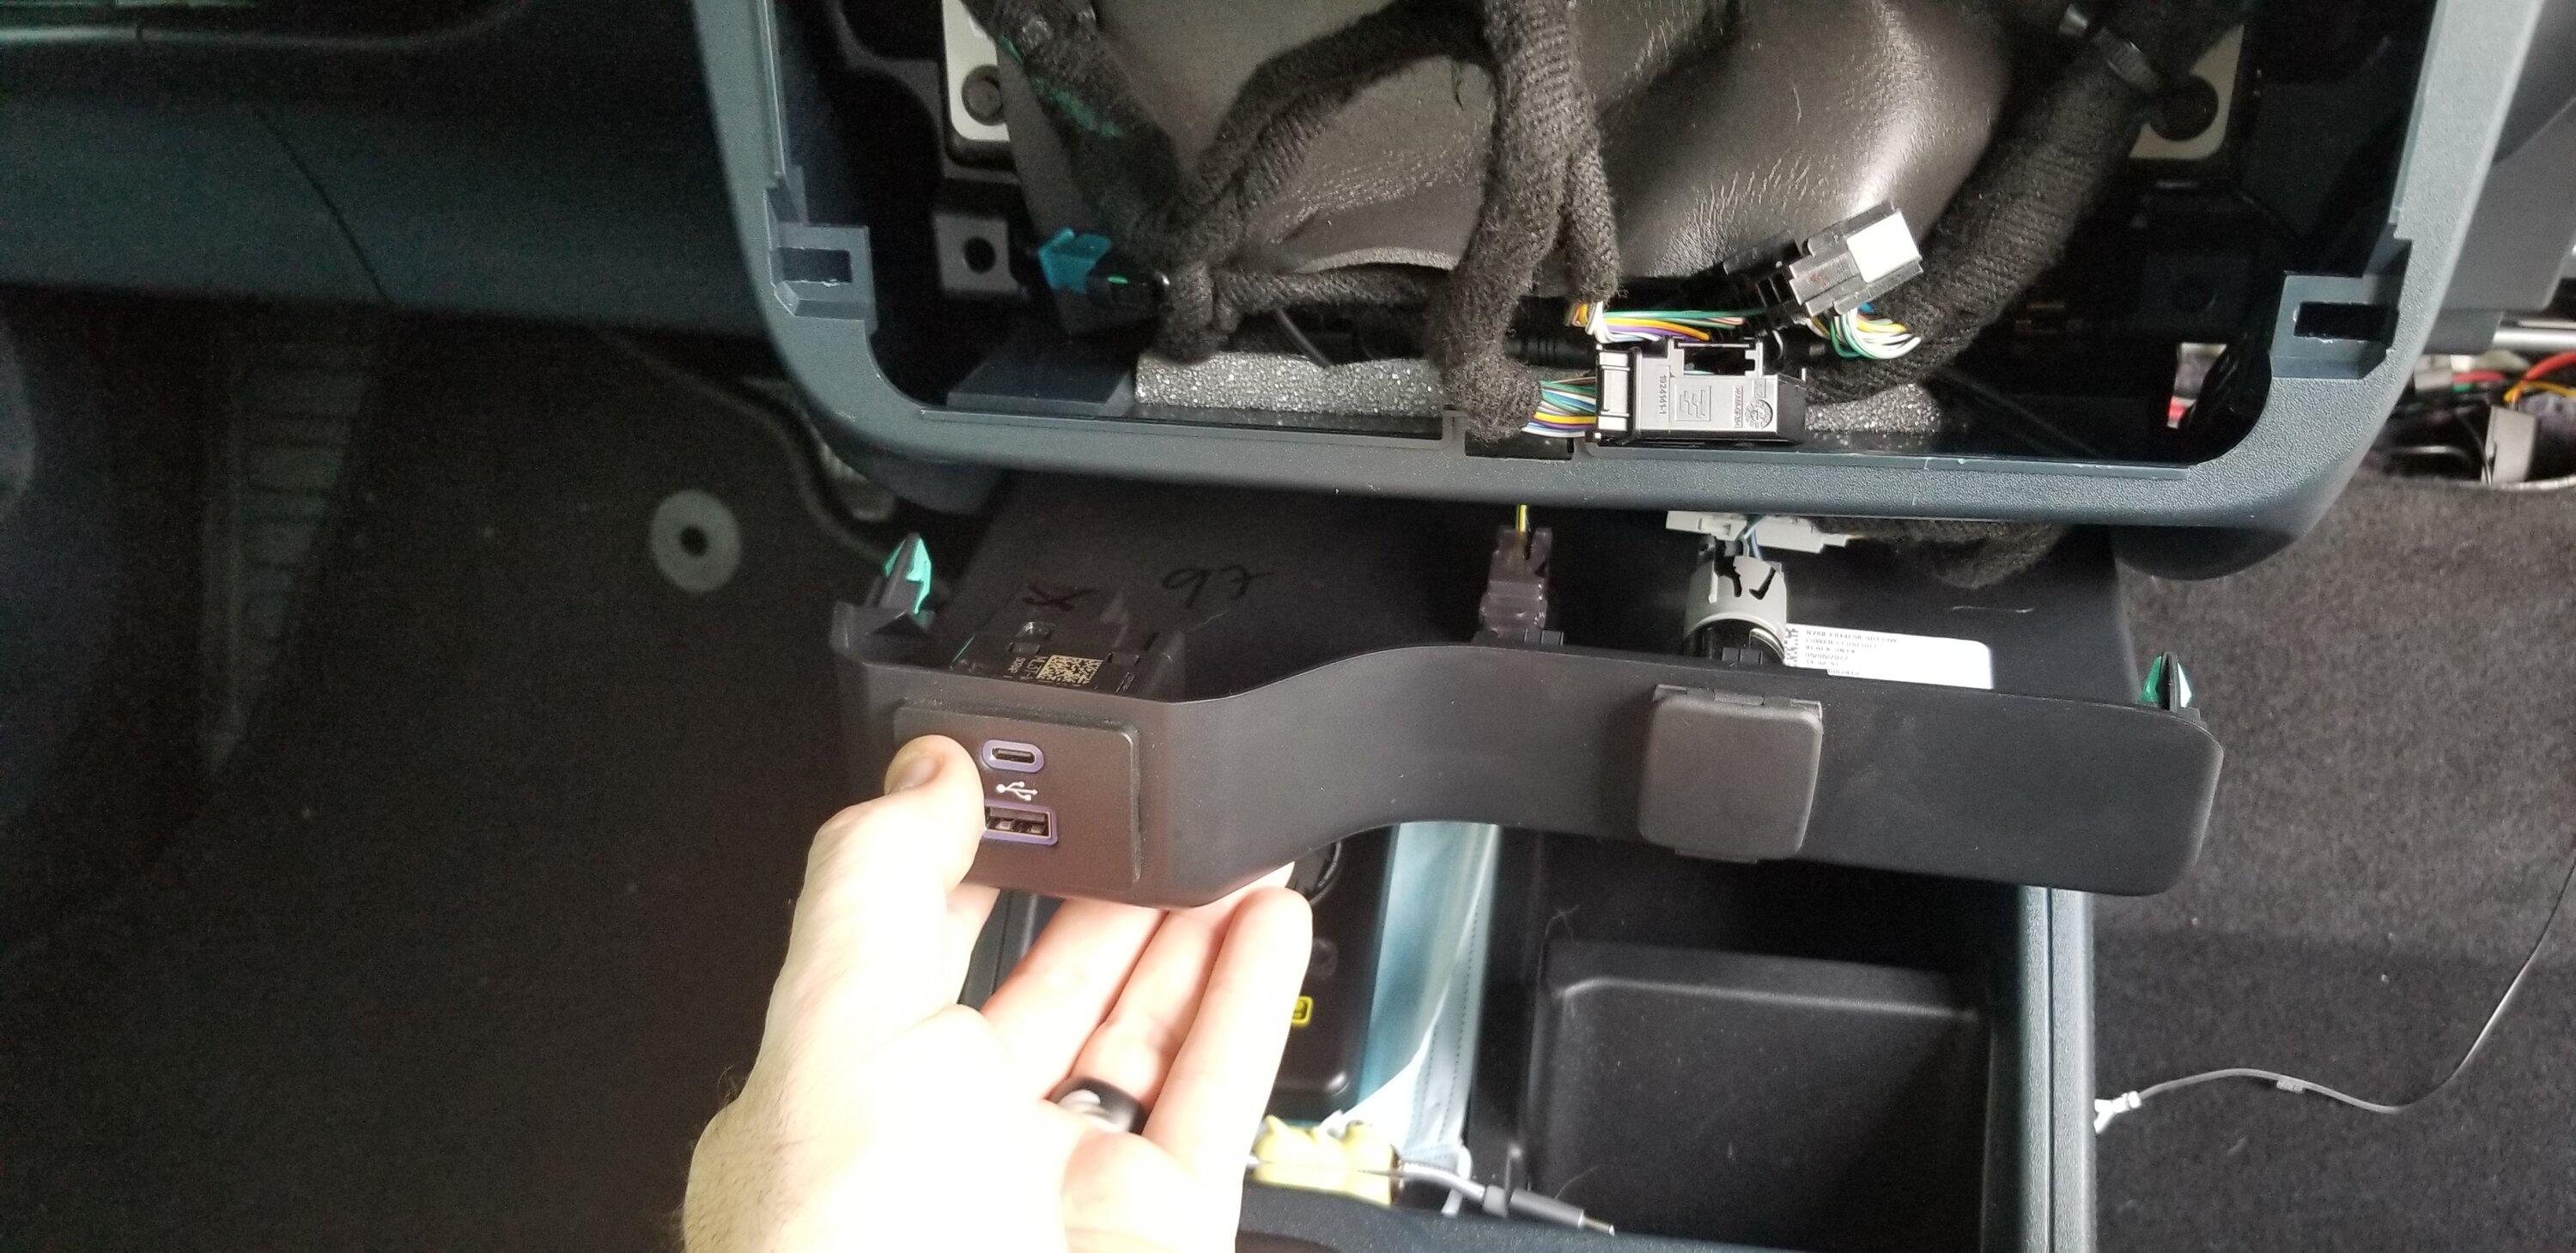
I had to remove the 2 plugs on the USB outlet to get enough slack.
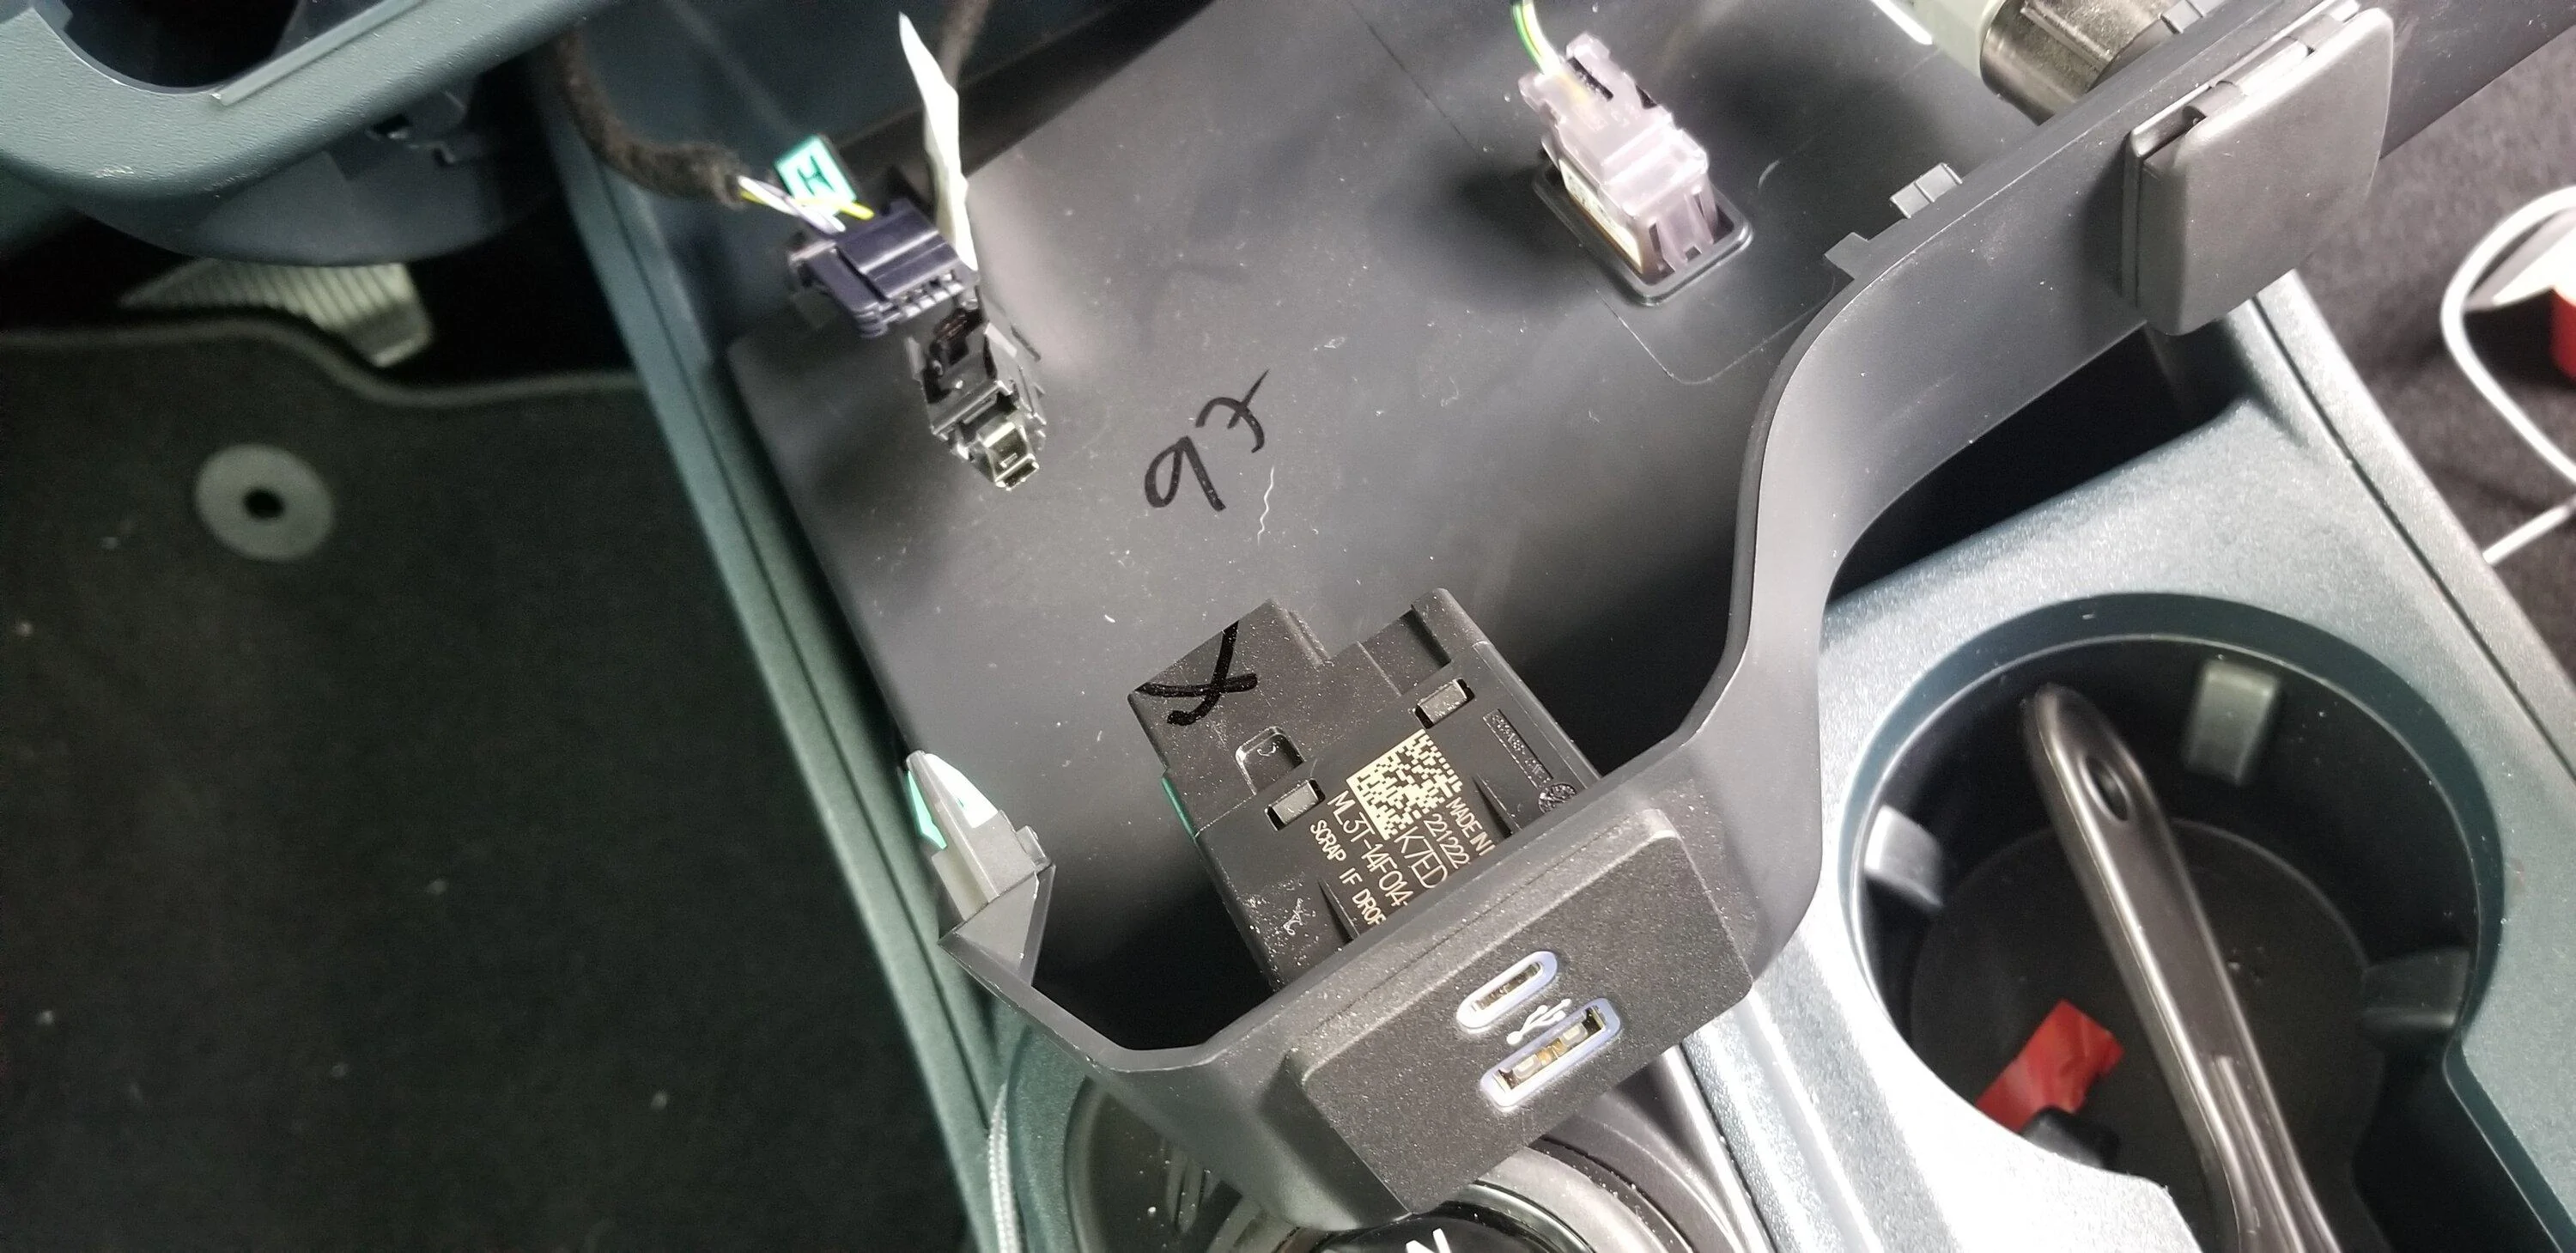
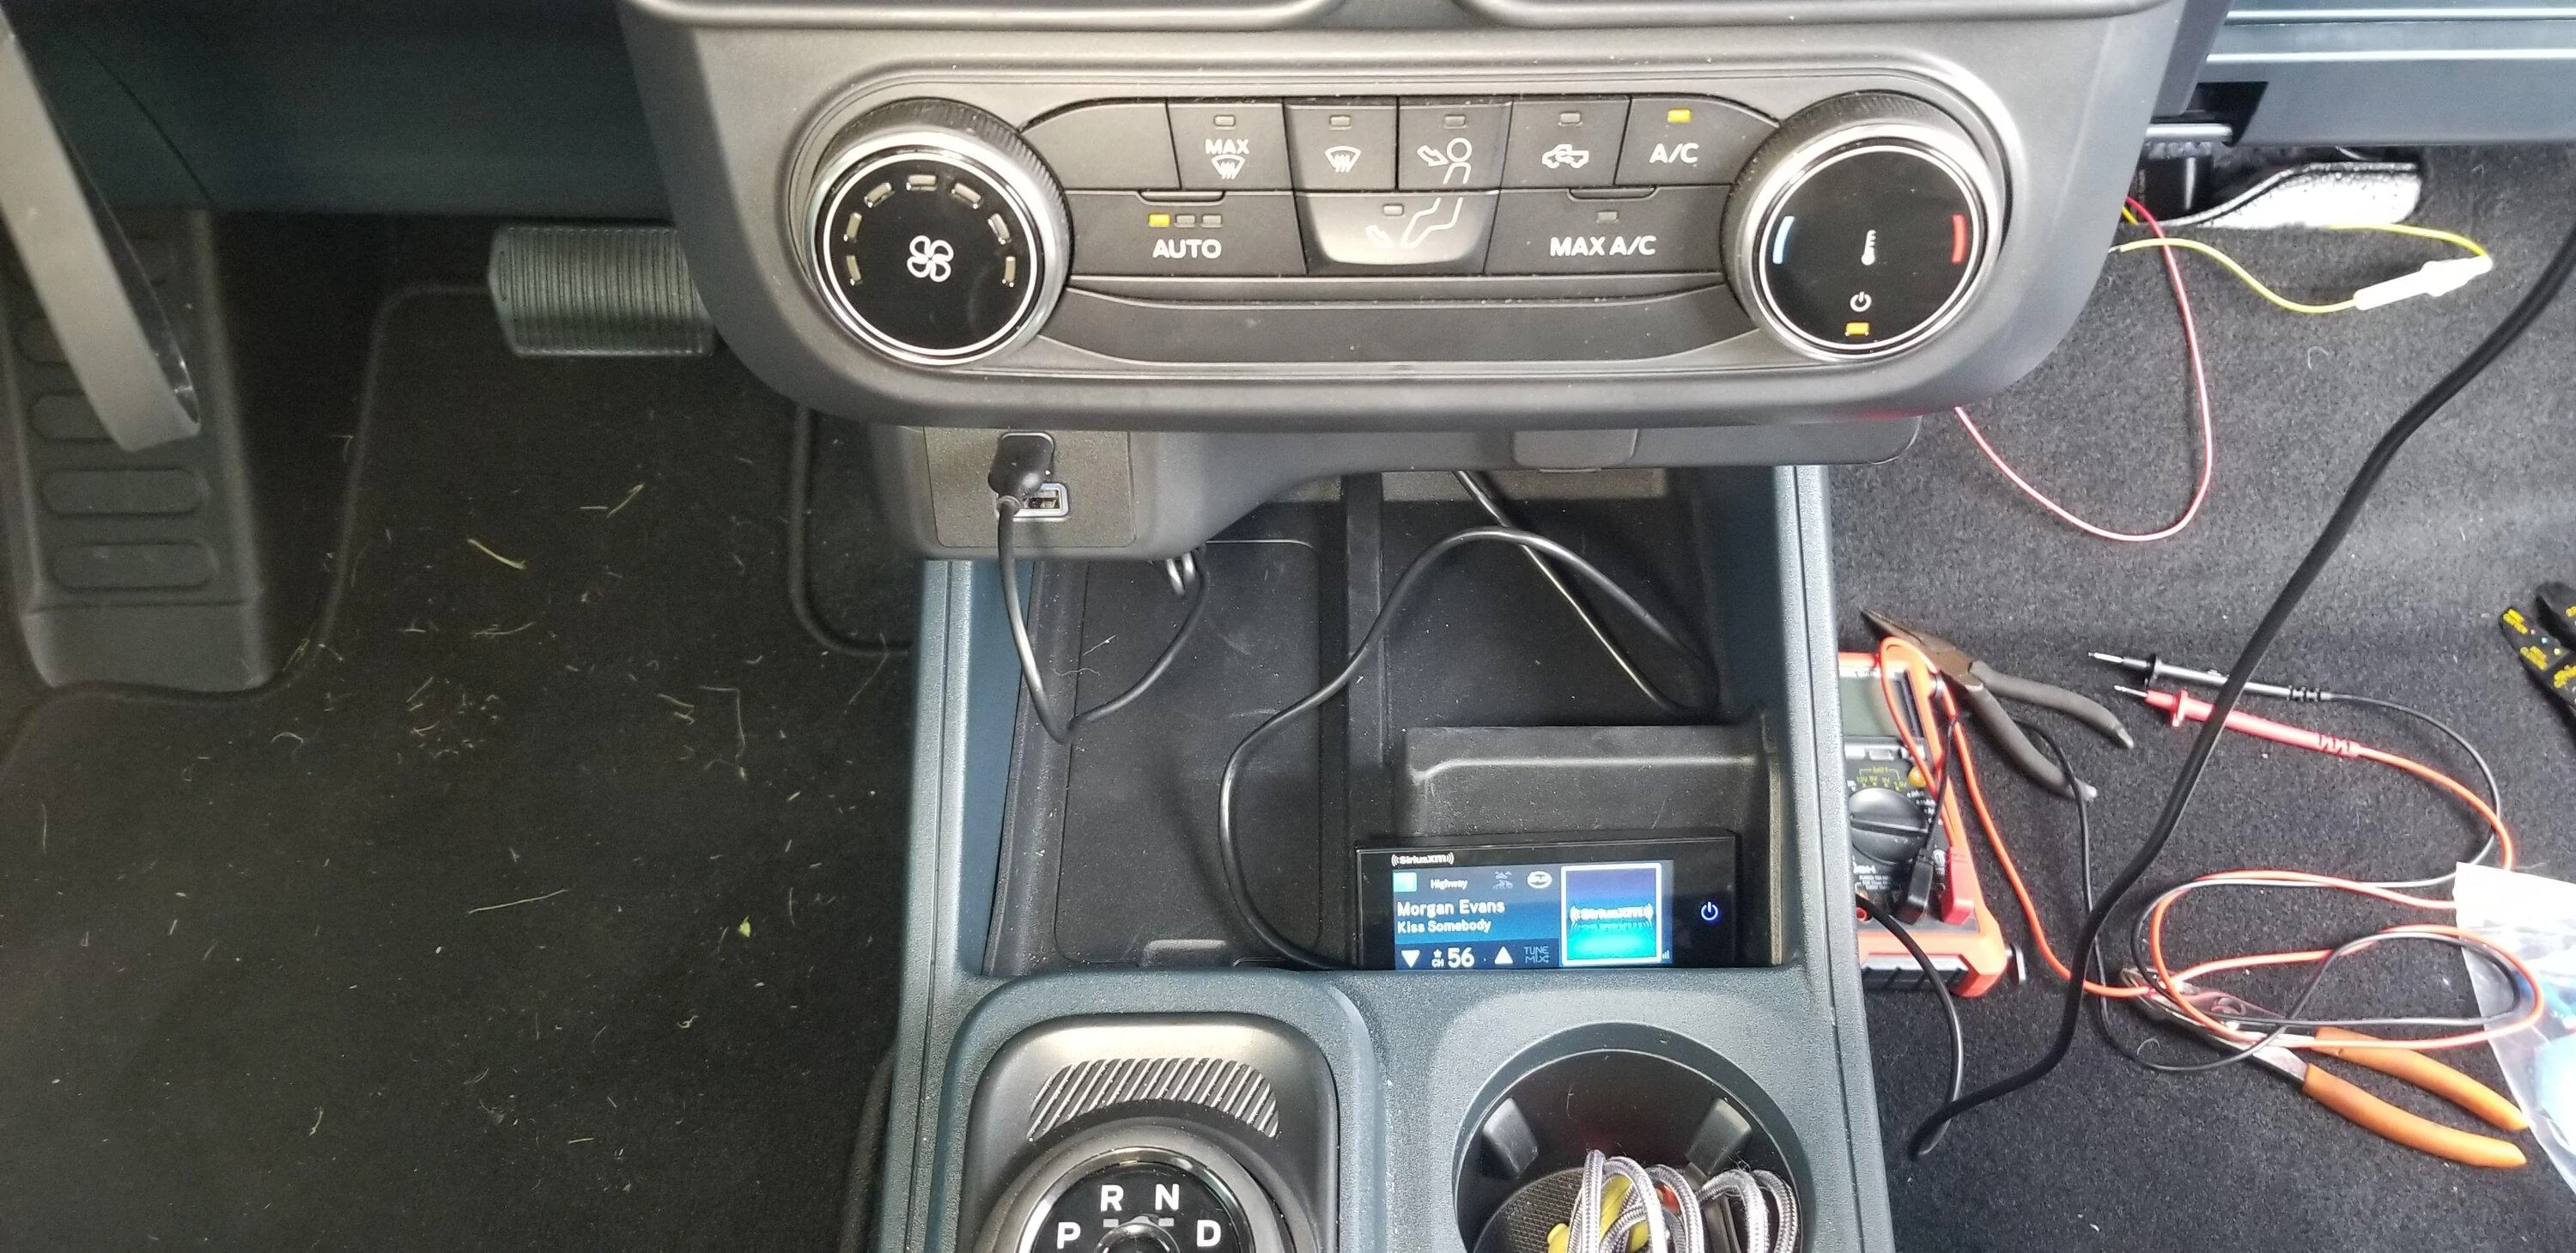
I decided to have the screen sit in the area under the Cig Plug.
The wire was routed behind the Cig Plug trim and up through the area under the A/C controls.
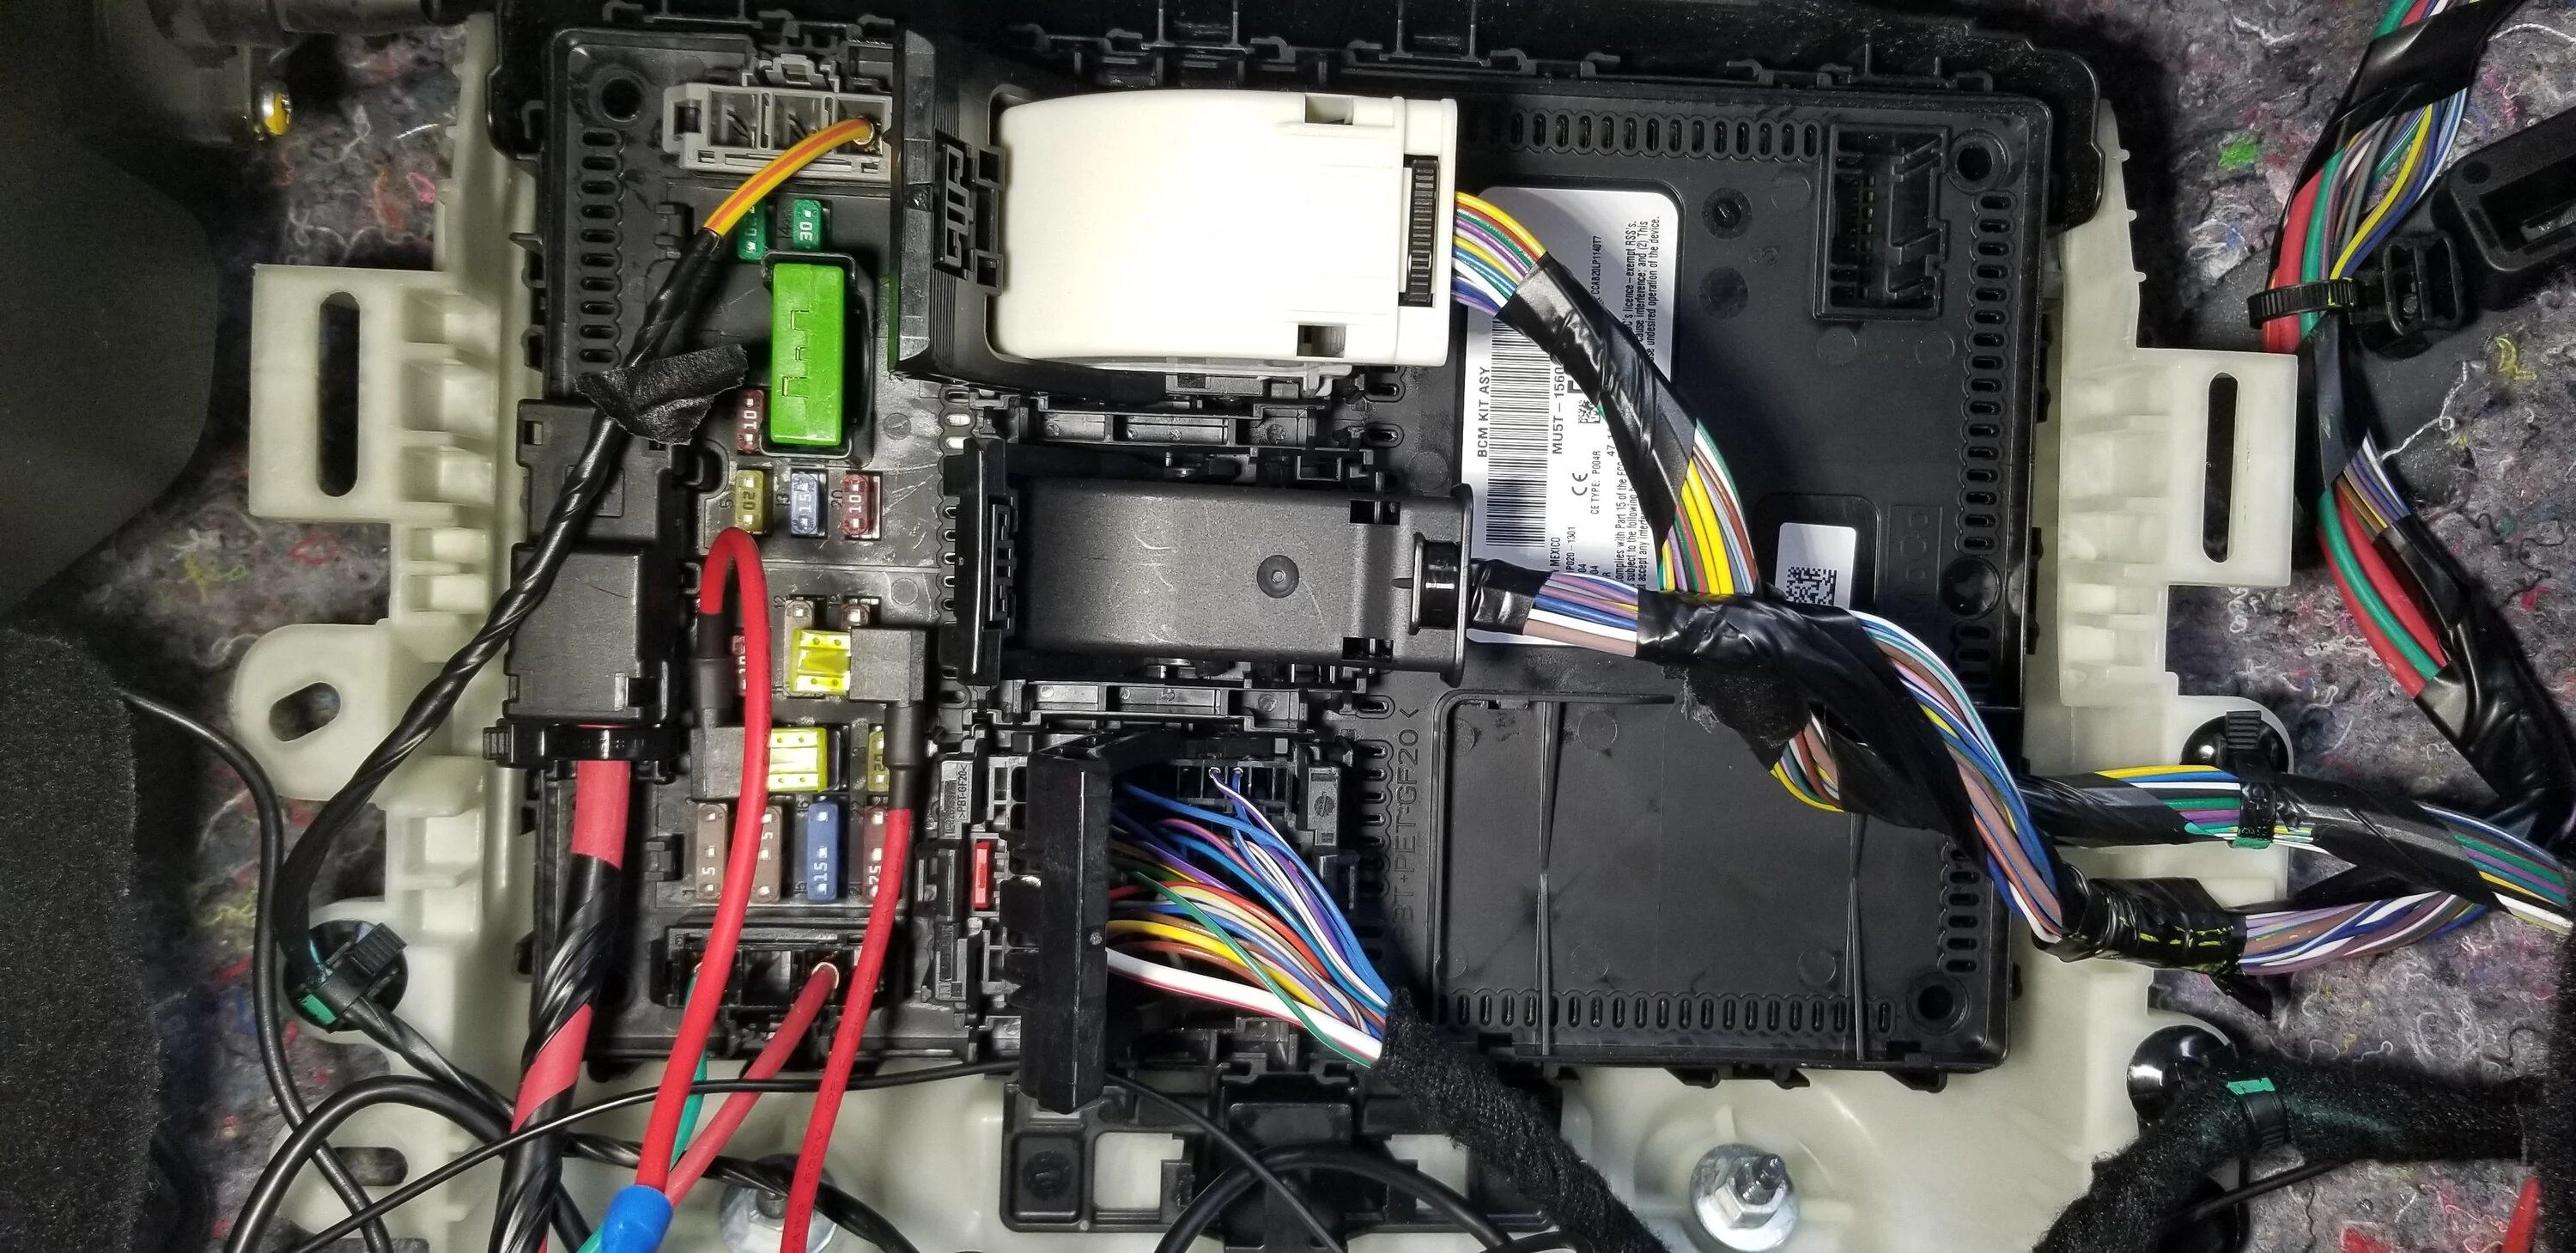
Then I followed the FM Antenna wire path back to the Fuse Box Area and plugged it into the brains.
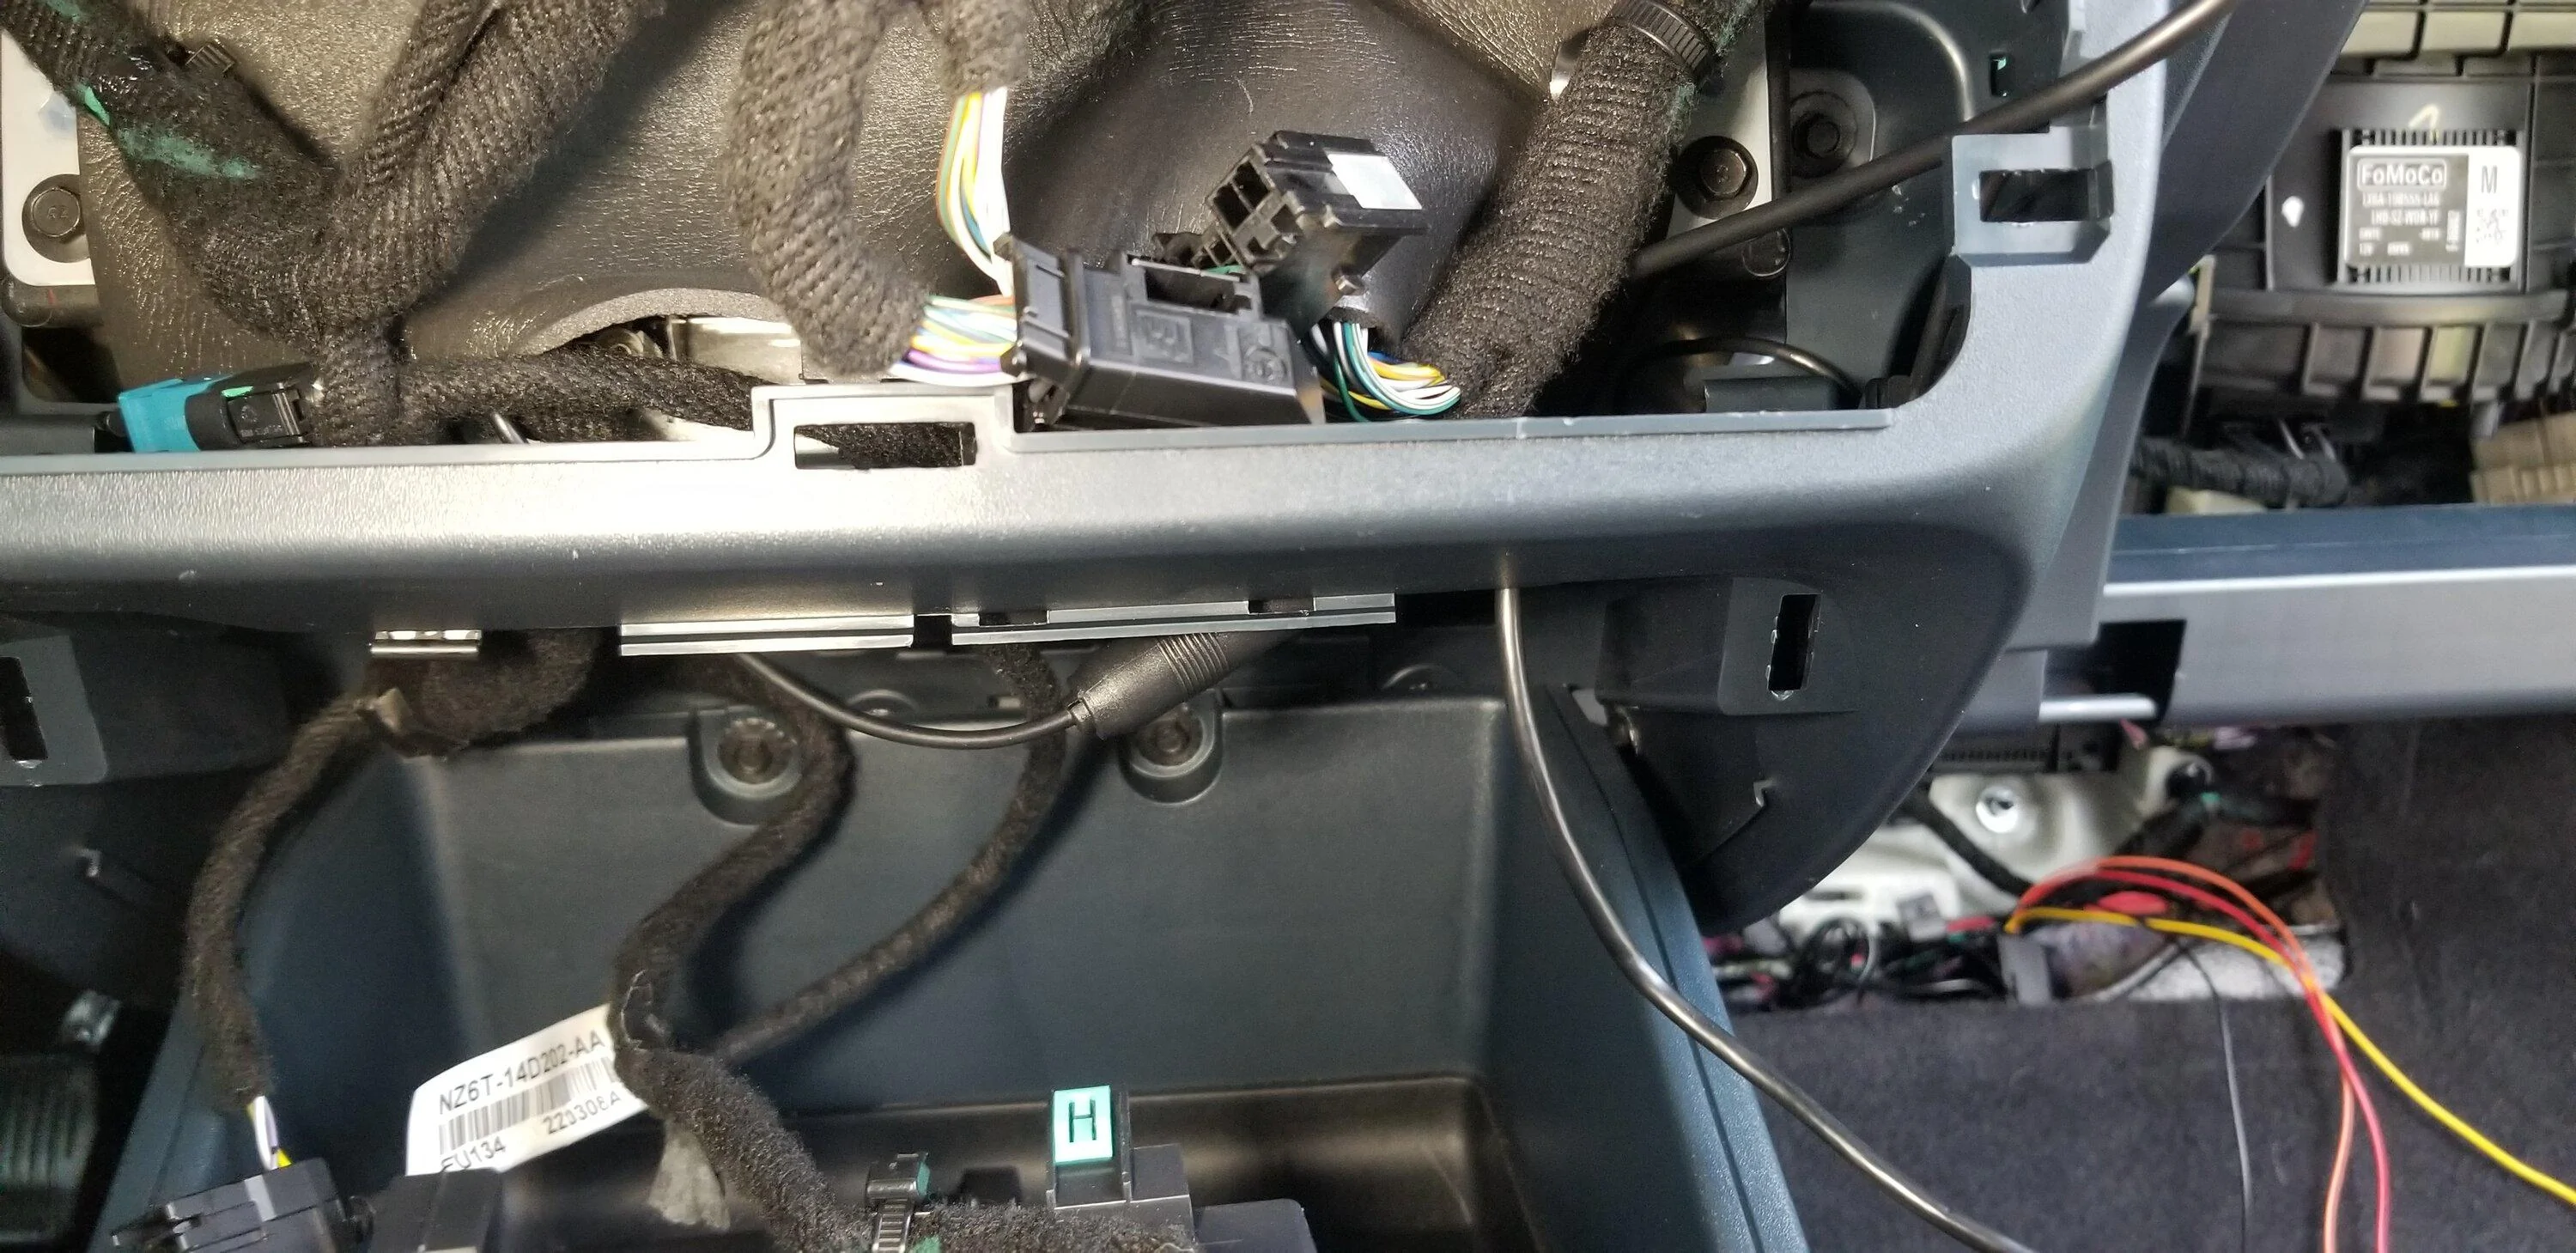
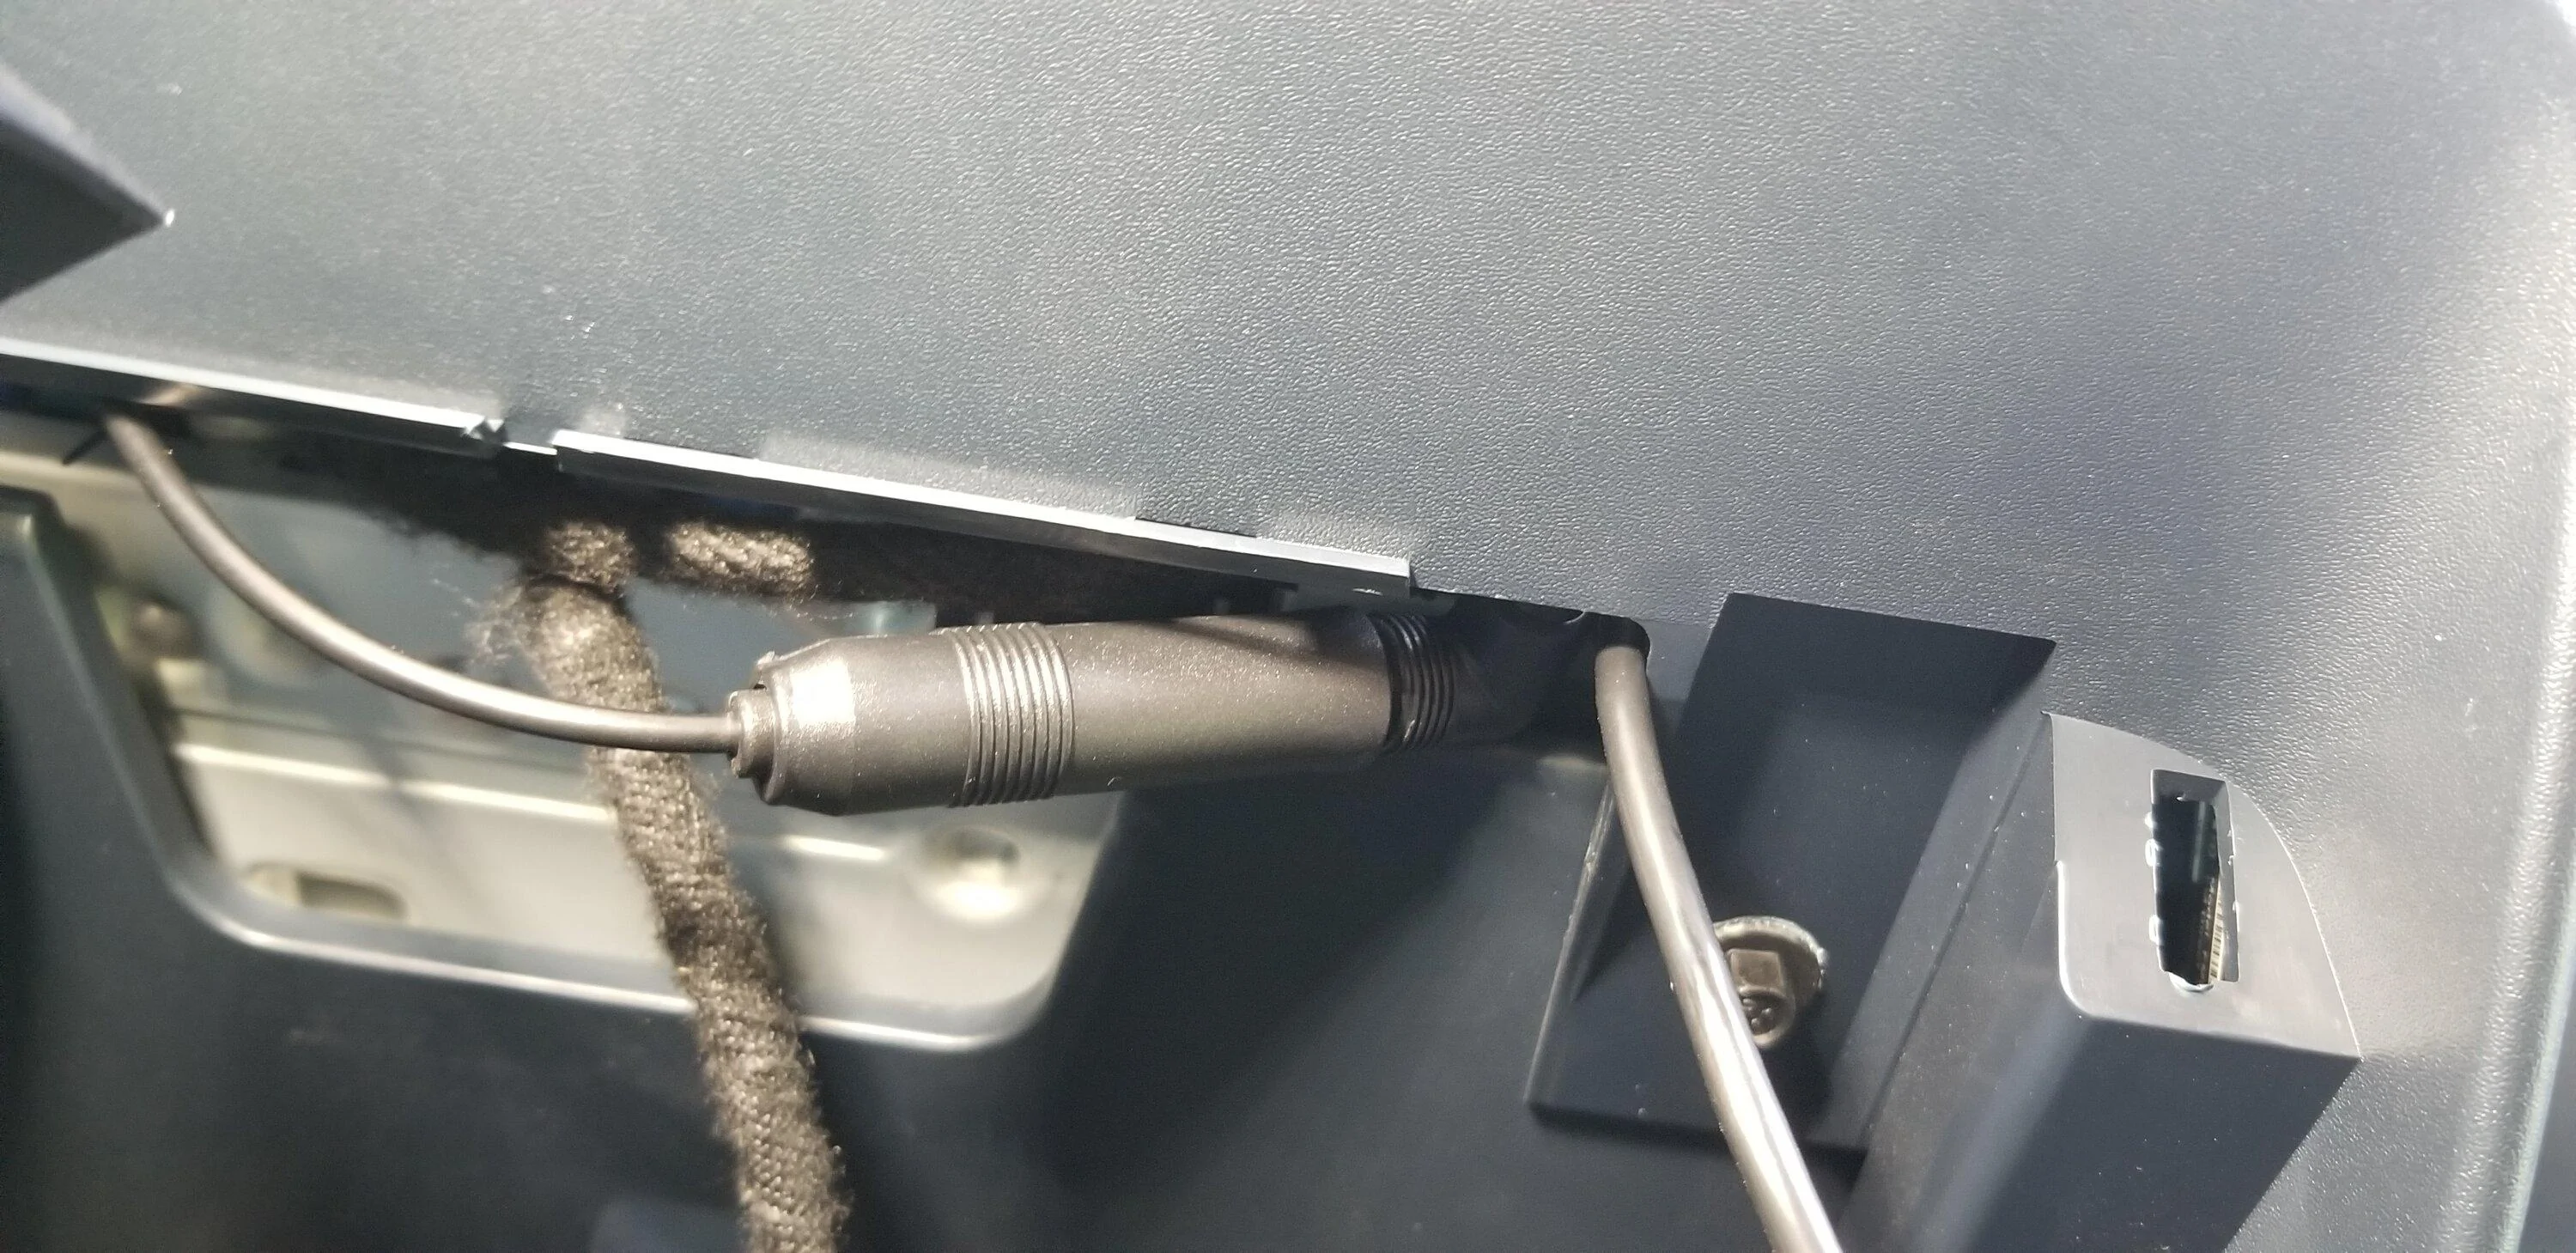
Pic of the underside of the center console with the lower USB/Cig Plug trim removed looking up into the area under the A/C control area where the FM Antenna plug is(left) and the Screen wire(right)
This is where I attached the ground wire. I just passed it behind the carpet.
You will have to pull off the trip there also. JUST PULL!! The trip will pop off. It's about 6-8 clips.

This was almost toolless. I just needed a wire crimper for the Fusebox Taps.
Items:
1) SiriusXM Commander Touch: EBAY Link, Amazon Link
- I was watching an Amazon listing for a few days and the price rose from ~$60 to ~$90
- Searched on Ebay and found it for ~$60
- SiriusXM Commander Touch Website
2) Ford Antenna Adaptors: Amazon Link(Option1 ), Amazon Link( Option 2 )
- Either one will work. For me Option 1 was available next day.
3) Fuse Taps x 3: Amazon Link, AutoZone(could be in-store)
- I got the 10-pack because I would then have extra.
4) Double-Sided Waterproof Tape: Amazon Link, Walmart Link(usually available in-store)
5) Wire Crimper: Amazon Link, Walmart Link(usually available in-store)
6) OPTIONAL Thumb drive to update the firmware. with Micro-USB adaptor
- I always keep one of these around for the older pieces of tech that are Micro-USB
- Directions to update the firmware (Simply unzip the files to the root of the thumb drive and plug into the bottom of the display)
- Firmware
Directions:
I started by opening the engine and passenger door looking for a good place to run the antenna. I knew the pax floor/firewall was where the fuse box was and where I was going to be pulling power.
I choose just above the pax side, above window .
This gave me an easy run to the pax floor area.
I was able to feed the antenna wire down along the window and use a plastic putty knife to hide the wire behind the windshield.
Overview of the under-hood/quarter panel
There was a small piece of trip just above the hood that I was able to easy pull off and route the wire under.
Shown here is under the hood along the inside of the pax front quarter panel. Just behind the washer fluid hose.
Just a closeup of the antenna wire as it is routed down from the windshield, along the inside of the quarter panel, against the inside of the door jam.
I debated running it inside the wiring harness gasket from the door to the body but then I saw a break in the weather stripping in the right spot.
Pulled off the Model Badge(whatever it's called) to more easily get to the wire path
Overview of the door jam area with the antenna wire visible.
Routed the wire from above the door jam area down the jam to the break in the weather stripping
Decided to use little strips of double-sided tape to hold the wire routing in place.
Then brought the antenna wire through the weather stripping seam and behind the glove box.
Also, I removed the trim just to the right of the glove box. You just pull. It has 4 clips and at the base is a nonrenewable push-in clip. Mine was still usable upon reassembly. This made it easier to get my hand behind for routing the wire
Final wire path!
You do not need to remove the glove box for this install but it was easier to see.
Just under the carpet is a foam block. This had a small hole in it that fits the commander module PERFECT!!!!
I was able to hide everything right in there like it was made for it.
Fits just perfect!!
Now onto the Radio and FM antenna adaptor install.
You will have to remove the A/C controls to get to the FM antenna plug on the Radio
To remove the face just grip each vent and pull out while wiggling up and down slightly.
Takes a bit of strength but it will pop right out!
Disconnect the 2 plugs and set the controls aside
Even though the FM plugs are BLUE we will be using the BROWN plug.
Pinch the connector top to bottom and pull it out.
I plugged in the Commander FM antenna to the BROWN connector and the other end to the Plug I removed and tucked the wires under the factory harness.
I was also able to tuck the FM Adaptor in the bottom right. This also allowed me to run the wire from the adaptor back behind the center console down and under the carpet back over to the pax fuse box are to the pocket in the foam flooring.
Pic of the FM antenna wire routing through the bottom right and back to the firewall and down to the fuse box area.
Next, I was able to pull down just a bit and then towards me to get the lower trim with the USBs and Cig Plug to pop off. The direction of the trim's clips are front to back and must be pulled towards you to remove.
I had to remove the 2 plugs on the USB outlet to get enough slack.
I decided to have the screen sit in the area under the Cig Plug.
The wire was routed behind the Cig Plug trim and up through the area under the A/C controls.
Then I followed the FM Antenna wire path back to the Fuse Box Area and plugged it into the brains.
Pic of the underside of the center console with the lower USB/Cig Plug trim removed looking up into the area under the A/C control area where the FM Antenna plug is(left) and the Screen wire(right)
This is where I attached the ground wire. I just passed it behind the carpet.
You will have to pull off the trip there also. JUST PULL!! The trip will pop off. It's about 6-8 clips.
Sponsored
Last edited:

") LOL
LOL