
- First Name
- Tony
- Joined
- May 4, 2025
- Threads
- 12
- Messages
- 195
- Reaction score
- 464
- Location
- Raleigh, NC
- Vehicle(s)
- 2025 Maverick XLT
- Engine
- 2.5L Hybrid
- Thread starter
- #1
Edits below: after the unit began going into parking mode on a long (4+ hour) trip. Wolfbox customer support recommended, and shipped out at no cost, switching to hardwired power off the fusebox. This really only took a few minutes more time.
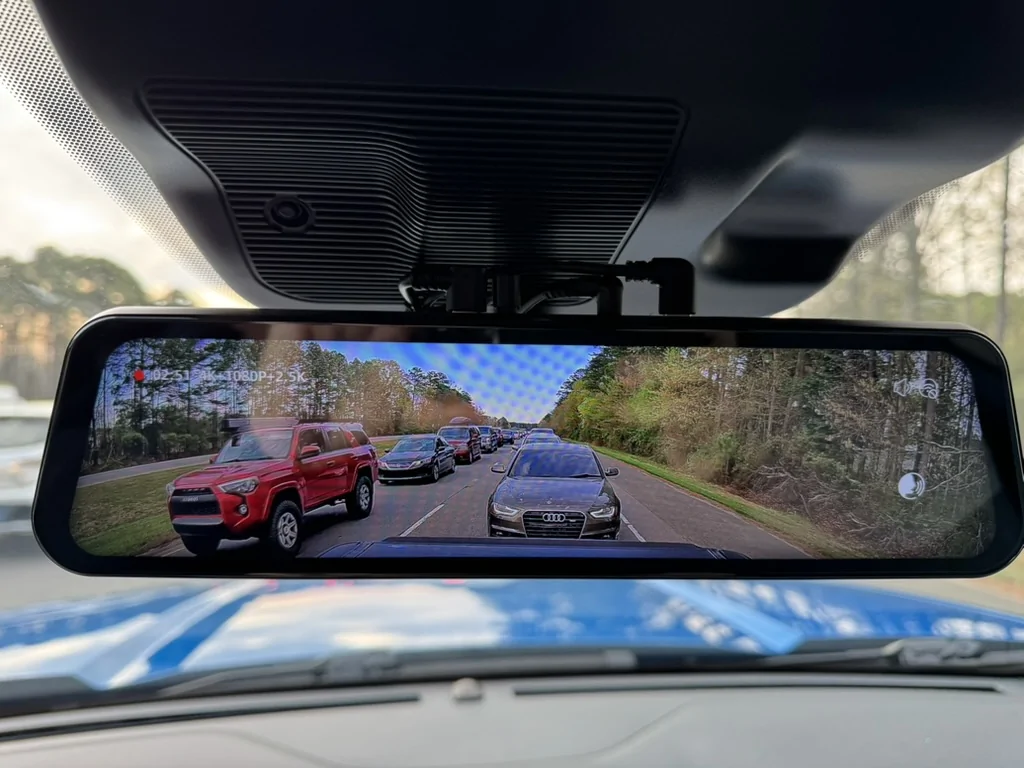
Installed the Wolfbox G900TriPro (bumper version) in and on my 2025 XLT hybrid with the luxury package. Took about 4 hours to complete with all cables hidden.
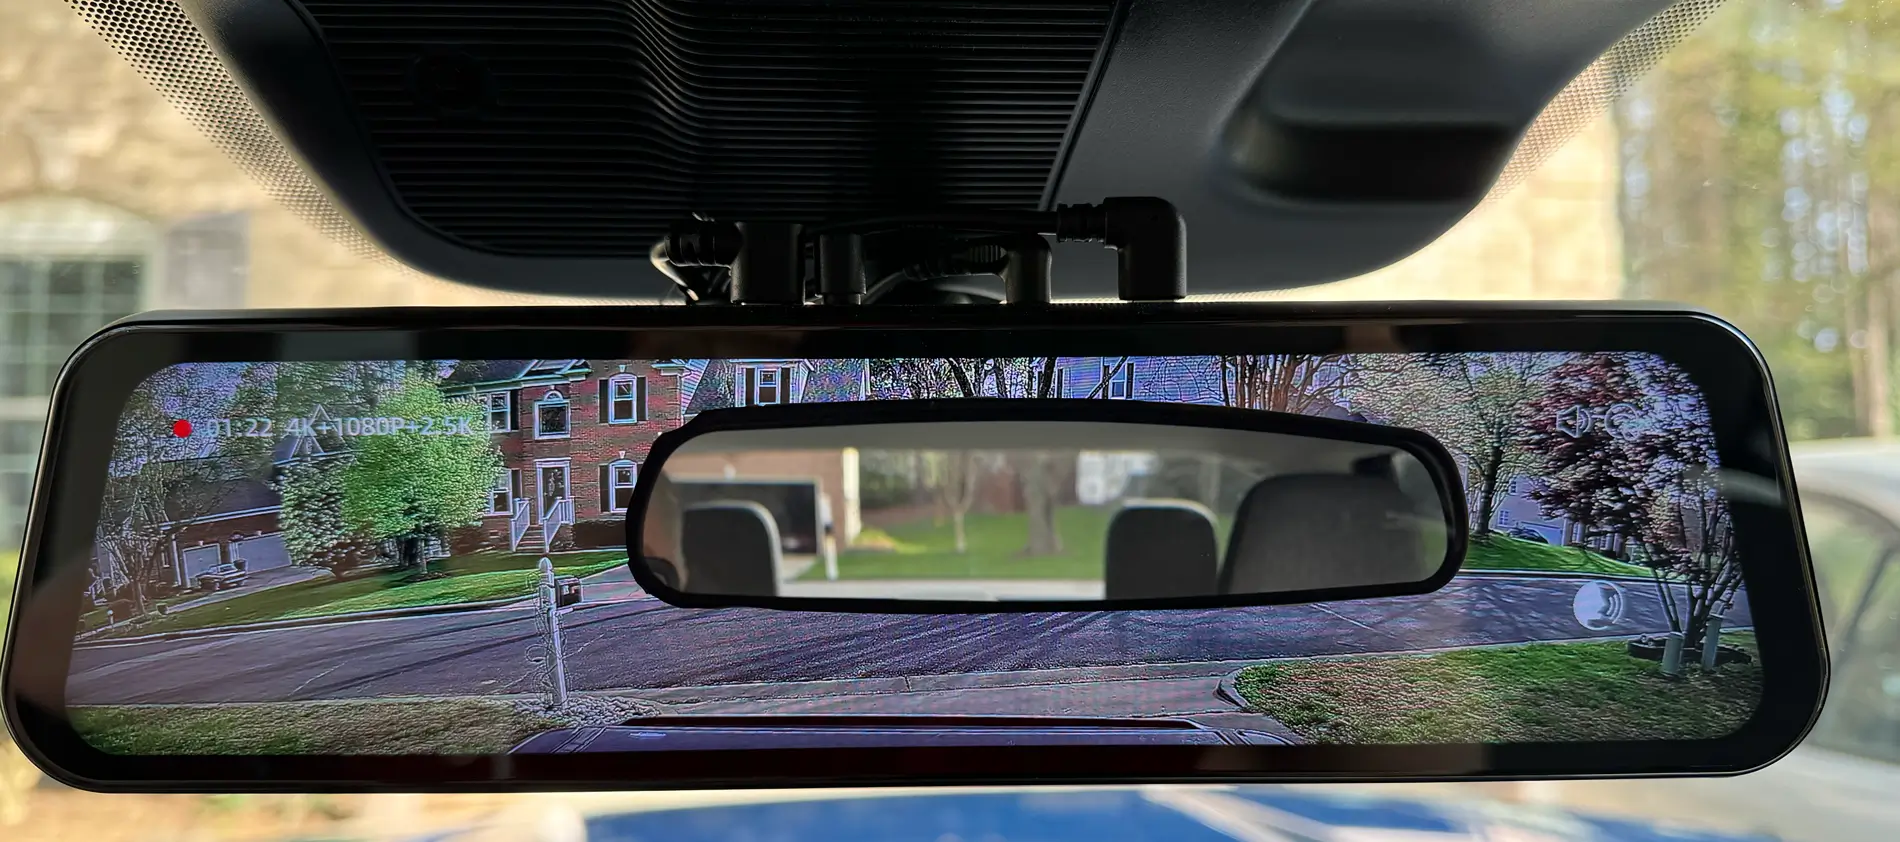
tl;dr: great as a digital rear view mirror with a game changing 170º field of view, some design choices make it hard to get a really clean install though.
The package I bought included a 4K camera on the back of the screen, a wired 2k rear camera (with a 170º field of view), and a wired 1k camera I ran to the front bumper, OEM mount, polarizing filter for the 4k camera, and OBD power cable. Edit: after the unit misbehaved while powered through the OBD port, I switched to a hardwire kit
There are multiple ways to mount the screen. I chose the OEM mount because it is the easiest (1 screw) and cleanest. You can also strap this 11" screen to your existing mirror, an option I guess is there for owners who aren't comfortable disconnecting the wires on stock mirrors with auto-dimming, clock, compass or other features, not a Maverick problem,. There's also console/dashboard mount option.
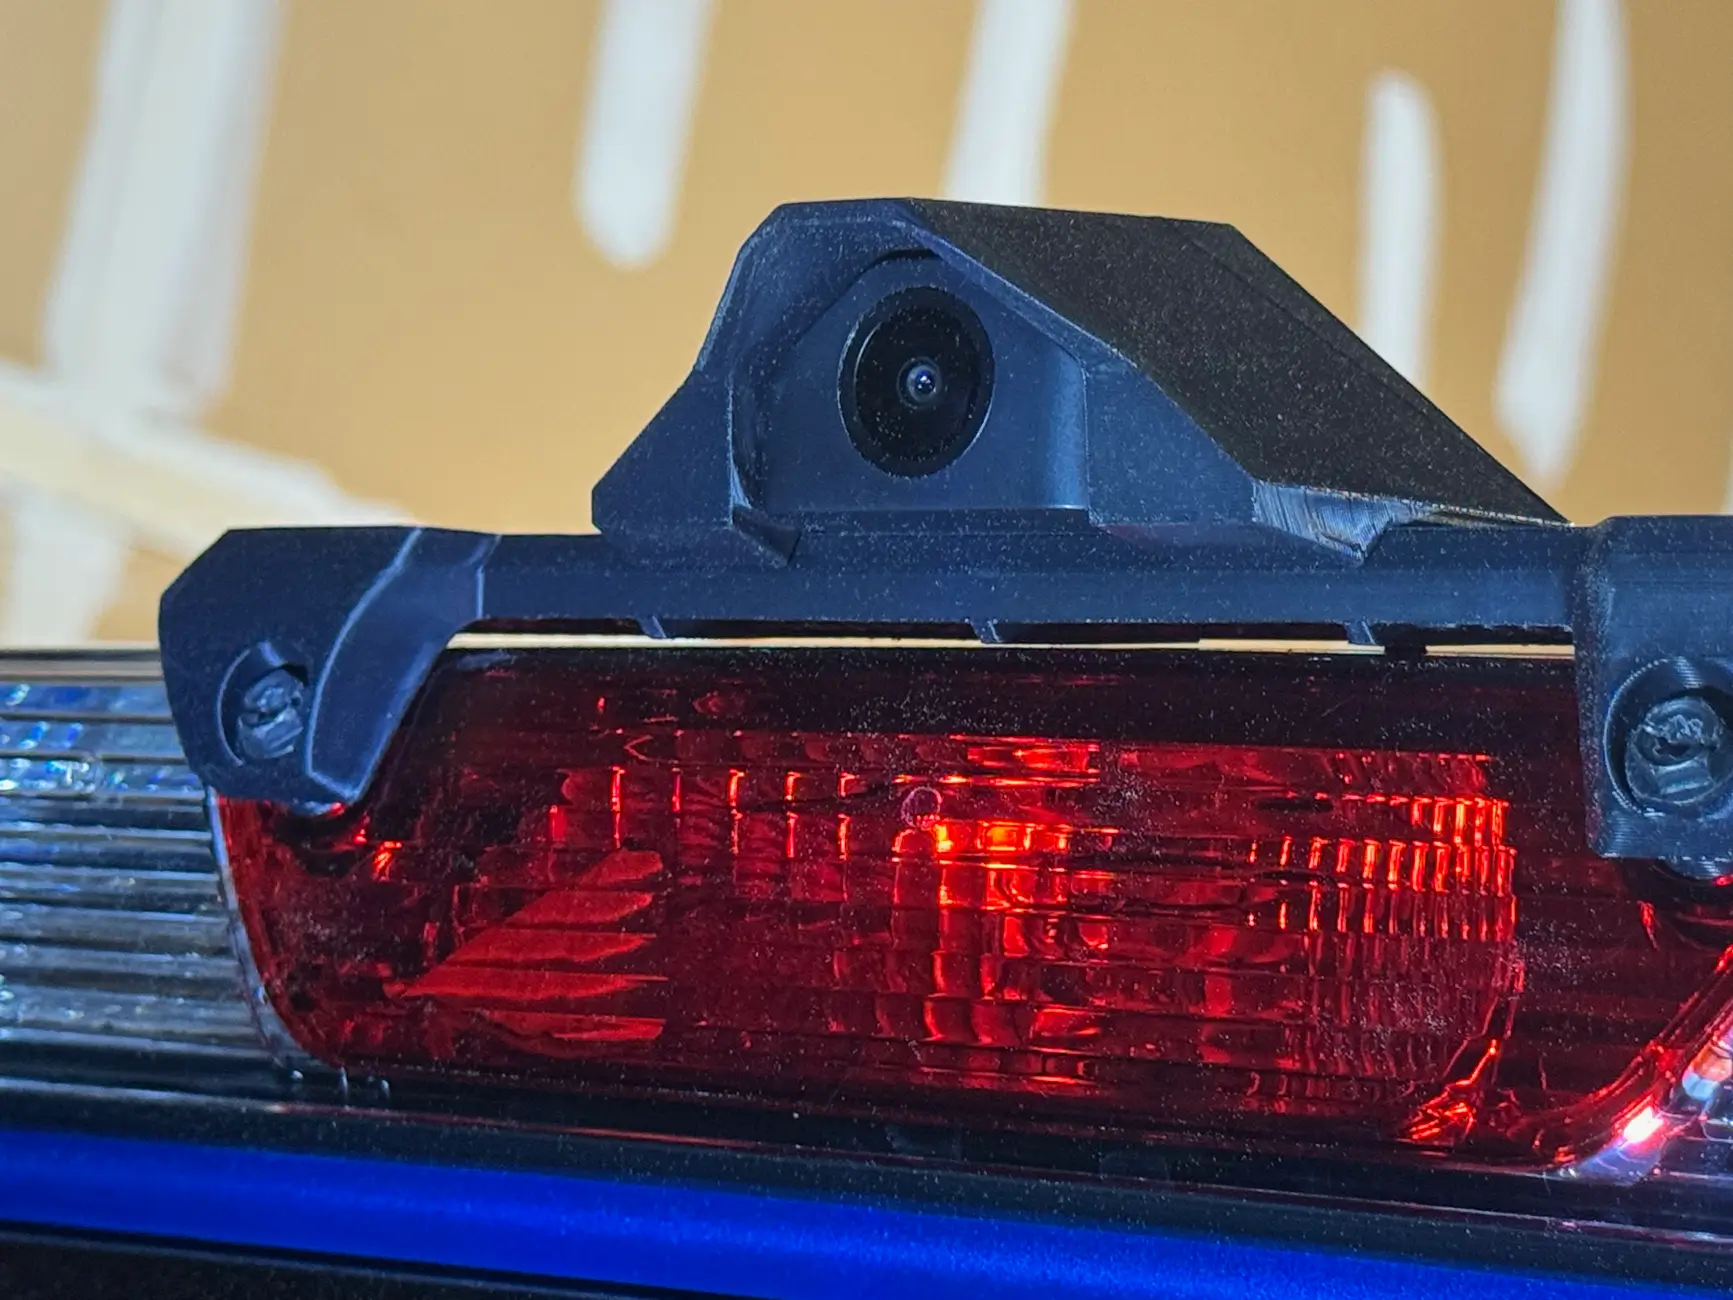
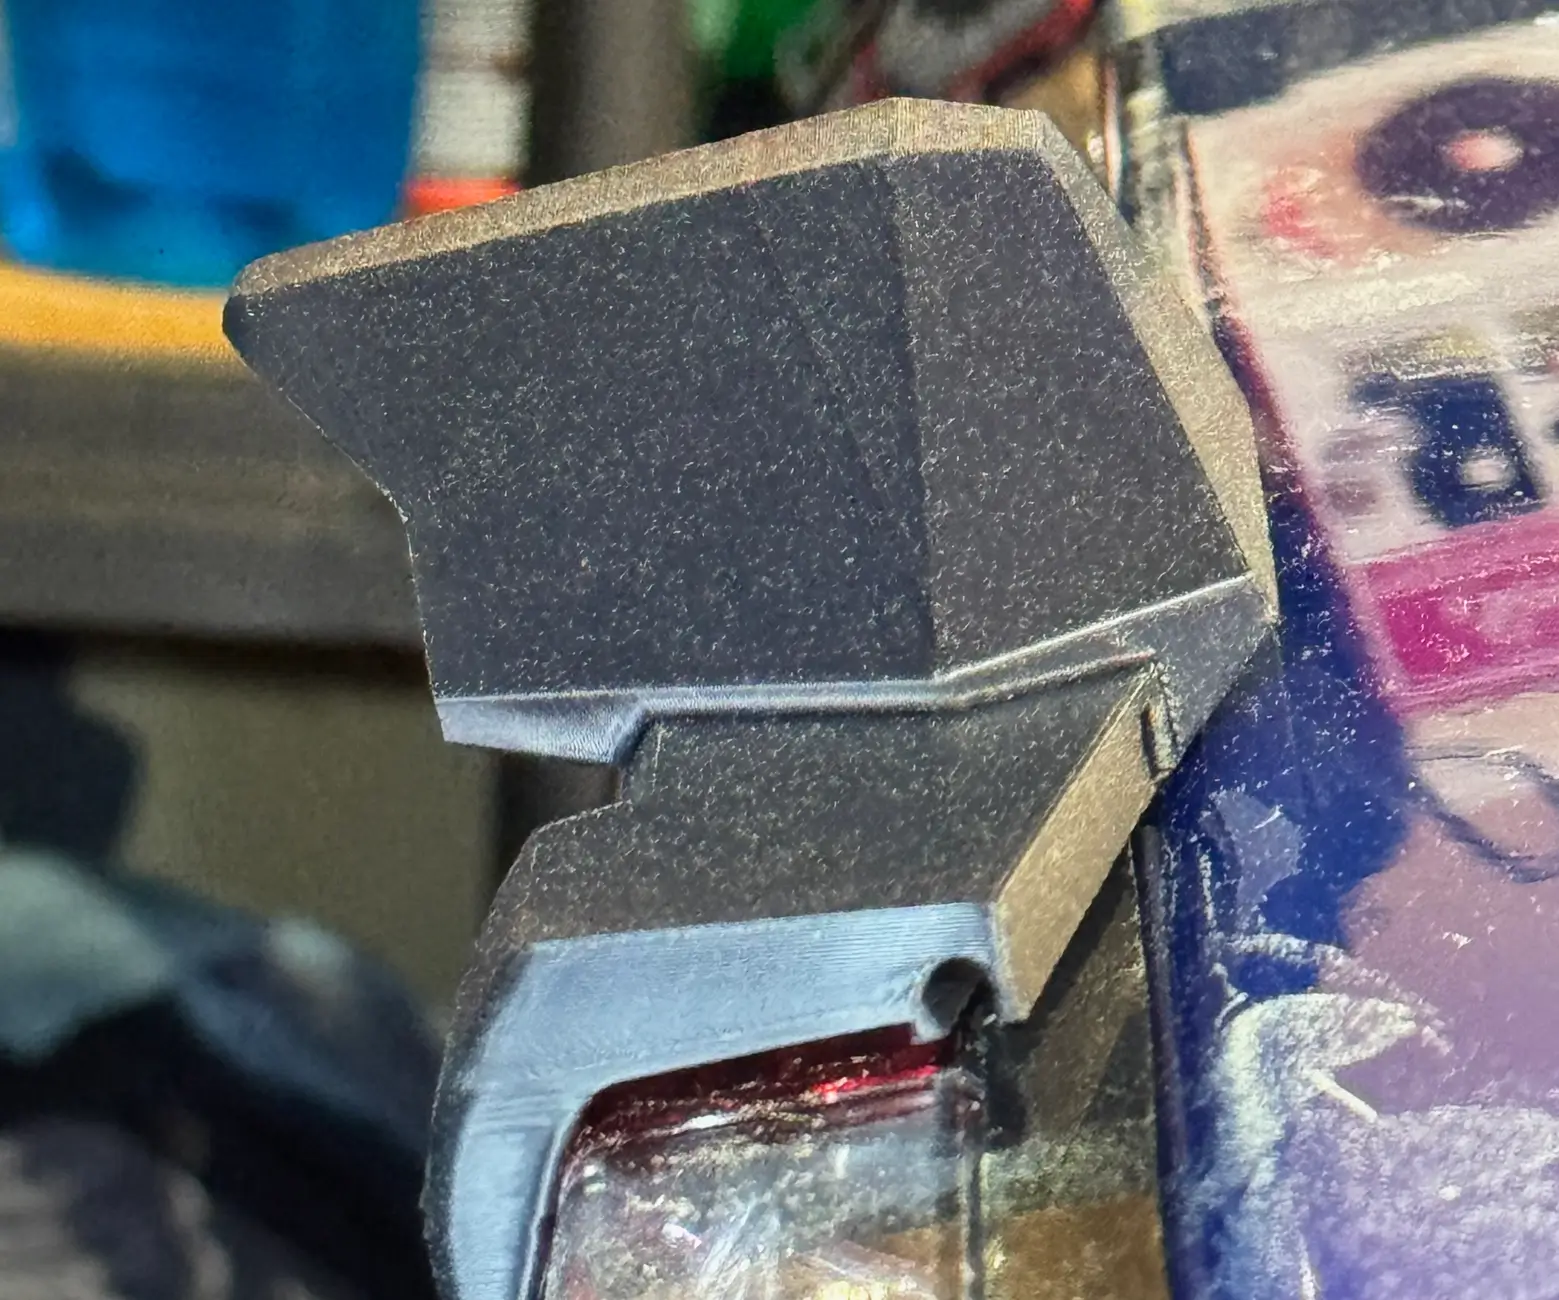
The rear camera was mounted above the third brake/cargo light in a 3D printed housing purchased from Etsy.
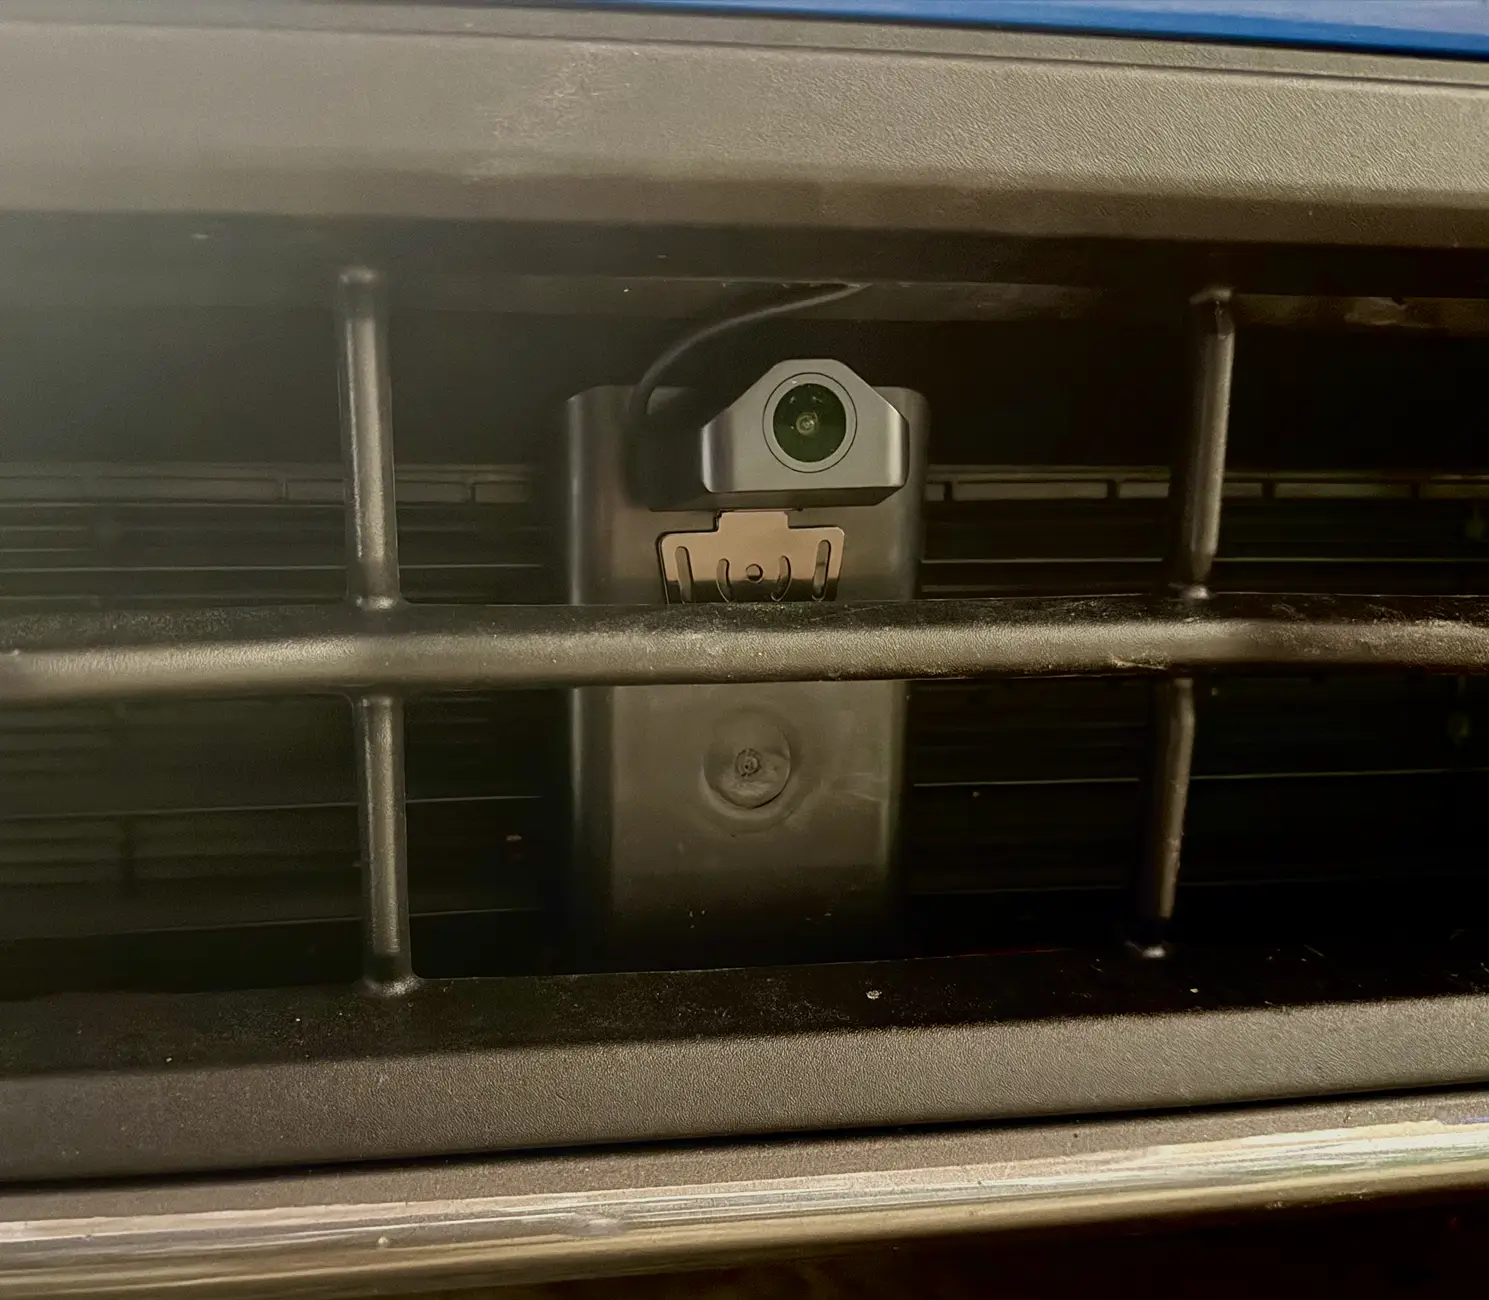
That bumper camera (labeled as "extra" in the menus) was mounted in the center of the lower bumper cover. Running this cable was by far the most challenging part of the install (more on that below)
Pros:
rear camera
OBD power cable & GPS
Lessons learned
Installed the Wolfbox G900TriPro (bumper version) in and on my 2025 XLT hybrid with the luxury package. Took about 4 hours to complete with all cables hidden.
tl;dr: great as a digital rear view mirror with a game changing 170º field of view, some design choices make it hard to get a really clean install though.
The package I bought included a 4K camera on the back of the screen, a wired 2k rear camera (with a 170º field of view), and a wired 1k camera I ran to the front bumper, OEM mount, polarizing filter for the 4k camera, and OBD power cable. Edit: after the unit misbehaved while powered through the OBD port, I switched to a hardwire kit
There are multiple ways to mount the screen. I chose the OEM mount because it is the easiest (1 screw) and cleanest. You can also strap this 11" screen to your existing mirror, an option I guess is there for owners who aren't comfortable disconnecting the wires on stock mirrors with auto-dimming, clock, compass or other features, not a Maverick problem,. There's also console/dashboard mount option.
The rear camera was mounted above the third brake/cargo light in a 3D printed housing purchased from Etsy.
That bumper camera (labeled as "extra" in the menus) was mounted in the center of the lower bumper cover. Running this cable was by far the most challenging part of the install (more on that below)
Pros:
- install
- straight forward install and setup
- included cables are of sufficient length without too much slack to stash away.
- I was pleasantly surprised at the zip ties included for for a cleaner safer install around things like airbags. The corrugated plastic conduit around the bumper camera cable for additional protection under the hood was nice too. Saved me from having to buy these separately.
- Quality (3M?) adhesives for mounting the cameras and GPS
- The included trim tool was better than my existing set of trim tools.
- operations
- High quality images. 2k is plenty for the rear, 1k is plenty for the front. 4k dash cam looks great too
- The rear camera's 170º field of view (FOV) essentially eliminates blind spots, removes obstructions like headrests and rear seat passengers, and when mounted above the 3rd brake/cargo light, eliminates whatever is in the bed from blocking the view.
To give you an idea of how much more you can see, I photoshop'd a view of the original mirror over the Wolfbox screen. The Wolfbox is only physically a little bit bigger. -
- easy to flip the image on bumper and rear cameras to suit the mounting location.
- Having the bumper and rear views in split screen makes parking a breeze.
- The mass of cables connected to the top doesn't look great, especially after you've spent time hiding them elsewhere.
This design choice was clearly made to support rubber banding the screen to an existing mirror (see comments about stock auto dimming mirrors above). A very poor tradeoff to me. - The right angle USB-C cables all must be left facing, which makes bundling the mass of cables for a cleaner install more difficult.
Fortunately in vehicles with a plastic cover over stock windshield mounted cameras and other electronics, like the Maverick, the cables aren't as noticeable.
- The screen takes a few seconds to power up, including the unnecessary animated logo splash screen This takes getting used to with a digital rear view mirror, especially since the first gear you put a vehicle into is usually reverse.
- Headlights and other lights in the rear camera have an annoying starburst pattern, adjusting the exposure helps a bit, but its still there.
- LED headlights have a strobe effect. This is common across most dash cams and digital rear view mirrors. You get used to it.
- Similar image adjustability of each camera. Adjustments to the rear and bumper camera is limited to brightness, unlike the 4k camera which offers exposure adjustment.
- When buying direct from Wolfbox, you've got one option: reliably unreliable FedEx ground. Recommending $7 shipping protection at checkout for "quick refund for lost, damaged or delayed package" is passing the problem on to customers. I'd rather have a choice of UPS or USPS, even if free shipping can't be offered.
- Firmware updates require a laptop and card reader, this could be handled through the app, or using the onboard WiFi. If $25 smart home lighting equipment can do it, a $350 dash cam should be able to as well.
- It would be great if the unit could connect to my home (or the vehicle's) wifi and periodically upload files to the cloud. See above comment.
- cable connections on the back instead of top for a cleaner install.
rear camera
- 4 screws to remove the 3rd brake/cargo light
- fished the cable through the headliner, out the same holes that the brake/cargo light is powered through, using fish tape
- cut a small slit in the foam surrounding the brake/cargo light for the camera cable, replaced the light, tightened the outer screws. It's a tight fit but I need to put a line of silicone caulk back there to ensure no water gets in behind the light.
- mounted the camera into the 3D printed housing (see above), mounted that to the 3rd bake light using the remaining (original) screws.
- tucked the cable under the headliner along the back window, down the C pillar (behind the door seal)
- lifted the back seat and ran the cable under the trim along the door, tucked under the B pillar trim, then under the driver's door sill trim,
- up the A pillar, zip tied behind the side-curtain airbag, tucked under the headliner along the top of the windshield to behind the mirror.
- bundled and zip tied excess cable behind the panel on the end of the dashboard on the drivers side. There's a fair amount of room back there.
step 7 above, in reverse, also bundled excess cable in the same placeDuring a long roadtrip, after about 4 hours, the dash cam started powering down and going into parking mode. I contacted Wolfbox customer support who recommended switching from powering it through the OBD cable purchased with the unit, to powering from the fuse box. The sent the hardwire kit free of charge.
I used the spare #3 fuse (5A spare) for the red (hot when the truck is powered on, main accessory power) wire, and #20 (10A, spare) for the yellow (always hot, parking mode power), ran the cable up the passenger A pillar, tucked between the windshield and headliner and under the black plastic cowl covering the vision assist camera and such.
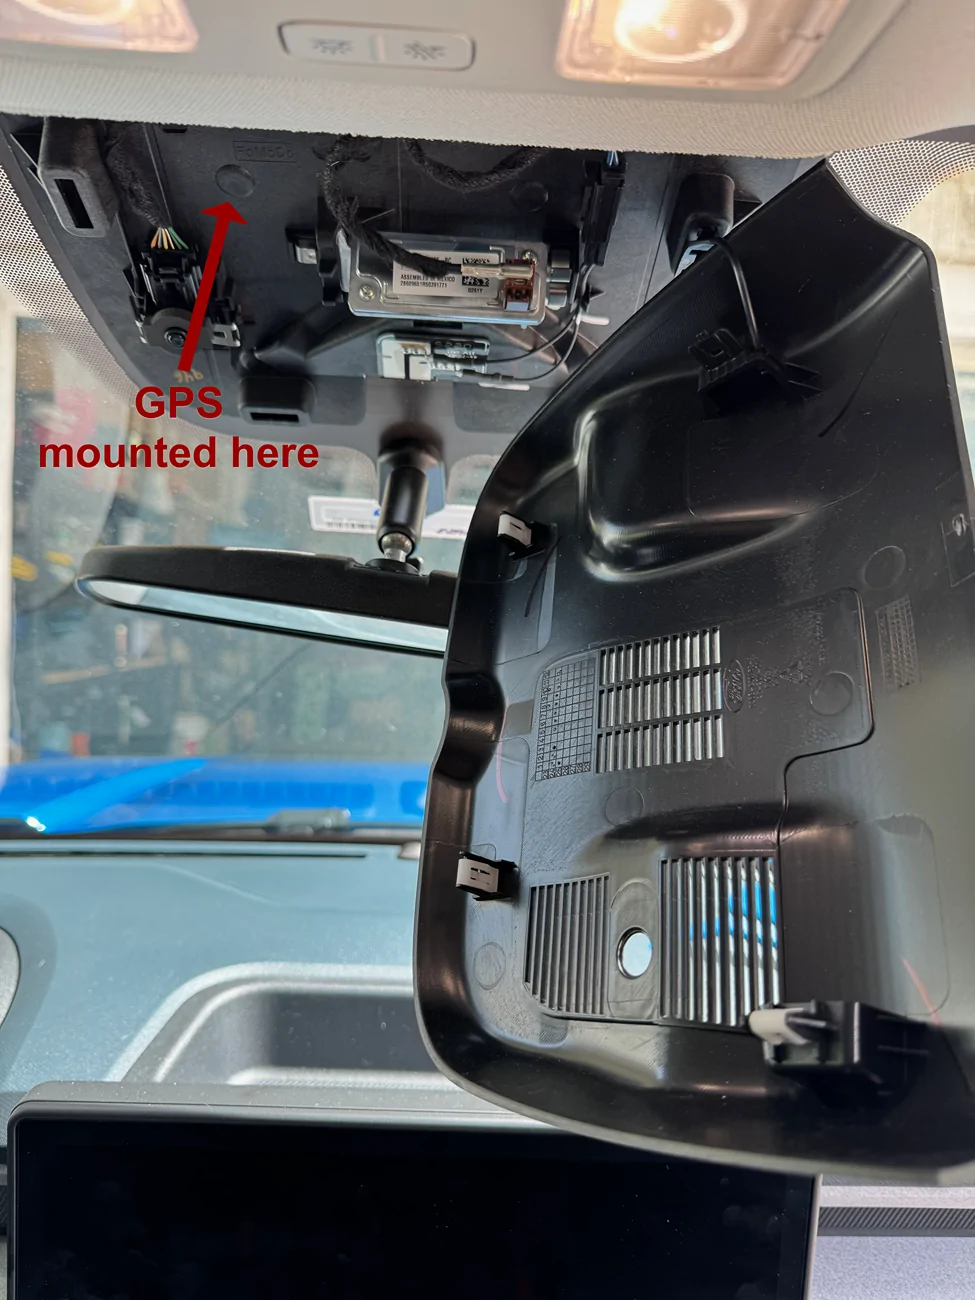
- mounted the GPS above the vision assist camera, zip tied excess cable covered both with the black plastic housing, works and looks great.
- Ran cable up the driver's A pillar, tucked between the windshield and headliner and under the black plastic cowl.
- cut a small slit in the rubber firewall grommet above the brake pedal, pulled the cable through using a fish tape
- ran the cable over the top of the strut tower, but under the black plastic cowl covering the windshield wipers (no need to remove it, just run it under) , along the drivers side of the engine bay, zip tying to the frame or other wire bundles along the way
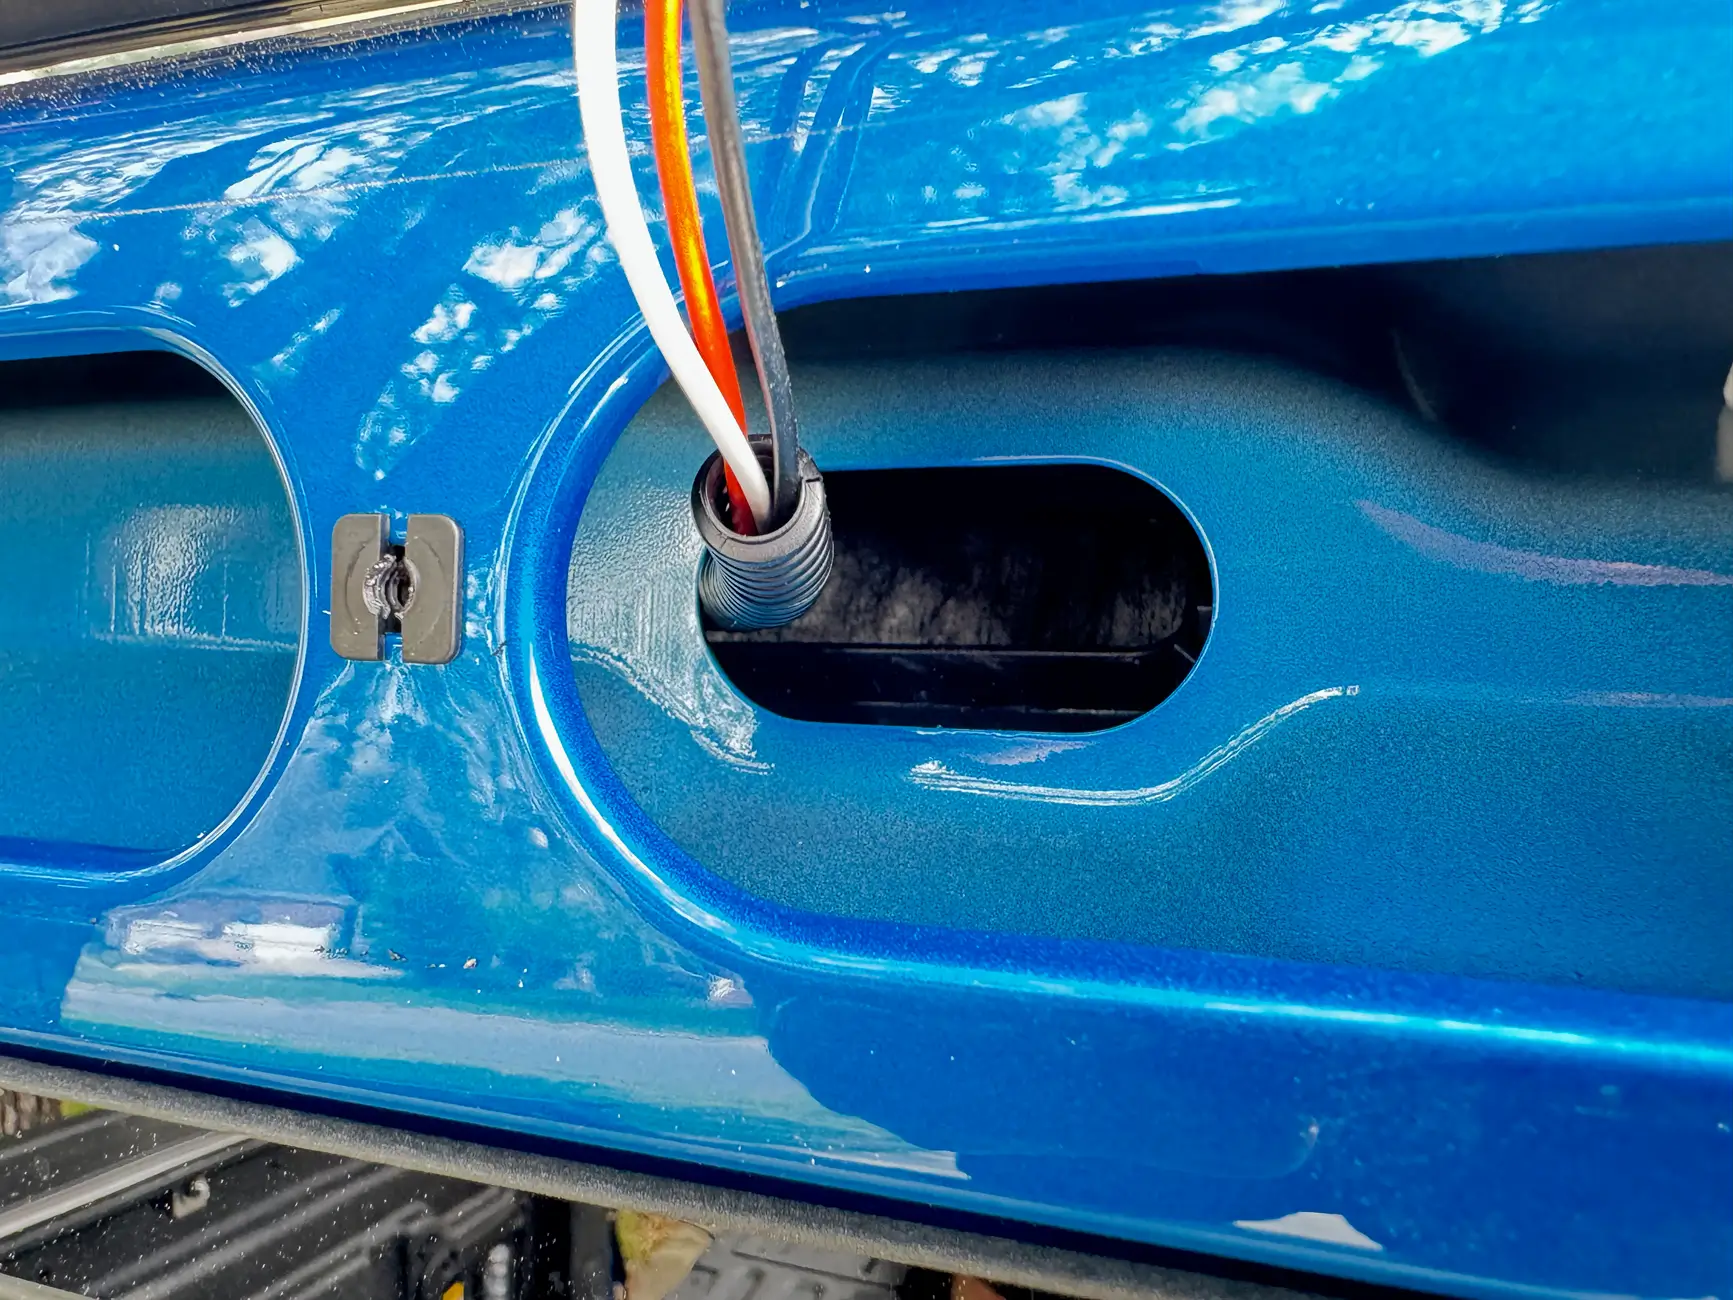
- after searching for an hour, finally found the one bit of daylight that can be seen from the engine bay through the very top of the grill, all the way on the front right, fished the wire through that gap and through the grill, tucked along the backside of the grill. This avoided removing the front grill and bumper cover which I did not want to do if possible.
- again using the fish tape, ran the cable through an existing v-shaped opening at the center in the gasket between the bumper cover and the grill, out into the lower bumper cover
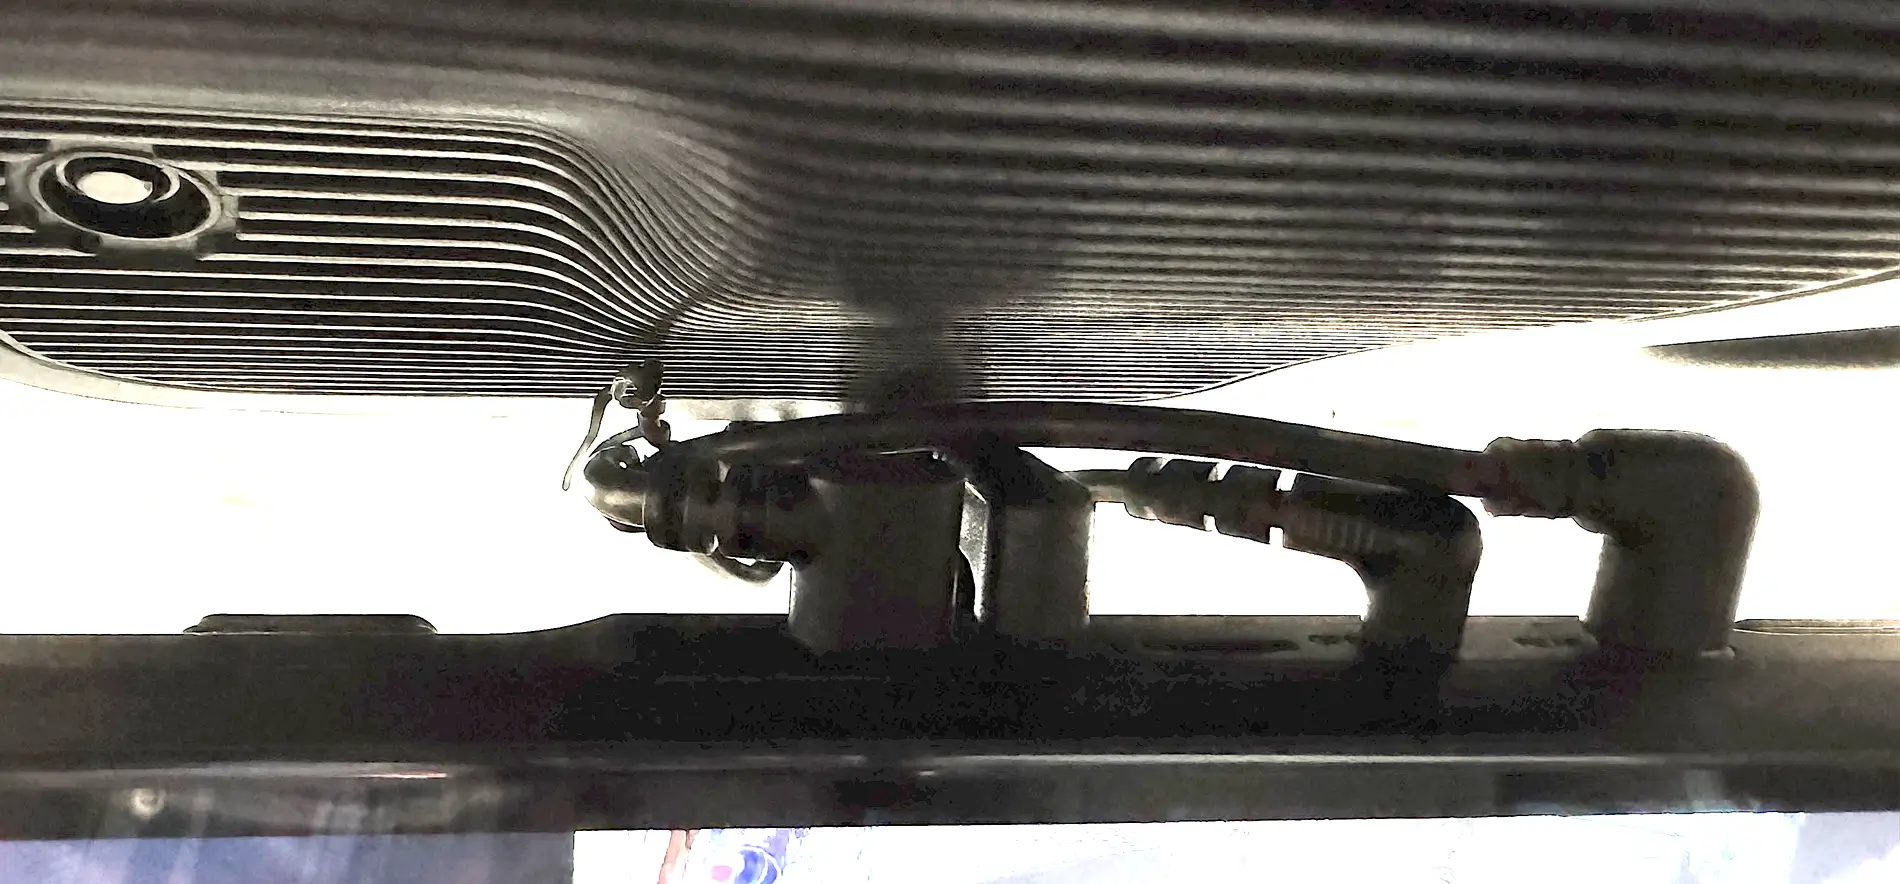
- mounted the camera (using the provided 3M adhesive) in the lower bumper cover (see image above).
- tucked the connection and excess cable behind the bumper cover.
Lessons learned
- test everything before you start pulling cable
- A fish tape is a must have,
- tuck wire more, pull trim pieces less. There's generally plenty of access and room under the headliner and along weather stripping.
- zip wherever possible especially along the A-pillars to ensure the tables stay behind the airbags
- what I thought would be the hardest (routing cable through the firewall) was the easiest
- what I thought would be the easiest (routing cable to the front bumper) was by far the hardest
- the hardwire kit is simple to install and provides the most consistent power
Sponsored
Last edited:


