- First Name
- Lane
- Joined
- Jul 20, 2023
- Threads
- 15
- Messages
- 406
- Reaction score
- 977
- Location
- Central Wisconsin
- Website
- photos.app.goo.gl
- Vehicle(s)
- 2023 Area 51 Hybrid XL, 2006 VW Jetta Smyth UTE
- Engine
- 2.5L Hybrid
- Thread starter
- #1
For those unaware, people are removing the rear center seat belt in order to remove some of its parts to make room behind the seat for audio gear. I've seen other threads mention cutting the belt in order to remove it, but you don't have to. Here's what I did which should be 100% reversible. Everything should be able to be reinstalled if it's ever needed or when it's time to sell the vehicle.
1. Remove the plastic cover on the rear wall that sits over the belt and reel mechanism. Even though you're going to be careful, at least one of the fasteners on its backside is gonna break.

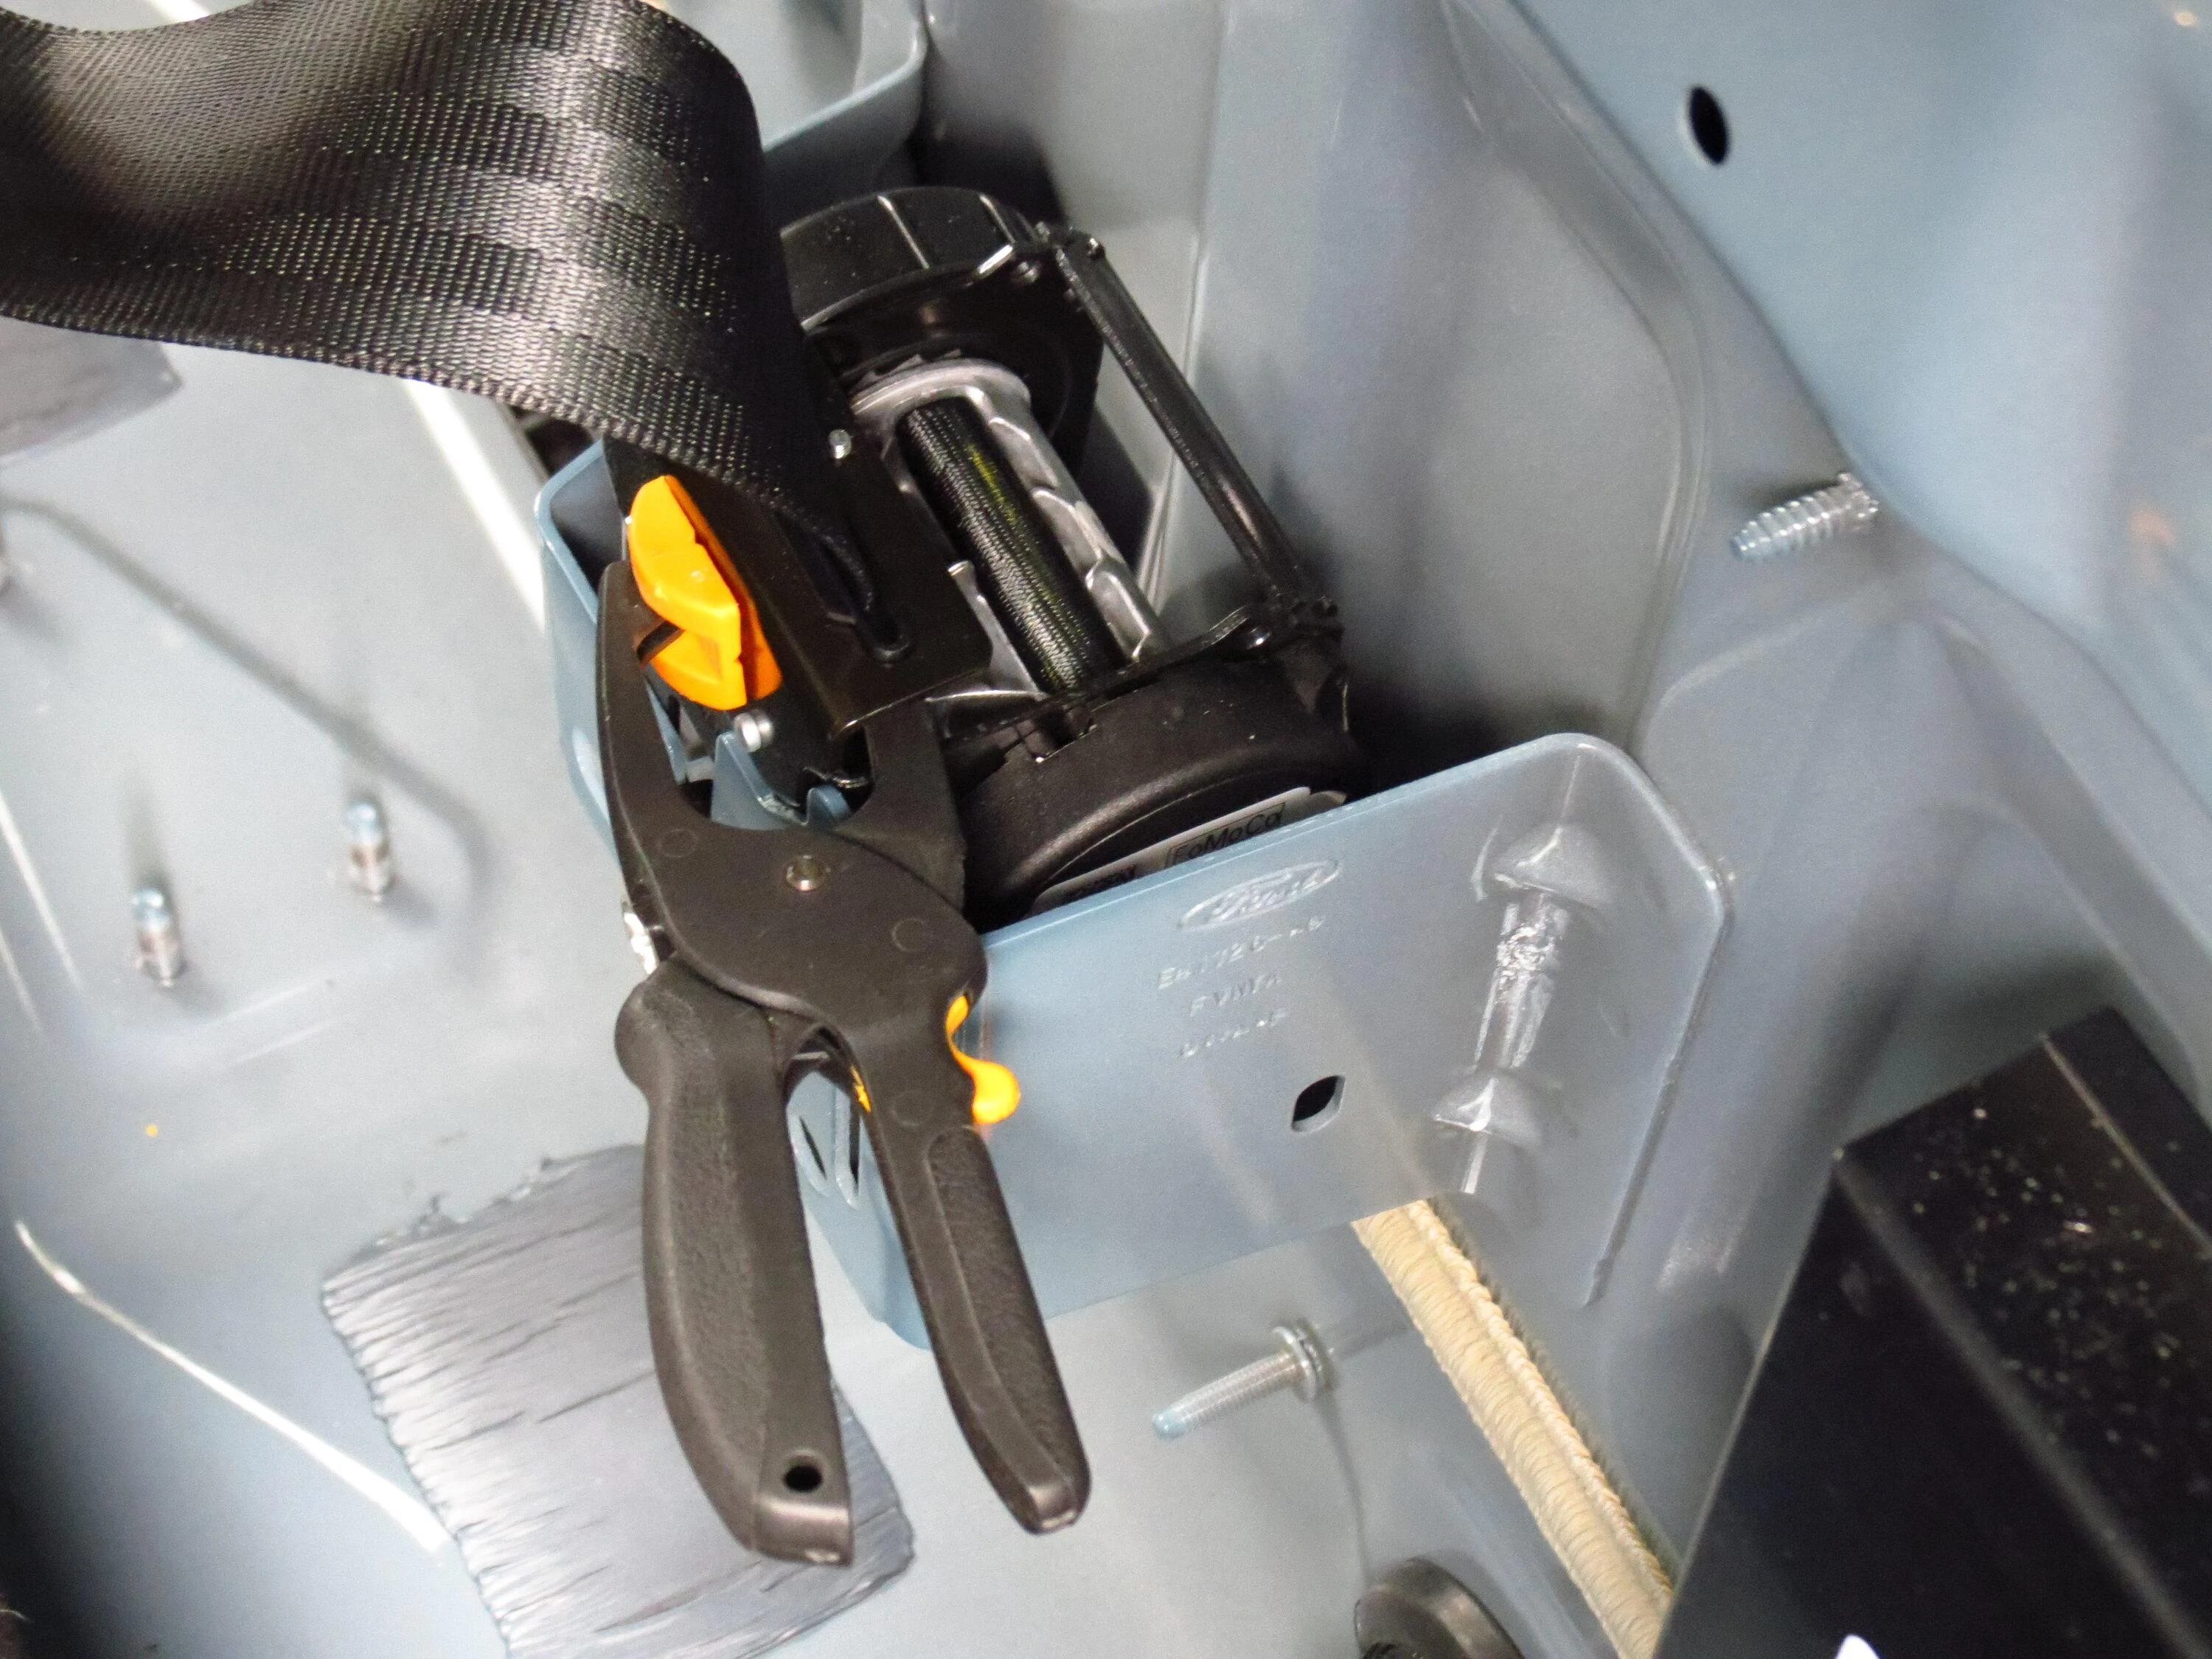
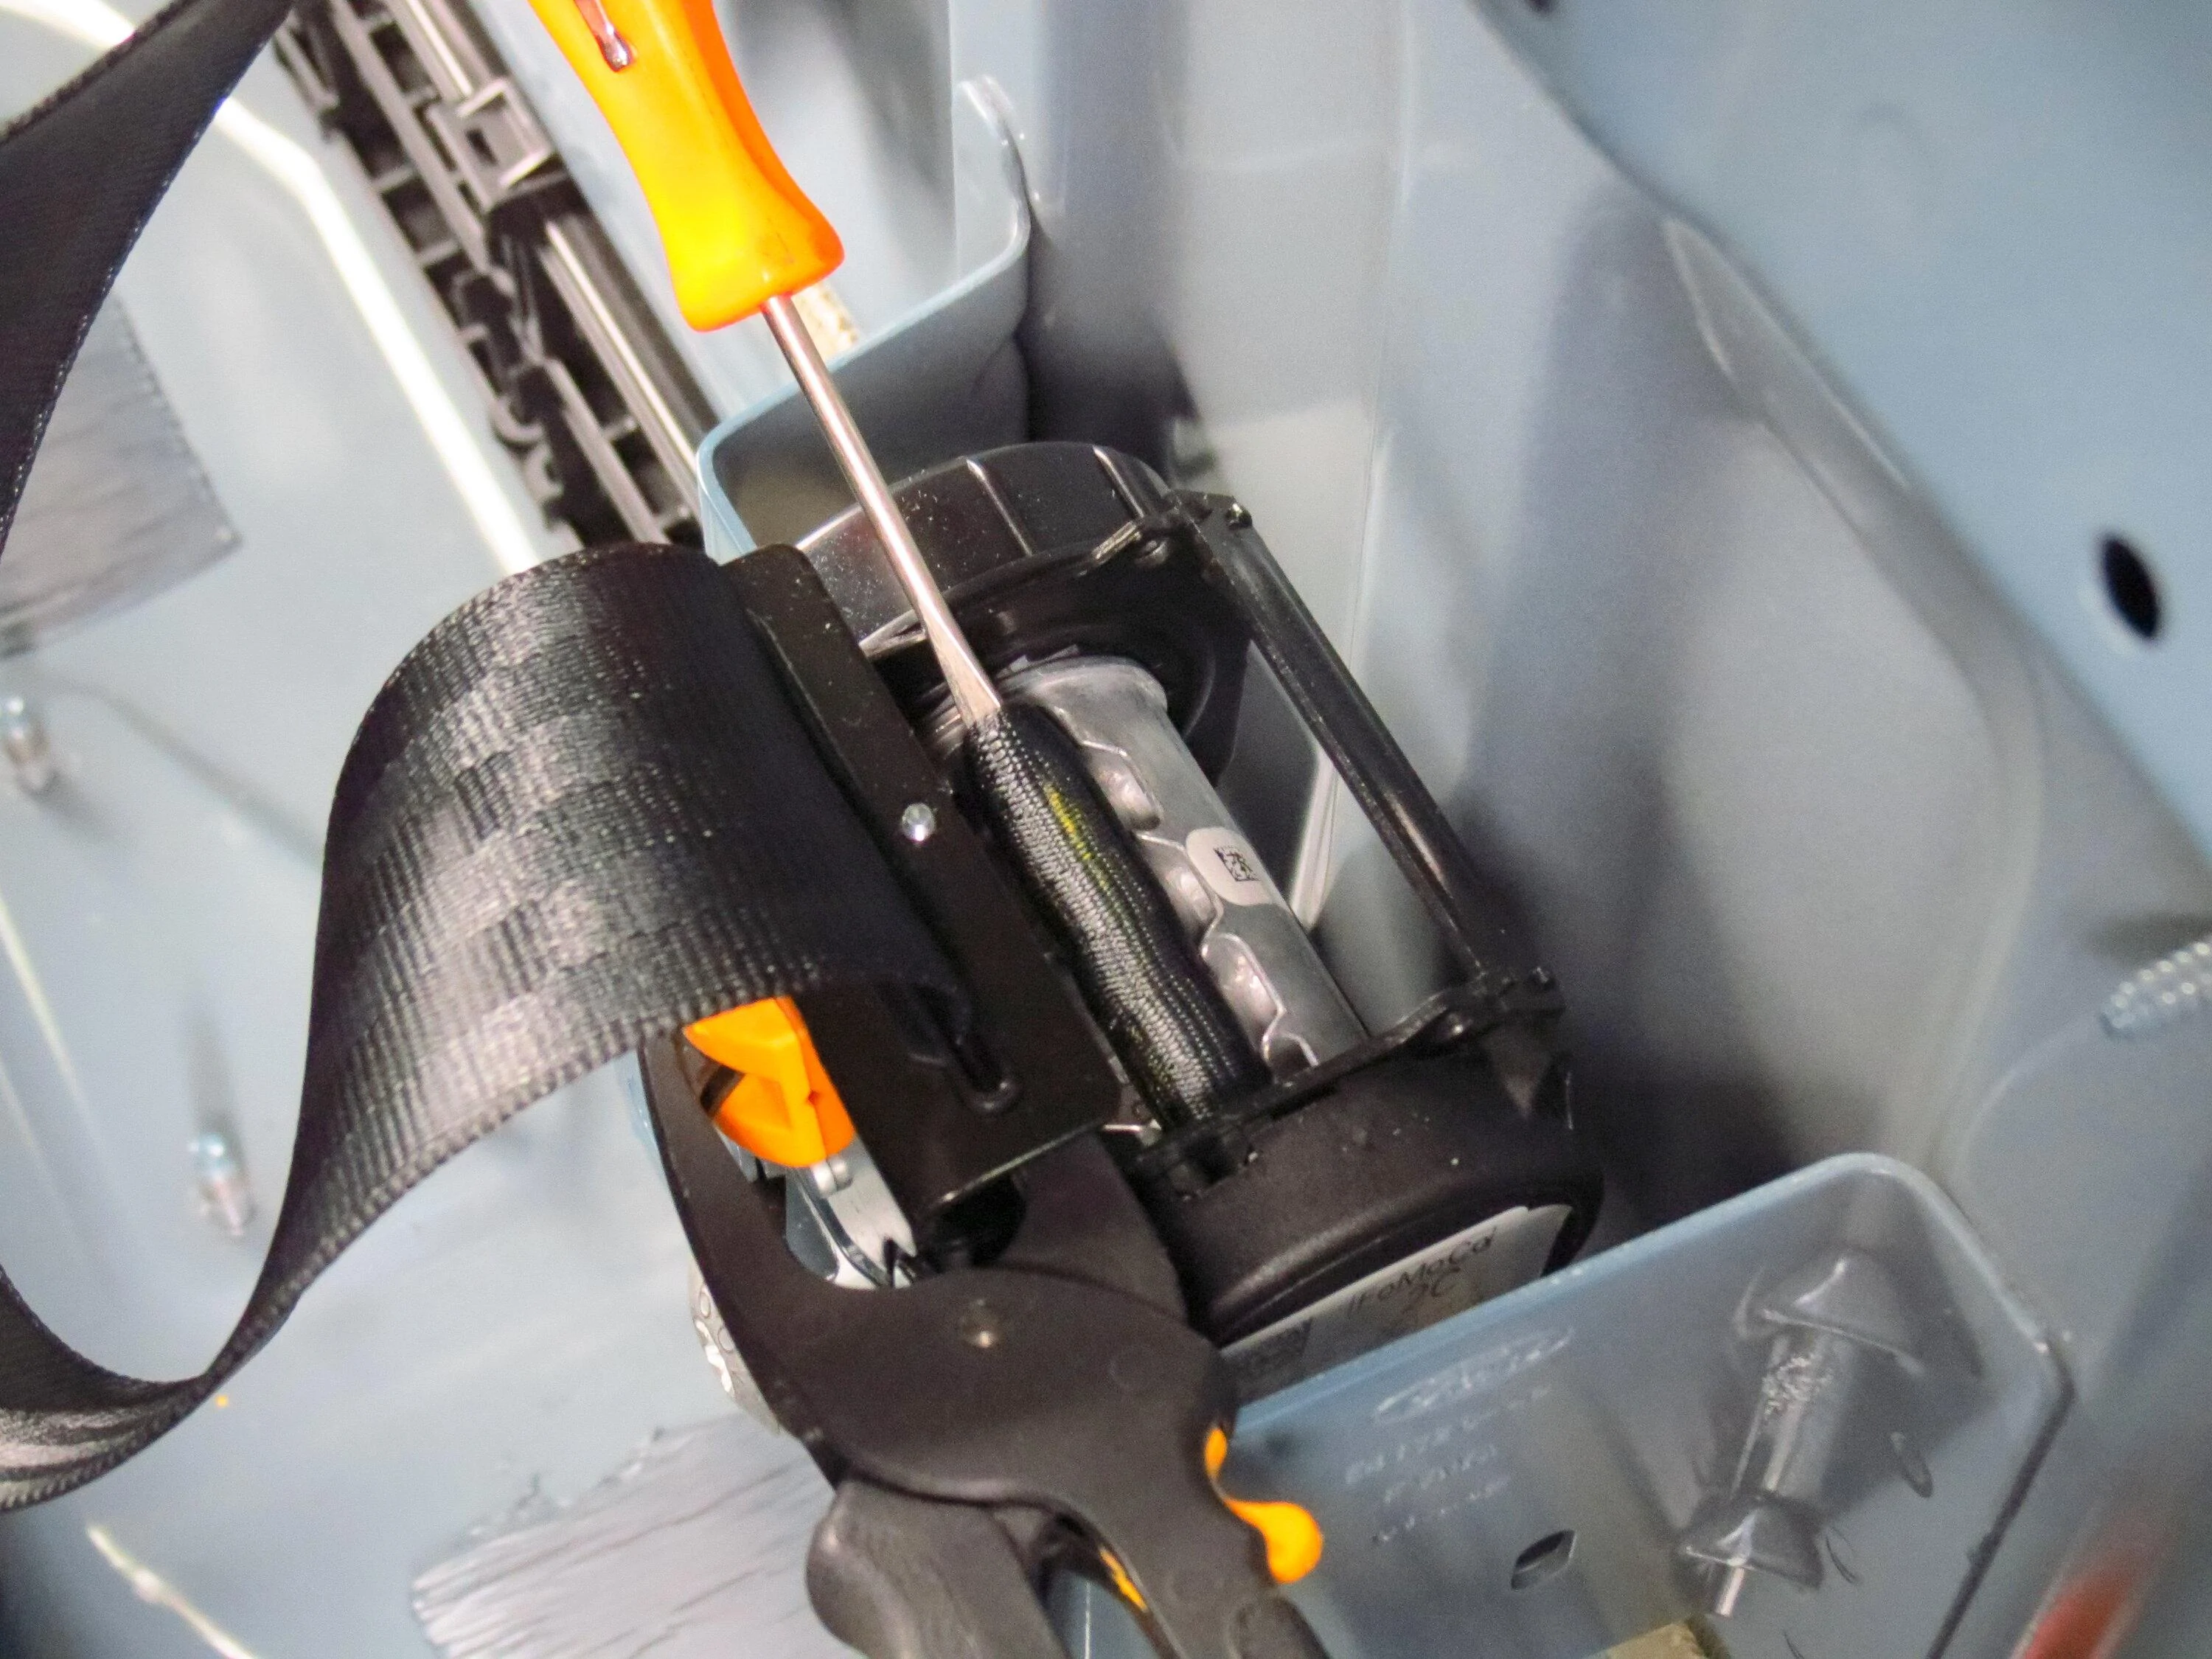
2. Pull the belt to get most of it unwound from the reel's spool. Stop pulling when you see the thick-looking end of the belt sitting within the reel's spool. Use a clamp to hold the belt to the reel bracket so the reel doesn't pull it all back in when you let go of the belt. You can use masking tape, rubber bands, whatever you have.
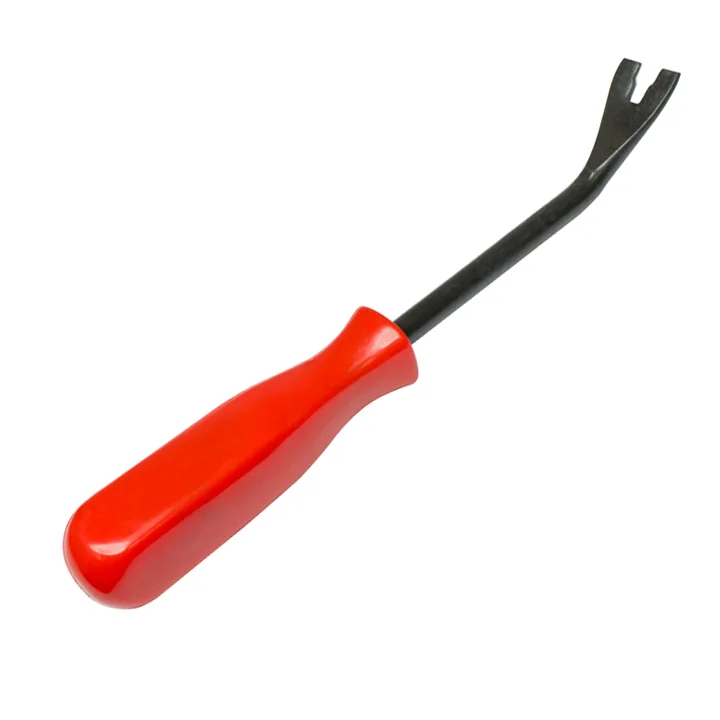
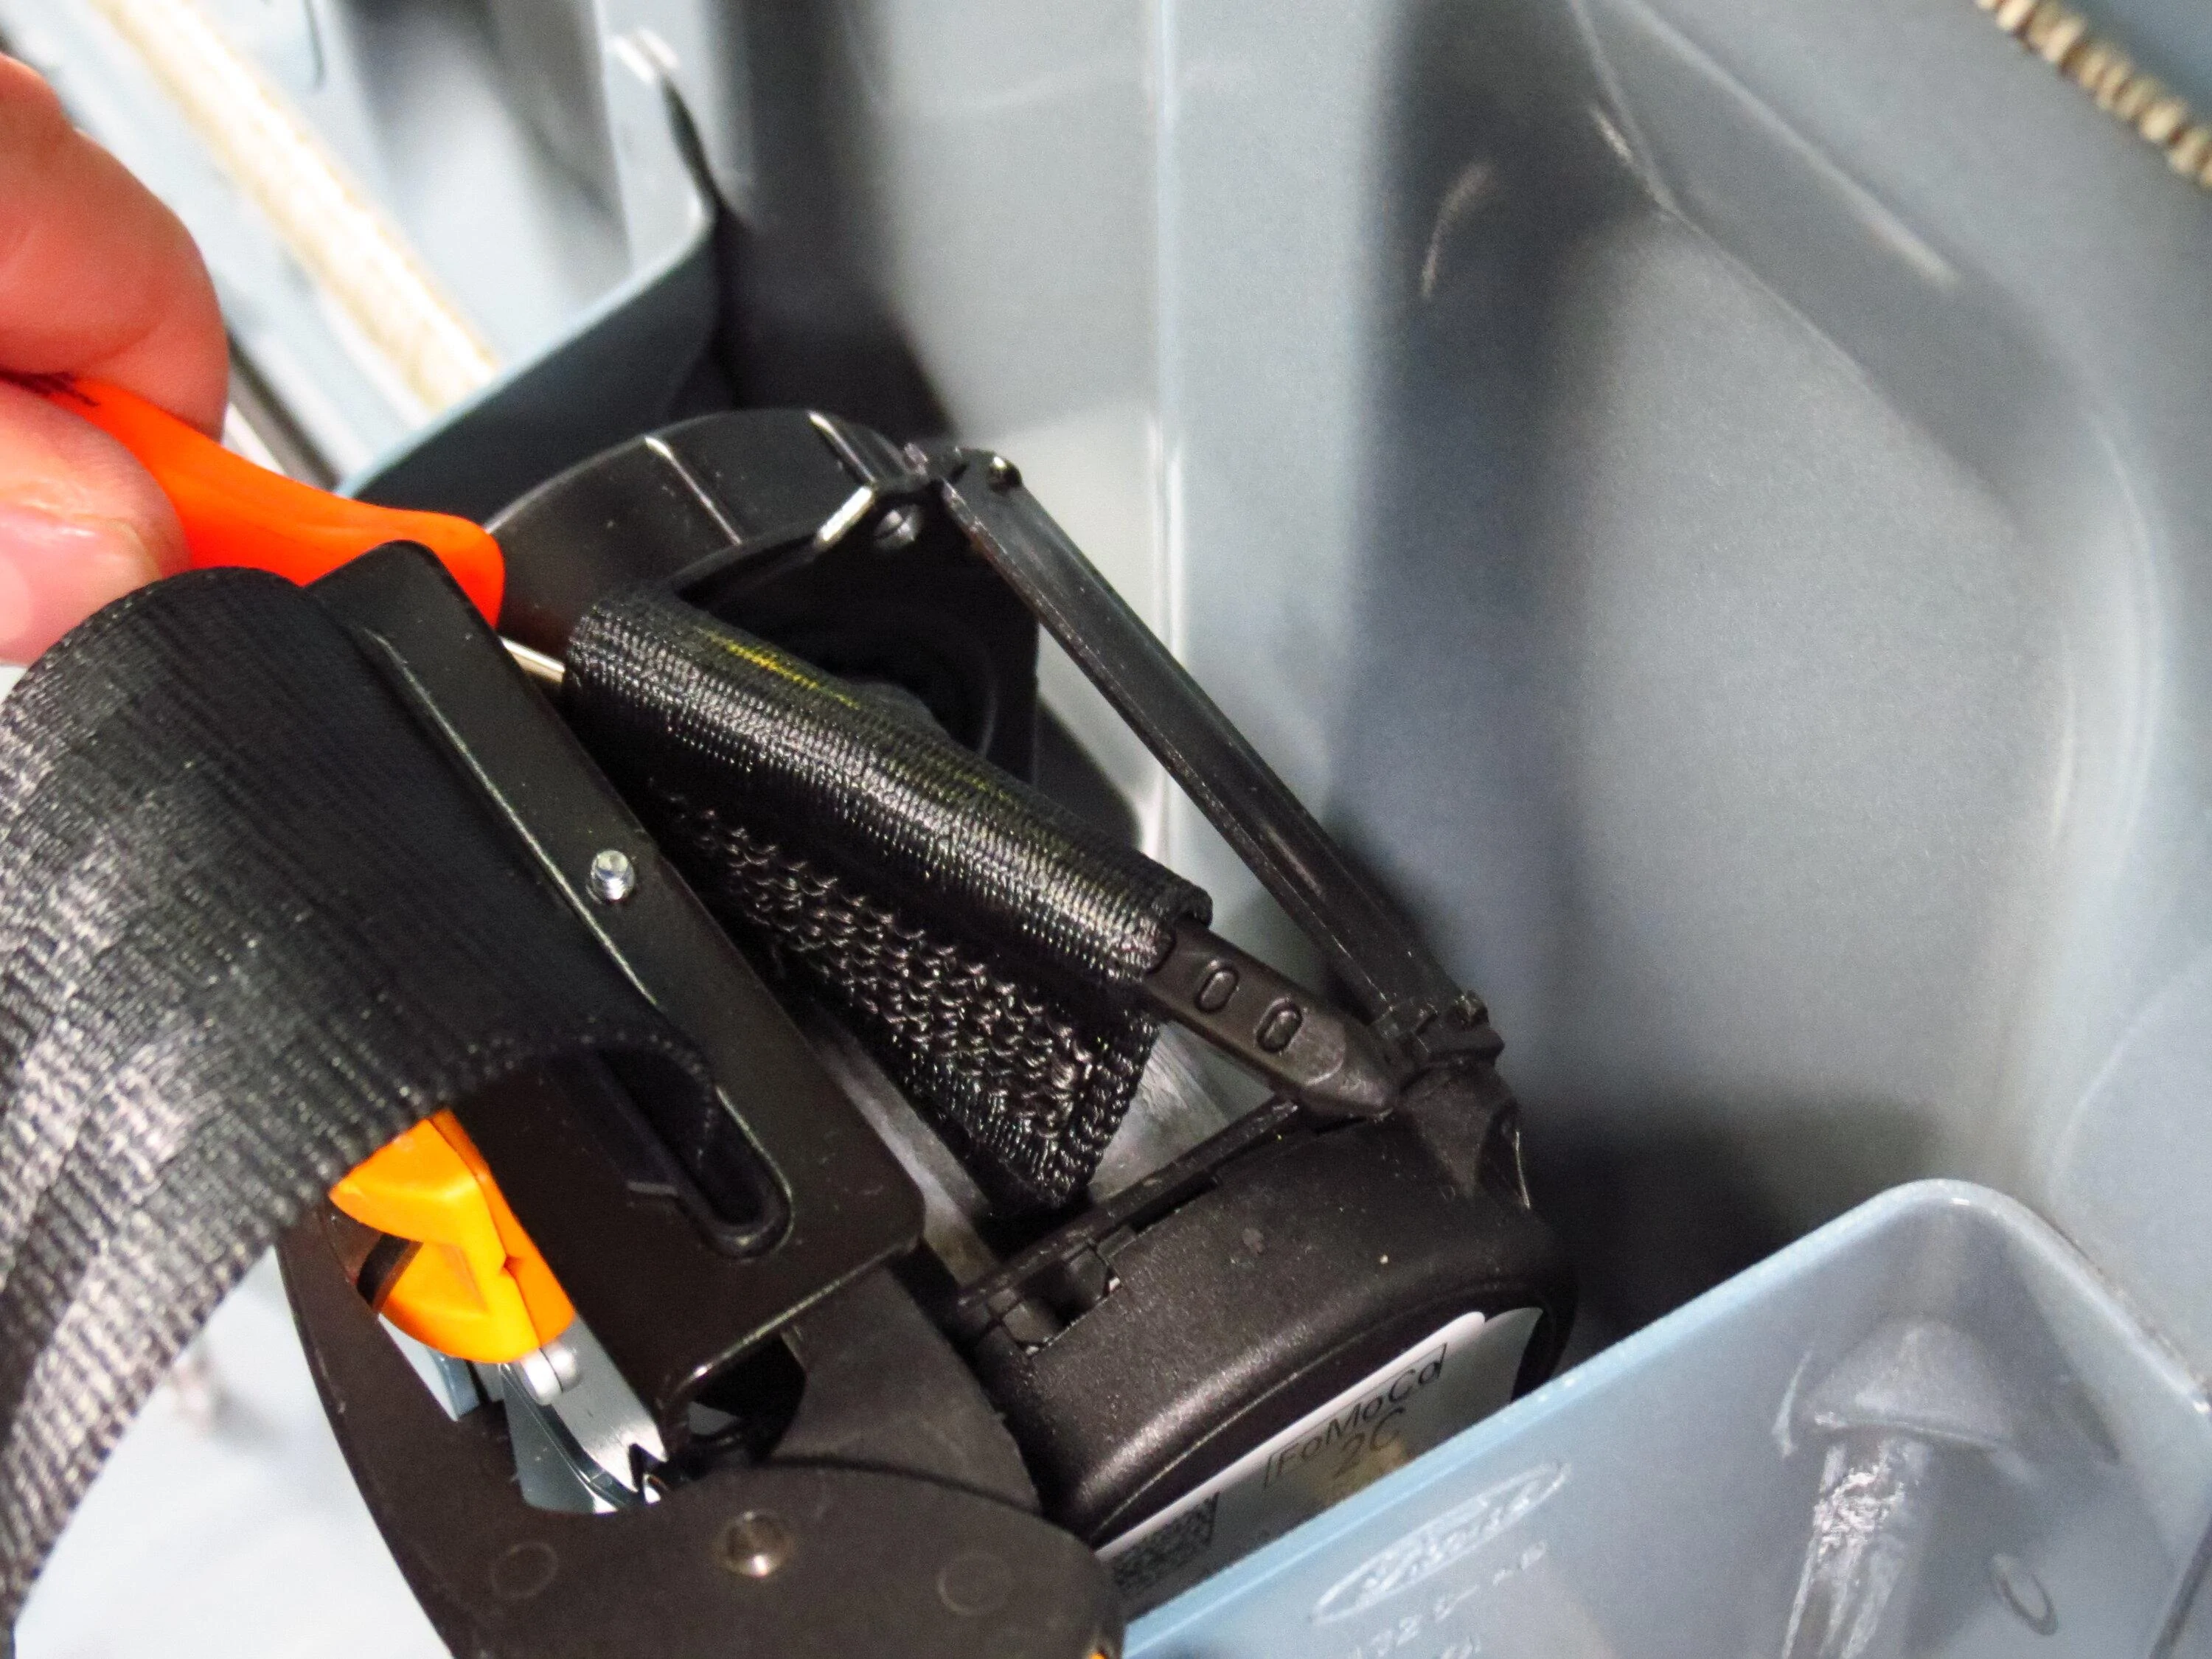
3. On the end of that belt webbing is a sewn loop with a plastic rod inside of it. Get a small screwdriver to pry on the loop of webbing so you can get it out of the reel's center section a bit.
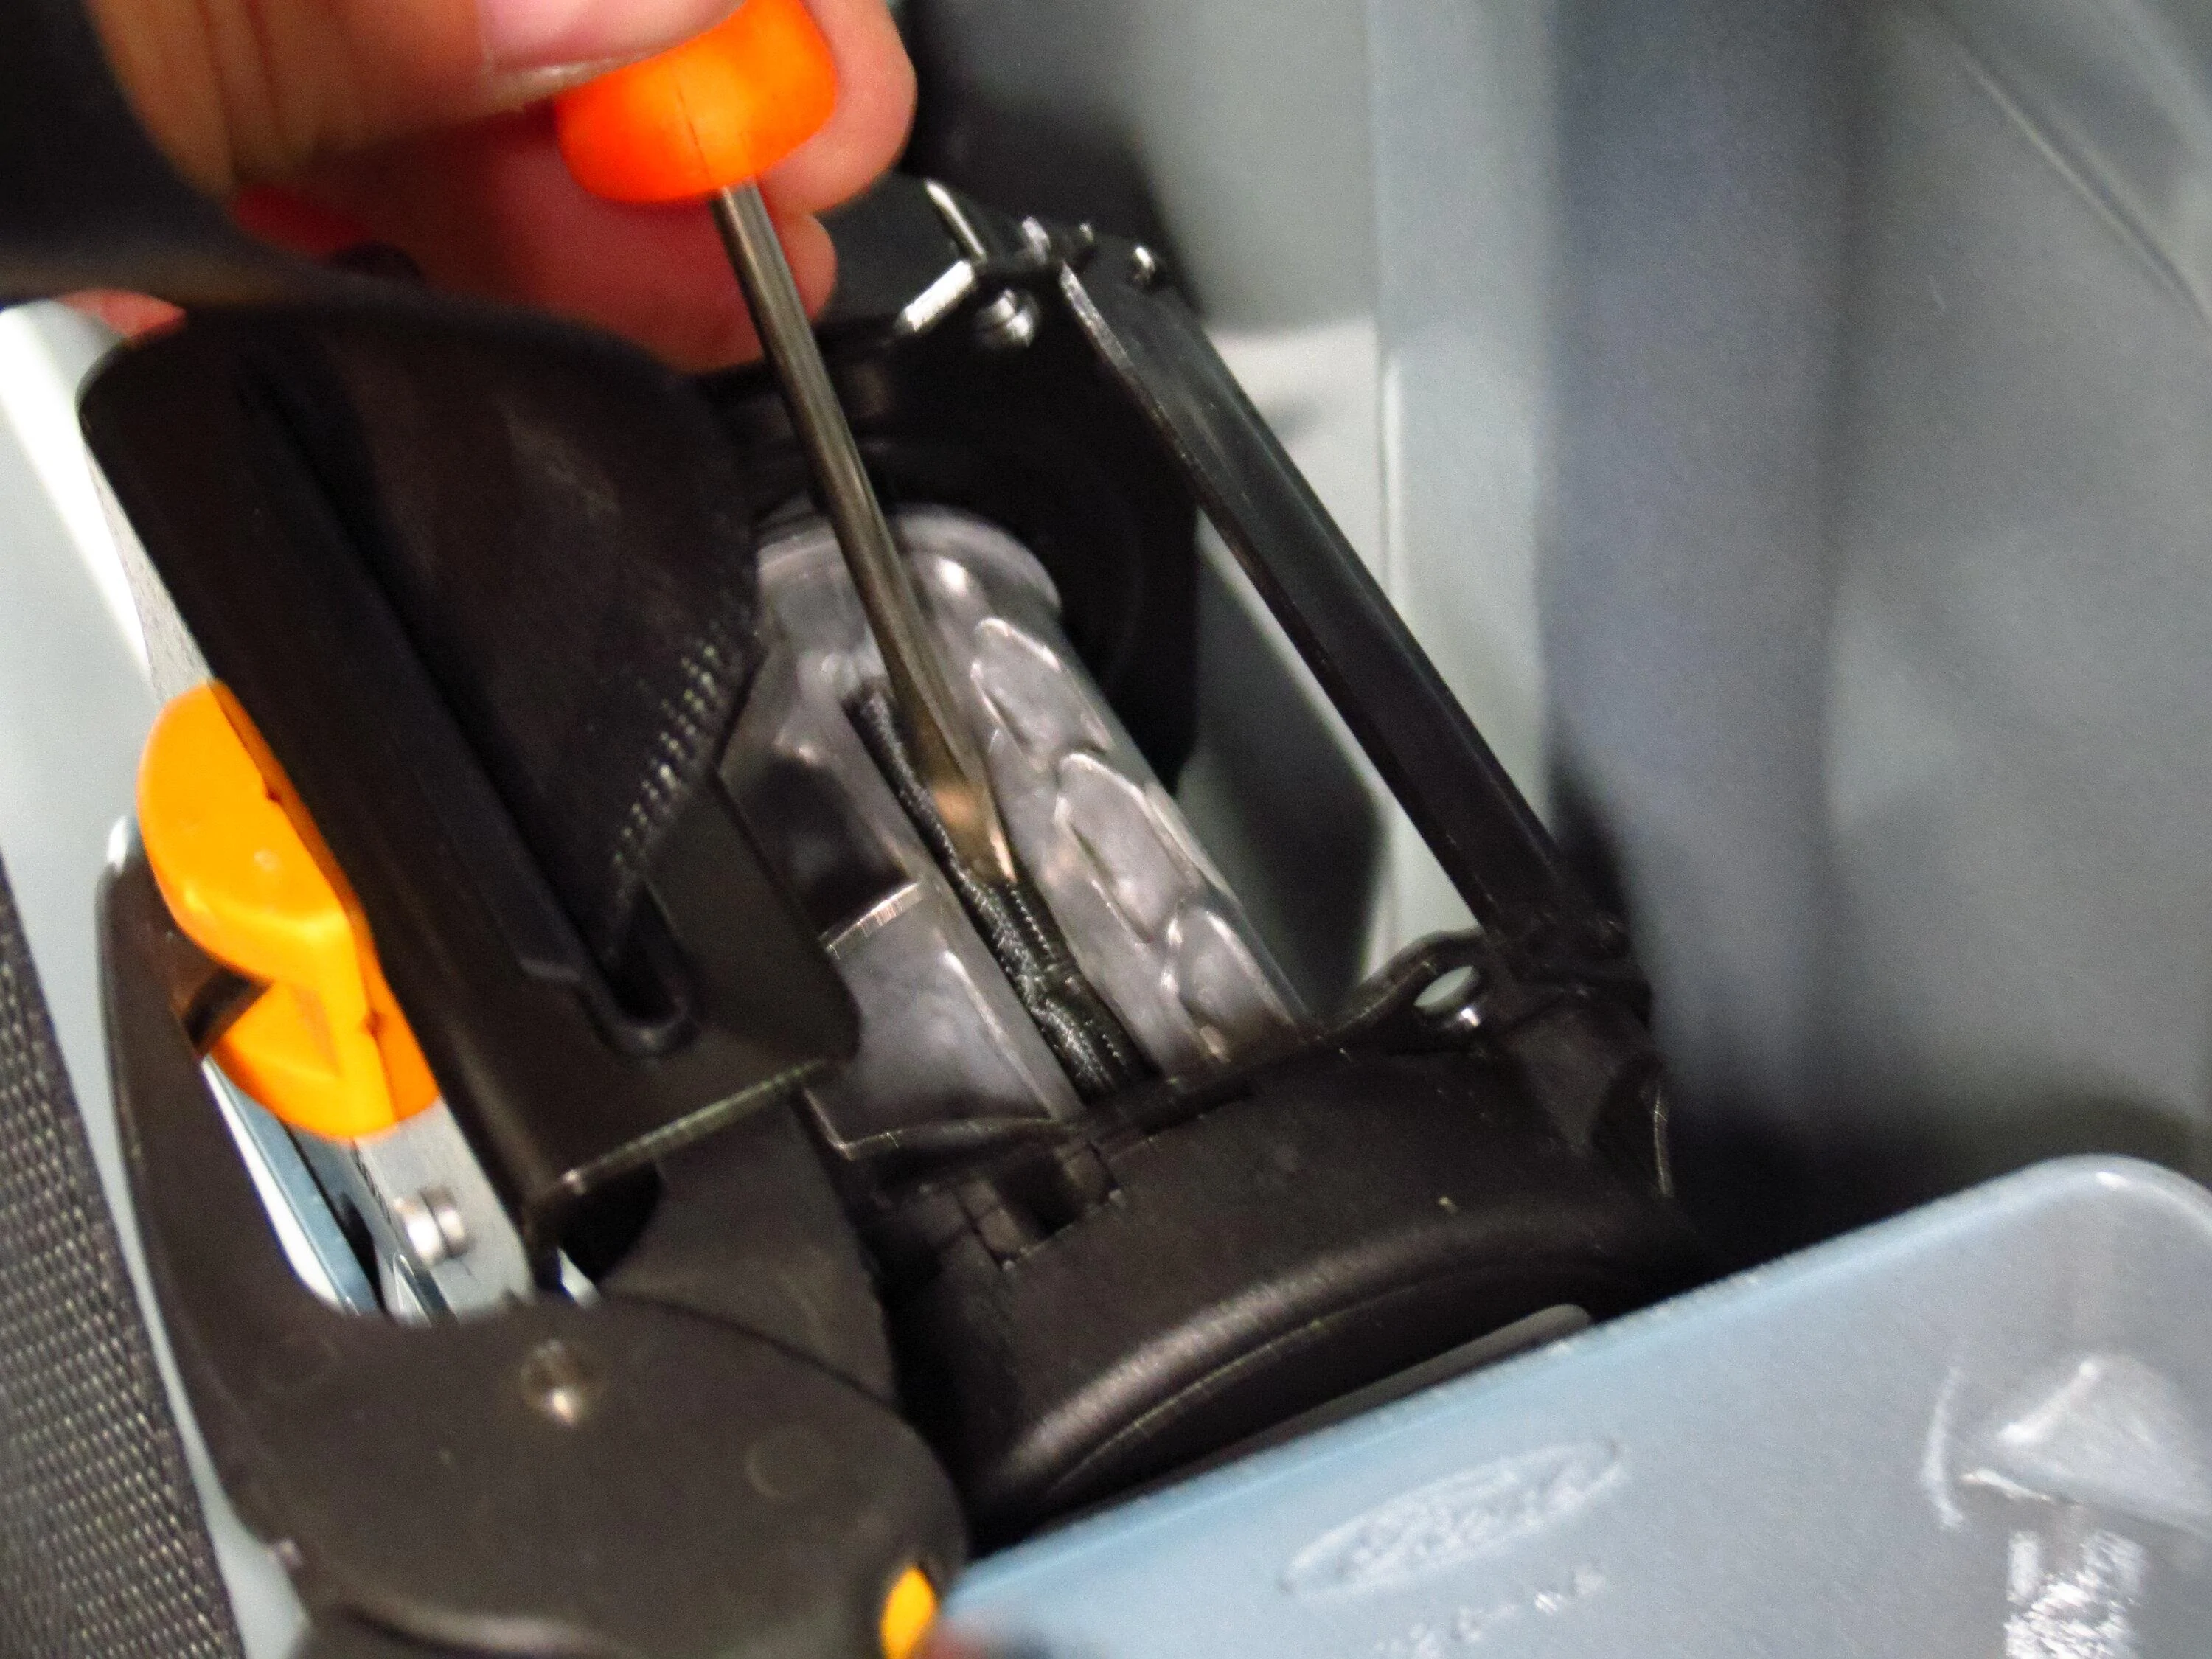
4. When you've pulled the loop on the end of the belt out of the reel's spool just a bit, push the screwdriver into one end of the loop to push out the plastic rod.
5. Once the rod is out of the loop, flatten the loop of belt as much as you can and shove it back down into the slot in the spool. Use the small screwdriver to push it further in. You should then be able to pull the end of the belt completely out of the other side of the spool. Since there's a spring with tension on the reel, it's going to scare you as you pull out the belt as it spins up to wood chipper speeds looking for something to feed upon. Its anger will die down in a second or two.
6. You'll now have all the belt out of the end of the spool, but the loop on the end of the belt is still confined by the slot in the reel's bracket. At this point, remove the whole reel assembly from the bracket on the back of the bed which will require a pretty large Torx bit. You'll need a Phillips screwdriver to remove a small screw which holds a plastic guide to the reel's bracket. Once the plastic guide is free, you can pull the end of the belt through it and the metal slot in the reel bracket that it was mounted in.

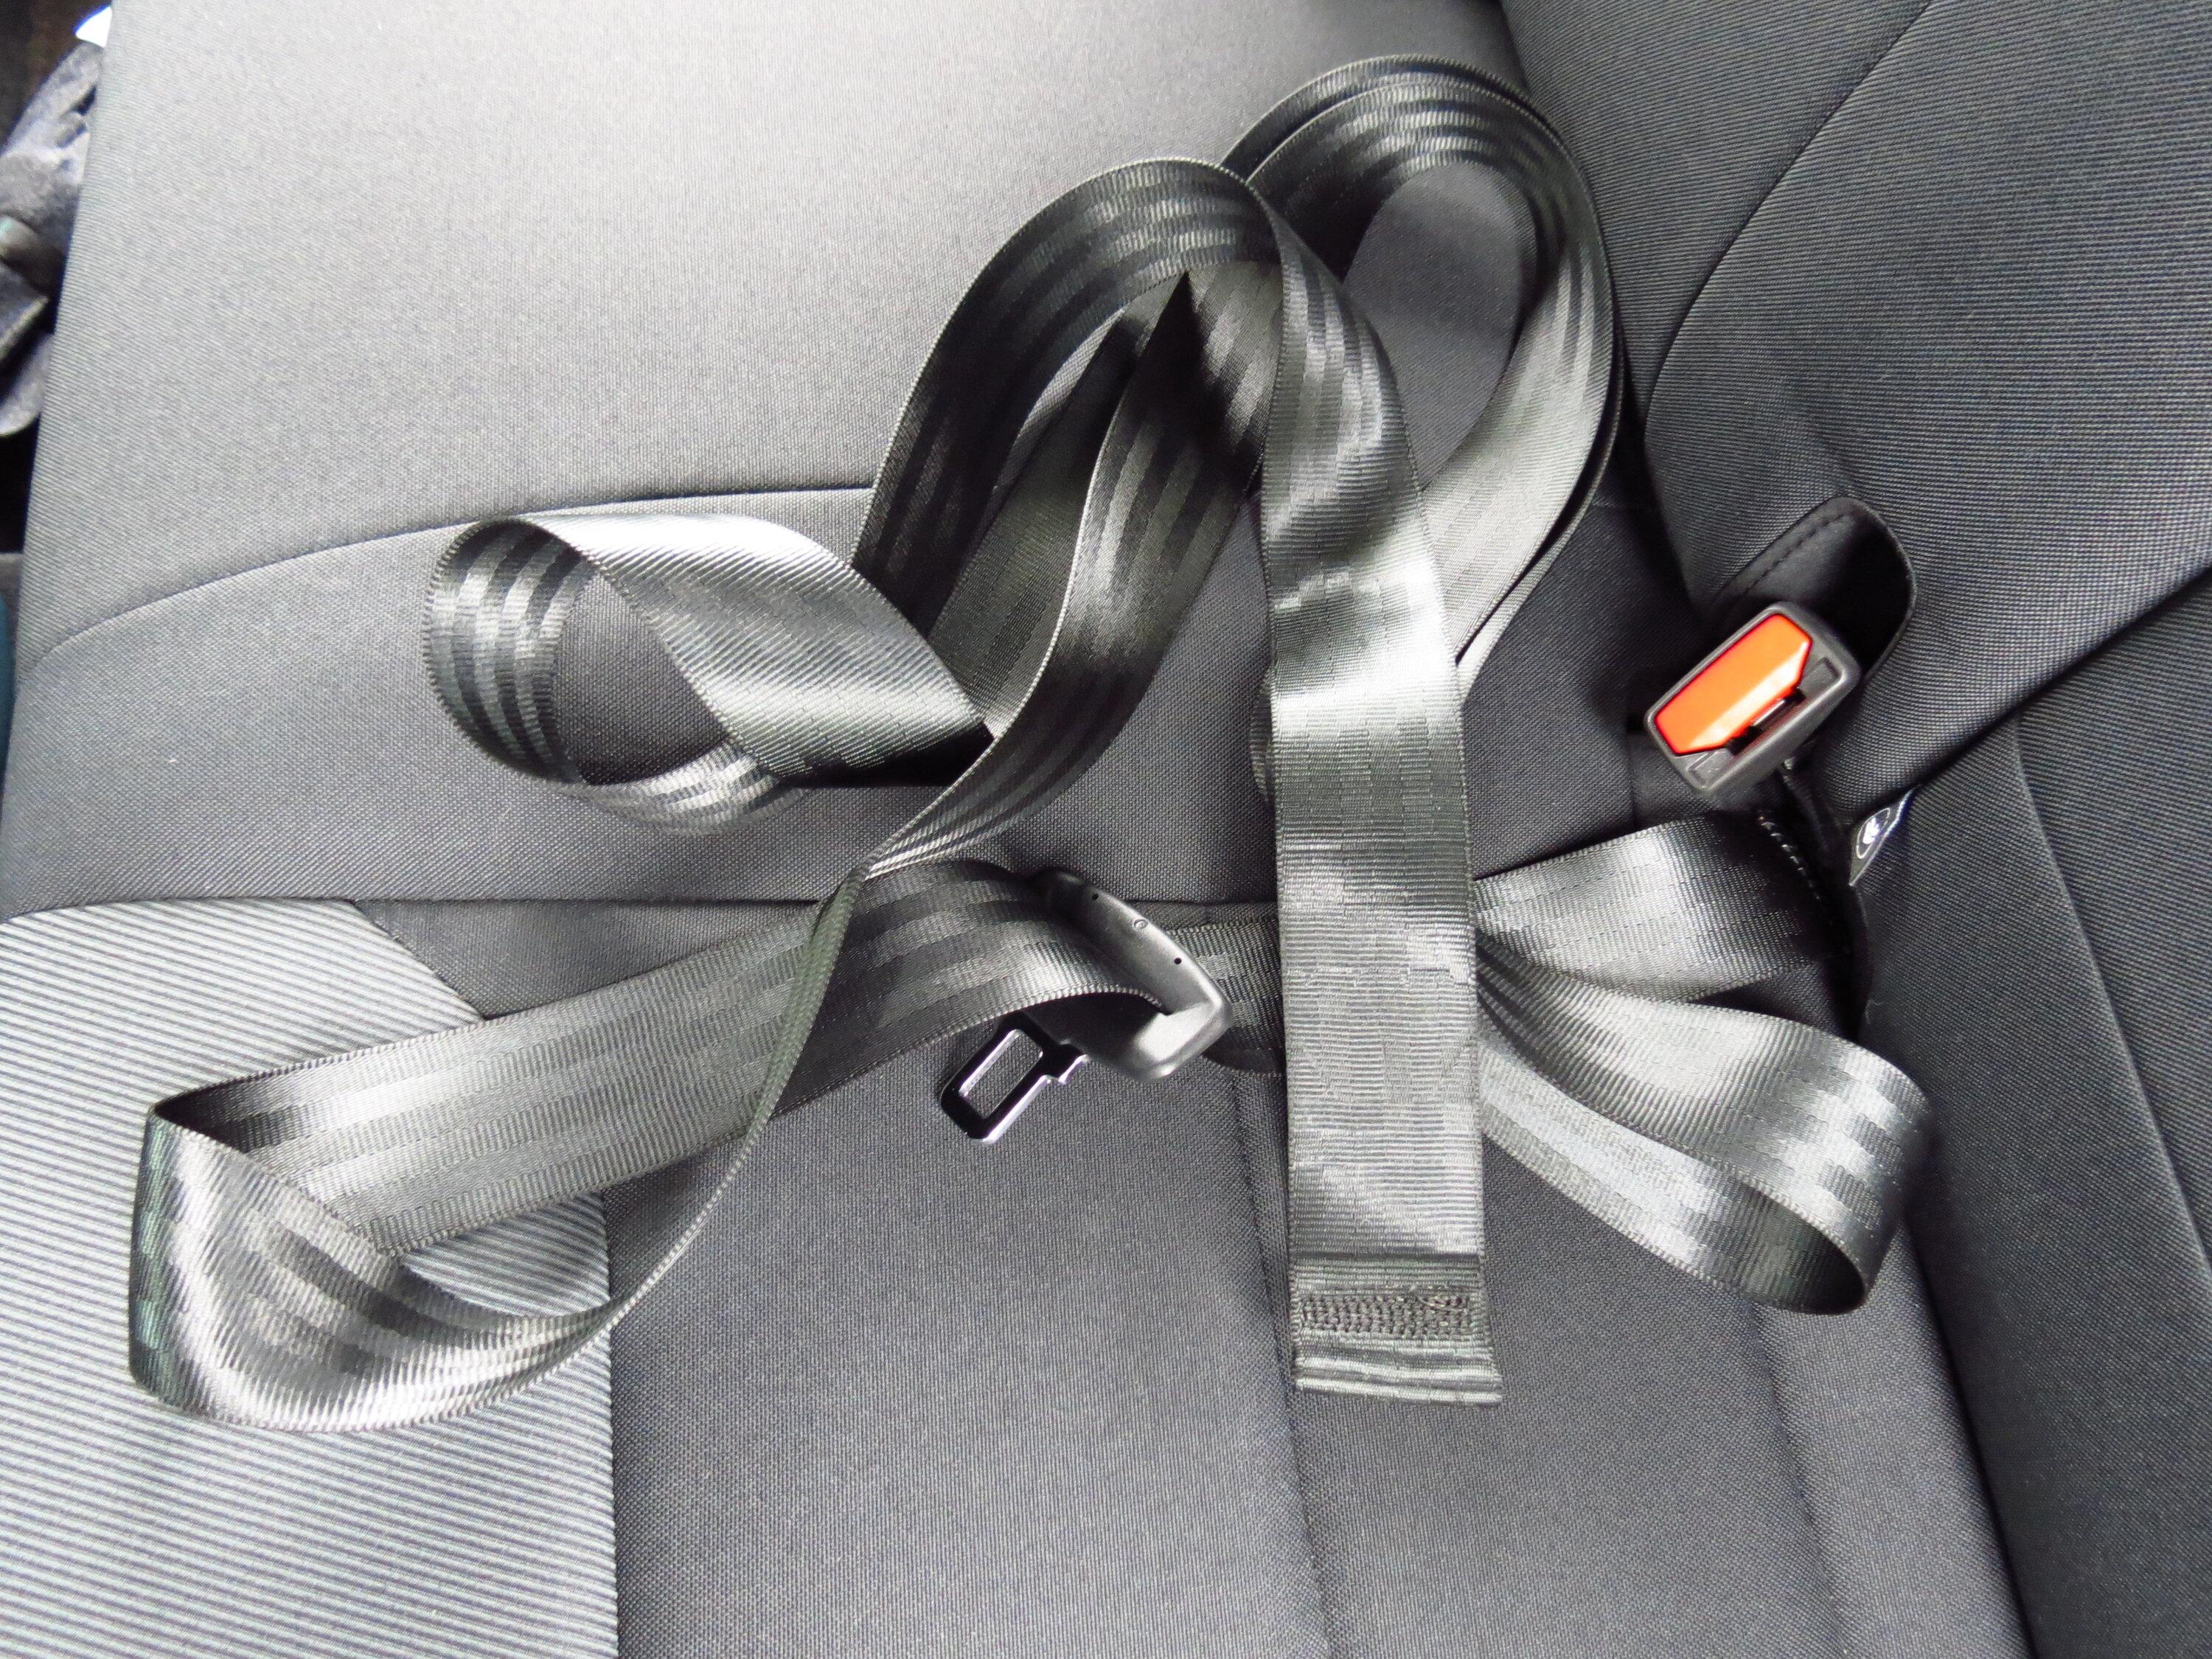
6. Yaay! Now we've got a lot of loose belt. This photo lets you see the sewn loop on the end of the belt better.
Since the one bracket which holds the other end of the belt to the floor also attaches the rear driver's side passenger belt to the floor, we can't completely remove the loose belt unless you want to cut that bracket. Don't do that. Pull all that loose belt under the seat, fold it up all nice, and zip tie it. You can let it hang in the underseat cargo area, or you can zip-tie it anywhere else under the seat if you want it further out of the way.

For the now-orphan latch/buckle, I just pushed it down into its seat opening so it's no longer visible (a bit beyond what's shown in the photo below). How do you know which is the right buckle? I took a guess that the center buckle was the one that didn't have wires running into it for detection of whether it was latched.

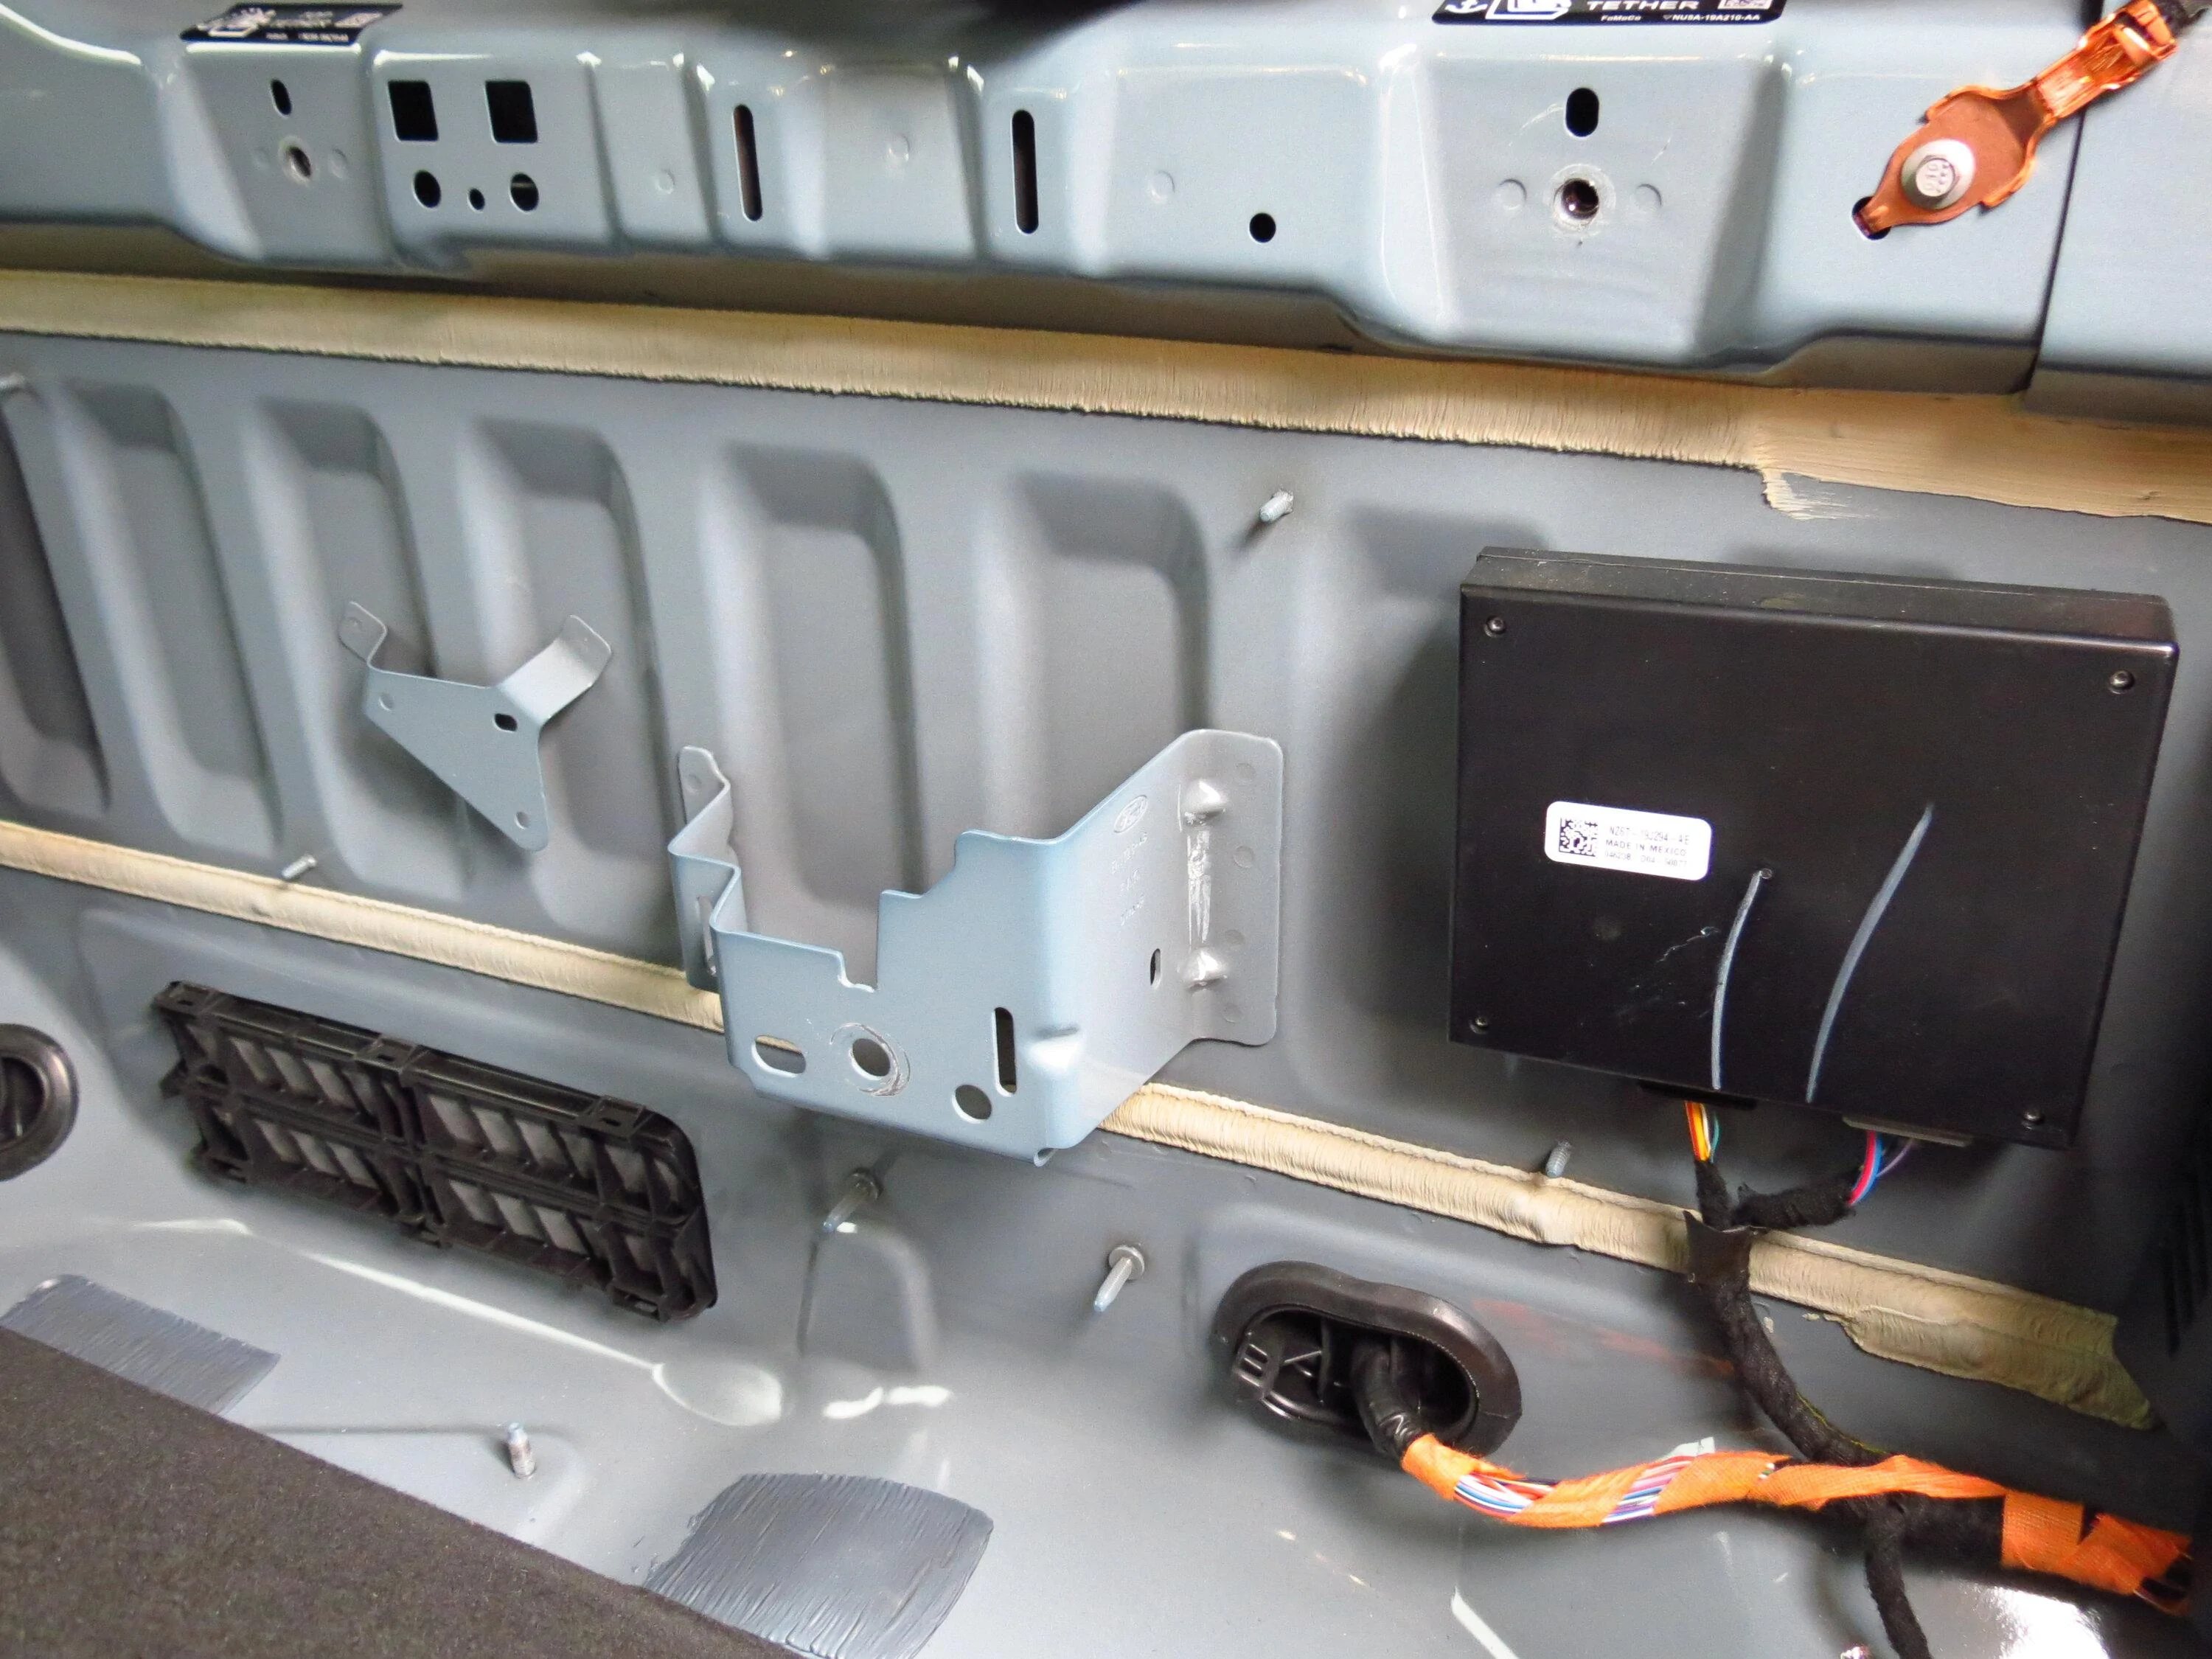
With the reel mechanism now removed, you'll be left staring at the large empty mounting bracket on the rear wall where the whole works was attached. I'd love to have the space available where that bracket sits, but its removal would mean that this process becomes irreversible and I wouldn't be able to put everything back to the way it was. So for me, it's going to stay.
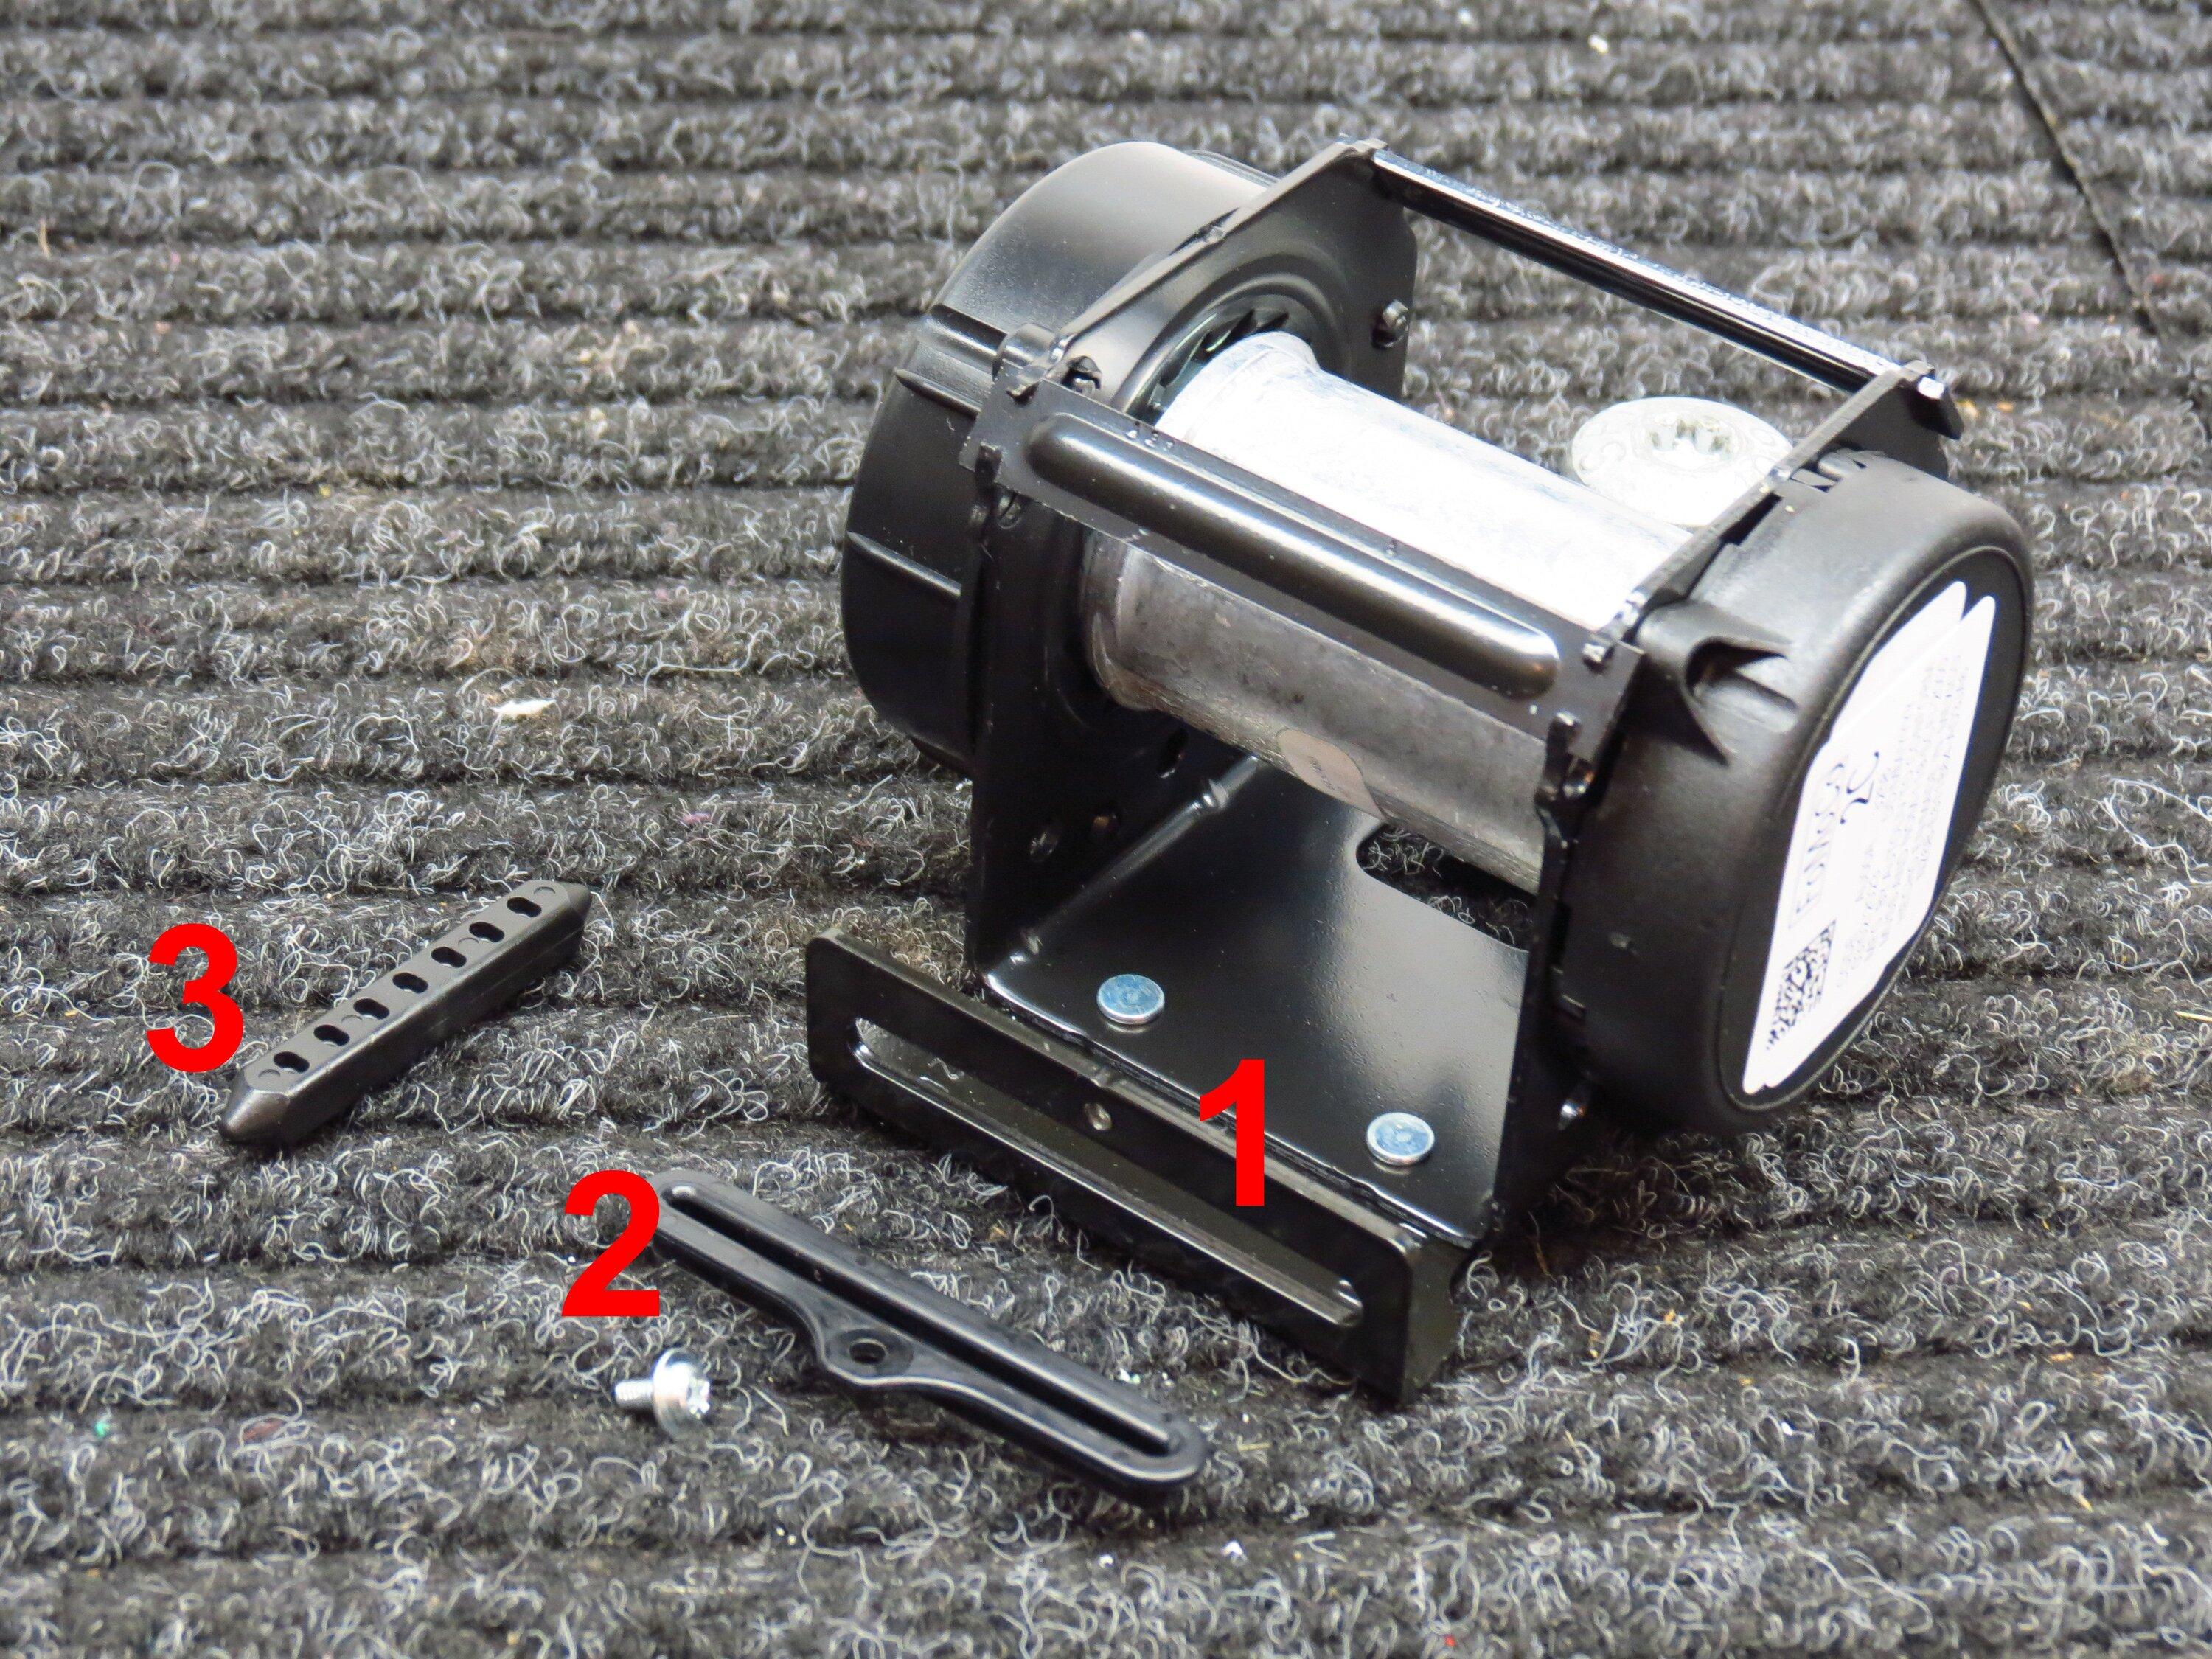
Here's a pic to show the parts a bit better. #1 is the slot in the reel bracket that the belt passes through, #2 is the plastic insert that sits in that slot that needs to be removed to pull the belt through and out. #3 is the plastic rod that sits inside the sewn loop in the end of the belt and holds the end in the reel itself.
I hope this helps others wanting to get all this stuff out of the way without having to break or cut things.
1. Remove the plastic cover on the rear wall that sits over the belt and reel mechanism. Even though you're going to be careful, at least one of the fasteners on its backside is gonna break.
2. Pull the belt to get most of it unwound from the reel's spool. Stop pulling when you see the thick-looking end of the belt sitting within the reel's spool. Use a clamp to hold the belt to the reel bracket so the reel doesn't pull it all back in when you let go of the belt. You can use masking tape, rubber bands, whatever you have.
3. On the end of that belt webbing is a sewn loop with a plastic rod inside of it. Get a small screwdriver to pry on the loop of webbing so you can get it out of the reel's center section a bit.
4. When you've pulled the loop on the end of the belt out of the reel's spool just a bit, push the screwdriver into one end of the loop to push out the plastic rod.
5. Once the rod is out of the loop, flatten the loop of belt as much as you can and shove it back down into the slot in the spool. Use the small screwdriver to push it further in. You should then be able to pull the end of the belt completely out of the other side of the spool. Since there's a spring with tension on the reel, it's going to scare you as you pull out the belt as it spins up to wood chipper speeds looking for something to feed upon. Its anger will die down in a second or two.
6. You'll now have all the belt out of the end of the spool, but the loop on the end of the belt is still confined by the slot in the reel's bracket. At this point, remove the whole reel assembly from the bracket on the back of the bed which will require a pretty large Torx bit. You'll need a Phillips screwdriver to remove a small screw which holds a plastic guide to the reel's bracket. Once the plastic guide is free, you can pull the end of the belt through it and the metal slot in the reel bracket that it was mounted in.
6. Yaay! Now we've got a lot of loose belt. This photo lets you see the sewn loop on the end of the belt better.
Since the one bracket which holds the other end of the belt to the floor also attaches the rear driver's side passenger belt to the floor, we can't completely remove the loose belt unless you want to cut that bracket. Don't do that. Pull all that loose belt under the seat, fold it up all nice, and zip tie it. You can let it hang in the underseat cargo area, or you can zip-tie it anywhere else under the seat if you want it further out of the way.
For the now-orphan latch/buckle, I just pushed it down into its seat opening so it's no longer visible (a bit beyond what's shown in the photo below). How do you know which is the right buckle? I took a guess that the center buckle was the one that didn't have wires running into it for detection of whether it was latched.
With the reel mechanism now removed, you'll be left staring at the large empty mounting bracket on the rear wall where the whole works was attached. I'd love to have the space available where that bracket sits, but its removal would mean that this process becomes irreversible and I wouldn't be able to put everything back to the way it was. So for me, it's going to stay.
Here's a pic to show the parts a bit better. #1 is the slot in the reel bracket that the belt passes through, #2 is the plastic insert that sits in that slot that needs to be removed to pull the belt through and out. #3 is the plastic rod that sits inside the sewn loop in the end of the belt and holds the end in the reel itself.
I hope this helps others wanting to get all this stuff out of the way without having to break or cut things.
Sponsored
Last edited:
 If you wanted to remove both parts of the seat as one piece, you'll need two people and extra care.