
- First Name
- Jose
- Joined
- Oct 23, 2024
- Threads
- 8
- Messages
- 30
- Reaction score
- 60
- Location
- New Braunfels, Tx
- Vehicle(s)
- 2024 Ford Maverick Hybrid Lariat
- Engine
- 2.5L Hybrid
- Thread starter
- #1
This is the fifth of six long posts; on the B&O sound system upgrade of my 2024 Ford Maverick with Lariat trim. Here are the titles of the 6 posts:
Part 1: Introduction and Conclusion of B&O Sound System Upgrade
Part 2: B&O Front Door, Tweeter and Rear Speaker Replacement
Part 3: B&O Center Speaker Replacement with a 4 inch Speaker
Part 4: B&O Subwoofer Replacement
Part 5: B&O Upgrade, Subwoofer Amp Installation
Part 6: Best Way to Install Kicker 6.75” Sub into the OEM Enclosure
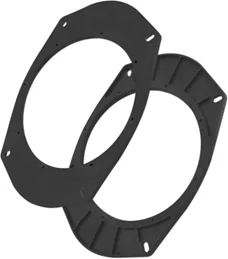
Components for Subwoofer replacement:
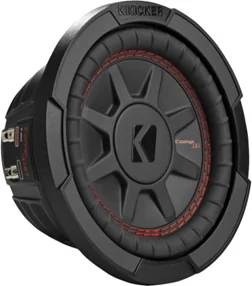
- KICKER 48CWRT672 CompRT 6.75" Subwoofer, DVC, 2-ohm
- Door Speaker Adapters Fit for Dodge/Chrysler/Jeep 6X9 to 6.5 Inch Black
Since I posted this thread I have learned a way to install this subwoofer into the OEM enclosure with modification to the enclosure. I only wish I had thought of it for my installation. Please see Part 6 for details.
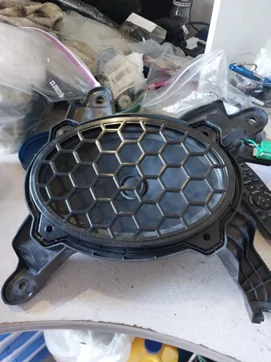
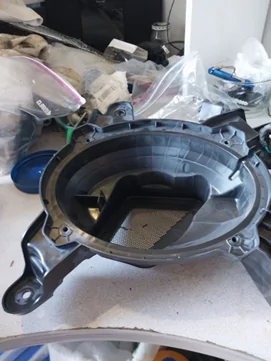
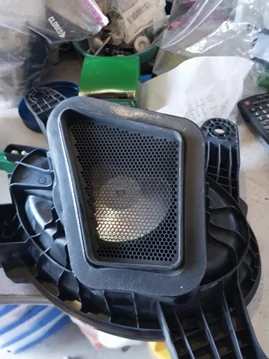
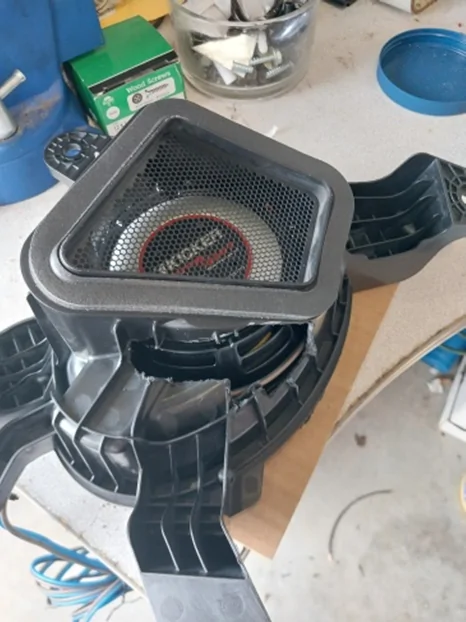
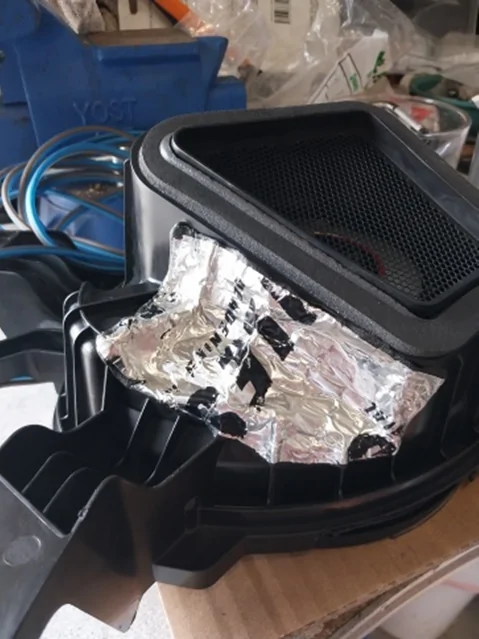
I selected the KICKER 48CWRT672 because of the experience and results with the 8” Kicker subwoofer installation in my son’s car. I gave a quick look at using a 6x9 inch replacement but good ones, were coaxial speakers and had to be bought in pairs. Both of which I did not want or need. I took the OEM subwoofer enclosure out of the truck and took measurements. Using the Kicker dimensional drawing, I knew I could make this subwoofer fit in a modified OEM enclosure. I wanted to keep the OEM enclosure because it fits a hole in the bed of truck which serves as a port for air passage. Below are photos of the OEM subwoofer and enclosure:
When selecting a speaker or subwoofer its peak power rating is not the specification to use. Peak power only represents the ability for a speaker to survive a surge in volume for a few milliseconds. Root Mean Square (RMS) power handling is the primary factor when selecting a subwoofer, speaker or amp. RMS power handling represents the ability of the speaker/subwoofer to sustain that power for a long period of time. For an Amp, RMS power rating is the power it can provide for a long period of time. If you drive 300 watts RMS into a speaker rated for 300 watts peak it will blow within seconds. Speaker/subwoofer and Amp should be selected as a pair where the RMS power handling of the speaker/subwoofer should match the RMS power rating of the amp. For a subwoofer, it does not have to be exact, a comparative a rating within 50 watt RMS will be fine. Meaning subwoofer rated at 300 watts RMS will be fine with an Amp rated at 250 or 350 watts RMS.
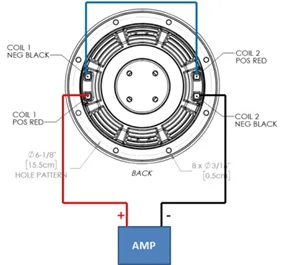
I went with this Kicker 2 ohm Dual Voice Coil (DVC) subwoofer because I knew I could make it fit in the OEM enclosure. It is rated 150 watts Root Mean Square (RMS), 300 watts peak. Being a DVC means 75 watts per coil. It is hard to find quality subwoofers with a single voice coil (SVC). Subwoofers have DVCs because of flexibility for multiple subwoofer installations and Amp matching. An amp can be wired to a DVC subwoofer with in a parallel or serial fashion. I selected the KICKER 46CXA4001T CXA400.1 400w Mono Class D Car Audio Amplifier Amp because it is rated 150 watts RMS into 4 ohm. I wired DVCs of the Kicker subwoofer serially to present a 4 ohm impedance to the Amp.
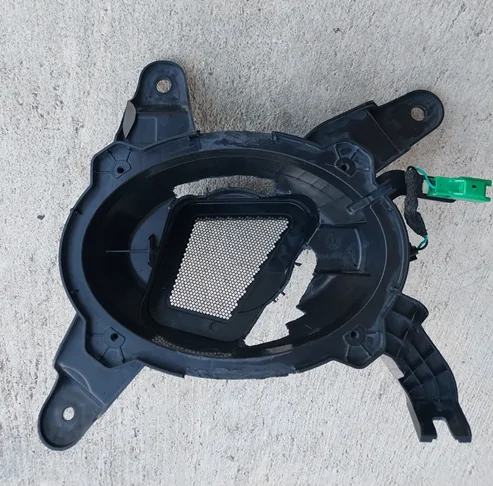
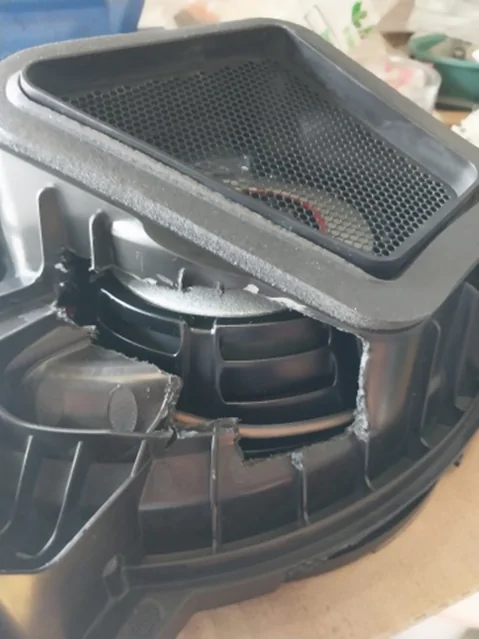
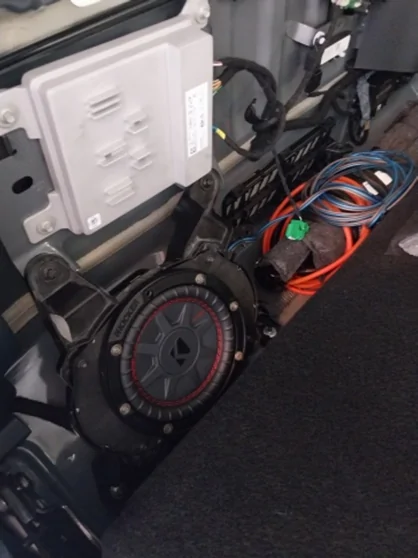
Below are photos of the finished modifications to the OEM subwoofer enclosure. Please note the green connector is the OEM subwoofer harness which provides the connection between the OEM amp and the OEM 6x9” subwoofer. I repurposed this harness for the RCA input of the new subwoofer amp.
Stop here go to Part 6: Best Way to Install Kicker 6.75” Sub into the OEM Enclosure
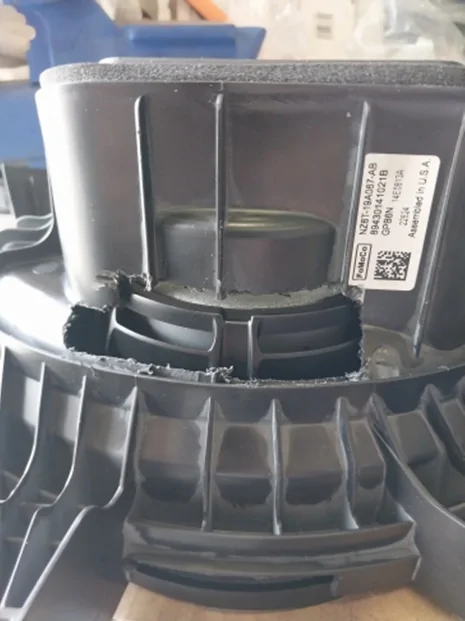
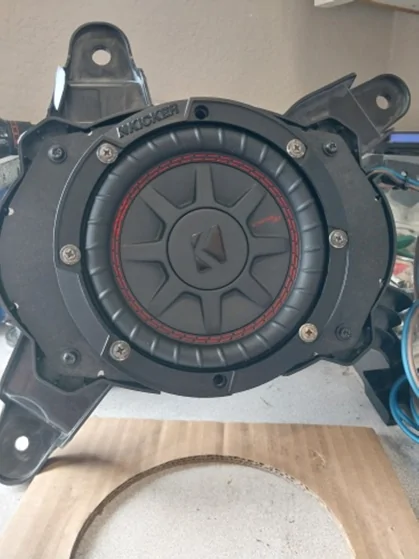
I used a Dremel cutting wheel to make the cuts. I used a file to clean up the shavings. I did make a mistake when fitting the subwoofer. I fitted the subwoofer without the 6x9 to 6.75 inch adapter. This adapter has to be used to install the subwoofer into the OEM enclosure. Without the adapter, I cut too much of the OEM enclosure. I used sound deadening material to cover up the openings I made to the OEM enclosure.
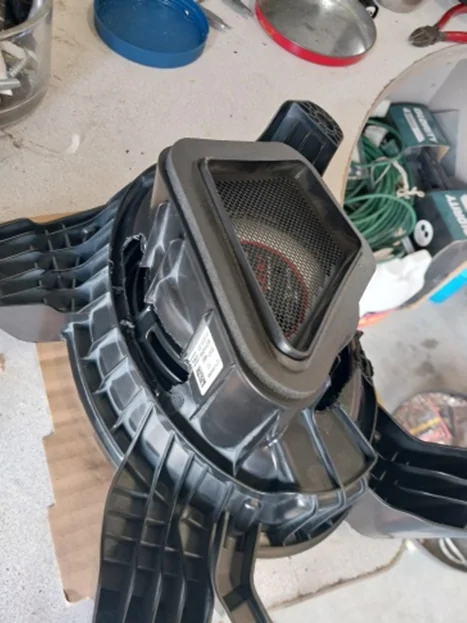
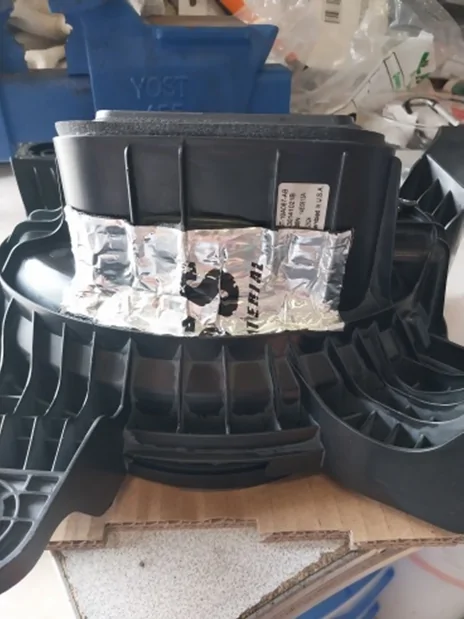
The 6x9 to 6.75” adapter had be tweaked at 8 locations so it would fit flush in the OEM subwoofer enclosure. You can see the silver marks in the picture below. I also had to trim the bend off the top and bottom front of the enclosure (where there are no screws) so the woofer meets flush to the adapter. Look at the above pictures to see the cuts where the subwoofer sits on the cardboard.
Part 1: Introduction and Conclusion of B&O Sound System Upgrade
Part 2: B&O Front Door, Tweeter and Rear Speaker Replacement
Part 3: B&O Center Speaker Replacement with a 4 inch Speaker
Part 4: B&O Subwoofer Replacement
Part 5: B&O Upgrade, Subwoofer Amp Installation
Part 6: Best Way to Install Kicker 6.75” Sub into the OEM Enclosure
Components for Subwoofer replacement:
- KICKER 48CWRT672 CompRT 6.75" Subwoofer, DVC, 2-ohm
- Door Speaker Adapters Fit for Dodge/Chrysler/Jeep 6X9 to 6.5 Inch Black
Since I posted this thread I have learned a way to install this subwoofer into the OEM enclosure with modification to the enclosure. I only wish I had thought of it for my installation. Please see Part 6 for details.
I selected the KICKER 48CWRT672 because of the experience and results with the 8” Kicker subwoofer installation in my son’s car. I gave a quick look at using a 6x9 inch replacement but good ones, were coaxial speakers and had to be bought in pairs. Both of which I did not want or need. I took the OEM subwoofer enclosure out of the truck and took measurements. Using the Kicker dimensional drawing, I knew I could make this subwoofer fit in a modified OEM enclosure. I wanted to keep the OEM enclosure because it fits a hole in the bed of truck which serves as a port for air passage. Below are photos of the OEM subwoofer and enclosure:
When selecting a speaker or subwoofer its peak power rating is not the specification to use. Peak power only represents the ability for a speaker to survive a surge in volume for a few milliseconds. Root Mean Square (RMS) power handling is the primary factor when selecting a subwoofer, speaker or amp. RMS power handling represents the ability of the speaker/subwoofer to sustain that power for a long period of time. For an Amp, RMS power rating is the power it can provide for a long period of time. If you drive 300 watts RMS into a speaker rated for 300 watts peak it will blow within seconds. Speaker/subwoofer and Amp should be selected as a pair where the RMS power handling of the speaker/subwoofer should match the RMS power rating of the amp. For a subwoofer, it does not have to be exact, a comparative a rating within 50 watt RMS will be fine. Meaning subwoofer rated at 300 watts RMS will be fine with an Amp rated at 250 or 350 watts RMS.
I went with this Kicker 2 ohm Dual Voice Coil (DVC) subwoofer because I knew I could make it fit in the OEM enclosure. It is rated 150 watts Root Mean Square (RMS), 300 watts peak. Being a DVC means 75 watts per coil. It is hard to find quality subwoofers with a single voice coil (SVC). Subwoofers have DVCs because of flexibility for multiple subwoofer installations and Amp matching. An amp can be wired to a DVC subwoofer with in a parallel or serial fashion. I selected the KICKER 46CXA4001T CXA400.1 400w Mono Class D Car Audio Amplifier Amp because it is rated 150 watts RMS into 4 ohm. I wired DVCs of the Kicker subwoofer serially to present a 4 ohm impedance to the Amp.
Below are photos of the finished modifications to the OEM subwoofer enclosure. Please note the green connector is the OEM subwoofer harness which provides the connection between the OEM amp and the OEM 6x9” subwoofer. I repurposed this harness for the RCA input of the new subwoofer amp.
Stop here go to Part 6: Best Way to Install Kicker 6.75” Sub into the OEM Enclosure
I used a Dremel cutting wheel to make the cuts. I used a file to clean up the shavings. I did make a mistake when fitting the subwoofer. I fitted the subwoofer without the 6x9 to 6.75 inch adapter. This adapter has to be used to install the subwoofer into the OEM enclosure. Without the adapter, I cut too much of the OEM enclosure. I used sound deadening material to cover up the openings I made to the OEM enclosure.
The 6x9 to 6.75” adapter had be tweaked at 8 locations so it would fit flush in the OEM subwoofer enclosure. You can see the silver marks in the picture below. I also had to trim the bend off the top and bottom front of the enclosure (where there are no screws) so the woofer meets flush to the adapter. Look at the above pictures to see the cuts where the subwoofer sits on the cardboard.
Sponsored
Last edited:

")