
- First Name
- Bobert
- Joined
- Dec 2, 2022
- Threads
- 2
- Messages
- 33
- Reaction score
- 45
- Location
- Kentucky, US
- Vehicle(s)
- 2023 Ford Maverick Lariat
- Engine
- 2.5L Hybrid
- Thread starter
- #1
It was requested that I make this guide I posted in another thread (HERE) into its own post to make it easier to find. Hope this helps!
After collecting information from lots of people in the community, namely from the thread linked above (especially Billzilla15, 801Maverick801, pantera156, yeahiguessman, and Redneck Garage’s youtube videos…thank you everyone!!), I am happy to this guide for swapping over to Sync4 with a fully functional, all knobs and buttons working, no audio issues, working nav, and working reverse camera in 2022-2024 Ford Mavericks (specifically the hybrid and Lariat models)!
My Dad (Skilled Trade Ford retiree) and I sunk a considerable amount of time into this project and we wanted to give back to this great community. Here are the steps and “gotchas” we ran into and I hope this is helpful for those still trying to get things sorted out.
----Background: I started with a stock 2023 Maverick Hybrid Lariat w/ Lux package & Co-pilot360, factory navigation, and B&O sound system.
-----------------------------------------------------
----Here is my SYNC4 APIM AsBuilt for the above, hopefully it helps someone!
;Block 1
7D0G1G1: A081-4804-80C6
7D0G1G2: 0000-C609-38E1
7D0G1G3: 0001-0020-0C08
7D0G1G4: 02E0-00C0-007E
;Block 2
7D0G2G1: 0520-000A-0009
7D0G2G2: 02C0-00B0-004D
7D0G2G3: A040-0000-00BC
;Block 3
7D0G3G1: 5553-1503-039E
7D0G3G2: 0B00-073E-012D
7D0G3G3: 0000-0000-00DD
;Block 4
7D0G4G1: 0500-0000-00E1
;Block 5
7D0G5G1: 2102-3800-0038
7D0G5G2: 0000-0000-00DE
7D0G5G3: 0000-0000-00DF
;Block 6
7D0G6G1: 1806-1810-2F53
7D0G6G2: 4423
;Block 7
7D0G7G1: 1800-3300-002A
7D0G7G2: 03E8-A4B6-0025
7D0G7G3: 0056-5680-000D
7D0G7G4: 886A
;Block 8
7D0G8G1: C000-0001-00A1
7D0G8G2: 0000-0000-00E1
;Block 9
7D0G9G1: 0613-422C-F65E
7D0G9G2: 606C-5E00-0410
7D0G9G3: 0240-0000-0025
7D0G9G4: 1040-0000-0034
7D0G9G5: 0000-0000-00E5
;Block 10
7D0GAG1: 0000-0000-00E8
7D0GAG2: 0000-0000-00E9
7D0GAG3: 0000-0000-00EA
7D0GAG4: 0000-0000-00EB
7D0GAG5: 0000-0000-00EC
----Cost at time of writing (January 2025)
Not counting the hardware and aluminum (which I already had on hand) or the FORscan license, less than $650 if you find a good price on APIM. Not too bad really!
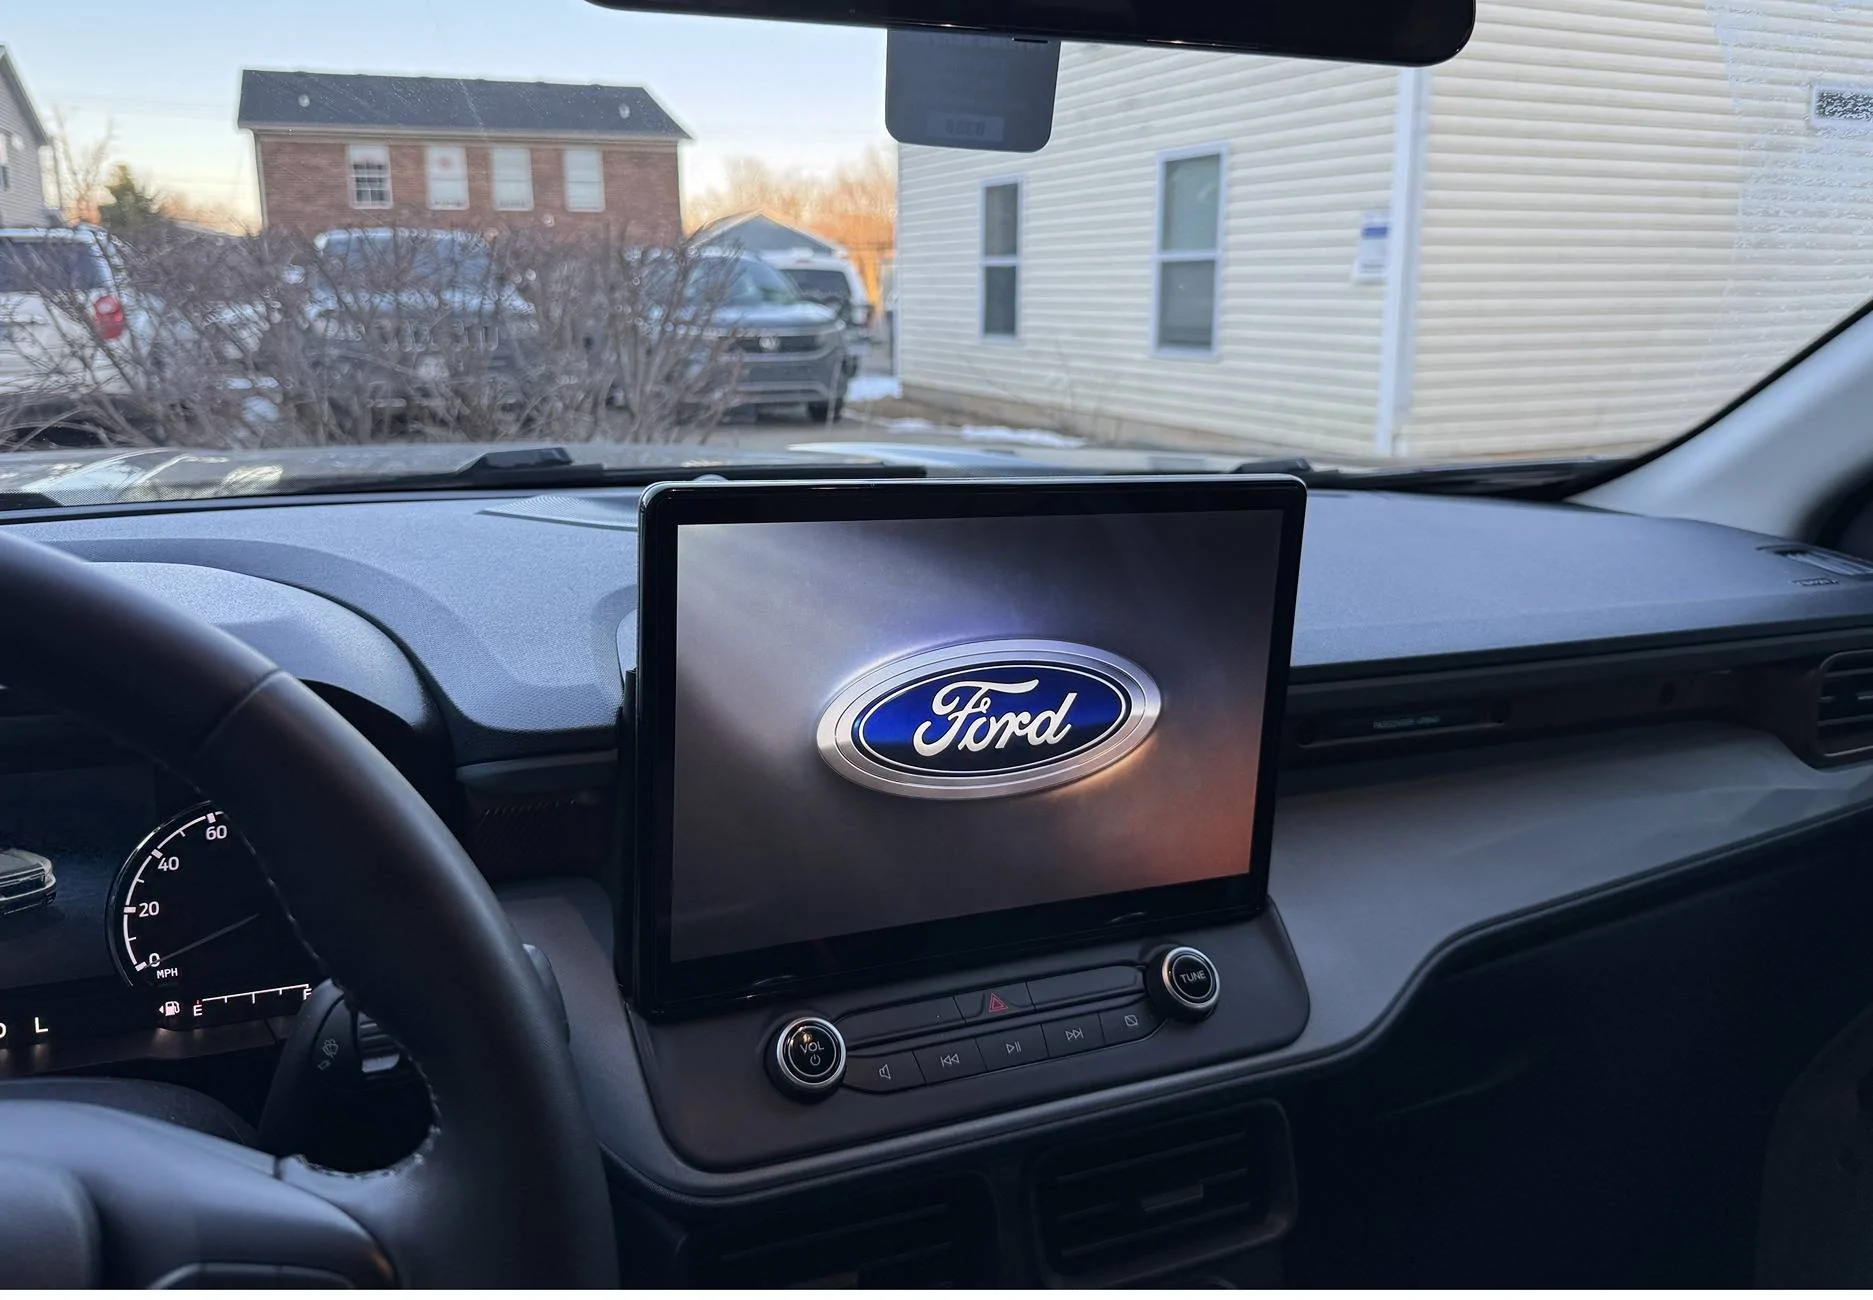
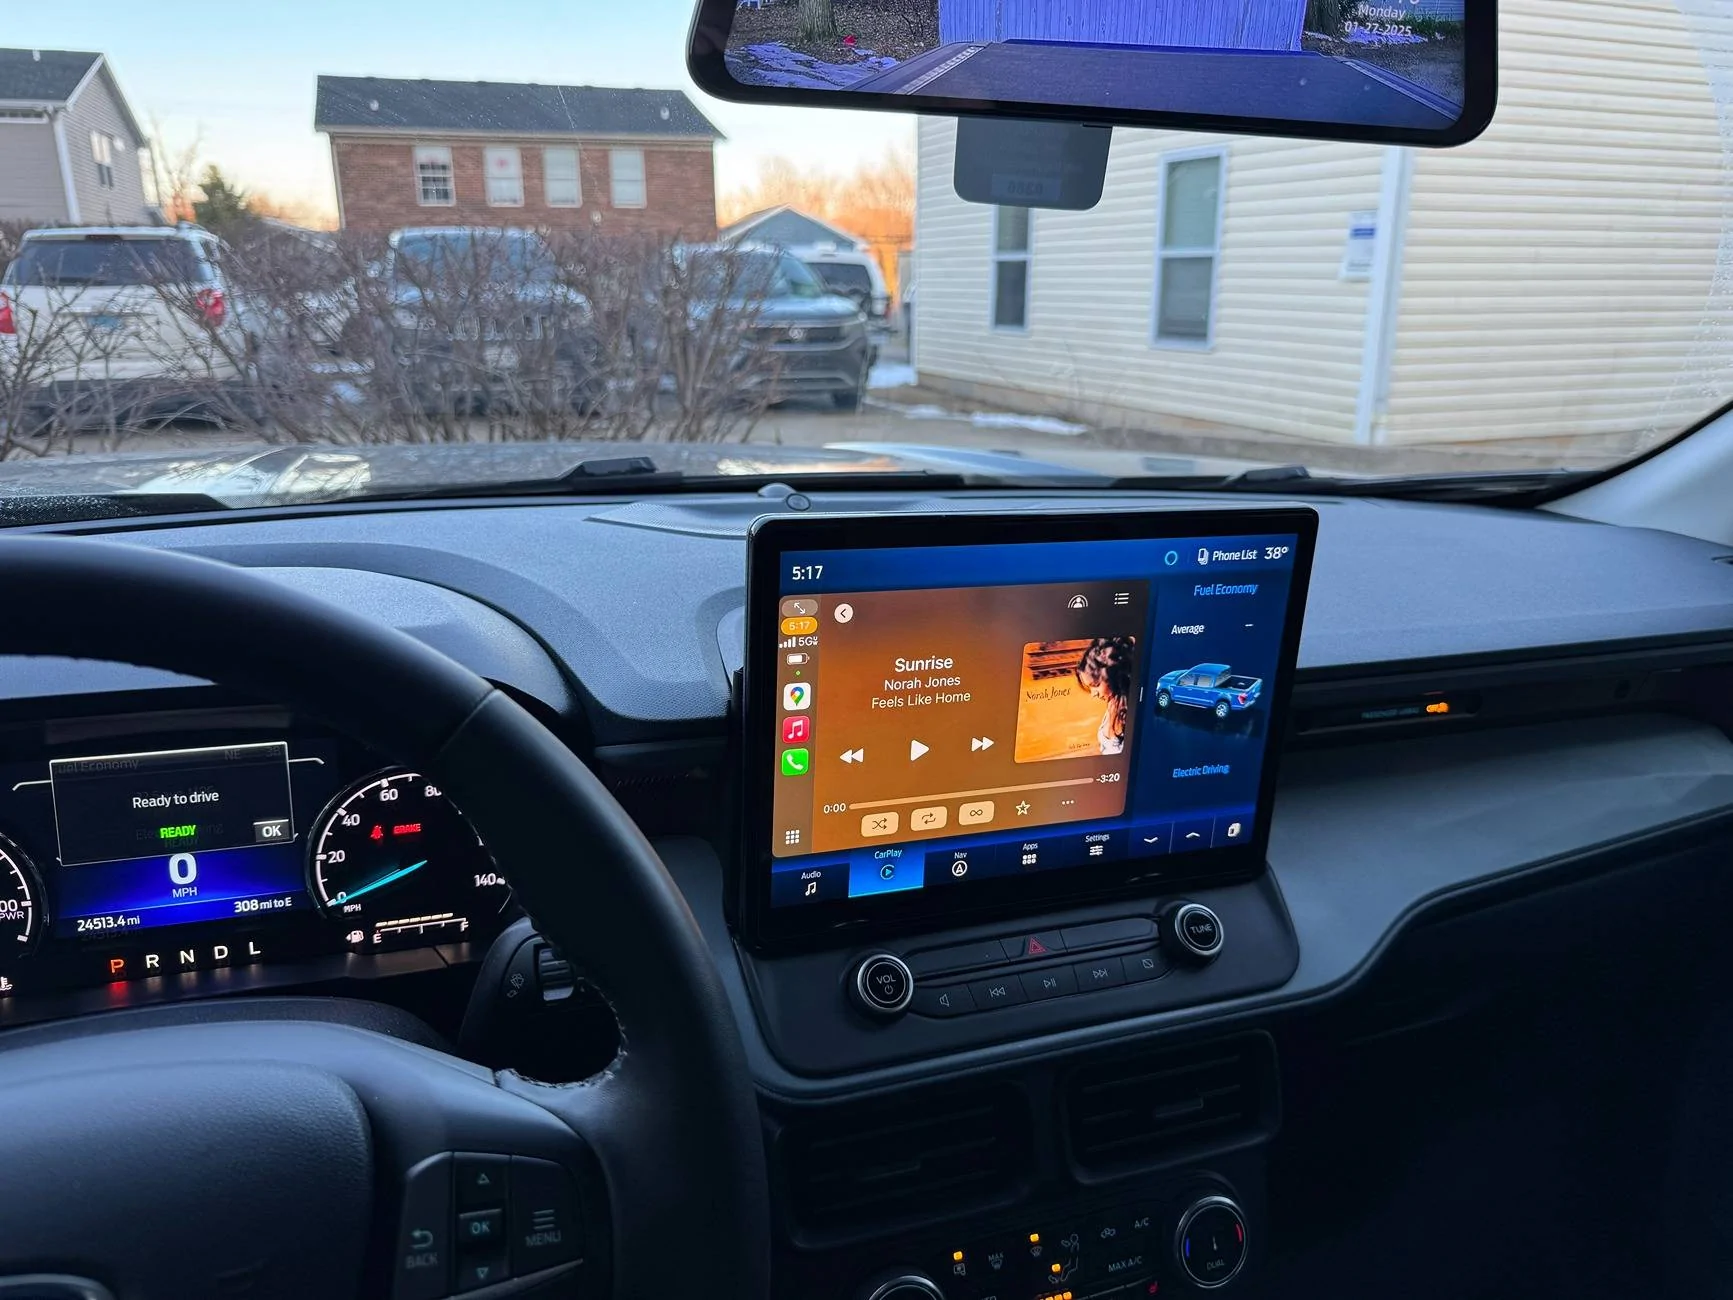
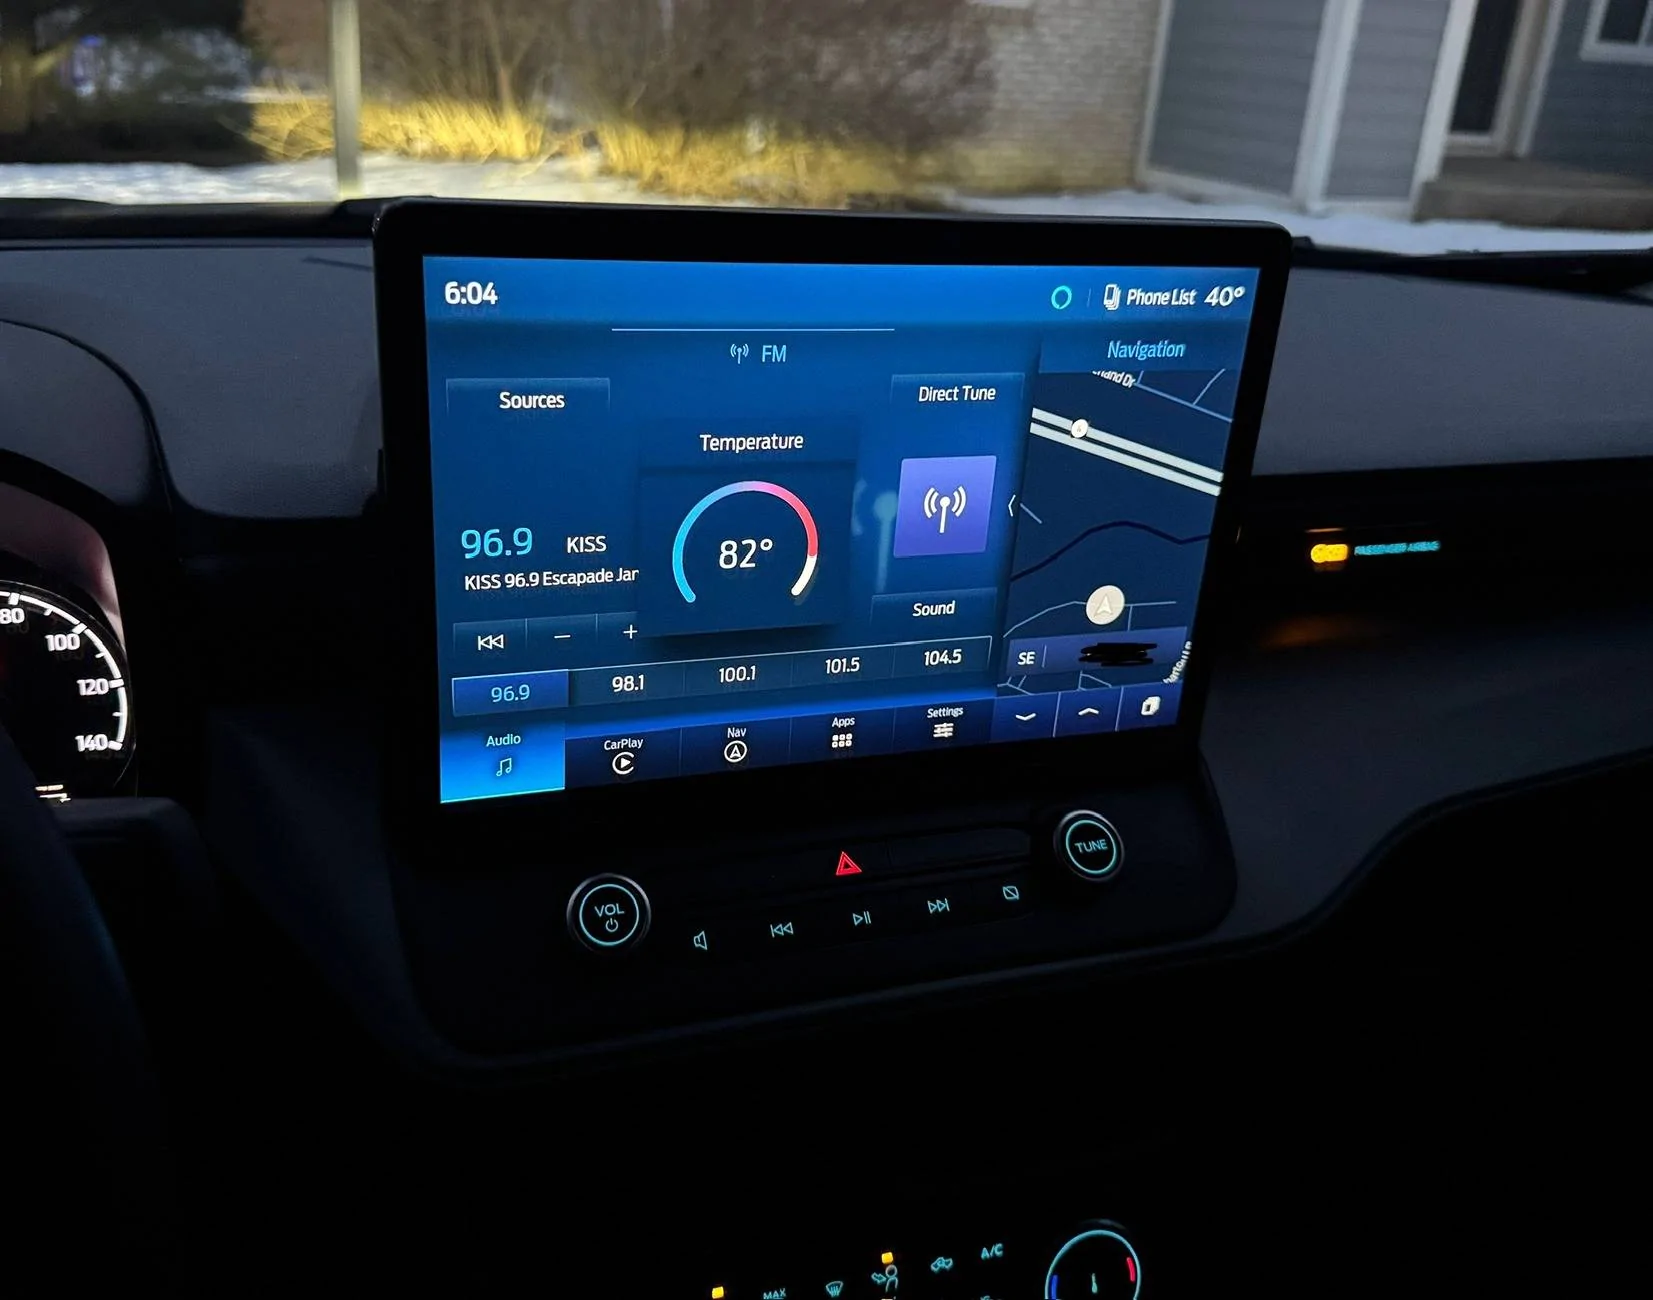
----Final Install Pics:
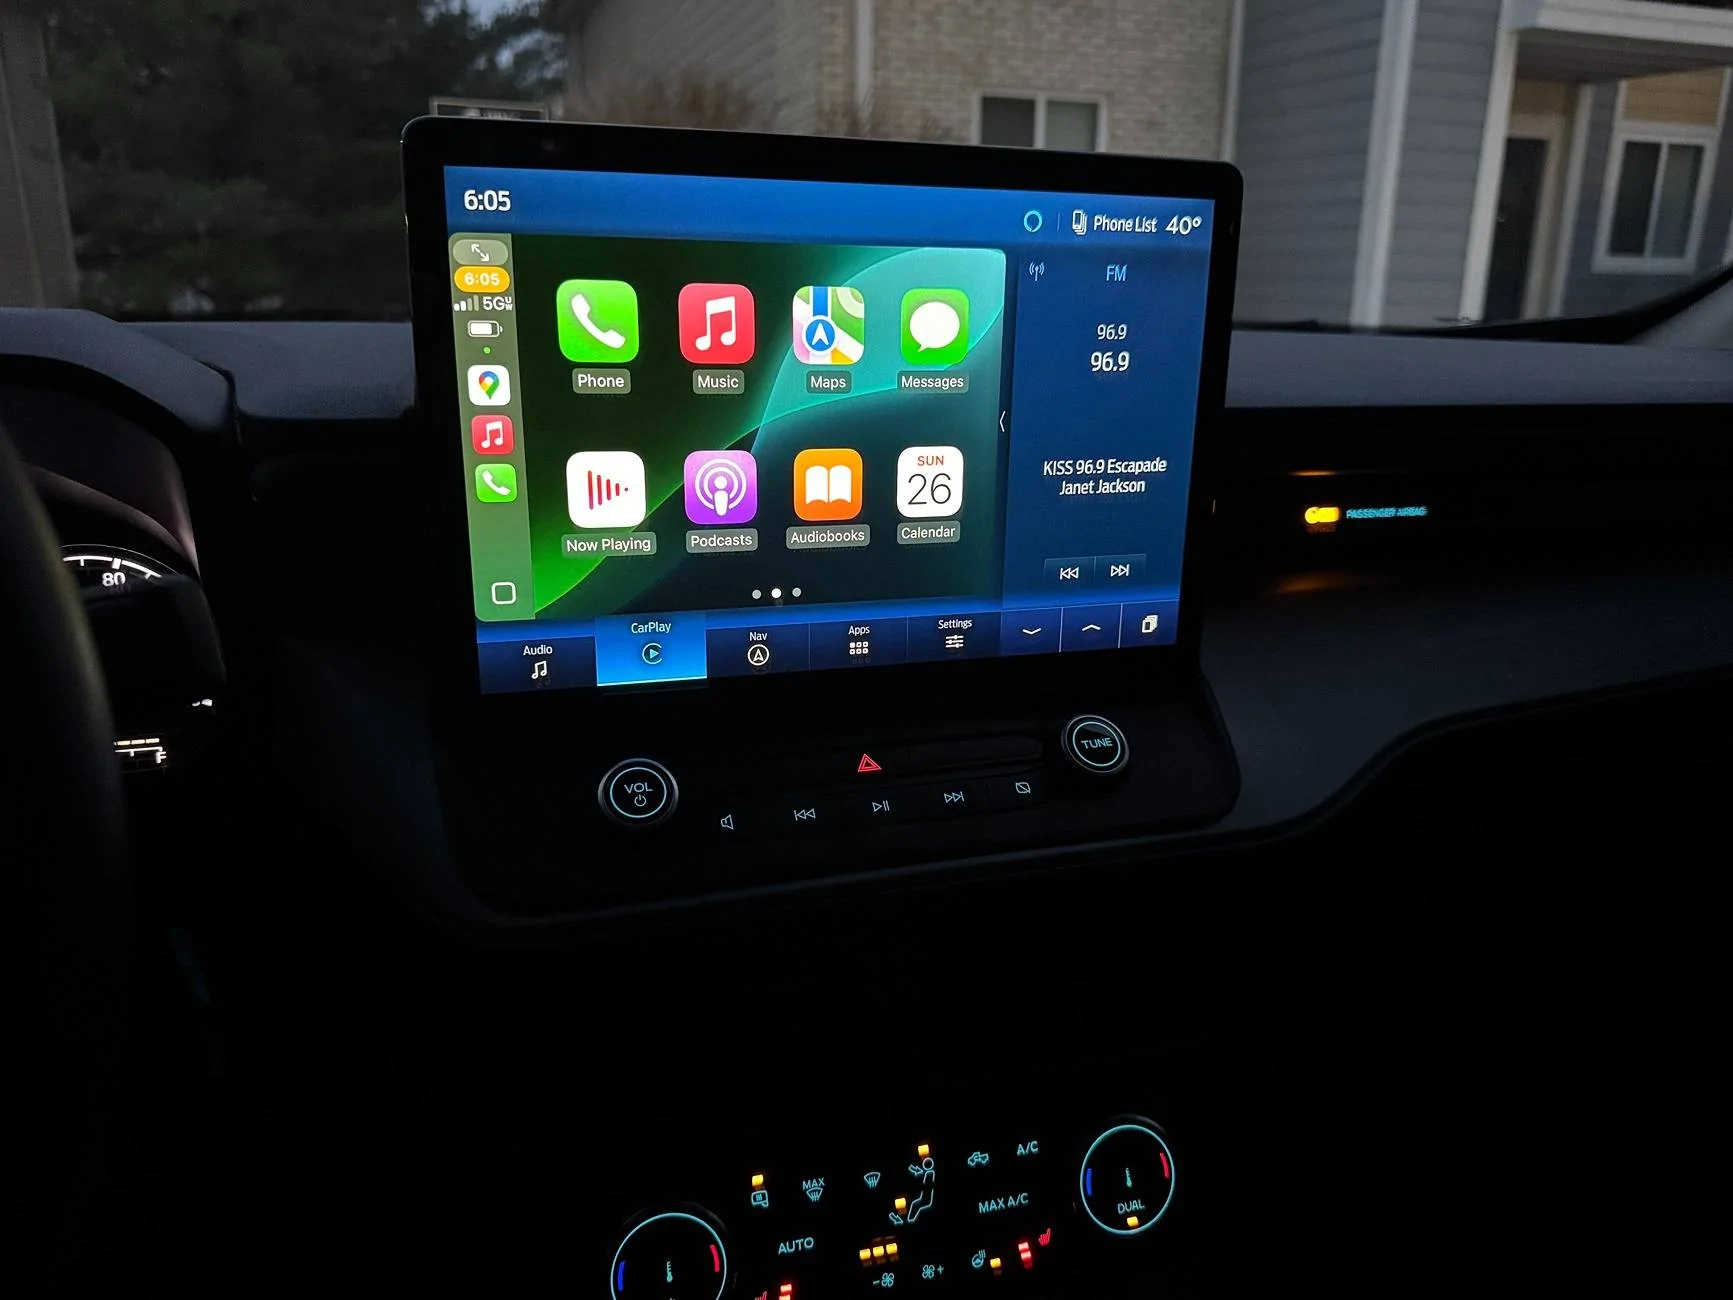
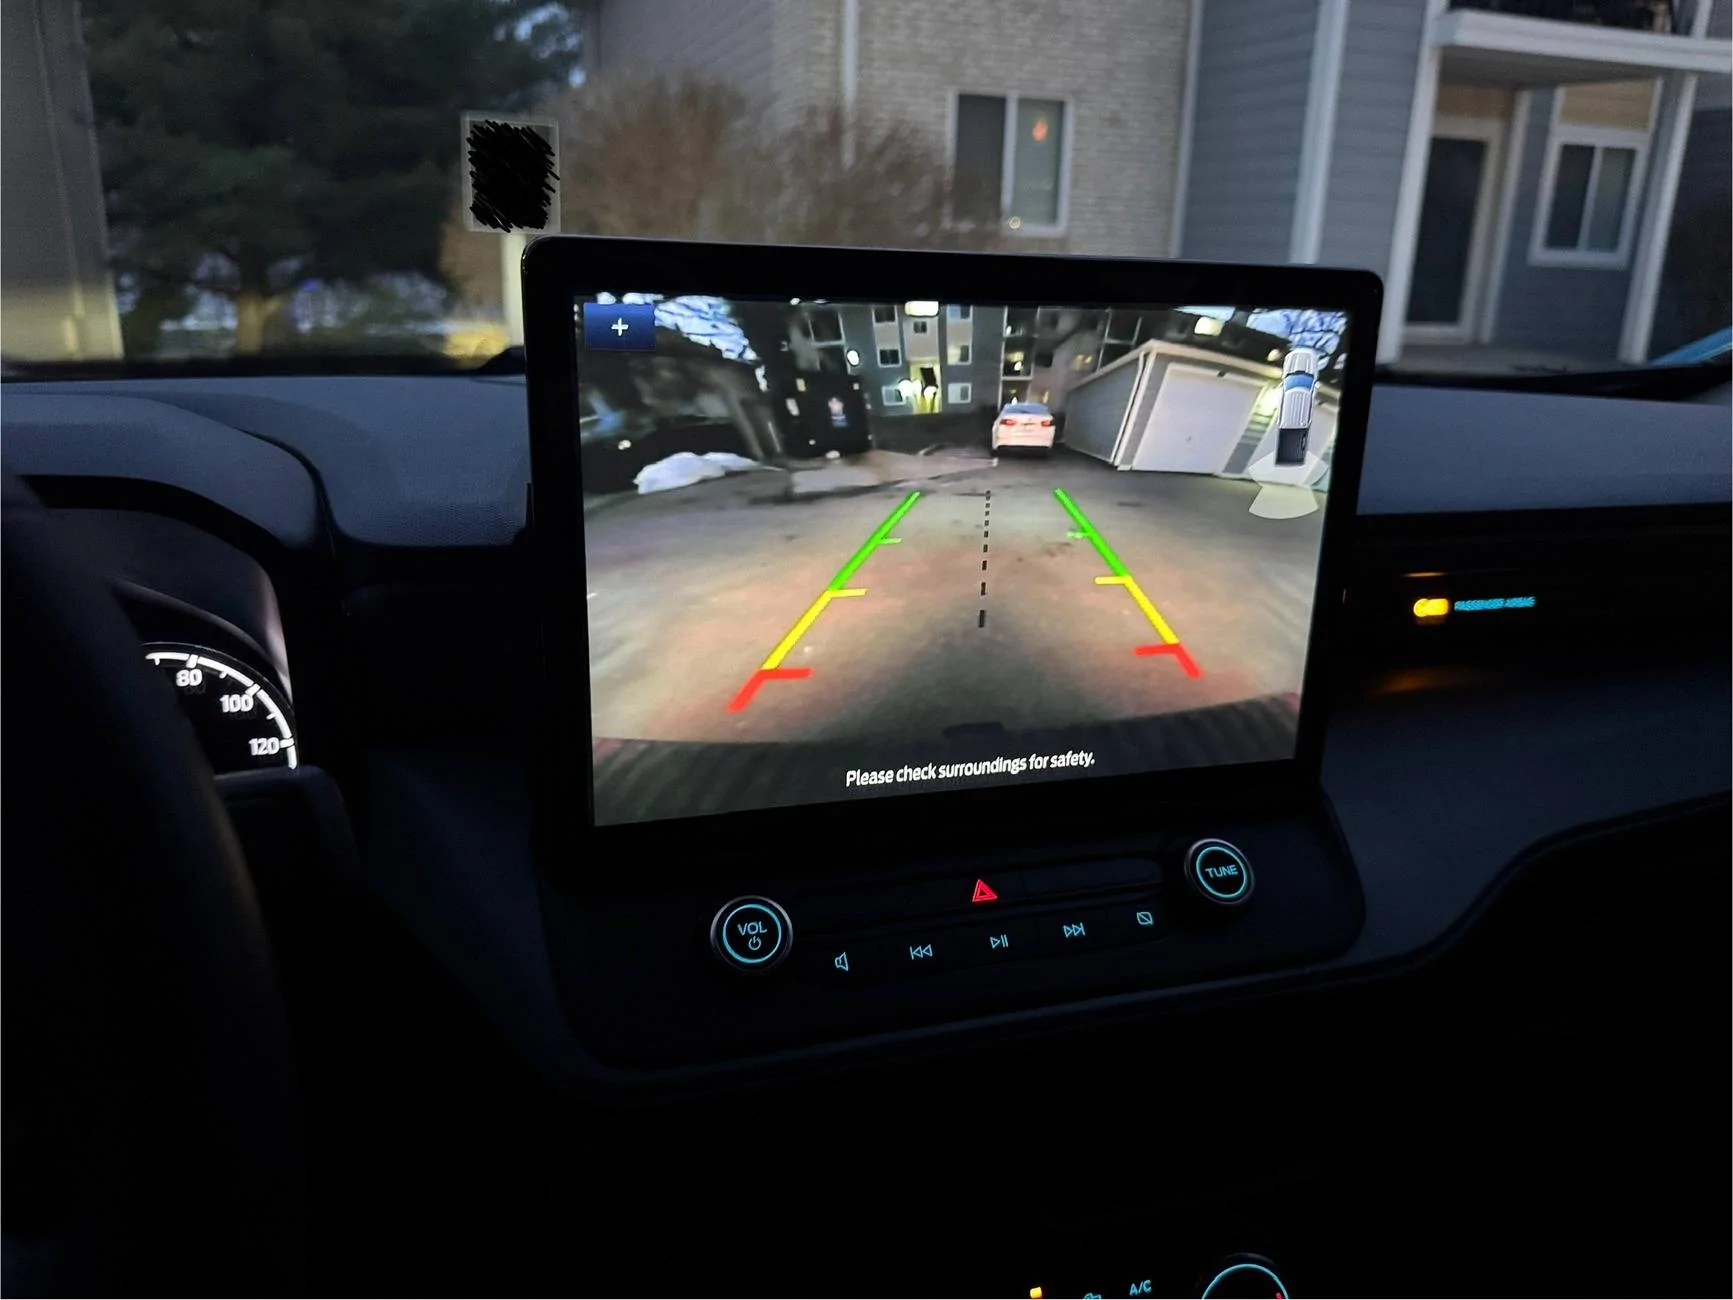
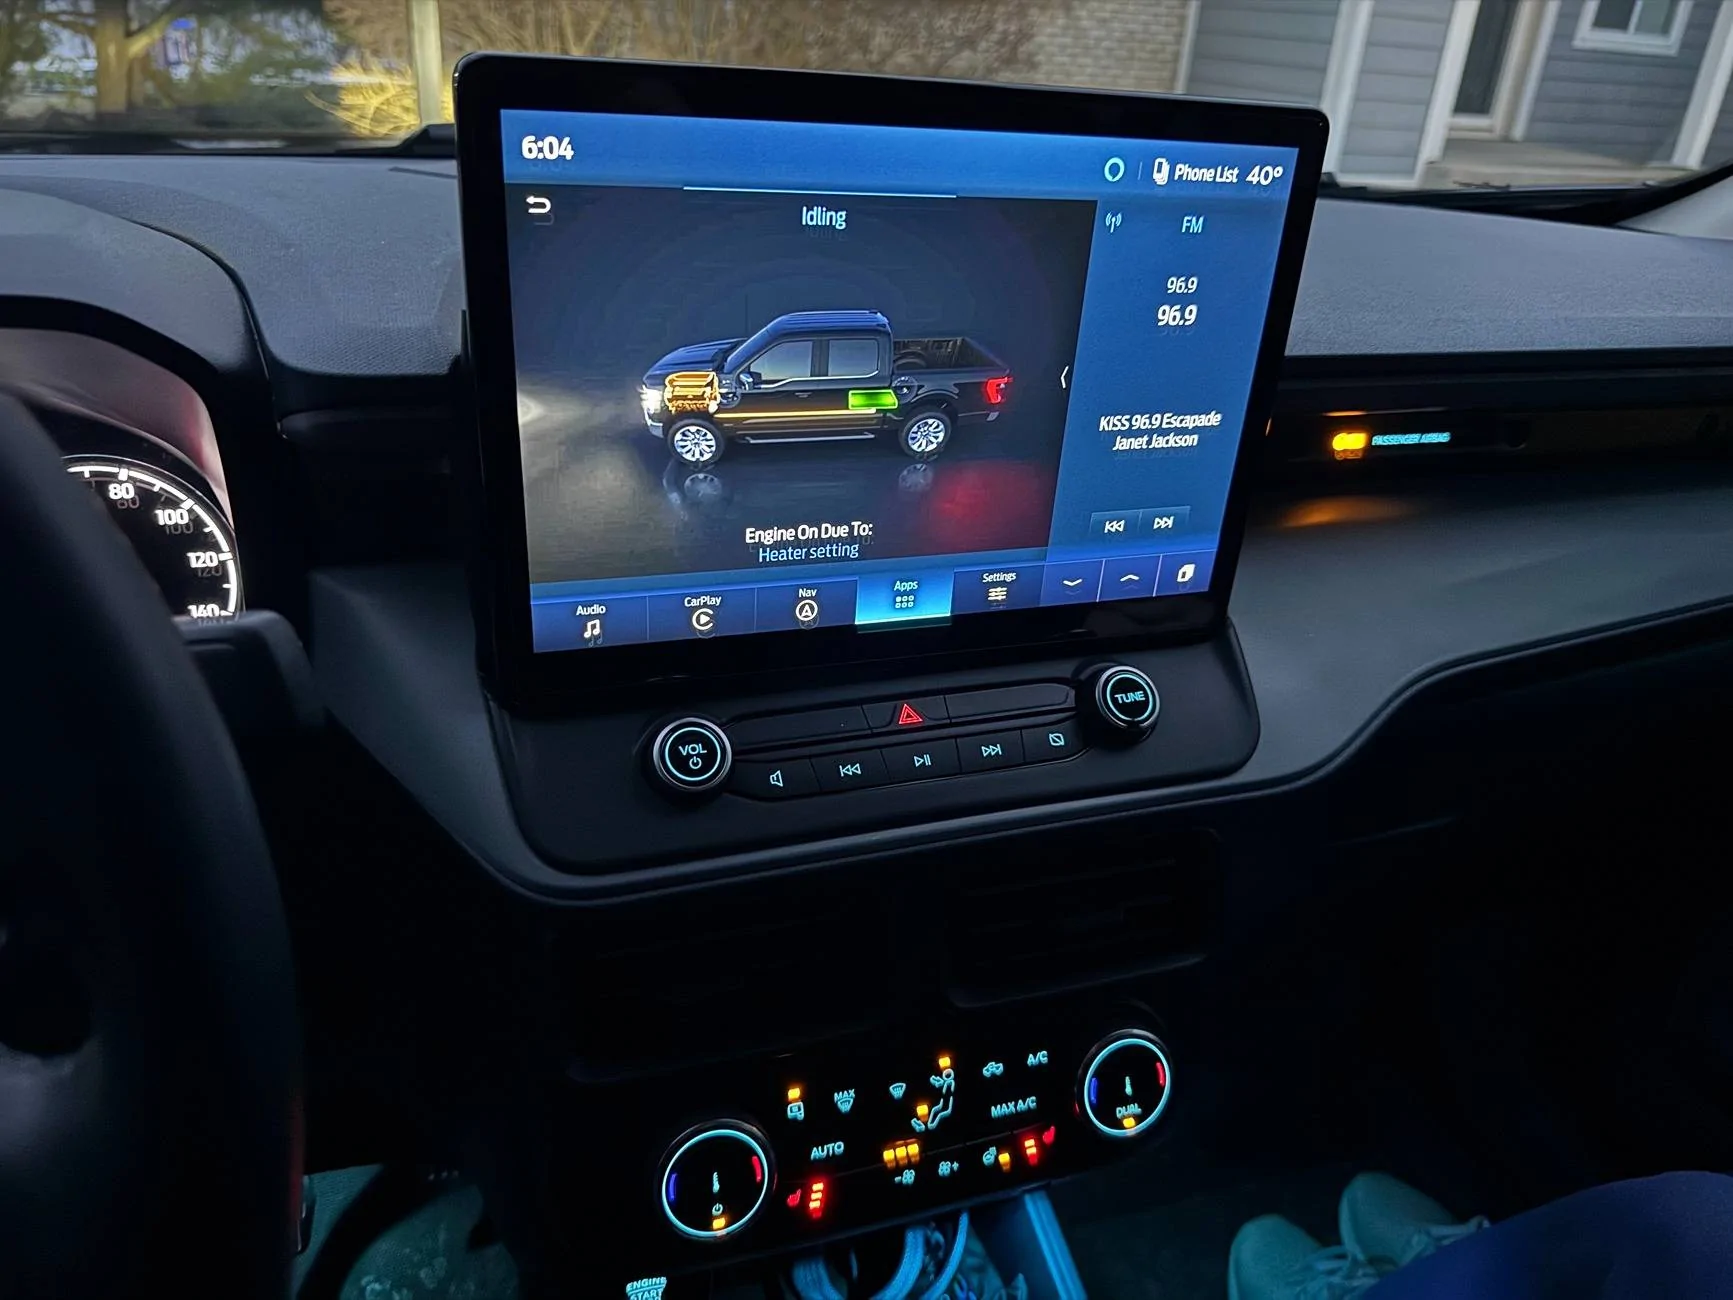
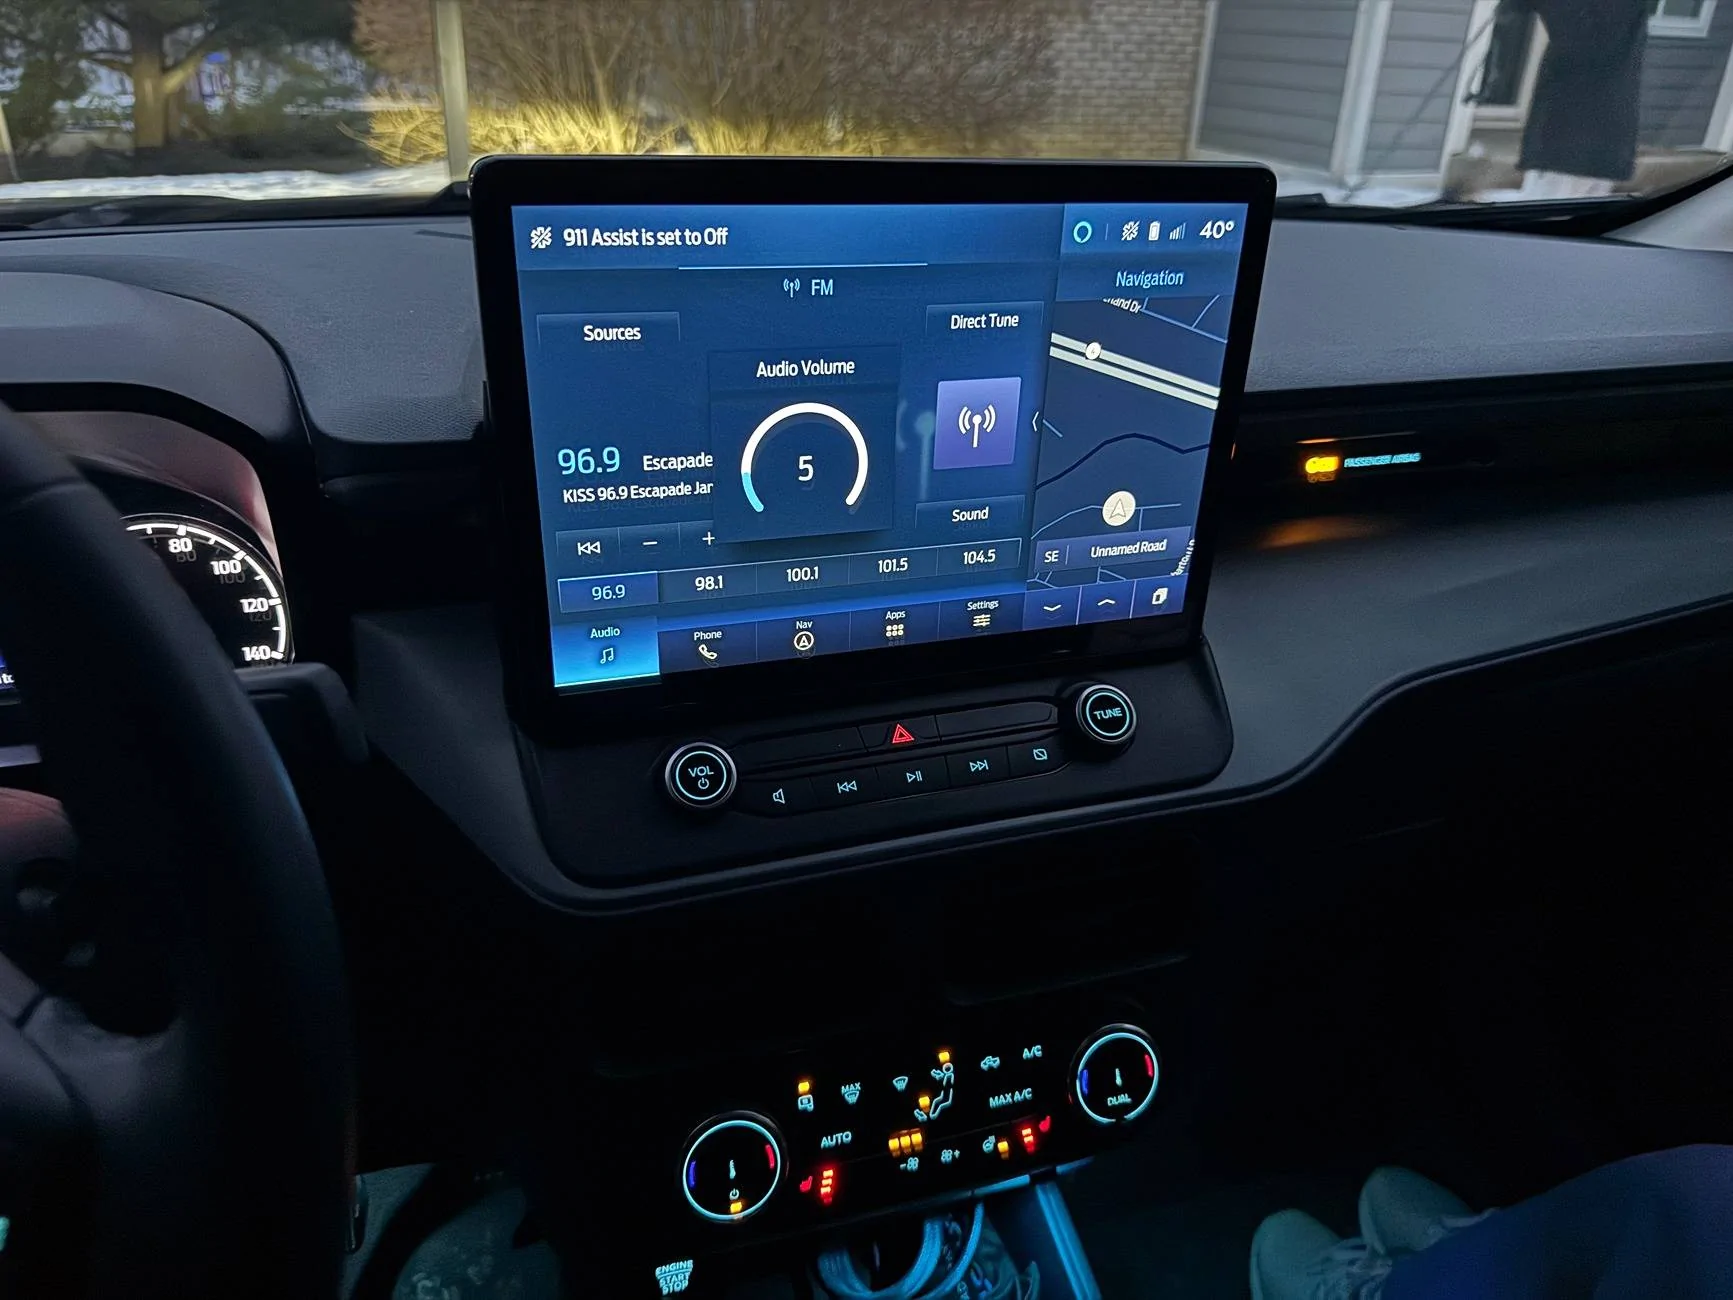
After collecting information from lots of people in the community, namely from the thread linked above (especially Billzilla15, 801Maverick801, pantera156, yeahiguessman, and Redneck Garage’s youtube videos…thank you everyone!!), I am happy to this guide for swapping over to Sync4 with a fully functional, all knobs and buttons working, no audio issues, working nav, and working reverse camera in 2022-2024 Ford Mavericks (specifically the hybrid and Lariat models)!
My Dad (Skilled Trade Ford retiree) and I sunk a considerable amount of time into this project and we wanted to give back to this great community. Here are the steps and “gotchas” we ran into and I hope this is helpful for those still trying to get things sorted out.
----Background: I started with a stock 2023 Maverick Hybrid Lariat w/ Lux package & Co-pilot360, factory navigation, and B&O sound system.
- Obtain necessary parts (basically what others have stated here, but this is what I used)
- 2023 Ford Escape APIM SYNC4 (P/N: PJ6T-14G670-BFP)
- 2022 Ford Transit 12in display w/HOUSING (P/N: NK4T-18B955-FC3UAW)
- SYNC3 54pin passthrough cable (Amazon)
- Screen Power Wire (P/N: 6U2Z14S411JB)
- Screen Data Cable (P/N: ML3Z14D202B)
- Aluminum flat stock (1/8in)
- M5-0.8x30mm bolts (for custom bracket to dash mounting, factory thread patten)
- M5x8 bolts (for Transit screen to bracket mounting, you can use what you have)
- 25mm Nylon Standoff (M5 center hole)
- Take a photo or use FORscan to make a backup of your current SYNC3-3.4 APIM AsBuilt data (DO NOT SKIP THIS STEP)
- The HEX code page with the strings of numbers/letters for the APIM is what we are interested in here.
- Use this piece of software from @consp GitHub repository (Thank you sir!!) https://github.com/consp/apim-asbuilt-decode/releases
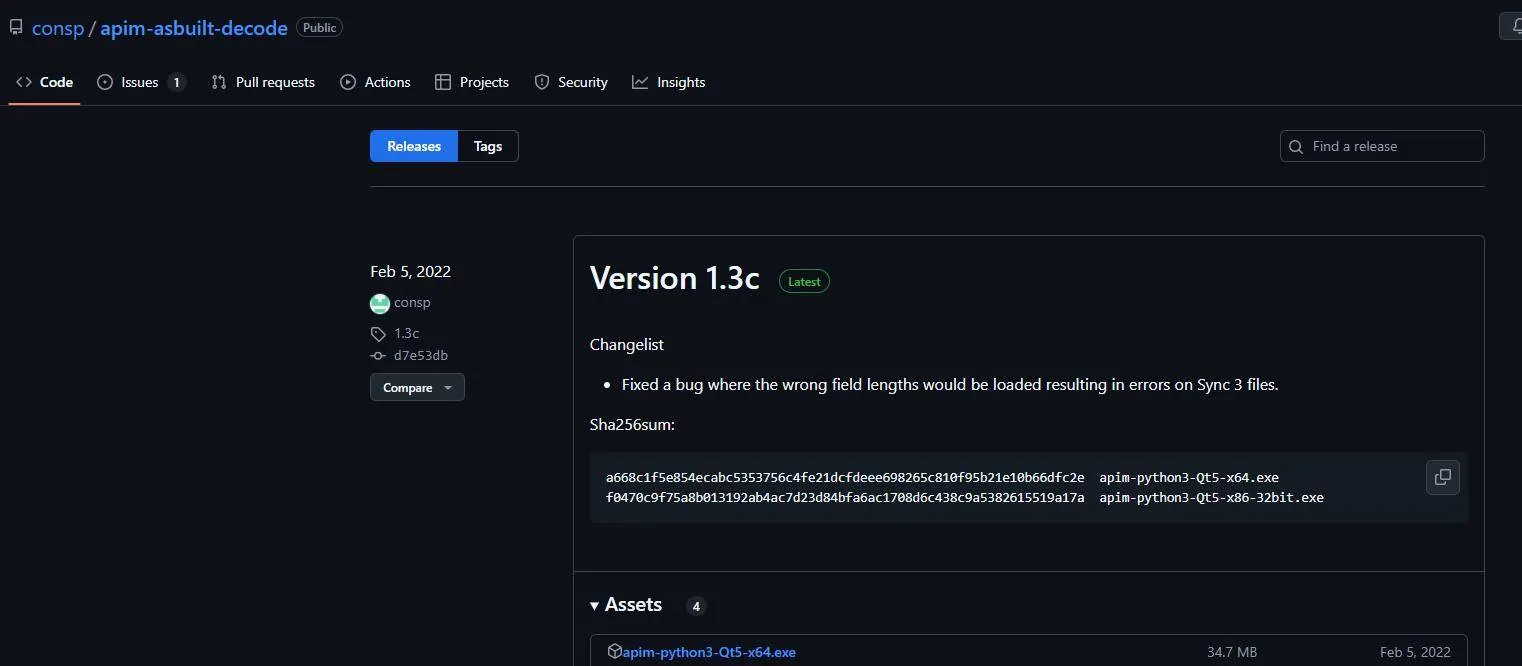
- You can open you SYNC3-3.4 APIM AsBuilt ABT file from FORscan and make notes of your configuration as shown. This will help tremendously in knowing what to set when programming SYNC4 APIM. The settings and values Ford has provided are NOT intuitive and there is a lot of missing context. Ex. Often times “Disable” value is what is needed for a setting if you already have a hard-button on your truck.
- Prepare your SYNC3 passthrough wiring harness
- NOTE: This is the piece (as many other have mentioned) is what caused me the most issues. I have a non-functioning reverse camera that was difficult to diagnose because of this cheap harness. I highly recommend depinning, and slightly bending the locking tab/barb on the pins outward for every pin and reinstalling. These pins are exceptionally loose from the factory apparently, and my camera pin was wired correctly but not tight enough to make a connection!
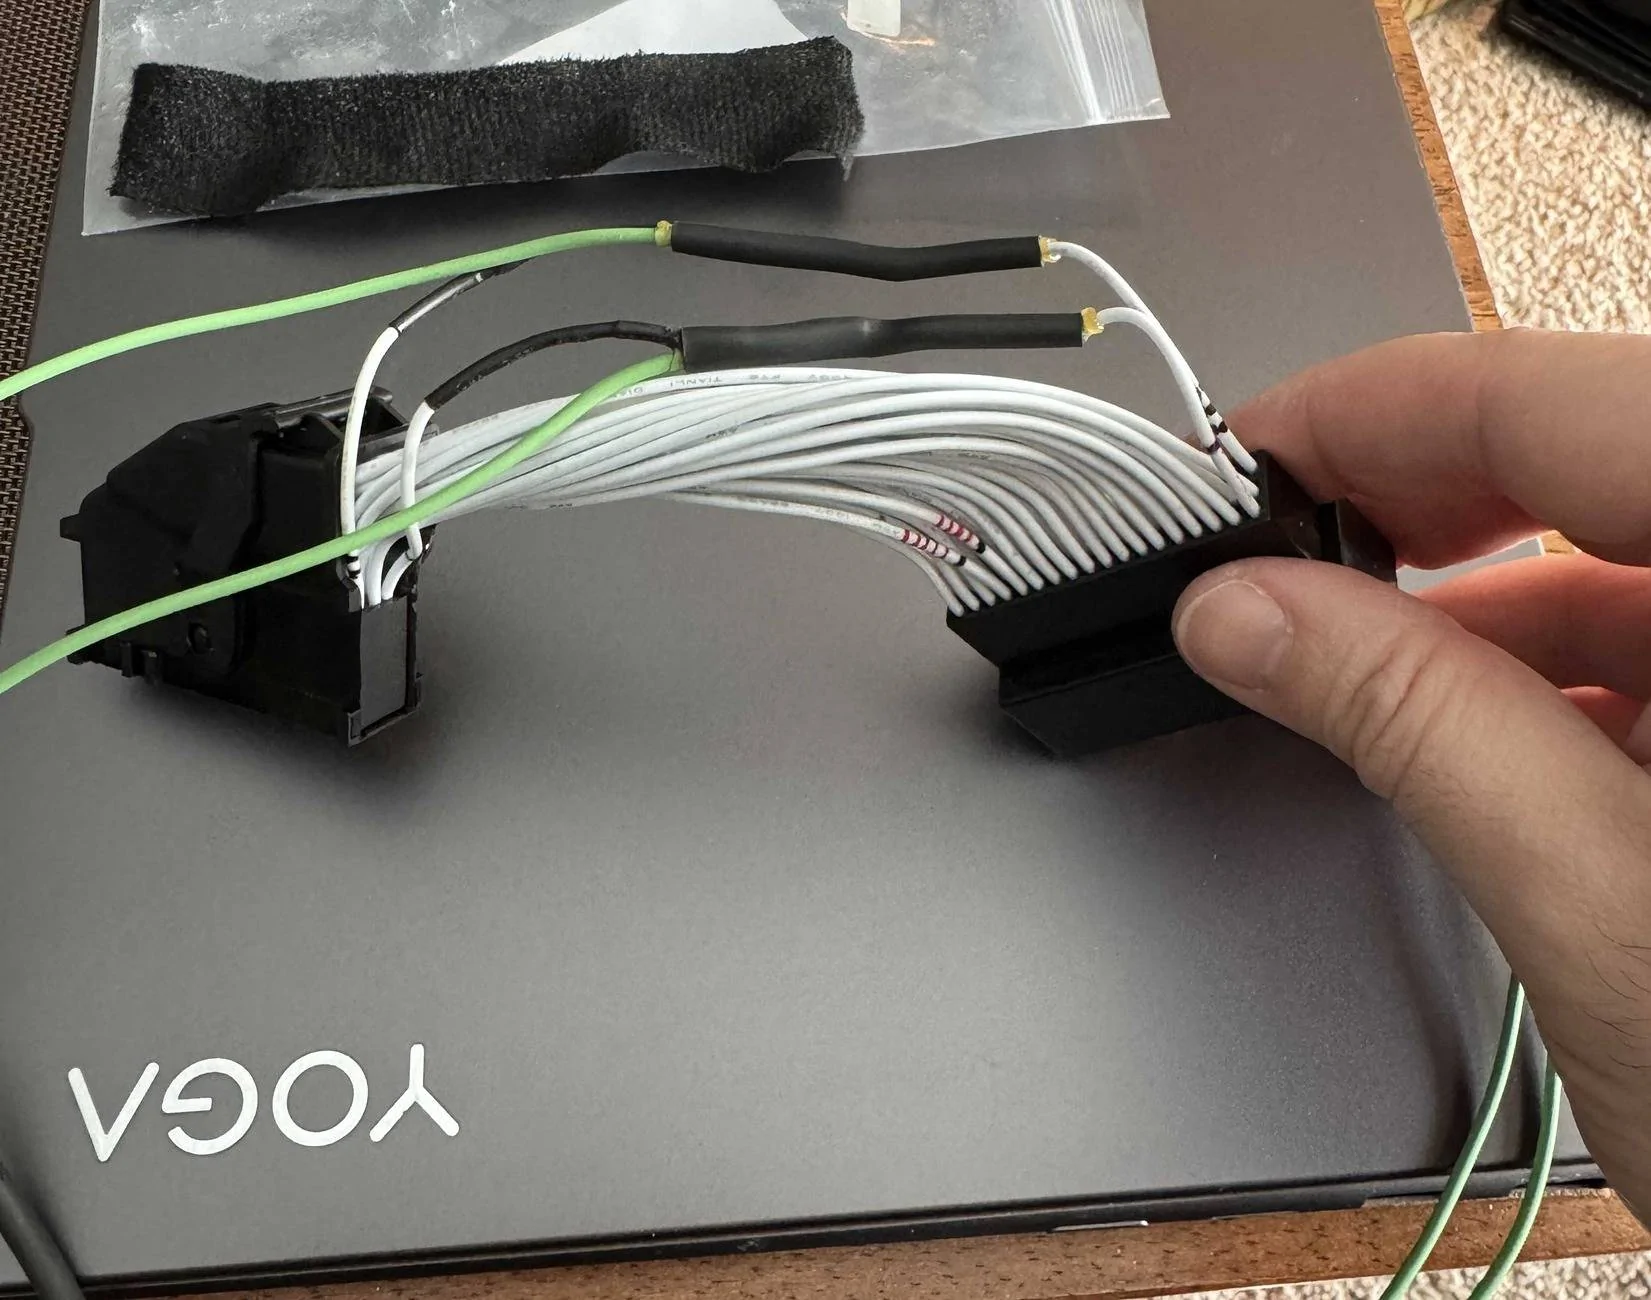
- NOTE: This is the piece (as many other have mentioned) is what caused me the most issues. I have a non-functioning reverse camera that was difficult to diagnose because of this cheap harness. I highly recommend depinning, and slightly bending the locking tab/barb on the pins outward for every pin and reinstalling. These pins are exceptionally loose from the factory apparently, and my camera pin was wired correctly but not tight enough to make a connection!
- Disassemble the Transit screen from the housing and snip off the three little black “pins” sticking out from the bottom. Not doing this can make mounting the screen squarely to the dash difficult, at least for me.
- While the housing is off of the screen, remove the metal screen bracket from the LCD carefully, and cut off enough of the central mounting tab so it is at least flush with the outside plastic housing when reinstalled. This allows you mount the screen more securely later.
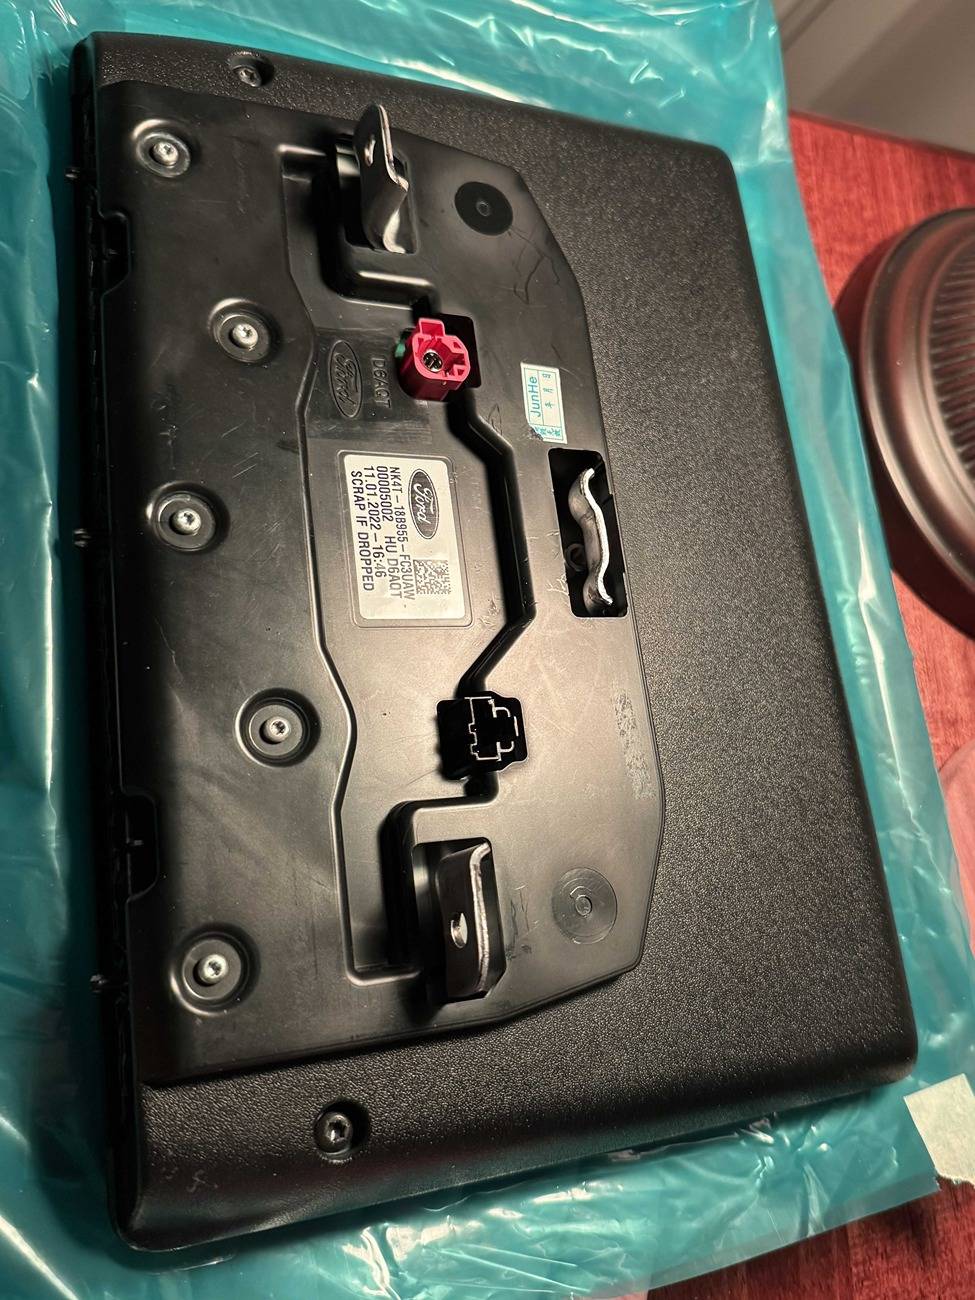
- I watched a couple of YouTube videos (thank you @ Redneck Garage) for the teardown and physical install.
- No one was kidding, removing the factory APIM from the dash was a NIGHTMARE. It can and will cut you, scratch up your plastic interior, and came close to nicking some nearby wiring harnesses during removal/install.
- I found carefully rotating the APIM 90deg left of right so you can get better access to unplug cables…things will still be very tight to get a hand in for unplugging.
- Plug in all new parts (screen, passthrough harness, APIM, climate knobs, etc…) carefully and turn ignition to ON.
- Make a FORscan APIM backup (image and file) of the SYNC4 APIMs AsBuilt (This is handy for troubleshooting later and for the values in memory block 10, which isn’t fully defined in the analysis software from GitHub yet).
- Does the screen boot up???
- If YES, then success! Proceed with install
- If NO, then your passthrough wiring harness likely has a fault
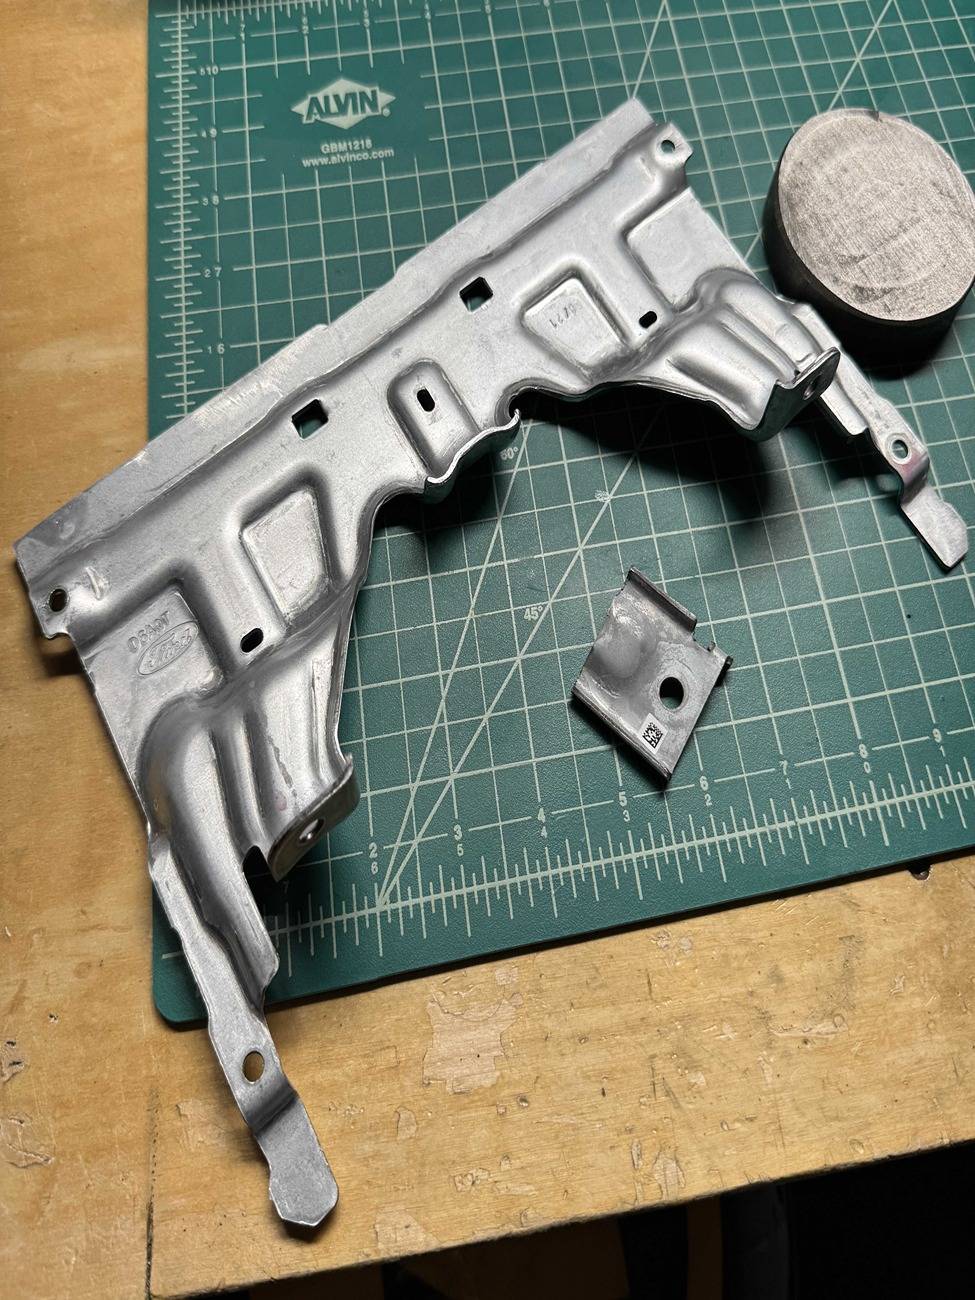
- Use the aluminum bar stock to layout where the CENTER dash mounting hole from the OEM screen will be, and also the PASSENGER side mounting hole for stability.
- This is very important for Audio quality…the center screw hole in the dash from the original screen is the only grounded mount to the car frame (image). This made a pretty big difference for me.
- We chose to use our own M5x30mm bolts to mounting our cut aluminum bar stock using through holes, and then drilled and tapped hole on the ends for the Transit screen mount after tracing the layout.
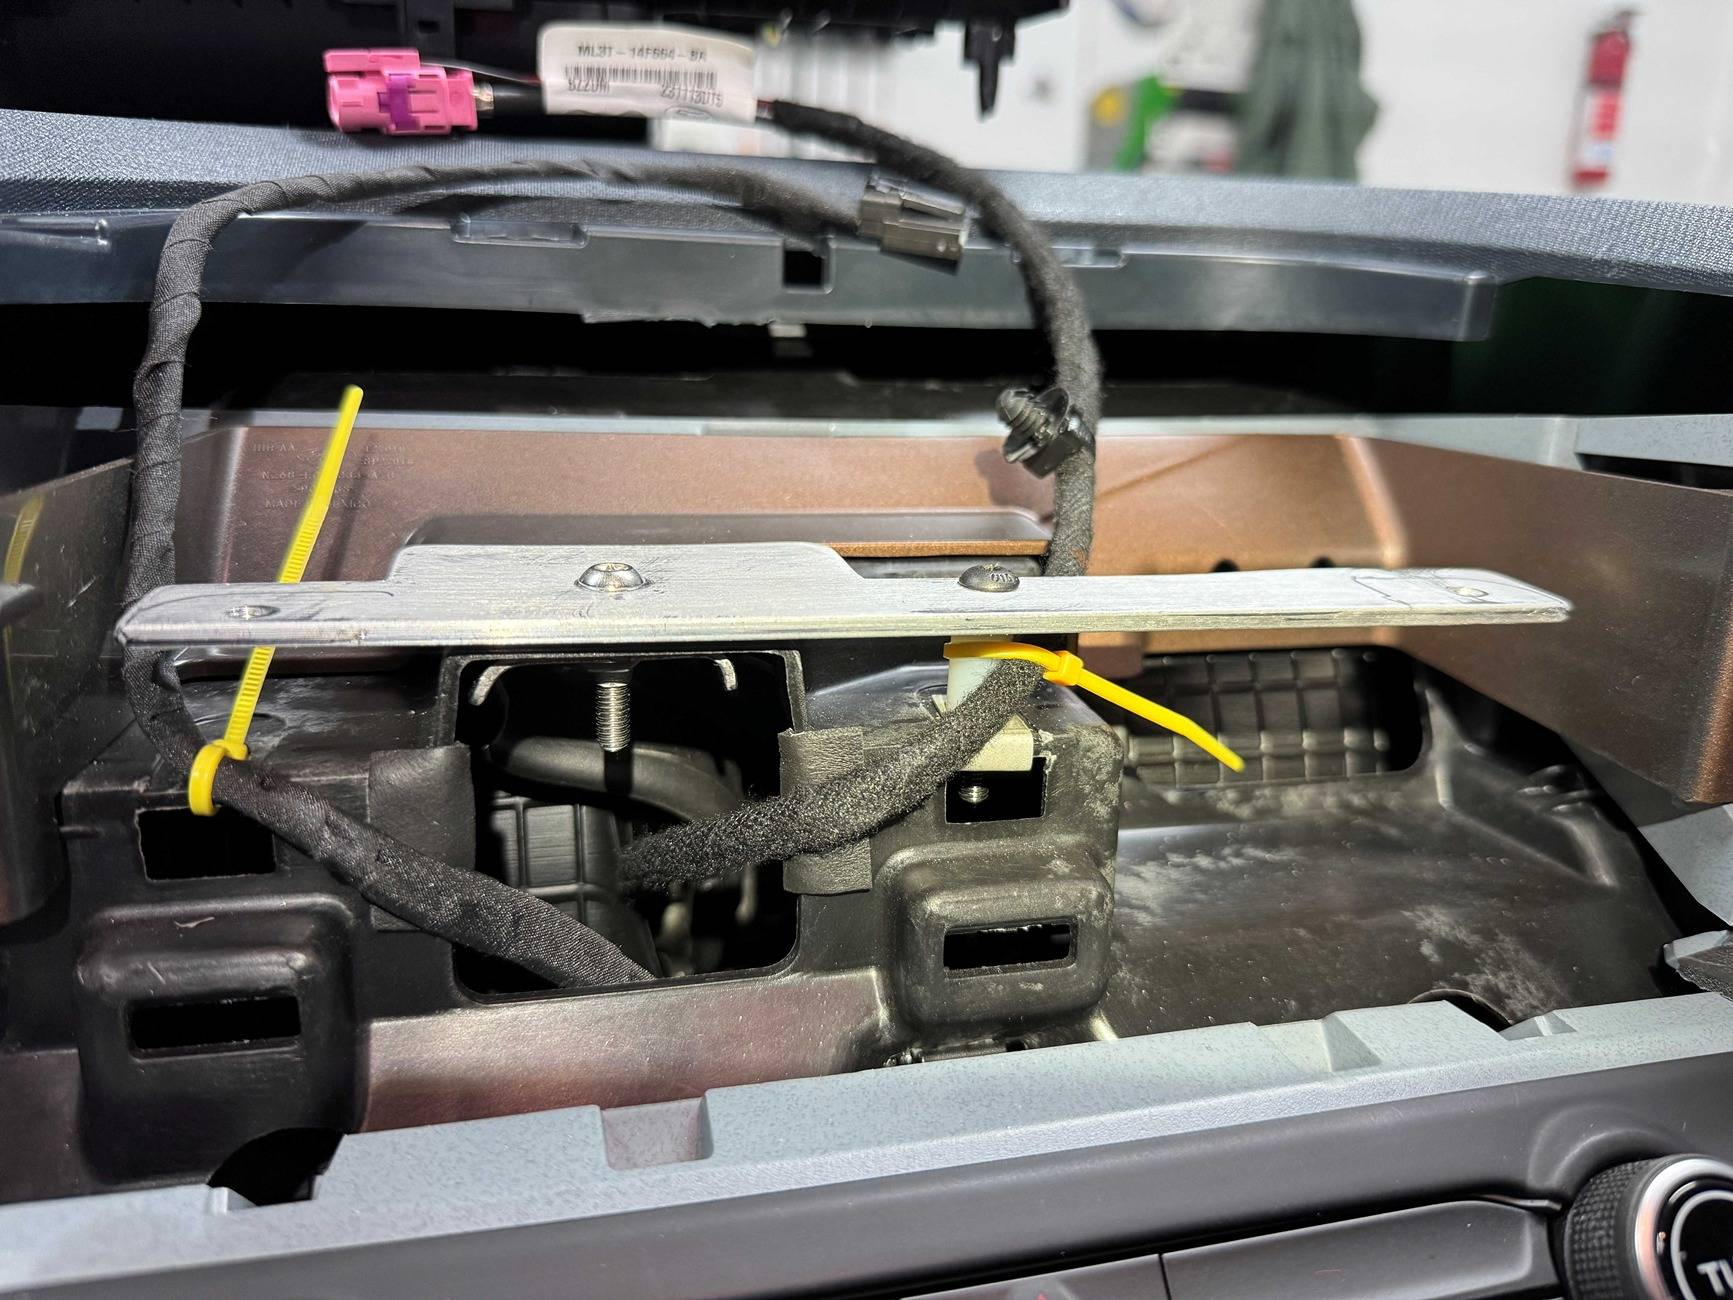
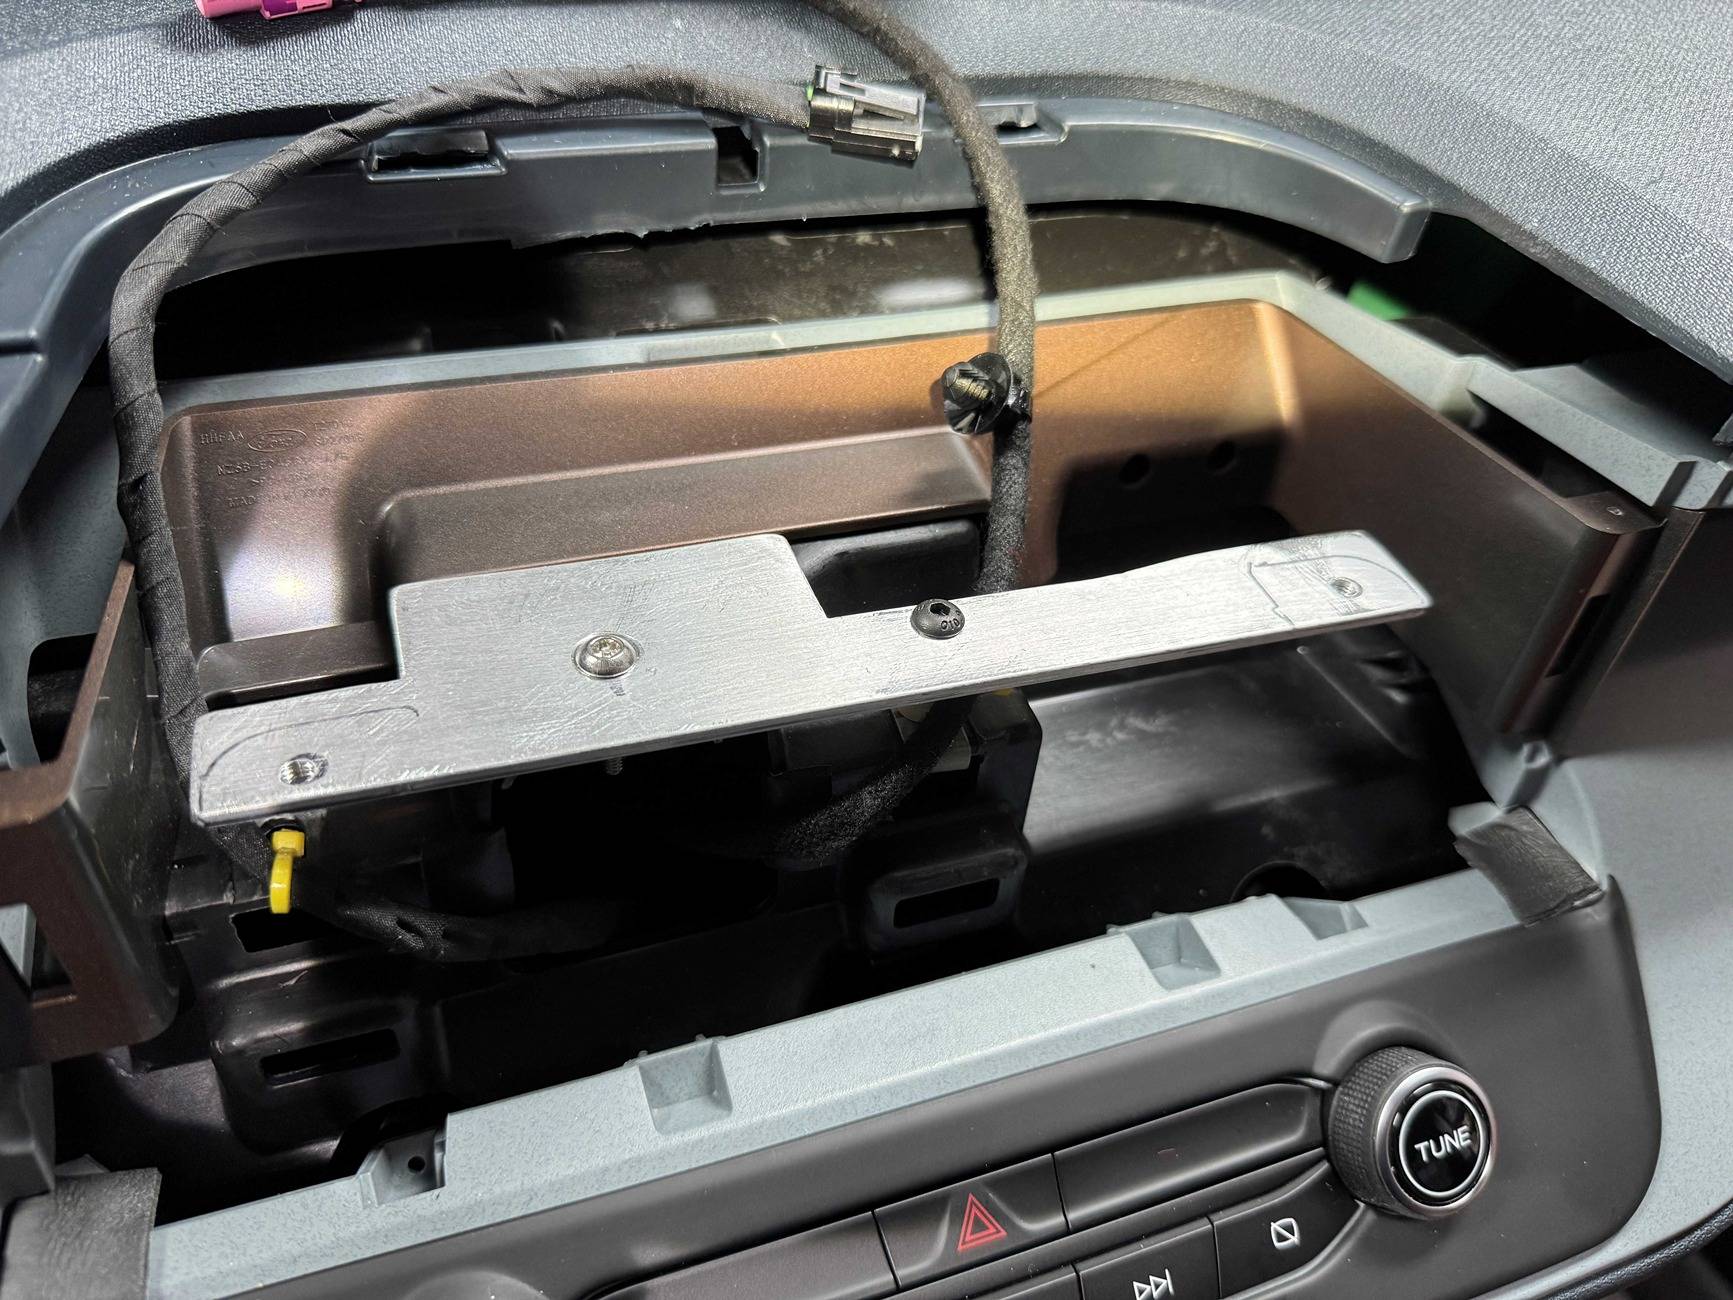
- If you cut off the center metal tab on the screen housing mount, you can reinstall the factory begin screen tray without any modification.
- We used some 3/8-1/2in sections of heatshrink tubing to fill the gaps next to the screen until I can 3D print something (maybe at a later date).
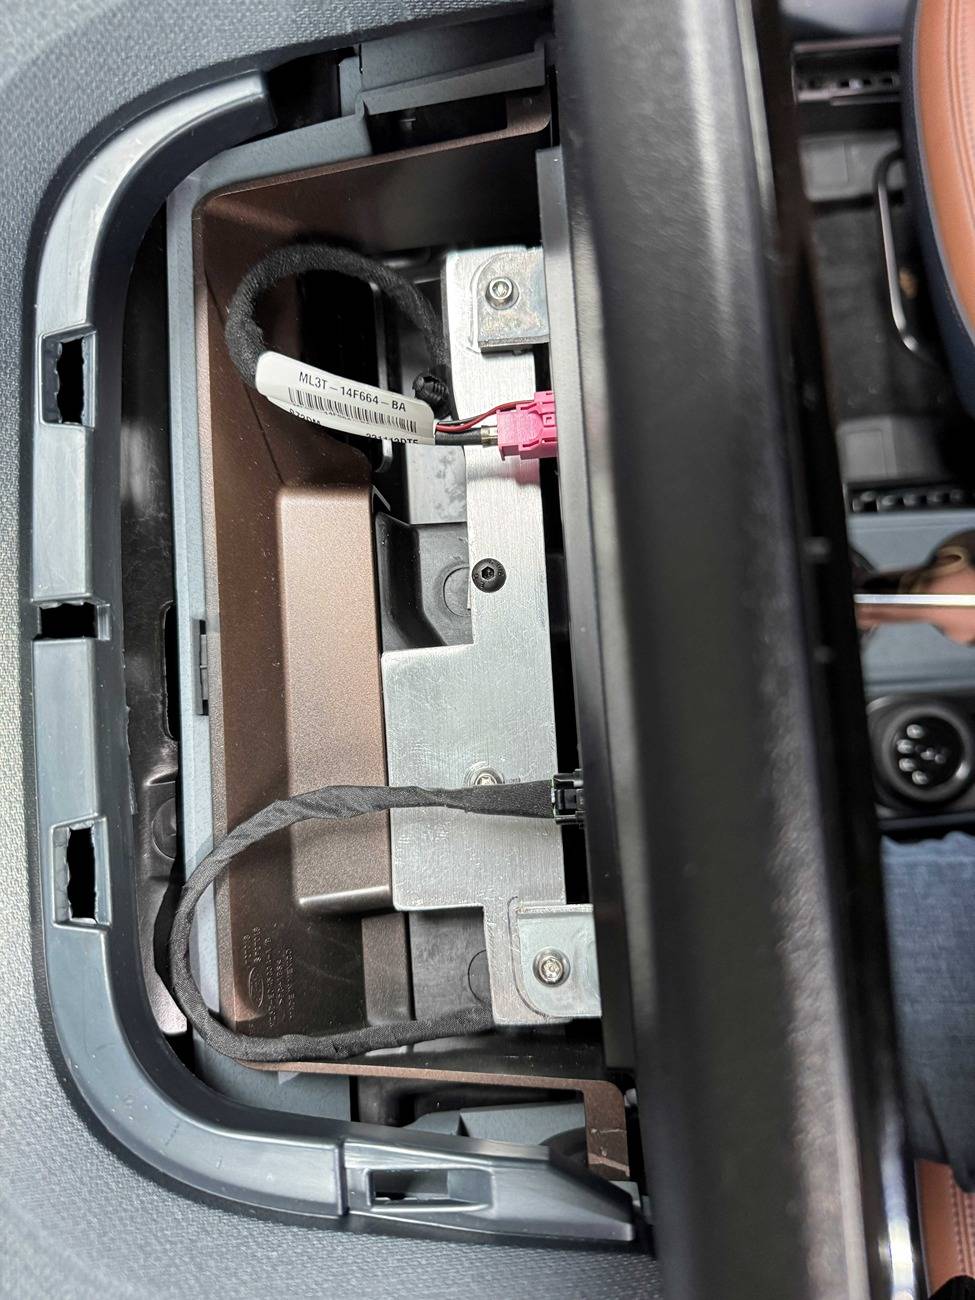
- We used some 3/8-1/2in sections of heatshrink tubing to fill the gaps next to the screen until I can 3D print something (maybe at a later date).
- At this point everything should be reinstalled and new screen mounted.
- Using FORscan, I started with Billzilla15’s (this helped a ton, thanks again!) to get things in a mostly working starting state.
- As Billzilla15 mentioned, this is VERY SPECIFIC to your vehicle. That posted AsBuilt is setup for an AWD EcoBoost Mav, and it mostly worked with my Hybrid, but fuel efficiency, switch to electric, and braking seemed a little “off” until I tweaked to for my Hybrid Mav (as expected).
- I used the software from consp’s GitHub to match all of the setting that I could from my factory APIM SYNC3 AsBuilt to make a SYNC4 APIM AsBuilt for my vehicle.
- The major tweak for me was under the “Visual Design” setting to “12in Landscape”, and setting “HEV/Hybrid” to “Enable/HEV”.
- Success!! The following work as they did from factory:
- Volume knob works and show volume number correctly on new display.
- Climate controls and fan speed shows numbers on display when changed.
- Heated seats and heated steering wheel work.
- Reverse Camera is bright, clear, and works perfectly with proximity sensors.
- Audio plays clearly and without static, pops, or cracks (woot!)
- Navigation/GPS is spot on
- Ambient Lighting works as original.
- CarPlay works flawlessly.
- FordPass App allows all of the same functionality as factory. (Must HotSwap already app connected factory APIM to SYNC4 APIM….DO NOT FACTORY RESET SYNC or you have to tear down, reinstall factory APIM, reconnect app, then reinstall SYNC4 hardware!)
- Door Keypad and Intelligent Access work
- You cannot get OTA SYNC4 updates now.
- HD Radio works
-----------------------------------------------------
----Here is my SYNC4 APIM AsBuilt for the above, hopefully it helps someone!
;Block 1
7D0G1G1: A081-4804-80C6
7D0G1G2: 0000-C609-38E1
7D0G1G3: 0001-0020-0C08
7D0G1G4: 02E0-00C0-007E
;Block 2
7D0G2G1: 0520-000A-0009
7D0G2G2: 02C0-00B0-004D
7D0G2G3: A040-0000-00BC
;Block 3
7D0G3G1: 5553-1503-039E
7D0G3G2: 0B00-073E-012D
7D0G3G3: 0000-0000-00DD
;Block 4
7D0G4G1: 0500-0000-00E1
;Block 5
7D0G5G1: 2102-3800-0038
7D0G5G2: 0000-0000-00DE
7D0G5G3: 0000-0000-00DF
;Block 6
7D0G6G1: 1806-1810-2F53
7D0G6G2: 4423
;Block 7
7D0G7G1: 1800-3300-002A
7D0G7G2: 03E8-A4B6-0025
7D0G7G3: 0056-5680-000D
7D0G7G4: 886A
;Block 8
7D0G8G1: C000-0001-00A1
7D0G8G2: 0000-0000-00E1
;Block 9
7D0G9G1: 0613-422C-F65E
7D0G9G2: 606C-5E00-0410
7D0G9G3: 0240-0000-0025
7D0G9G4: 1040-0000-0034
7D0G9G5: 0000-0000-00E5
;Block 10
7D0GAG1: 0000-0000-00E8
7D0GAG2: 0000-0000-00E9
7D0GAG3: 0000-0000-00EA
7D0GAG4: 0000-0000-00EB
7D0GAG5: 0000-0000-00EC
----Cost at time of writing (January 2025)
Not counting the hardware and aluminum (which I already had on hand) or the FORscan license, less than $650 if you find a good price on APIM. Not too bad really!
- ~$240= 2023 Ford Escape APIM SYNC4 (P/N: PJ6T-14G670-BFP)
- ~$300= 2022 Ford Transit 12in display w/HOUSING (P/N: NK4T-18B955-FC3UAW)
- ~$10= SYNC3 54pin passthrough cable (Amazon)
- ~$30= Ford Screen Power Wire (P/N: 6U2Z14S411JB)
- ~$45= Ford Screen Data Cable (P/N: ML3Z14D202B)
----Final Install Pics:
Sponsored
Last edited:


 nice work! Too much screen for me but looks great.