- First Name
- Bob
- Joined
- Dec 9, 2021
- Threads
- 21
- Messages
- 374
- Reaction score
- 639
- Location
- St. Charles, MO.
- Vehicle(s)
- sold 22 Hybrid XL now 24 Hybrid XL, 57 Chevy 454ci
- Engine
- 2.5L Hybrid
- Thread starter
- #1
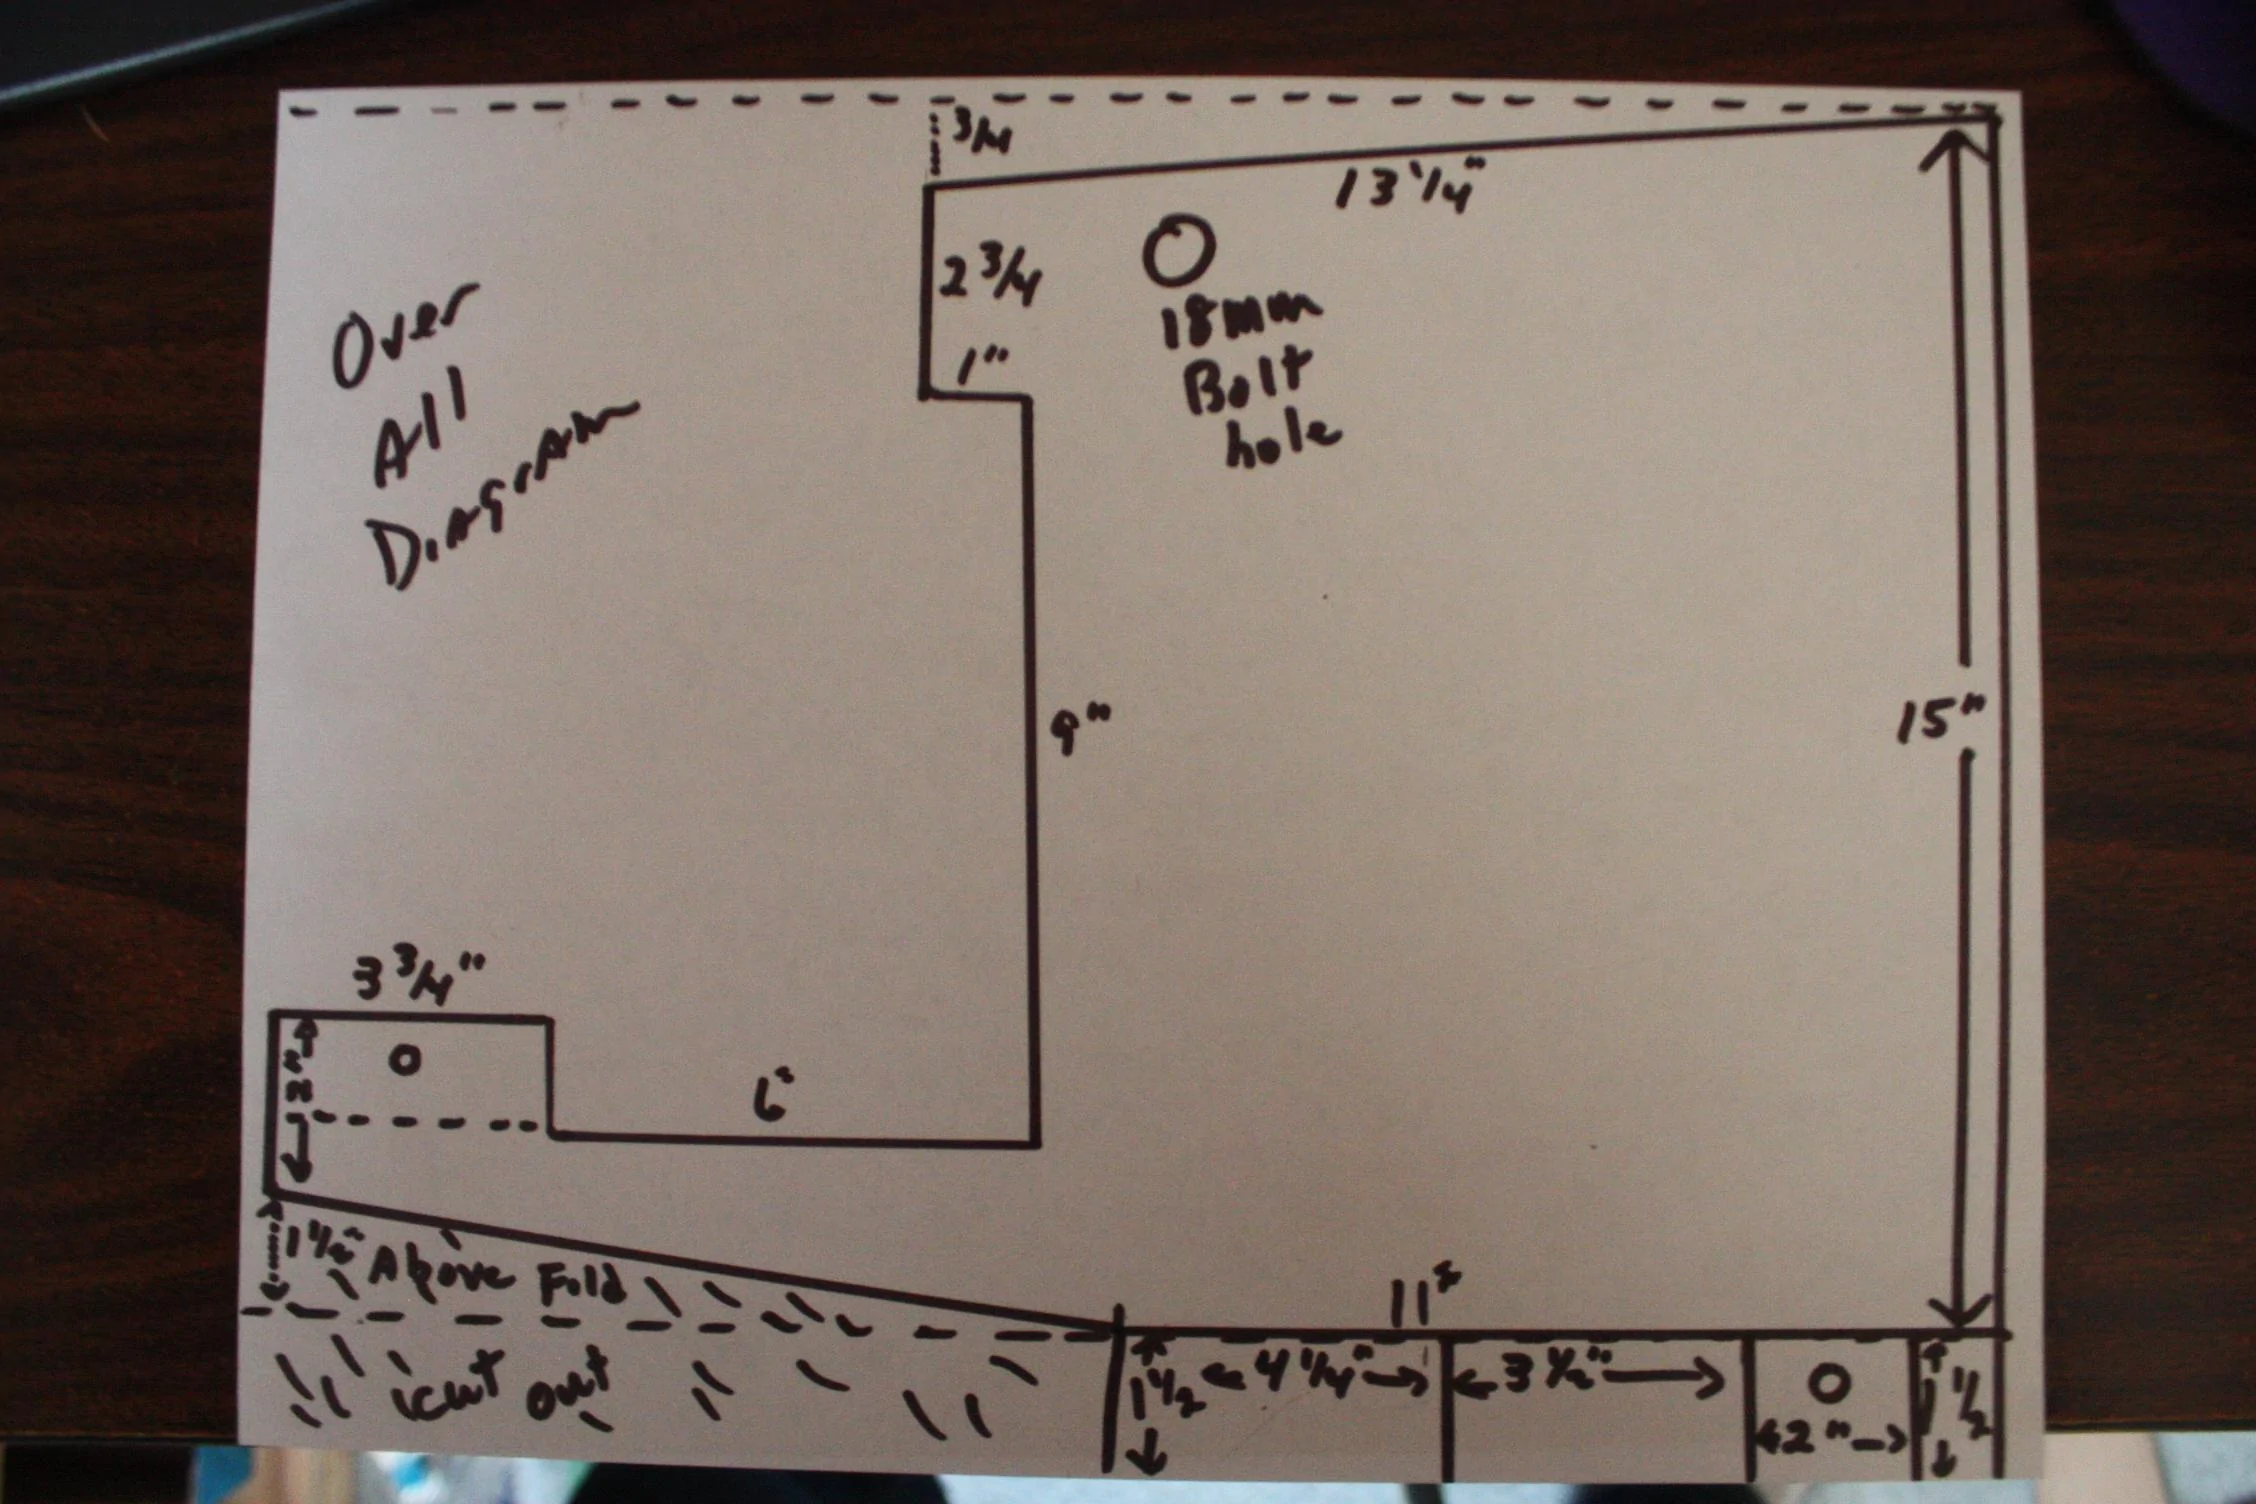
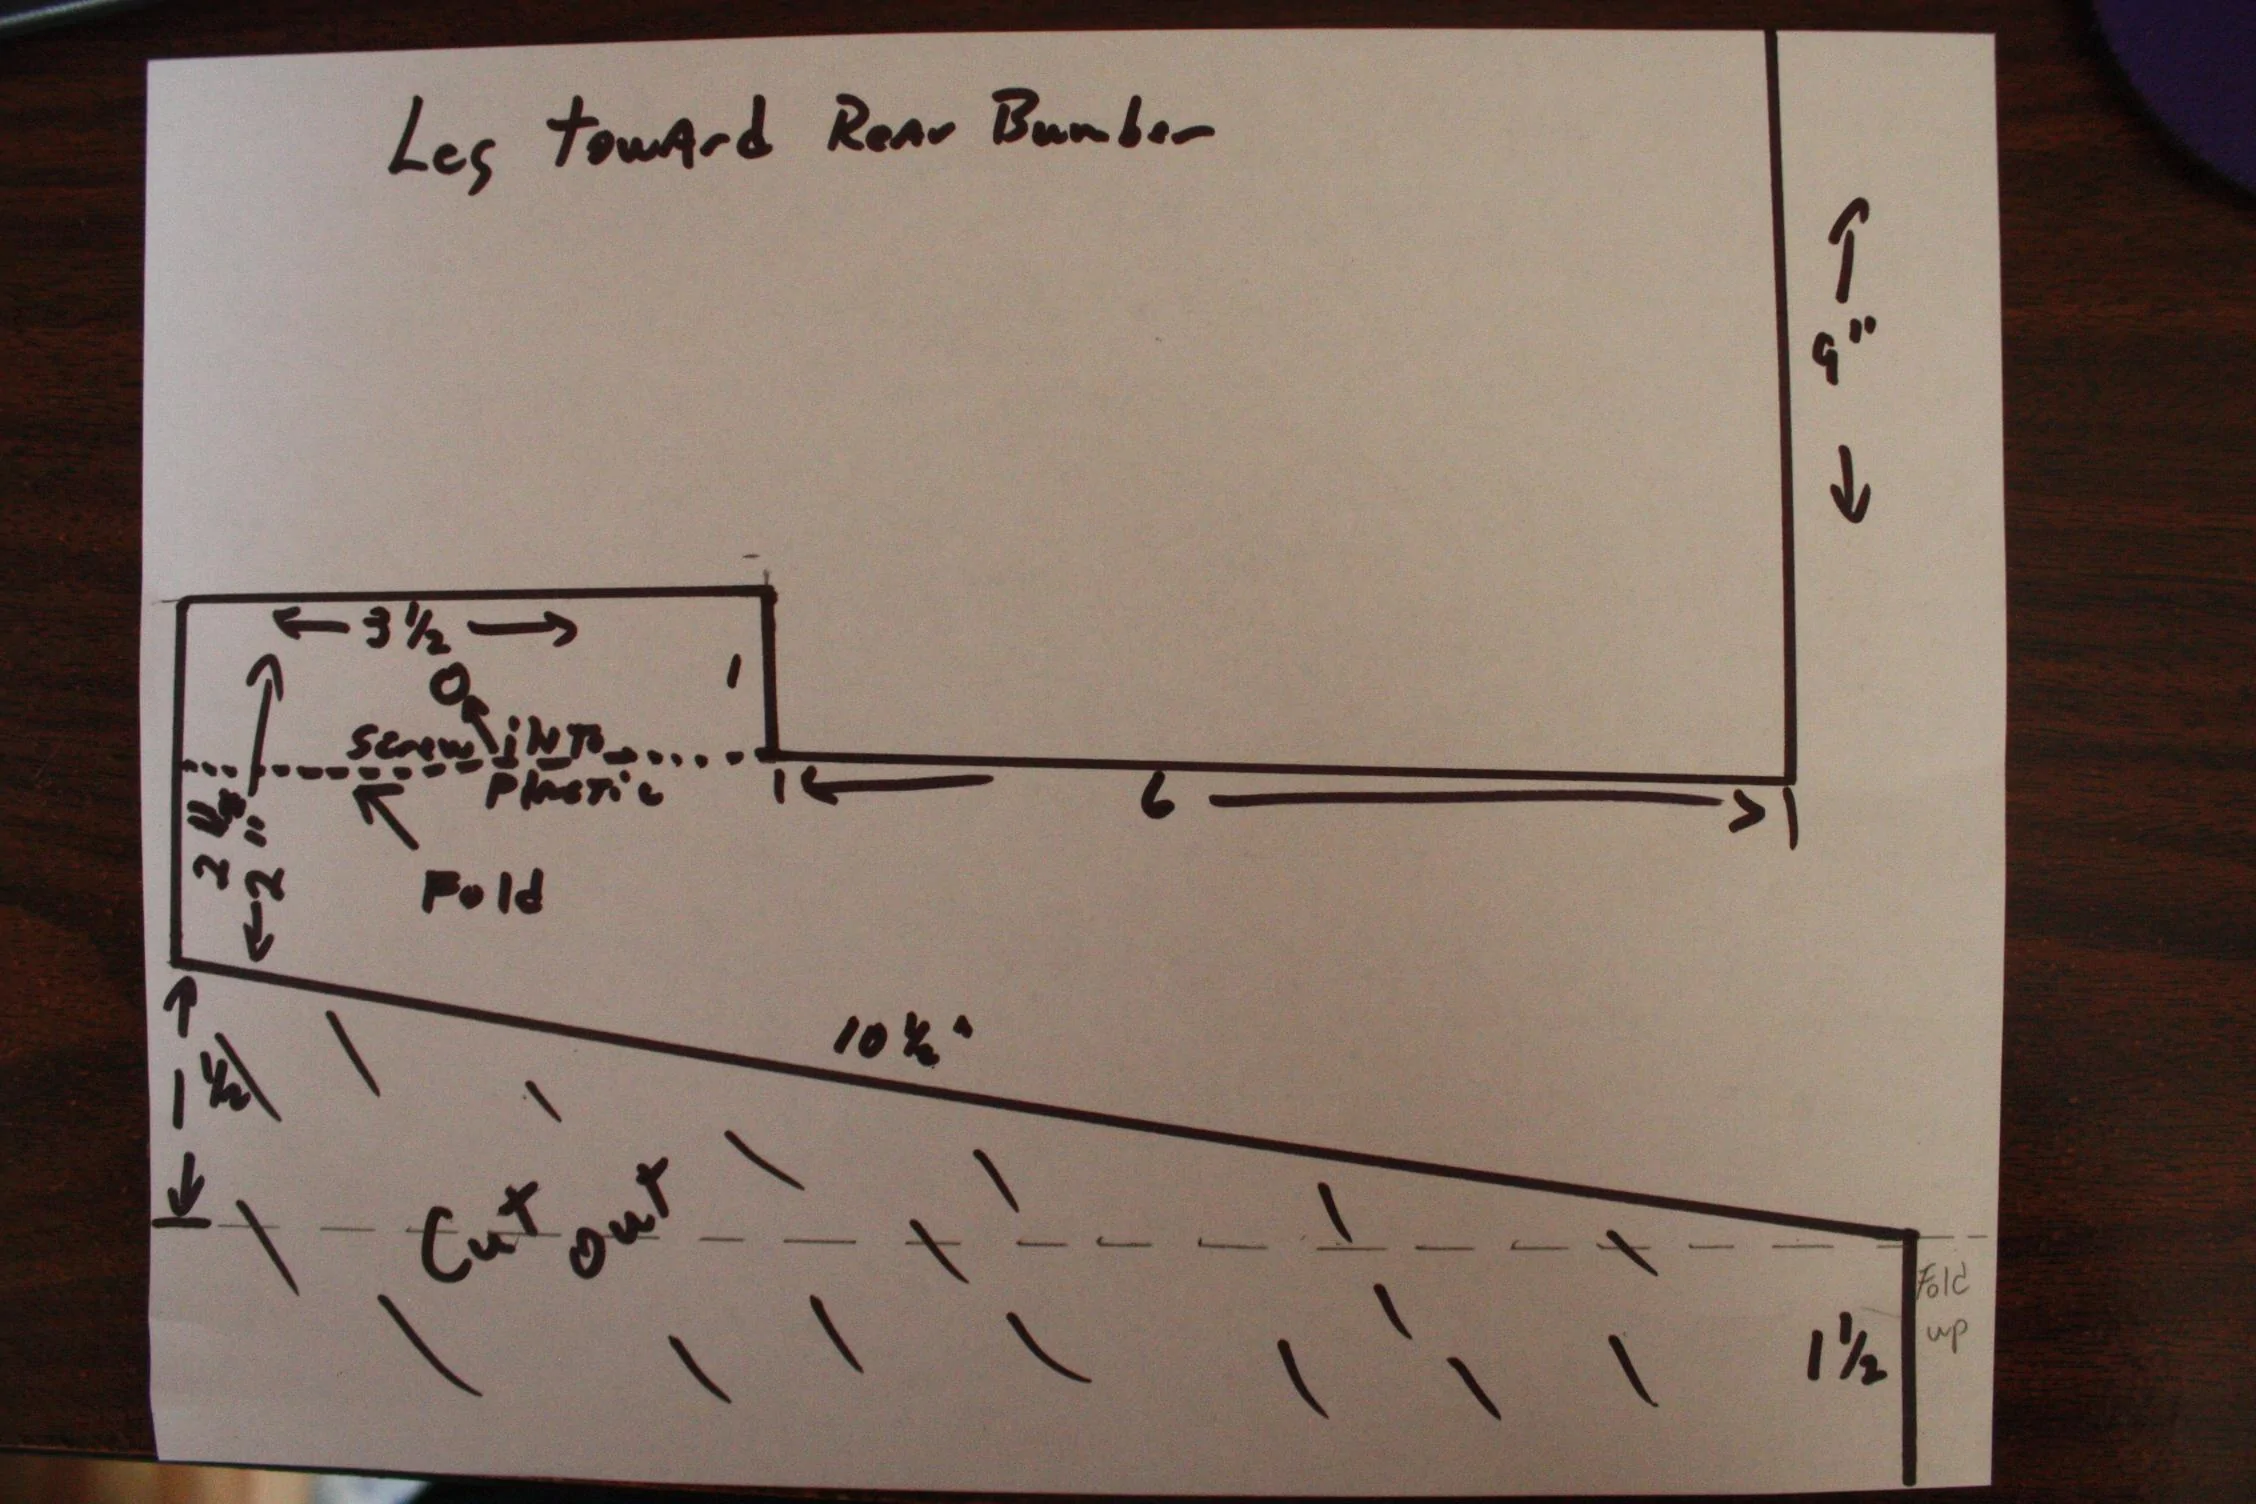
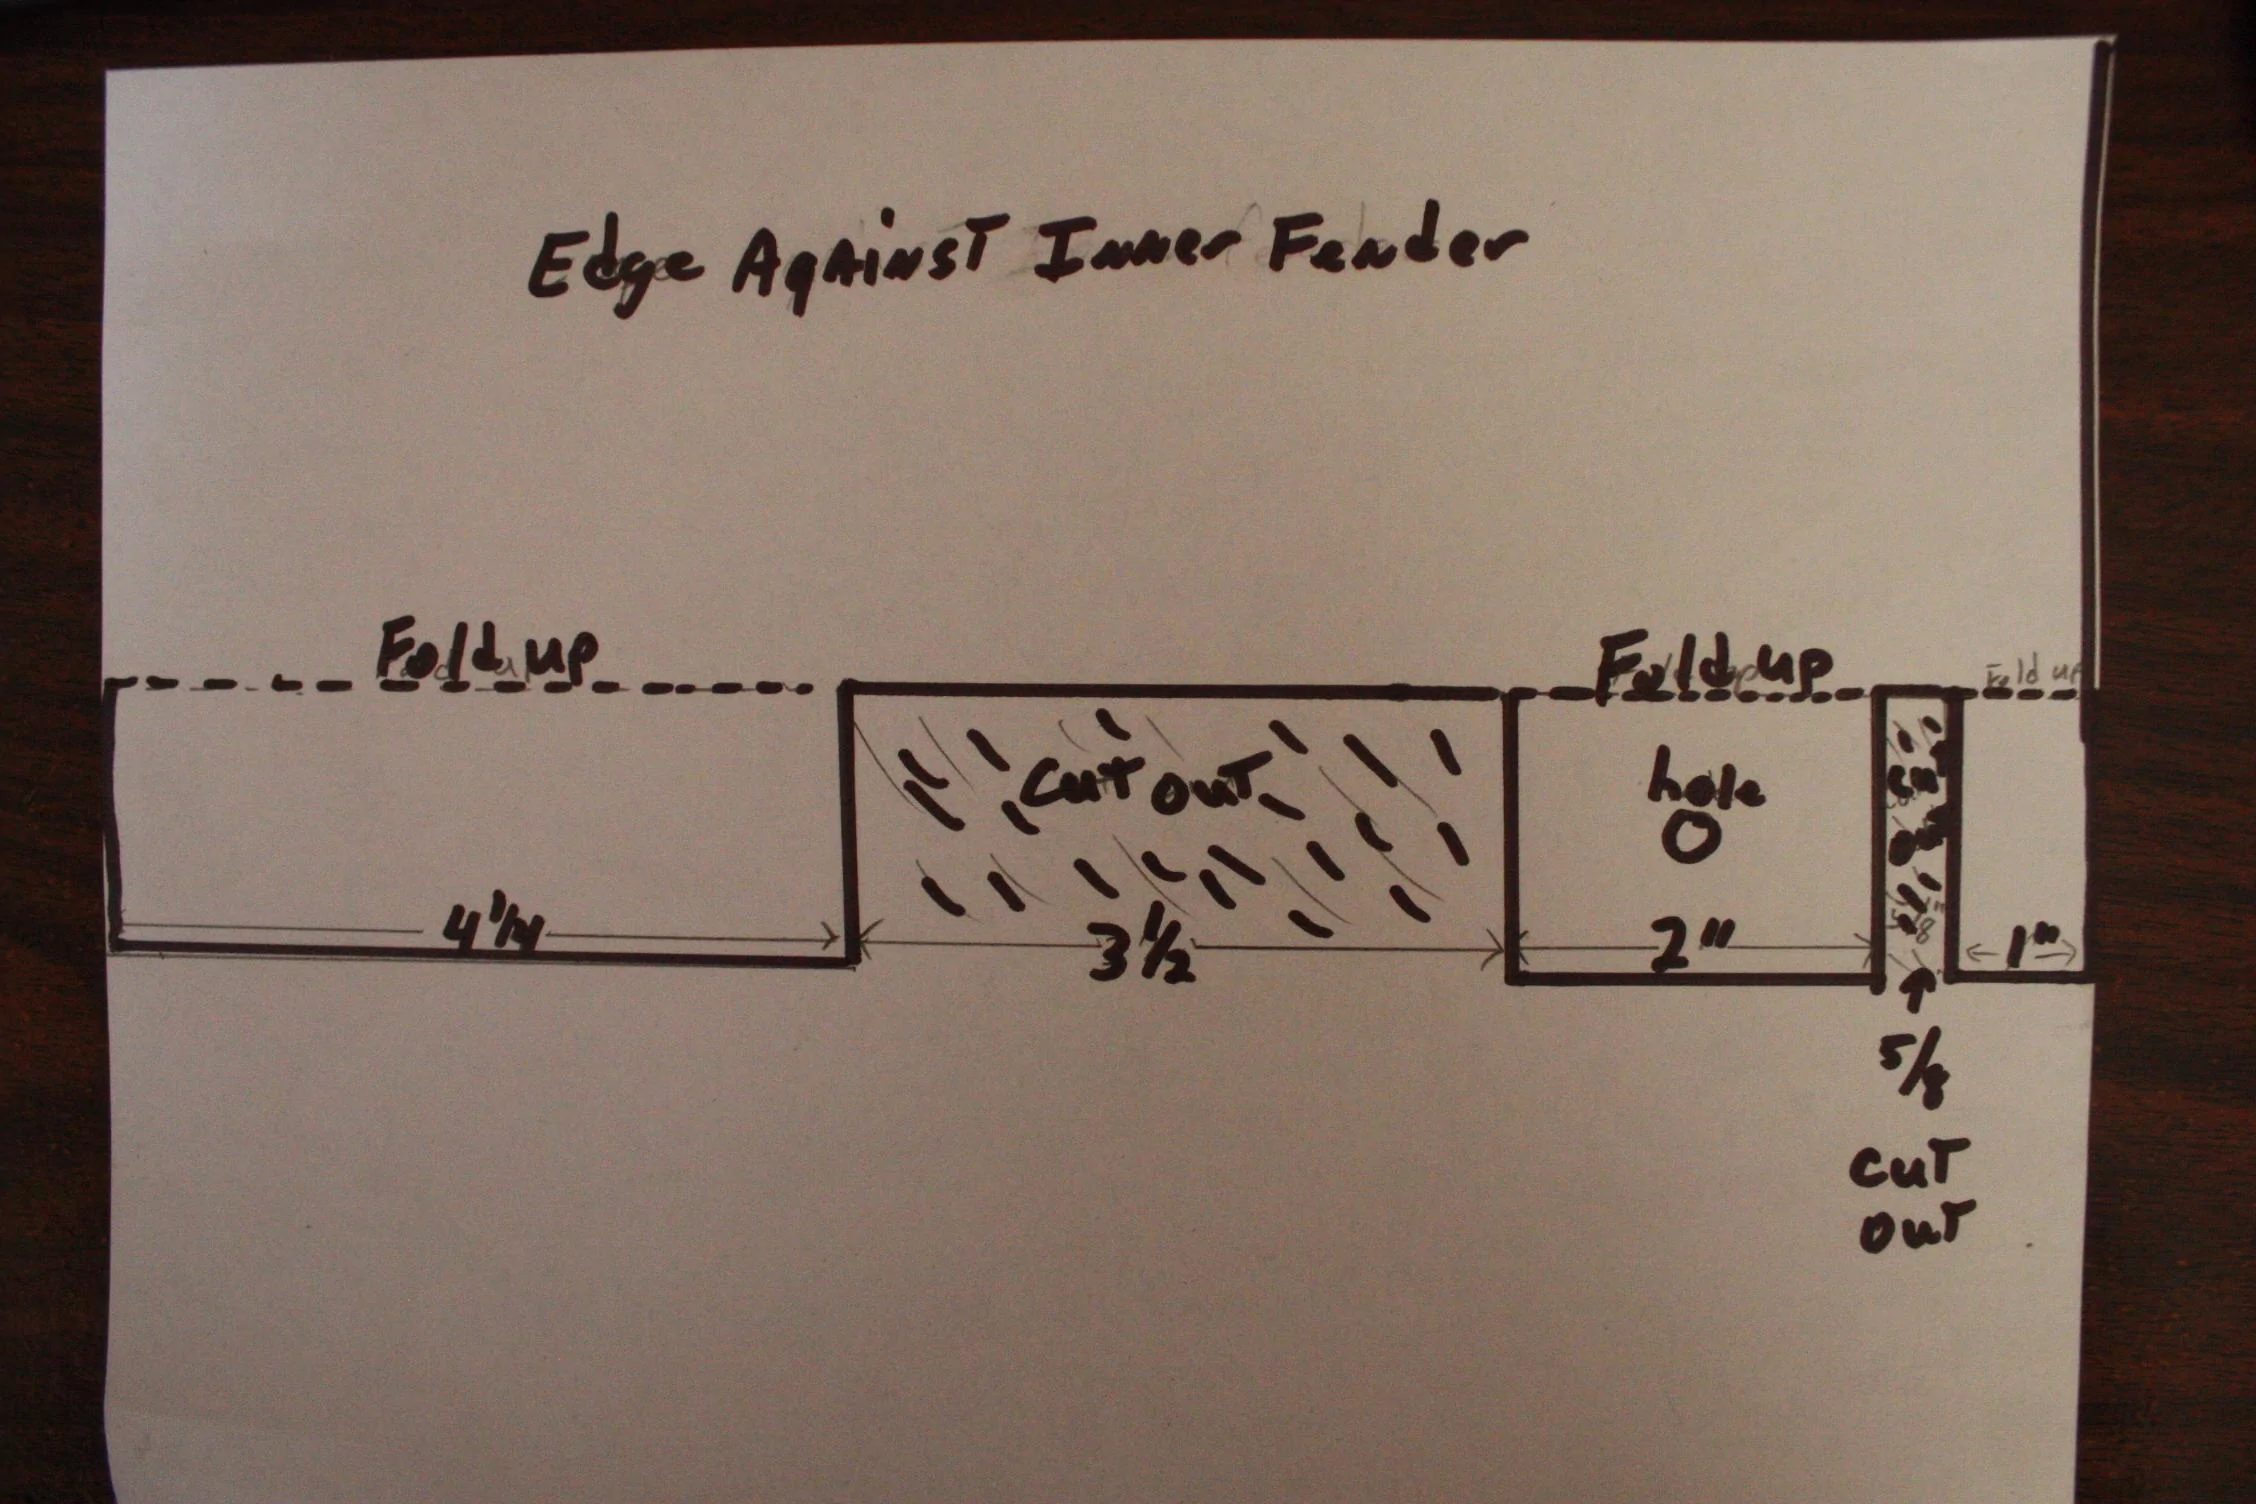
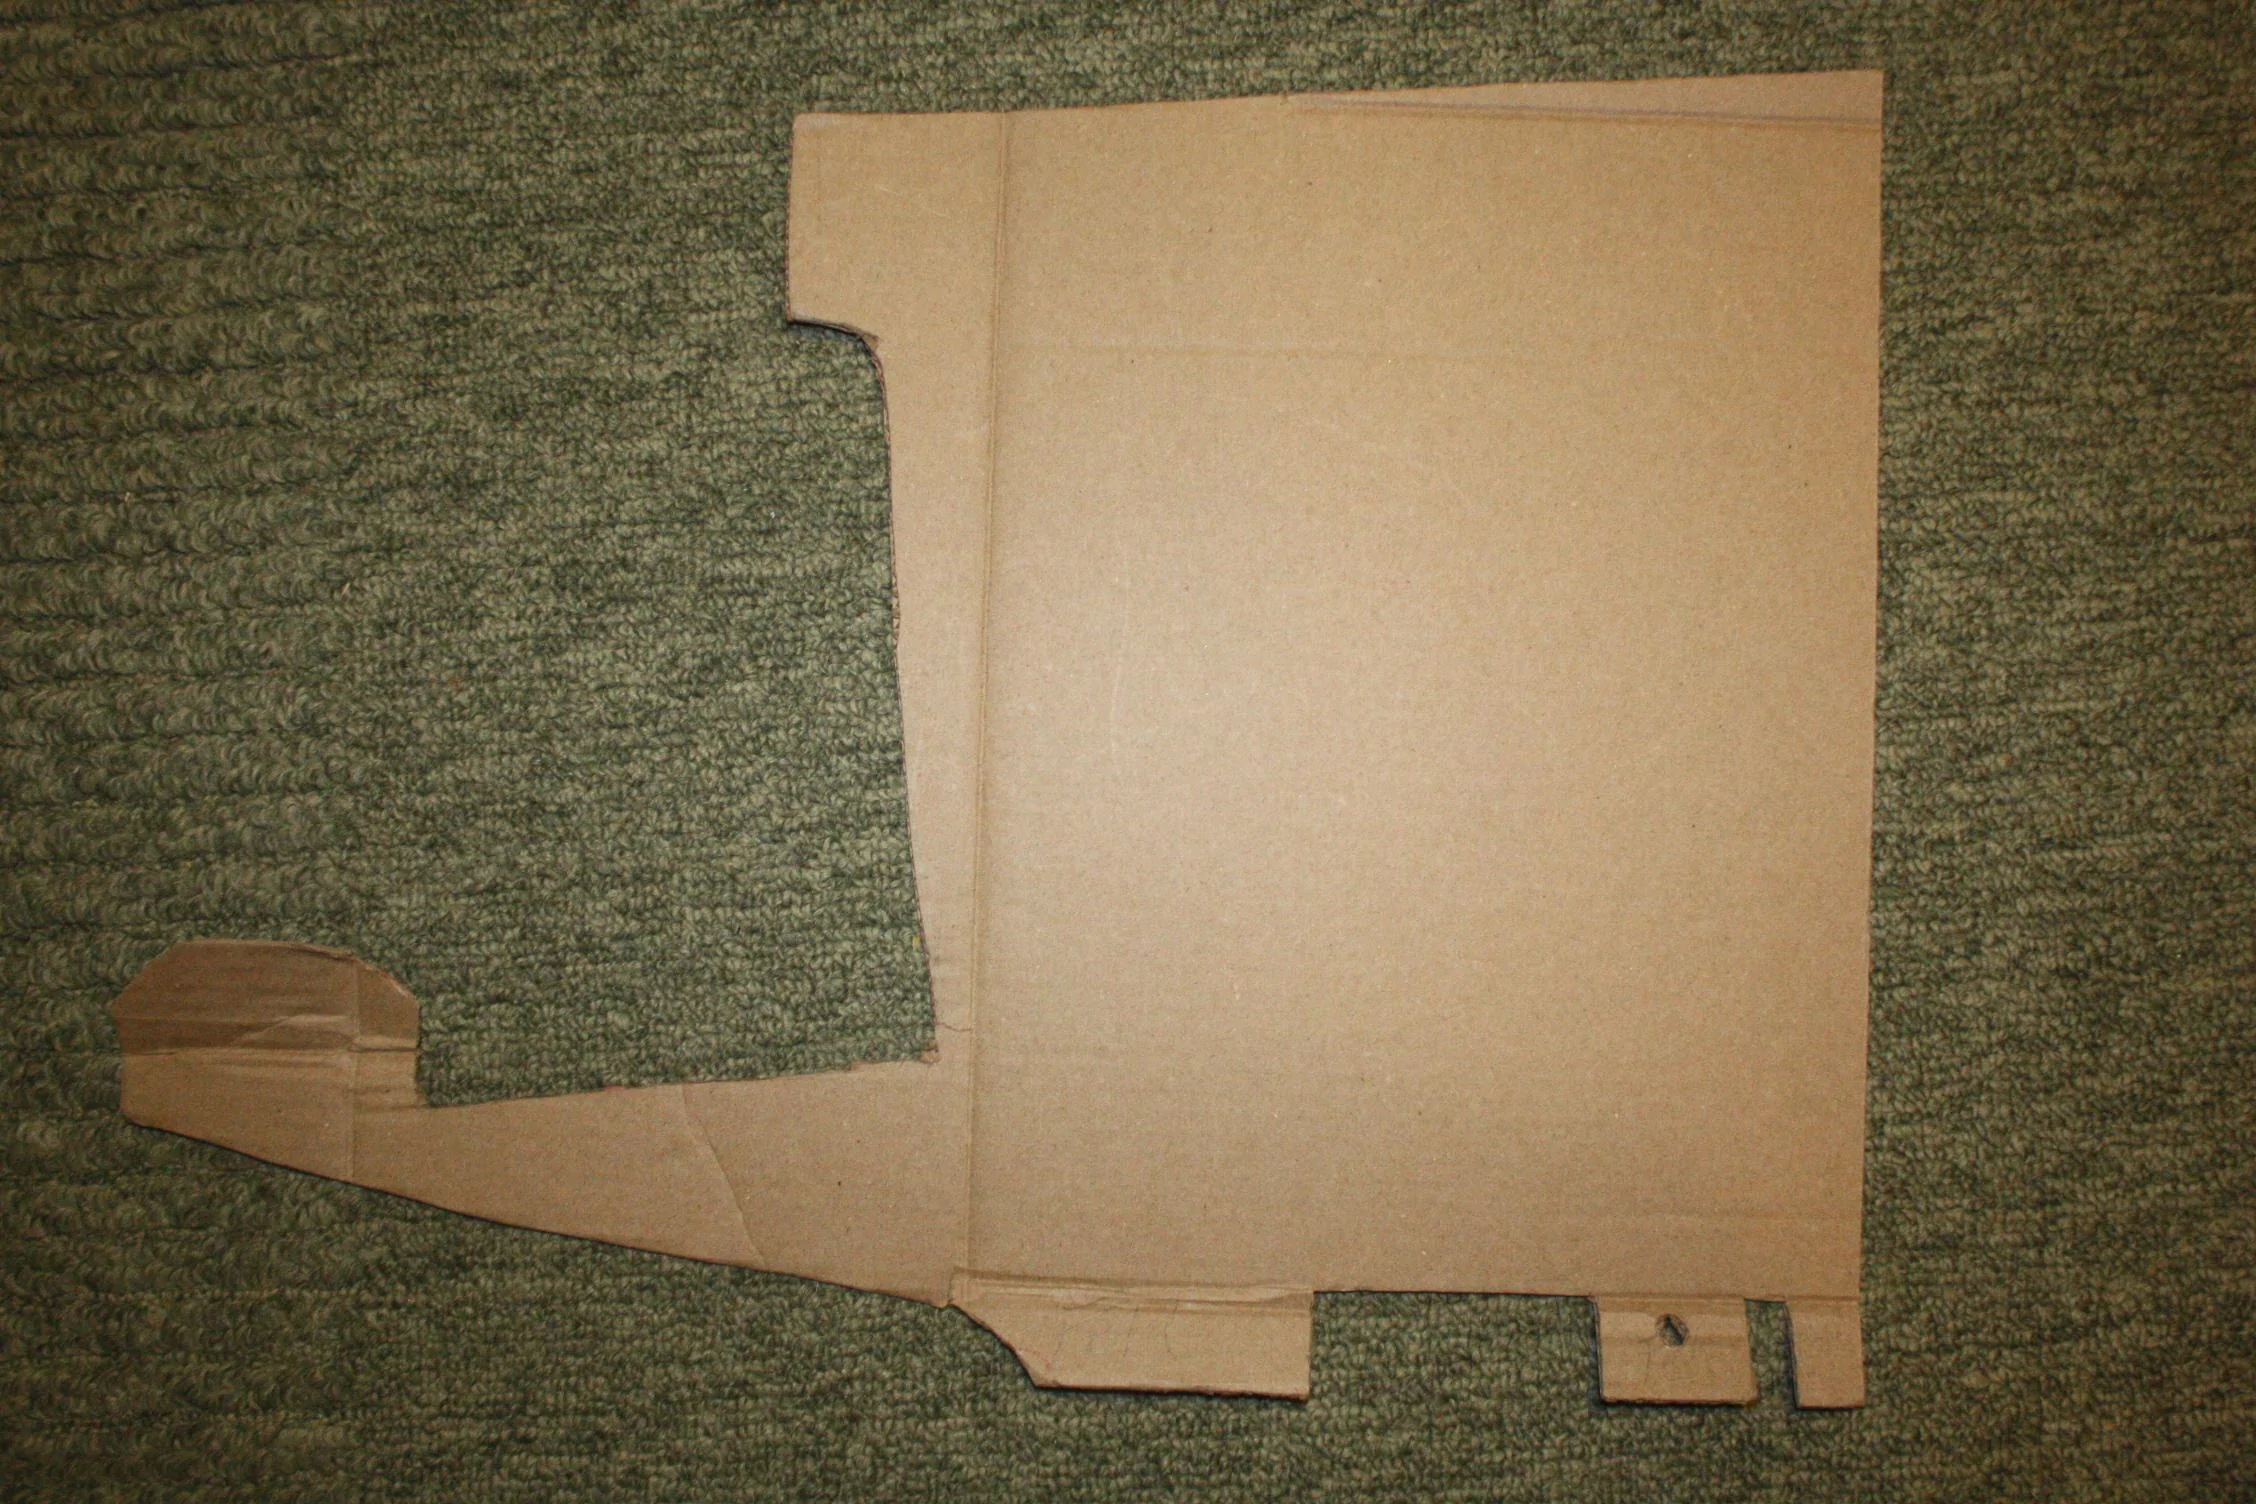
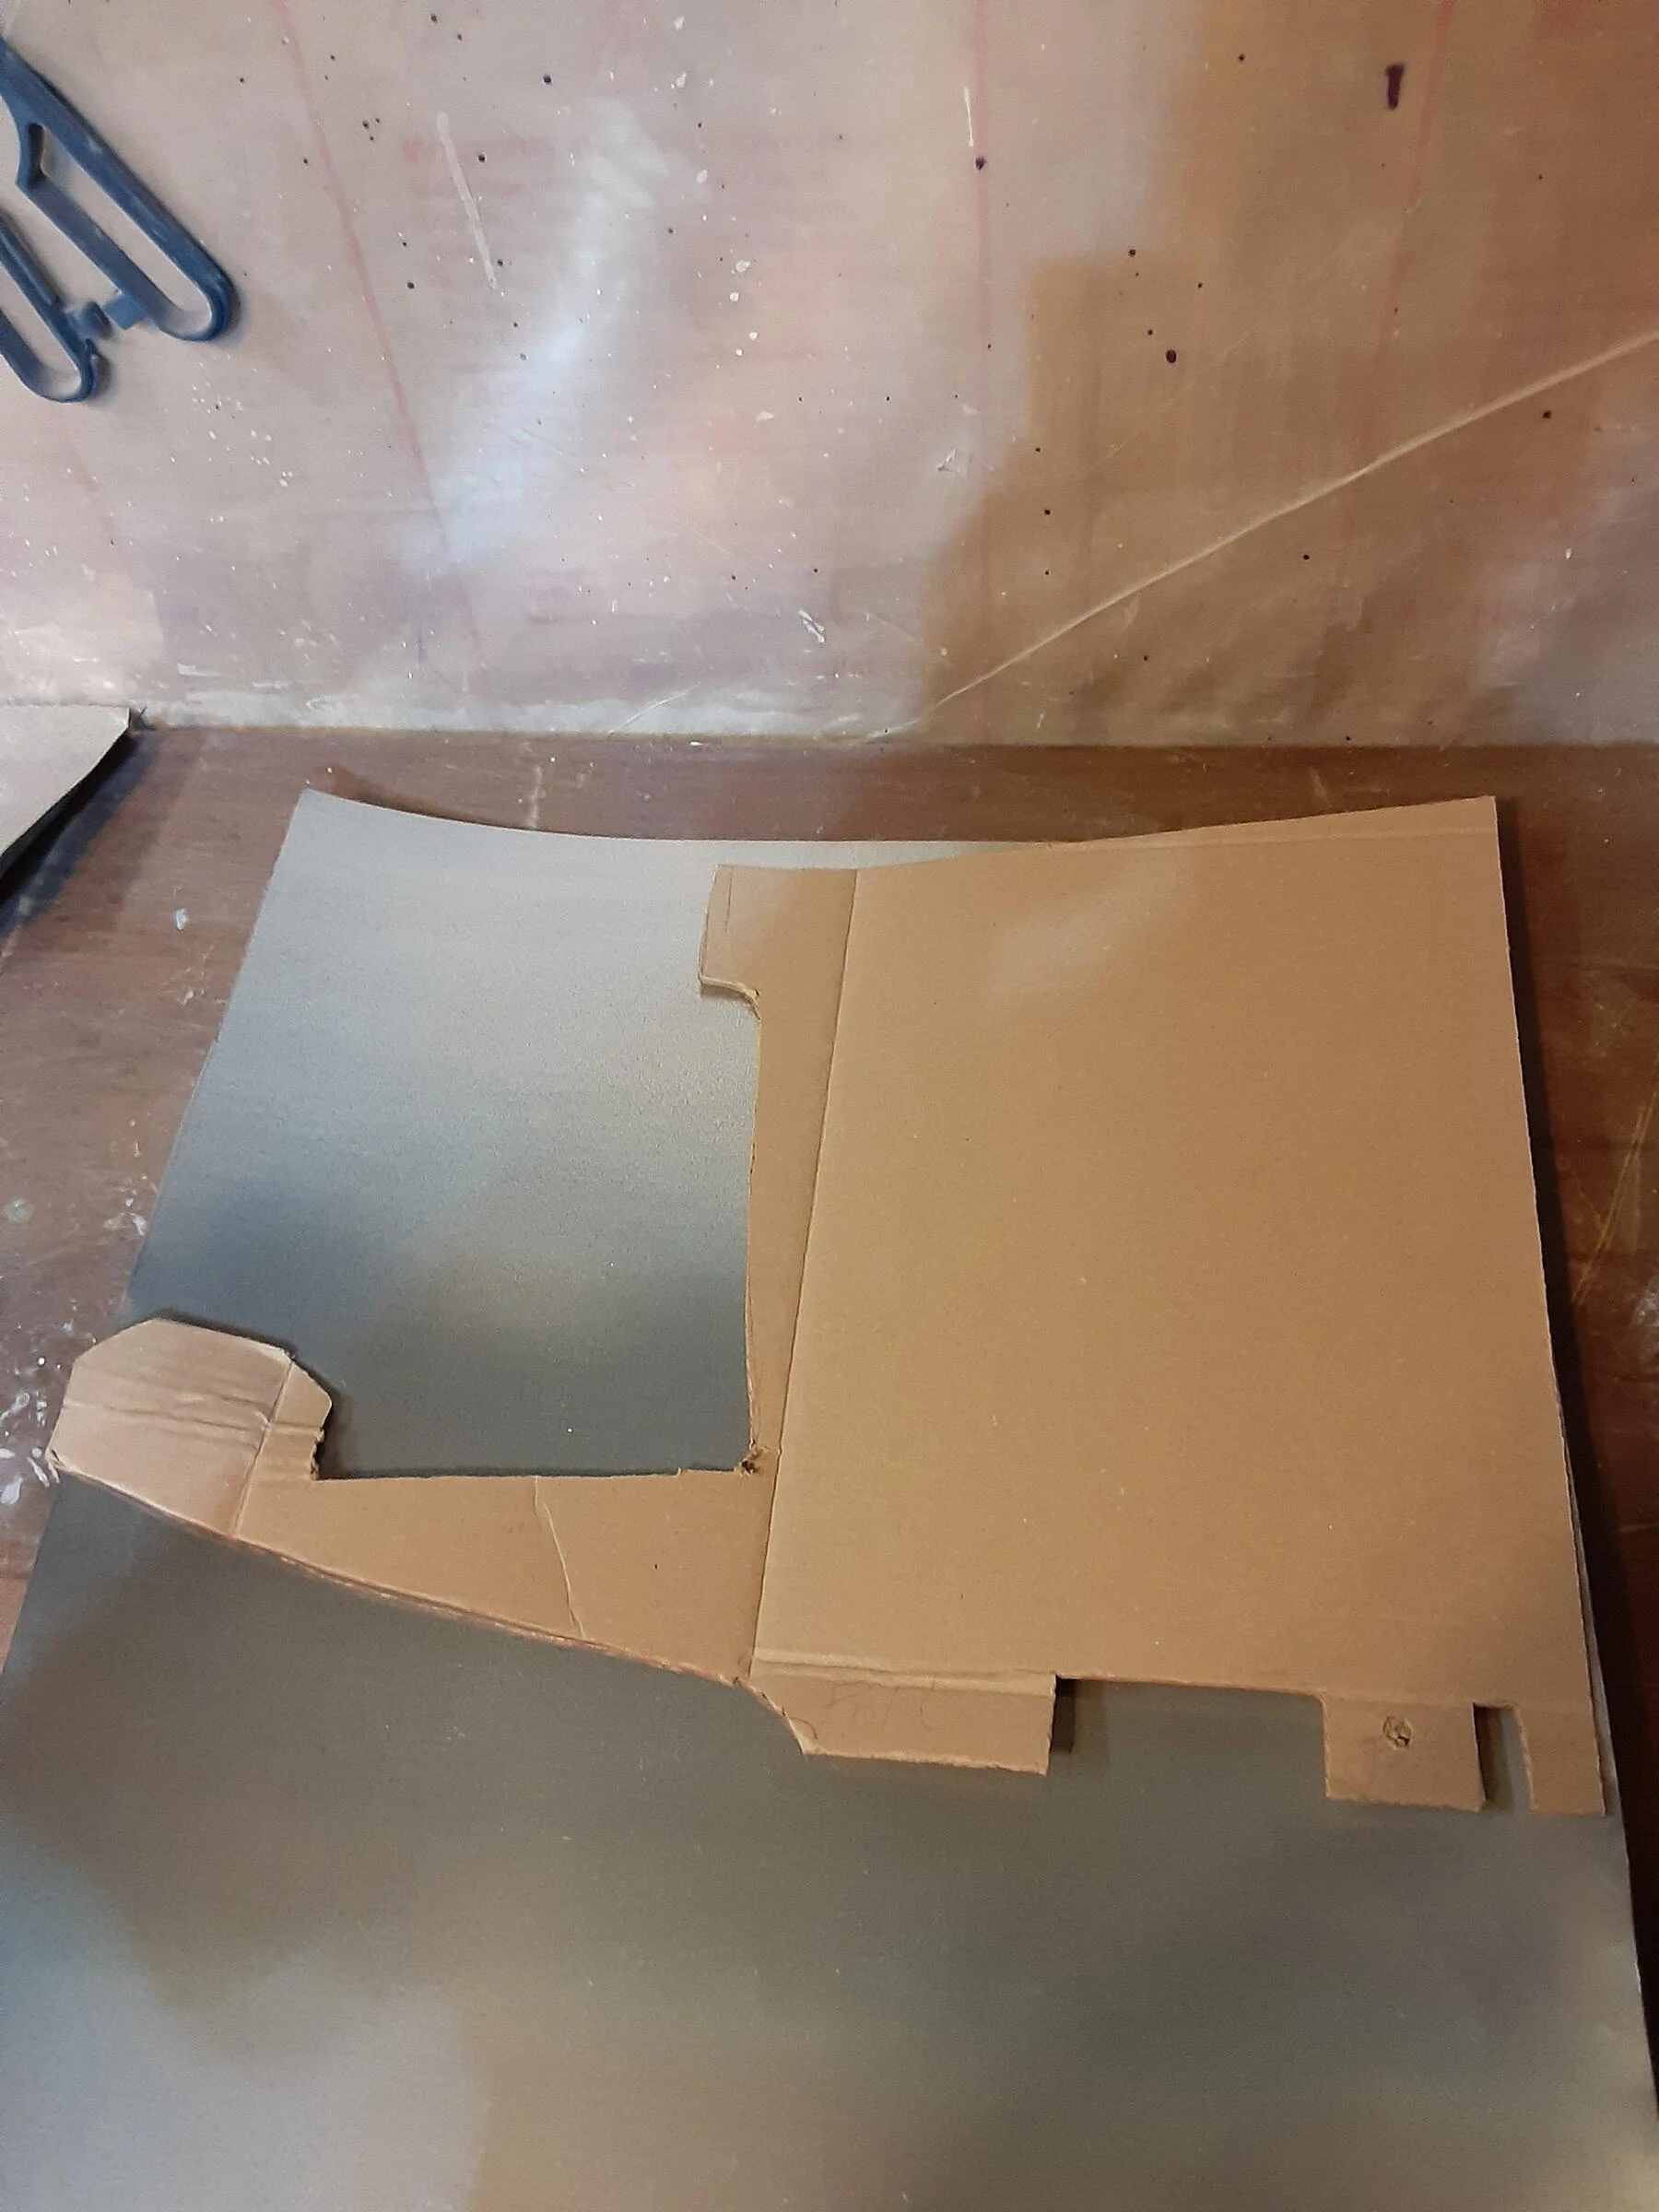
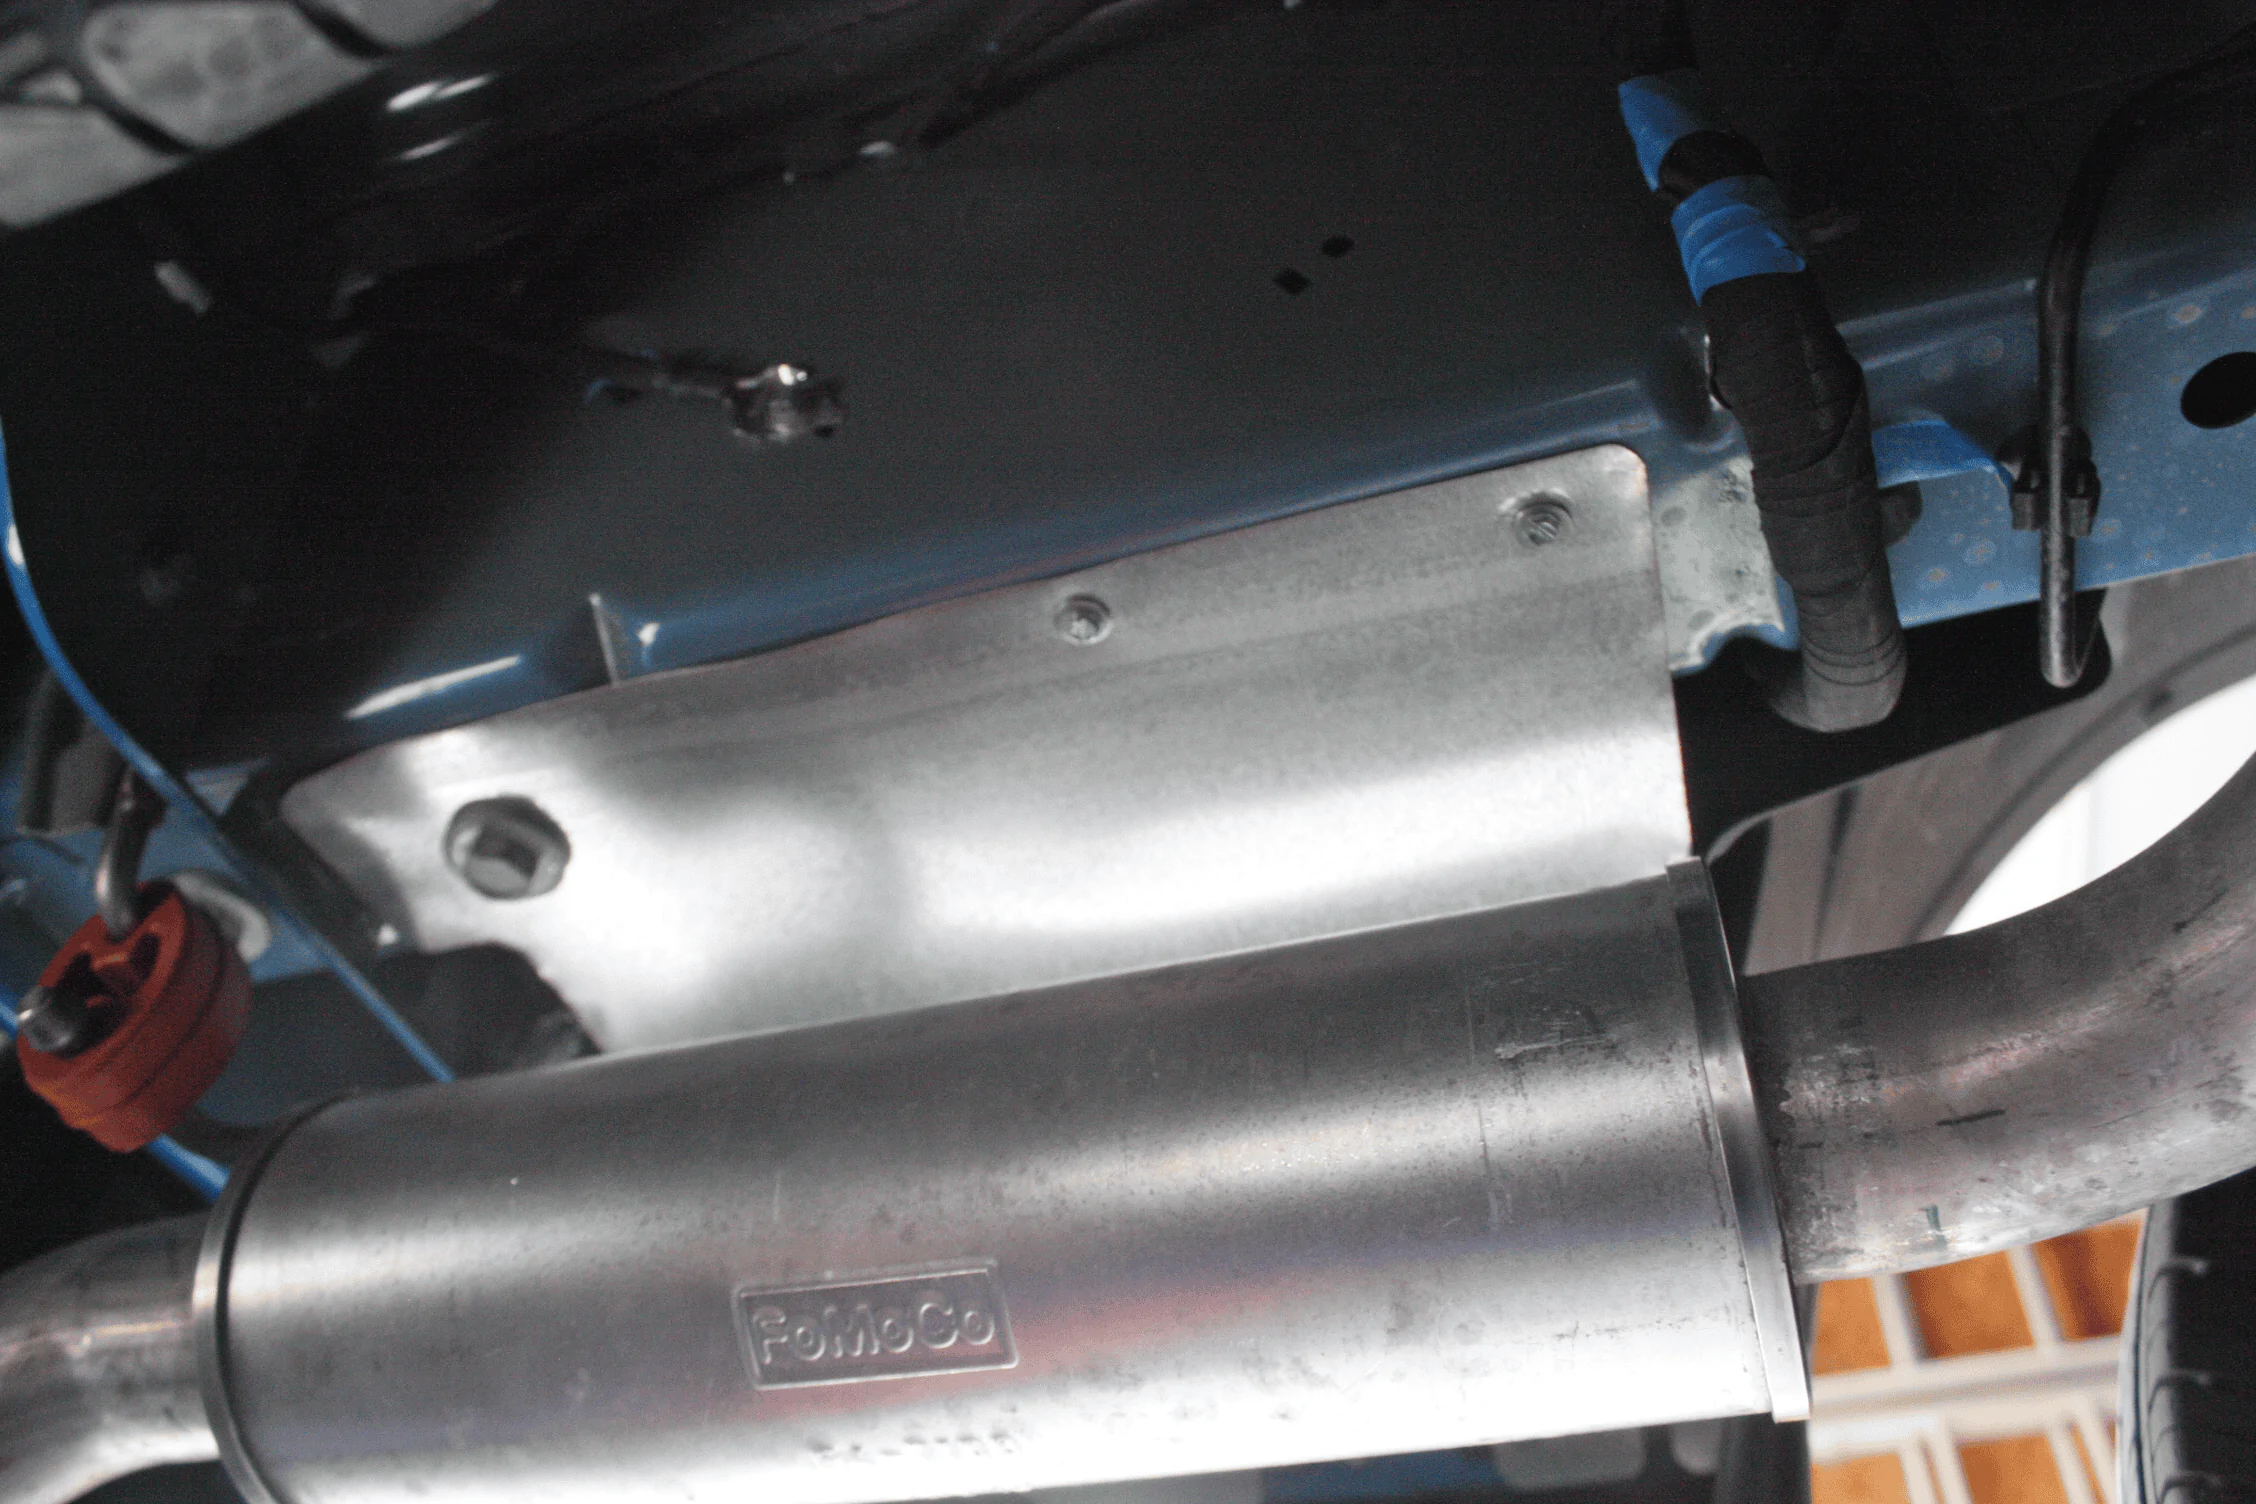
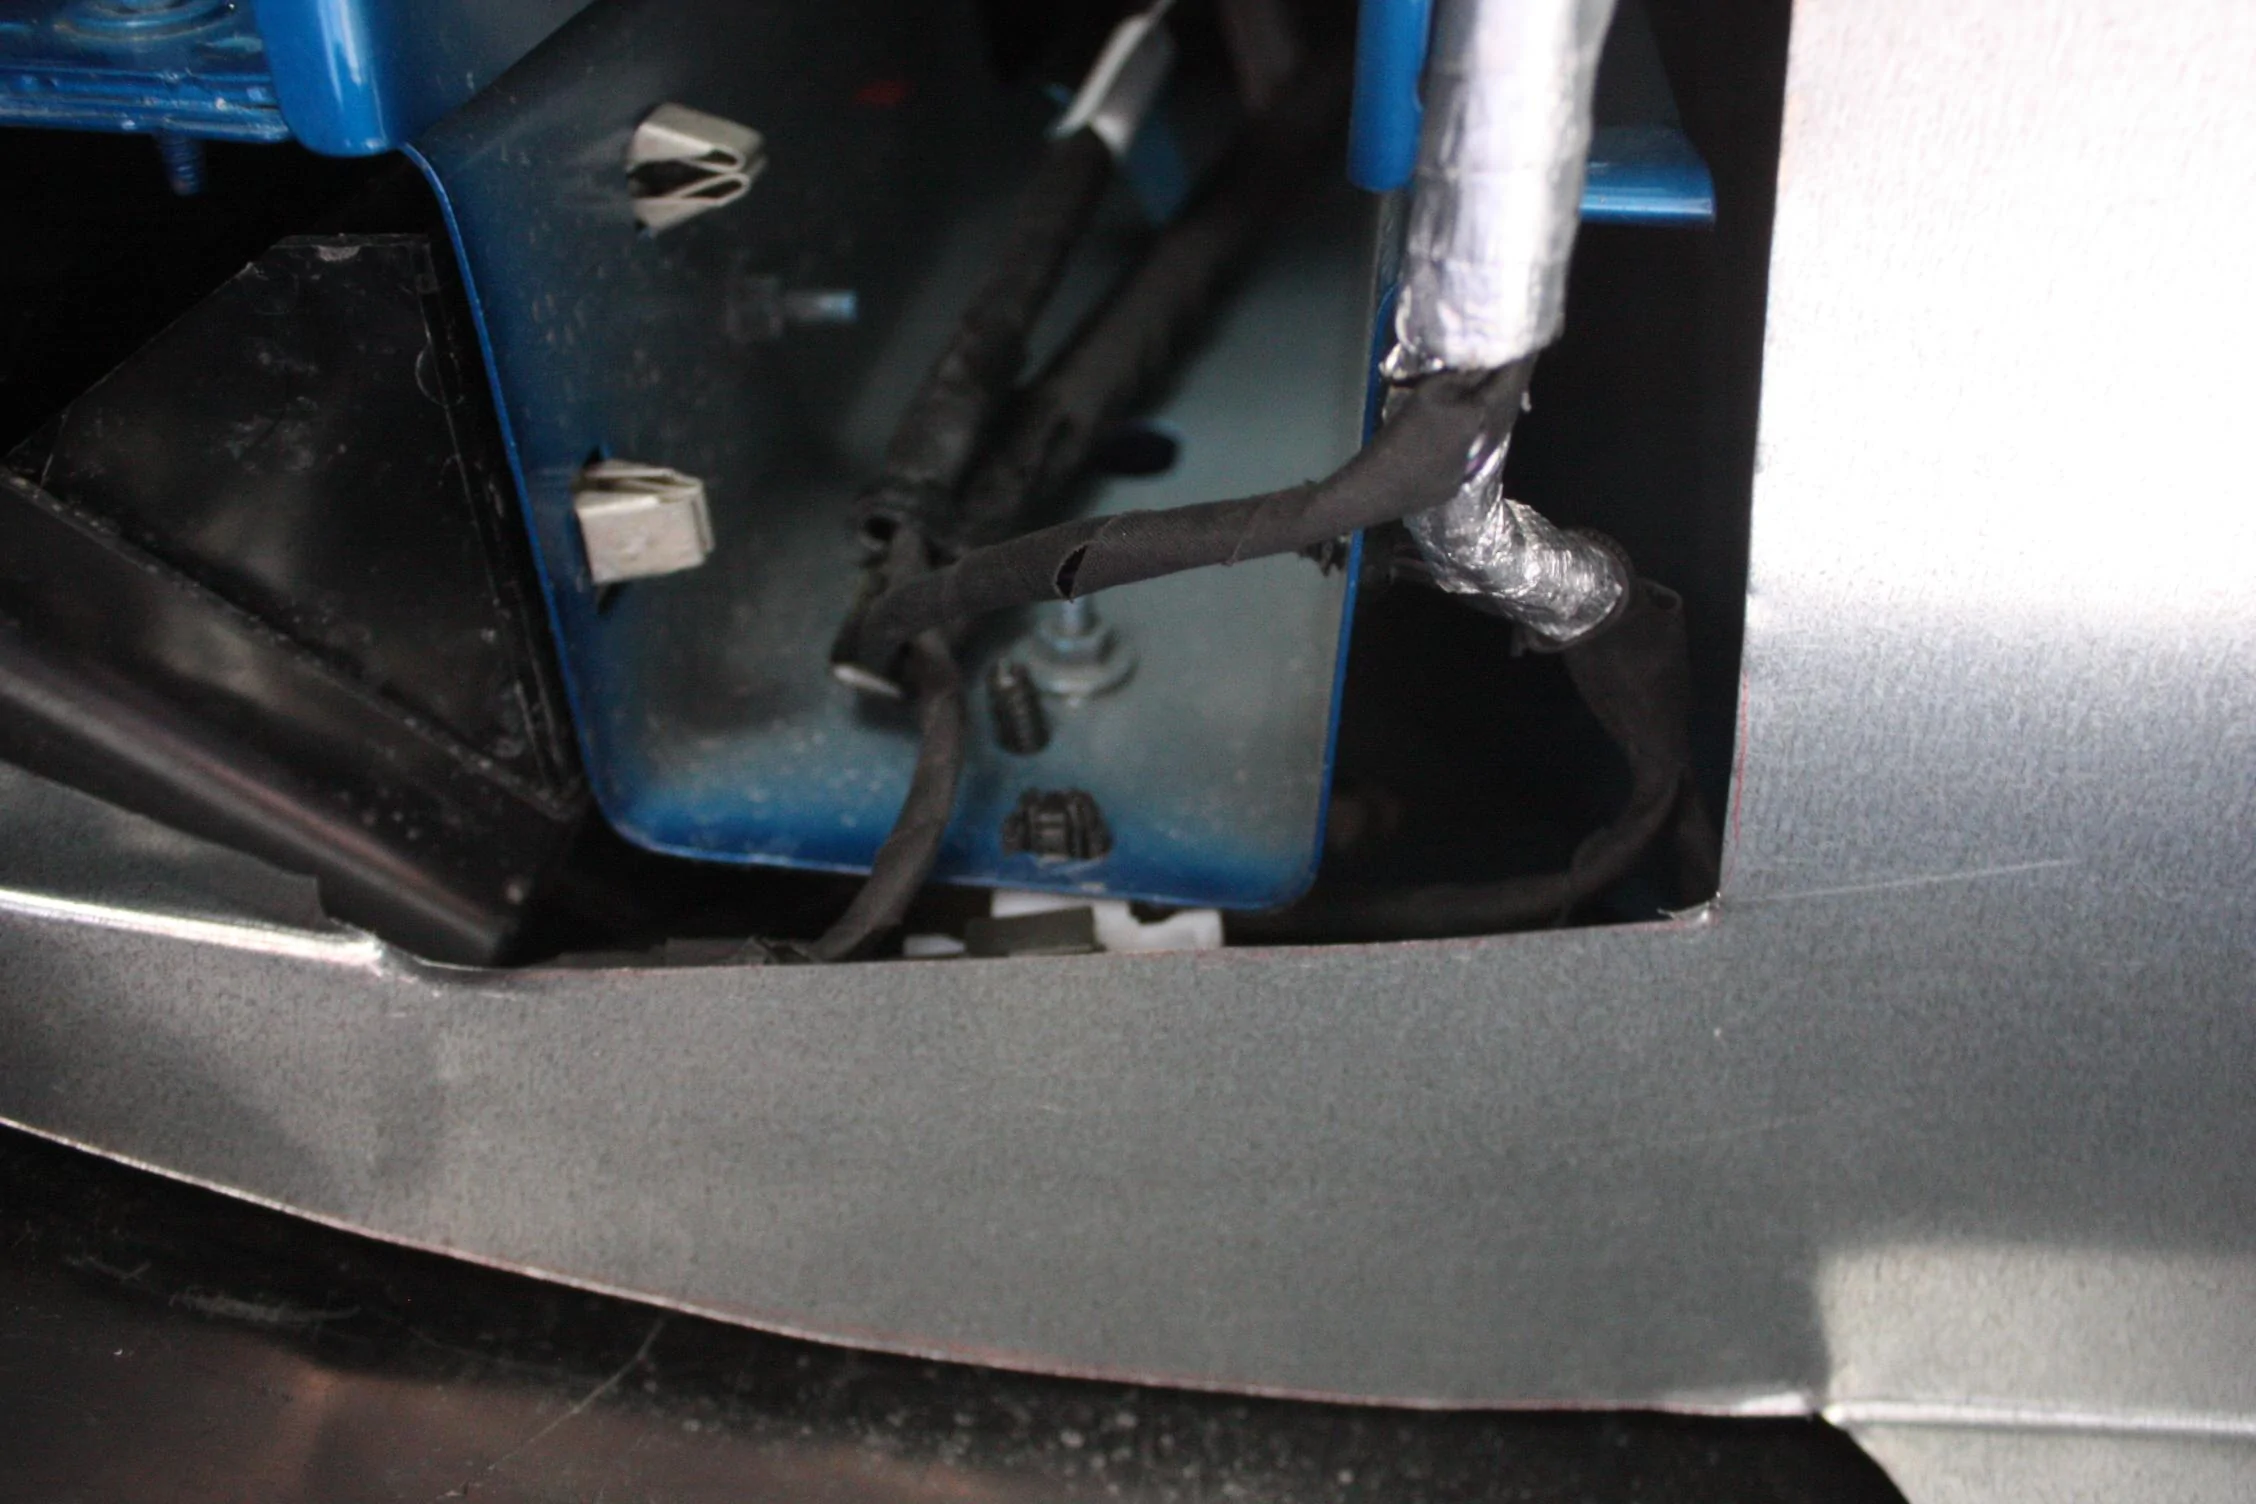
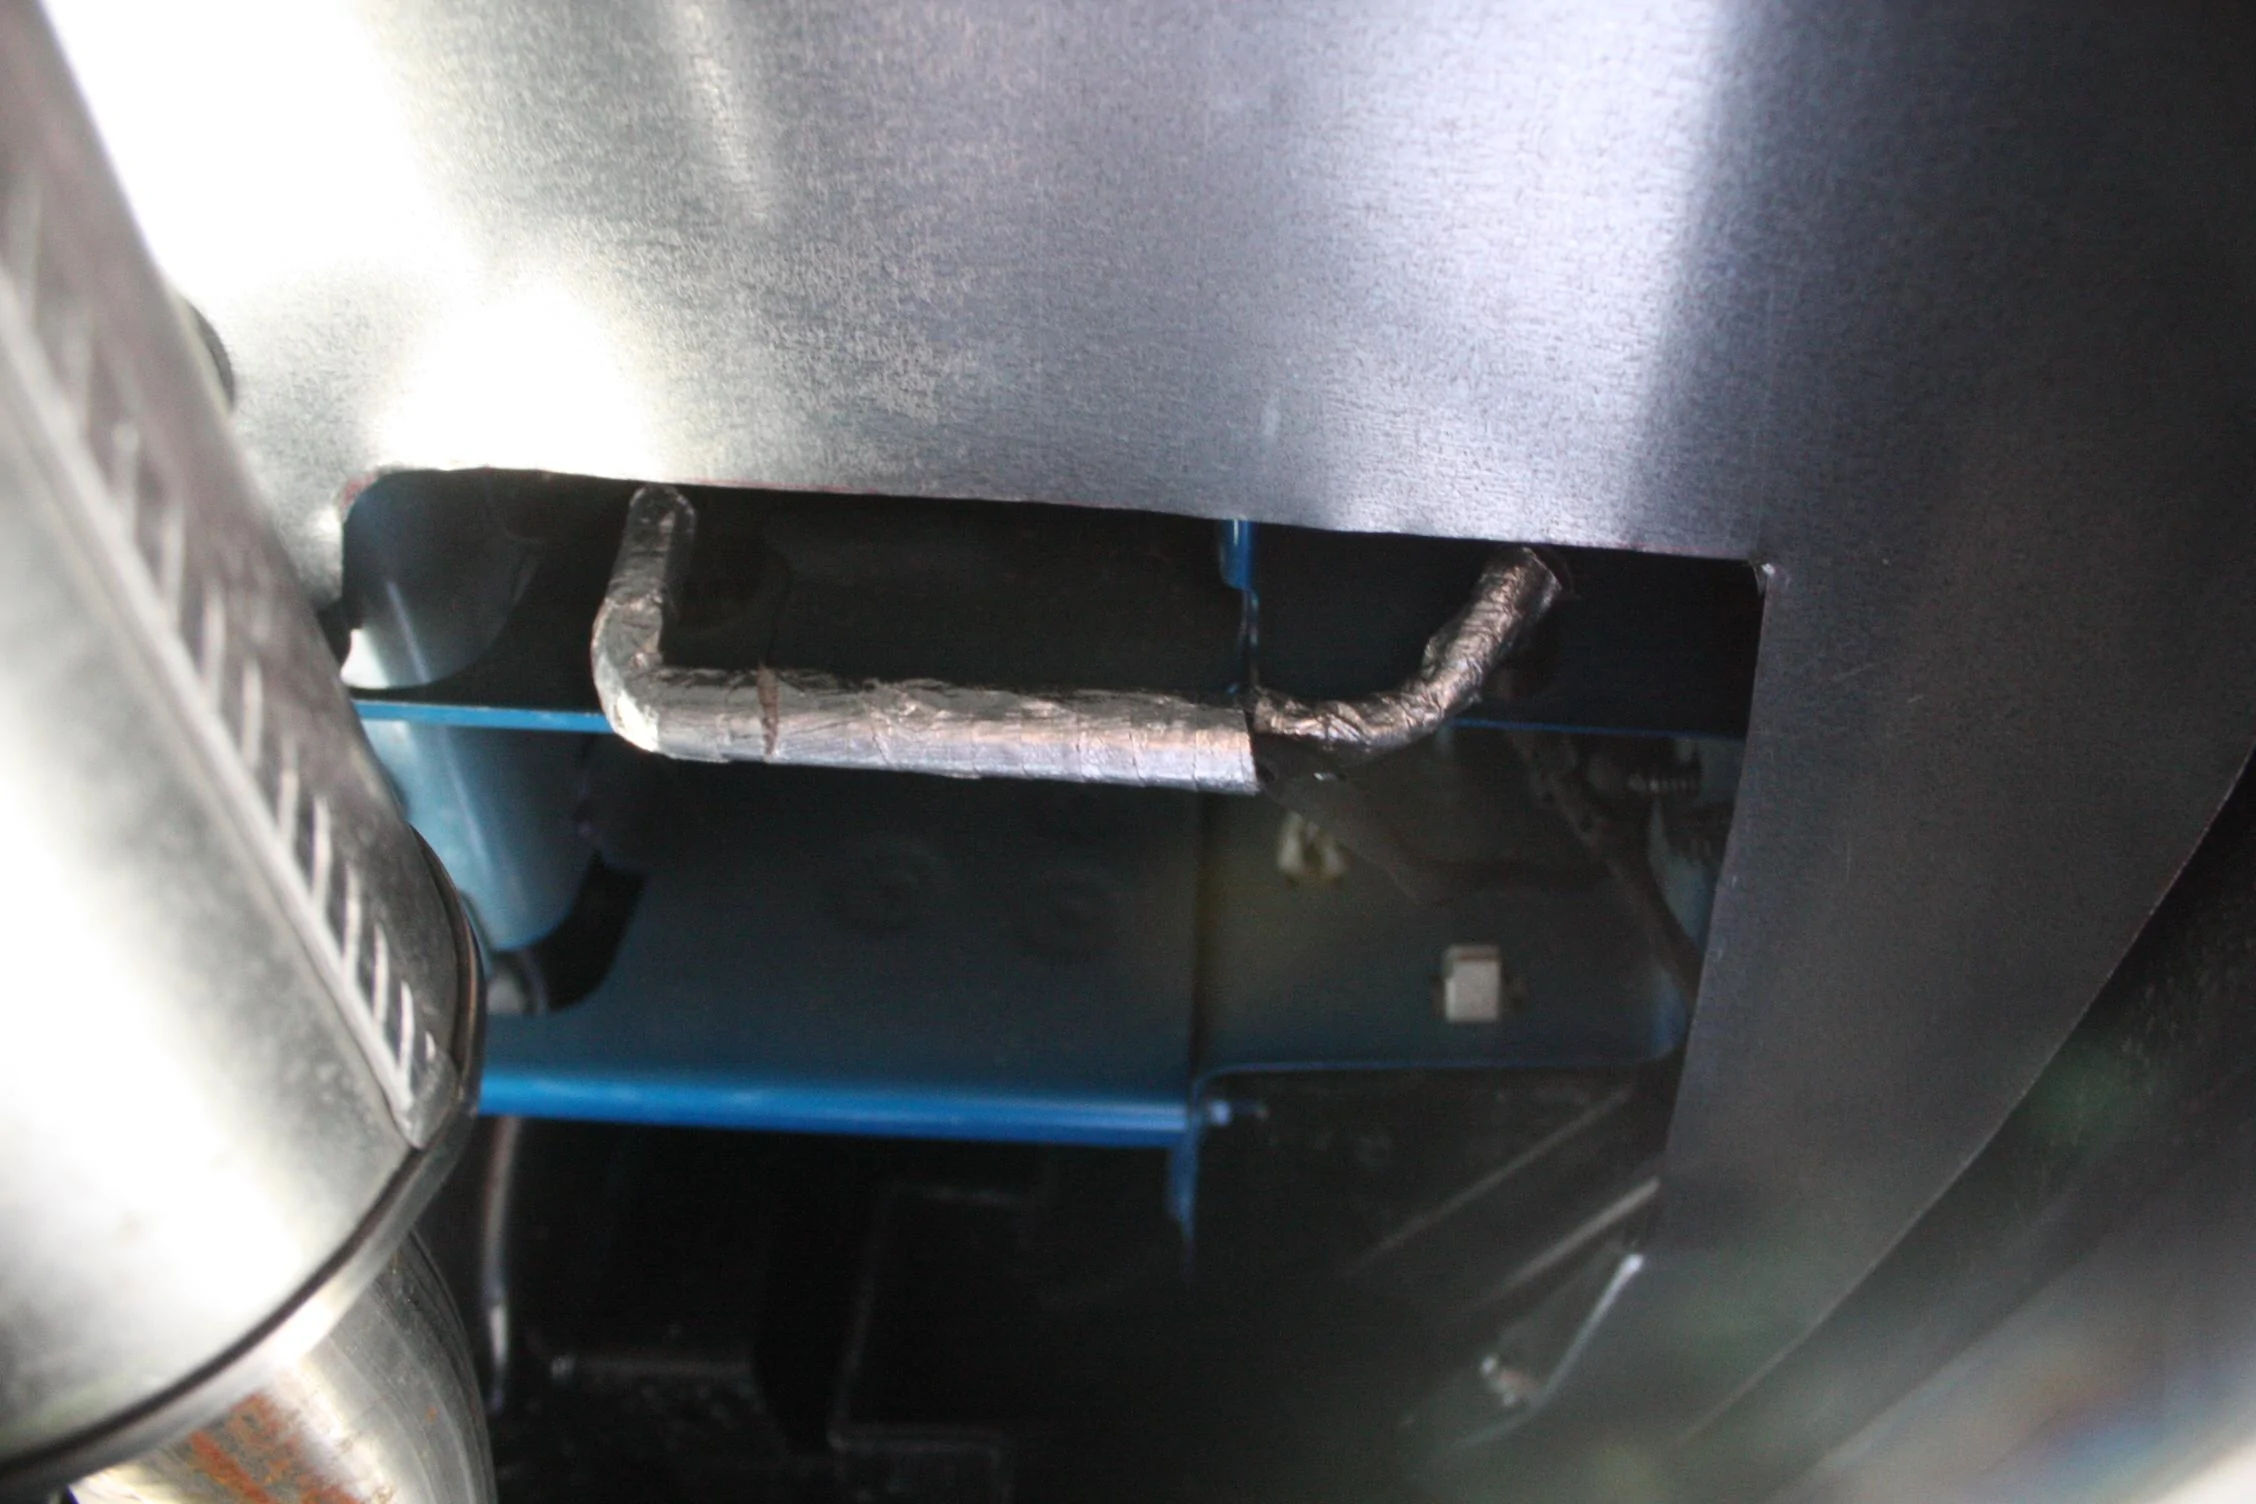
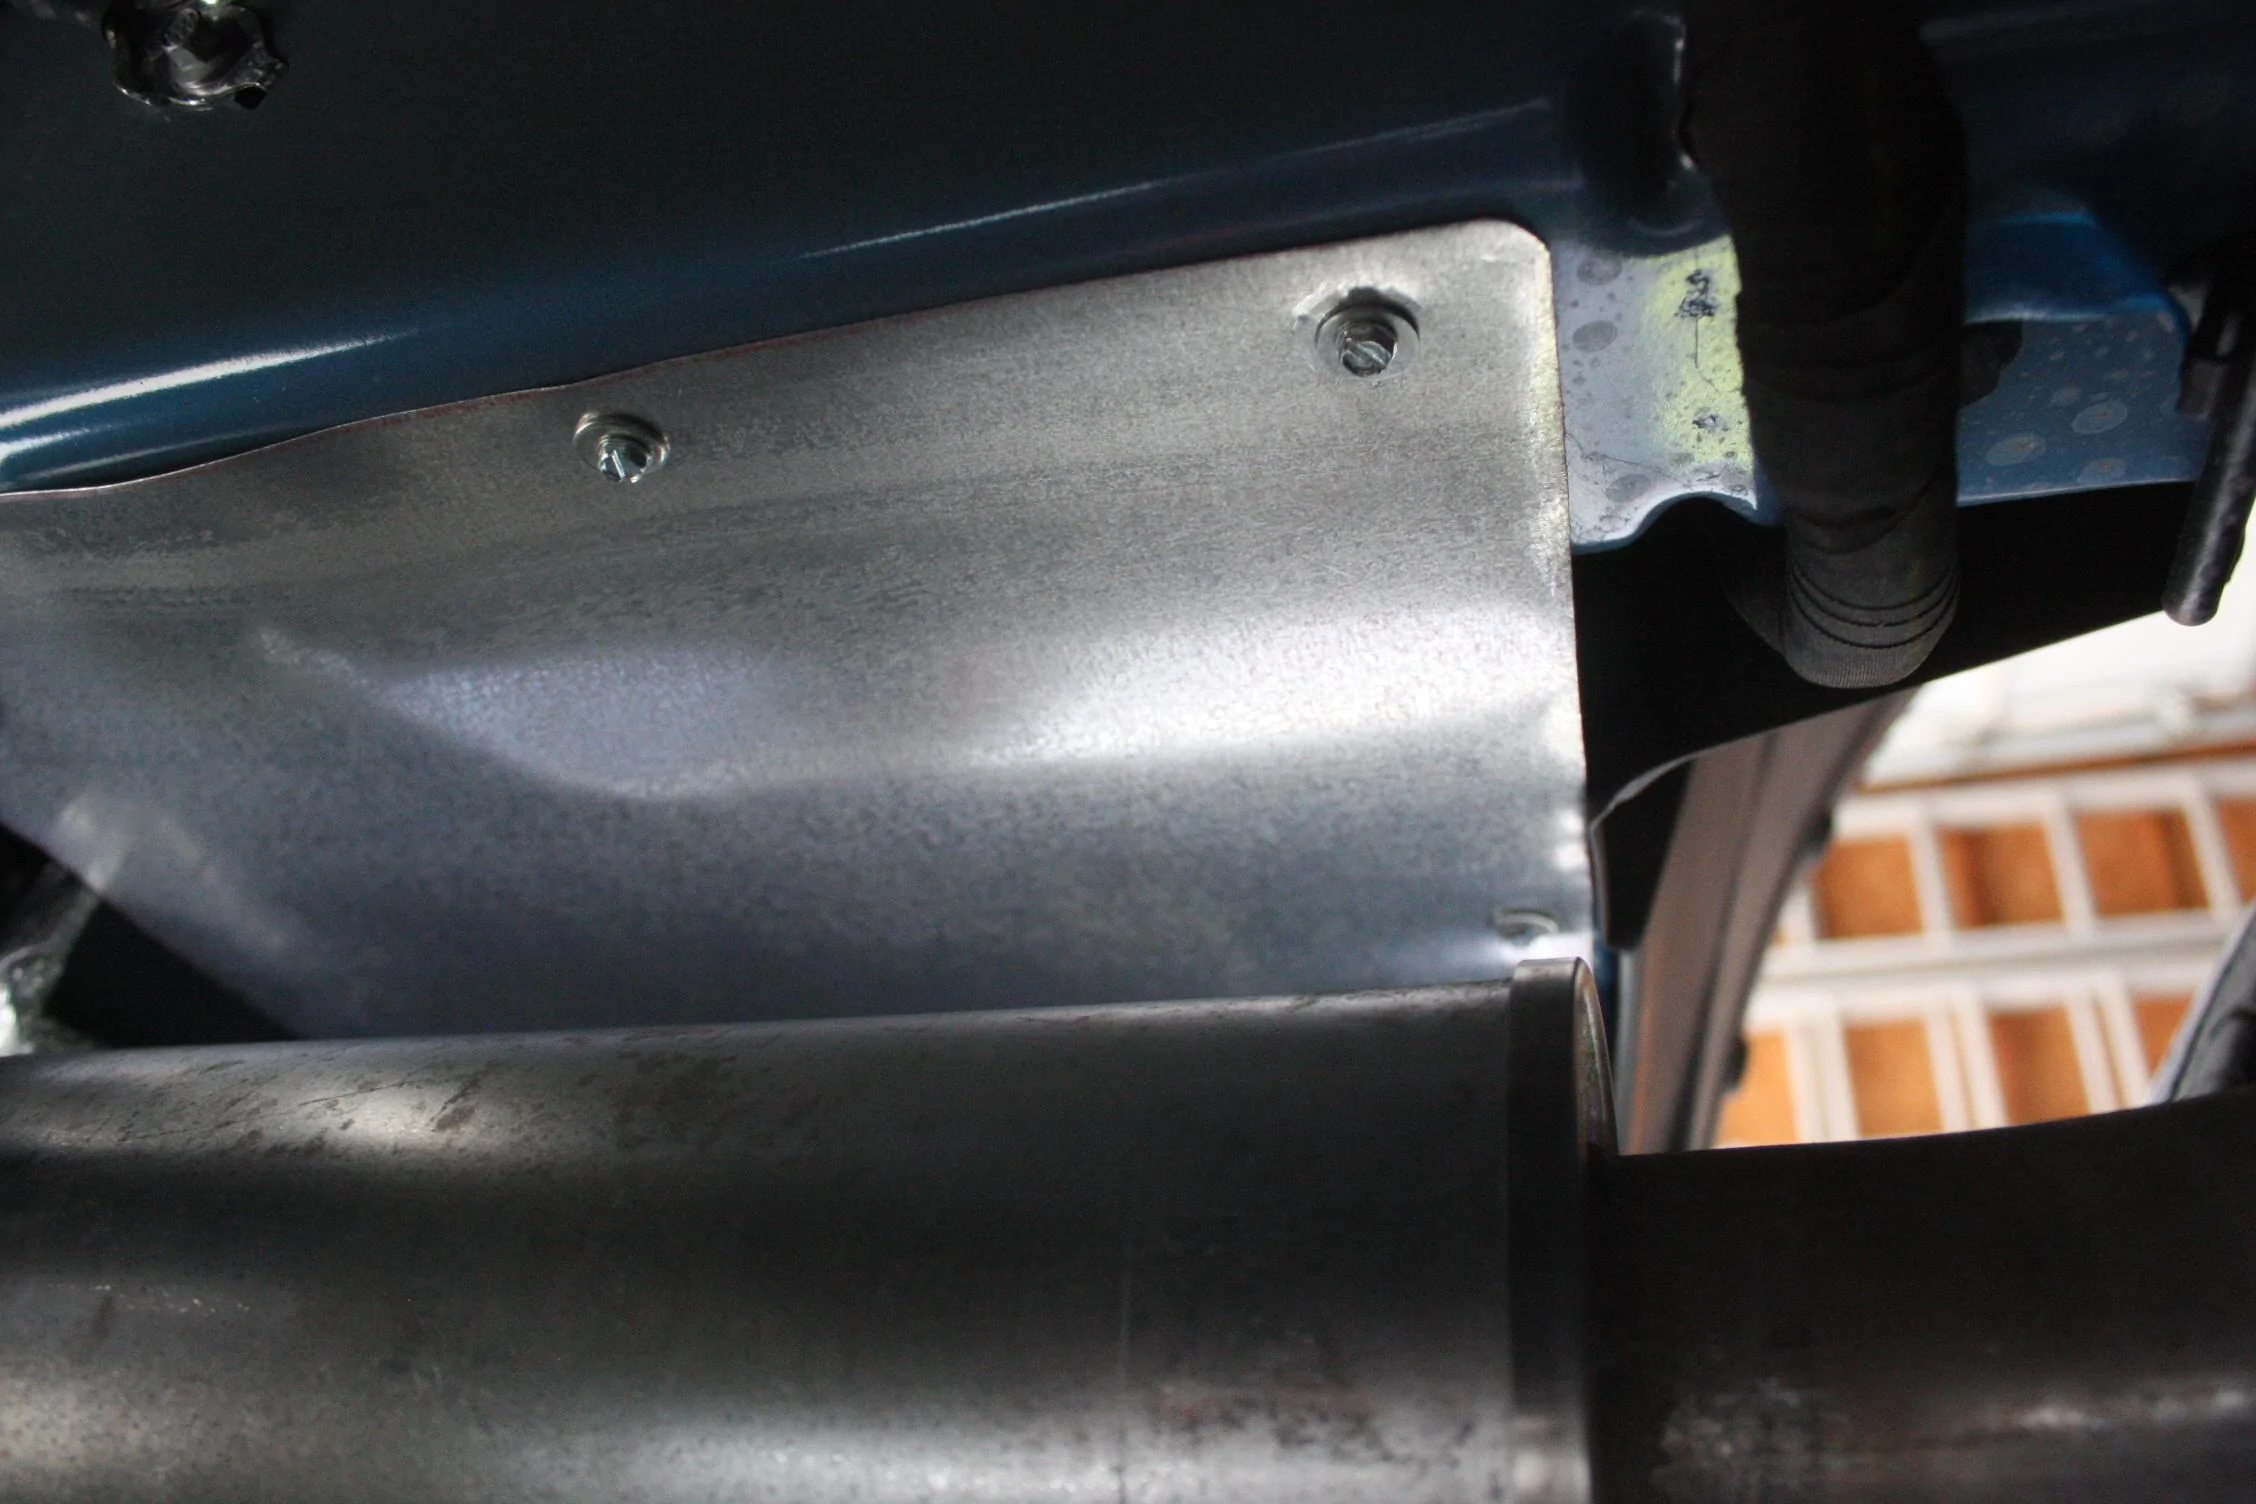
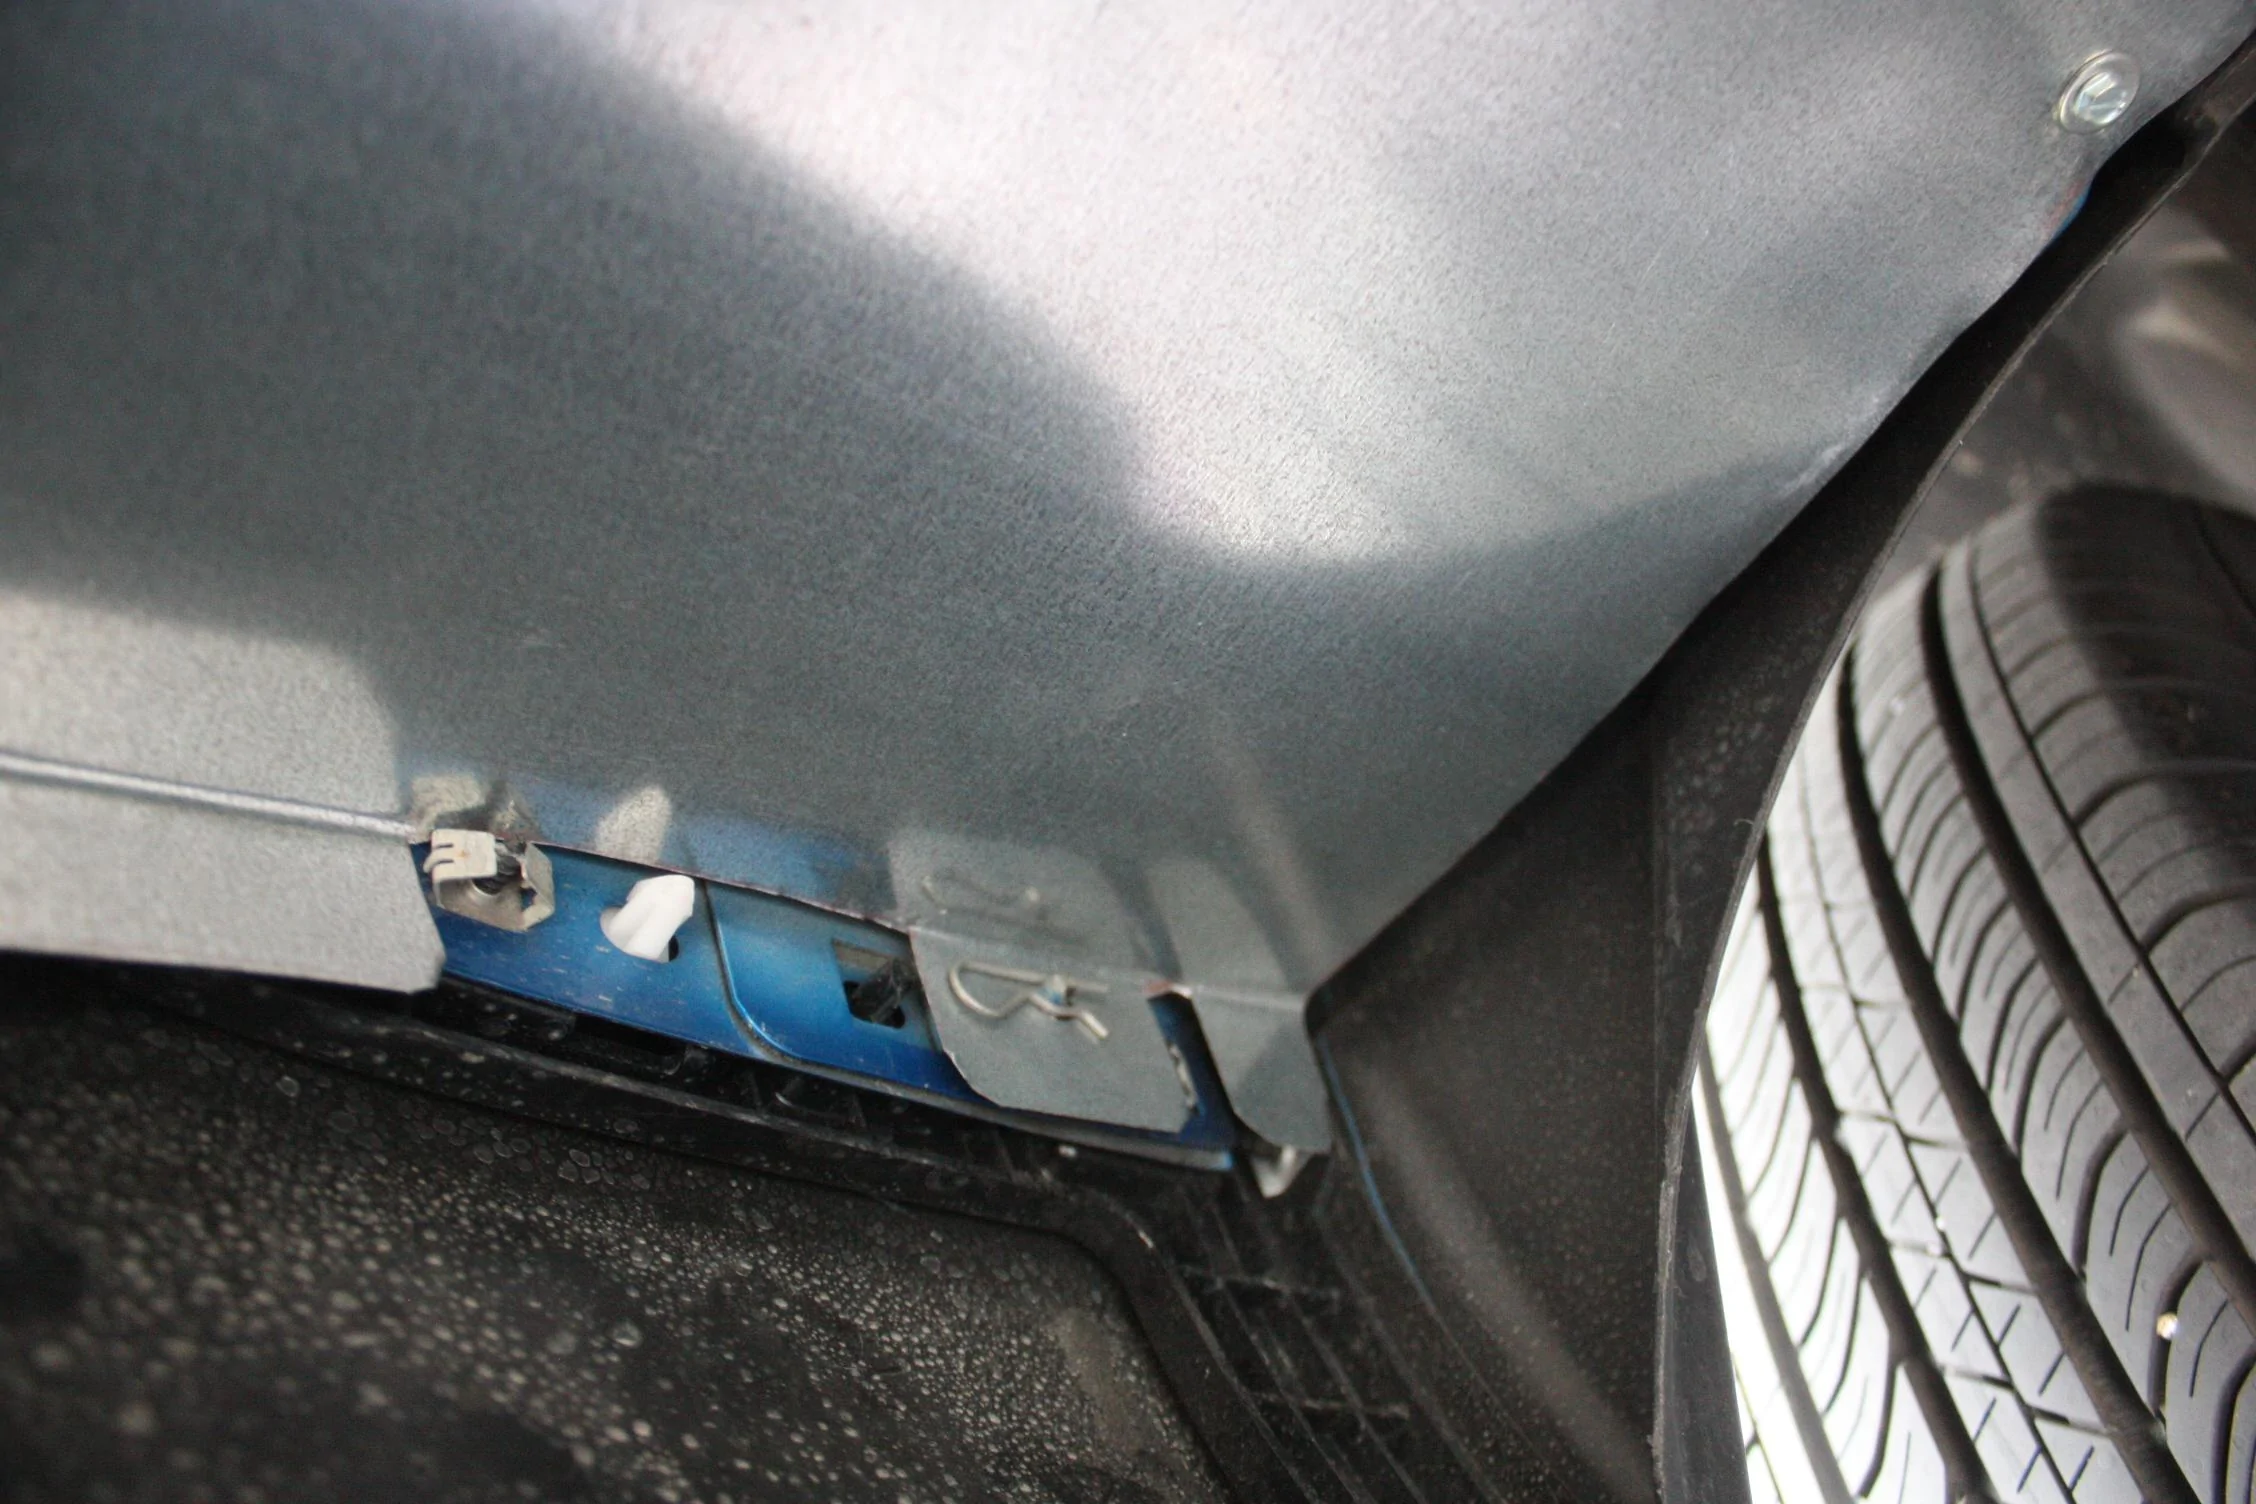
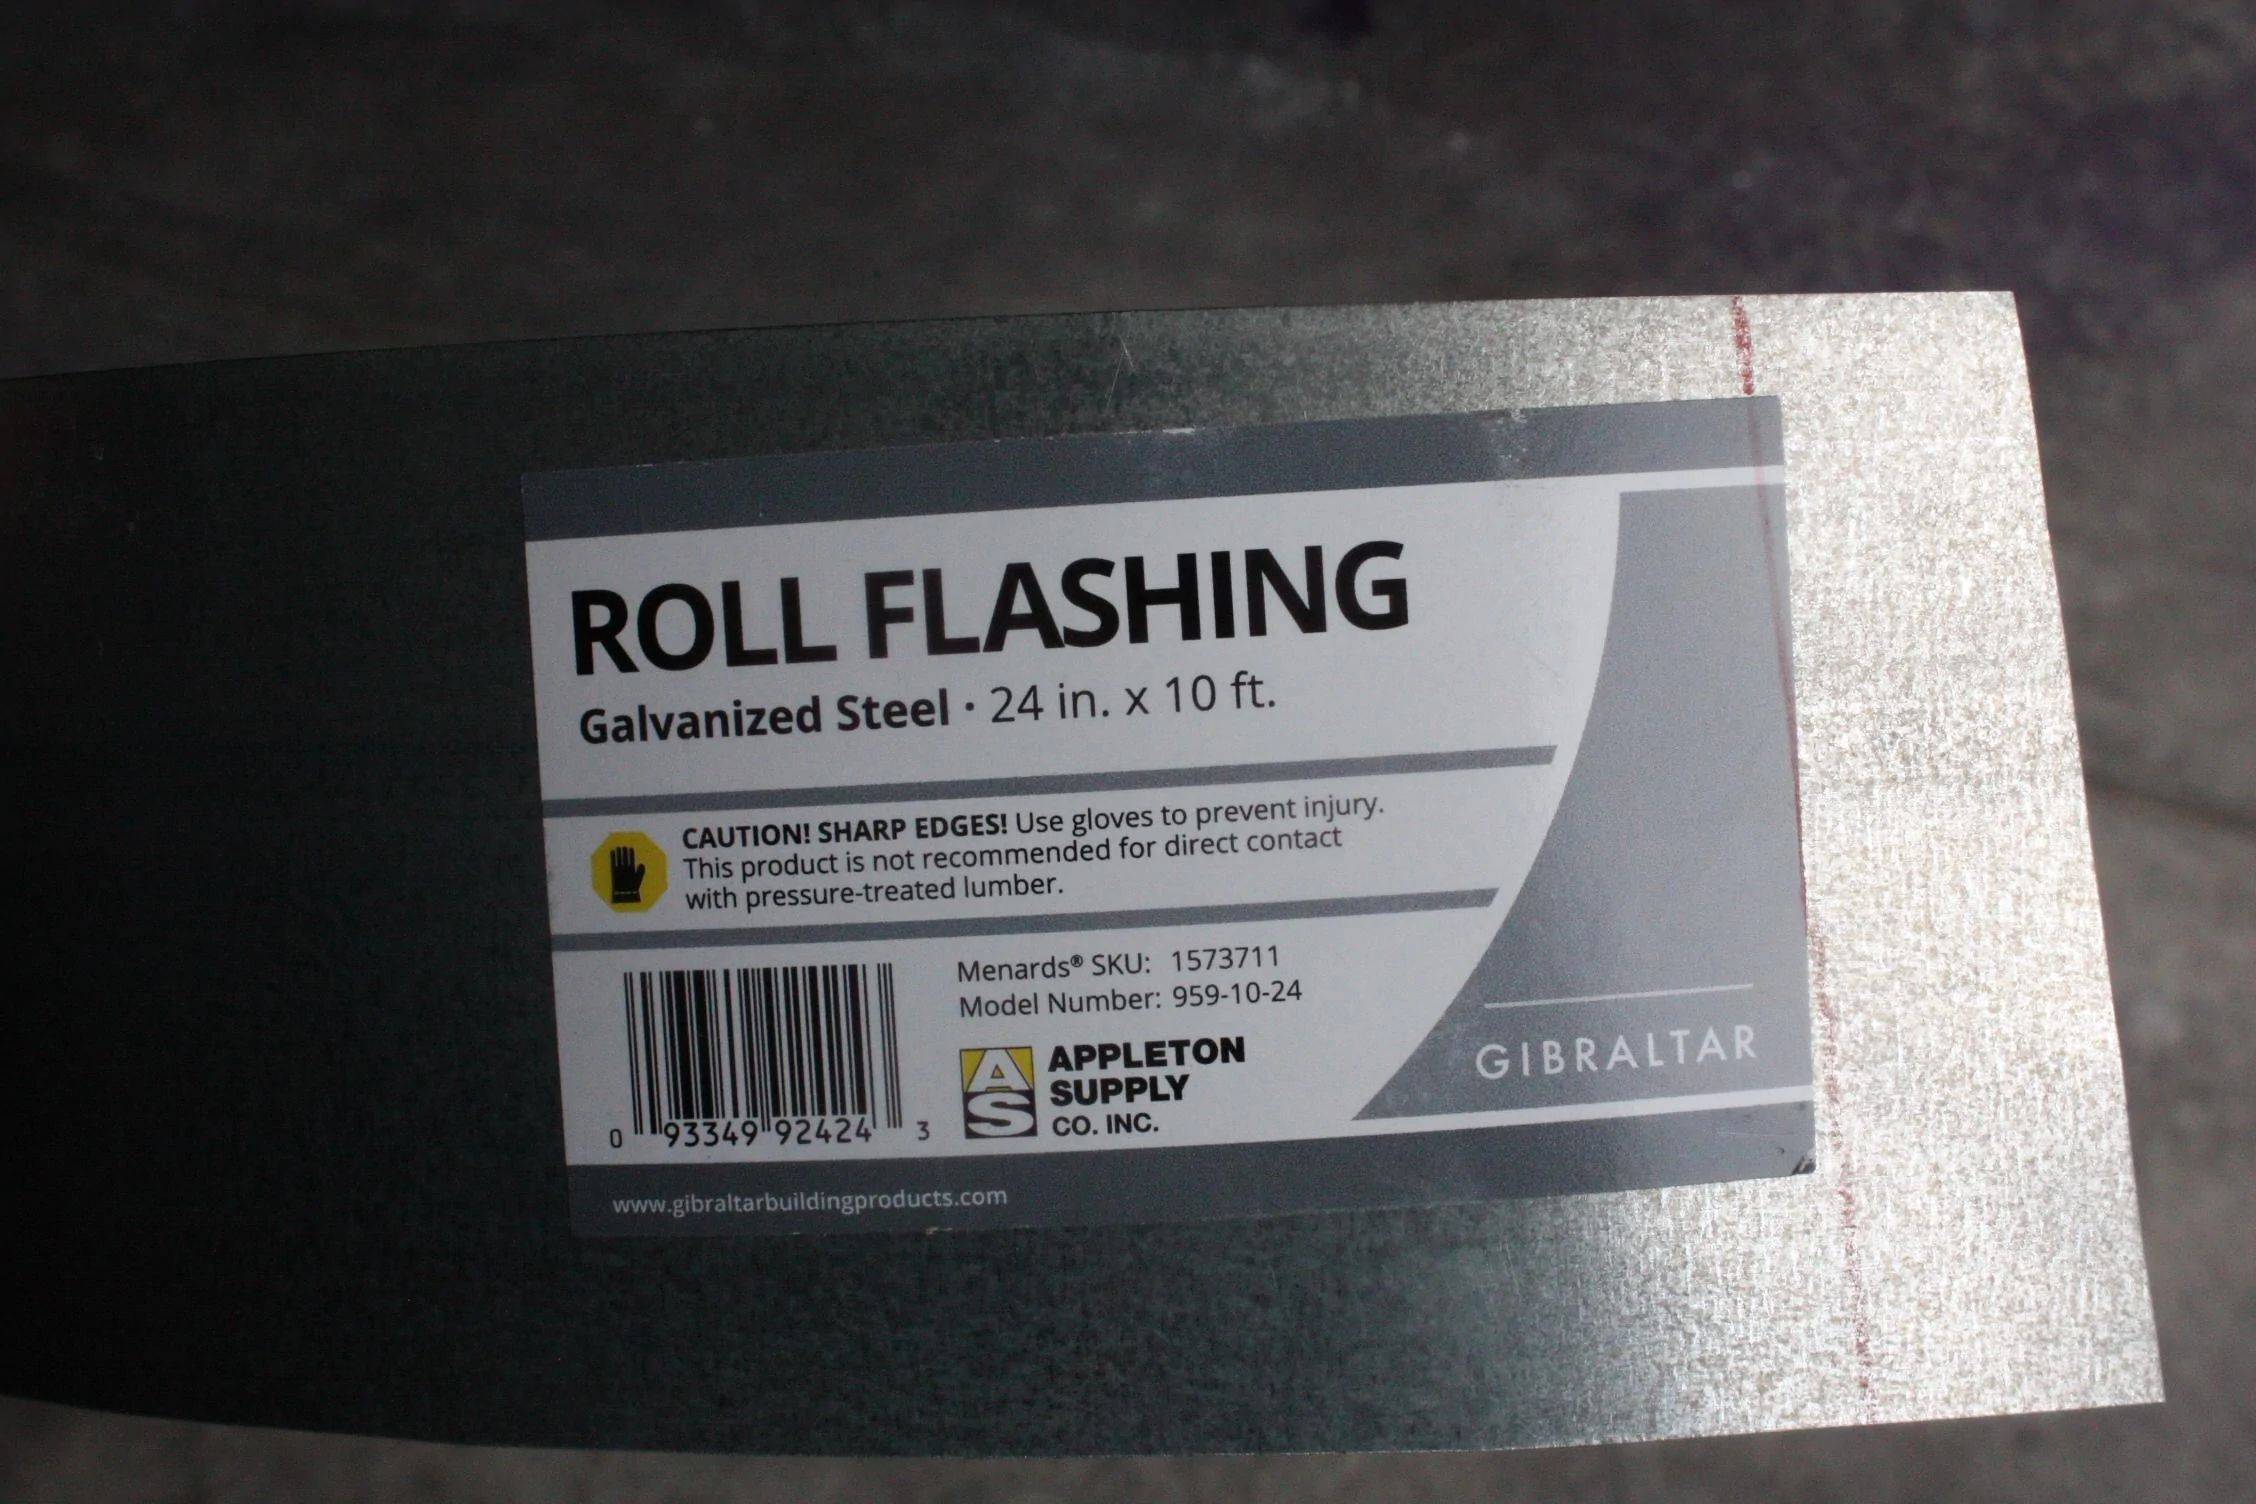
I've made a filler panel to prevent water/snow/dirt and what ever from going up behind the left rear tail light assembly. I used Galvanized Steel after making a prototype out of cardboard. Had to make sure to give more than enough clearance of wiring so as to not rub. Thought I could use the one bolt at lower inner fender side but the nut (10mm) is not a nut that can be removed, believe the nut is part of the bracket and the bolt comes through from the outside. Now I have a clip to attach the panel to the bolt temporally, will try something different later. Used the one large bolt (18mm) in the frame at rear of the panel to hold the rear, drilled new holes to secure more areas. I may just cut off the rear leg of the panel (but it does give extra support), don't think it's really needed except for extra support. Be careful if you work with any sheet metal, cuts skin very easy! OH, no rattles or squeaks heard...yet!
I've added more information later in thread.
I've added more information later in thread.
Sponsored
Last edited by a moderator:

")