- First Name
- Austin
- Joined
- Jun 15, 2022
- Threads
- 5
- Messages
- 24
- Reaction score
- 76
- Location
- Indiana, USA
- Vehicle(s)
- 2022 Ford Maverick XL 2.0L AWD
- Engine
- 2.0L EcoBoost
- Thread starter
- #1
Hi all!
This is a full step by step guide on how to install a Mk8 Fiesta wheel into any Maverick. I had multiple people request that I share how I installed mine in detail (for anyone interested in the process or for anyone interested in following this process step by step.)
(Steps 1 & 3 & 4 will be fully shown in the linked YouTube video in Step 3)
Step #1:
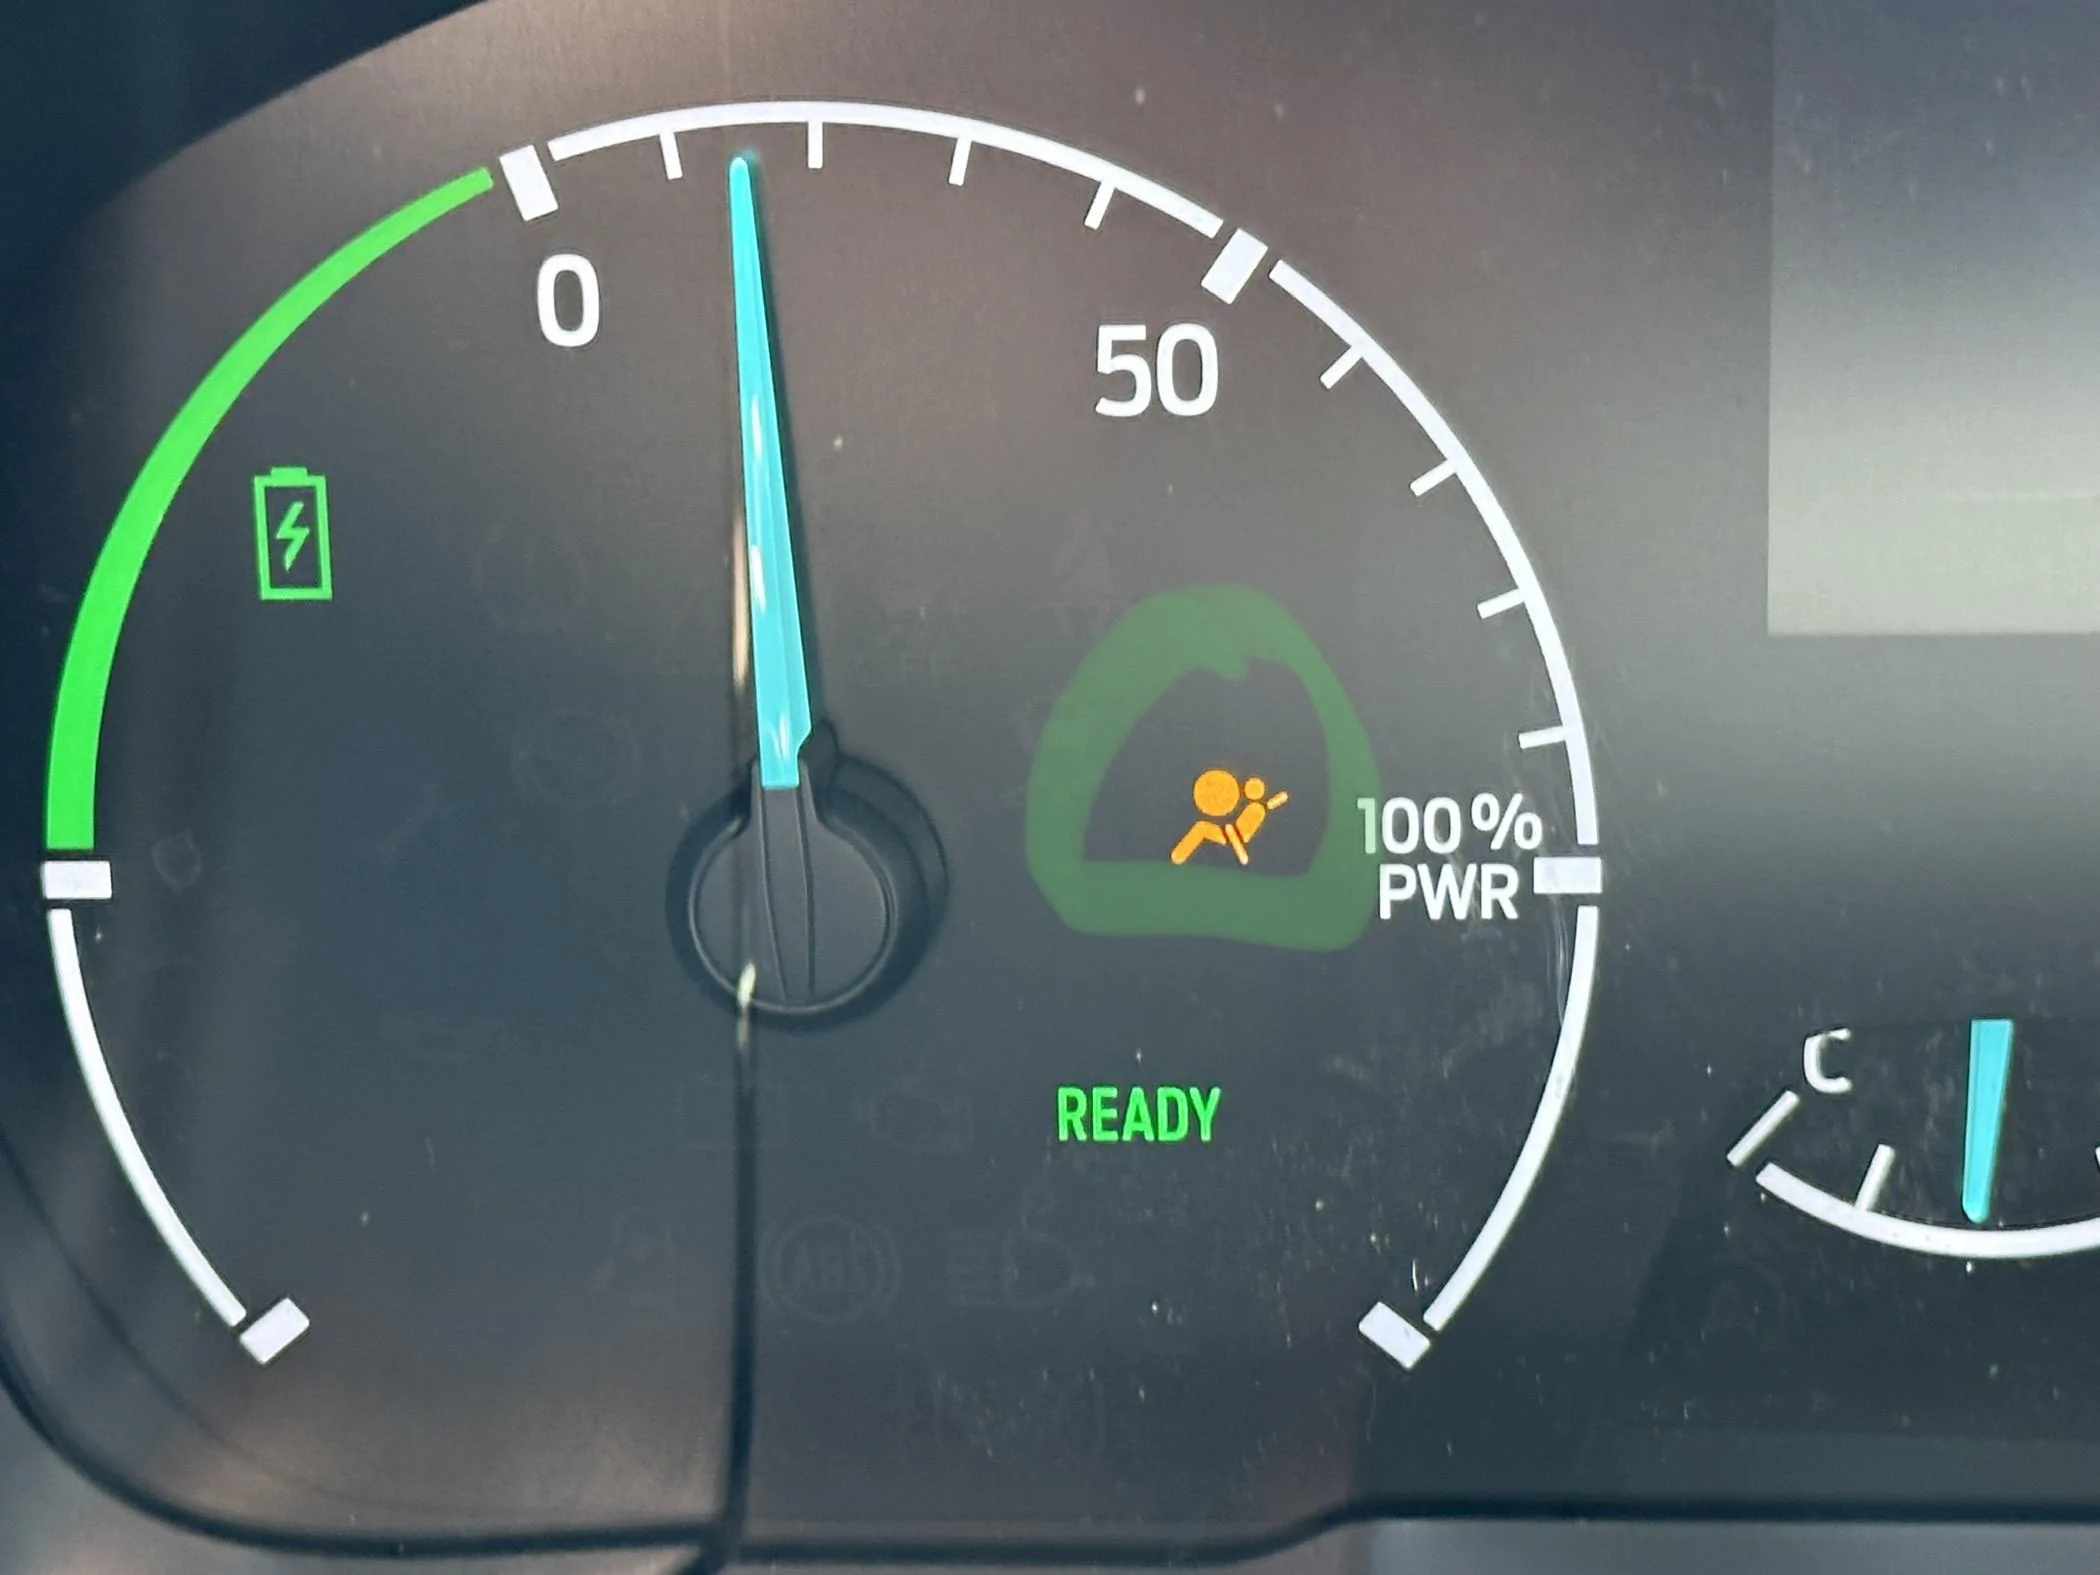
Remove the airbag- Turn the wheel left or right 90° to expose the release clips on the backside of the steering wheel. Push downward with a flathead screwdriver that's long enough to reach the release clips, but short enough that it does not make contact with your gauge cluster and damage it. Turn the wheel 180° in the opposite direction and repeat. The airbag should come out with three connectors on it. If you follow the workshop manual from Ford, there is a SRS depowering procedure, but nobody goes through it.
Do what you feel comfortable doing.
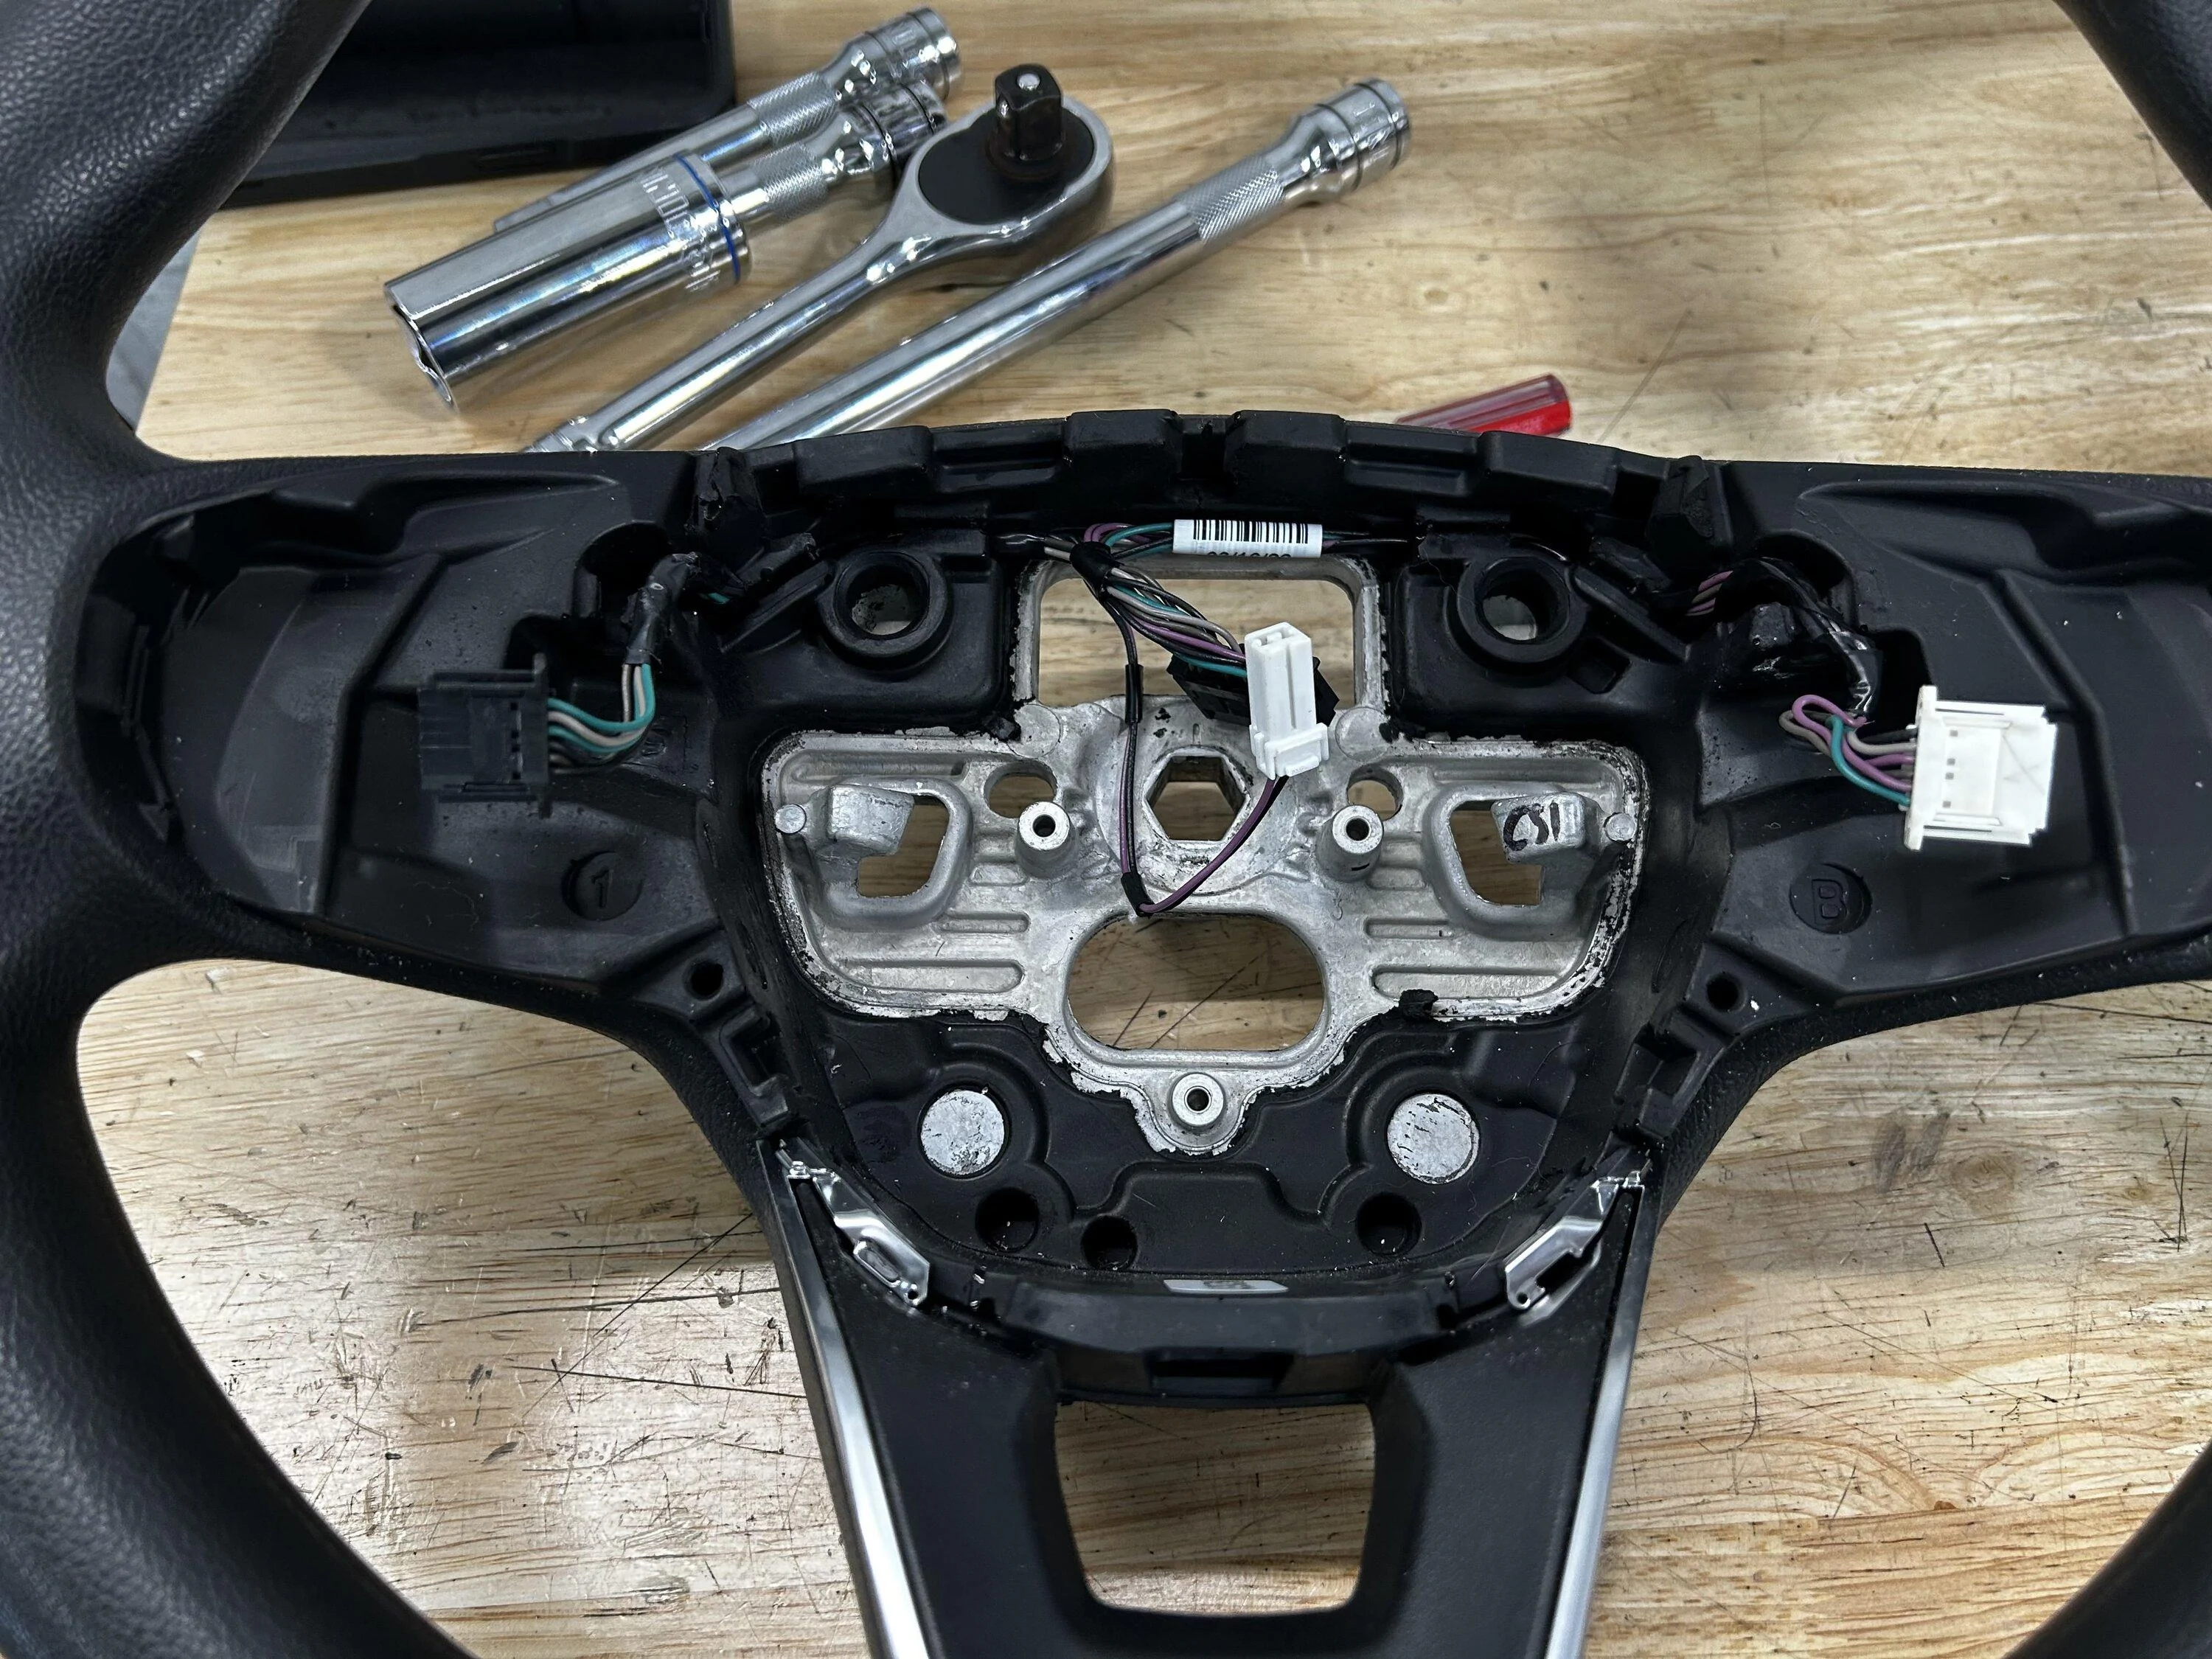
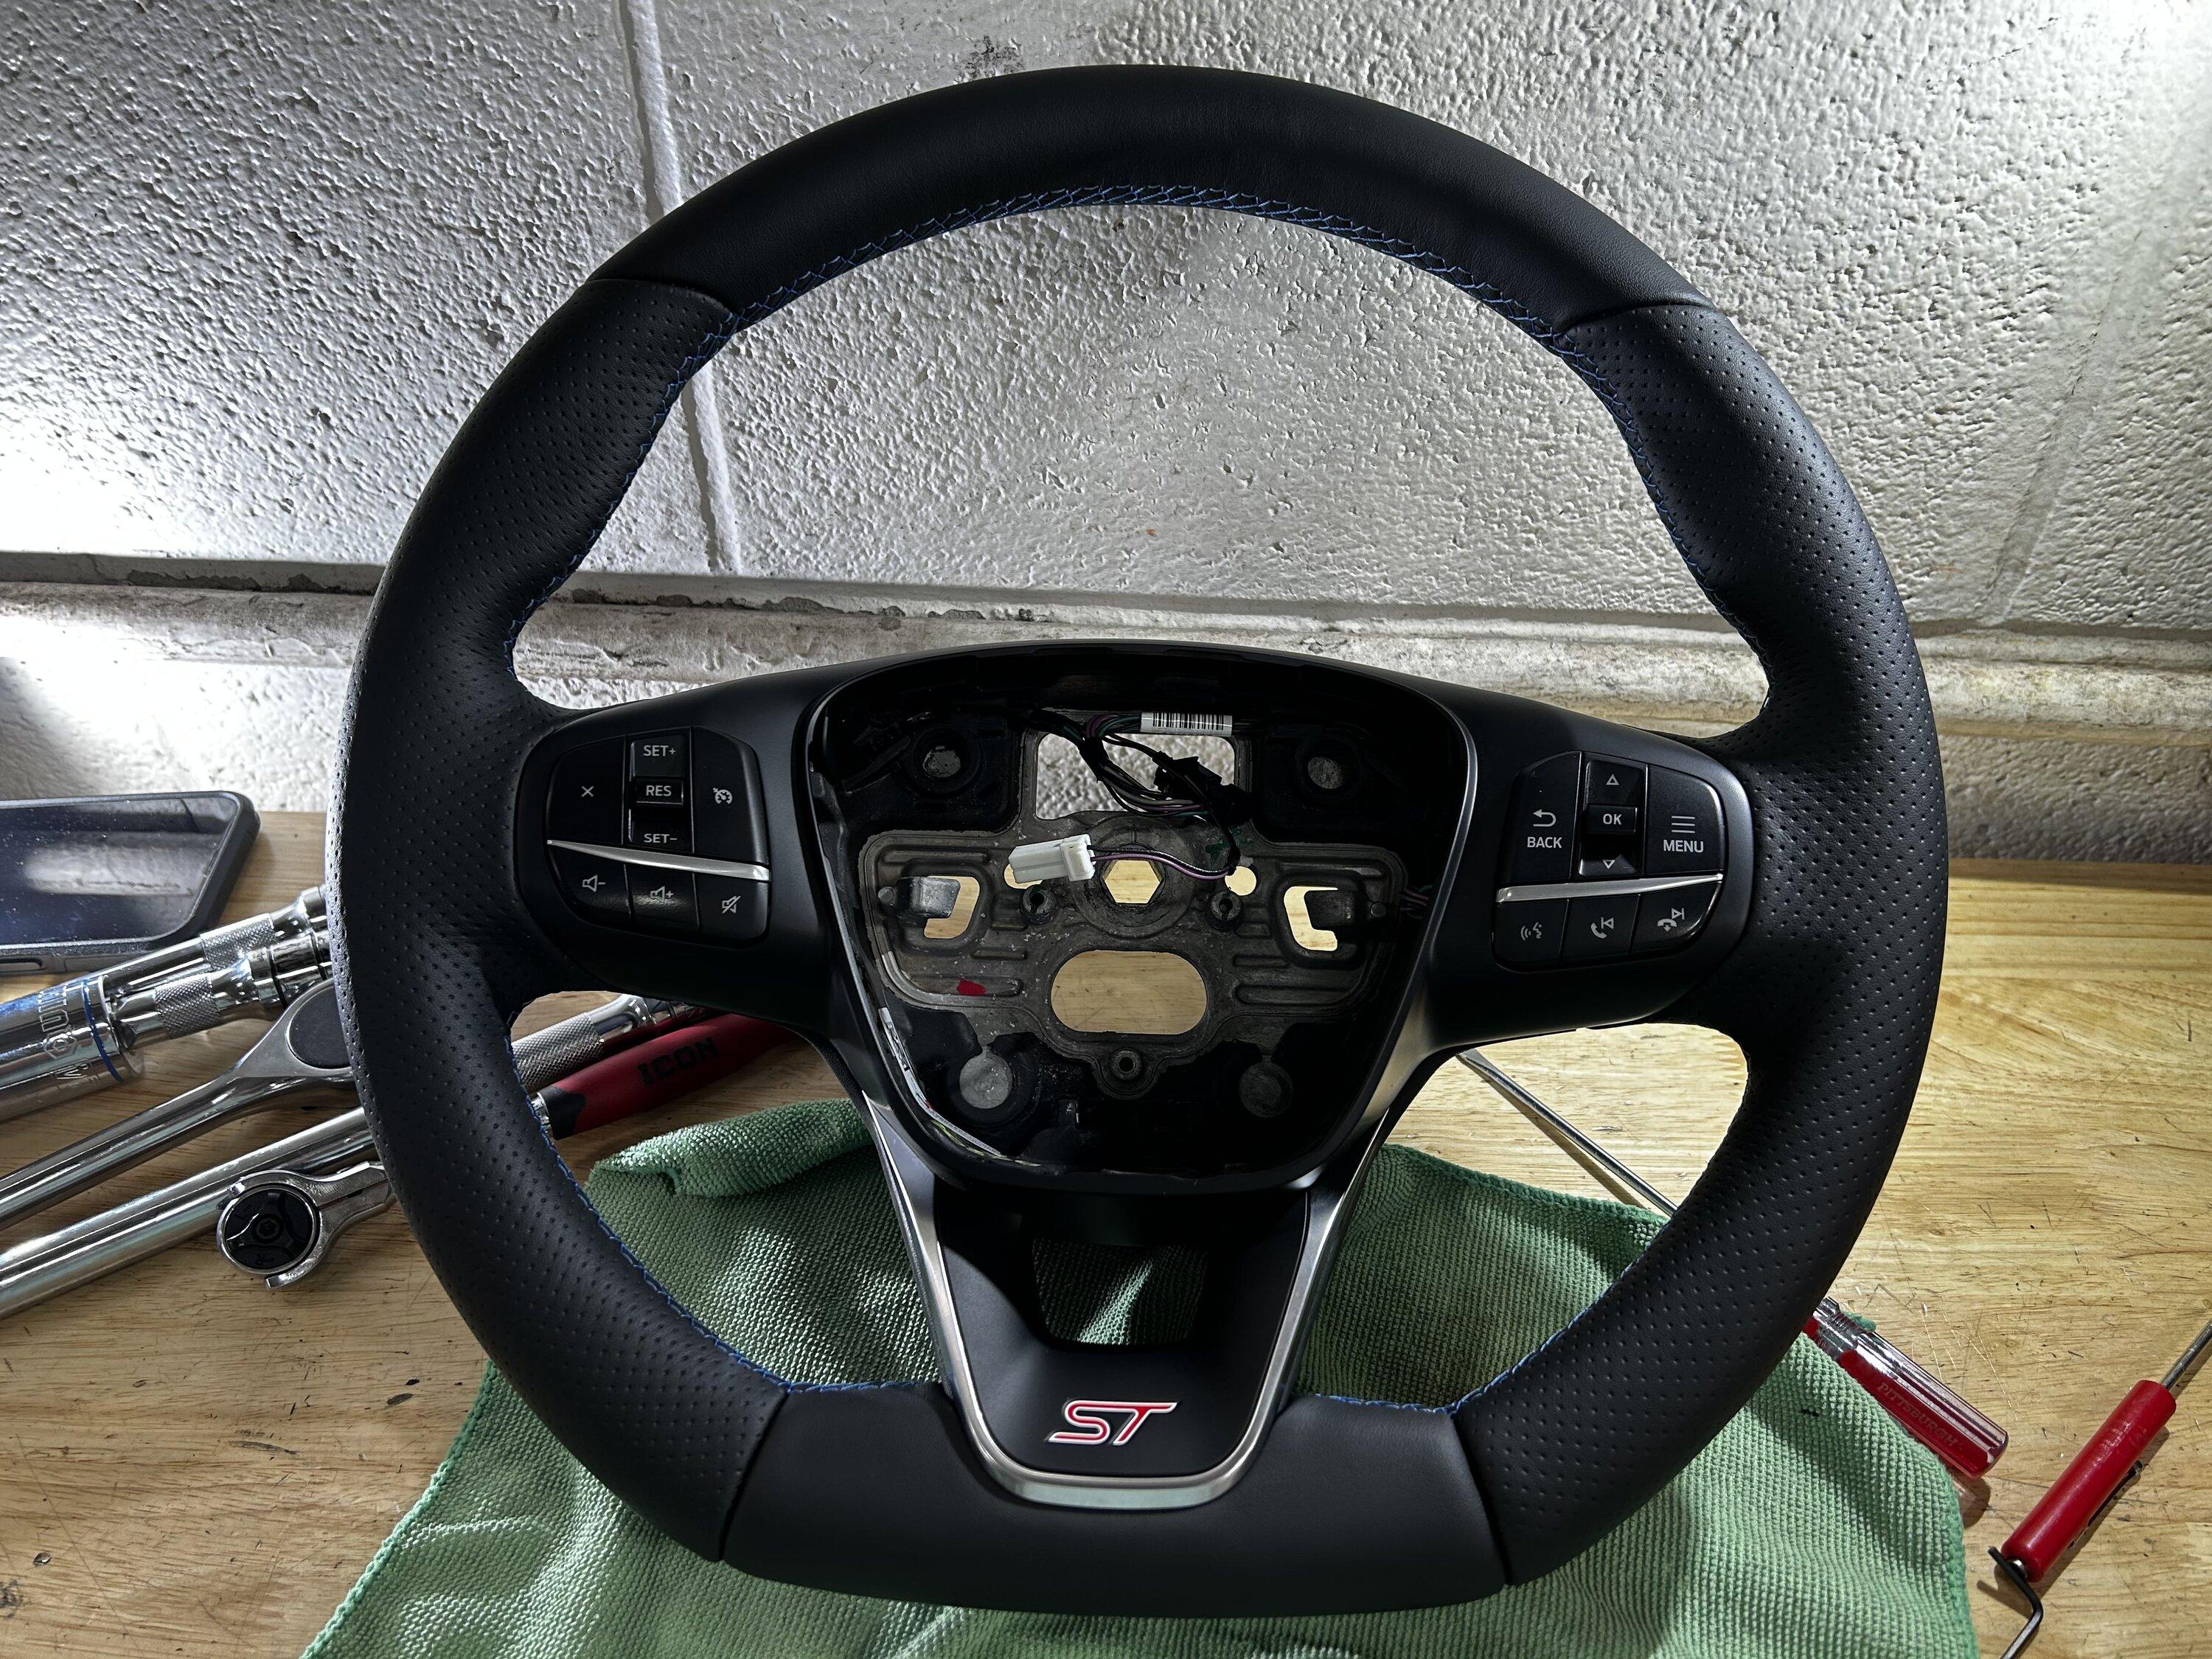
Lift up on the orange SRS tabs with a small flathead screwdriver/techdriver or an angled pick. Once both tabs are lifted the connectors should wiggle out. If not, you need to lift the orange tab higher up. There should be one 2-wire white connector left at the top of the airbag for the horn. This disconnects like a regular connector. The airbag should be free. Sit it down on a soft surface. The final connector is a black rectangular one on the clock spring. Its at the top of the wheel as you can see in the picture. This is the main connector for the steering wheel switches and horn. This disconnects like a regular connector.
Step #2:
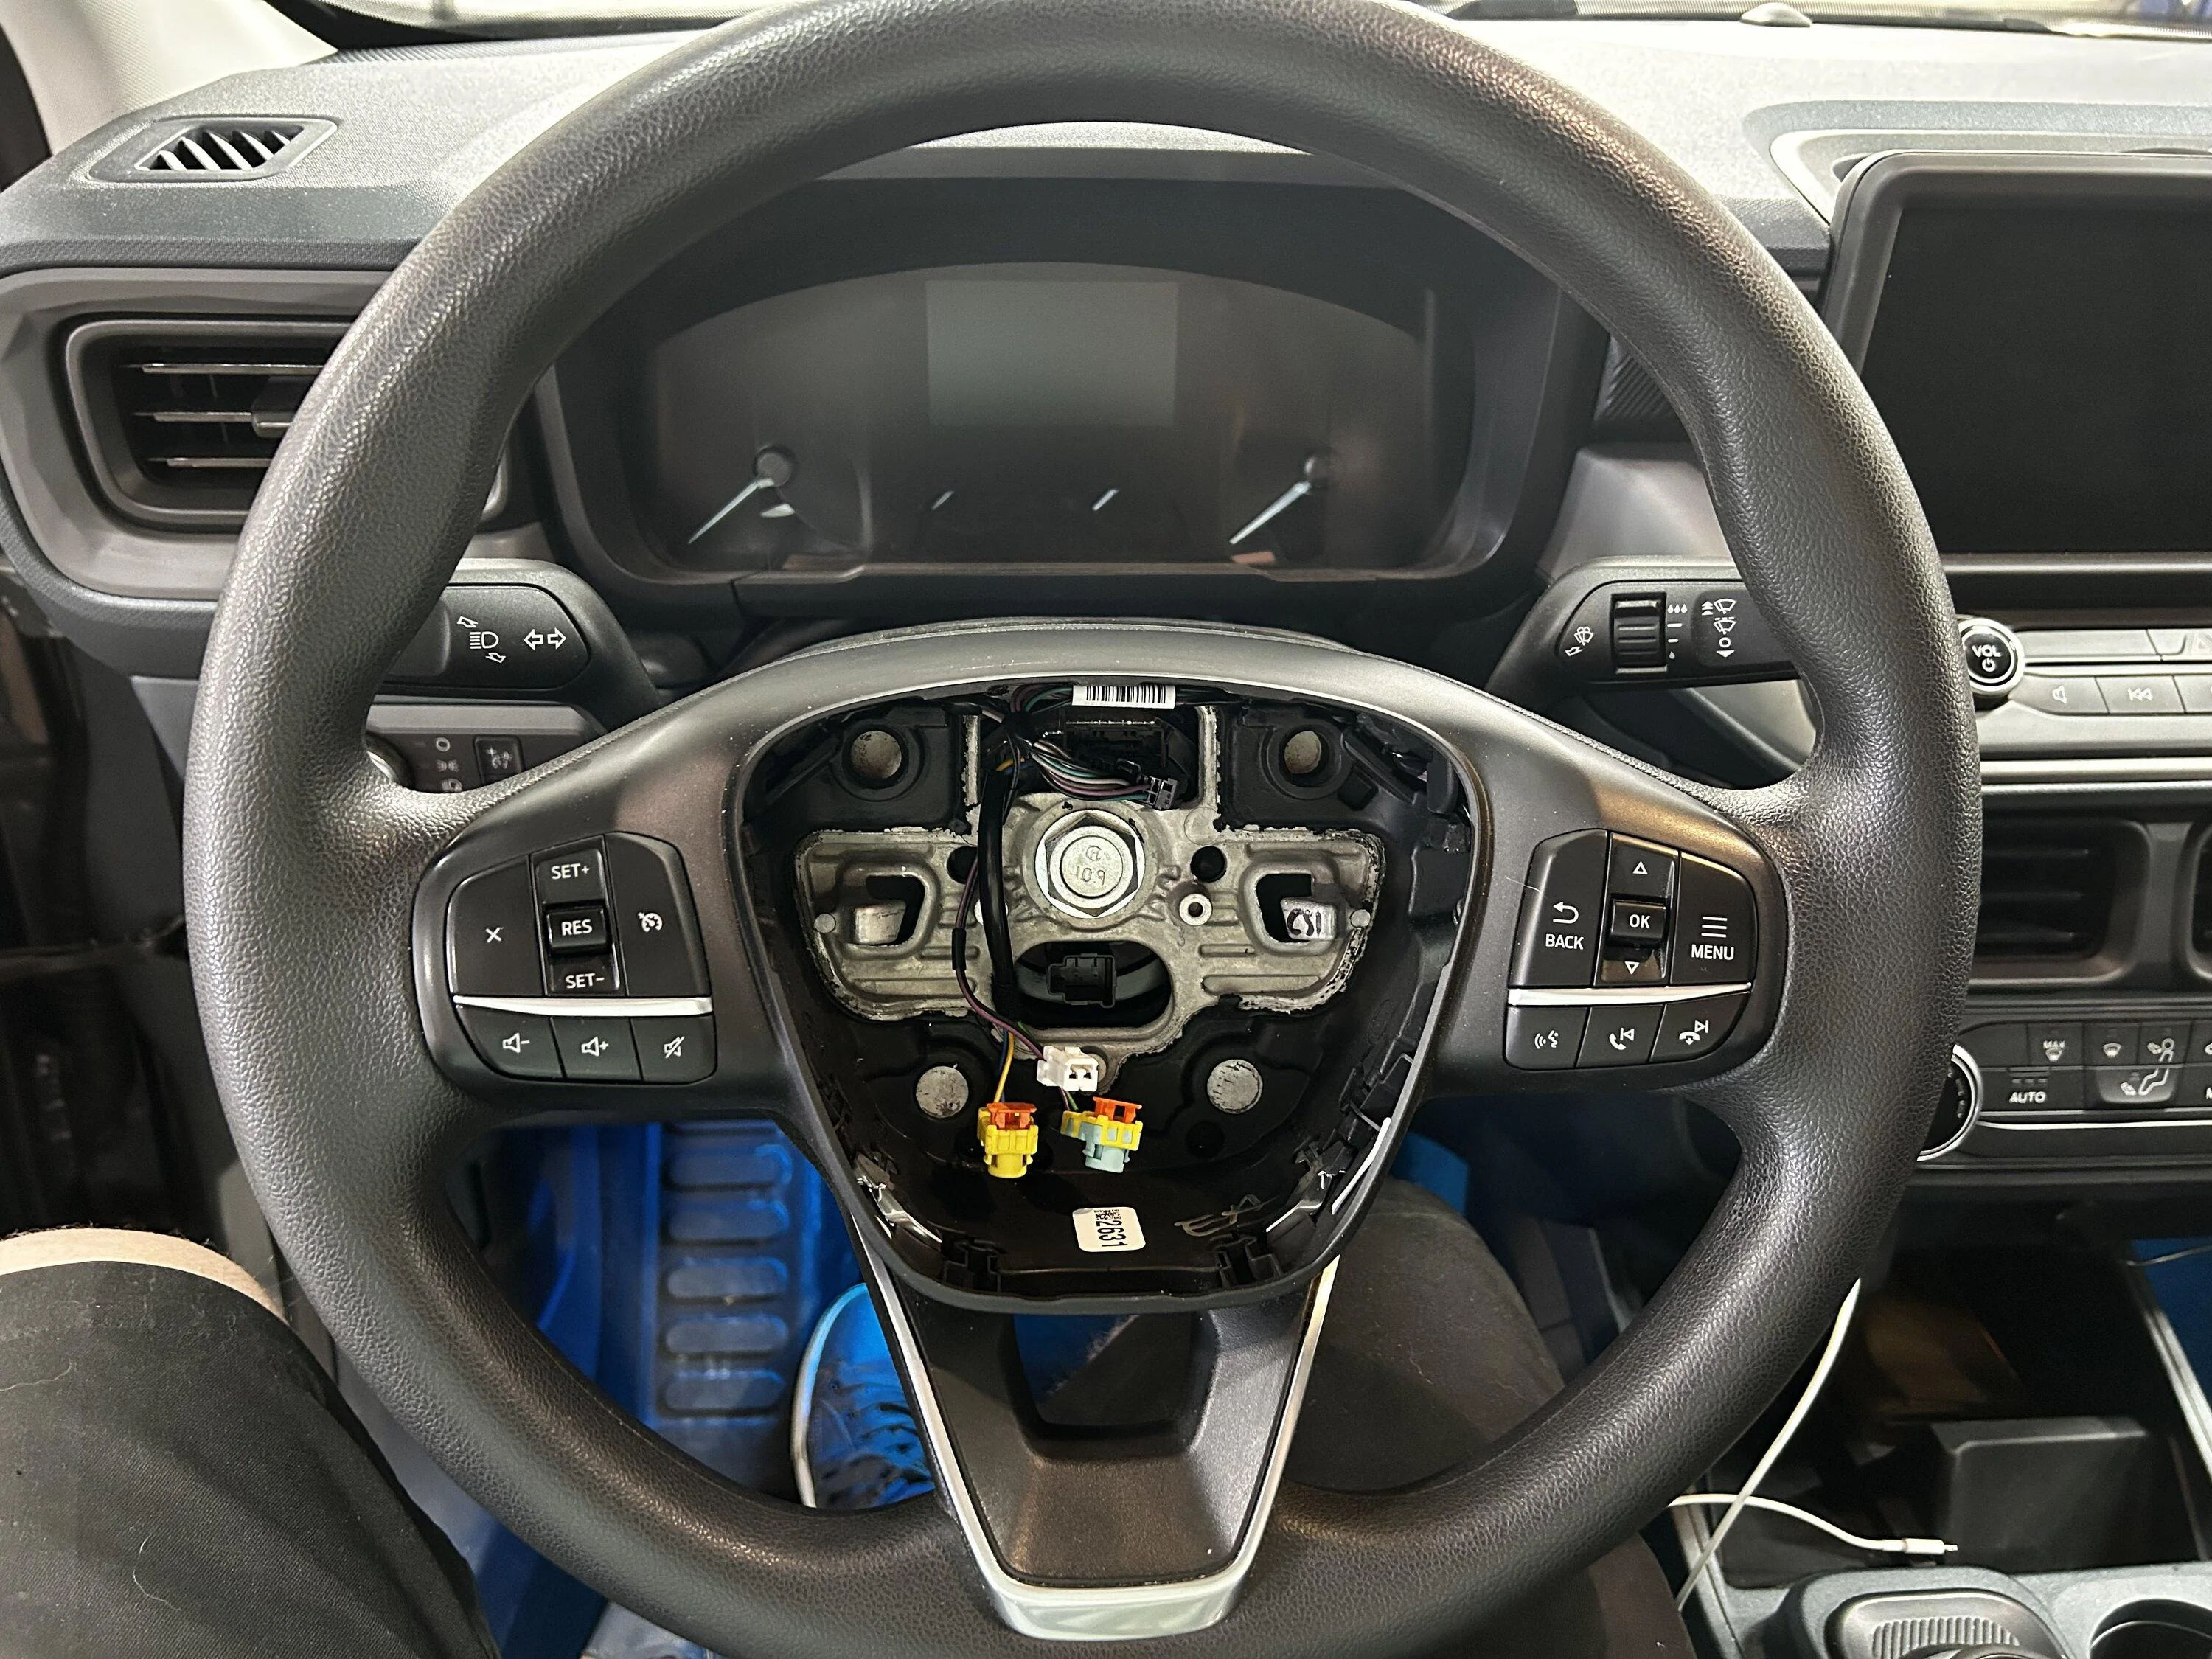
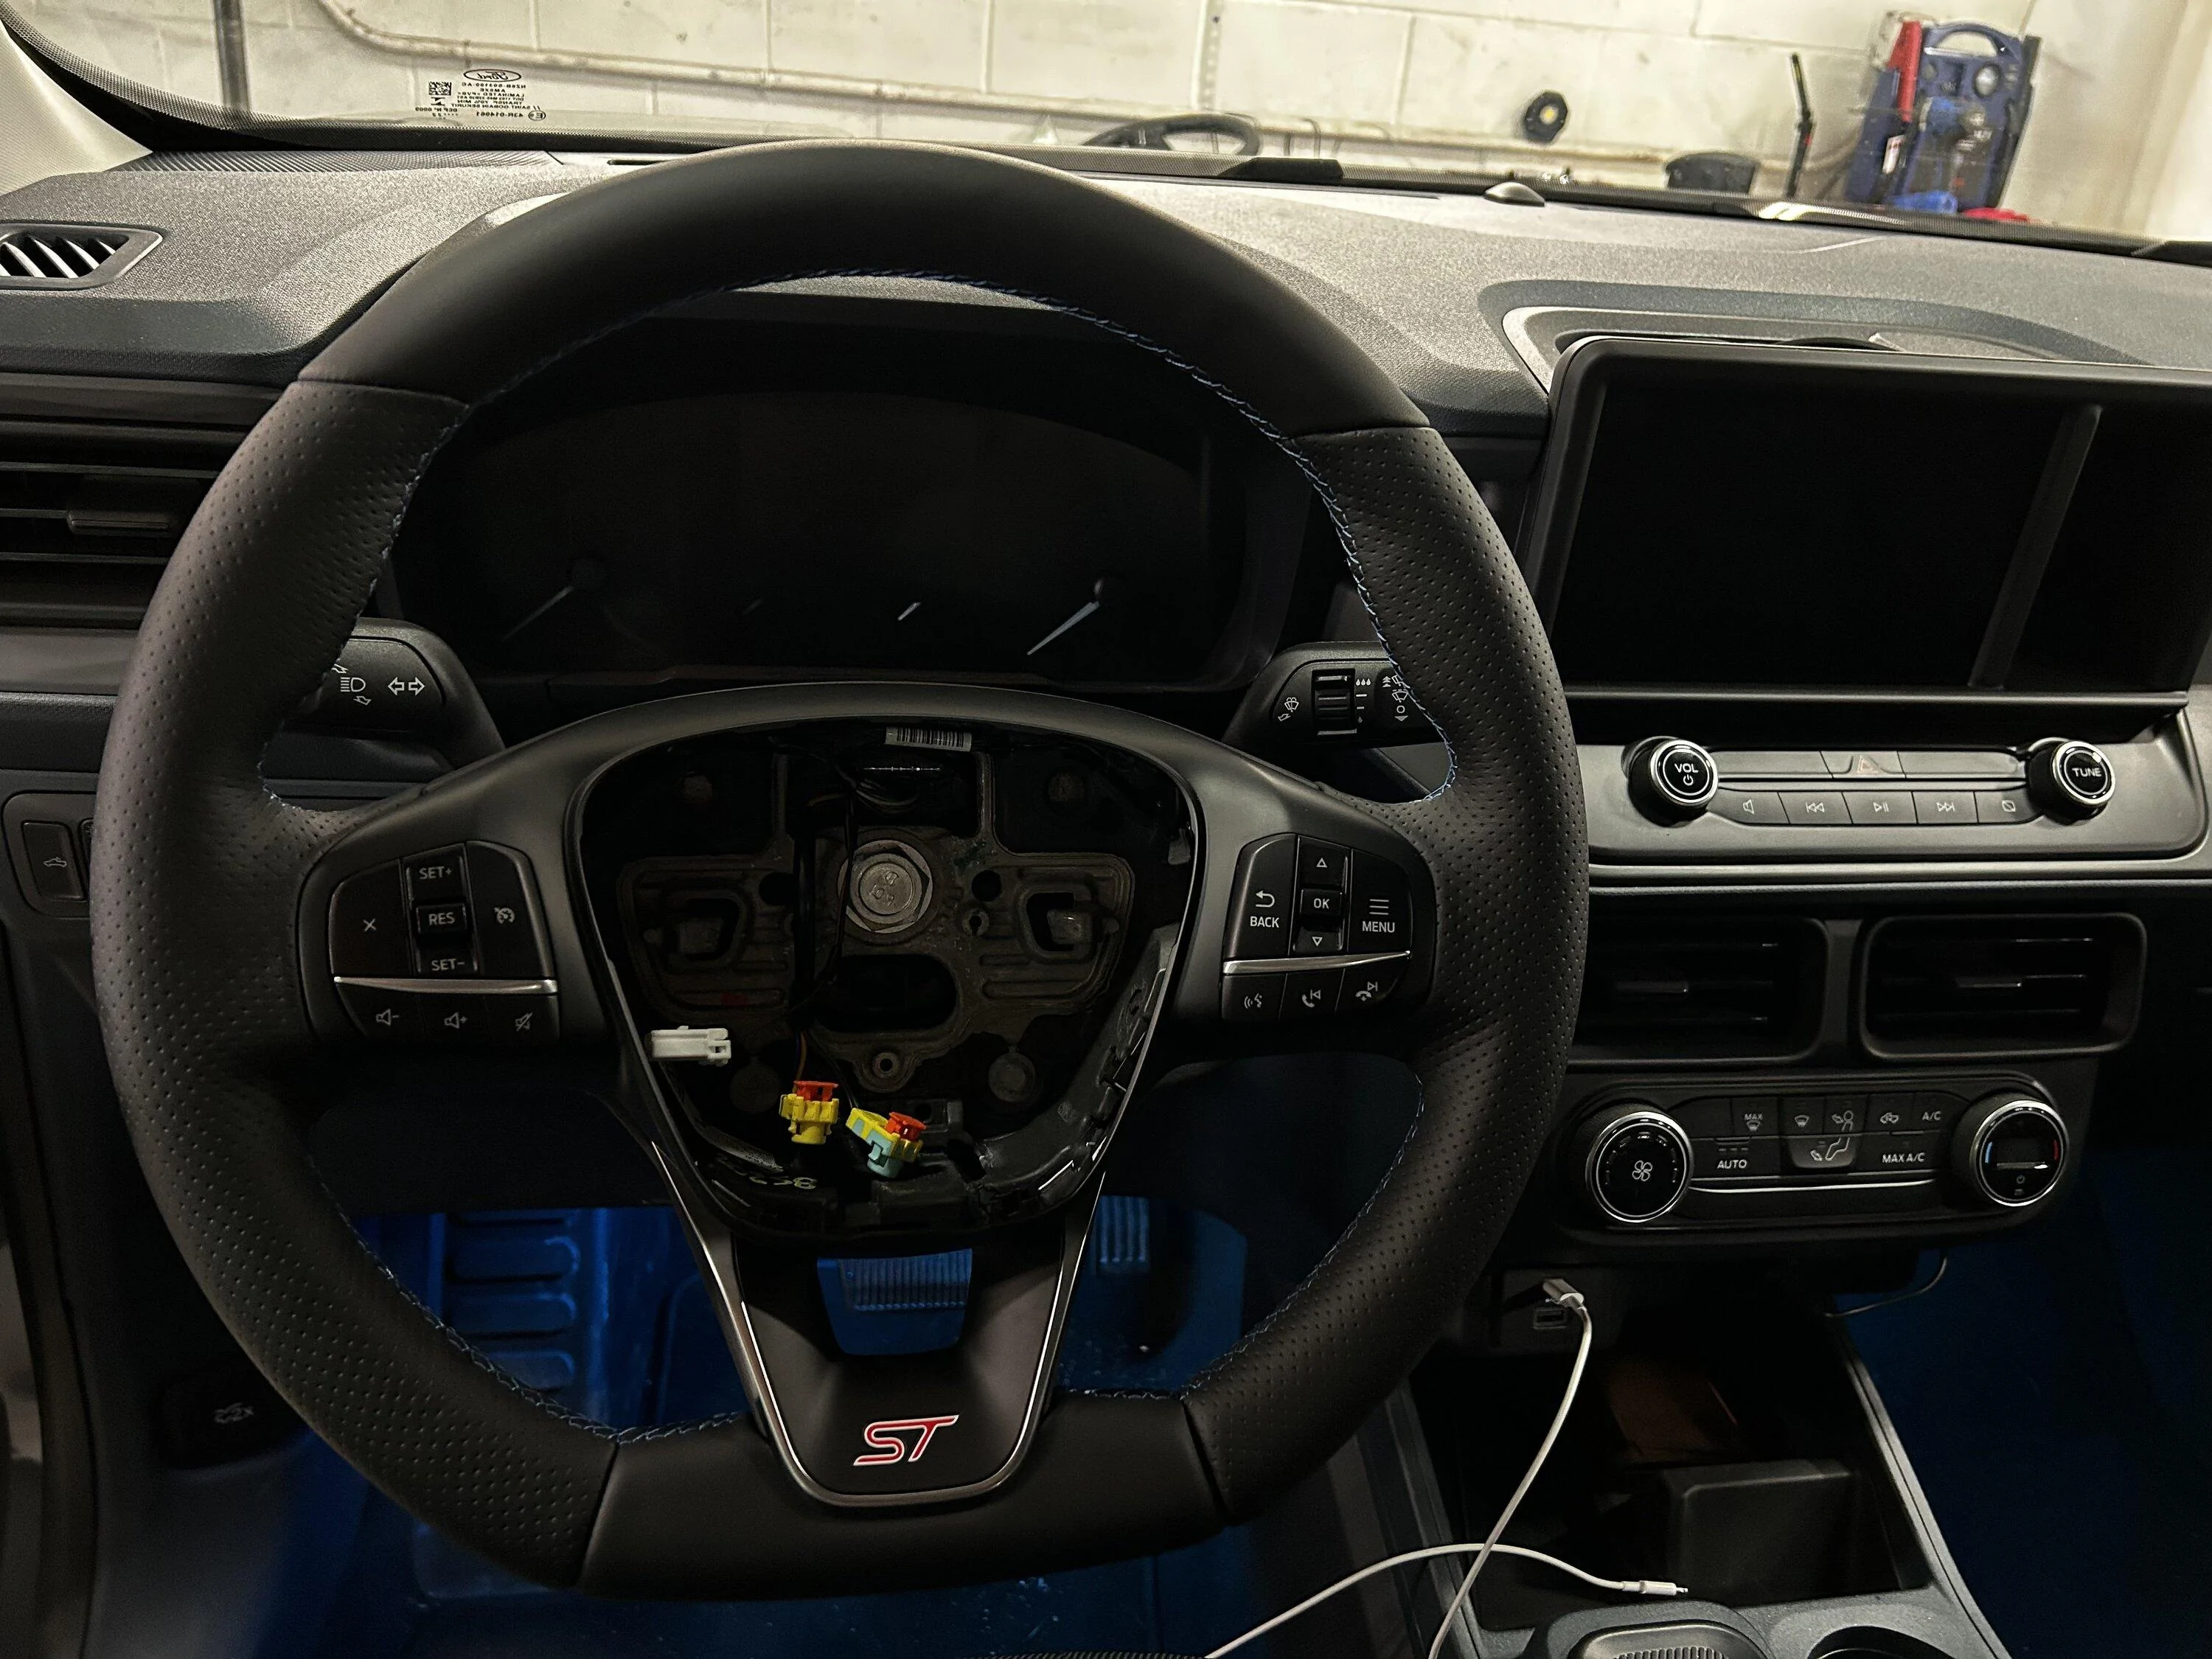
Remove the steering wheel- Center the wheel and level it flat. This is for wheel and clock-spring alignment. I used a ⅜ air stubby impact for this, but I’m sure any electric impact will zip it right out. If you’re doing this manually, you may need some helping hands to keep the wheel straight. The steering wheel bolt is a 24mm torqued down to 35ftlbs per the workshop manual. It doesn't take much to remove it. Once the bolt is removed, all you need to do is carefully pull towards you and the steering wheel will slide off. Make sure to gently guide the SRS wires though the wheel passthrough as the wheel comes off. They stay with the clock spring.
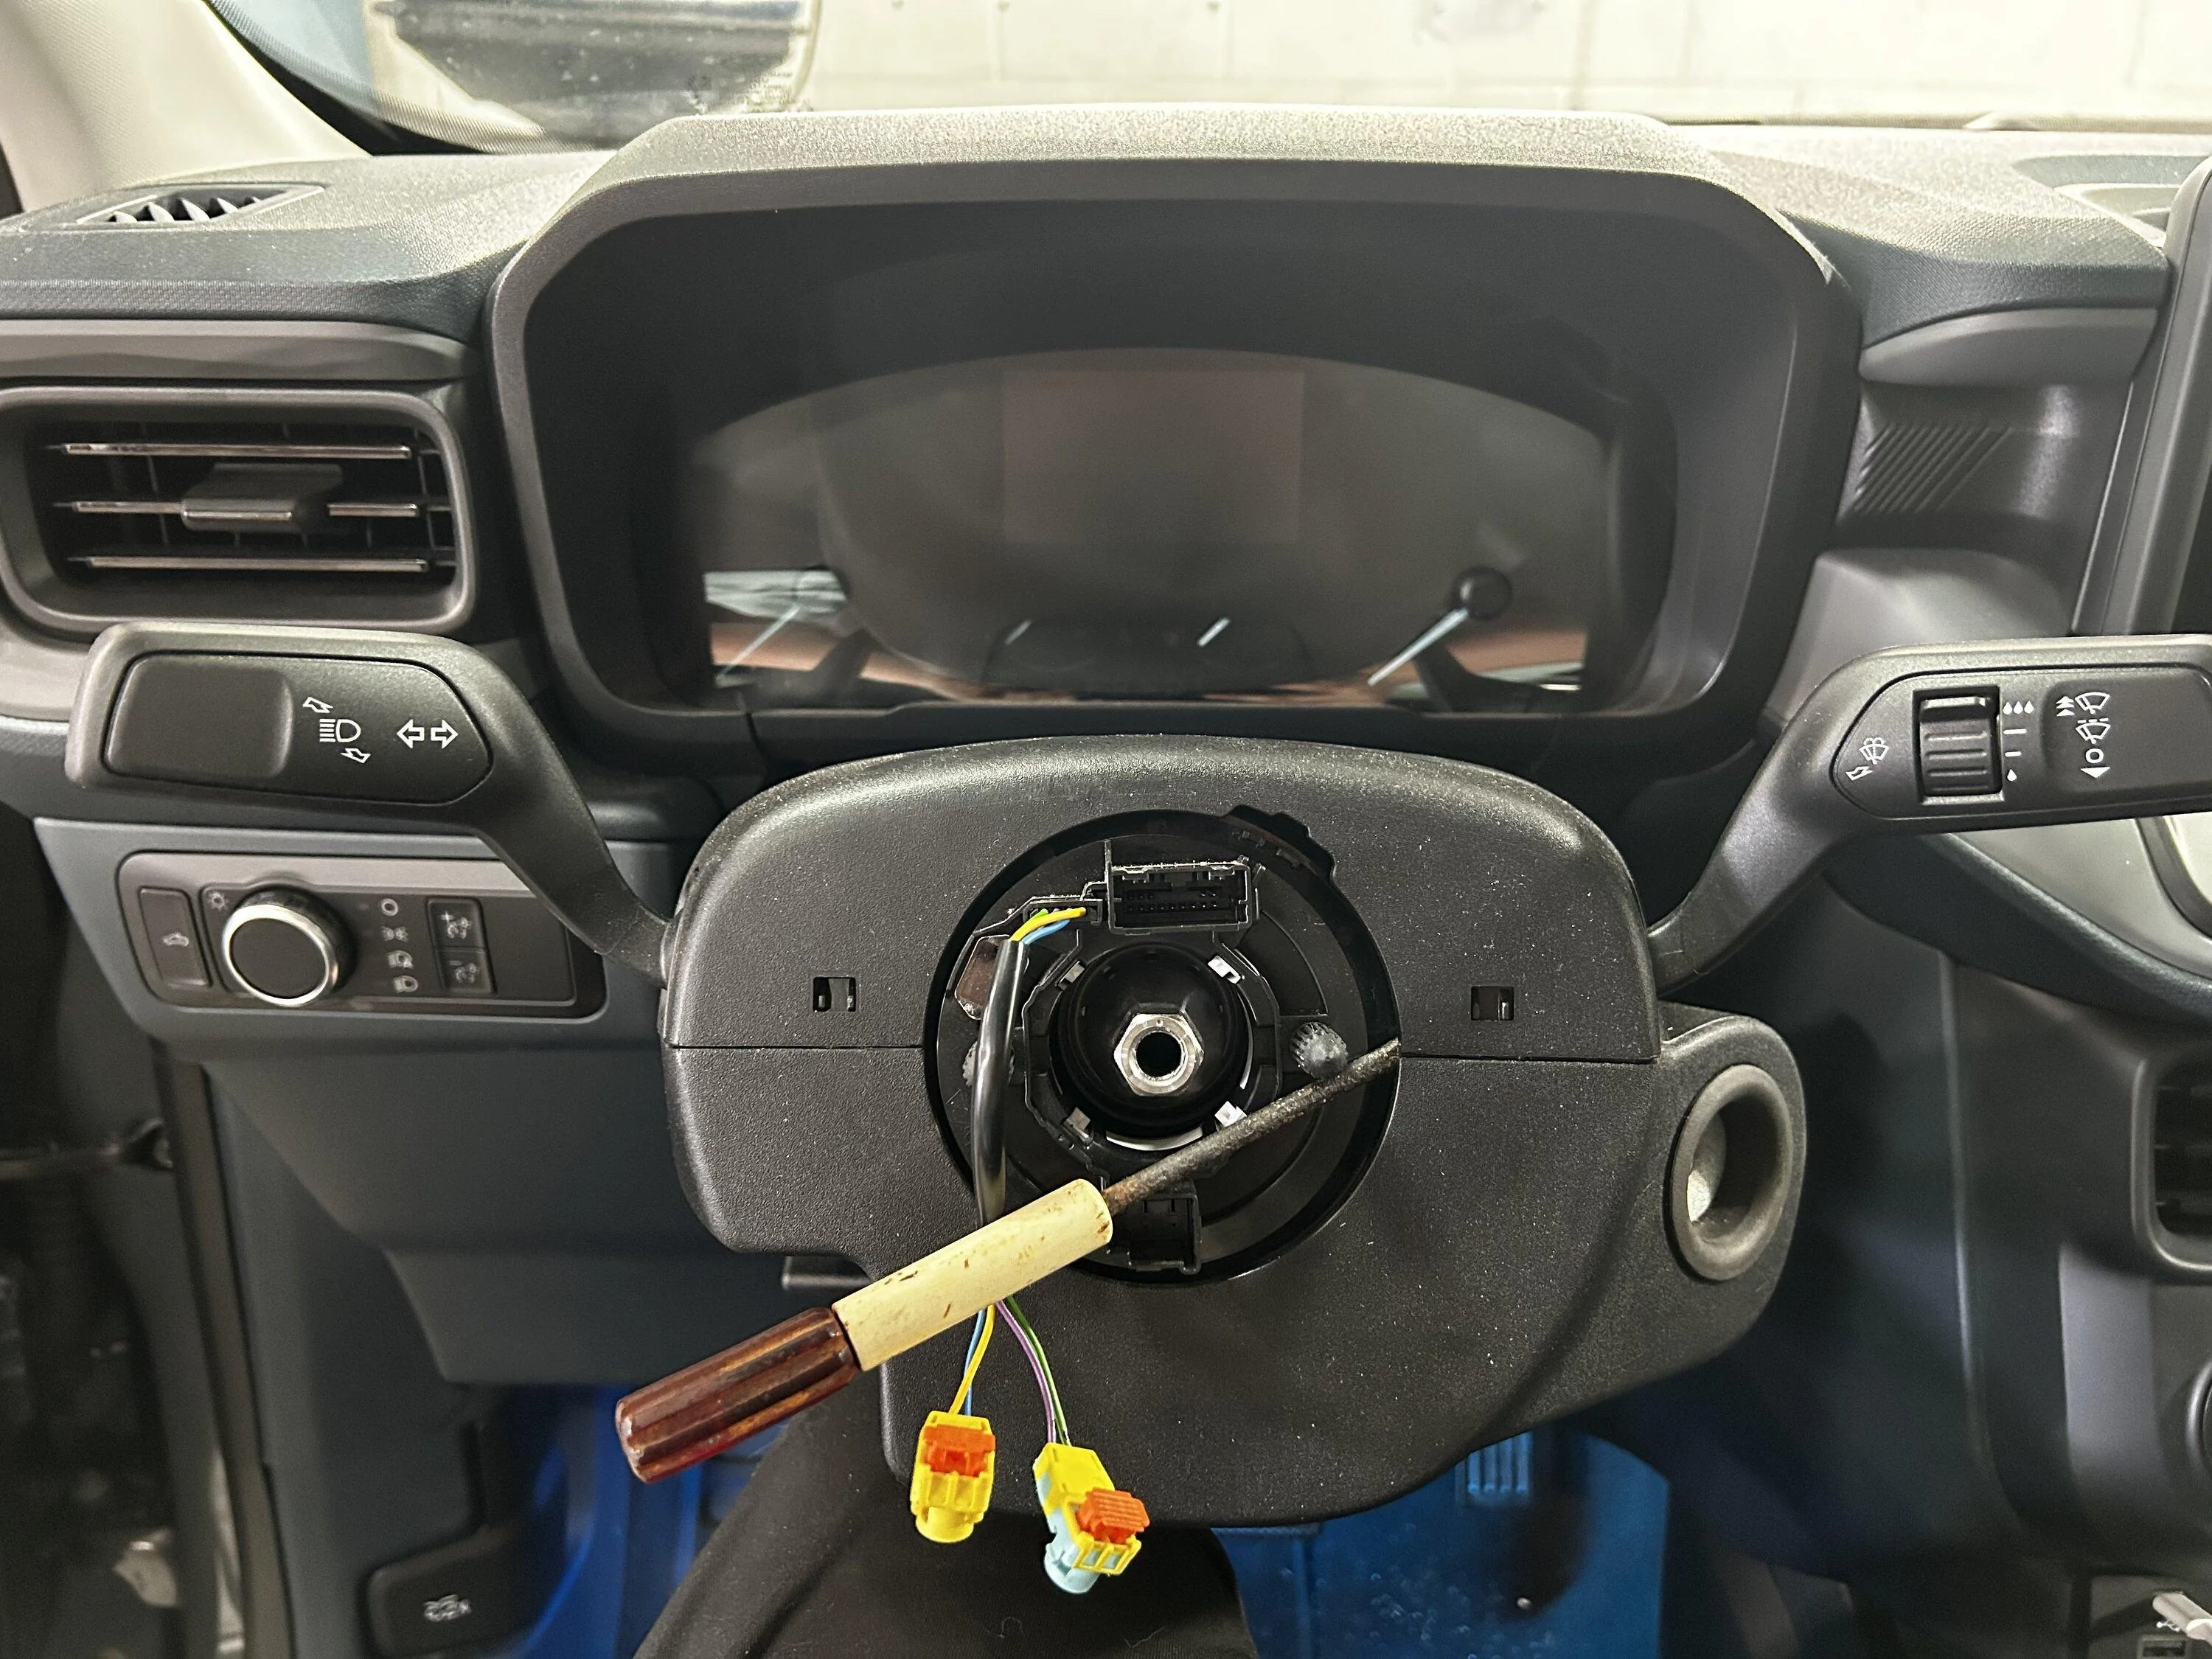
From here the workshop manual suggests to tape the clock spring in place with painters tape. It cannot be rotated around without the steering wheel installed, and if it does rotate, damage could occur. Tape prevents unintentional movement. Professional preference for me, I opted to jam a small flat head between the clock spring post, the clock spring itself, and column. Congratulations! You’ve removed a Ford steering wheel!
Step #3:
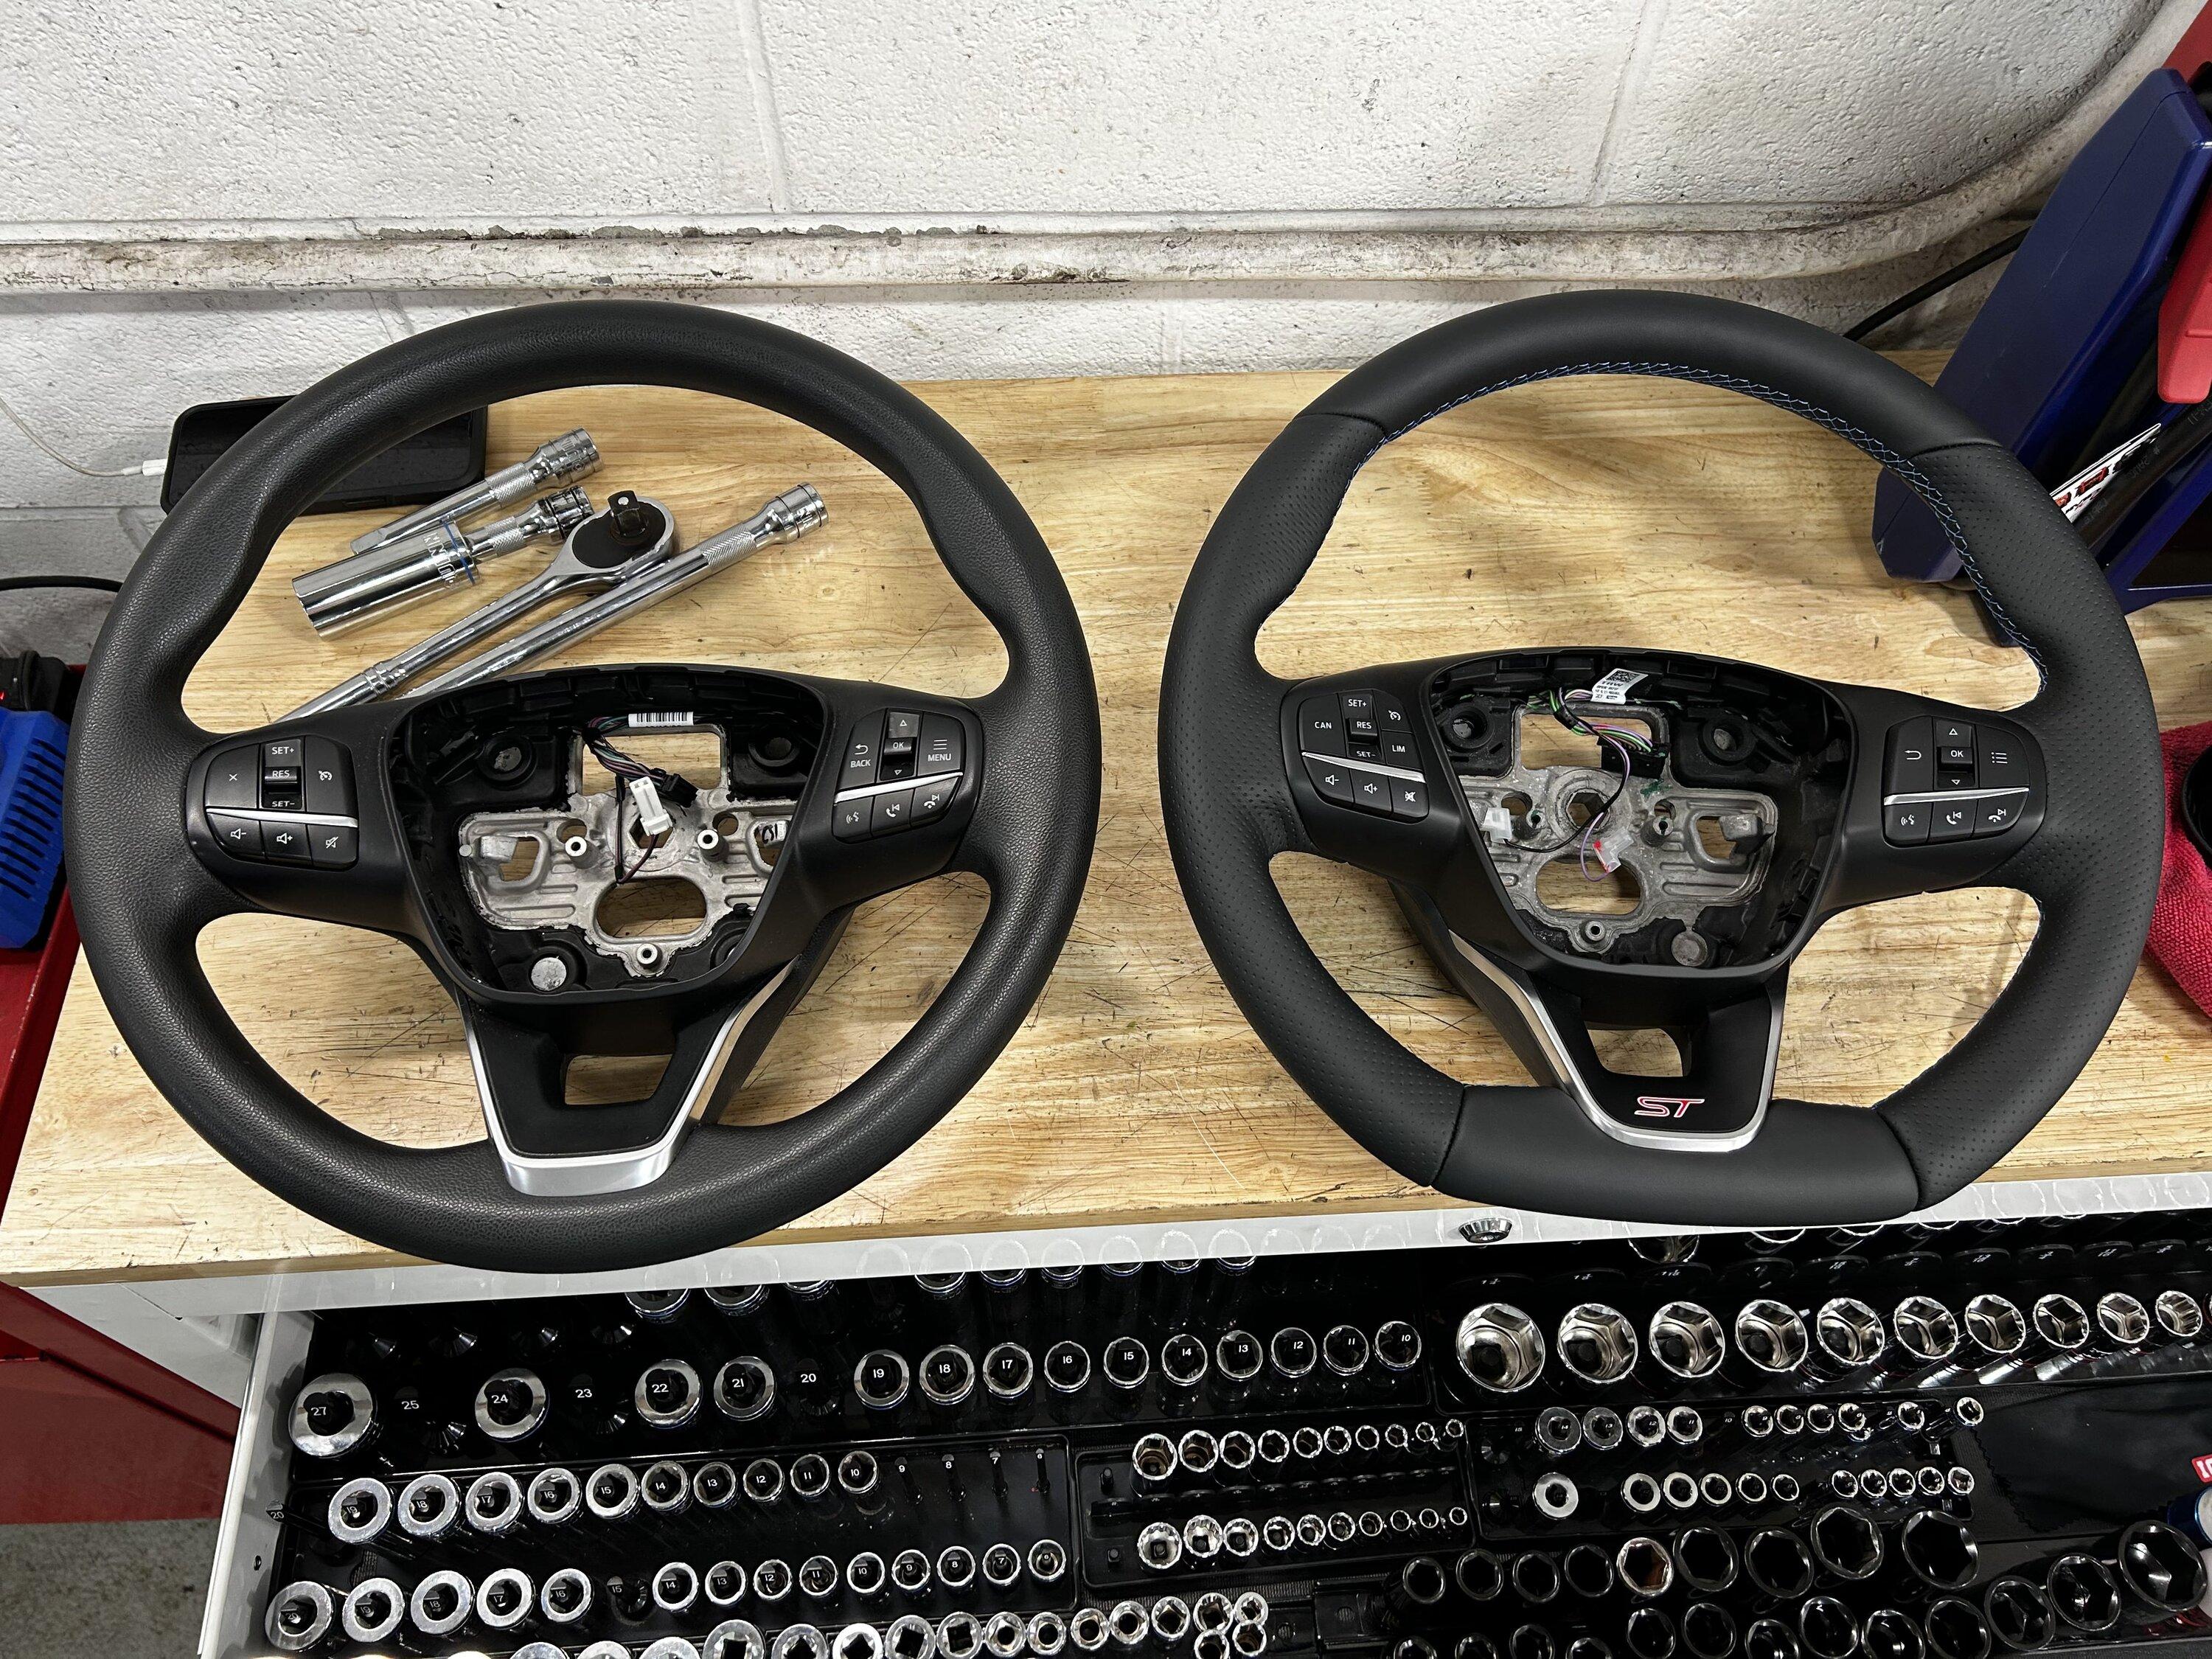
Disassembly and transferring parts- Anyone who's done the cruise control mod with ForScan, already knows how to remove the plastics on the wheel. I will link a video below as it's easier to watch than to explain. Please be careful, you can break either steering wheel if you remove the plastics incorrectly. Start with your OEM Maverick wheel to ‘practice’ with. You won’t need it once the swap is completed, obviously, so breaking something won't matter. Remove this on both steering wheels. Ensure to remove the connectors for the steering wheel buttons on both sides.
Ford Maverick Cruise Control 4:50 to 6:42 relevant for Steps 1 & 3 (video does NOT include wheel removal for step 2)
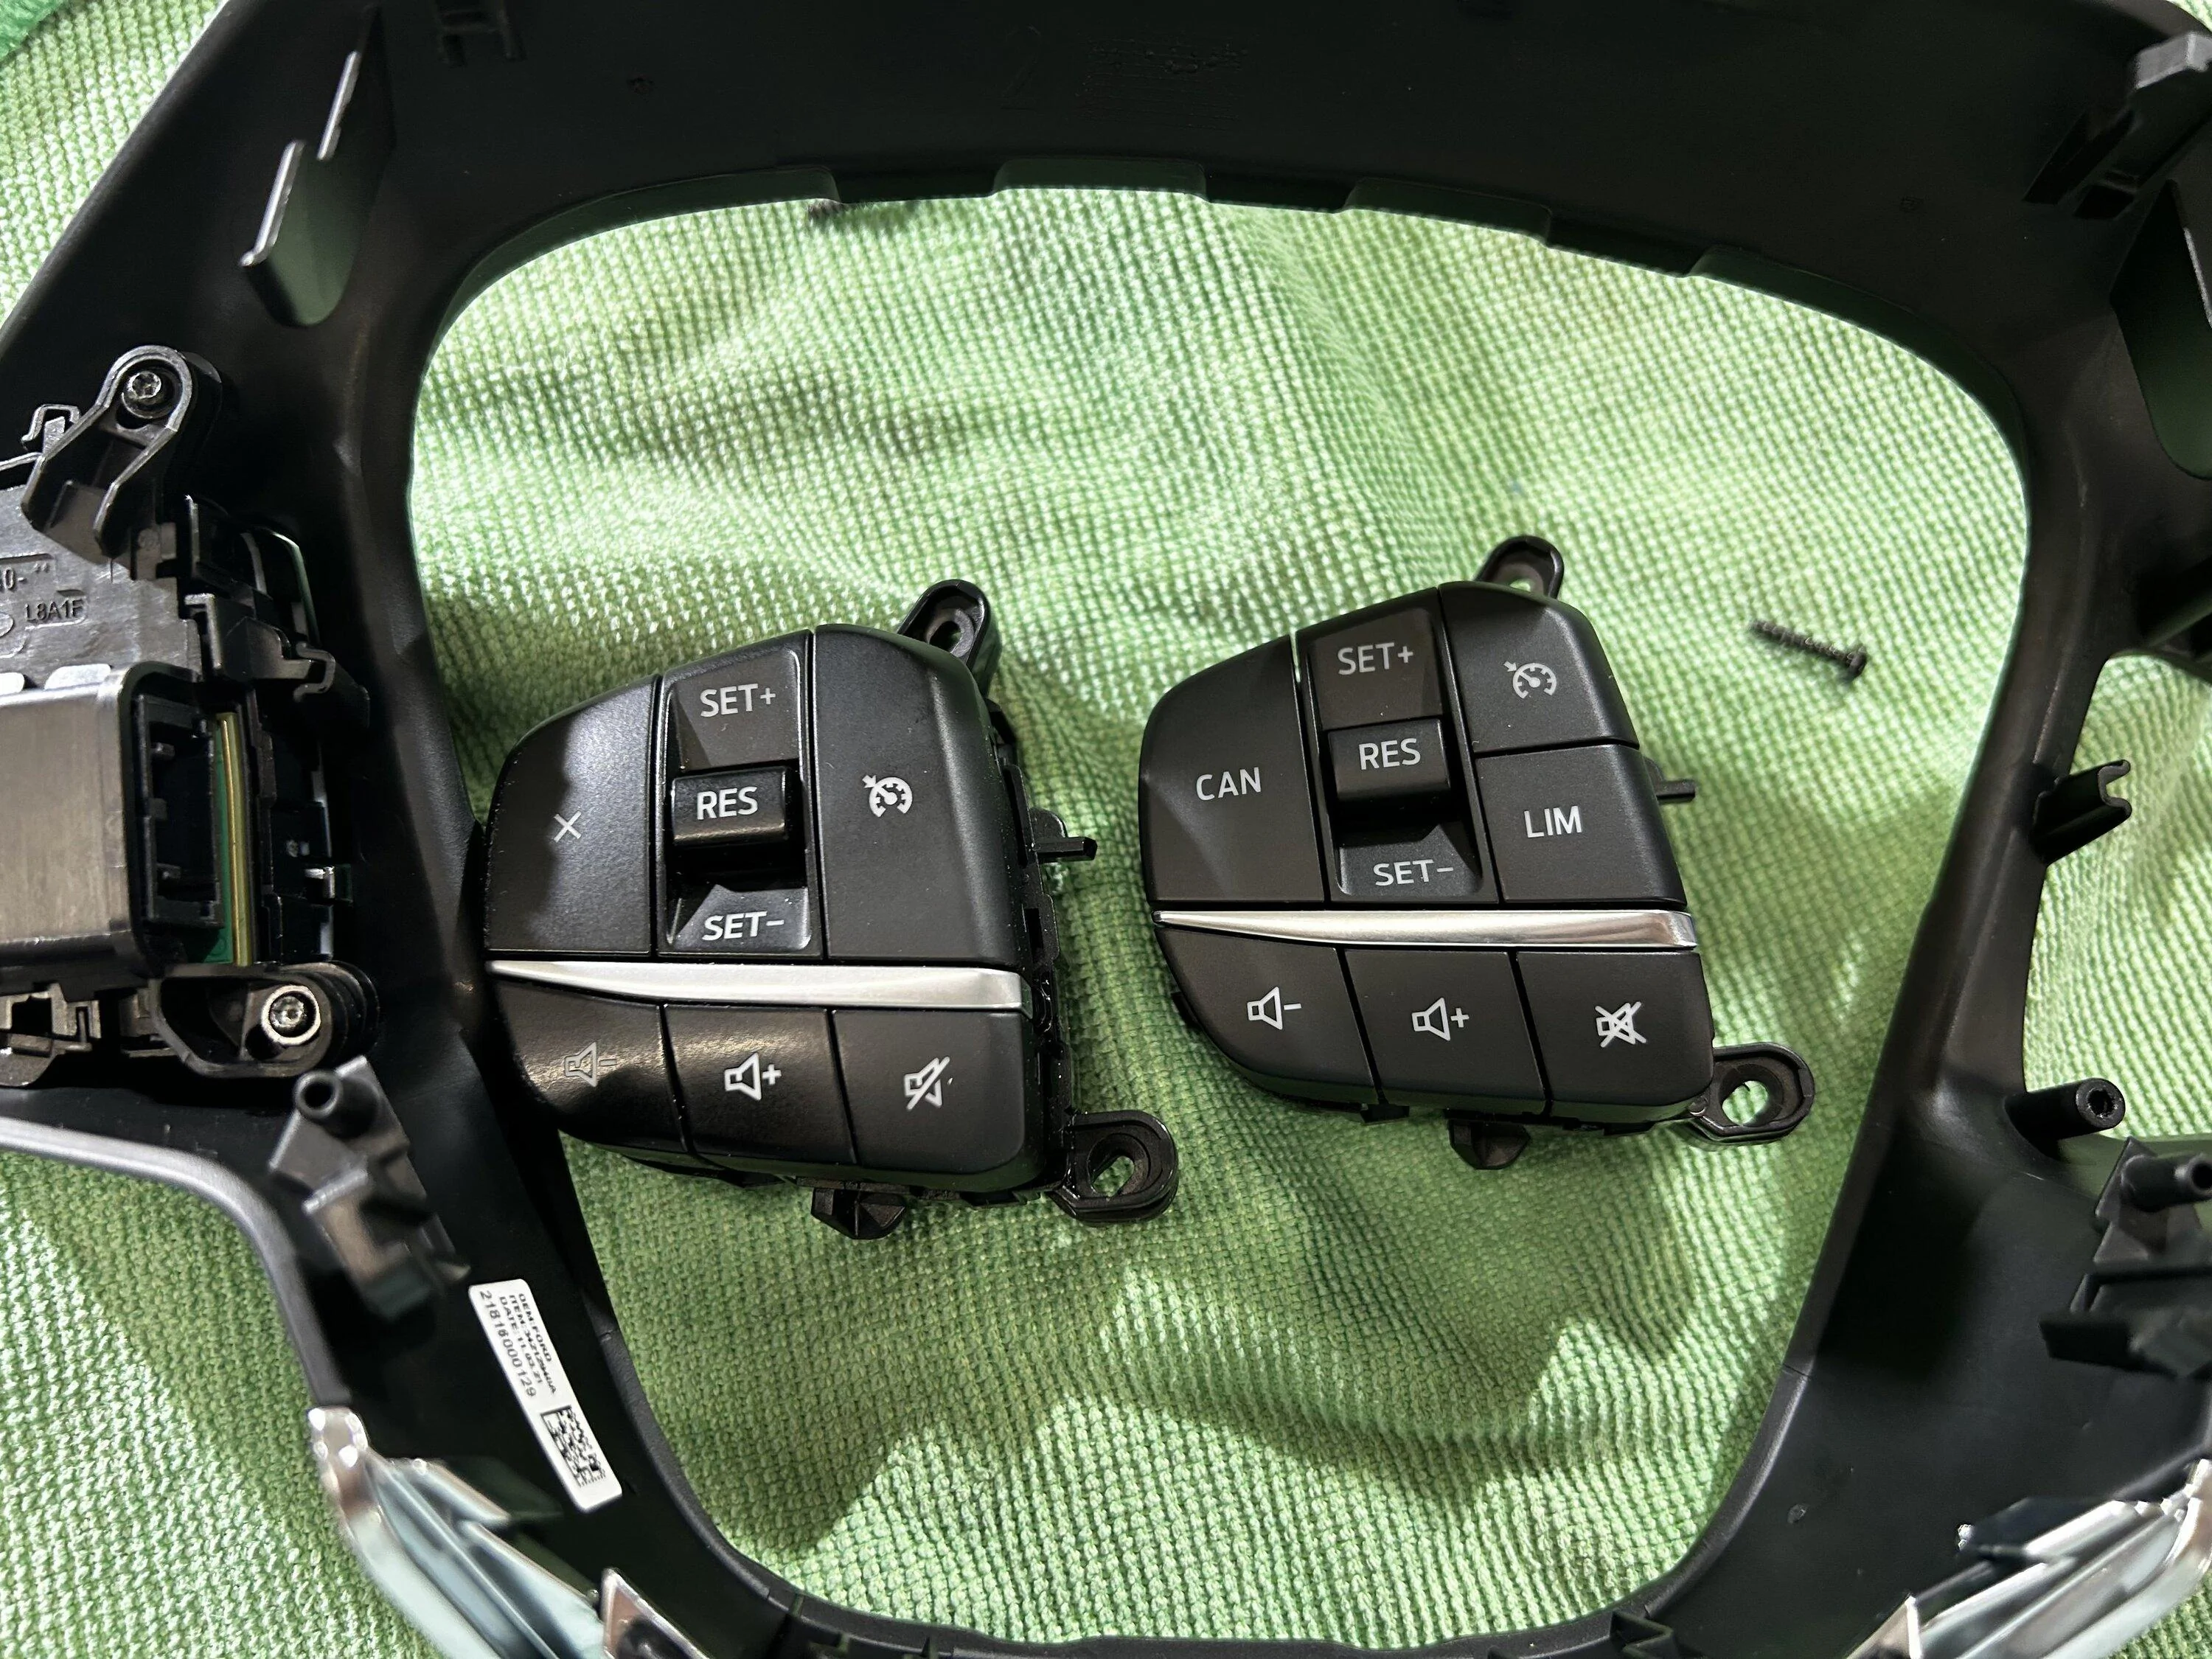
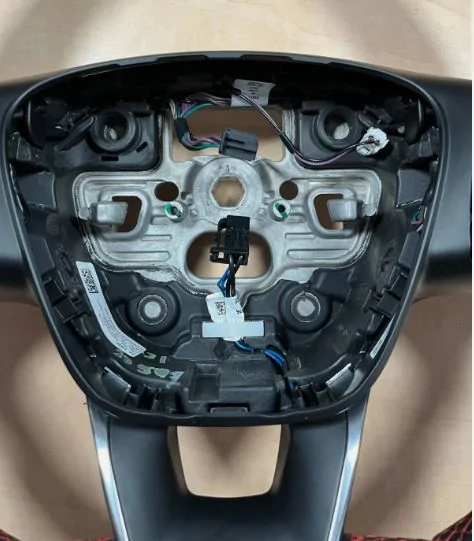
Once the plastic trim is removed, as partially instructed in the video, swap your factory Maverick steering wheel buttons over to your Fiesta ST plastic trim panel. Both Euro and USDM wheels use two T7 Torx bits per steering wheel control. There are two small tabs on the outside of each button as well, that just need slightly pulled outward to allow the buttons to release. The Euro switches that will come with your ST wheel are incompatible with the USDM Maverick. (USDM on the left vs Euro on the right in above picture) With that said, the Euro steering wheel harness is also incompatible with the Mavericks airbag.

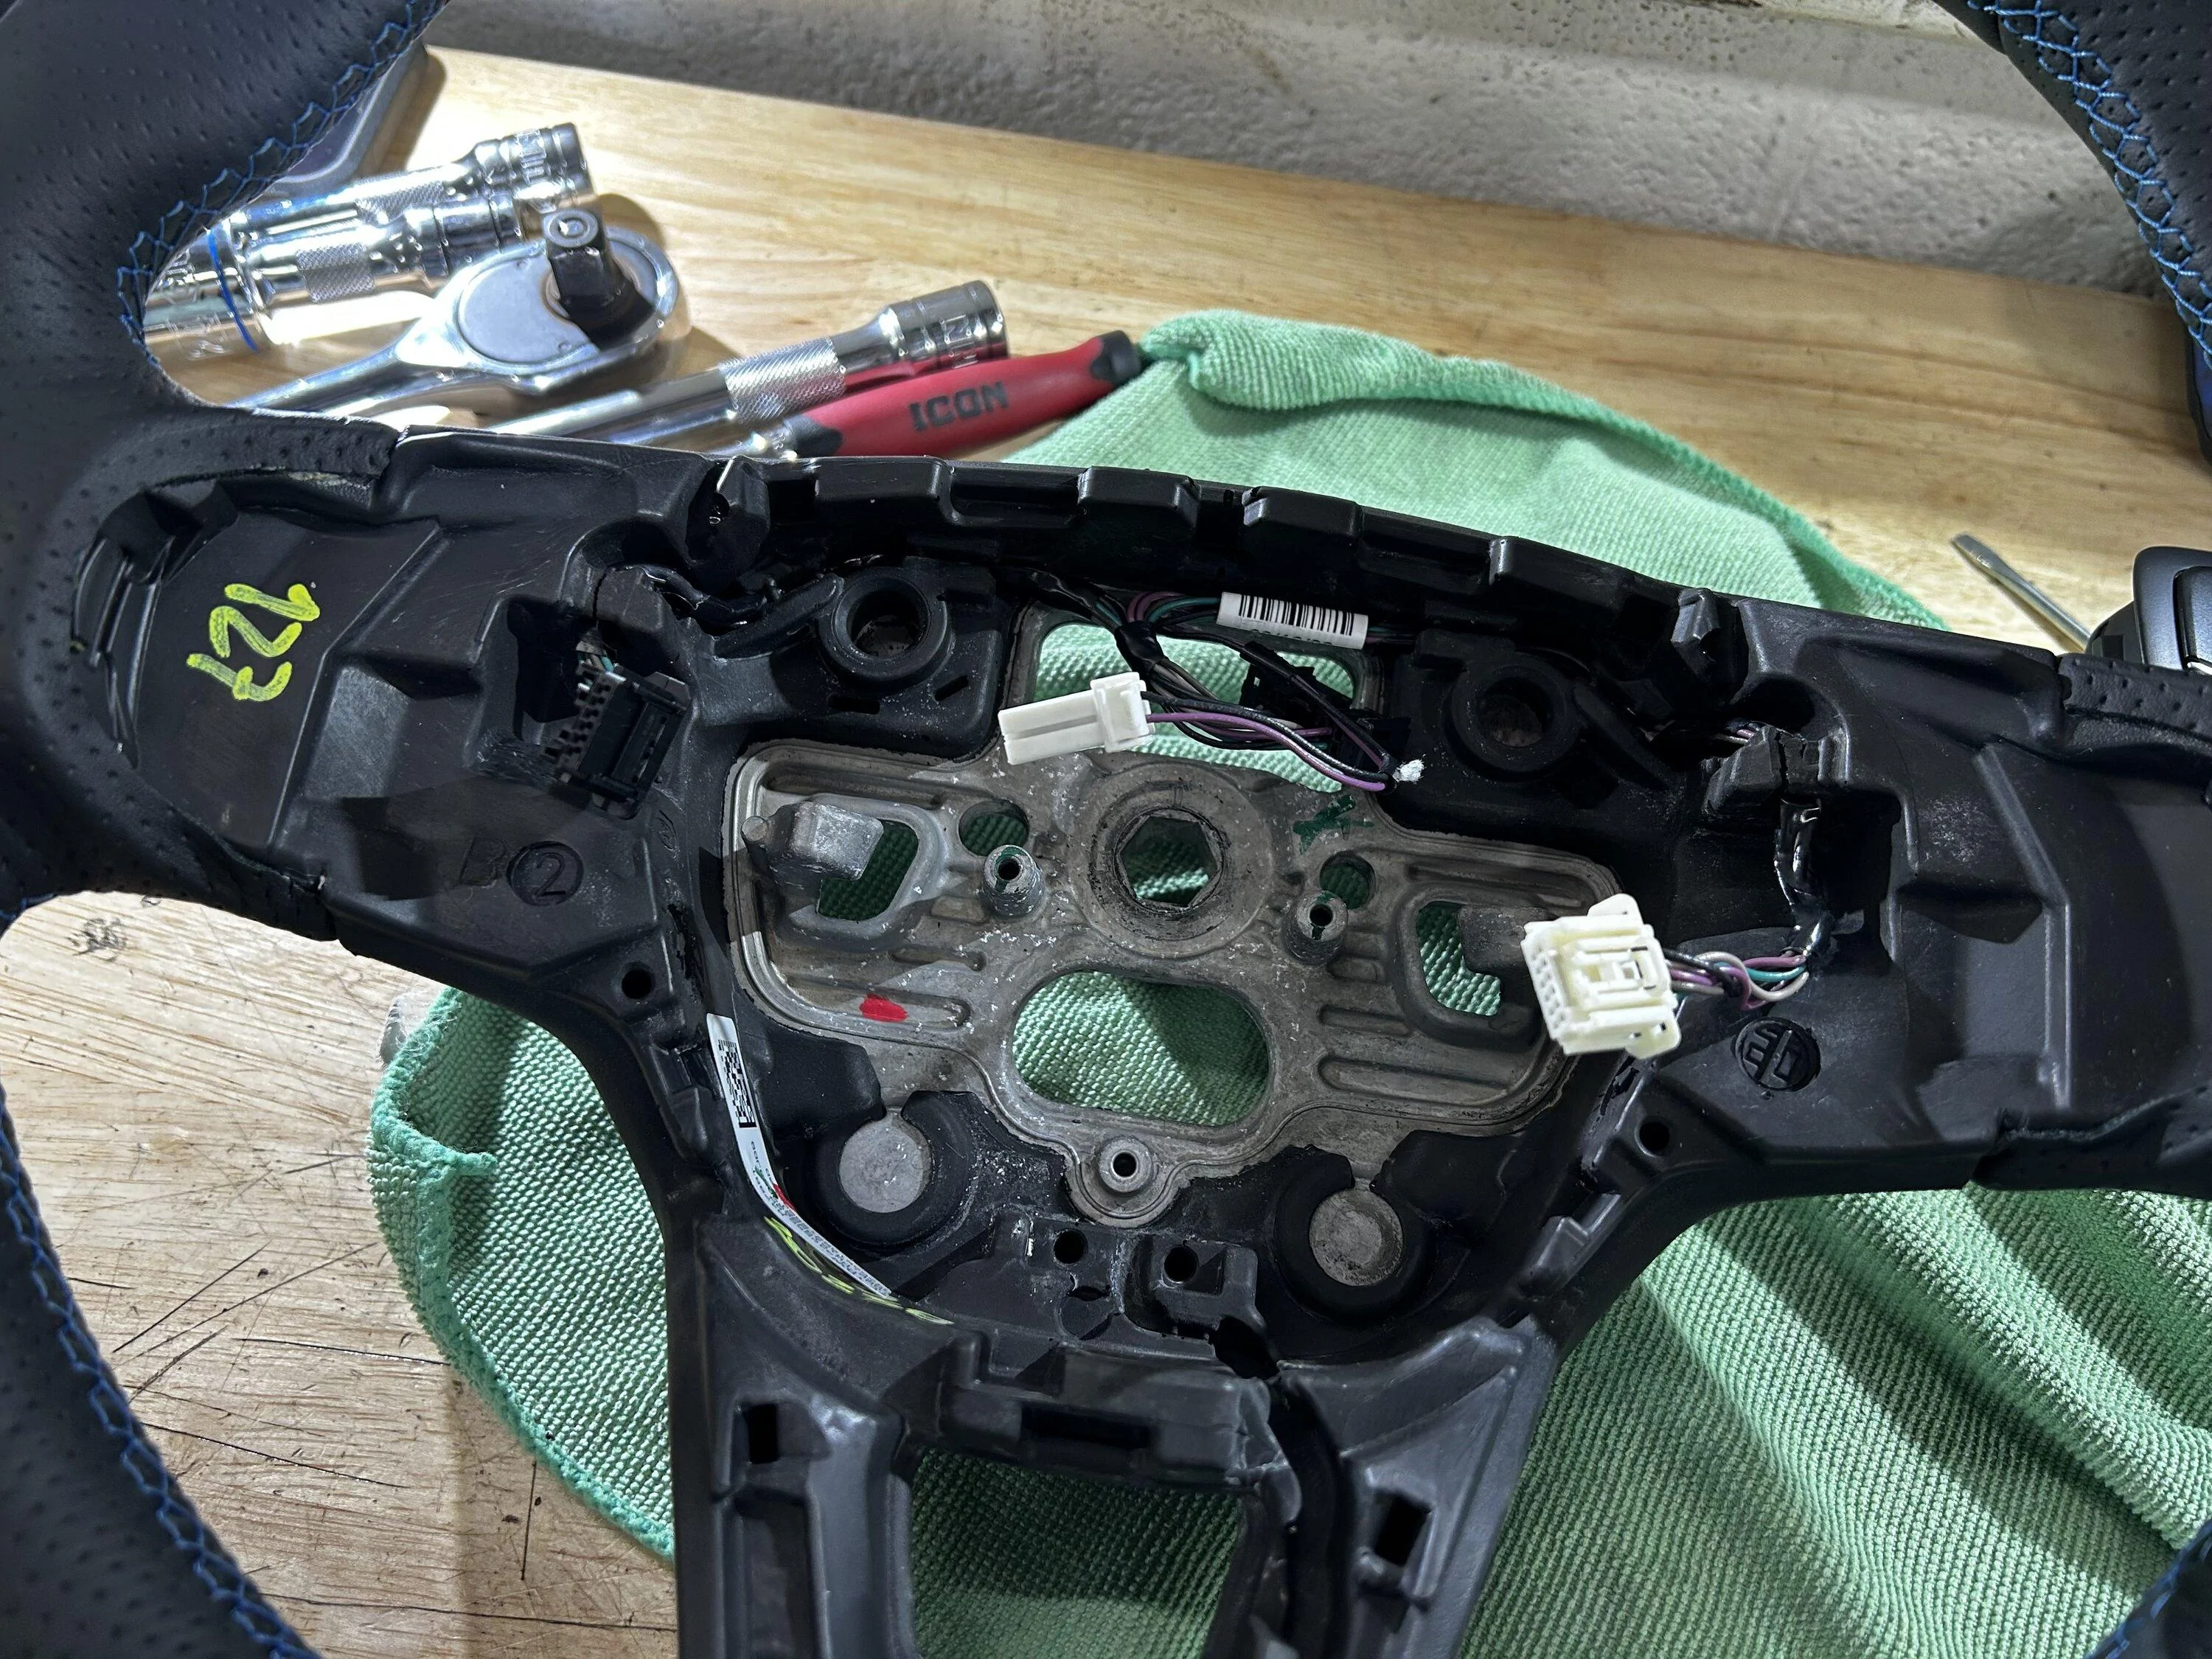
This is simple, just carefully remove both wiring harnesses from each wheel. Pay attention to how they were routed and their orientation. Take a picture if need-be. They are only held in with friction and grooves. Put the USDM Maverick harness into the Fiesta ST wheel. You may need a blunt plastic trim tool or similar to help seat the harness correctly. (USDM on the left vs Euro on the right in above picture)
Step #4:
Reinstallation- Once you’ve successfully rerouted your USDM wheel harness into the ST wheel, it's time to reassemble. This is shown in the aforementioned YouTube video at 6:42 to 6:50. Carefully and correctly push all the tabs back in place and reconnect your steering wheel buttons to the harness. This may take an attempt or two if you’ve never done this before. Once properly seated and reconnected, bring your steering wheel back into the truck along with your 24mm bolt.
Guide the SRS wires through the wheel and remove the tape (or flathead) holding the clock spring in place. Seat the wheel correctly and firmly in place. Run the 24mm bolt down by hand until its finger tight. Reconnect the black rectangular connector for the horn and switches to the clock spring. Per the workshop manual, the wheel is to be torqued to 35ftlbs. I chose to set my torque wrench to 40ftlbs because I added an extension to clear the steering wheel.
Do what you feel comfortable doing.
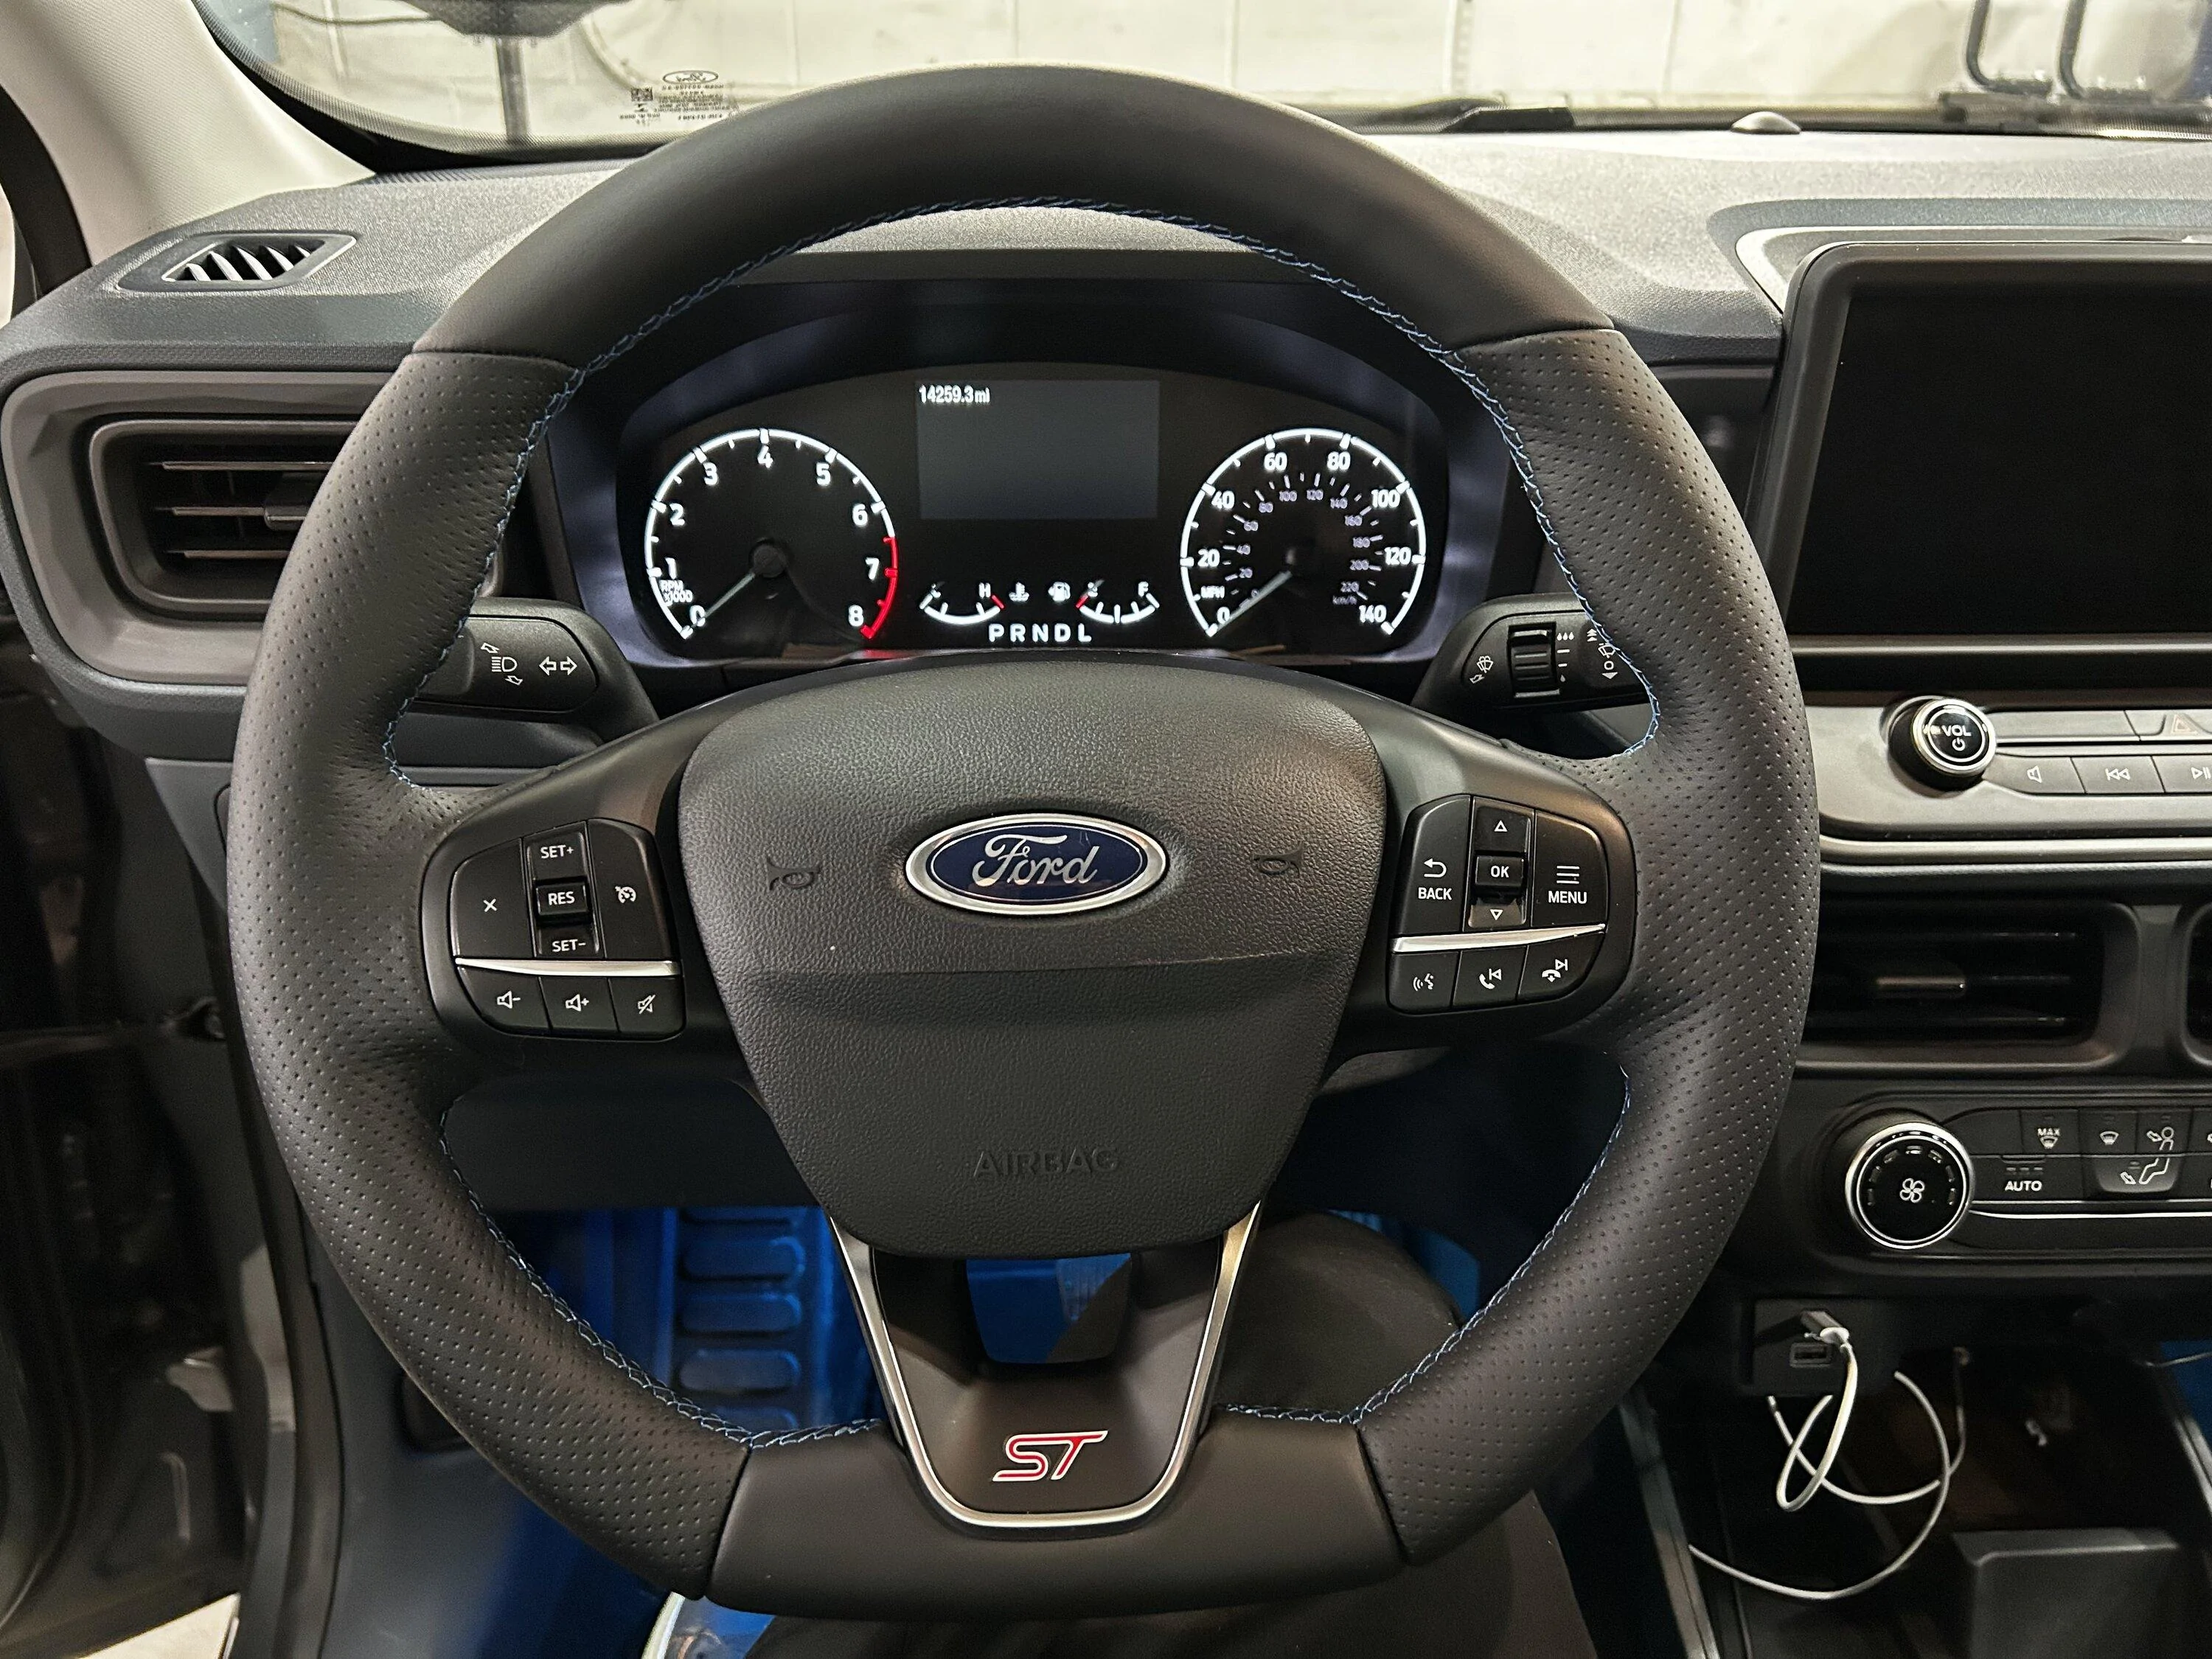
I was able to torque this by myself but an extra set of hands never hurt. Once the new steering wheel is torqued down, it's time to reinstall the airbag. Connect the horn connector at the top of the airbag. Using the small screwdriver; seat the SRS airbag connectors flush with the inflator. The connectors are color coded. Push the orange tab down so the connector and tab seat flush as they were before removal. Then simply align the airbag in its hole, and push on the left and right side simultaneously. The release clips should engage, and the horn should honk. Congratulations! You’ve installed a Fiesta ST steering wheel!
If you’re an XL owner who is doing a wheel swap alongside the cruise control mod, please resume instructions on programming using ForScan to enable your switches. If that does not apply to you, ensure the SRS light goes off when you start the truck, and ensure all of your buttons work. If they do not, you forgot and/or didn’t correctly seat a connector.
Hopefully this was helpful to those attempting to do this swap!
This is a full step by step guide on how to install a Mk8 Fiesta wheel into any Maverick. I had multiple people request that I share how I installed mine in detail (for anyone interested in the process or for anyone interested in following this process step by step.)
(Steps 1 & 3 & 4 will be fully shown in the linked YouTube video in Step 3)
Step #1:
Remove the airbag- Turn the wheel left or right 90° to expose the release clips on the backside of the steering wheel. Push downward with a flathead screwdriver that's long enough to reach the release clips, but short enough that it does not make contact with your gauge cluster and damage it. Turn the wheel 180° in the opposite direction and repeat. The airbag should come out with three connectors on it. If you follow the workshop manual from Ford, there is a SRS depowering procedure, but nobody goes through it.
Do what you feel comfortable doing.
Lift up on the orange SRS tabs with a small flathead screwdriver/techdriver or an angled pick. Once both tabs are lifted the connectors should wiggle out. If not, you need to lift the orange tab higher up. There should be one 2-wire white connector left at the top of the airbag for the horn. This disconnects like a regular connector. The airbag should be free. Sit it down on a soft surface. The final connector is a black rectangular one on the clock spring. Its at the top of the wheel as you can see in the picture. This is the main connector for the steering wheel switches and horn. This disconnects like a regular connector.
Step #2:
Remove the steering wheel- Center the wheel and level it flat. This is for wheel and clock-spring alignment. I used a ⅜ air stubby impact for this, but I’m sure any electric impact will zip it right out. If you’re doing this manually, you may need some helping hands to keep the wheel straight. The steering wheel bolt is a 24mm torqued down to 35ftlbs per the workshop manual. It doesn't take much to remove it. Once the bolt is removed, all you need to do is carefully pull towards you and the steering wheel will slide off. Make sure to gently guide the SRS wires though the wheel passthrough as the wheel comes off. They stay with the clock spring.
From here the workshop manual suggests to tape the clock spring in place with painters tape. It cannot be rotated around without the steering wheel installed, and if it does rotate, damage could occur. Tape prevents unintentional movement. Professional preference for me, I opted to jam a small flat head between the clock spring post, the clock spring itself, and column. Congratulations! You’ve removed a Ford steering wheel!
Step #3:
Disassembly and transferring parts- Anyone who's done the cruise control mod with ForScan, already knows how to remove the plastics on the wheel. I will link a video below as it's easier to watch than to explain. Please be careful, you can break either steering wheel if you remove the plastics incorrectly. Start with your OEM Maverick wheel to ‘practice’ with. You won’t need it once the swap is completed, obviously, so breaking something won't matter. Remove this on both steering wheels. Ensure to remove the connectors for the steering wheel buttons on both sides.
Ford Maverick Cruise Control 4:50 to 6:42 relevant for Steps 1 & 3 (video does NOT include wheel removal for step 2)
Once the plastic trim is removed, as partially instructed in the video, swap your factory Maverick steering wheel buttons over to your Fiesta ST plastic trim panel. Both Euro and USDM wheels use two T7 Torx bits per steering wheel control. There are two small tabs on the outside of each button as well, that just need slightly pulled outward to allow the buttons to release. The Euro switches that will come with your ST wheel are incompatible with the USDM Maverick. (USDM on the left vs Euro on the right in above picture) With that said, the Euro steering wheel harness is also incompatible with the Mavericks airbag.
This is simple, just carefully remove both wiring harnesses from each wheel. Pay attention to how they were routed and their orientation. Take a picture if need-be. They are only held in with friction and grooves. Put the USDM Maverick harness into the Fiesta ST wheel. You may need a blunt plastic trim tool or similar to help seat the harness correctly. (USDM on the left vs Euro on the right in above picture)
Step #4:
Reinstallation- Once you’ve successfully rerouted your USDM wheel harness into the ST wheel, it's time to reassemble. This is shown in the aforementioned YouTube video at 6:42 to 6:50. Carefully and correctly push all the tabs back in place and reconnect your steering wheel buttons to the harness. This may take an attempt or two if you’ve never done this before. Once properly seated and reconnected, bring your steering wheel back into the truck along with your 24mm bolt.
Guide the SRS wires through the wheel and remove the tape (or flathead) holding the clock spring in place. Seat the wheel correctly and firmly in place. Run the 24mm bolt down by hand until its finger tight. Reconnect the black rectangular connector for the horn and switches to the clock spring. Per the workshop manual, the wheel is to be torqued to 35ftlbs. I chose to set my torque wrench to 40ftlbs because I added an extension to clear the steering wheel.
Do what you feel comfortable doing.
I was able to torque this by myself but an extra set of hands never hurt. Once the new steering wheel is torqued down, it's time to reinstall the airbag. Connect the horn connector at the top of the airbag. Using the small screwdriver; seat the SRS airbag connectors flush with the inflator. The connectors are color coded. Push the orange tab down so the connector and tab seat flush as they were before removal. Then simply align the airbag in its hole, and push on the left and right side simultaneously. The release clips should engage, and the horn should honk. Congratulations! You’ve installed a Fiesta ST steering wheel!
If you’re an XL owner who is doing a wheel swap alongside the cruise control mod, please resume instructions on programming using ForScan to enable your switches. If that does not apply to you, ensure the SRS light goes off when you start the truck, and ensure all of your buttons work. If they do not, you forgot and/or didn’t correctly seat a connector.
Hopefully this was helpful to those attempting to do this swap!
Sponsored
Last edited: