Sponsored
Cut a hole under 2.0 engine shield for oil change accessibility?

- First Name
- Mike
- Joined
- Dec 18, 2021
- Threads
- 3
- Messages
- 241
- Reaction score
- 339
- Location
- Hermitage, Pa.
- Vehicle(s)
- 73 vette, 71Fiat 850, 91 Mercedes 500SL, 2001 F150
- Engine
- 2.0L EcoBoost
Actually, leaving it off will reduce the effectiveness of the air conditioning. It changes the airflow to a degree. How much is just a guess but the engineers were forced to do this in order that a/c and cooling system components could be smaller, lighter, hence less expensive for production. Mercedes used the trick in the mid 80s and they never put anything on a vehicle that did not serve a functional purpose. But I admit it is "one more thing".I left it off. Keep the parts cool

There’s a real nice looking 3d print file for some doors for the shield, let me see if I can find the post about it hereYeah, I'm gonna look for some hinges and a latch
This should be the link to the file
https://www.thingiverse.com/thing:5979898
Last edited:
I also thought about this. It's a pain to change it! I had an Integra then a Camry, didn't have to remove anything to get to access to either one. Took only 15min if I didn't have to change the filter.
Are all ford vehicles like this?
Are all ford vehicles like this?
Did you install it yet? Does it vibrate and get loose?Just got my 2023 Maverick last week. I'll print those covers with my 3D printer and cut the holes.
https://www.thingiverse.com/thing:5979898
Sponsored
- First Name
- John
- Joined
- Sep 15, 2022
- Threads
- 1
- Messages
- 22
- Reaction score
- 29
- Location
- Riverside, CA
- Website
- www.youtube.com
- Vehicle(s)
- 2023 Maverick XLT Hybrid, 2010 Camaro SS/RS
- Engine
- 2.5L Hybrid
No, sorry I'm sorting through other projects first. My 2010 Camaro started acting up and I've been having print quality issues with PETG prints for my drone project (adding Remote ID for FAA compliance). It's not serious, I'm just new to 3D printing and have too many things going wrong at exactly the same time.Did you install it yet? Does it vibrate and get loose?
- Banned
- #22
Yes the "bolts" thread into the "tin metal" stamped nuts. Had these first as trim hardware on my last Ranger (2008).
Will be doing my 2nd oil change this Sat. To ME its just another part... not a big deal..
Note* I hand thread them in, then use a manual ratchet to snug the bolts up..
Jerry
Update November 4th, 2023 14:00 hrs.
Just finished with my 2nd Oil Change and lost a "Nut" in the process. Found it after moving the "Pup".
Here is the Fastener "Assembly" for the Engine Bay Shield... (15 of them, total).
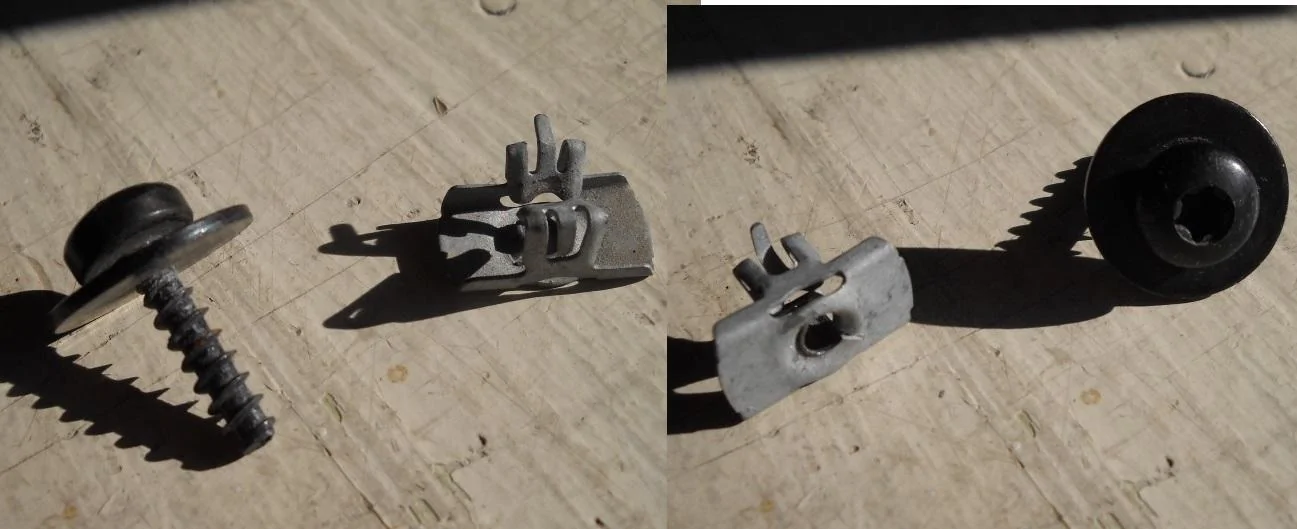
Black Metal "Screw" (Trox #T-30) and the 'Tin-metal Nut"
Guess, I will run with only "14 screws" for now...
Jerry
")
Screw & Spring Washer: W702413S450B
Nut: W718770S439
FX4 has the two part system and uses those parts to meet each other. Eventually, they will fail even if you are careful. The "nuts" are garbage. They rust, they tweak easily, they just suck. I've had two fail already and no, I don't torque 'em "good n tight". I live in Montana and they rust easily too. I don't mind the time constraint as I'm in no rush - but it's an absolute shit design.
I would totally replace my FX4 skid plate with a standard non metal one just to have a single piece to take off instead and then modify it with a flap for ease of use. I hate, and I mean hate, that two part design. The Tremor is the only one that uses the rear piece of the FX4 skid plate and not the front due to the bumper design, and the Tremor front bumper cannot be used on FX4's with tow packages due to the bottom radiator.
The more I see stuff like this thread, the more it makes me want to get into 3D printing.
Last edited:
I just got back from oil change and left the engine shield off. Planning to cut out access to filter and drain plug areas, fold down the cut parts and use some catches to have panels for oil changes. Hoping this works
I found this a while back. See if any of this helps you out. I forgot what power train this cut out is for.....sorry.I just got back from oil change and left the engine shield off. Planning to cut out access to filter and drain plug areas, fold down the cut parts and use some catches to have panels for oil changes. Hoping this works
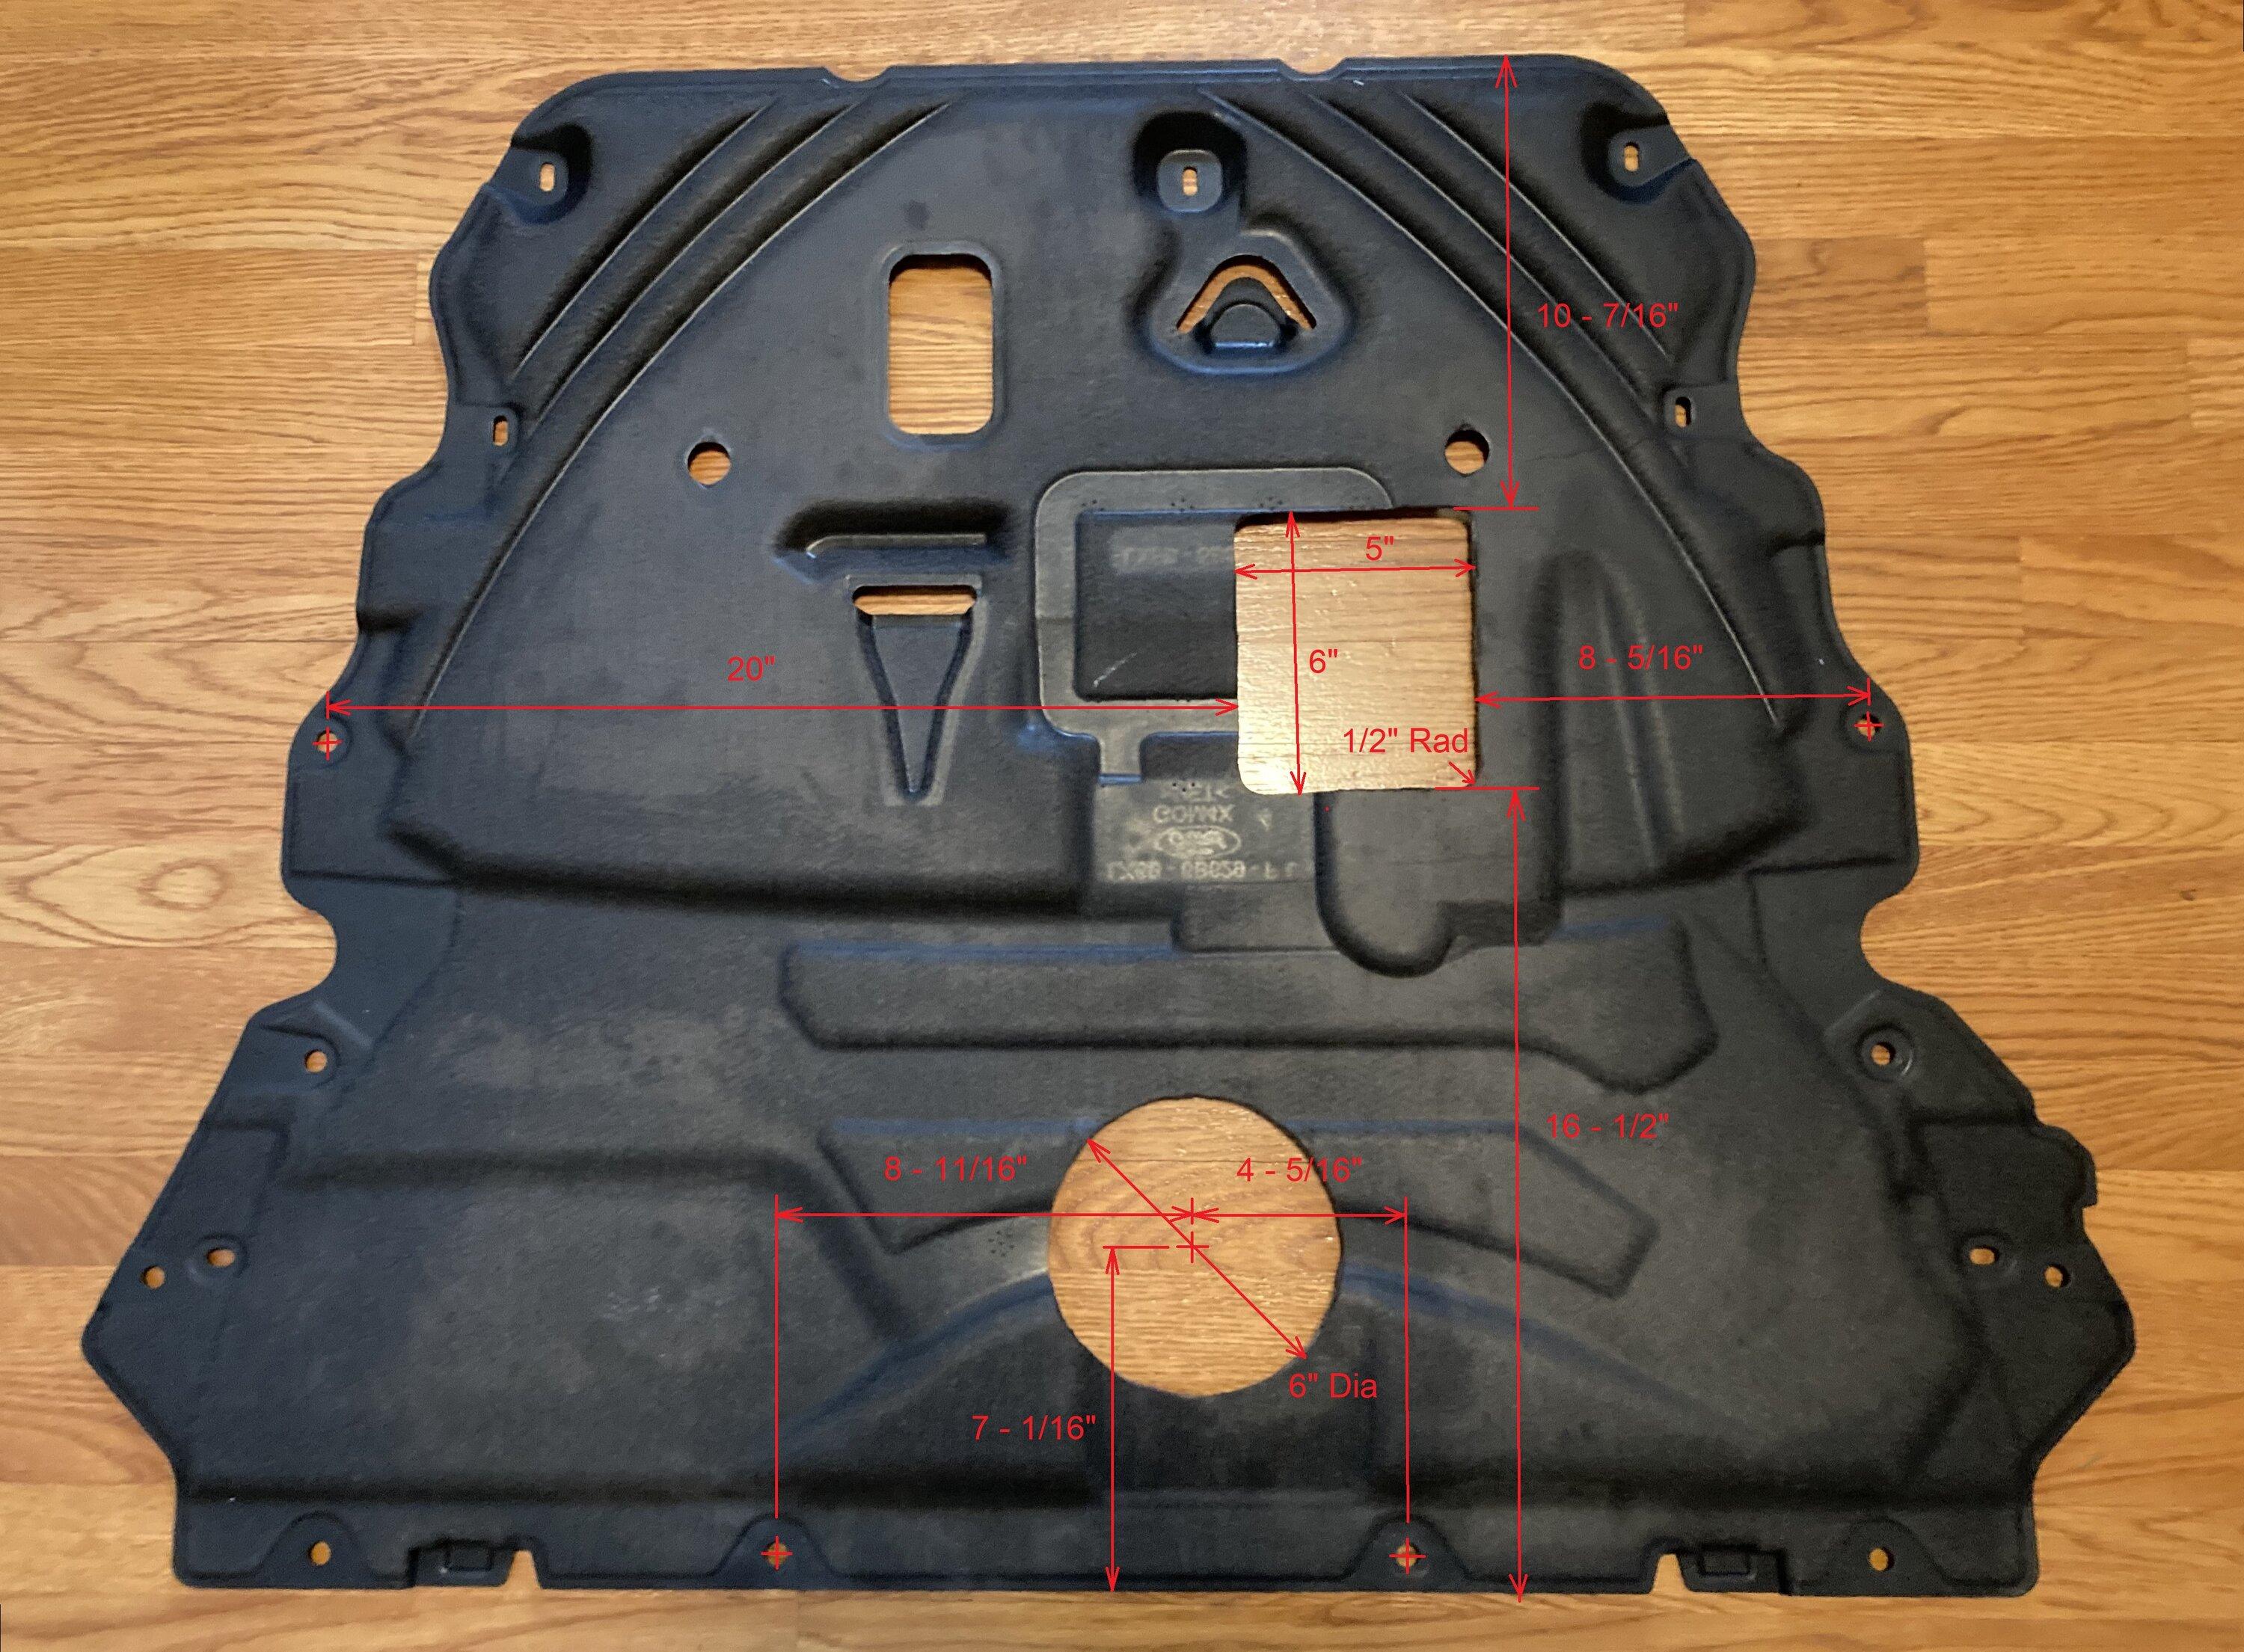
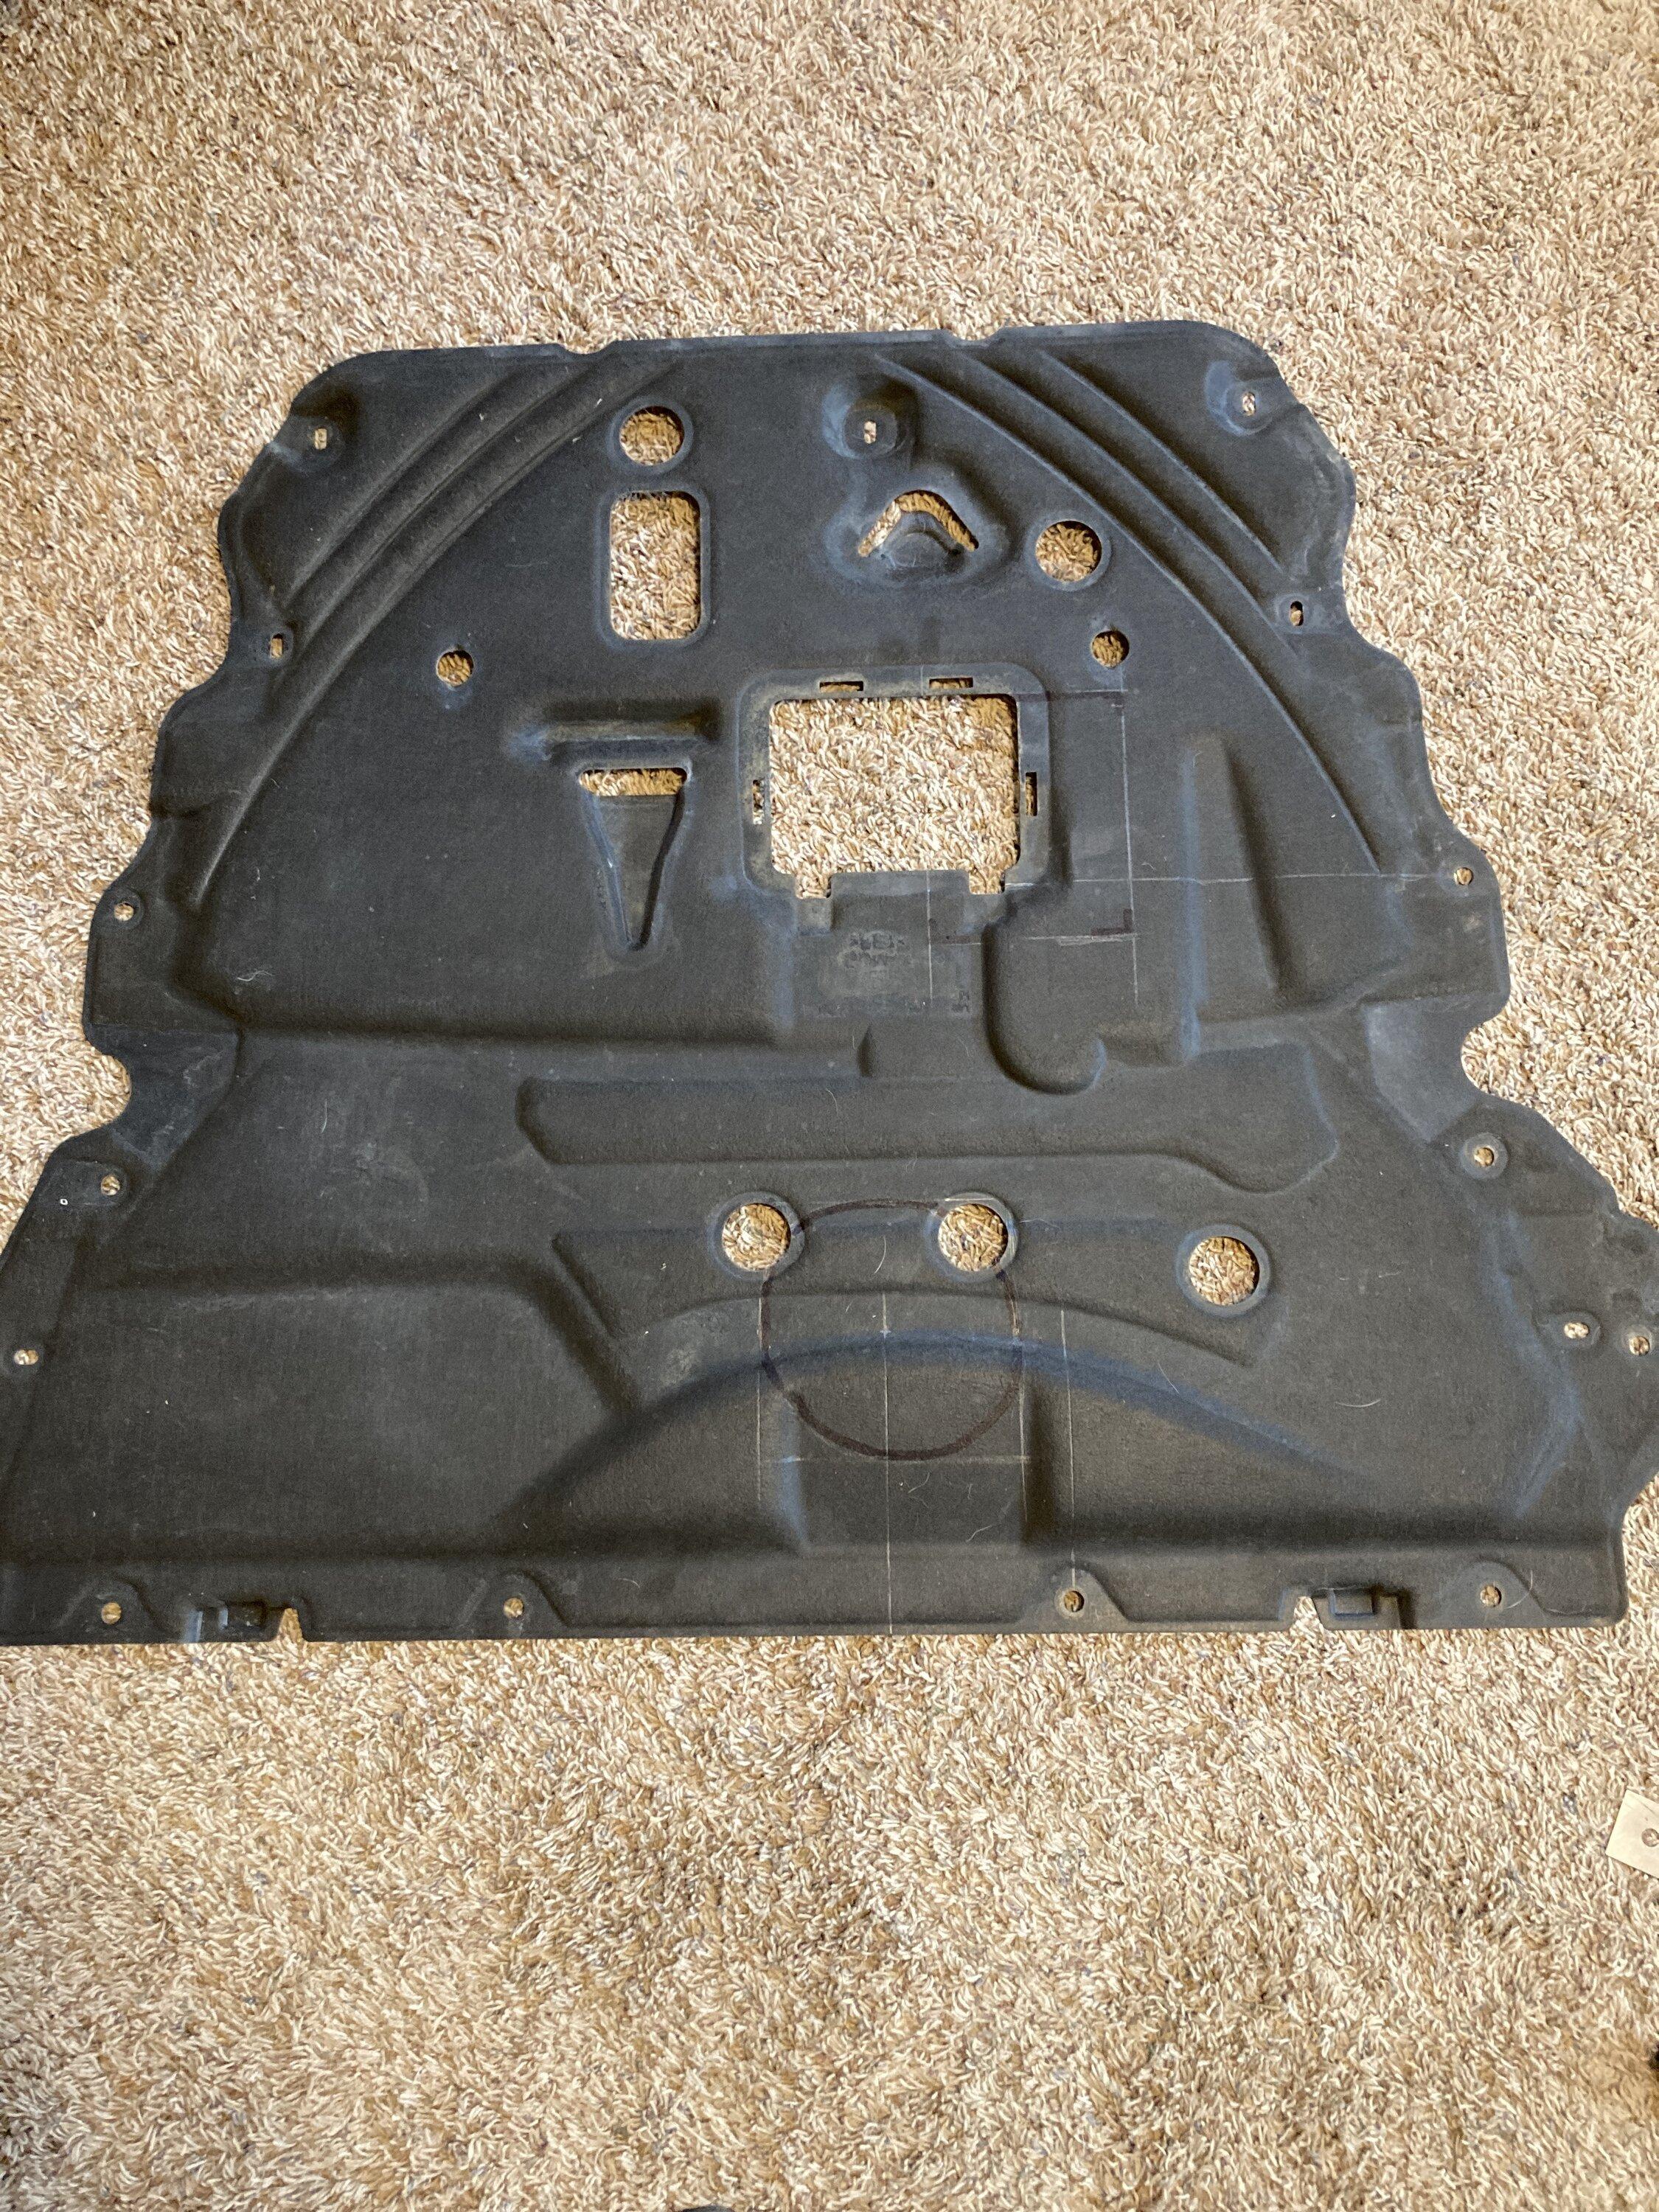
I have that saved, lol. But my shield looks different? Has a large square hole cut already? I have two thumb turn cam locks I’m hoping will workI found this a while back. See if any of this helps you out. I forgot what power train this cut out is for.....sorry.
And I have hybrid. Cam locks won’t be here till Tuesday, I measured oil filter location, and it looks same as pic from thingyverse. My panel missing large part near drain plug is goin to mean just removing more of the panel, not sure how my foot plan is going to work with material missing. Almost ready to cut
Last edited:
Sponsored
Please let us know what you do to modify it. (looks to be the same shield with different holes cut) I have a Hybrid and I do my own changes too. only 1650 mi now but will do 1st change at 2500I have that saved, lol. But my shield looks different? Has a large square hole cut already? I have two thumb turn cam locks I’m hoping will work
And I have hybrid
View attachment 136381
Thank You!

Now I’m spooked to start cutting not knowing where the openings need to be on ecoboost vs hybrid  gonna check the thingyverse file for the access panels to see
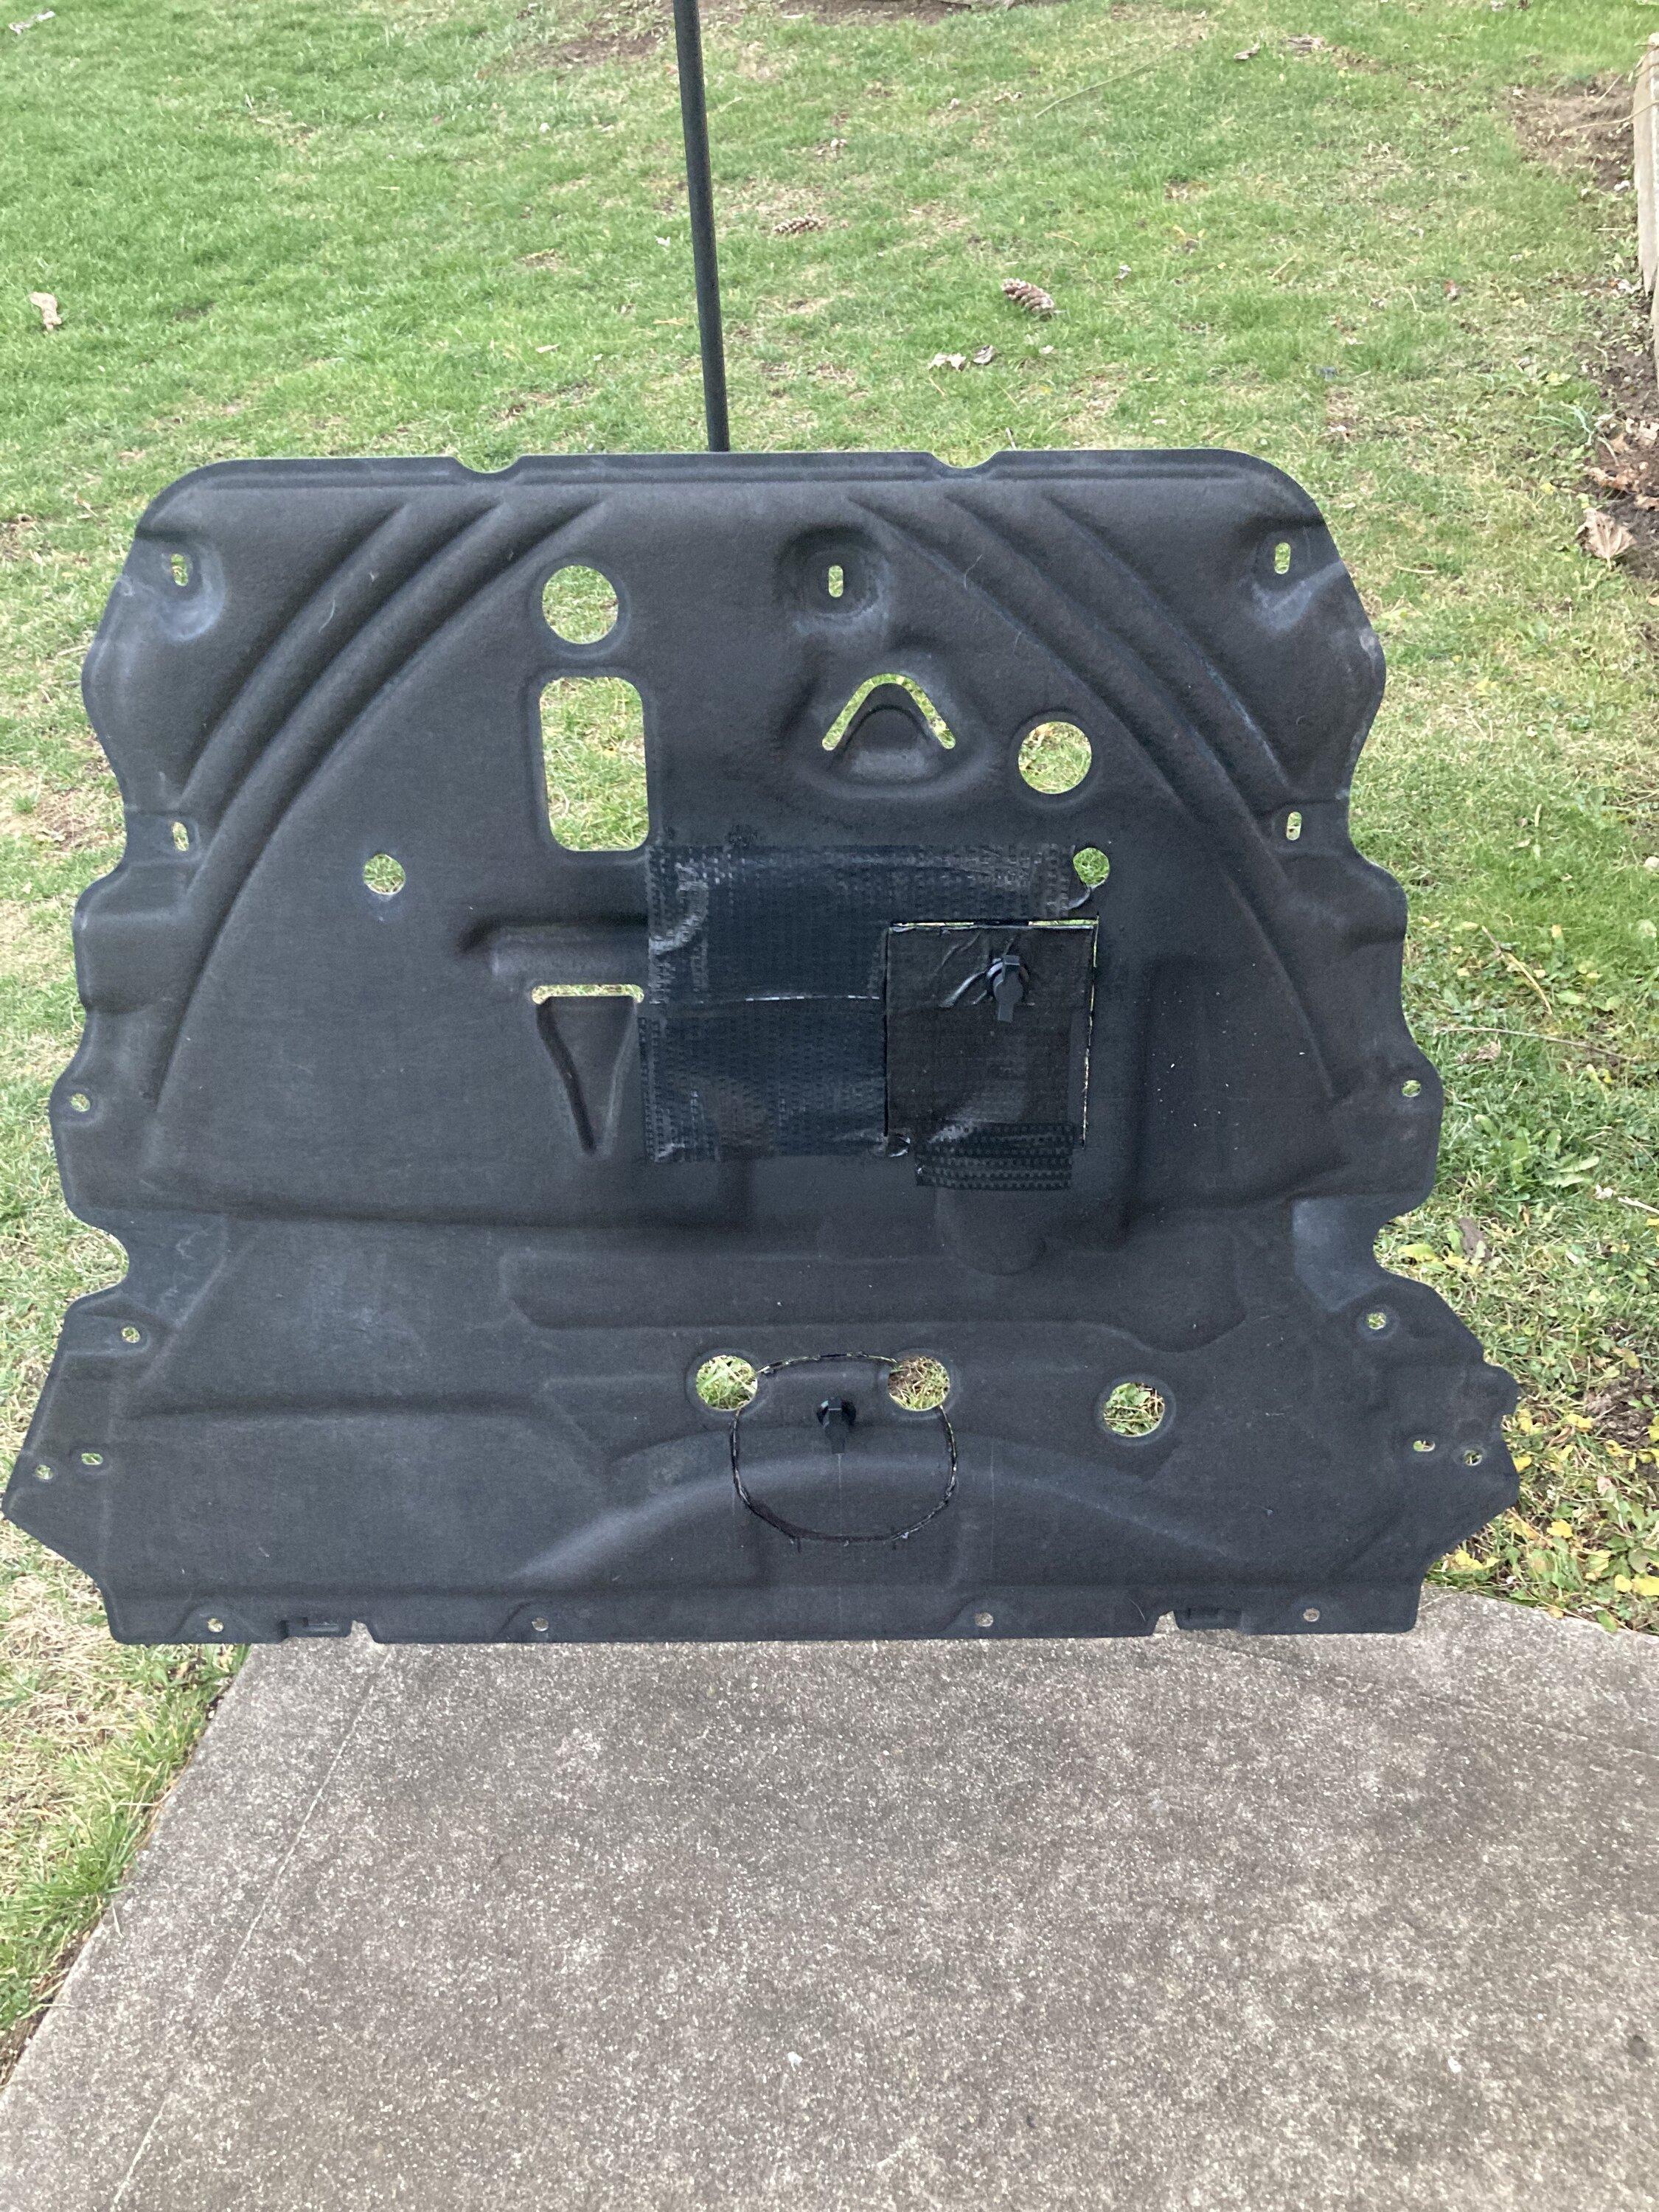
gonna check the thingyverse file for the access panels to seeAlmost finished, waiting on thumb latches. Had to fill in the big holePlease let us know what you do to modify it. (looks to be the same shield with different holes cut) I have a Hybrid and I do my own changes too. only 1650 mi now but will do 1st change at 2500
Thank You!
Hoping this works until I get the 3d access panels printed
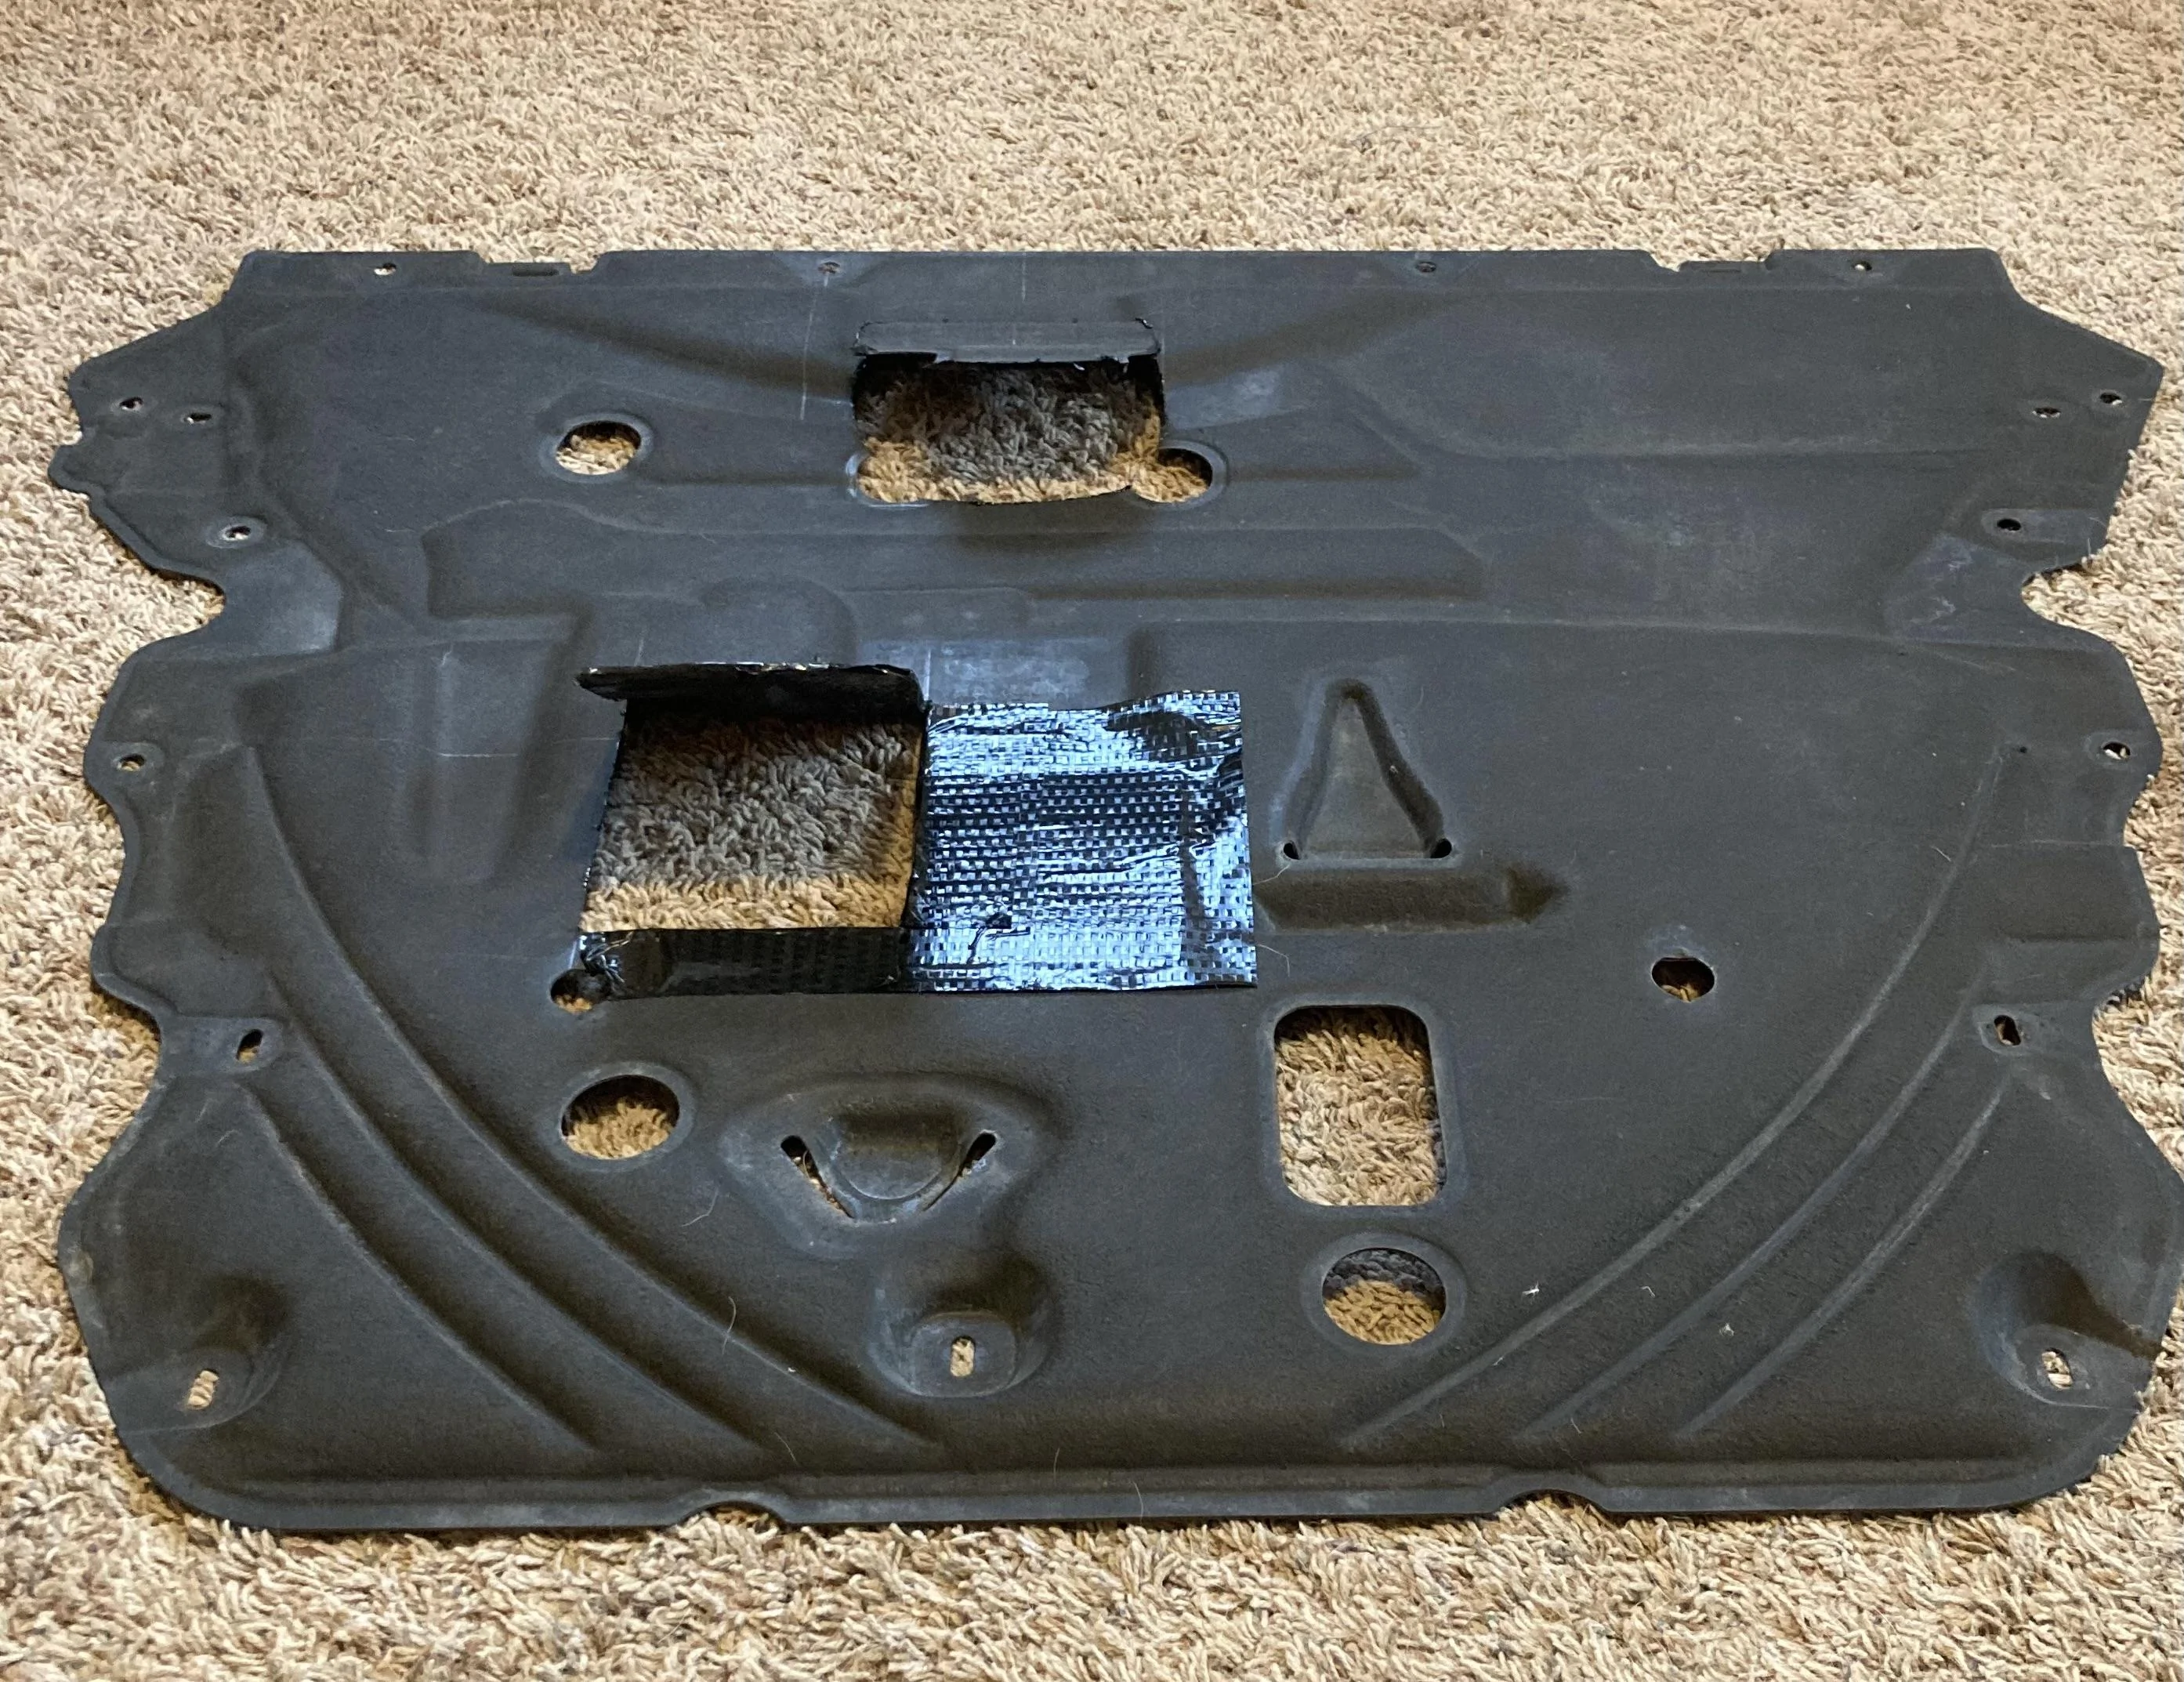
Thanks for being the "Guinea Pig"Almost finished, waiting on thumb latches. Had to fill in the big hole
Hoping this works until I get the 3d access panels printed
 on this one! I am cheering for you to get it right the 1st time!
The thingyverse access panel template that’s for ecoboost motor is the same on the hybrid. Out panel back on tonight but phone was in truck so I didn’t get pick of it installed. Should work perfectlyPlease let us know what you do to modify it. (looks to be the same shield with different holes cut) I have a Hybrid and I do my own changes too. only 1650 mi now but will do 1st change at 2500
Thank You!
Sponsored
Similar threads
- Replies
- 1
- Views
- 1,761
- Replies
- 16
- Views
- 2,335