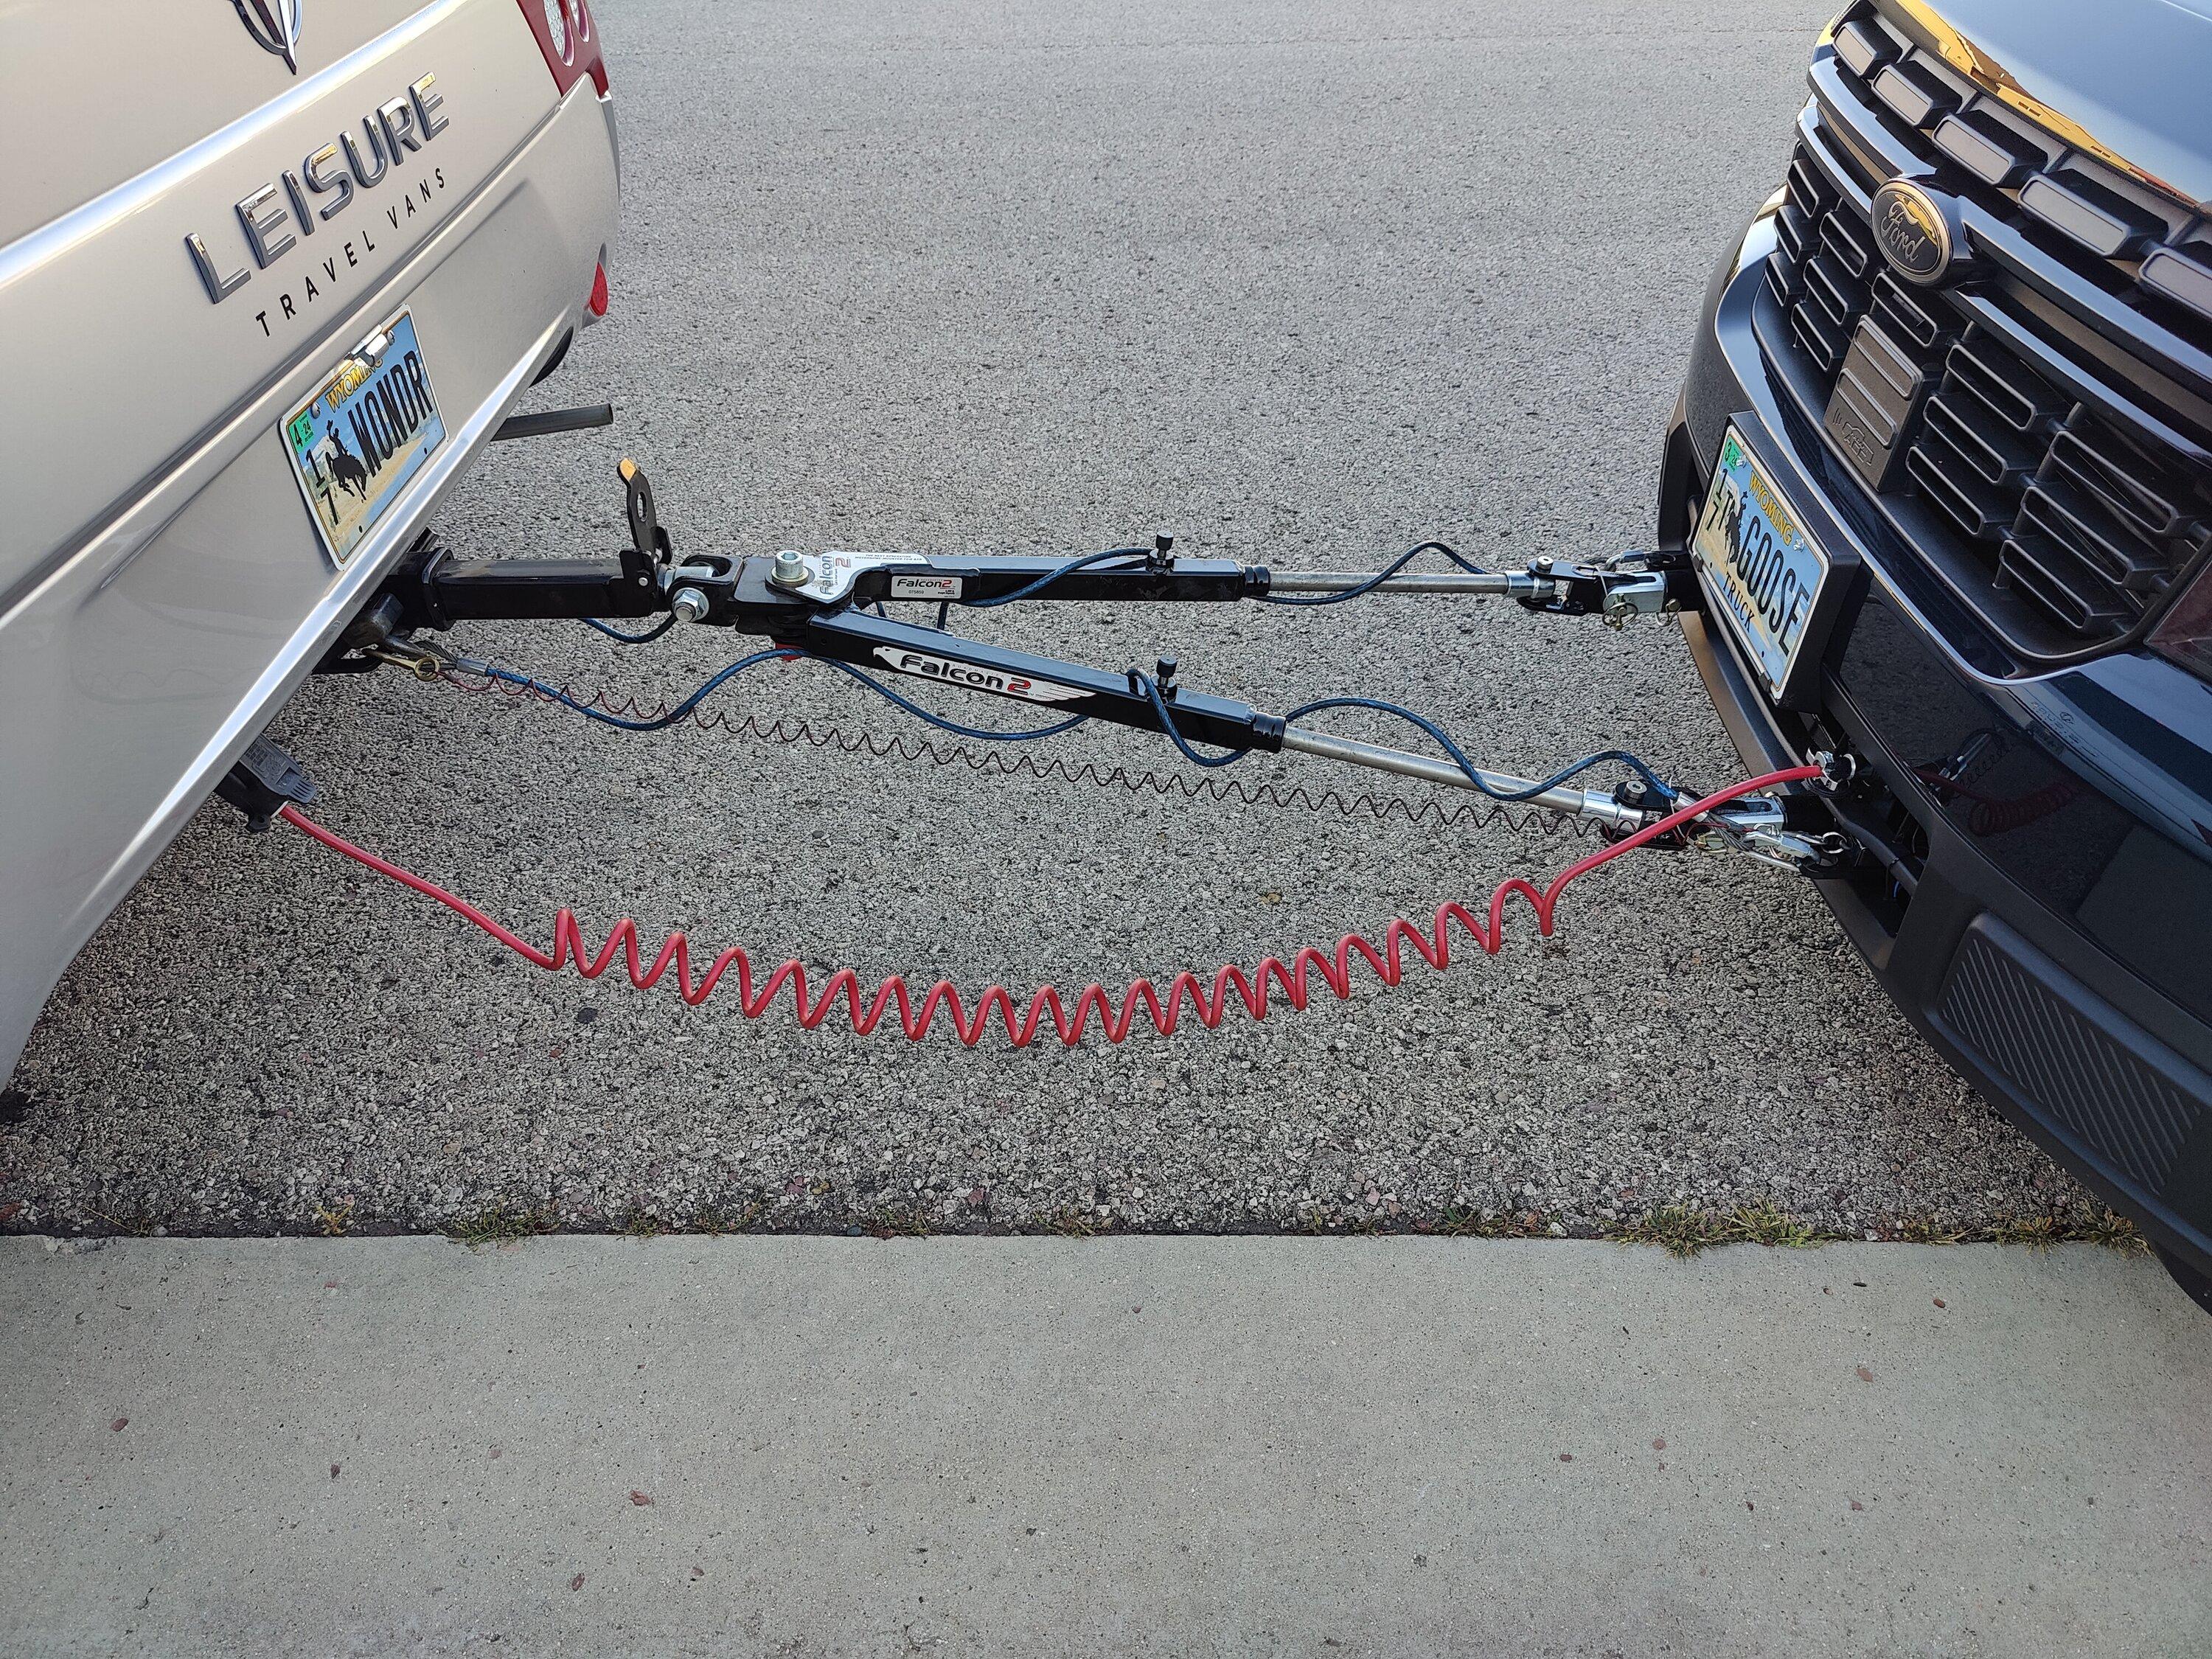
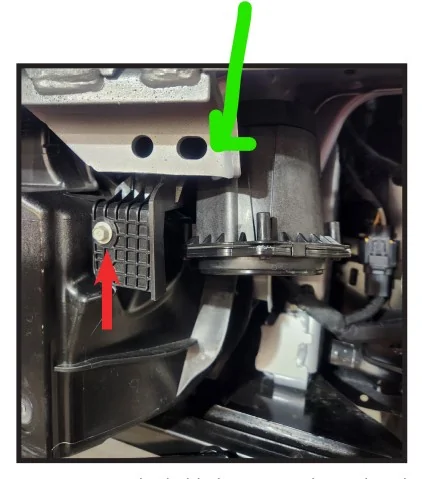
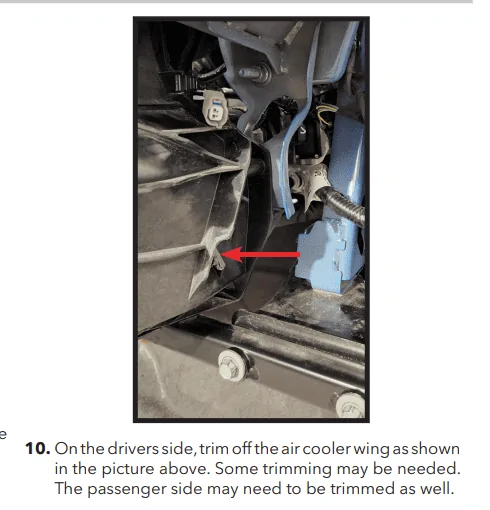
That looks really good. Yes, the narrower mounting points eliminate ANY issue with the towbar binding up like they do with the Blue Ox setup!
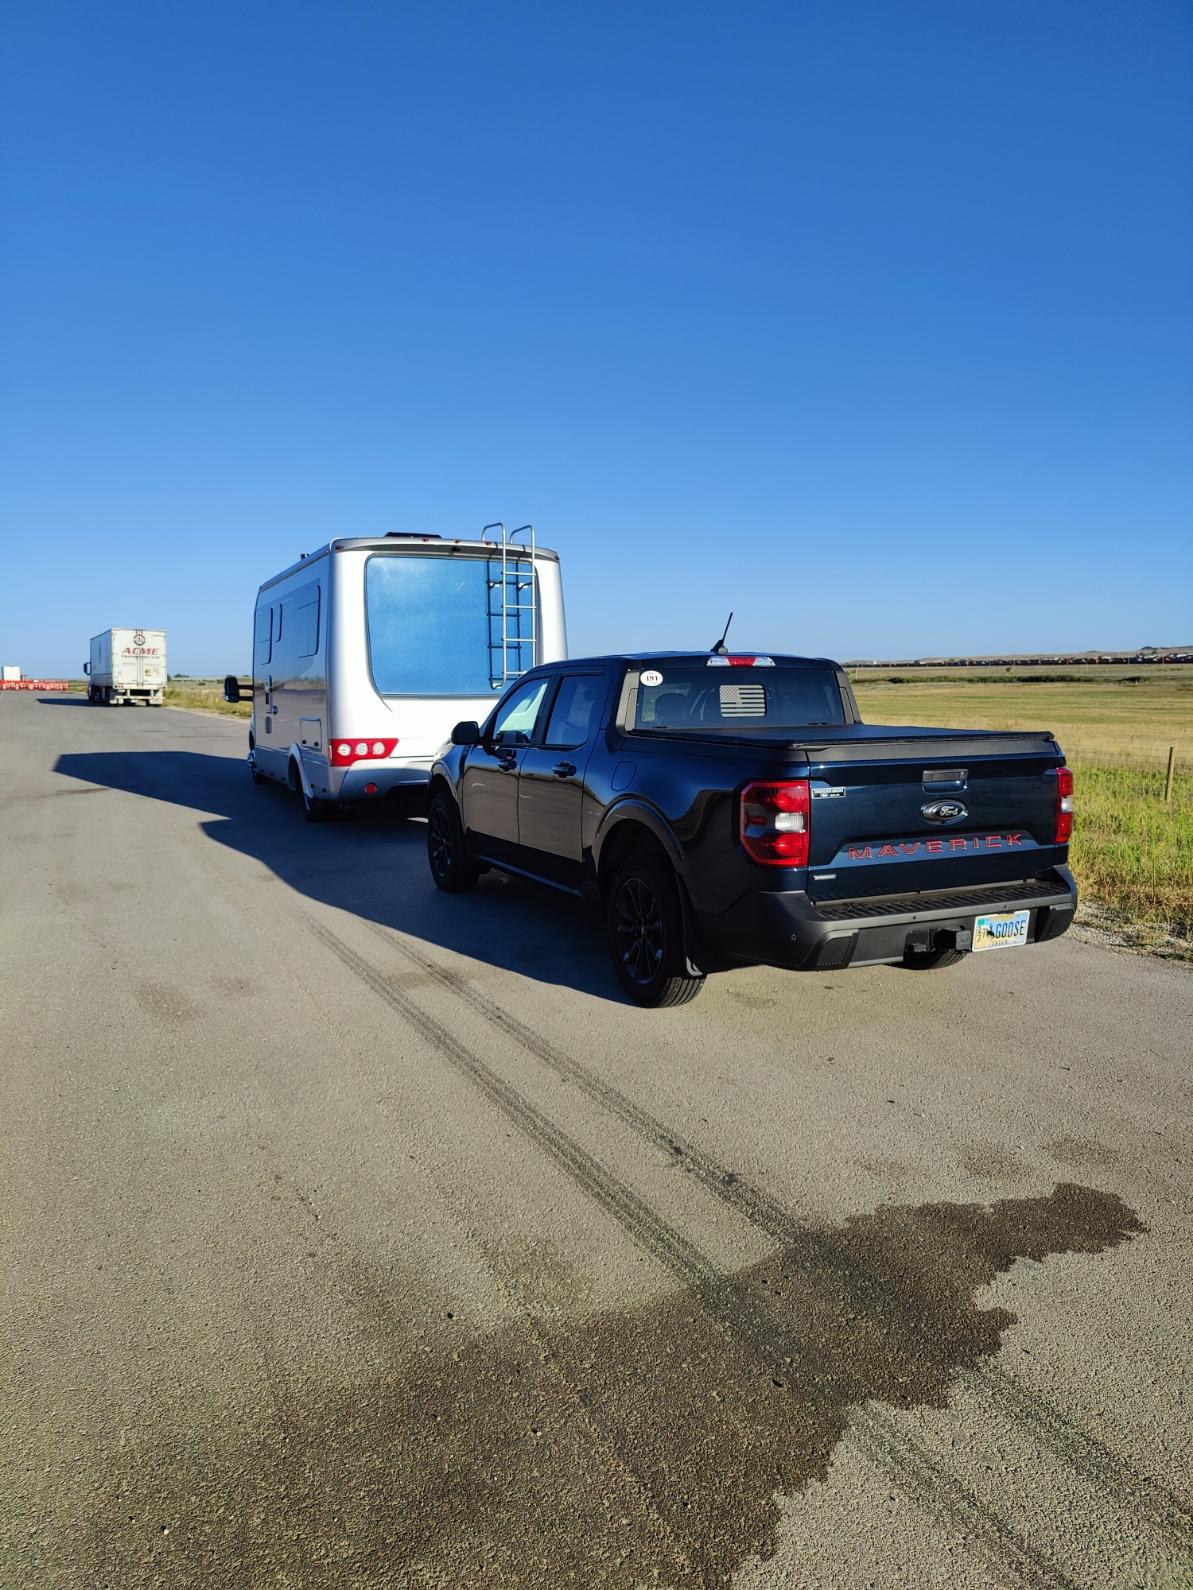
I don't have a good reference on mpg towing the Maverick yet. I got 7.54 mpg going to WV and back with the Jeep ( 5040 lbs). The Mav is probably about 1000 lbs lighter loaded up. But I can tell you it seems to tow much easier than just 1000 lbs should make. I think the rolling resistance may be a good bit lower with the narrower eco tires compared...to what was on the Jeep!
I don't have a good reference on mpg towing the Maverick yet. I got 7.54 mpg going to WV and back with the Jeep ( 5040 lbs). The Mav is probably about 1000 lbs lighter loaded up. But I can tell you it seems to tow much easier than just 1000 lbs should make. I think the rolling resistance may be a good bit lower with the narrower eco tires compared...to what was on the Jeep!
Sponsored