- First Name
- Eric
- Joined
- Mar 21, 2025
- Threads
- 20
- Messages
- 158
- Reaction score
- 90
- Location
- Hampton, VA
- Vehicle(s)
- 2024 Maverick
- Engine
- 2.5L Hybrid
- Thread starter
- #1
Many thanks to @LazyMex2022 (also a user here as @LaxyMex2022 )and @Bumpers & Doors DIY for there excellent videos on YouTube.
It is raining today and I do not have a garage so this is what I did yesterday. Then I screwed up with one of the bolts during re-assembly and decided to stop.
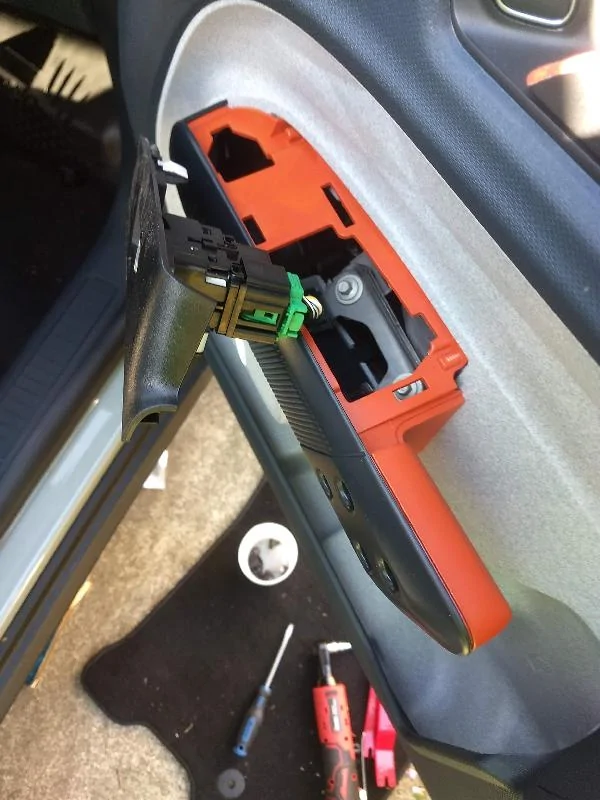
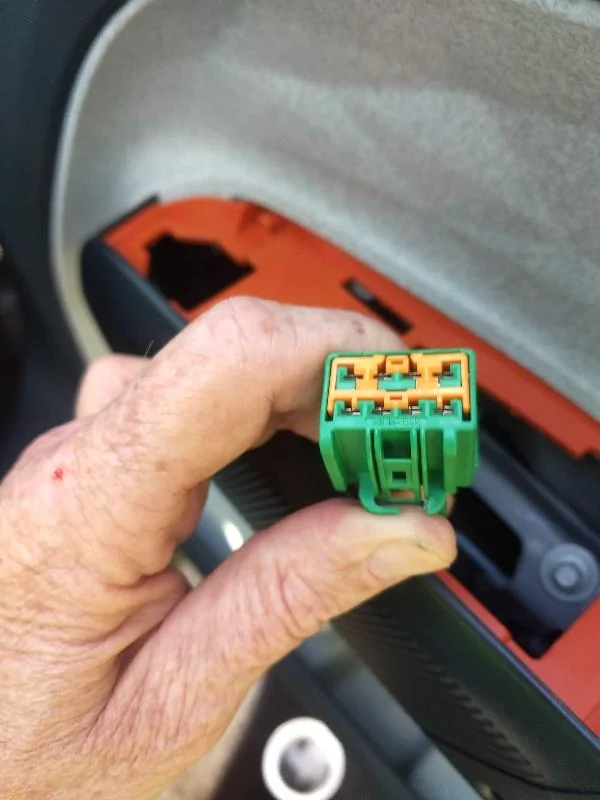
Window controller pops out pretty easily. Start near the back.

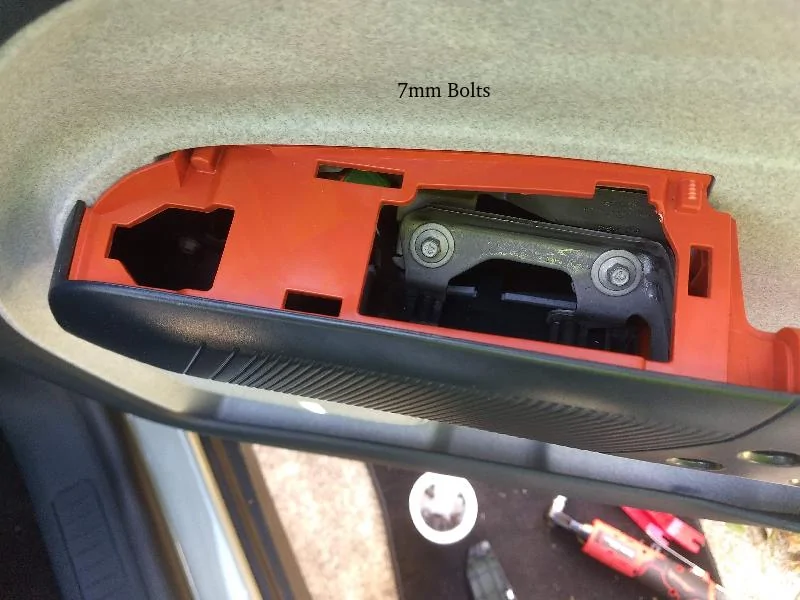
Bolts exposed by removing the window controller trim panel. 7mm.

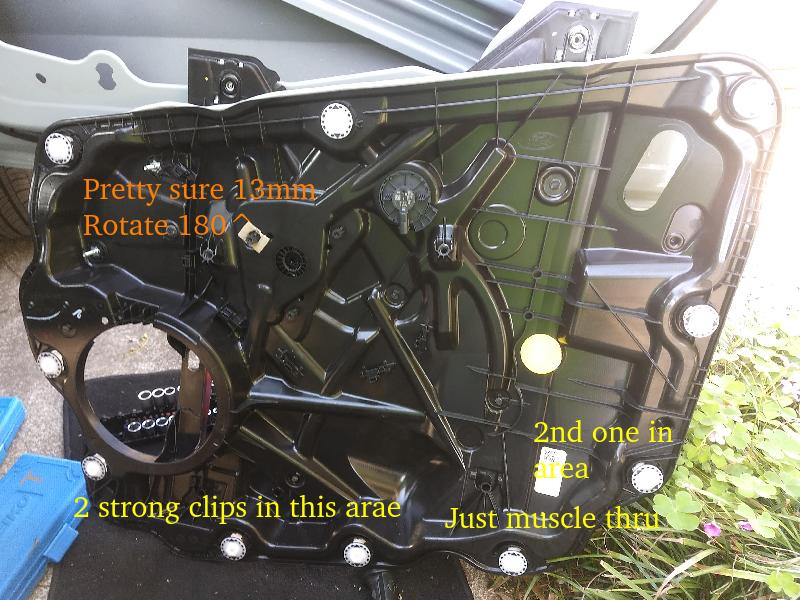
Backside of the interior door panel. There are two clips along the bottom that are kind of stiff to remove. The white fasteners are weird 13mm bolts that rotate 90^ (EDIT: I was wrong in the original post that it was 180^) to release from metal trim. I will coat the back of this panel with closed cell foam.

Door panel inner liner. I removed the metal bracket unnecessarily but it did make access to the wiring harness easier. I removed the 3 bolts holding the window motor. The motor stuck to the panel stiffly but then fell off the panel as it was removed. Just pull harder.
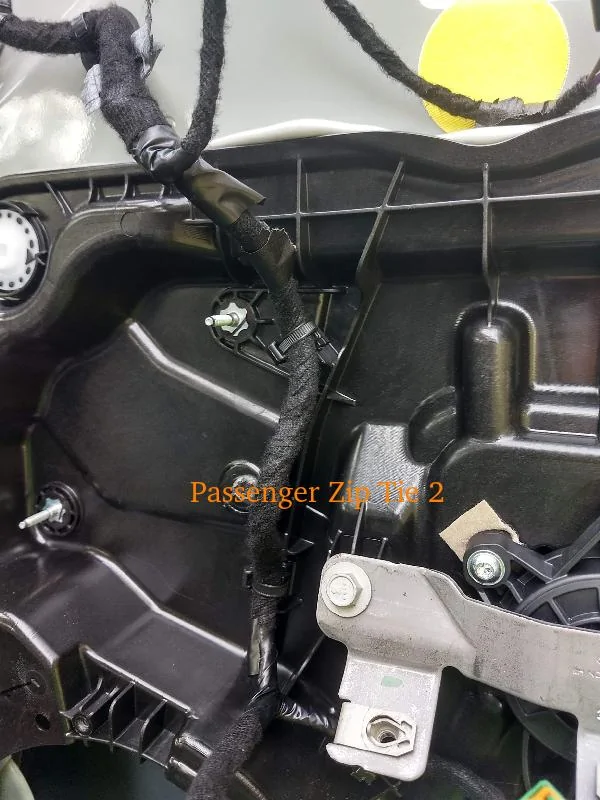
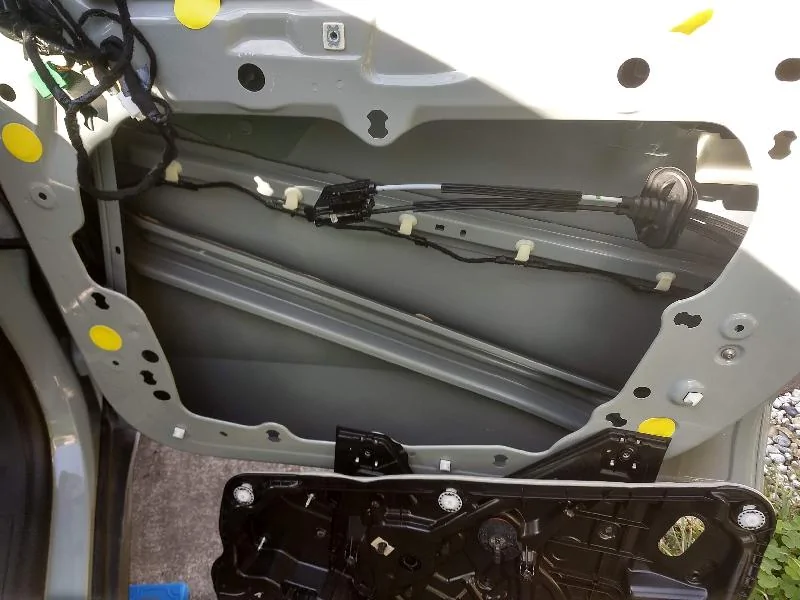
I removed a series of zip-ties to separate the harness from the inner panel to expose the metal door.
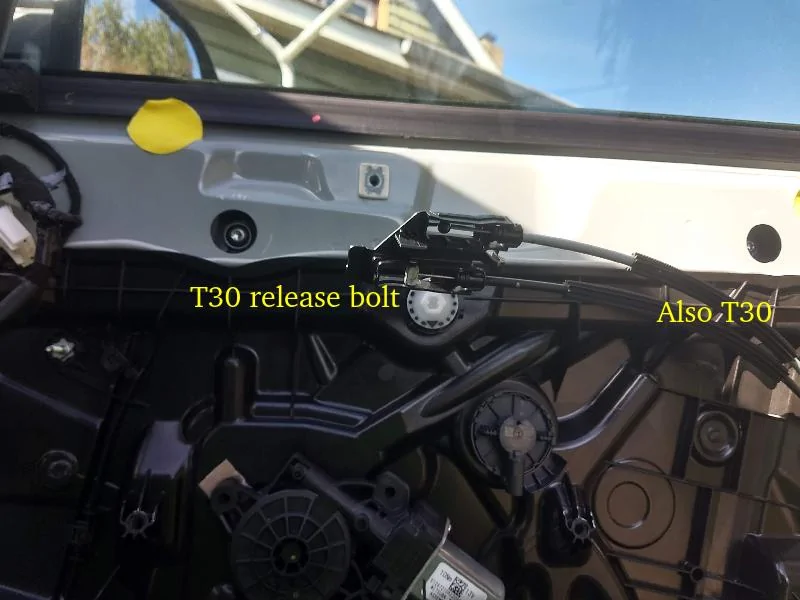
These bolts secure the window to the inner plastic panel that has rigging to raise and lower the window. LazyMex2022 does a great job in his video to document the process. The window sits in U shaped clamps and the window has two holes in the bottom. The clamps in the rigging have two plastic posts that fit in the window holes. Its unclear to me how exactly the T30 bolts relate to the window holes and U clamps; the bolts probably go through the holes but you cannot fully see what is going on.
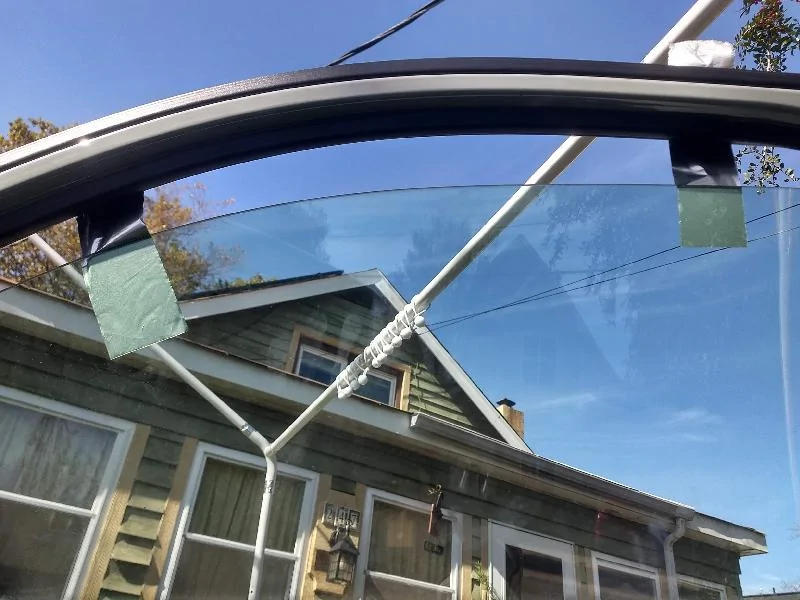
I used paper backed, foil style tape to secure the window to the door and prevent it from falling. Crack the window slightly open. Lift the window while pulling down on the rigging to separate the inner panel from the window. The foil tape is a PITA but is pretty strong, does not stretch and does not leave adhesive residue.
Hard to see in the pictures, but the windows have two holes in the bottom. The Raise/Lower cabling on the back of the inner pane have clamps that lock into these windows. The T30 bolts appear to hold the clamps firm but you also have to release a nub on each clamp from the hole. Watch the relevant section on the LazyMex2022 video.
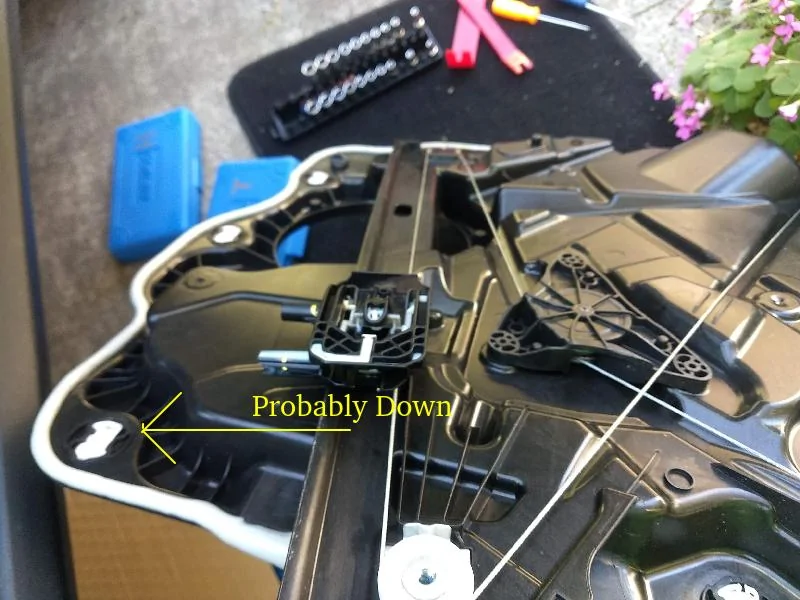
Inner door panel rigging for window.
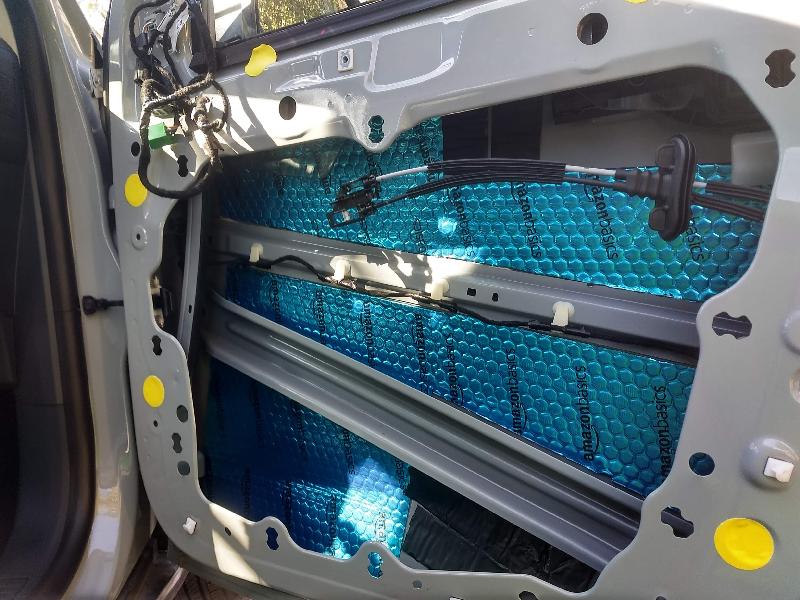
The Amazon Basic kit included 10 panels. I used 4 along the back wall and left 3 for each front door which was almost exactly right. I also had some 2" Boom Mat tape to fill in any gaps or shortages.

Back side of the door trim before.
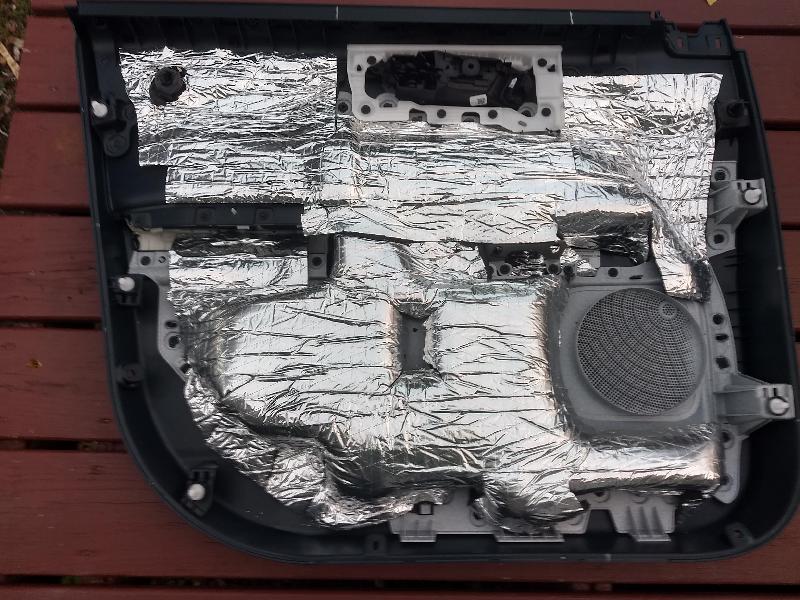
Closed cell foam installed. I cut the foam top and bottom to make the pieces easier to work with. After doing a rough fit, I cut the paper backing with a razor and then worked from the center to the edges left and right.
I got the inner panel reinstalled to the metal door without too much difficulty. The window can twist so I needed to get the forward clamp in the hole first and then the rearward clamp.
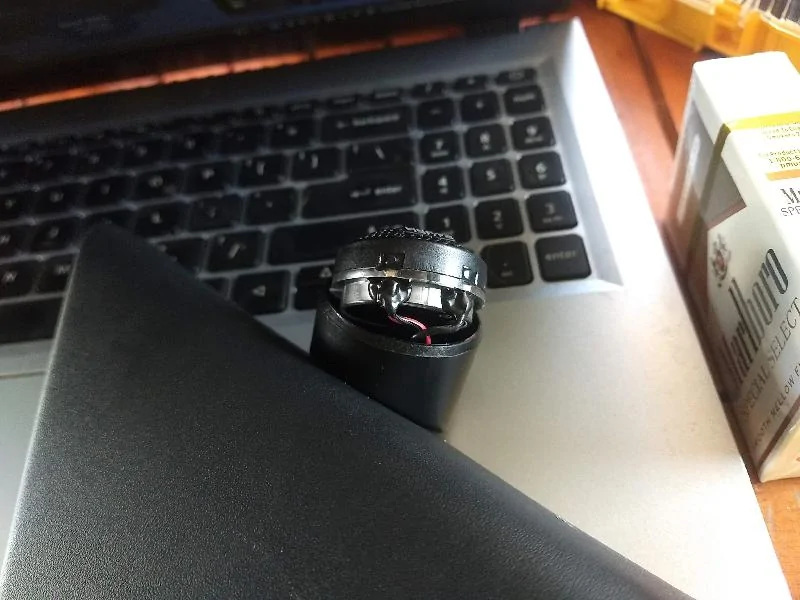
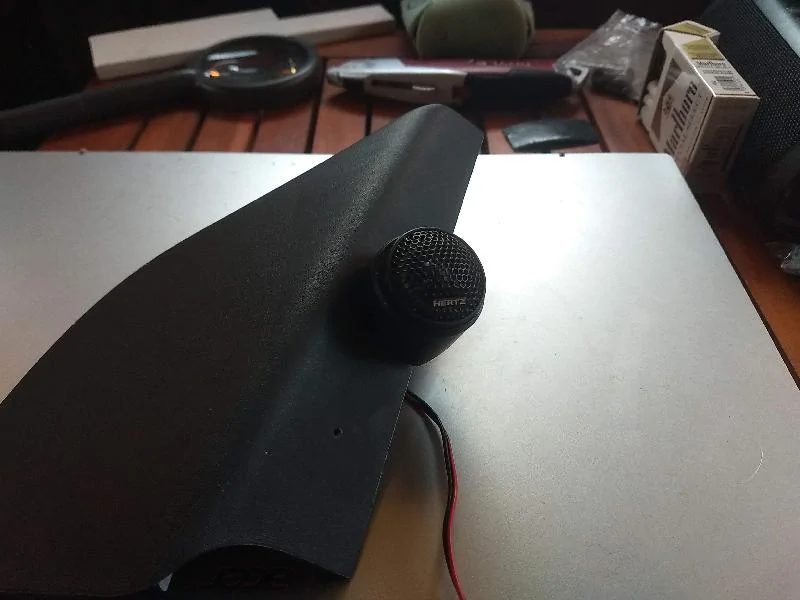
Then I started making mistakes. The plastic "bolts" aligned pretty easily back to the metal door. I confused the bolt that holds the metal bracket near the window motor with the bolt that secures the clamp to the window. I used a magnet (from the speaker) to prevent the wrong window bolt to the socket to keep it from falling behind the inner bracket but this still happened. I recognized that things were going wrong and packed it in for another day. Then it rained and here I am.
Before I posted this long thread, a search for "Sound deaden" yielded no results. Now that I have posted, several relevant threads are shown.
It is raining today and I do not have a garage so this is what I did yesterday. Then I screwed up with one of the bolts during re-assembly and decided to stop.
Window controller pops out pretty easily. Start near the back.
Bolts exposed by removing the window controller trim panel. 7mm.
Backside of the interior door panel. There are two clips along the bottom that are kind of stiff to remove. The white fasteners are weird 13mm bolts that rotate 90^ (EDIT: I was wrong in the original post that it was 180^) to release from metal trim. I will coat the back of this panel with closed cell foam.
Door panel inner liner. I removed the metal bracket unnecessarily but it did make access to the wiring harness easier. I removed the 3 bolts holding the window motor. The motor stuck to the panel stiffly but then fell off the panel as it was removed. Just pull harder.
I removed a series of zip-ties to separate the harness from the inner panel to expose the metal door.
These bolts secure the window to the inner plastic panel that has rigging to raise and lower the window. LazyMex2022 does a great job in his video to document the process. The window sits in U shaped clamps and the window has two holes in the bottom. The clamps in the rigging have two plastic posts that fit in the window holes. Its unclear to me how exactly the T30 bolts relate to the window holes and U clamps; the bolts probably go through the holes but you cannot fully see what is going on.
I used paper backed, foil style tape to secure the window to the door and prevent it from falling. Crack the window slightly open. Lift the window while pulling down on the rigging to separate the inner panel from the window. The foil tape is a PITA but is pretty strong, does not stretch and does not leave adhesive residue.
Hard to see in the pictures, but the windows have two holes in the bottom. The Raise/Lower cabling on the back of the inner pane have clamps that lock into these windows. The T30 bolts appear to hold the clamps firm but you also have to release a nub on each clamp from the hole. Watch the relevant section on the LazyMex2022 video.
Inner door panel rigging for window.
The Amazon Basic kit included 10 panels. I used 4 along the back wall and left 3 for each front door which was almost exactly right. I also had some 2" Boom Mat tape to fill in any gaps or shortages.
Back side of the door trim before.
Closed cell foam installed. I cut the foam top and bottom to make the pieces easier to work with. After doing a rough fit, I cut the paper backing with a razor and then worked from the center to the edges left and right.
I got the inner panel reinstalled to the metal door without too much difficulty. The window can twist so I needed to get the forward clamp in the hole first and then the rearward clamp.
Then I started making mistakes. The plastic "bolts" aligned pretty easily back to the metal door. I confused the bolt that holds the metal bracket near the window motor with the bolt that secures the clamp to the window. I used a magnet (from the speaker) to prevent the wrong window bolt to the socket to keep it from falling behind the inner bracket but this still happened. I recognized that things were going wrong and packed it in for another day. Then it rained and here I am.
Before I posted this long thread, a search for "Sound deaden" yielded no results. Now that I have posted, several relevant threads are shown.
Sponsored
Last edited:


 my post #8