- First Name
- Ryan
- Joined
- Dec 22, 2021
- Threads
- 20
- Messages
- 173
- Reaction score
- 590
- Location
- Nova Scotia, Canada
- Vehicle(s)
- 2016 Mazda 3
- Engine
- 2.0L EcoBoost
- Thread starter
- #1
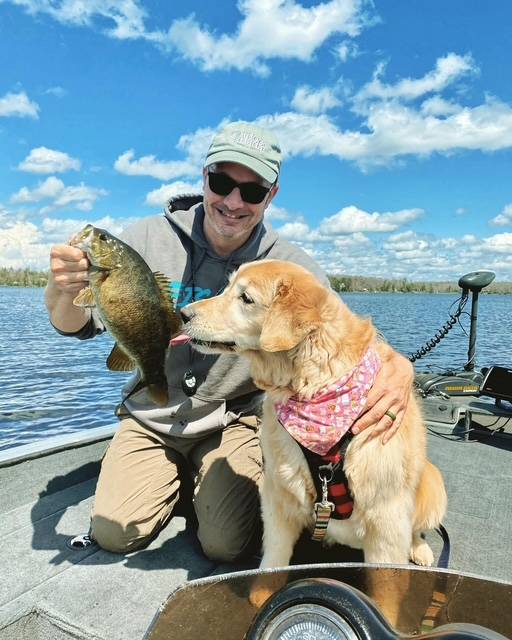
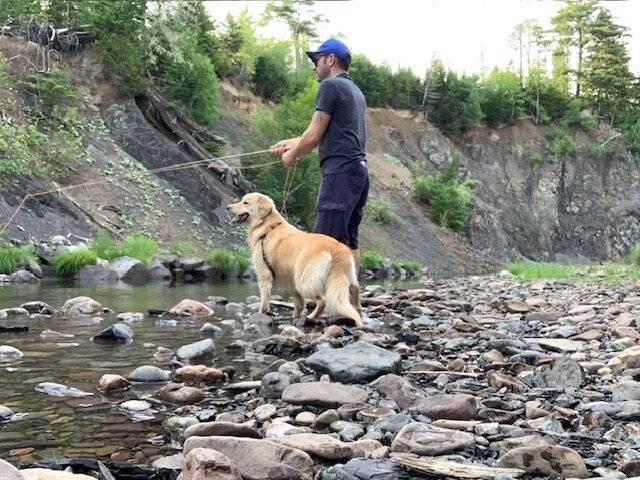
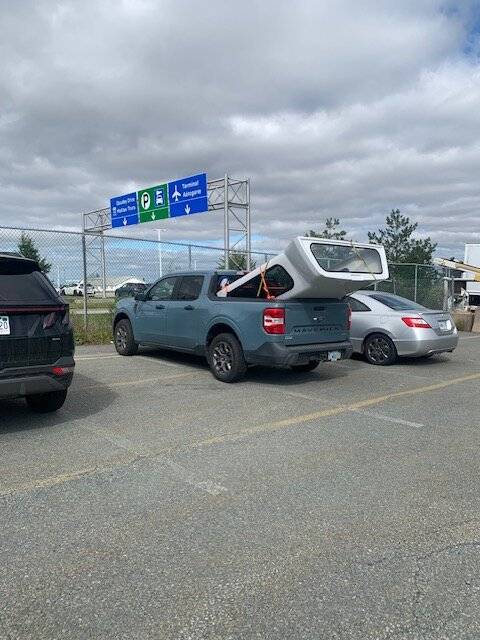
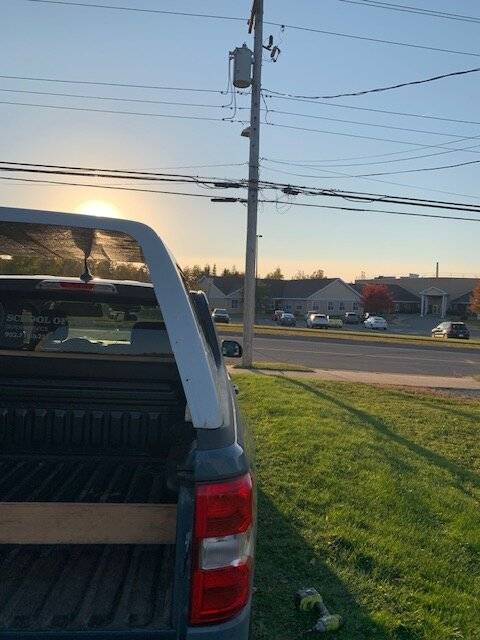
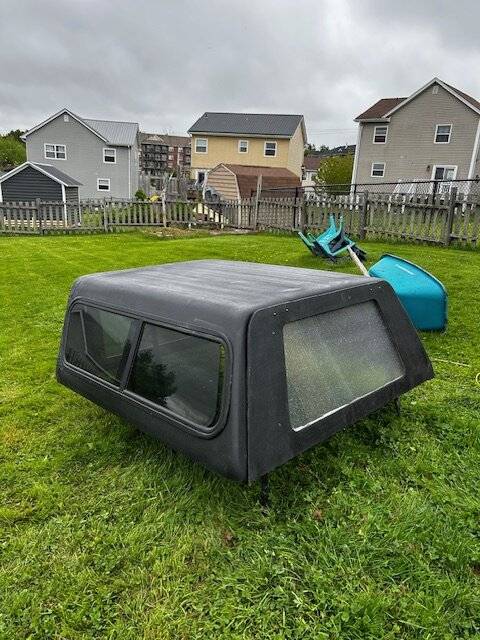
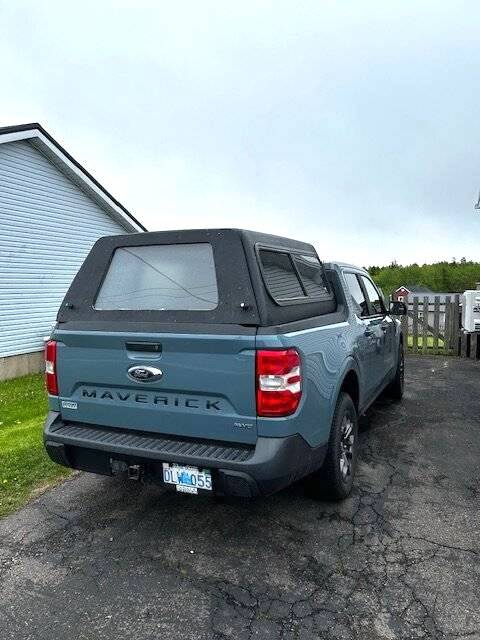
I am way too cheap to buy a brand new truck cap, I'm also not a big fan of the canvas soft caps and Flated toppers. But I wanted a cap to put on the truck to use as a better option than a tent for sleeping on camping trips. The best option for me was a free truck cap I got off Marketplace, described as an S10 stepside cap, but more likely this was a Leer Ford Ranger Stepside Cap, modified to fit the Maverick.
The cap has a wide section from the cab back about a foot, into a narrow section for most of the bed length. This worked perfect as the width of the cap in the narrow section perfectly matches the Maverick bed width. And the length of the narrow section of the cap was also pretty much spot on to fit the length of the bed once trimmed. Also a bonus, the sliding side windows are just barely the right length to fit back in the cap after trimming, so they can be re-used.
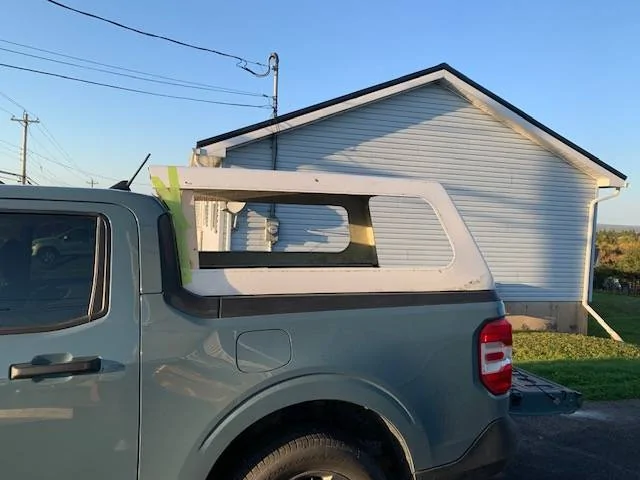
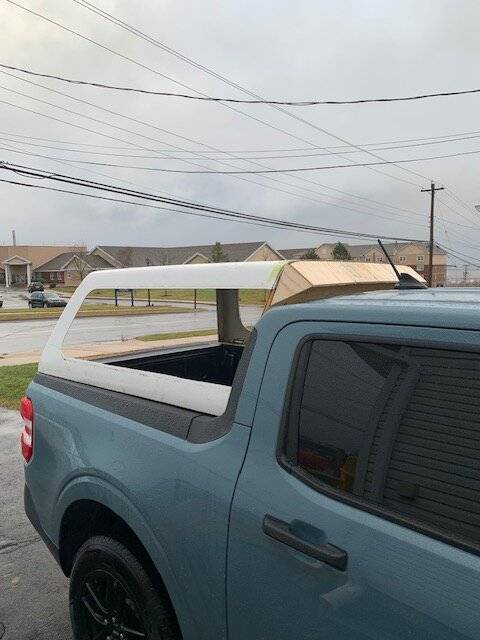
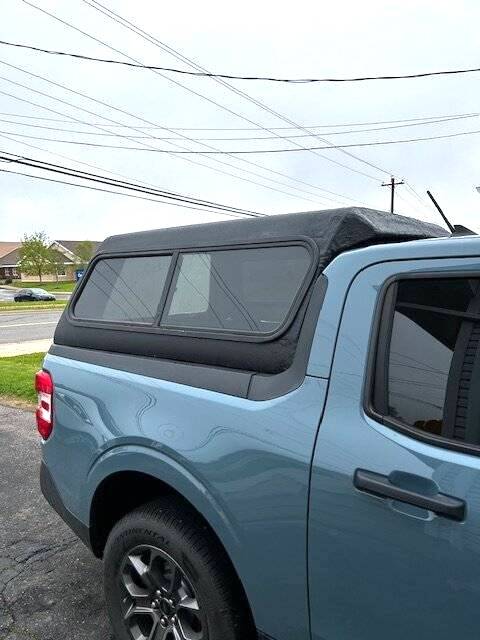
For the process of fitting this cap, I started by removing the side windows and cutting the wide front section off the cap. I stabilized everything with some scrap lumber, then set to work with tape and a tape measure to figure out how I would trim the cap and replace the front wall so it all blends with the shape of the cab. I eventually decided on a flat front wall with an integrated wind deflector as the easiest method I could come up with to make it all fit well. Once the fiberglass was all trimmed to best fit, I traced the front section onto a sheet of 1/2" plywood and screwed and bonded that in place as the front wall. I then added more plywood to form the wind deflector, and I cut out window opening. I filled in the gaps between the front wall and the old side window holes using scraps of fiberglass cut from the cap, these were bonded to the cap with epoxy and later trimmed out again to re-fit the windows. After some test fitments I also added a 1/4 round on the bottom of the front wall to help with eventually sealing the front of the cap.
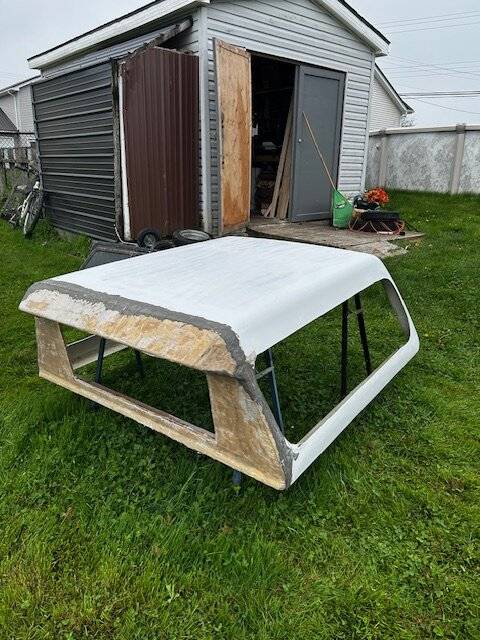
The back hatch was missing on my free cap so I had to build one of those too, that is just a sheet of 1/2" plywood with a window opening cut into it. It will get standard stainless hinges, a couple cheap locking truck cap latches, and I have a roll of bulb seal that will fit to the cap itself and hopefully seal the back enough to keep water and bugs out. I have a couple left supports to install once I can confirm they're the correct strength for holding the hatch up without being too stiff.
The front wall got a few layers of fiberglass to seal everything from the elements and to stiffen the front wall. That fiberglass overlaps the cap and the area where I bonded some additional fiberglass into the old window openings. The window openings had to be re-cut back farther in the cap, luckily the windows fit perfectly (just barely) at the new cap length. With the fiberglass cured and the windows cut out I sealed everything with seam sealer, primed, and painted with truck bed coating. This was an error, I thought the truck bed coating would be better at hiding the admittedly rough fiberglass work and seam sealer, it did not. That is all going to get removed at some point and re-done with a lot more focus on a clean finish. Also, Dupli-Colour spray on Truck Bed Coating is awful stuff, there's no good reason for this stuff to be on store shelves and I'm kicking myself for not doing a roll on product.
But with everything primed and coated I could move forward with the front and back windows, they are 1/8" plexi and will eventually be replaced with something better considering I cracked both of them already on install. For now they were both fit in and sealed with sealant, and held in place with 1x3 lumber that I notched on the table saw to fit over the sheets of plexi and hold it all in place. The 1x3s also add more stiffness to the plywood.
The cap was test fit successfully on the truck and looks great from 20 feet away. Once I fix that horrible seam between the new fiberglass front section and the cap it'll hopefully be a 5 footer, I'm not looking for perfect. I'm still on the hunt for an OEM Leer back window eventually to replace the plywood hatch, and I will fix that terrible seam and the coating in the near future (but not before I need the cap). The plan is to use this for camping, so I'm starting on an easily removable bed set-up and storage space in the back of the truck to use on fishing trips. I have a roof basket to go on the top for some extra storage space as well, that'll also come after I complete a successful first test run. I want to get a trip under my belt and confirm that everything is well sealed and functional before I re-finish the seam and truck bed coating that way I'm not rebuilding things twice.
As for costs into the cap, I got a lot of materials (including the cap) for free, and I salvaged a bunch of stuff from other projects to keep costs down. I'm into the entire thing for just over $100 (mostly seals and paint), If I paid for all my supplies and the plexi windows and such the total cost would be just over $200 or so. So I'm super happy with the extremely budget build and how it's turned out so far and I'm looking forward to having a comfortable spot to sleep on the next fishing trip.

The cap has a wide section from the cab back about a foot, into a narrow section for most of the bed length. This worked perfect as the width of the cap in the narrow section perfectly matches the Maverick bed width. And the length of the narrow section of the cap was also pretty much spot on to fit the length of the bed once trimmed. Also a bonus, the sliding side windows are just barely the right length to fit back in the cap after trimming, so they can be re-used.
For the process of fitting this cap, I started by removing the side windows and cutting the wide front section off the cap. I stabilized everything with some scrap lumber, then set to work with tape and a tape measure to figure out how I would trim the cap and replace the front wall so it all blends with the shape of the cab. I eventually decided on a flat front wall with an integrated wind deflector as the easiest method I could come up with to make it all fit well. Once the fiberglass was all trimmed to best fit, I traced the front section onto a sheet of 1/2" plywood and screwed and bonded that in place as the front wall. I then added more plywood to form the wind deflector, and I cut out window opening. I filled in the gaps between the front wall and the old side window holes using scraps of fiberglass cut from the cap, these were bonded to the cap with epoxy and later trimmed out again to re-fit the windows. After some test fitments I also added a 1/4 round on the bottom of the front wall to help with eventually sealing the front of the cap.
The back hatch was missing on my free cap so I had to build one of those too, that is just a sheet of 1/2" plywood with a window opening cut into it. It will get standard stainless hinges, a couple cheap locking truck cap latches, and I have a roll of bulb seal that will fit to the cap itself and hopefully seal the back enough to keep water and bugs out. I have a couple left supports to install once I can confirm they're the correct strength for holding the hatch up without being too stiff.
The front wall got a few layers of fiberglass to seal everything from the elements and to stiffen the front wall. That fiberglass overlaps the cap and the area where I bonded some additional fiberglass into the old window openings. The window openings had to be re-cut back farther in the cap, luckily the windows fit perfectly (just barely) at the new cap length. With the fiberglass cured and the windows cut out I sealed everything with seam sealer, primed, and painted with truck bed coating. This was an error, I thought the truck bed coating would be better at hiding the admittedly rough fiberglass work and seam sealer, it did not. That is all going to get removed at some point and re-done with a lot more focus on a clean finish. Also, Dupli-Colour spray on Truck Bed Coating is awful stuff, there's no good reason for this stuff to be on store shelves and I'm kicking myself for not doing a roll on product.
But with everything primed and coated I could move forward with the front and back windows, they are 1/8" plexi and will eventually be replaced with something better considering I cracked both of them already on install. For now they were both fit in and sealed with sealant, and held in place with 1x3 lumber that I notched on the table saw to fit over the sheets of plexi and hold it all in place. The 1x3s also add more stiffness to the plywood.
The cap was test fit successfully on the truck and looks great from 20 feet away. Once I fix that horrible seam between the new fiberglass front section and the cap it'll hopefully be a 5 footer, I'm not looking for perfect. I'm still on the hunt for an OEM Leer back window eventually to replace the plywood hatch, and I will fix that terrible seam and the coating in the near future (but not before I need the cap). The plan is to use this for camping, so I'm starting on an easily removable bed set-up and storage space in the back of the truck to use on fishing trips. I have a roof basket to go on the top for some extra storage space as well, that'll also come after I complete a successful first test run. I want to get a trip under my belt and confirm that everything is well sealed and functional before I re-finish the seam and truck bed coating that way I'm not rebuilding things twice.
As for costs into the cap, I got a lot of materials (including the cap) for free, and I salvaged a bunch of stuff from other projects to keep costs down. I'm into the entire thing for just over $100 (mostly seals and paint), If I paid for all my supplies and the plexi windows and such the total cost would be just over $200 or so. So I'm super happy with the extremely budget build and how it's turned out so far and I'm looking forward to having a comfortable spot to sleep on the next fishing trip.
Sponsored