- Thread starter
- #1
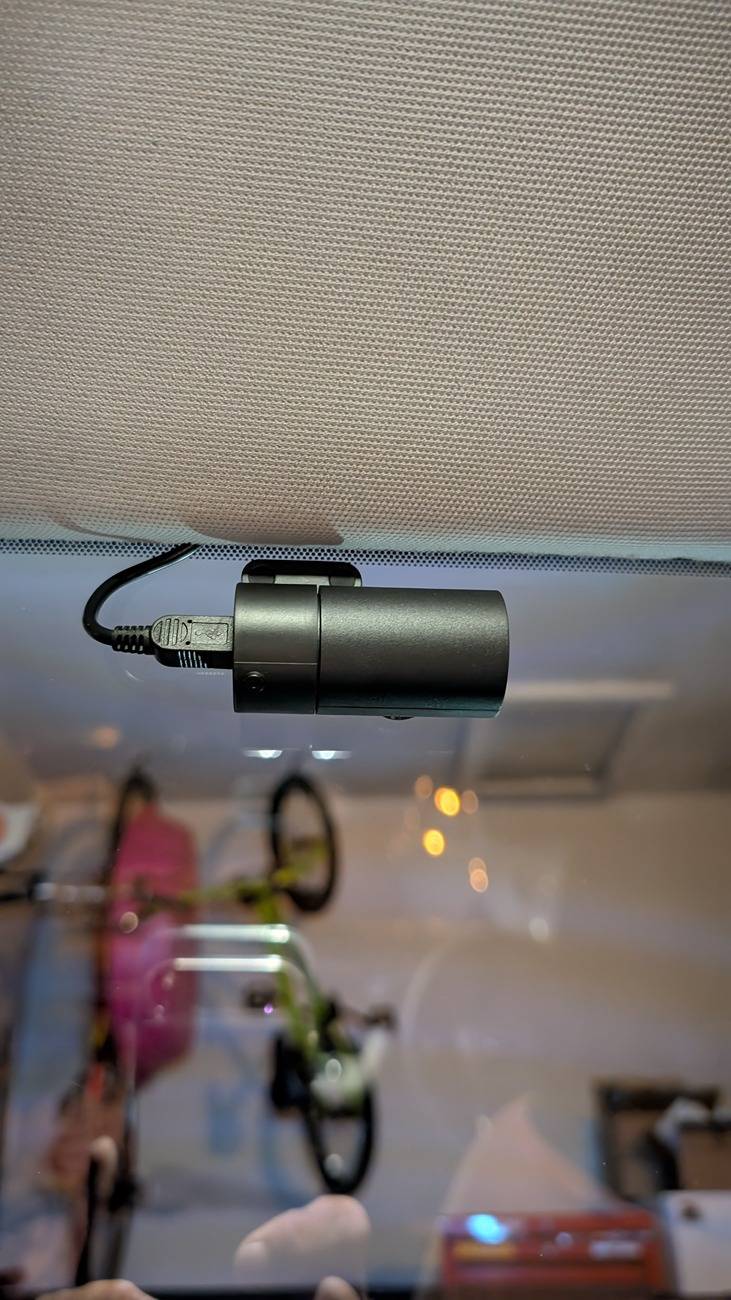
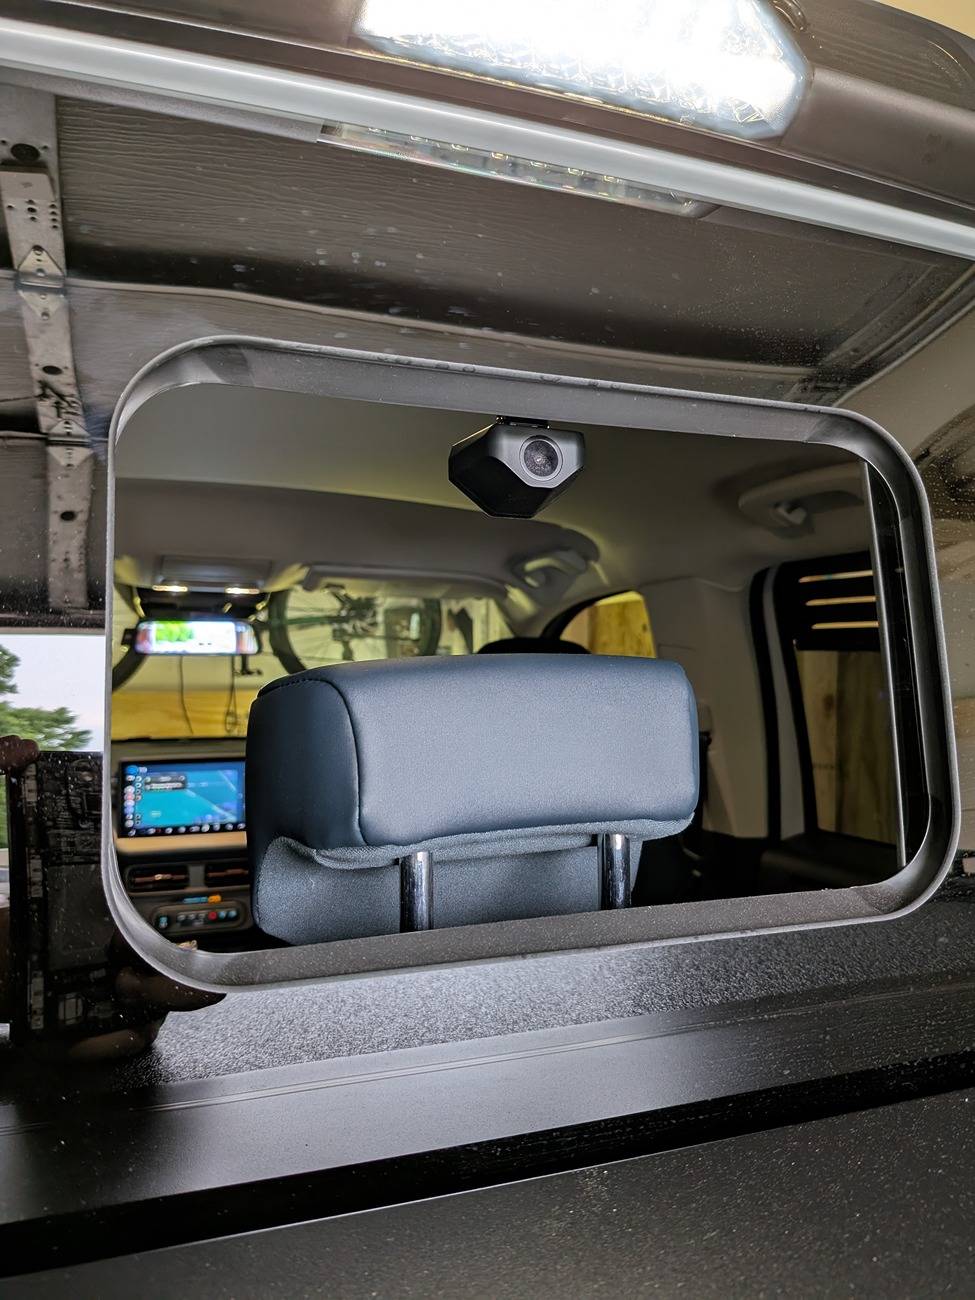
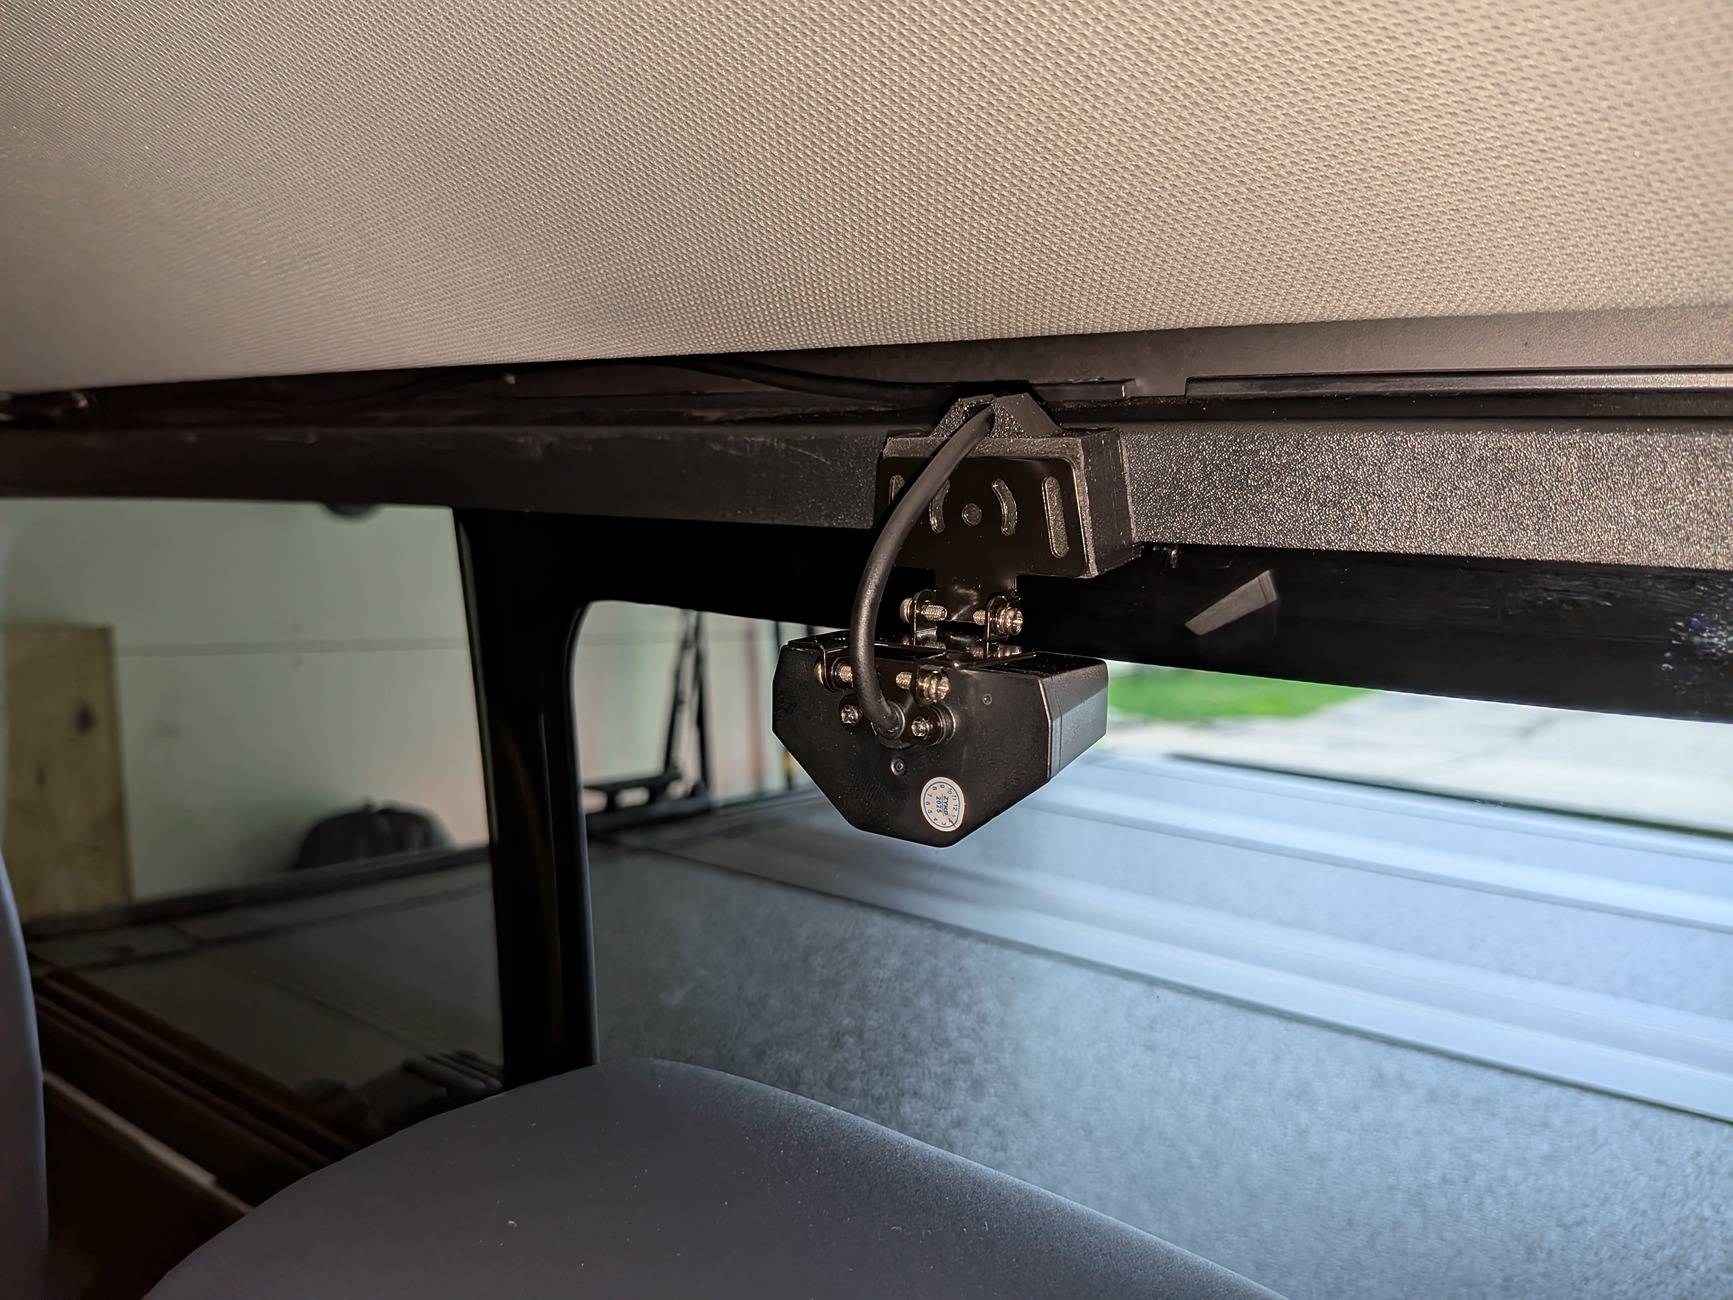
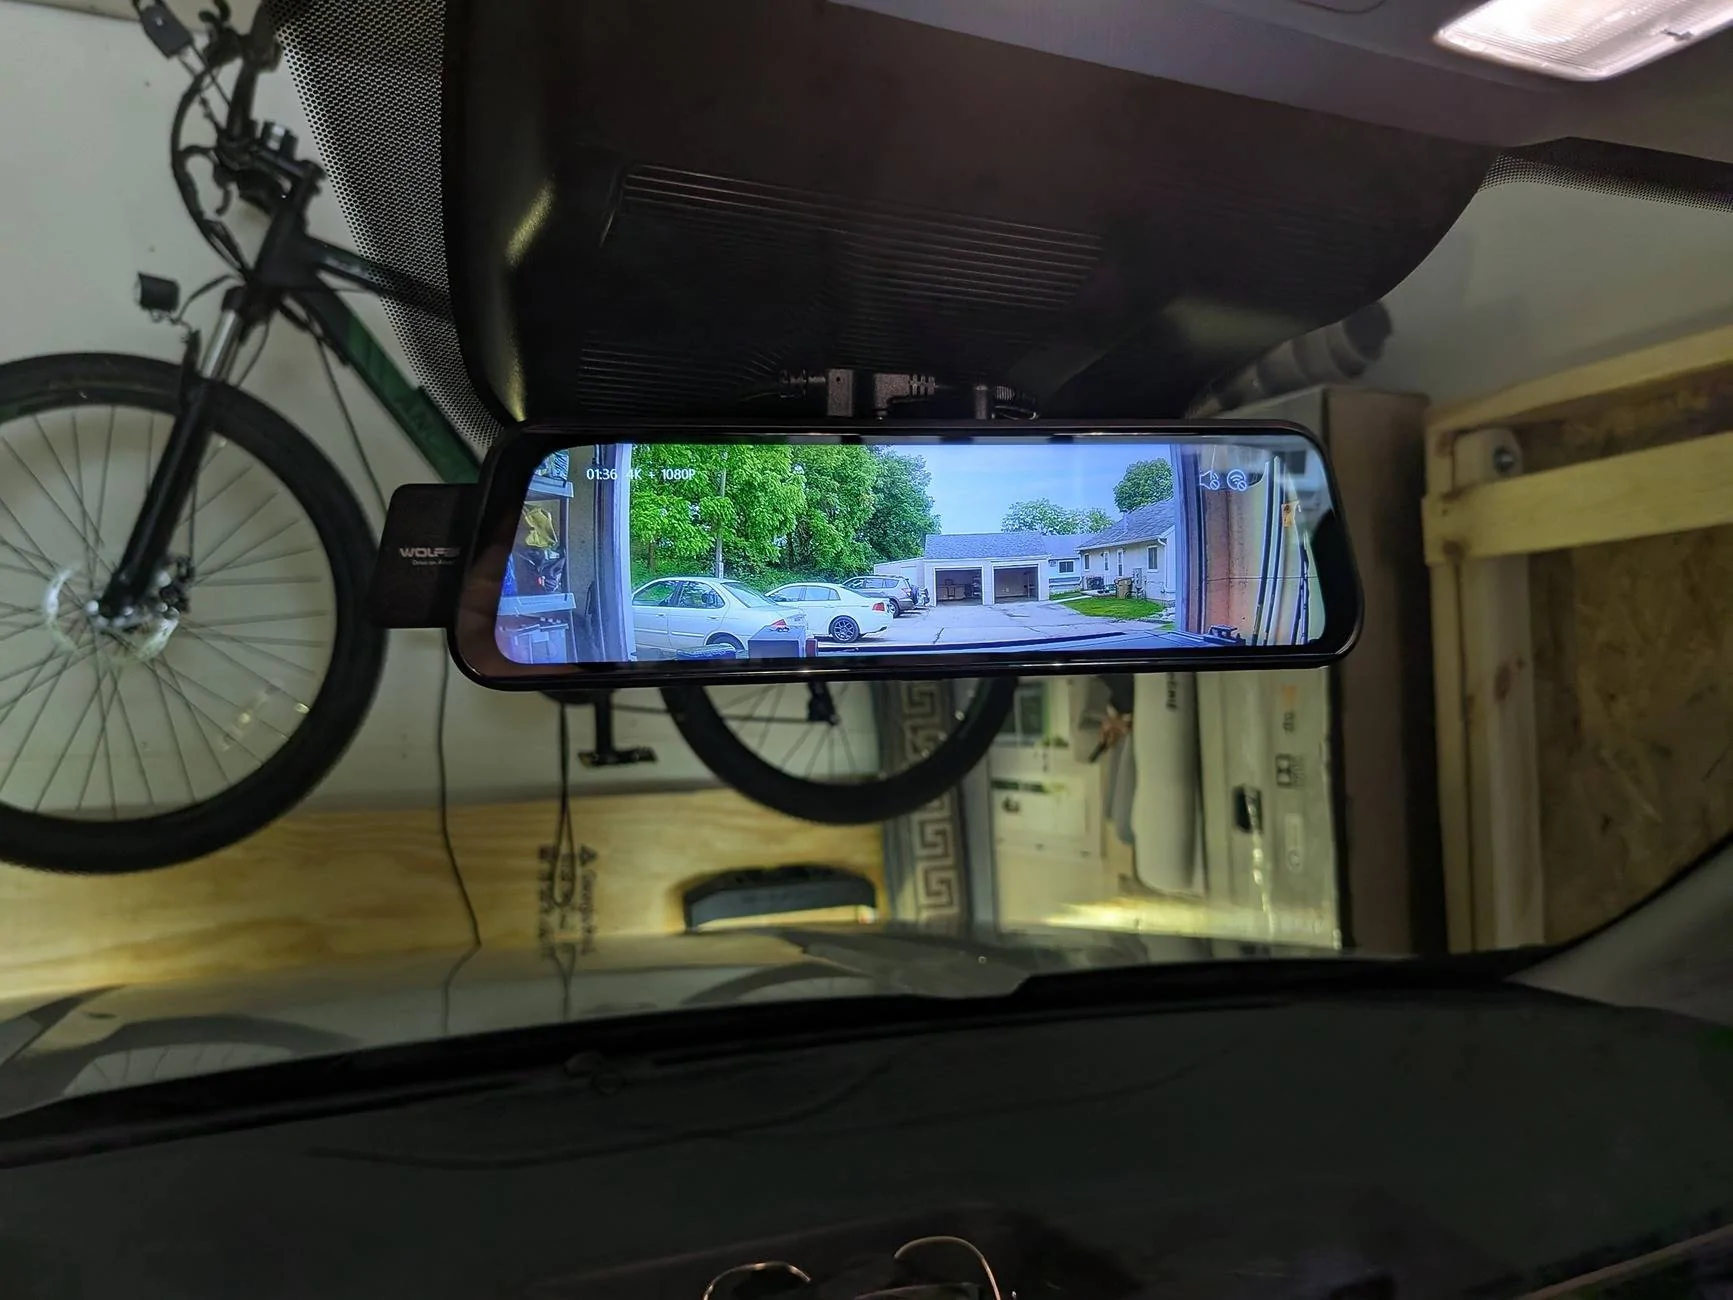
So after seeing how everyone was mounting their @WOLFBOX cameras, I decided I had a few thoughts. 1. I wanted mine in the car. I don't really hear about people stealing these things much, but the less temptation the better. Additionally, it would protect it from the elements which can't be a bad thing. 2. I wanted it as high as I could get it and centered. My psuedo-OCD wouldn't like anything off center as it would show in the rear view cam and I wouldn't be able to NOT notice it all the time. High as possible is just about being able to get the best view of what's happening behind me. 3. I needed to figure out a way to handle the sliding 5th window. Many don't have this option, but I do and it means I can't just mount it to the window itself.
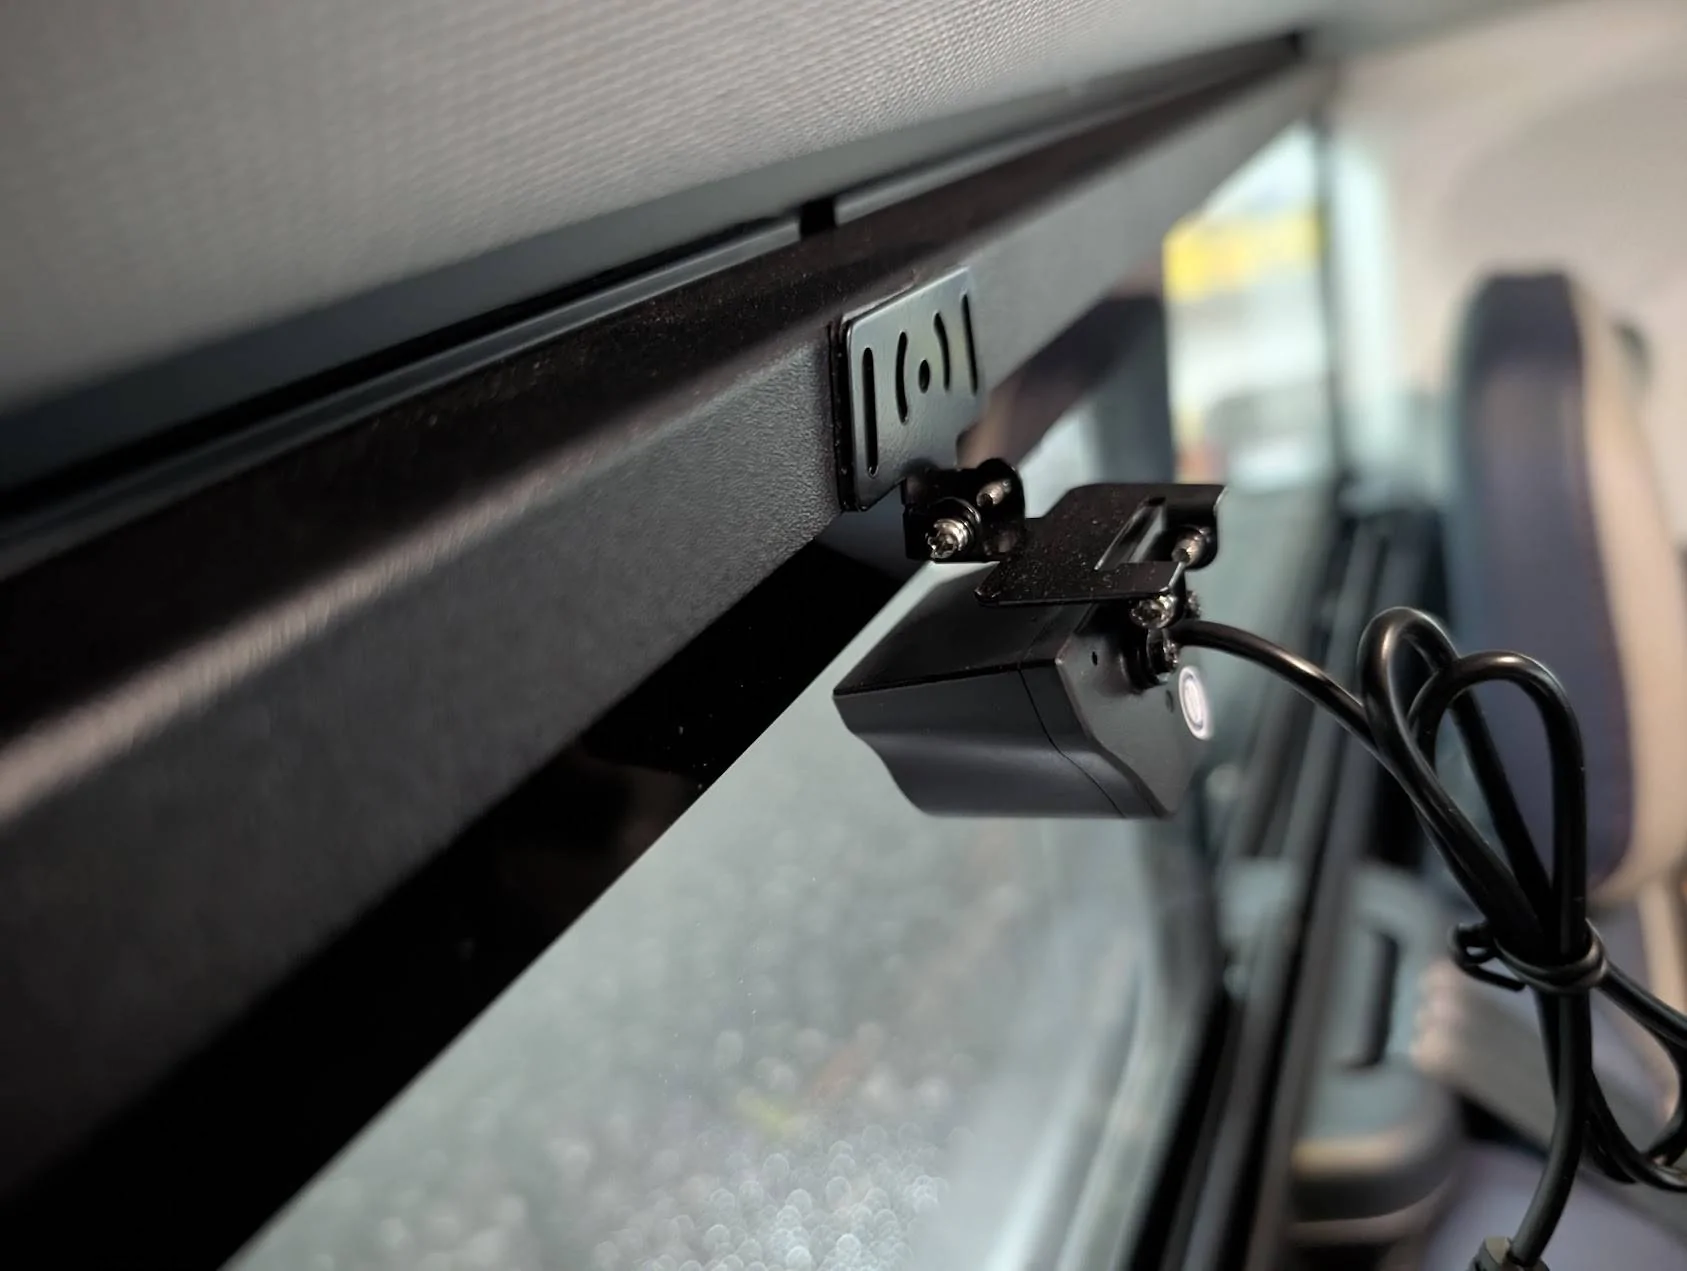
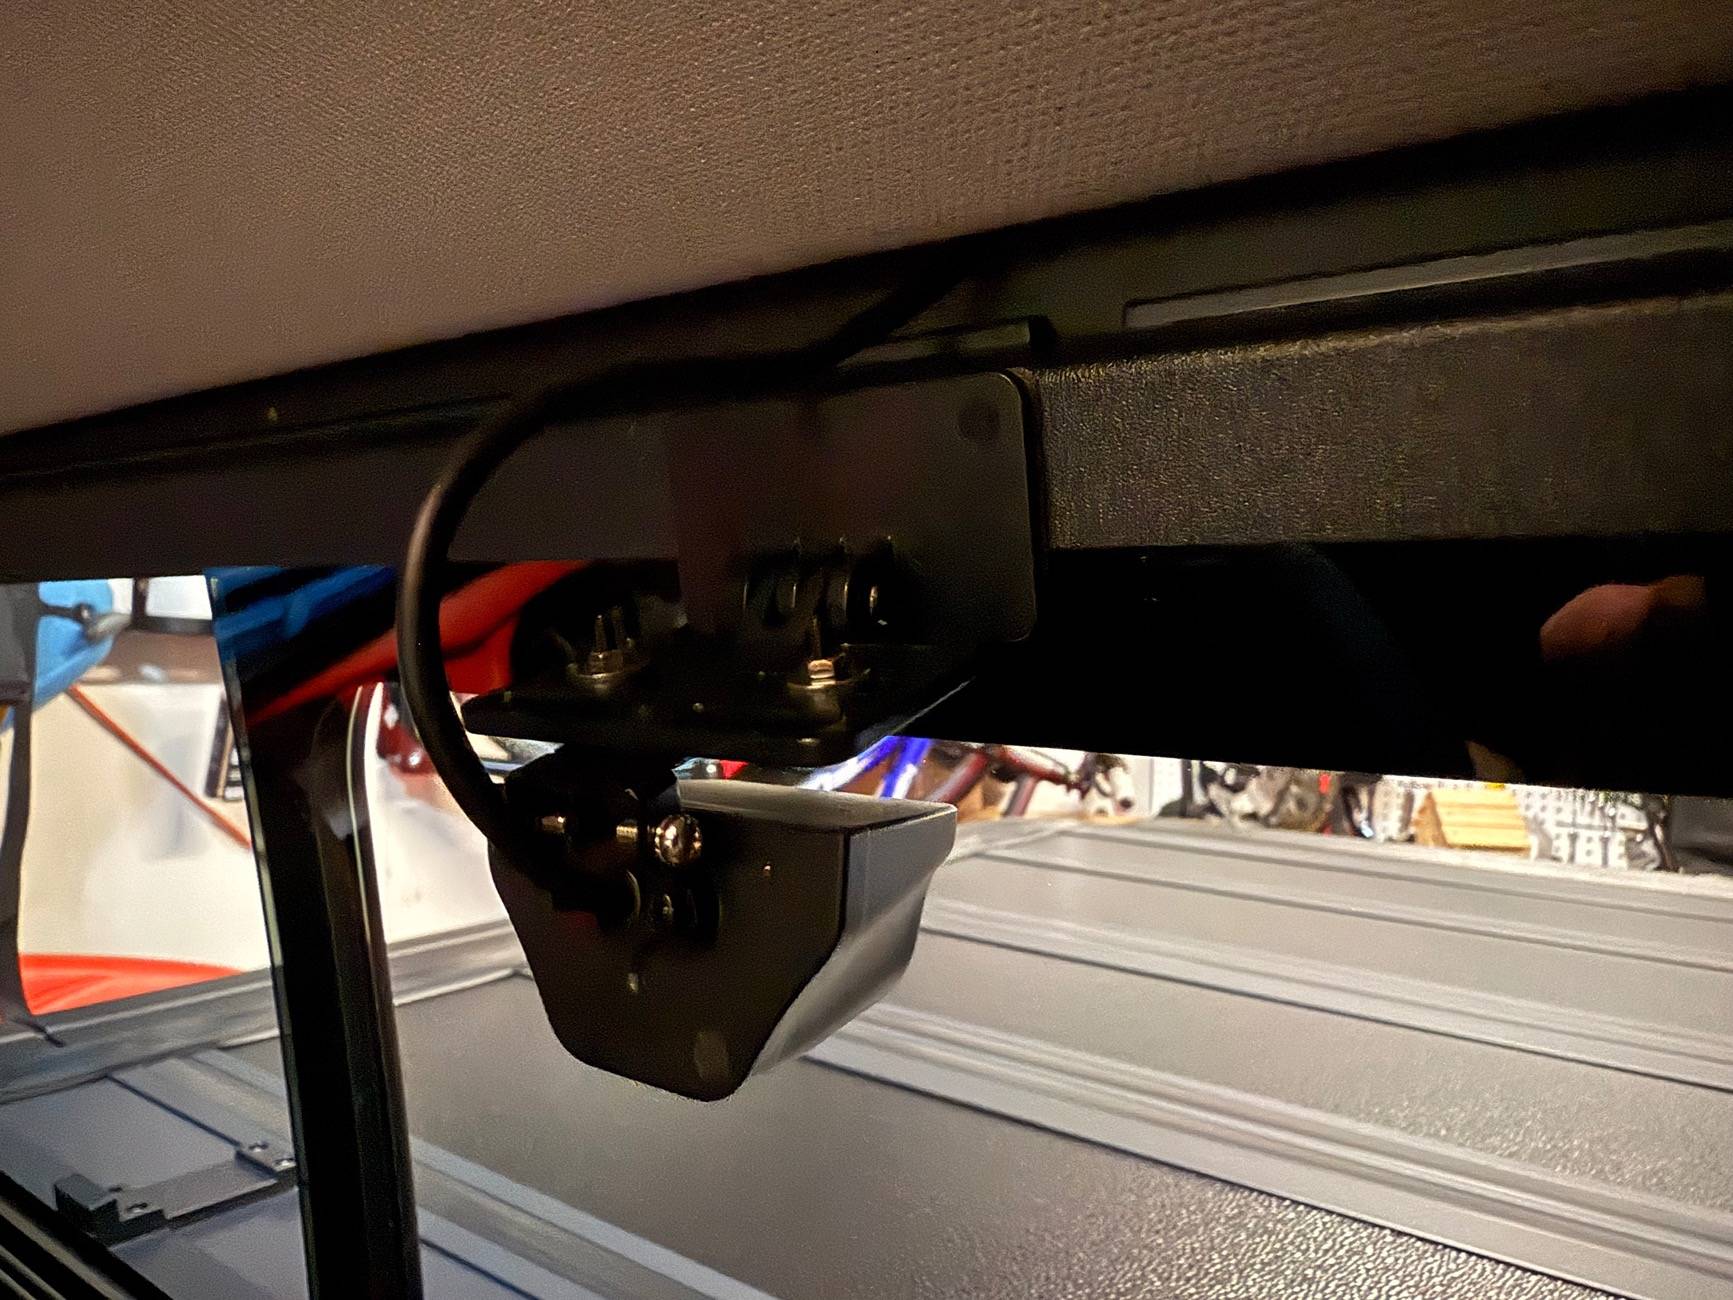
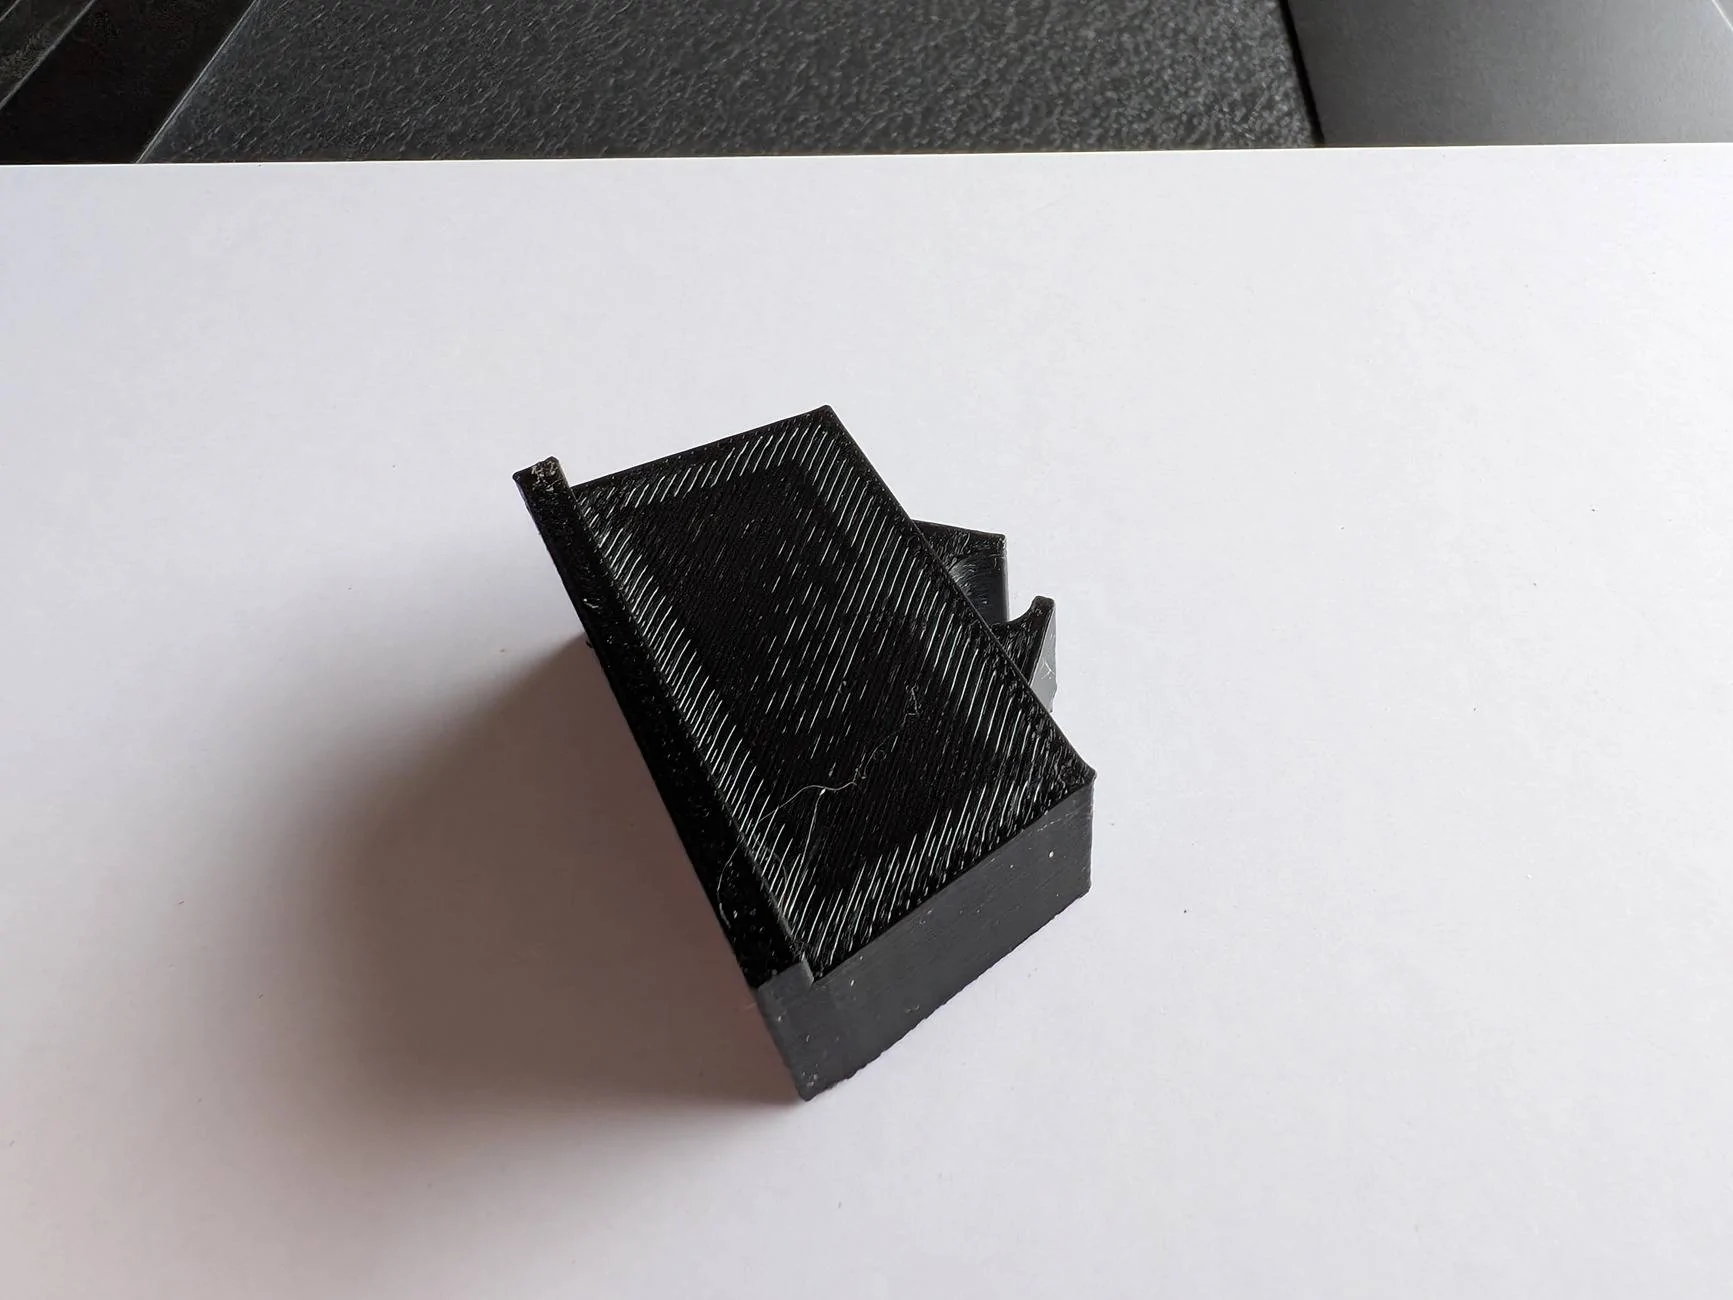
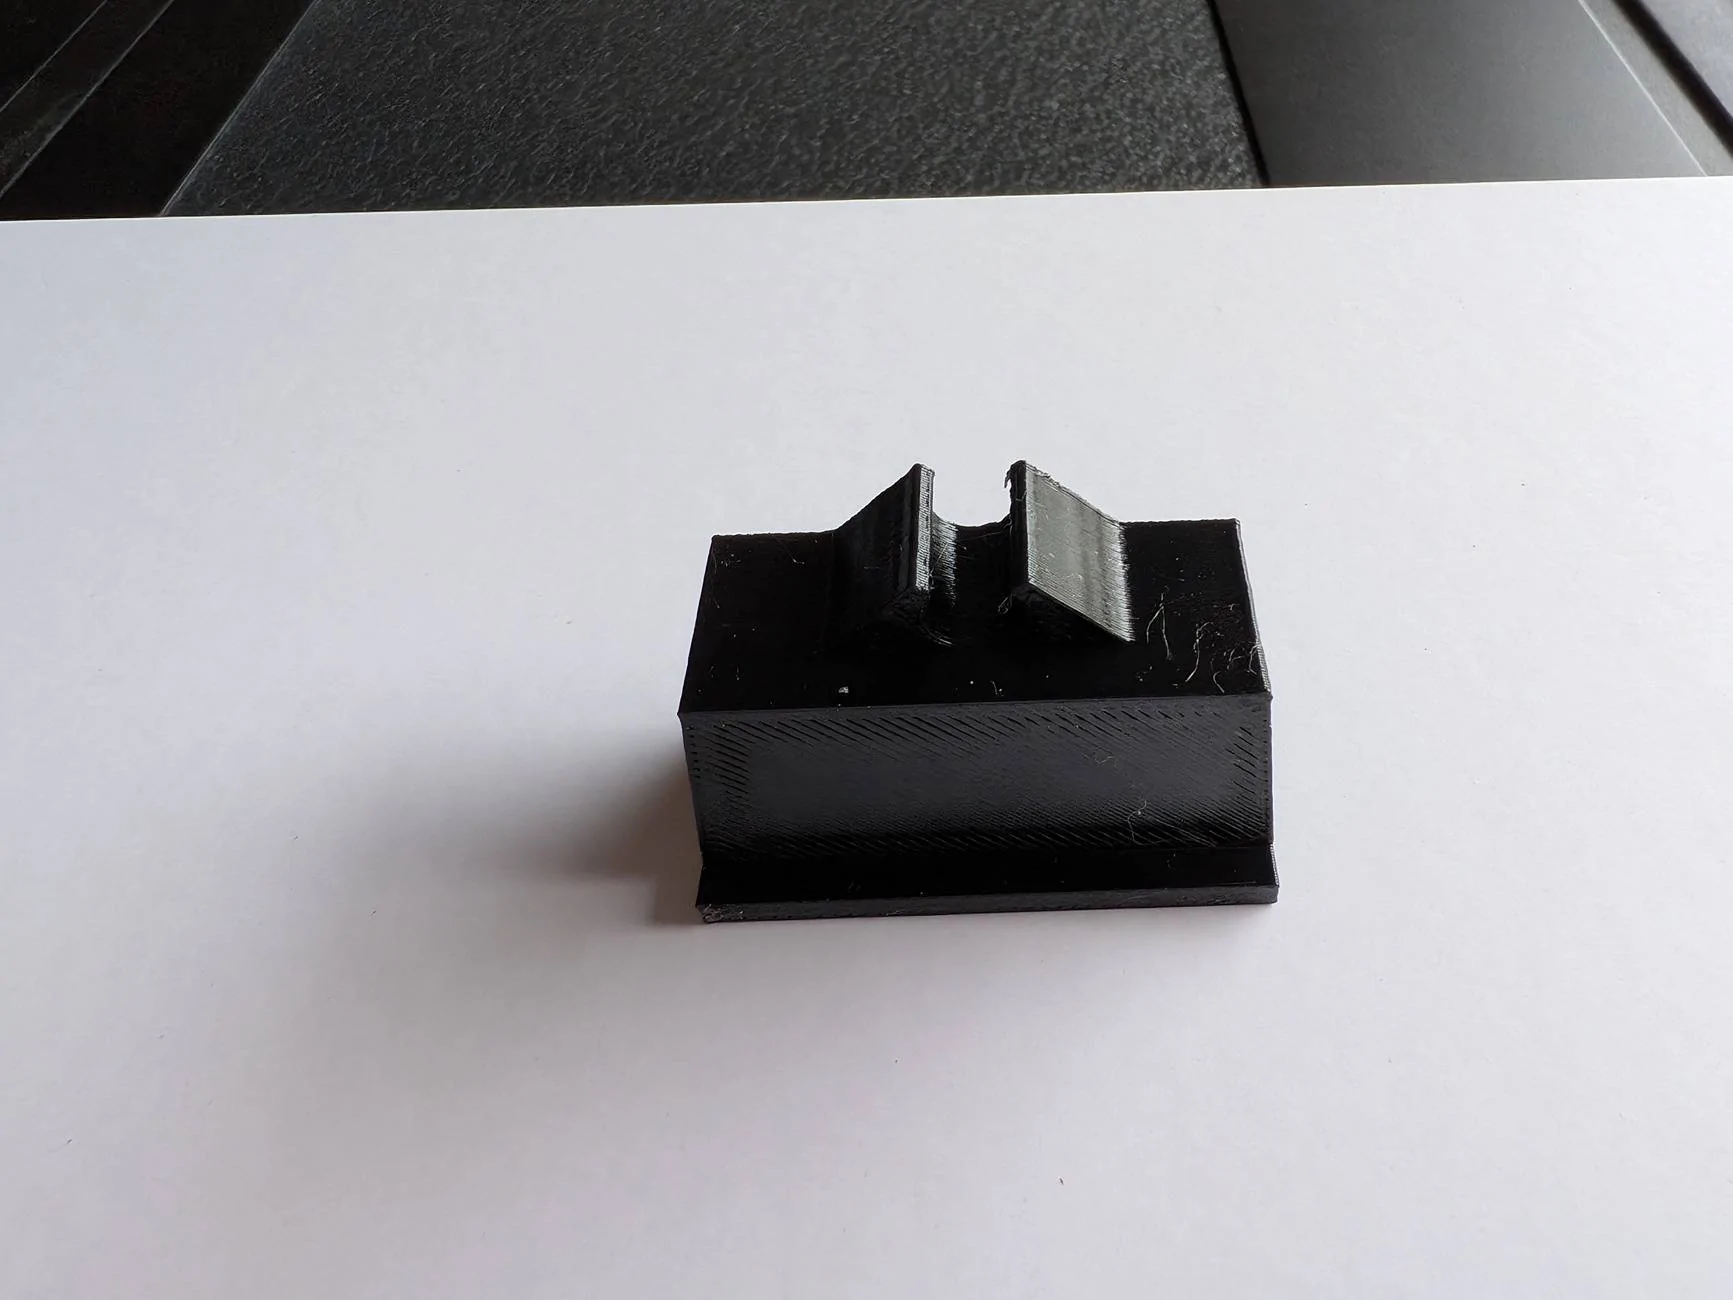
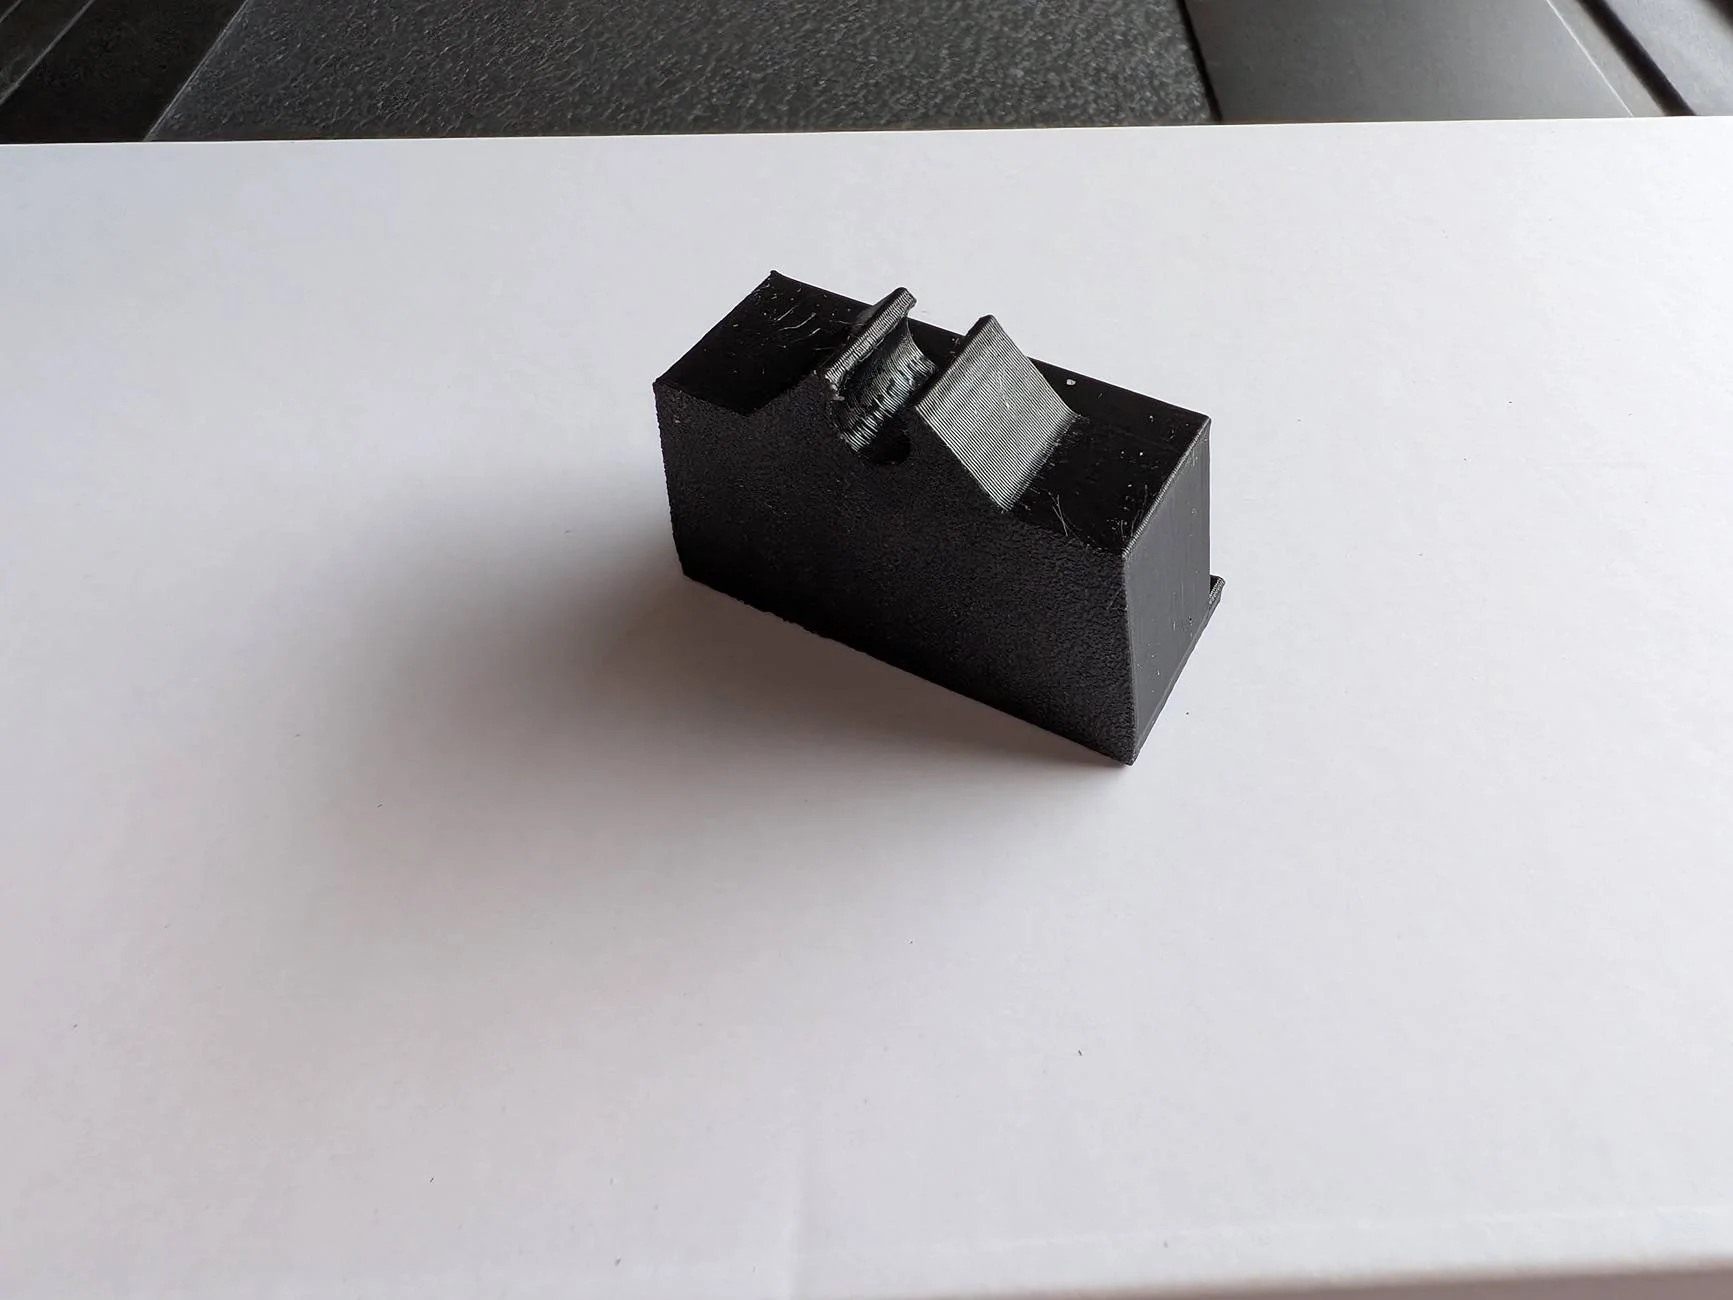
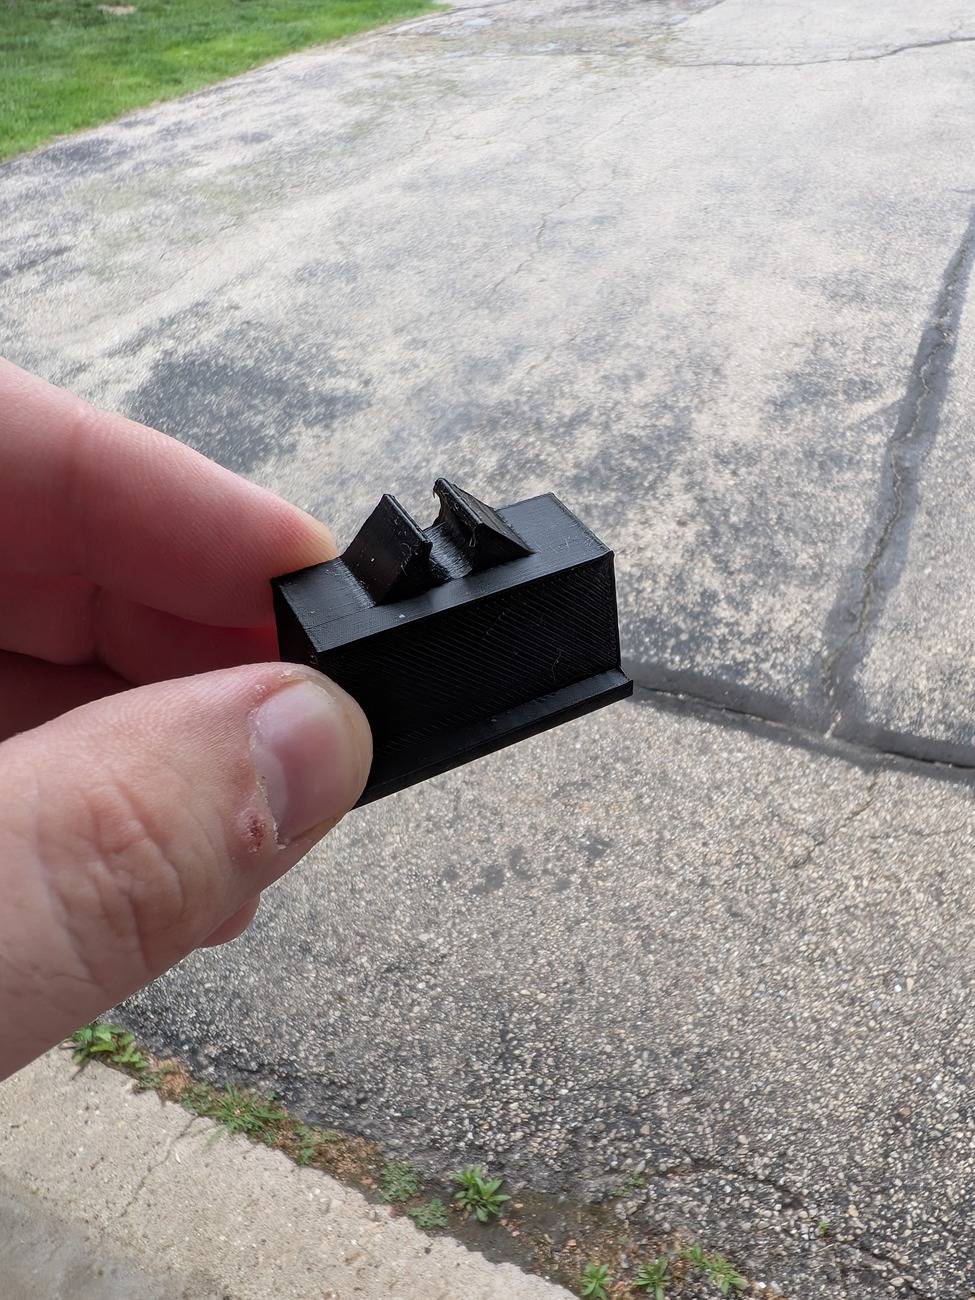
Enter frivolous spending and 3d printer purchases!! I have a little experience in 3d modeling and have prototyped all sorts of stupid things since my ownership and decided it was a perfect solution. I printed an adapter that the camera can attach to with the "2 arm" mounting option to give myself a little space and flexibility. It pulls the camera away from the window to avoid hitting it on opening, has a small channel for the cable to be routed through to clean and direct it, and it has a little ledge on the bottom to match the level to the window trim support piece.
It certainly could use a few version updates (I can think of 2 right off the top of my mind), but it'll do the job for now for sure. I've yet to see what happens with any kind of glare/reflection due to the lense being away from the window a little allowing light bleed, but I didn't notice it during prototype 1 so I think it's probably fine. It sticks out a little more than I'd like but realistically, no one's head is going to hit that in the middle.
If anyone has some suggestions or wants the stl files or even wants me to print/send them one, let me know and I'll see what we can work out. Lots of things suck in this world, but gotta love the DIY-ability of things these days!
EDIT: 3D Files can be found at: https://thangs.com/designer/Wilklersticks/3d-model/1357779
There are a few thicknesses. The thicker you go, the more adjustability you will have but could introduce reflections. The thinner you go, the less adjustability you have, but you run a better chance of no reflections. Maybe use double-sided tape to see which you like best.
Sponsored
Last edited: