- Thread starter
- #1
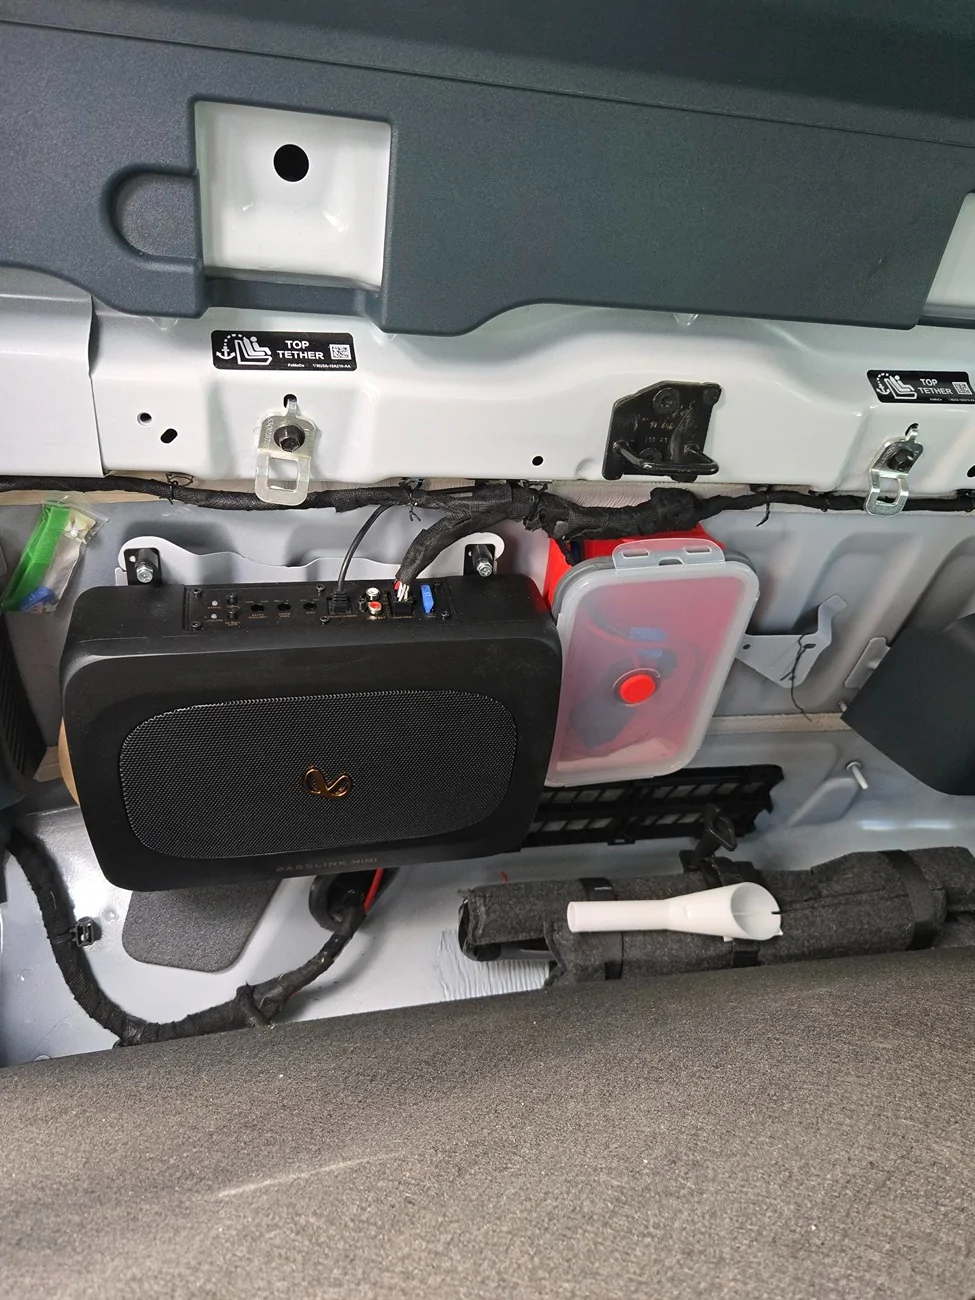
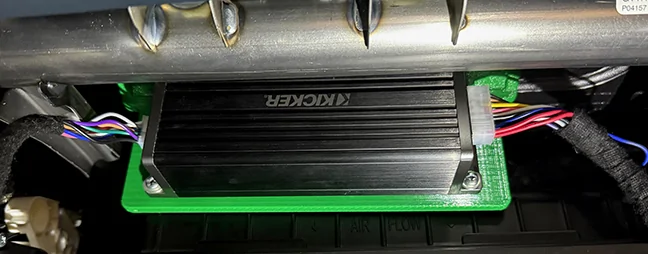
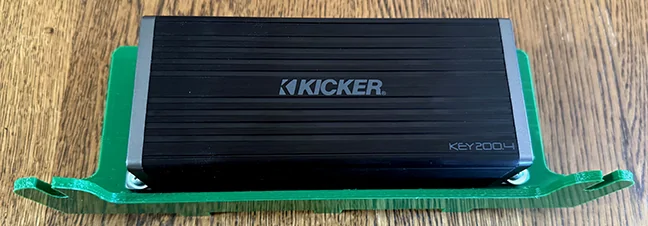
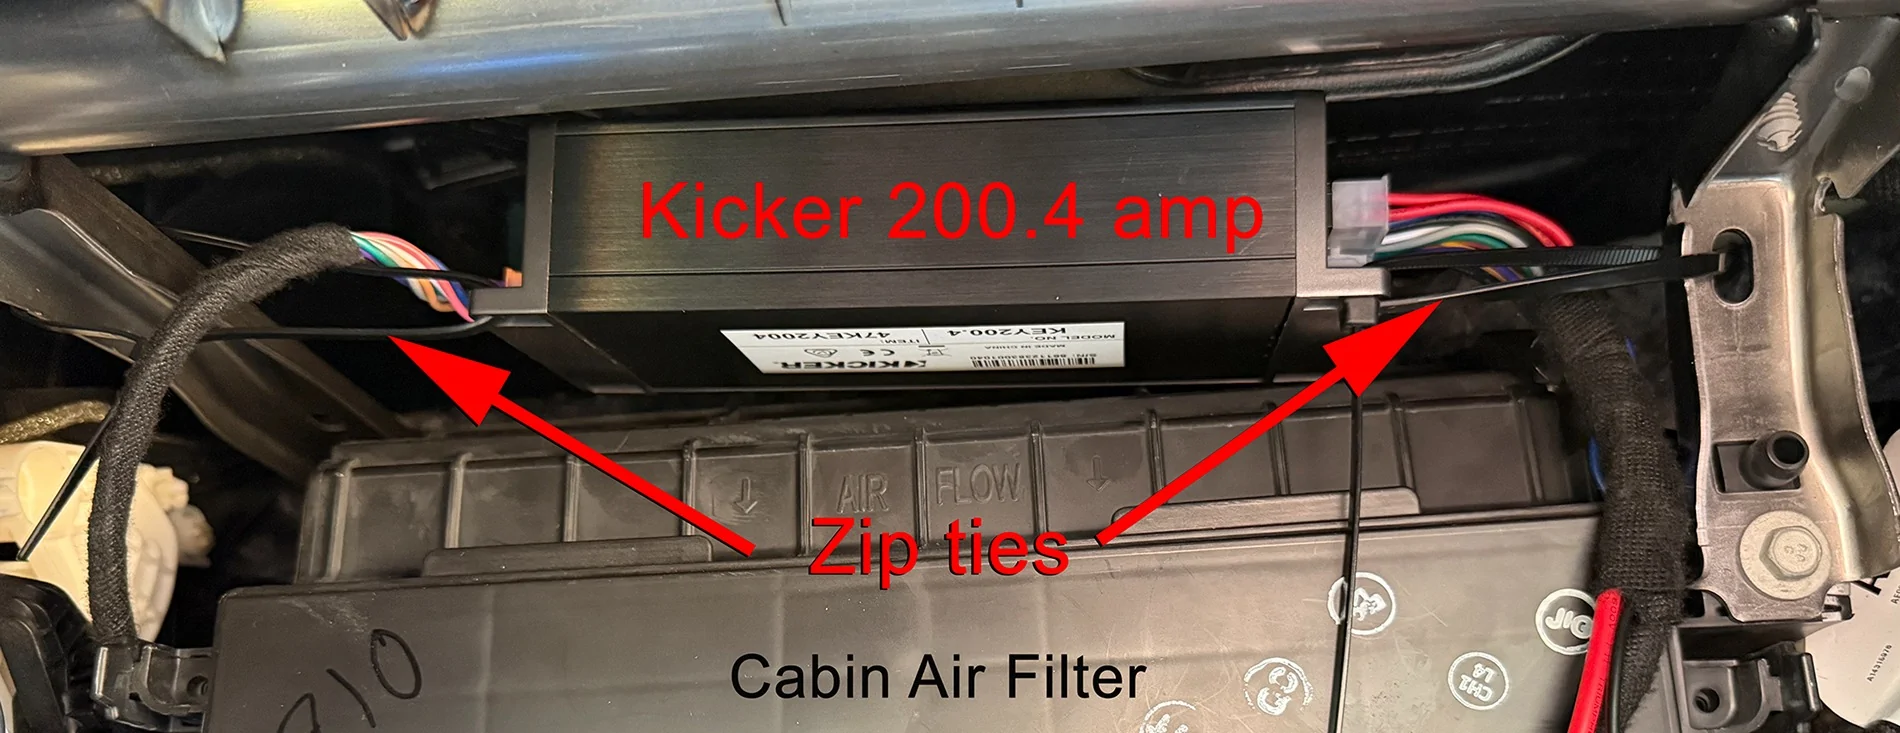
I recently added a Kicker 200.4 amplifier, which I ordered with the PlugNPlay kit that featured the subwoofer harness cabling. The subwoofer recently arrived so I thought I would go ahead and install it.
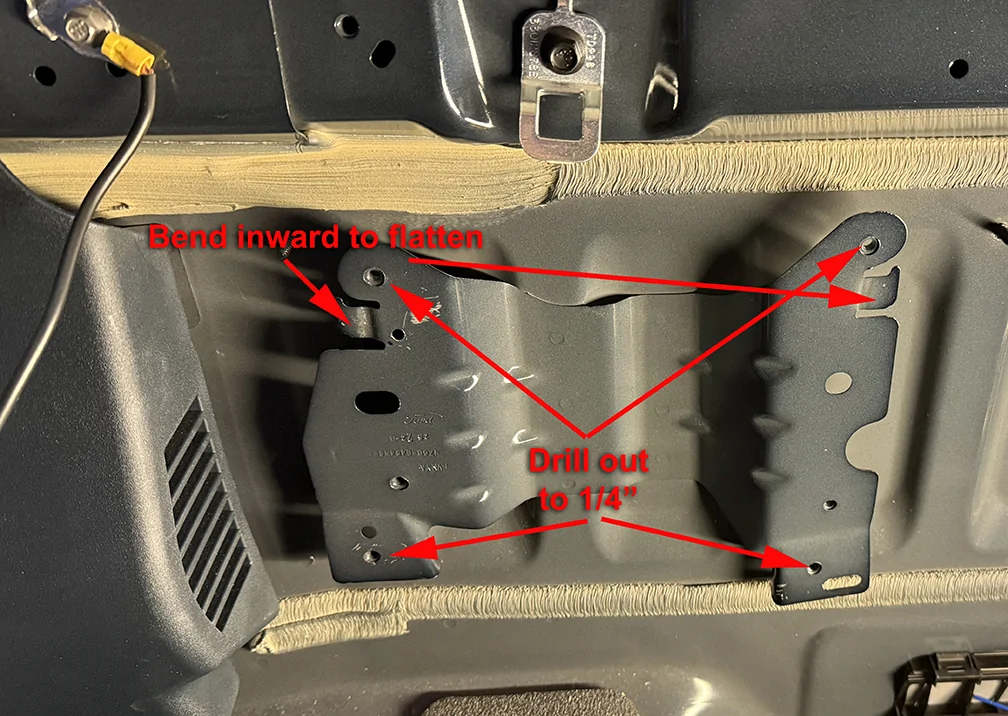
I'm not sure why some folks are cutting/removing the factory bracket that is used for the Lariat amplifier, the bracket worked perfect for my installation. The only thing I really had to do is bend the tiny upper side brackets so they were flat, really easy to do. I also bent the bottom tabs inward a bit to that the 4 mounting points were flush. I drilled out the 4 holes shown with a 1/4" drill bit. Tip: rotate the drill back and forth in a circular motion to slightly enlarge the holes, it will make it easier to slide the 1/4" bolts through.
Note: The bottom two mounting holes had a nut welded to the back, I just drilled right through the nut. The mounting bolts I bought would not fit into these existing nuts.
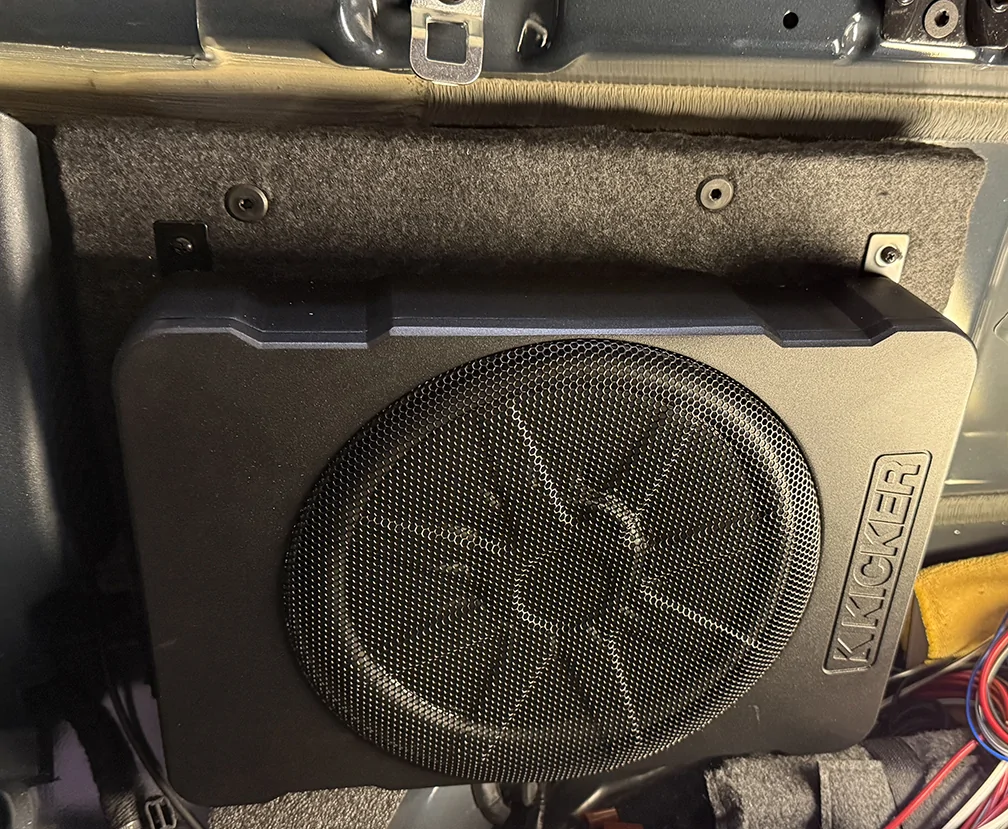
The 1/2" piece of plywood that I used I just happened to have laying in my garage wood stash, I used it the size it was which happened to be perfect. I mounted the board so it was flush to the piece of factory foam on the bottom below the bracket.
I used a paper template to mark the 4 bolt holes, and drilled them with a 1/4" bit, then I glued a piece of carpet to the board.
The bolts I found at Home Depot, I wanted ones with a flat top and these were marked as designed for furniture use. They are designed to be used with a "sleeve" type nut, but I just bought 4 quarter inch nuts.
Since the nuts cannot be reached in the back to hold them for installation of the bolt, I simply used some very strong packaging tape and taped them to the back of the screw hole, then carefully screwed each bolt to the nut. No problem tightening them, the nuts did not slip.

I mounted the sub to the board with the screws that were supplied with the subwoofer. It's best to drill pilot holes for those screws in advance of mounting the board to the vehicle bracket, as once the board is mounted it's hard to get a drill in the tight space to drill the pilot holes for mounting the subwoofer.
Note: Install the 2 lower Subwoofer brackets that are mounted to the back of the subwoofer so that they are at a 90 degree angle, this allows the subwoofer to be mounted at the very bottom of the backing board.
To give the subwoofer a little more "cushion", and to keep it slightly away from the four flat mounting bolts (so as to not scratch the back of the subwoofer), I attached four 1-inch round "peel & stick" "Gorilla H147 Pads" (Furniture Gripper Pads) to the back of the subwoofer. They are made of rubber (vs felt) which was ideal.
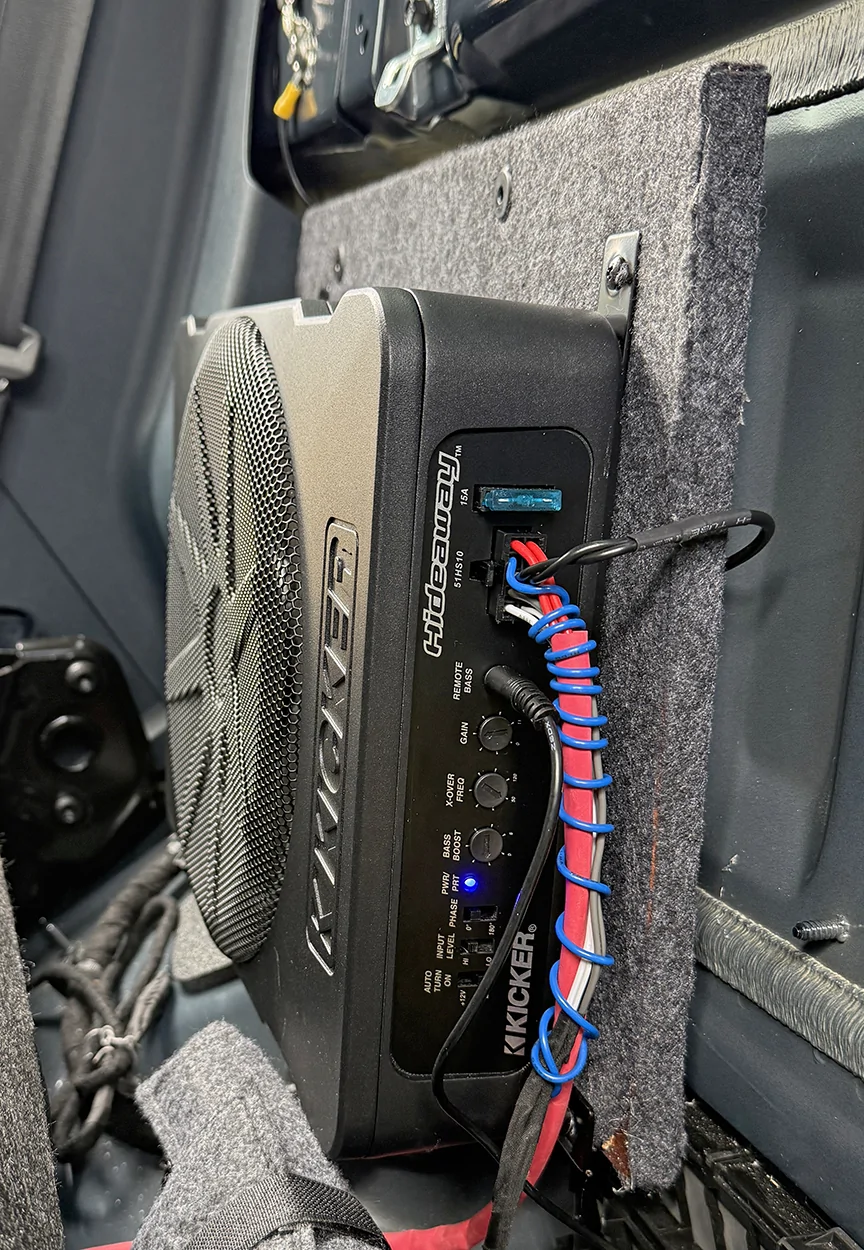
Finished result. The sub is mounted very securely, you can push/pull on the mounting board and it doesn't have any give at all:
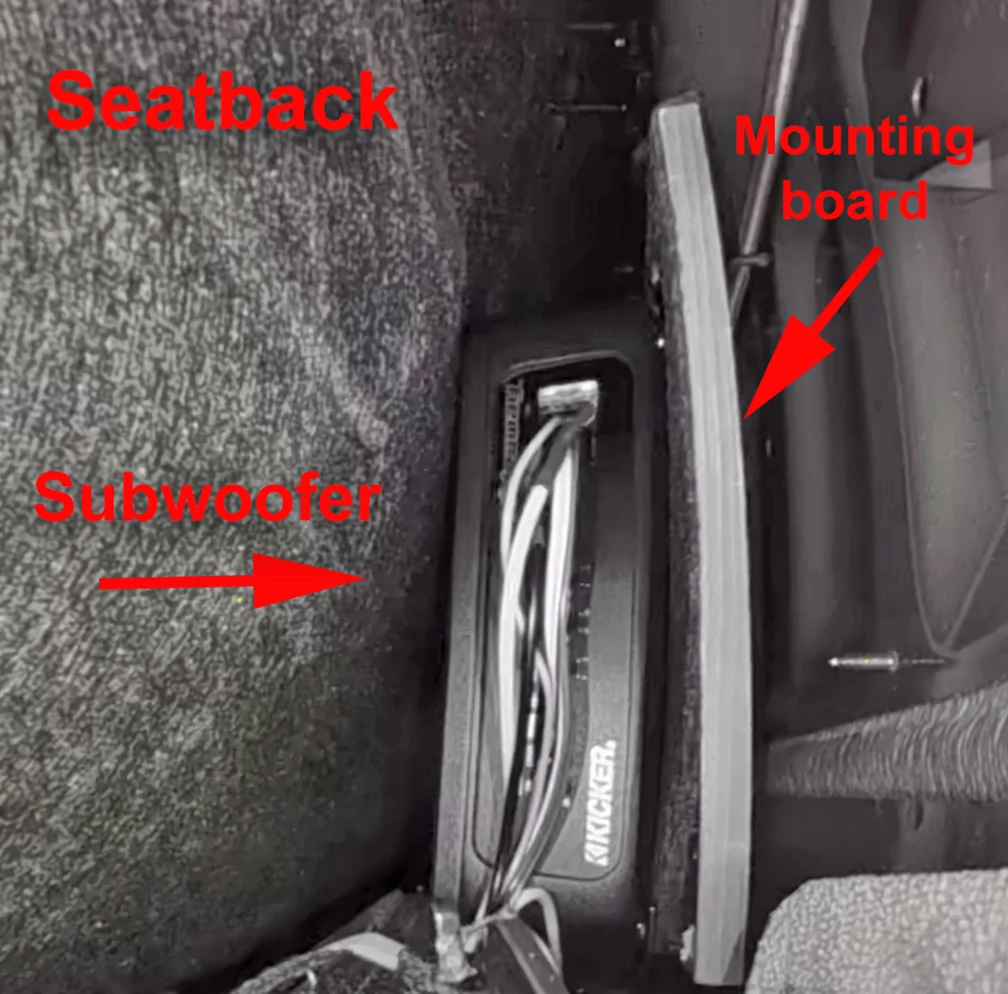
I was trying to figure out a way to determine how much room exactly there was between the subwoofer and the seatback when the seatback was fully closed... then I thought of using one of my low-light Ring camera's... I placed the camera behind the seatback and locked the seatback into position. As seen in the photo, not really any room left, which shows the importance of mounting the sub as low as possible.
SUMMARY of total system upgrade cost:
Kicker 200.4 Amp with custom harness (PlugnPlay Kit #11-2) - $520
Kicker HS10 subwoofer - $341.96
Front door speakers - Kicker KSC-6504 $121.87
Rear speakers - Kicker DSC-404 $48.99
Misc: ($64.74)
Amp mounting bracket
1/4" nuts (subwoofer mounting board)
1/4" bolts - 1/4"-20 x 30mm (Everbilt 471538) (subwoofer mounting board)
Front door speaker rings (Metra 82-5605)
Front door speaker wire adaptors (Metra 72-5602)
Rear speaker wire adaptors (Metra 72-5600)
GRAND TOTAL: $1097.56
NOTE:
If anyone wants a PDF of my subwoofer installation write-up, send me a PM. The file also includes instructions for installing the Kicker 200.4 amplifier.
I'm not sure why some folks are cutting/removing the factory bracket that is used for the Lariat amplifier, the bracket worked perfect for my installation. The only thing I really had to do is bend the tiny upper side brackets so they were flat, really easy to do. I also bent the bottom tabs inward a bit to that the 4 mounting points were flush. I drilled out the 4 holes shown with a 1/4" drill bit. Tip: rotate the drill back and forth in a circular motion to slightly enlarge the holes, it will make it easier to slide the 1/4" bolts through.
Note: The bottom two mounting holes had a nut welded to the back, I just drilled right through the nut. The mounting bolts I bought would not fit into these existing nuts.
The 1/2" piece of plywood that I used I just happened to have laying in my garage wood stash, I used it the size it was which happened to be perfect. I mounted the board so it was flush to the piece of factory foam on the bottom below the bracket.
I used a paper template to mark the 4 bolt holes, and drilled them with a 1/4" bit, then I glued a piece of carpet to the board.
The bolts I found at Home Depot, I wanted ones with a flat top and these were marked as designed for furniture use. They are designed to be used with a "sleeve" type nut, but I just bought 4 quarter inch nuts.
Since the nuts cannot be reached in the back to hold them for installation of the bolt, I simply used some very strong packaging tape and taped them to the back of the screw hole, then carefully screwed each bolt to the nut. No problem tightening them, the nuts did not slip.
I mounted the sub to the board with the screws that were supplied with the subwoofer. It's best to drill pilot holes for those screws in advance of mounting the board to the vehicle bracket, as once the board is mounted it's hard to get a drill in the tight space to drill the pilot holes for mounting the subwoofer.
Note: Install the 2 lower Subwoofer brackets that are mounted to the back of the subwoofer so that they are at a 90 degree angle, this allows the subwoofer to be mounted at the very bottom of the backing board.
To give the subwoofer a little more "cushion", and to keep it slightly away from the four flat mounting bolts (so as to not scratch the back of the subwoofer), I attached four 1-inch round "peel & stick" "Gorilla H147 Pads" (Furniture Gripper Pads) to the back of the subwoofer. They are made of rubber (vs felt) which was ideal.
Finished result. The sub is mounted very securely, you can push/pull on the mounting board and it doesn't have any give at all:
I was trying to figure out a way to determine how much room exactly there was between the subwoofer and the seatback when the seatback was fully closed... then I thought of using one of my low-light Ring camera's... I placed the camera behind the seatback and locked the seatback into position. As seen in the photo, not really any room left, which shows the importance of mounting the sub as low as possible.
SUMMARY of total system upgrade cost:
Kicker 200.4 Amp with custom harness (PlugnPlay Kit #11-2) - $520
Kicker HS10 subwoofer - $341.96
Front door speakers - Kicker KSC-6504 $121.87
Rear speakers - Kicker DSC-404 $48.99
Misc: ($64.74)
Amp mounting bracket
1/4" nuts (subwoofer mounting board)
1/4" bolts - 1/4"-20 x 30mm (Everbilt 471538) (subwoofer mounting board)
Front door speaker rings (Metra 82-5605)
Front door speaker wire adaptors (Metra 72-5602)
Rear speaker wire adaptors (Metra 72-5600)
GRAND TOTAL: $1097.56
NOTE:
If anyone wants a PDF of my subwoofer installation write-up, send me a PM. The file also includes instructions for installing the Kicker 200.4 amplifier.
Sponsored
Last edited: