Sponsored

Another method to mount Kicker Hideaway / amp board to back cabin wall

Mavito

2.0L EcoBoost
Well-known member
First Name
Coquito
Joined
Nov 22, 2021
Threads
5
Messages
47
Reaction score
32
Location
San Antonio
Vehicle(s)
2022 Maverick AWD
Engine
2.0L EcoBoost
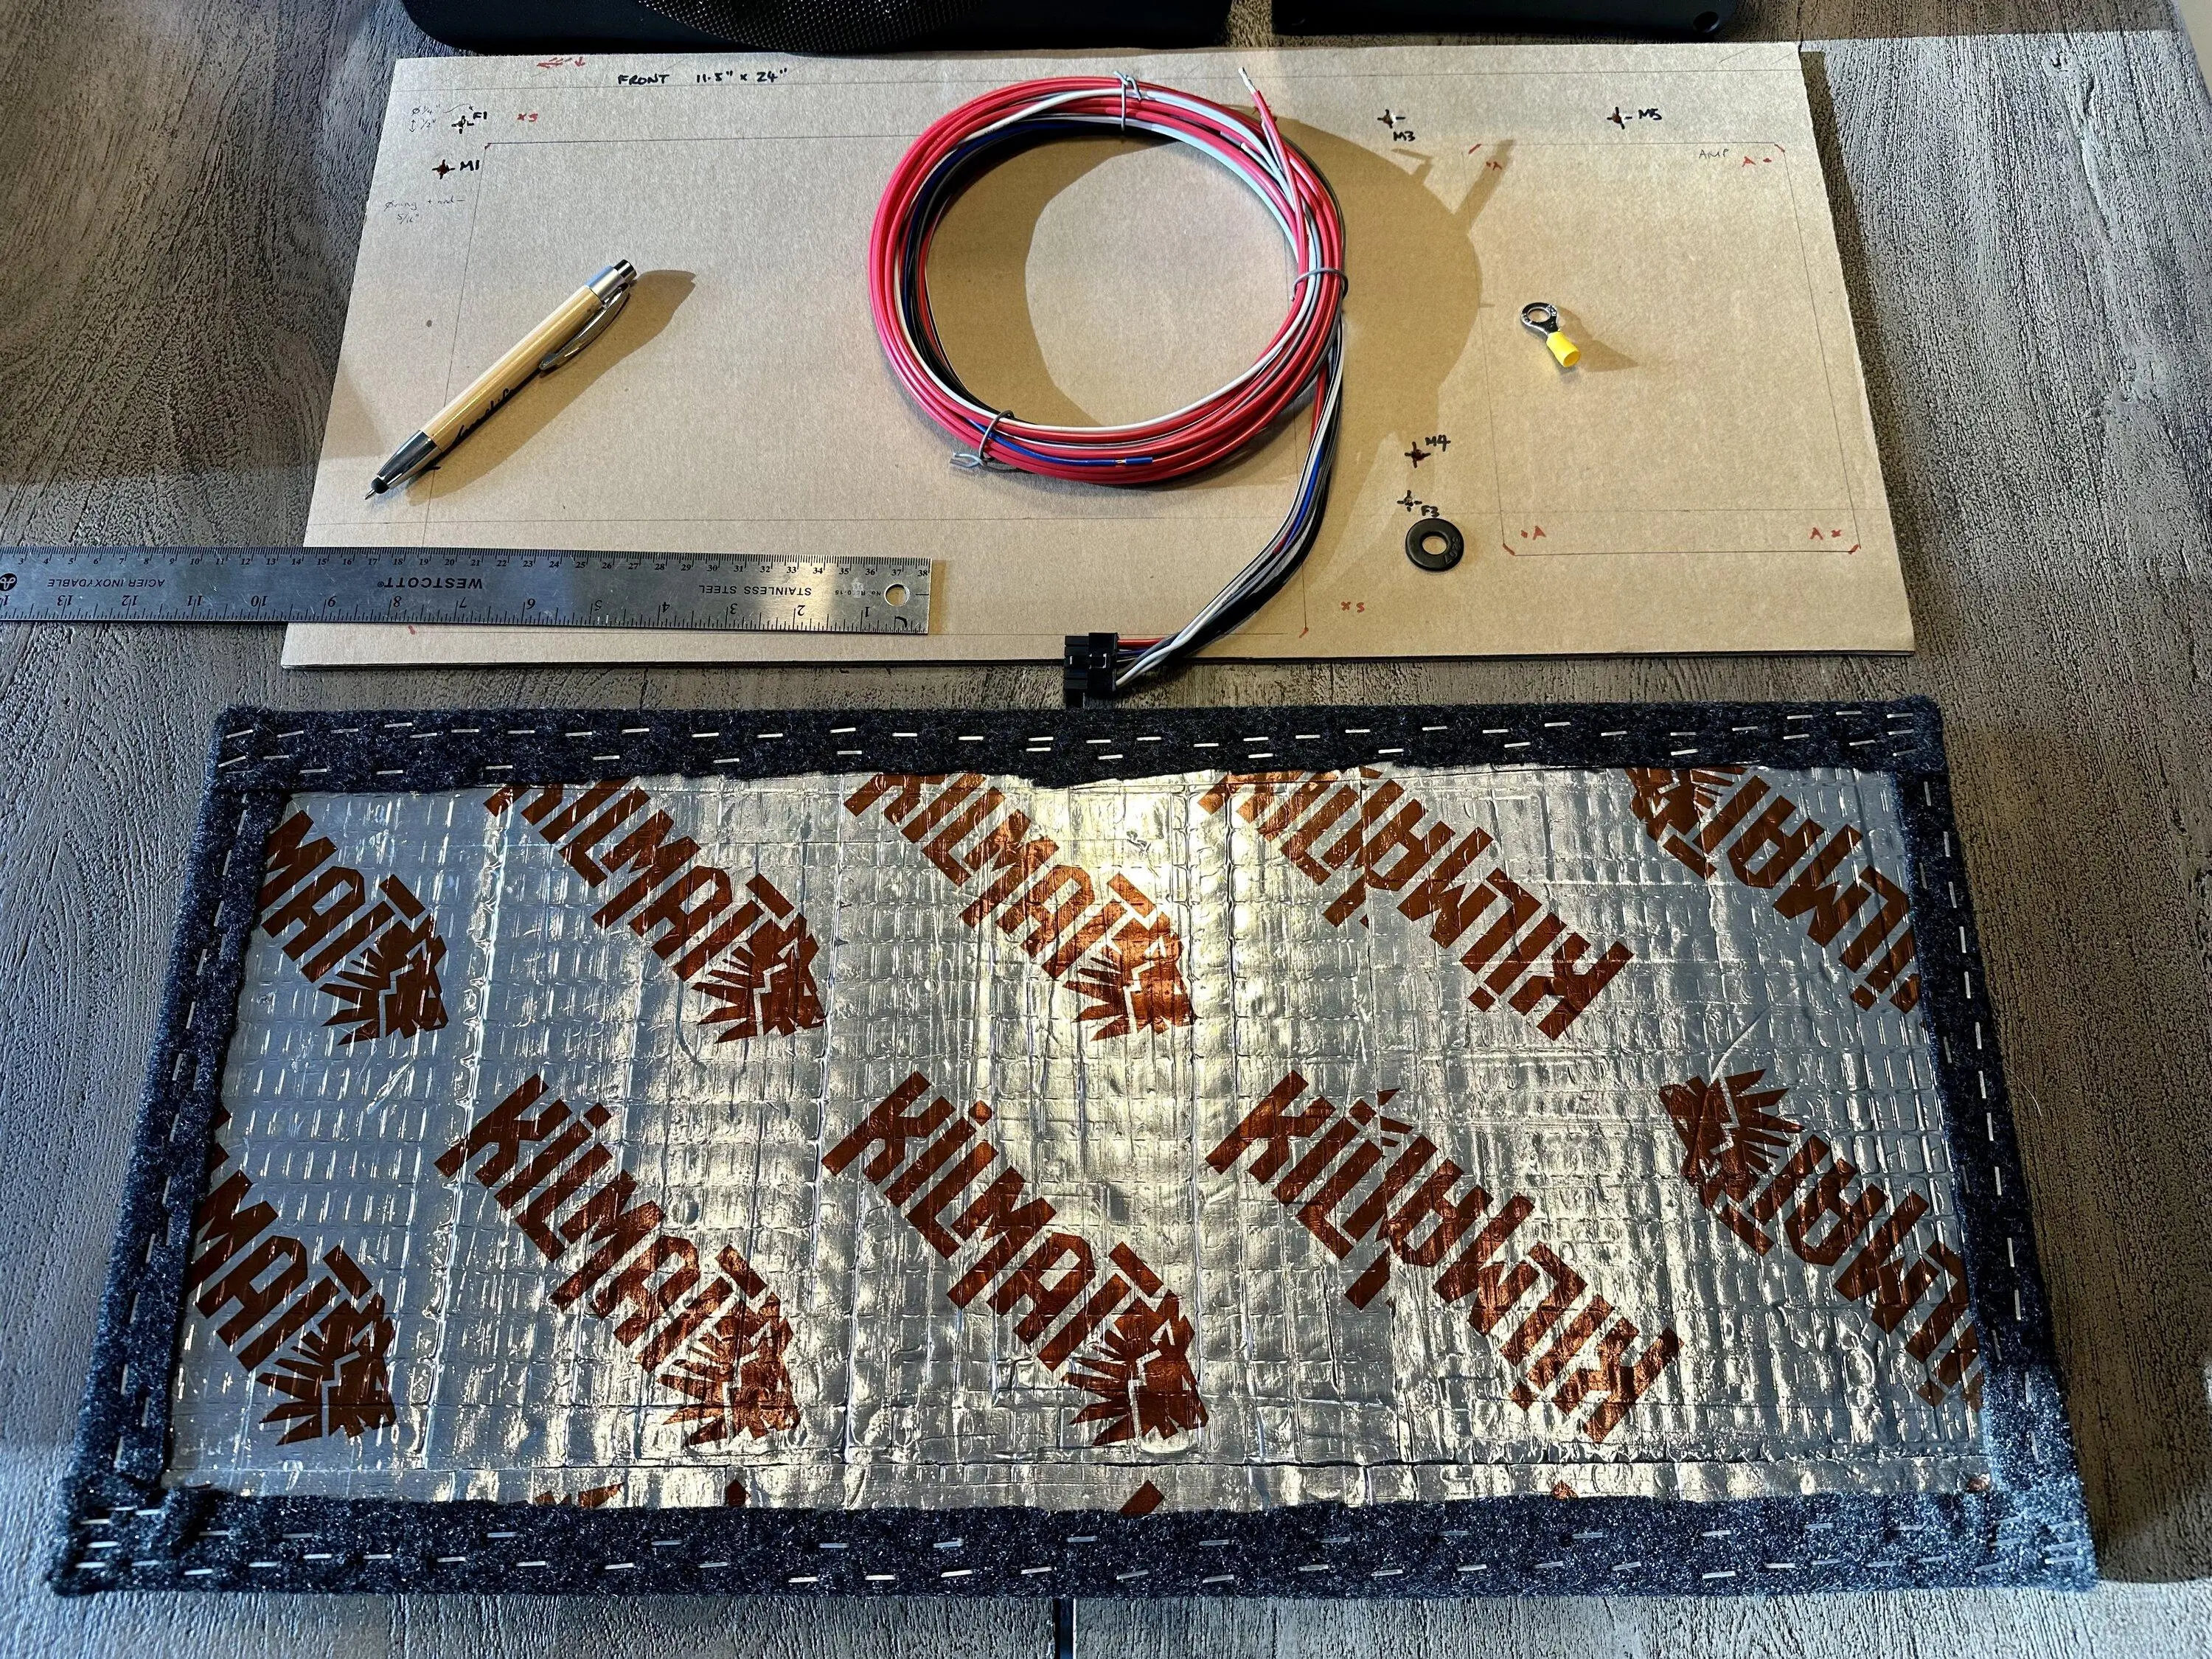
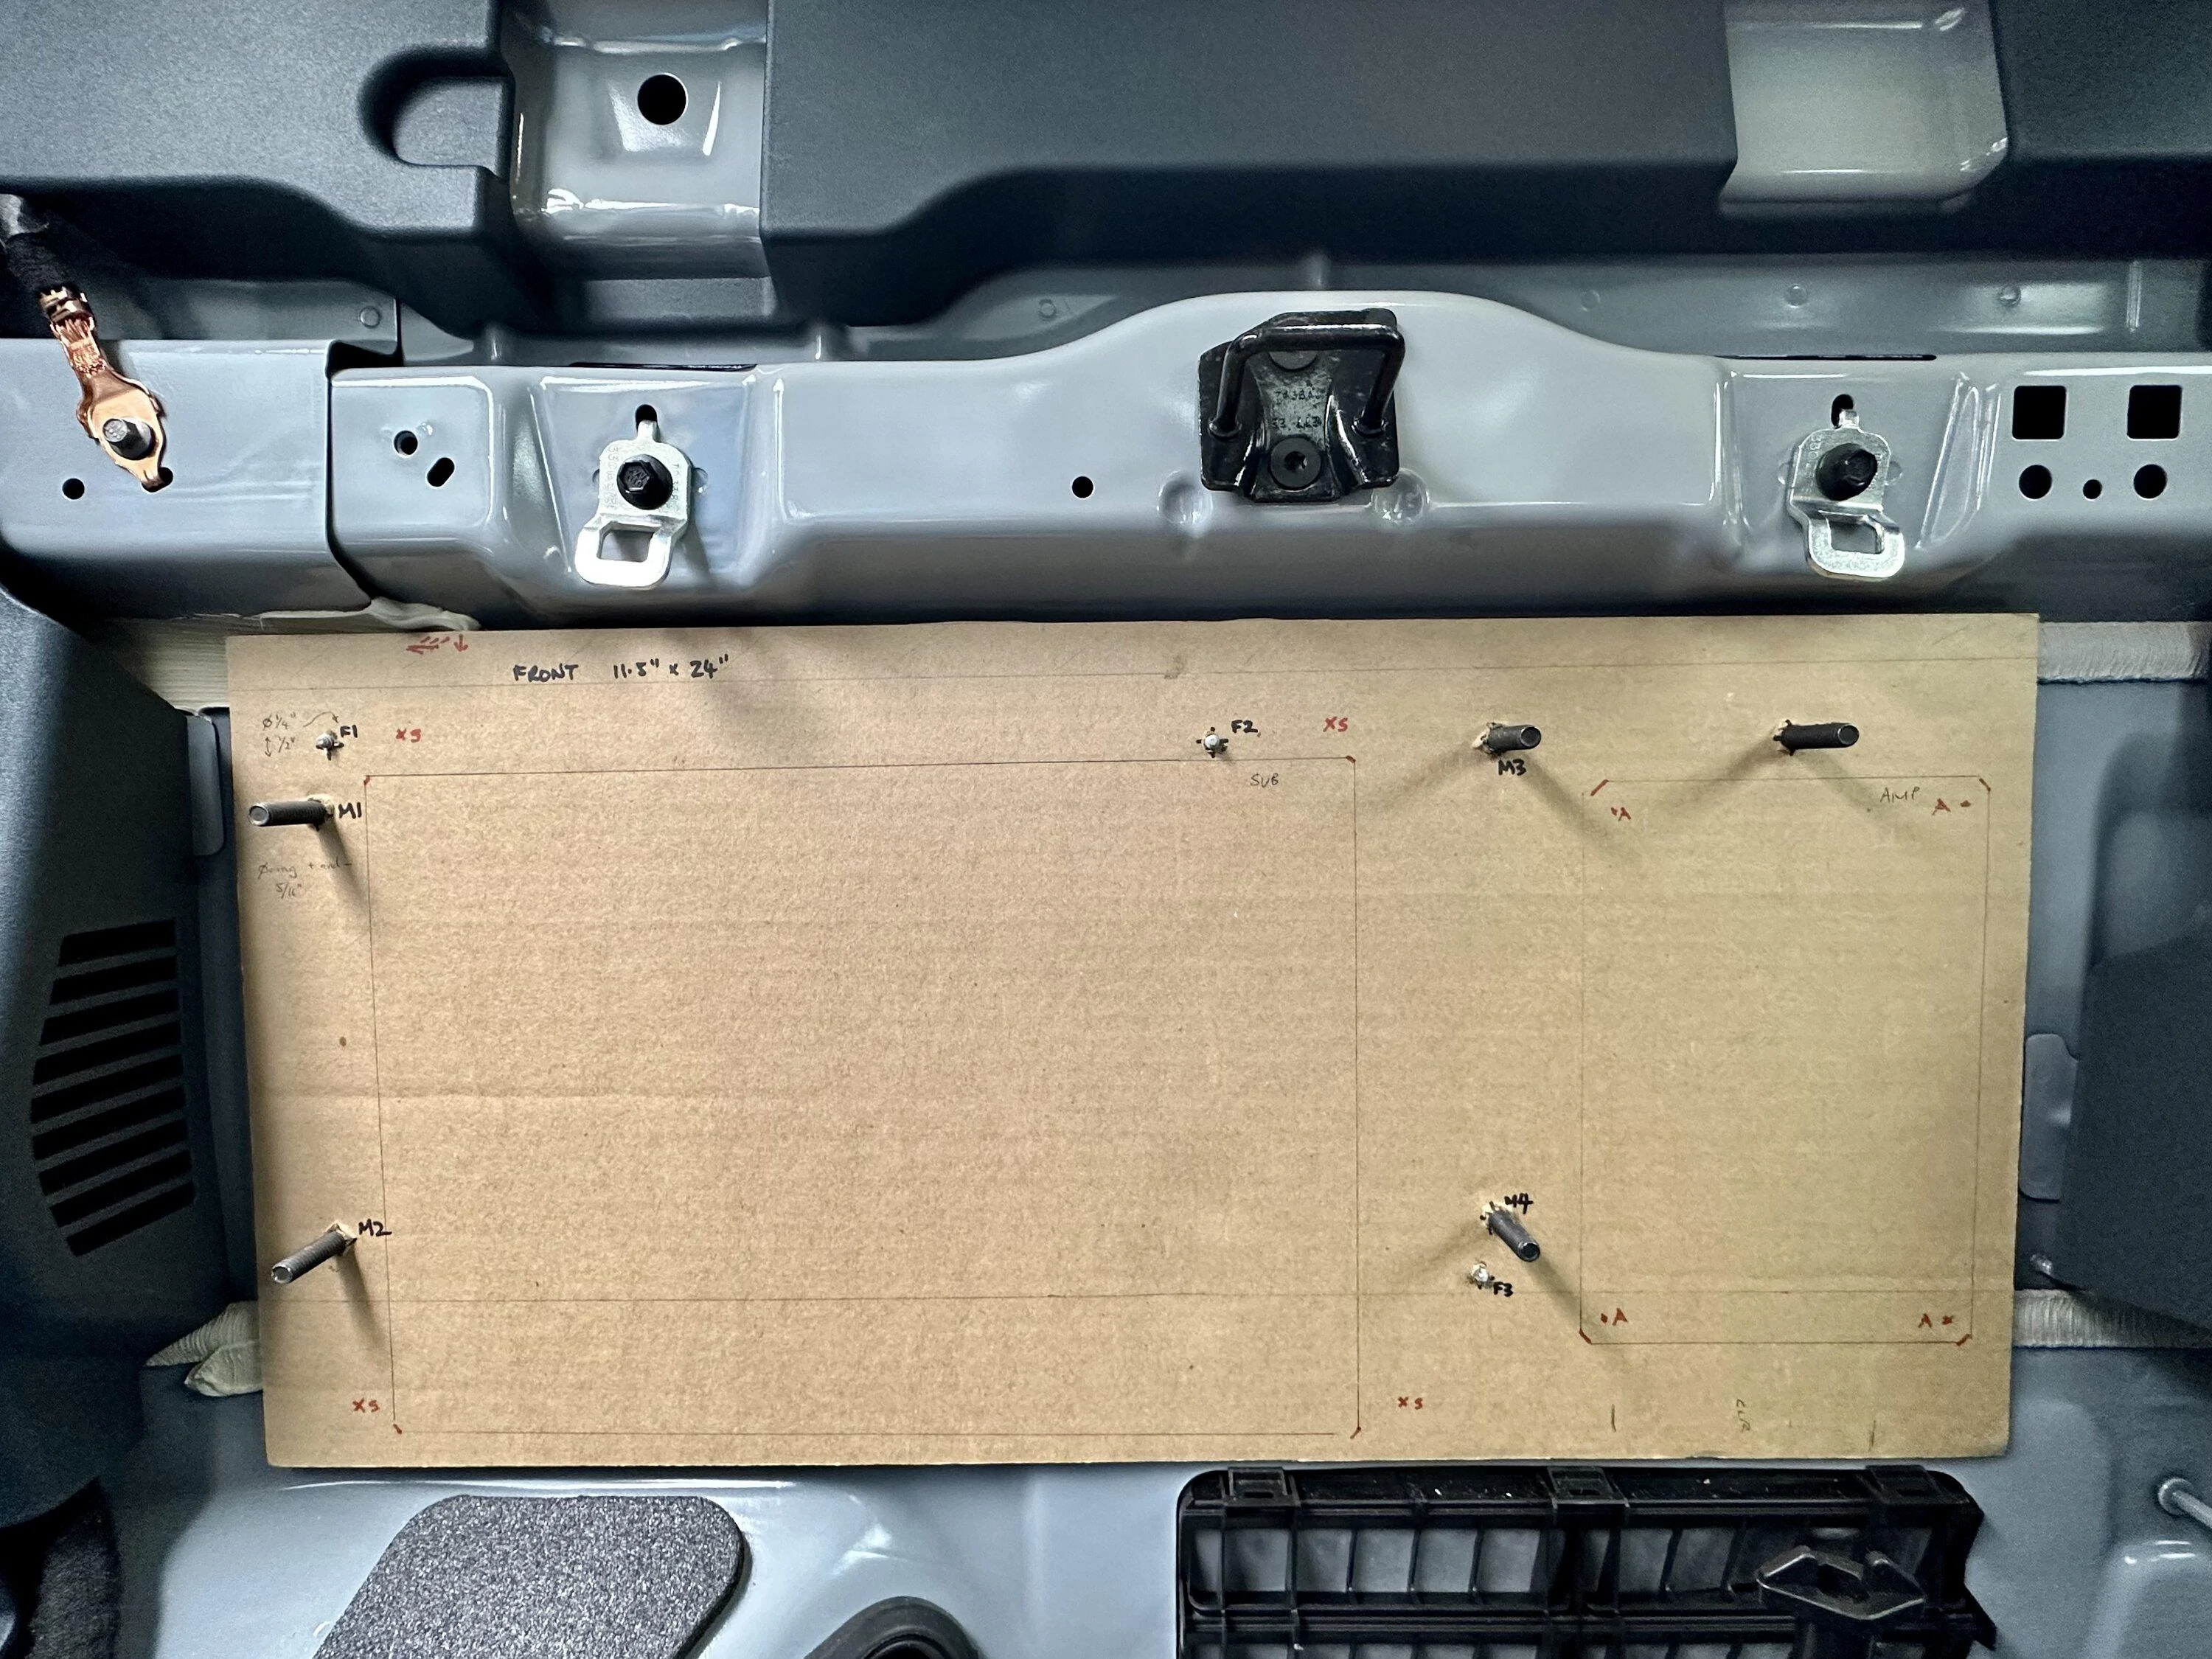
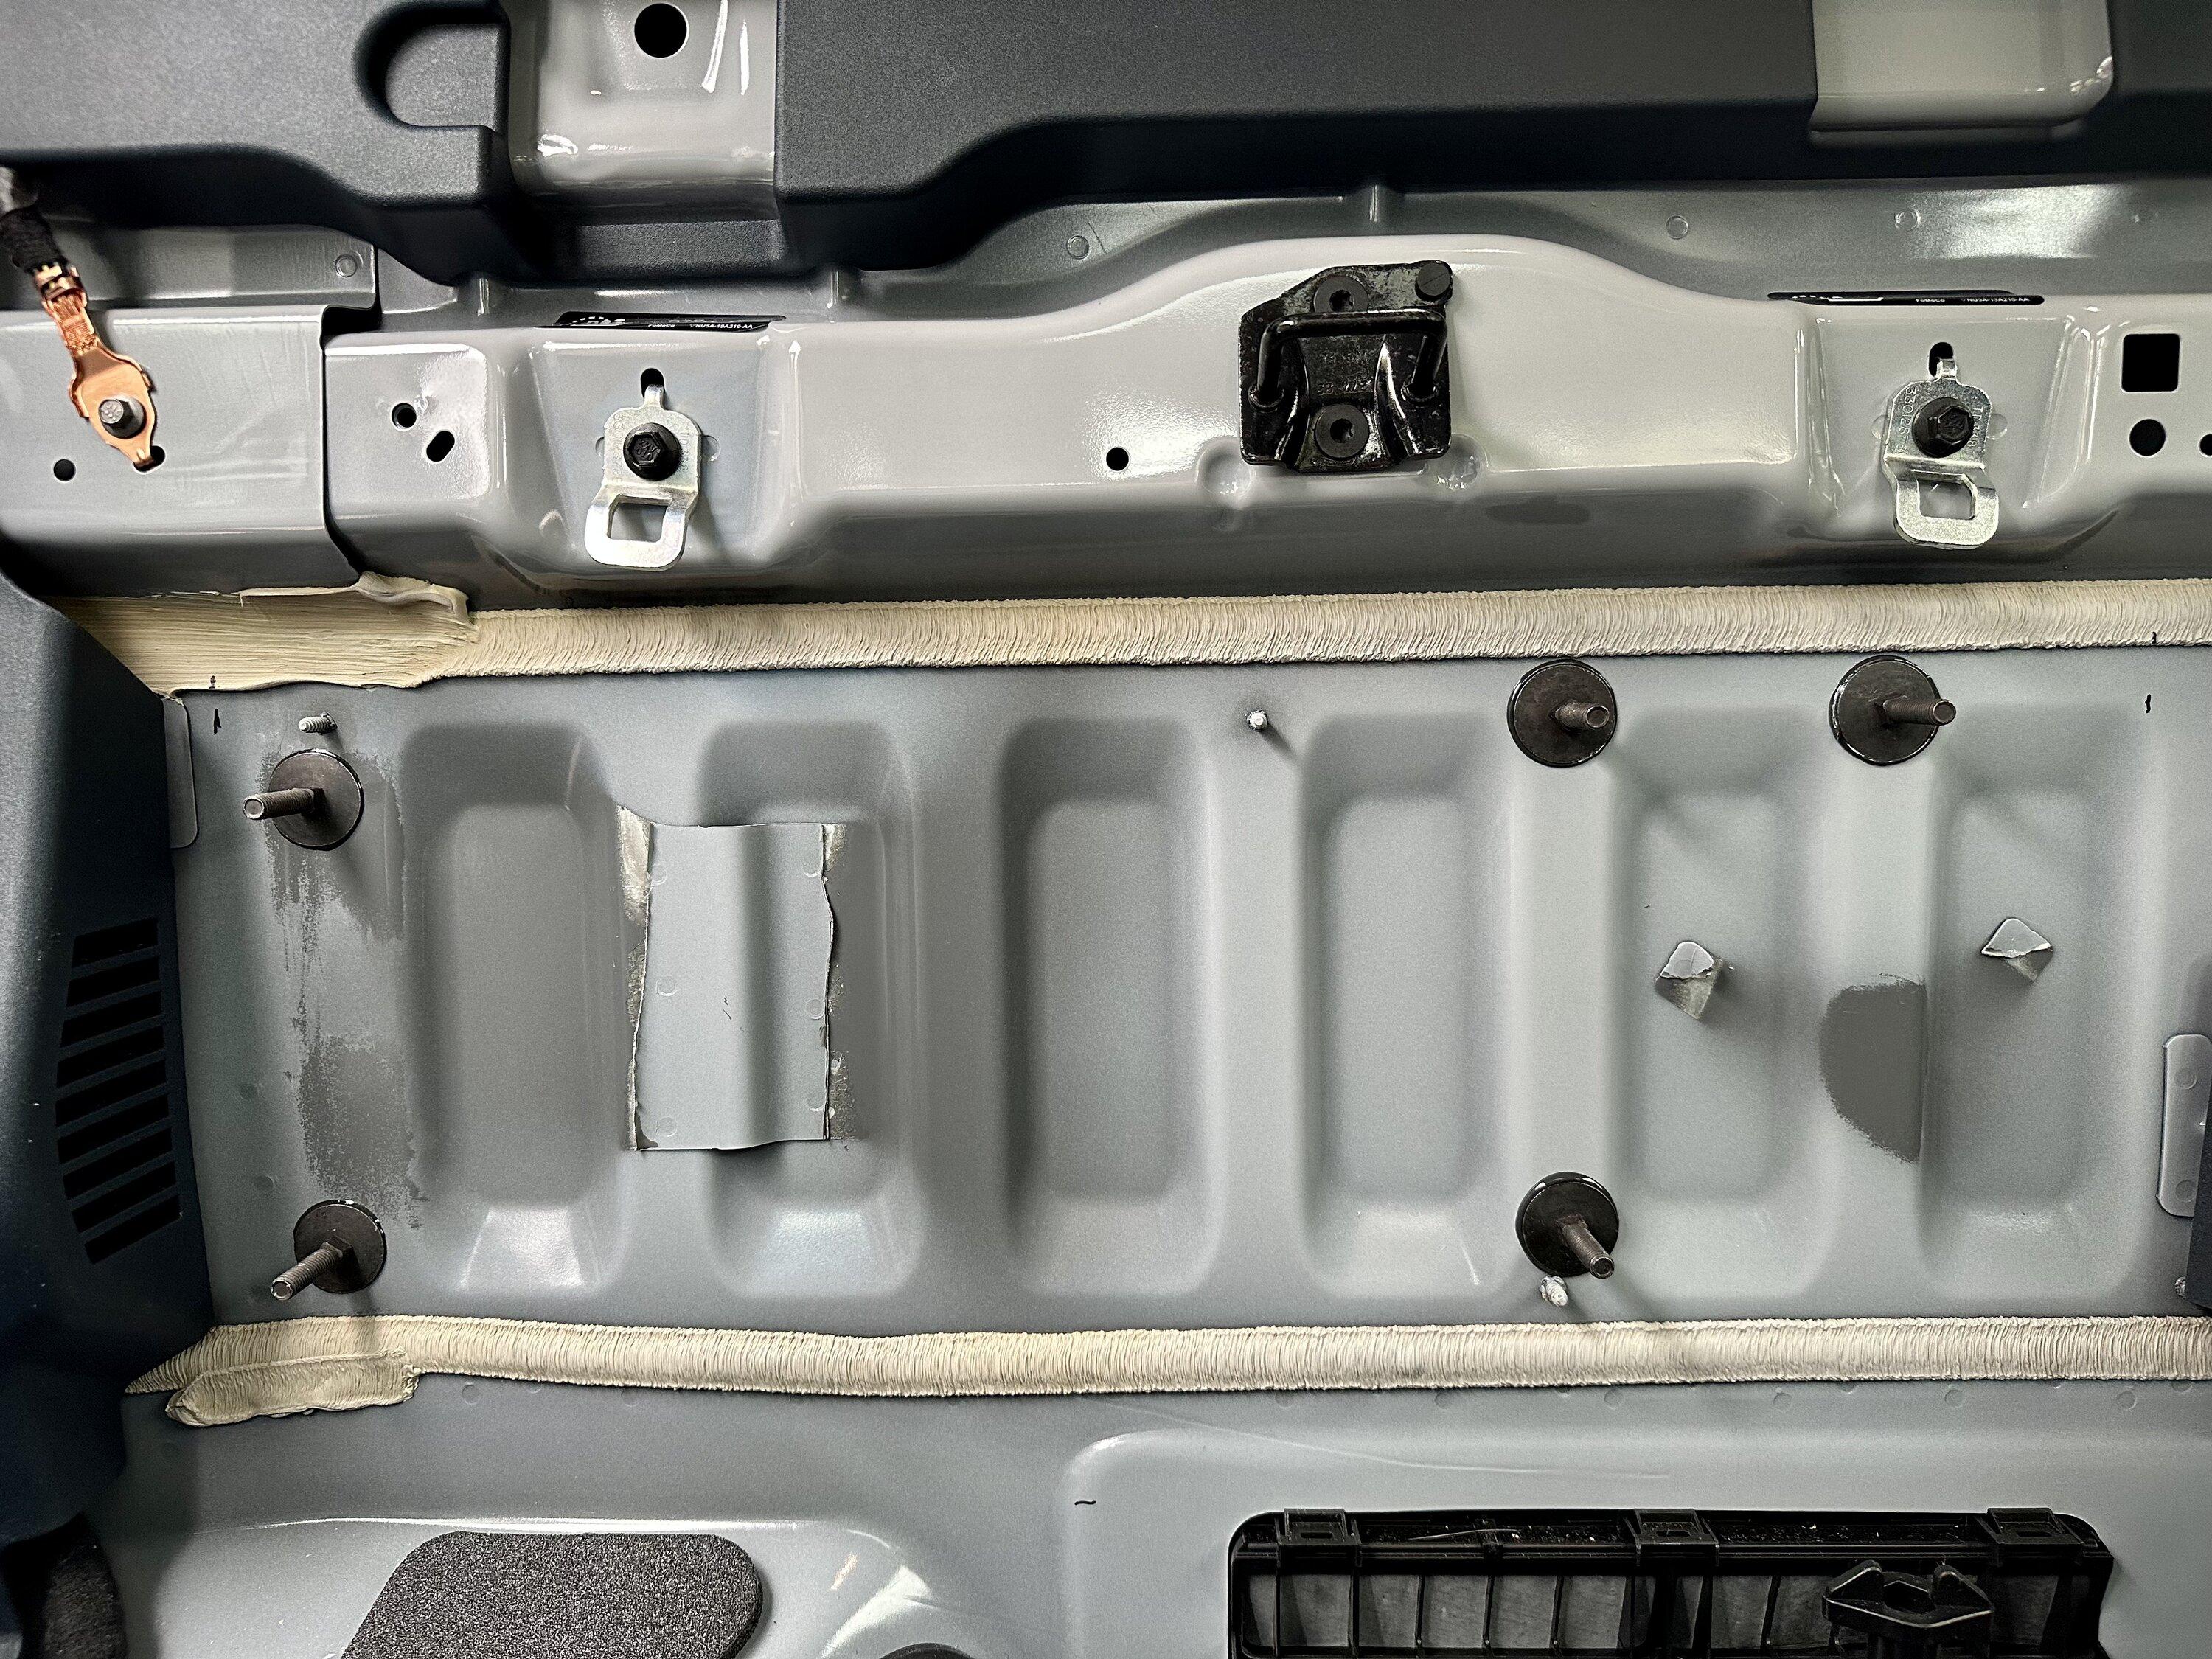
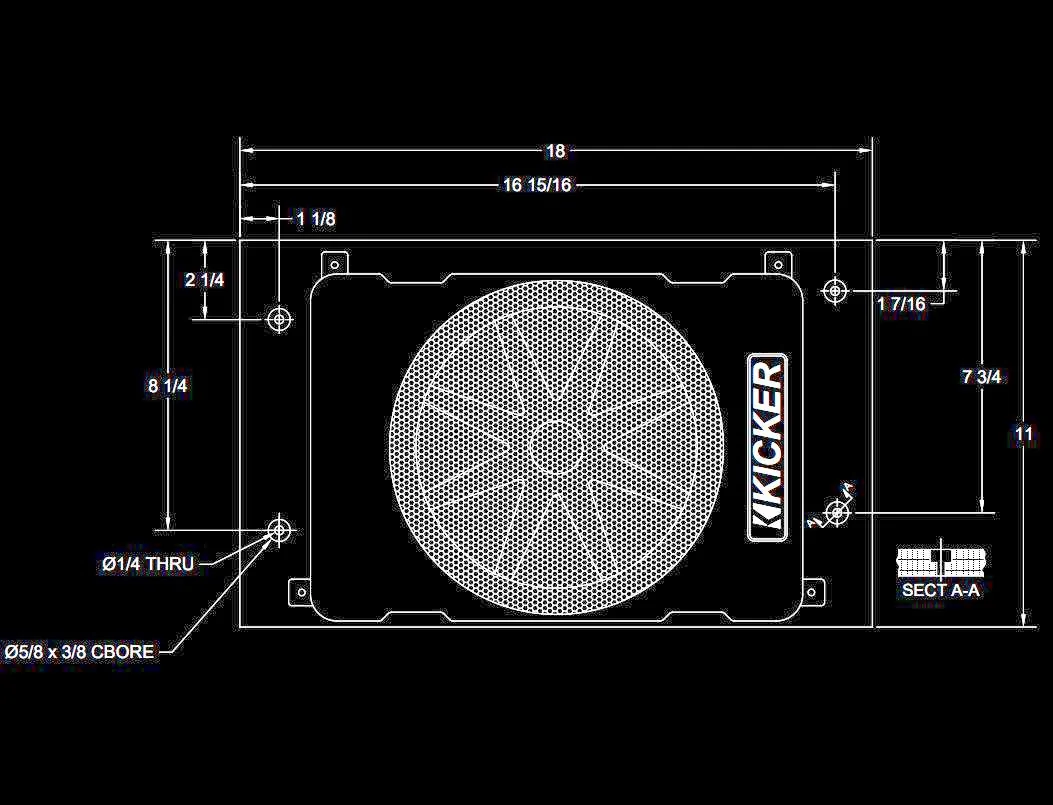
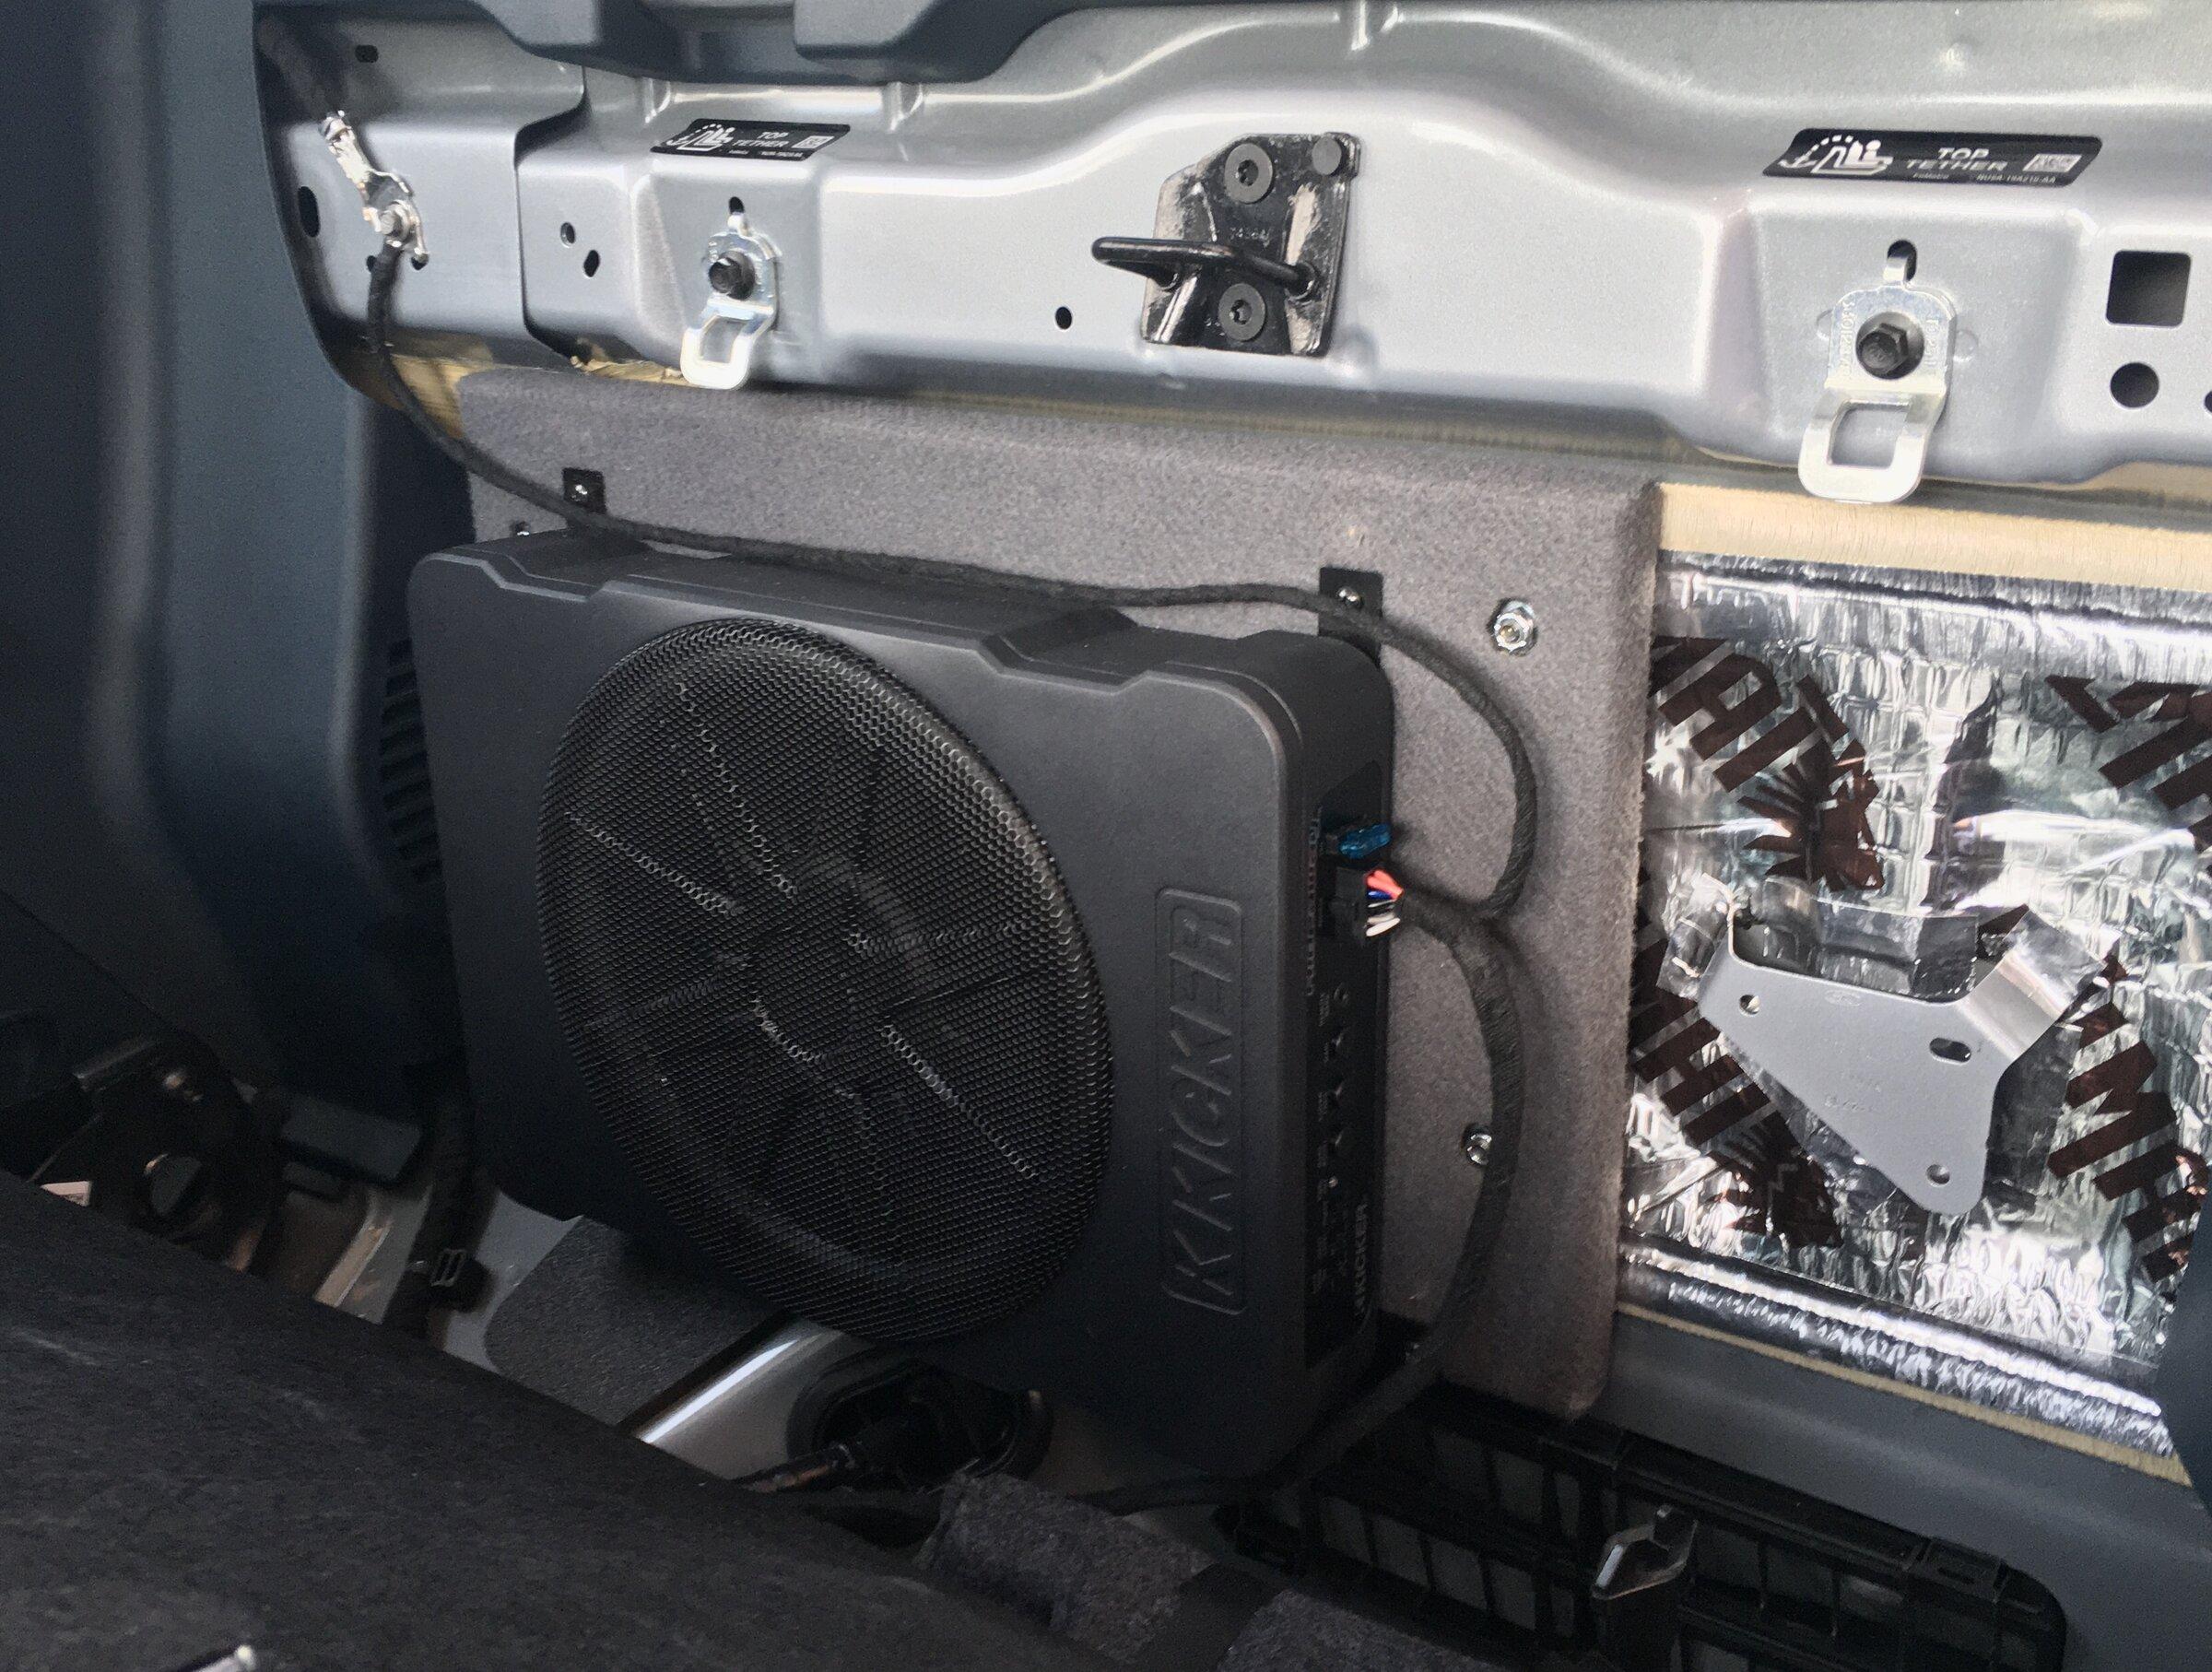
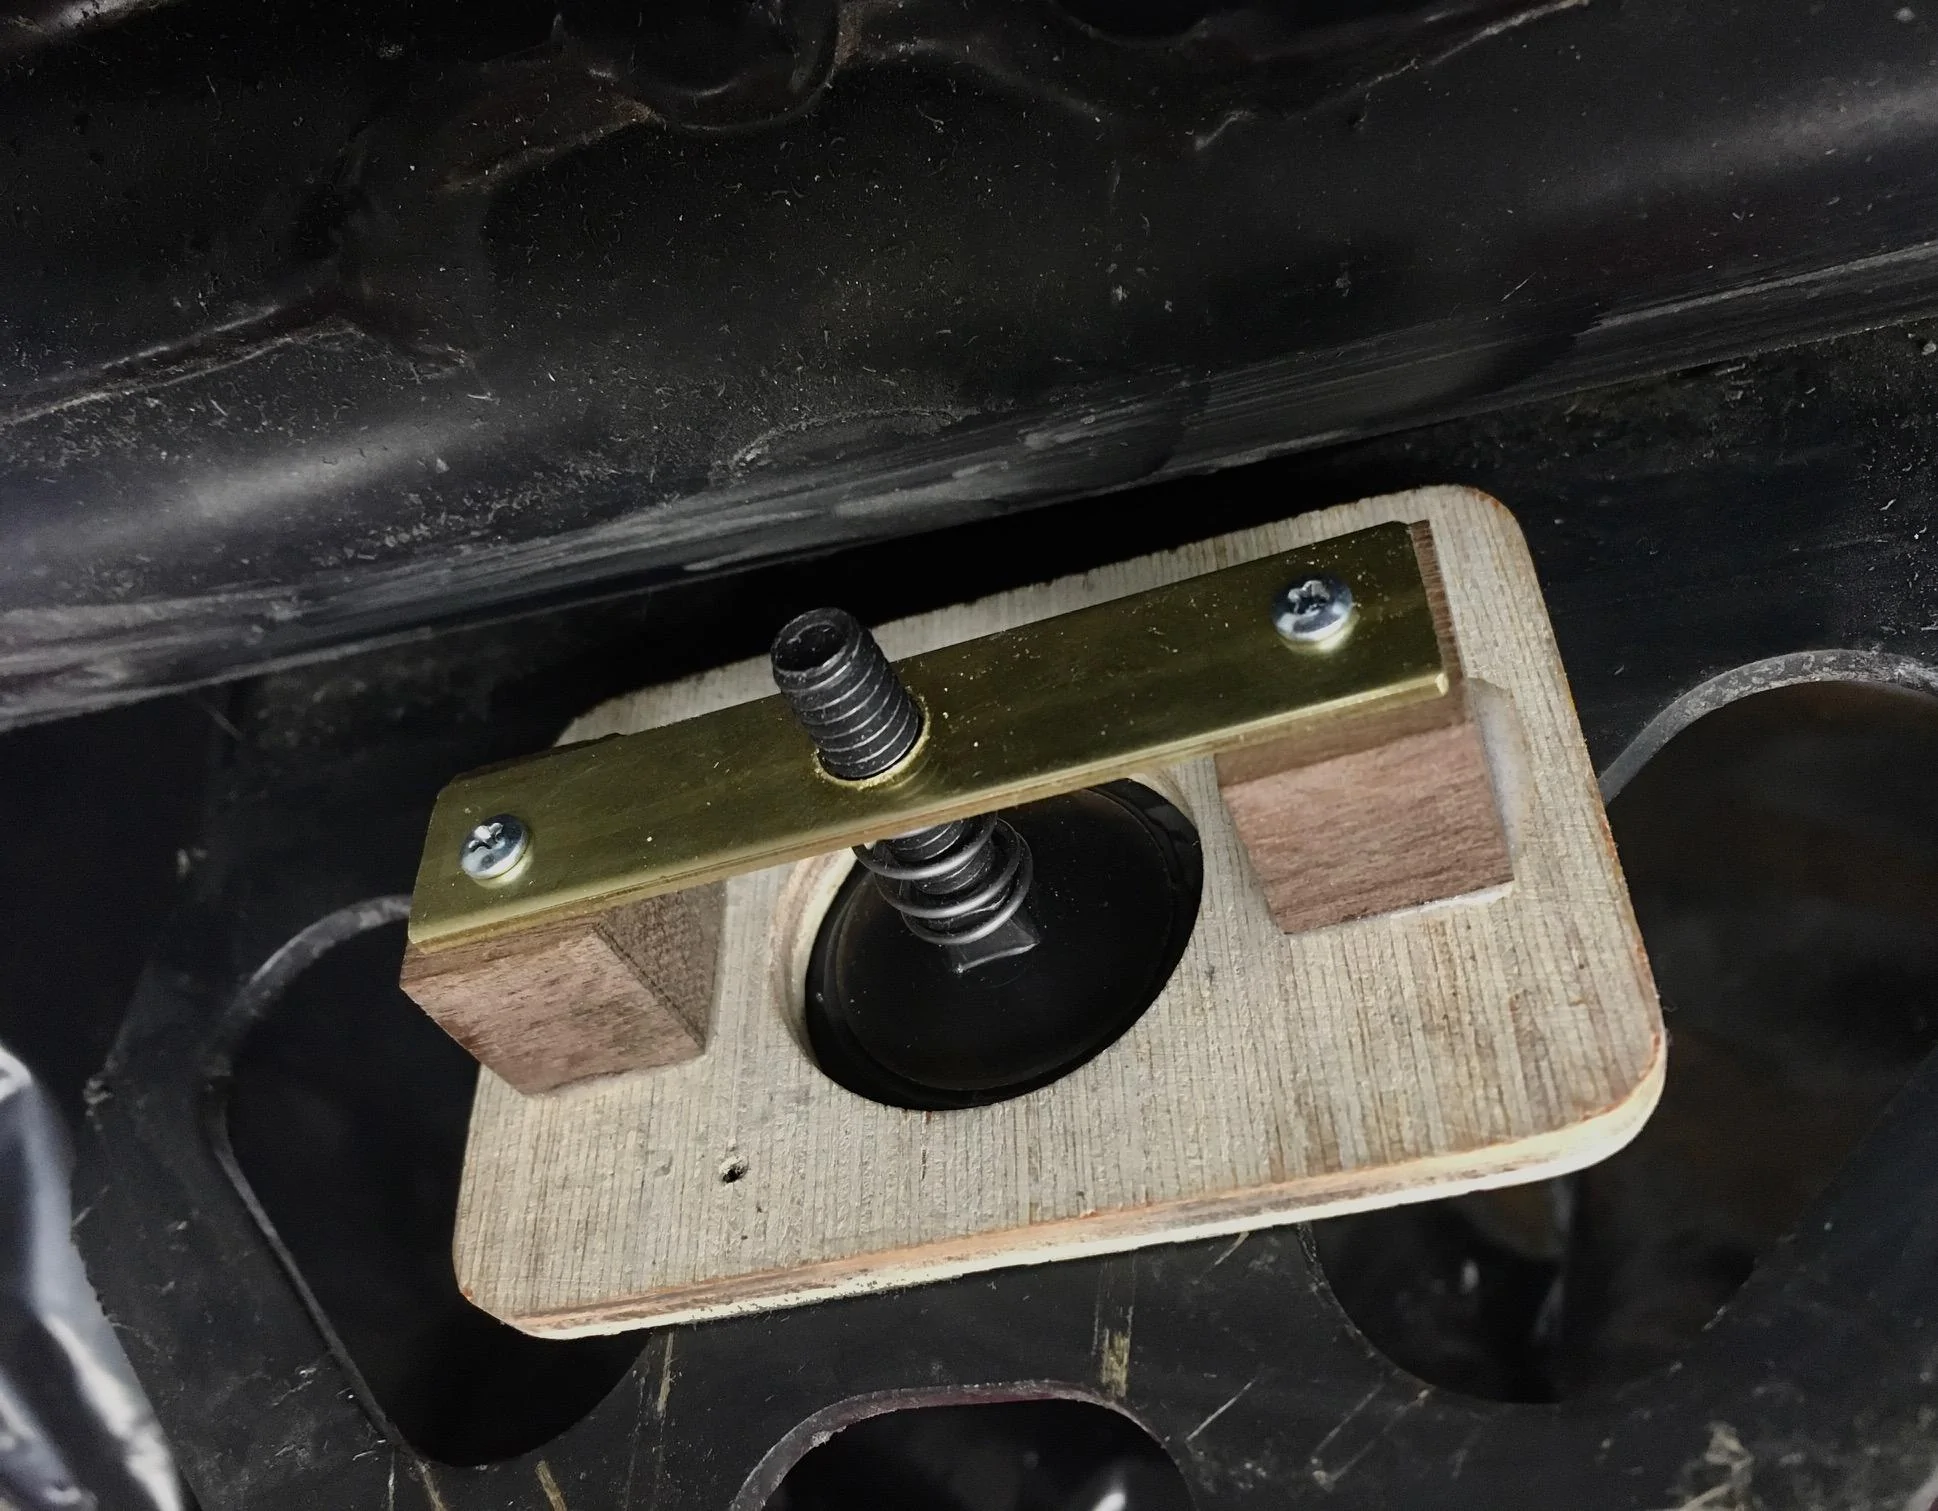
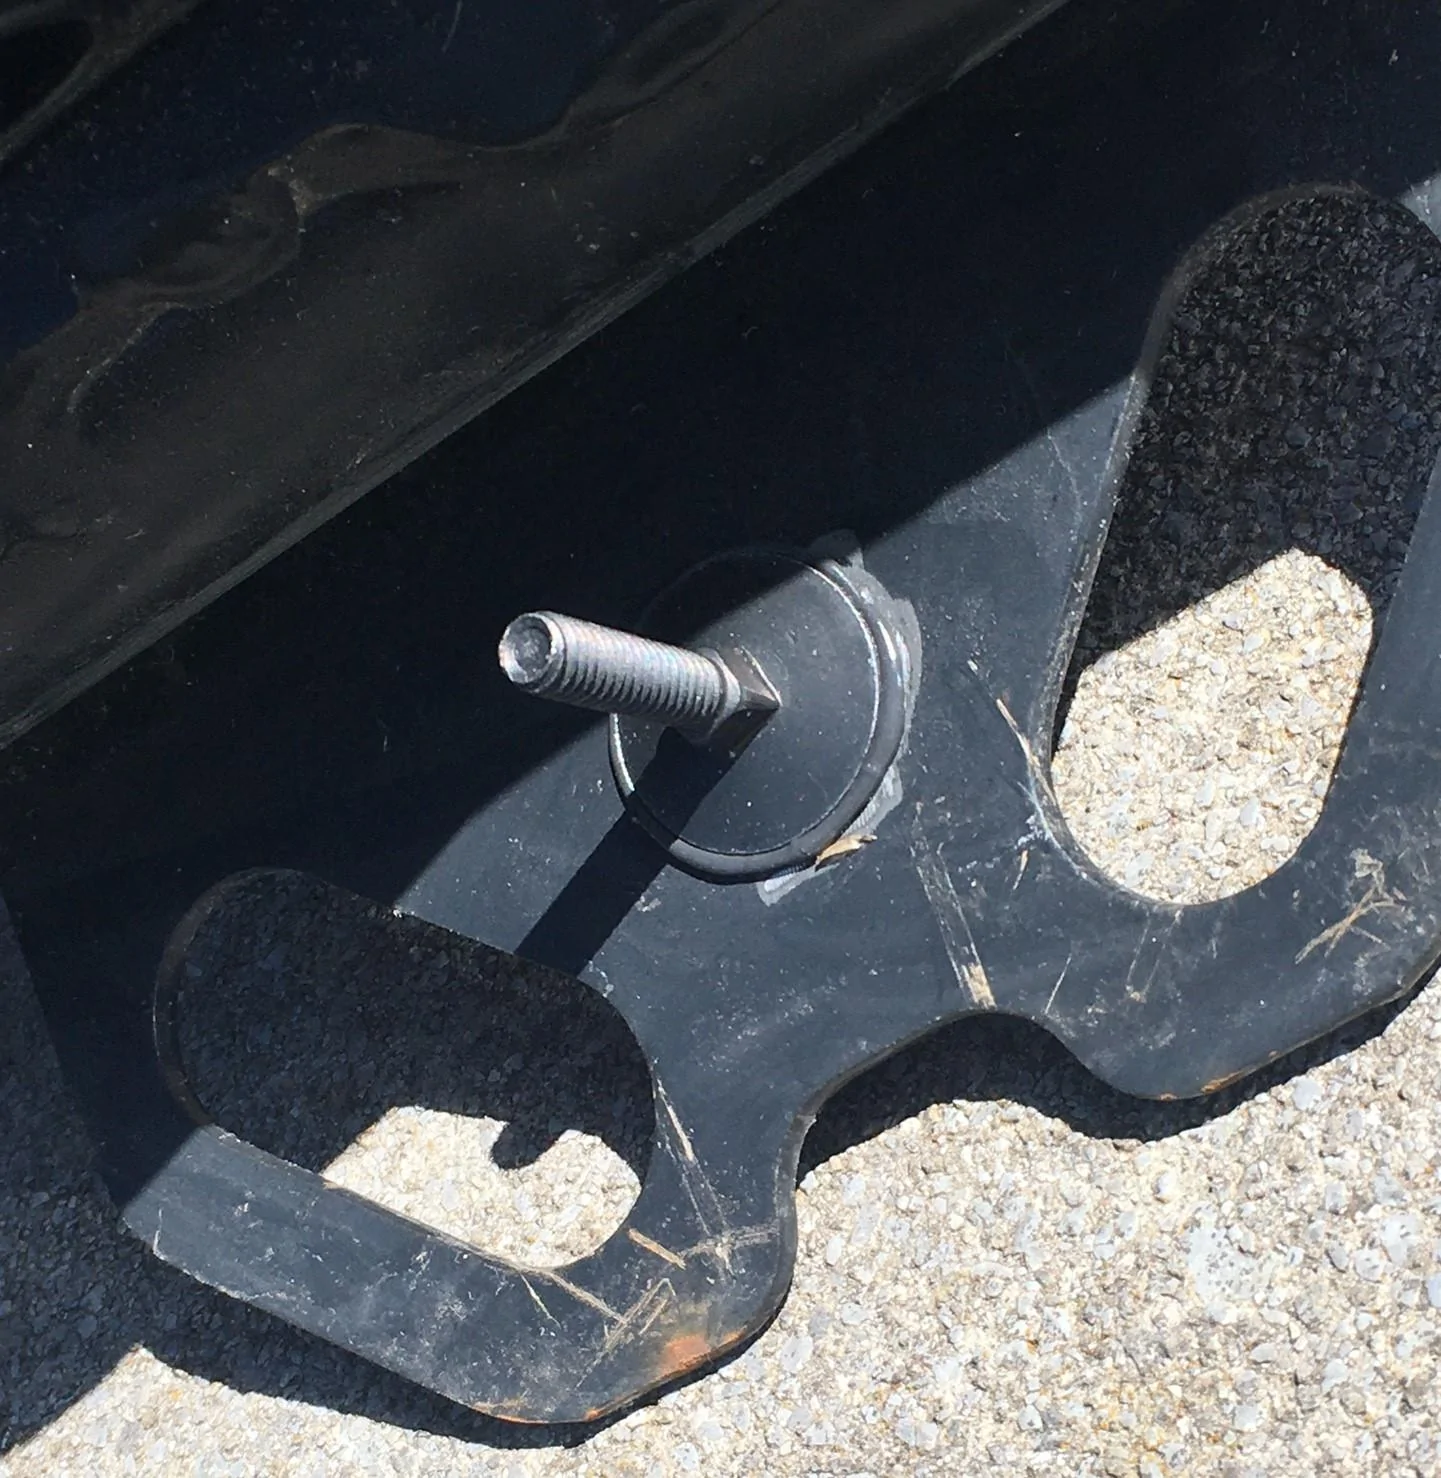
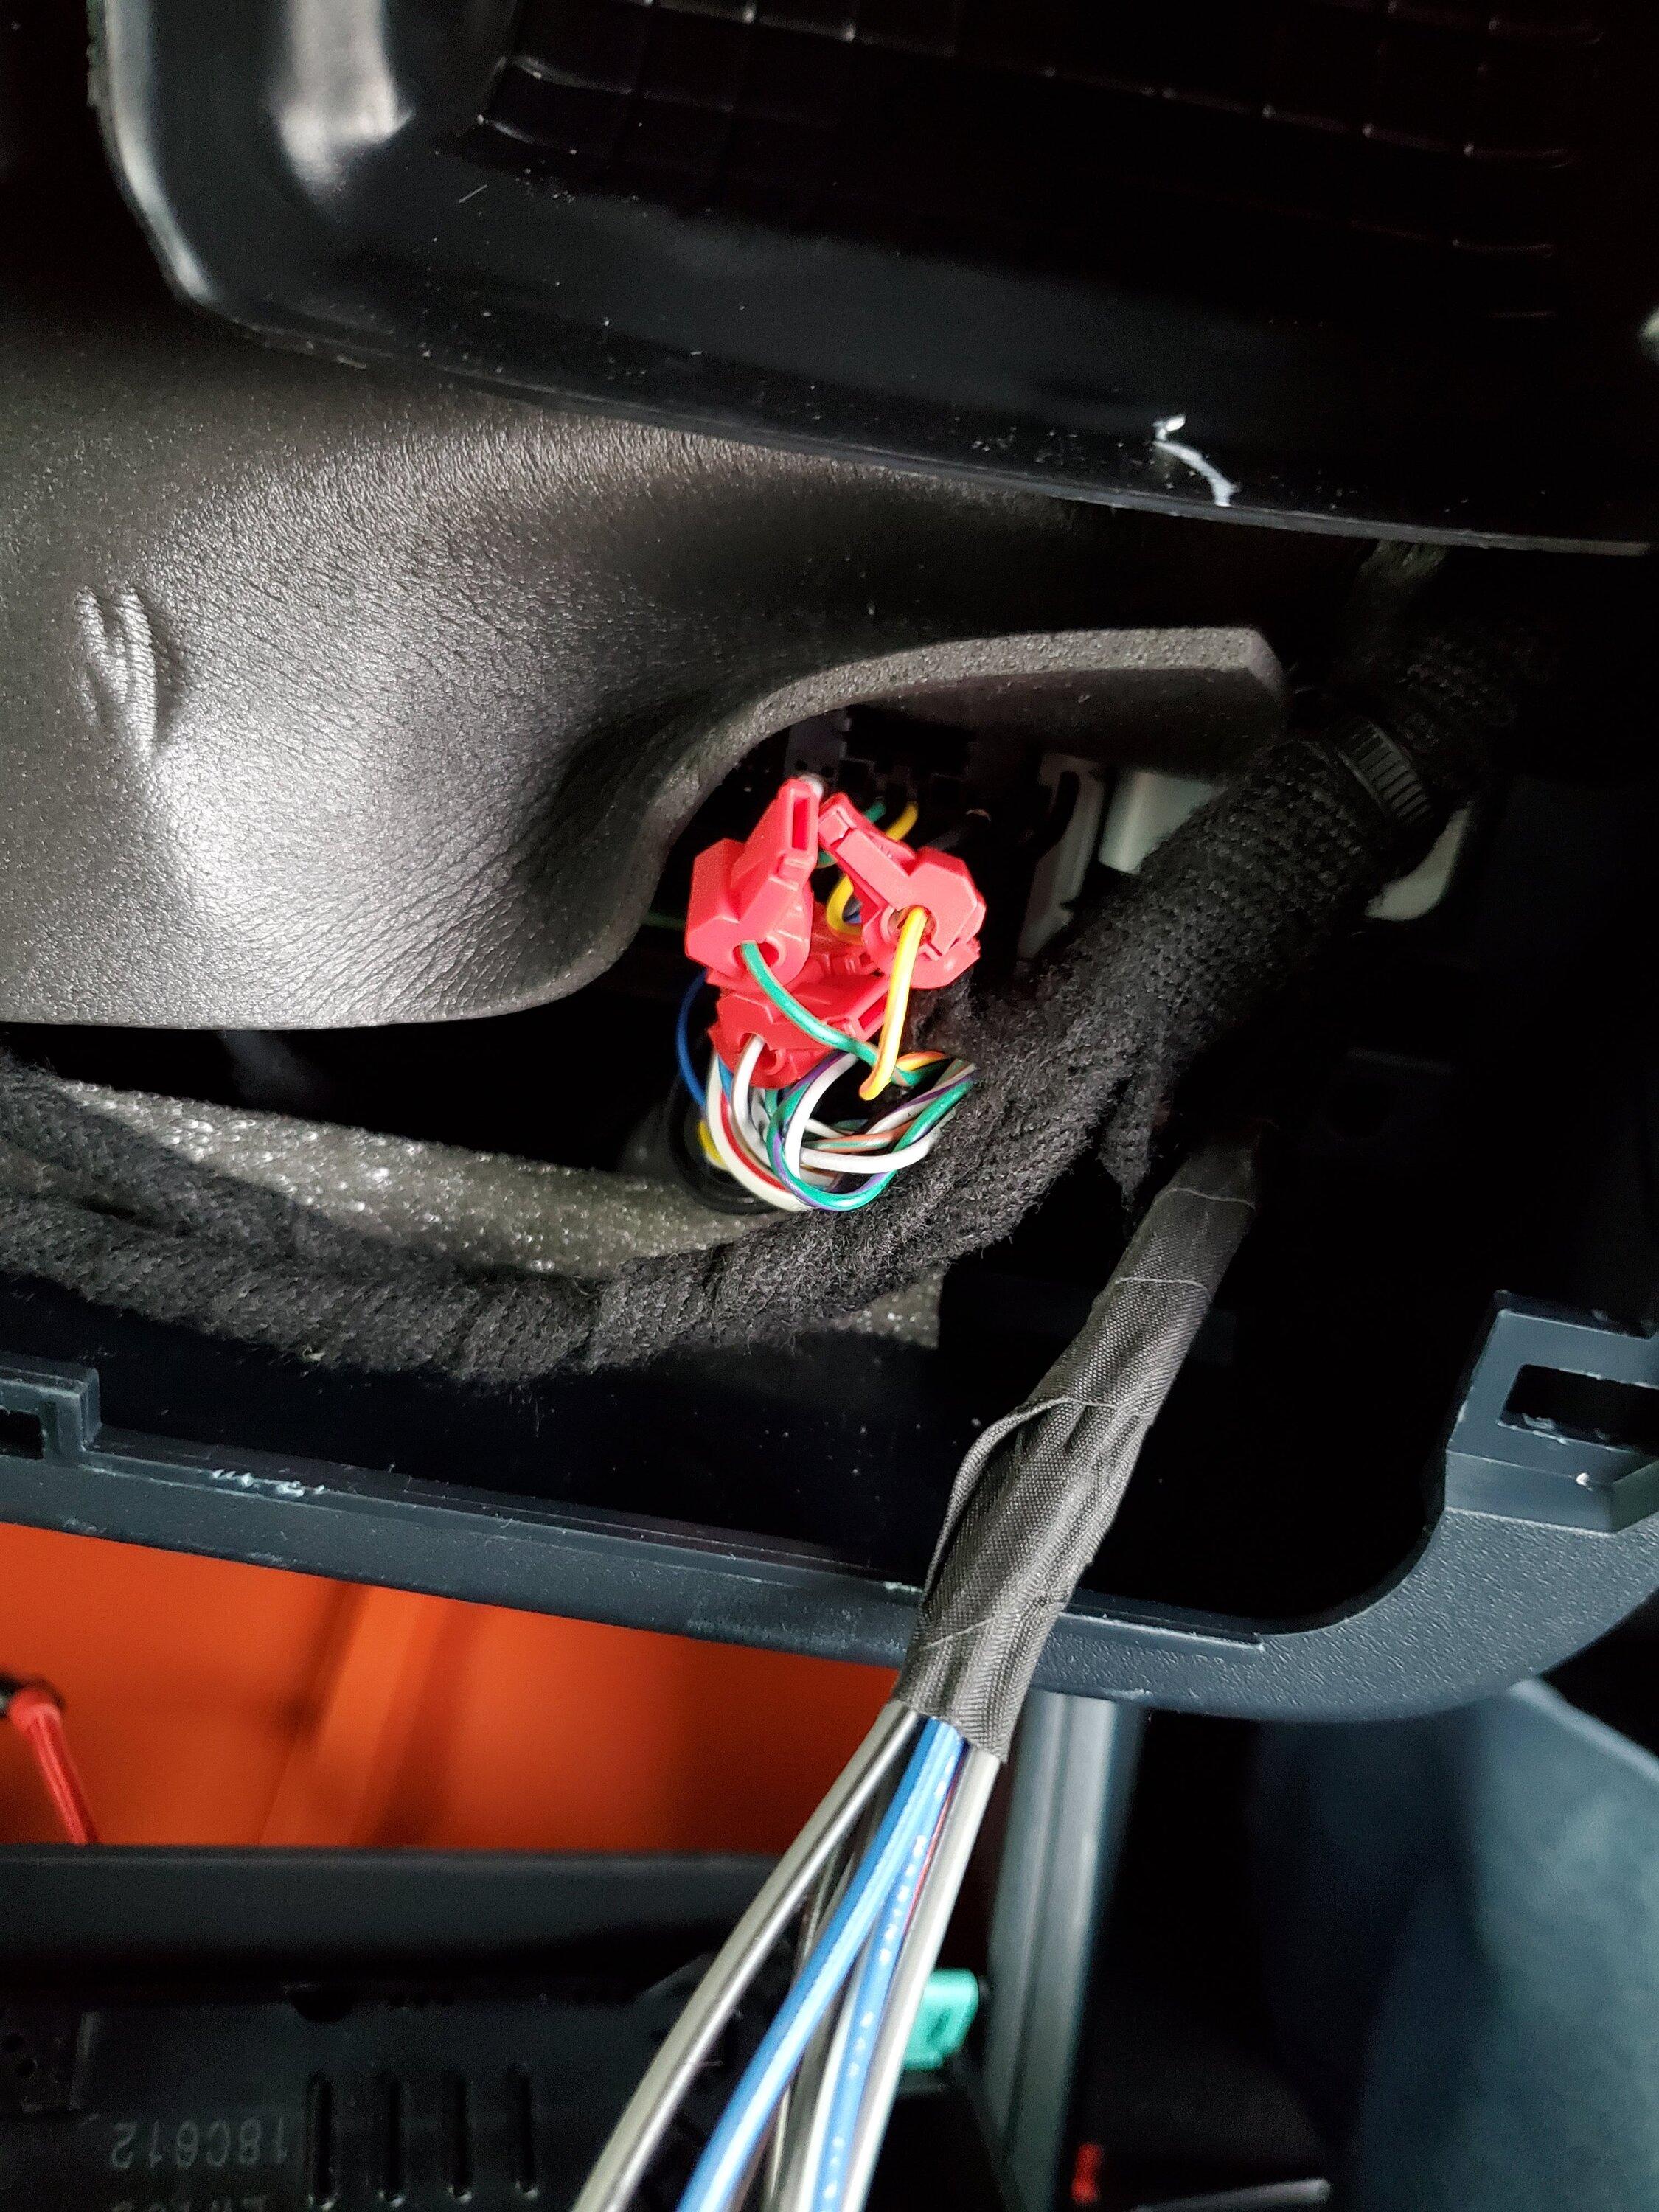
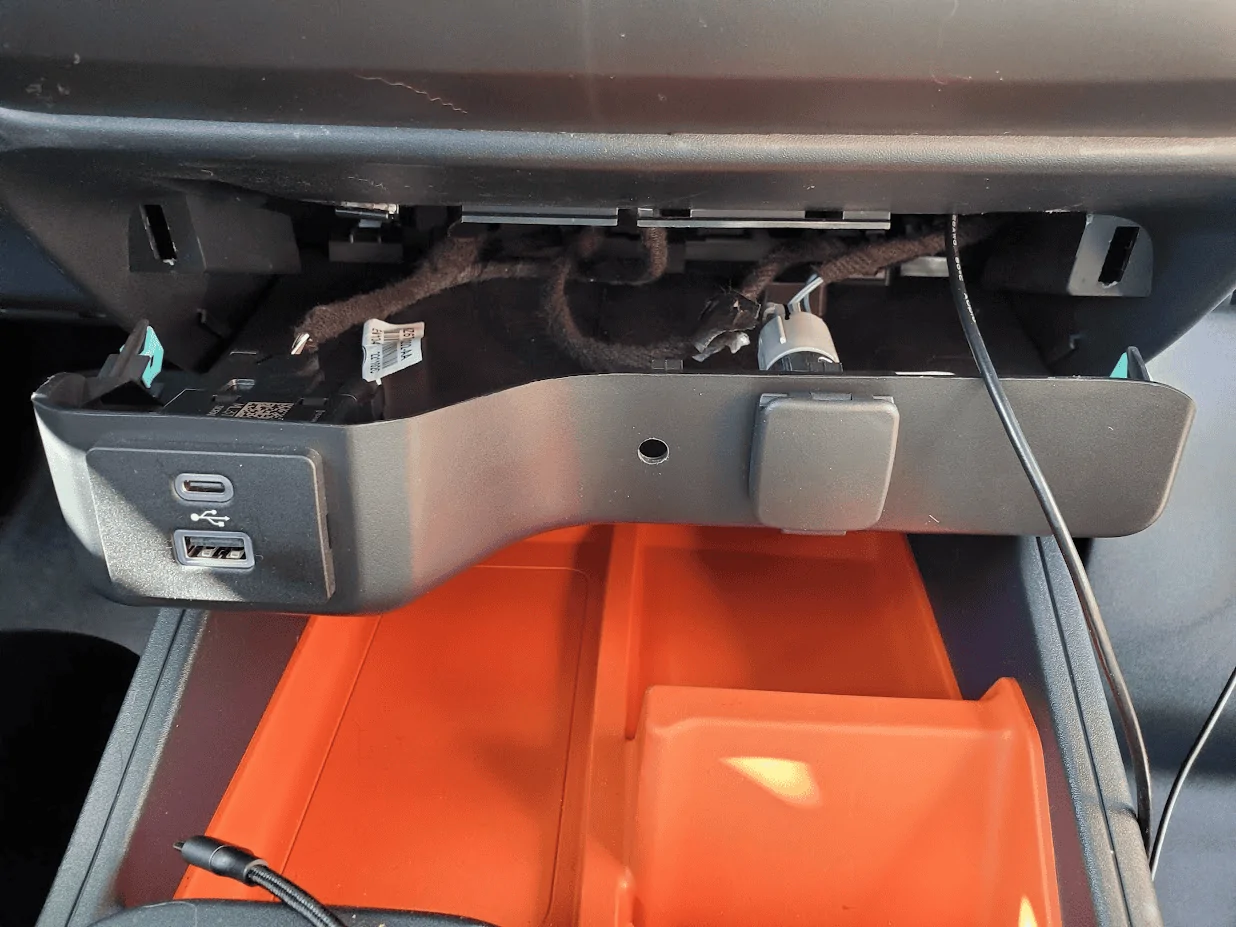
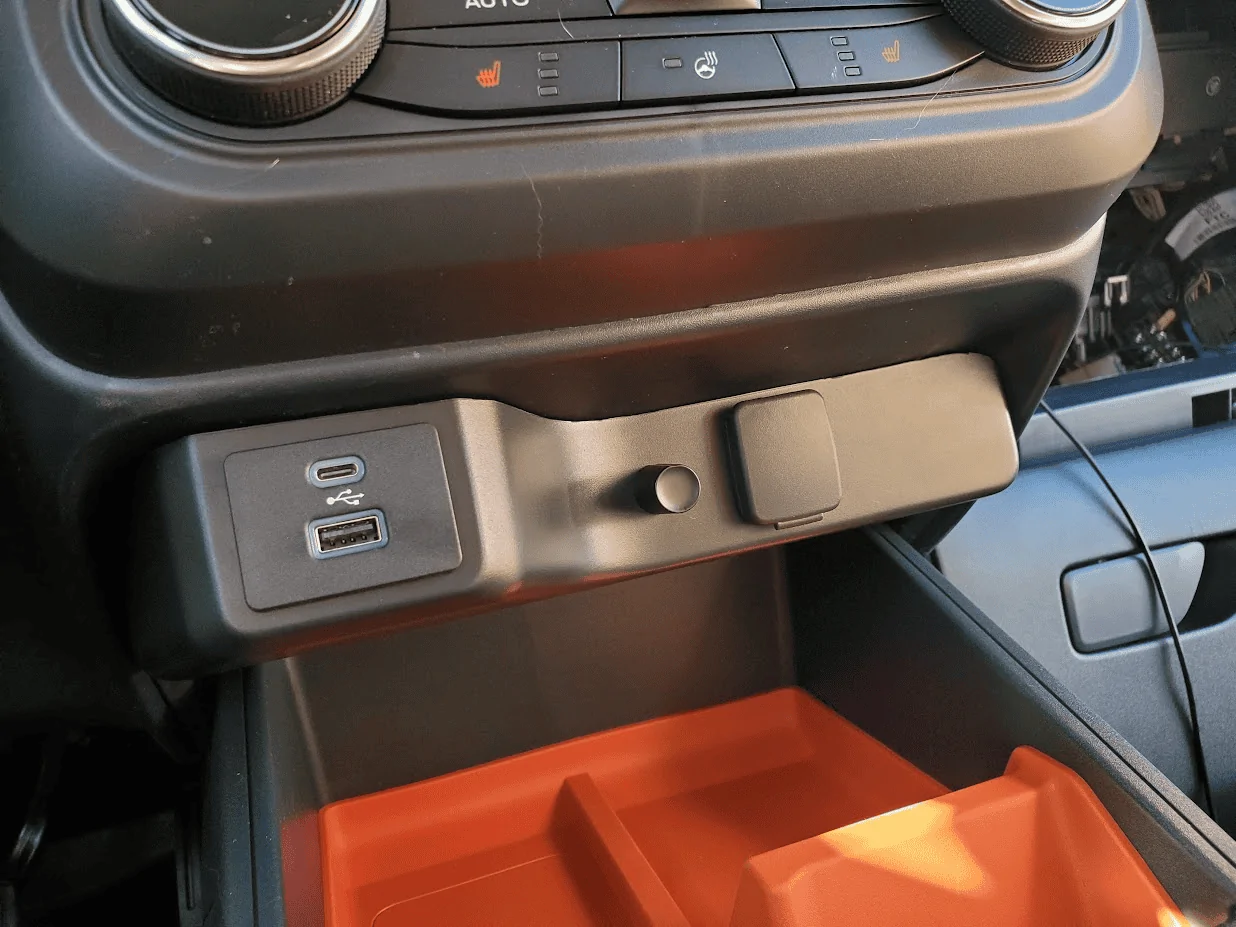
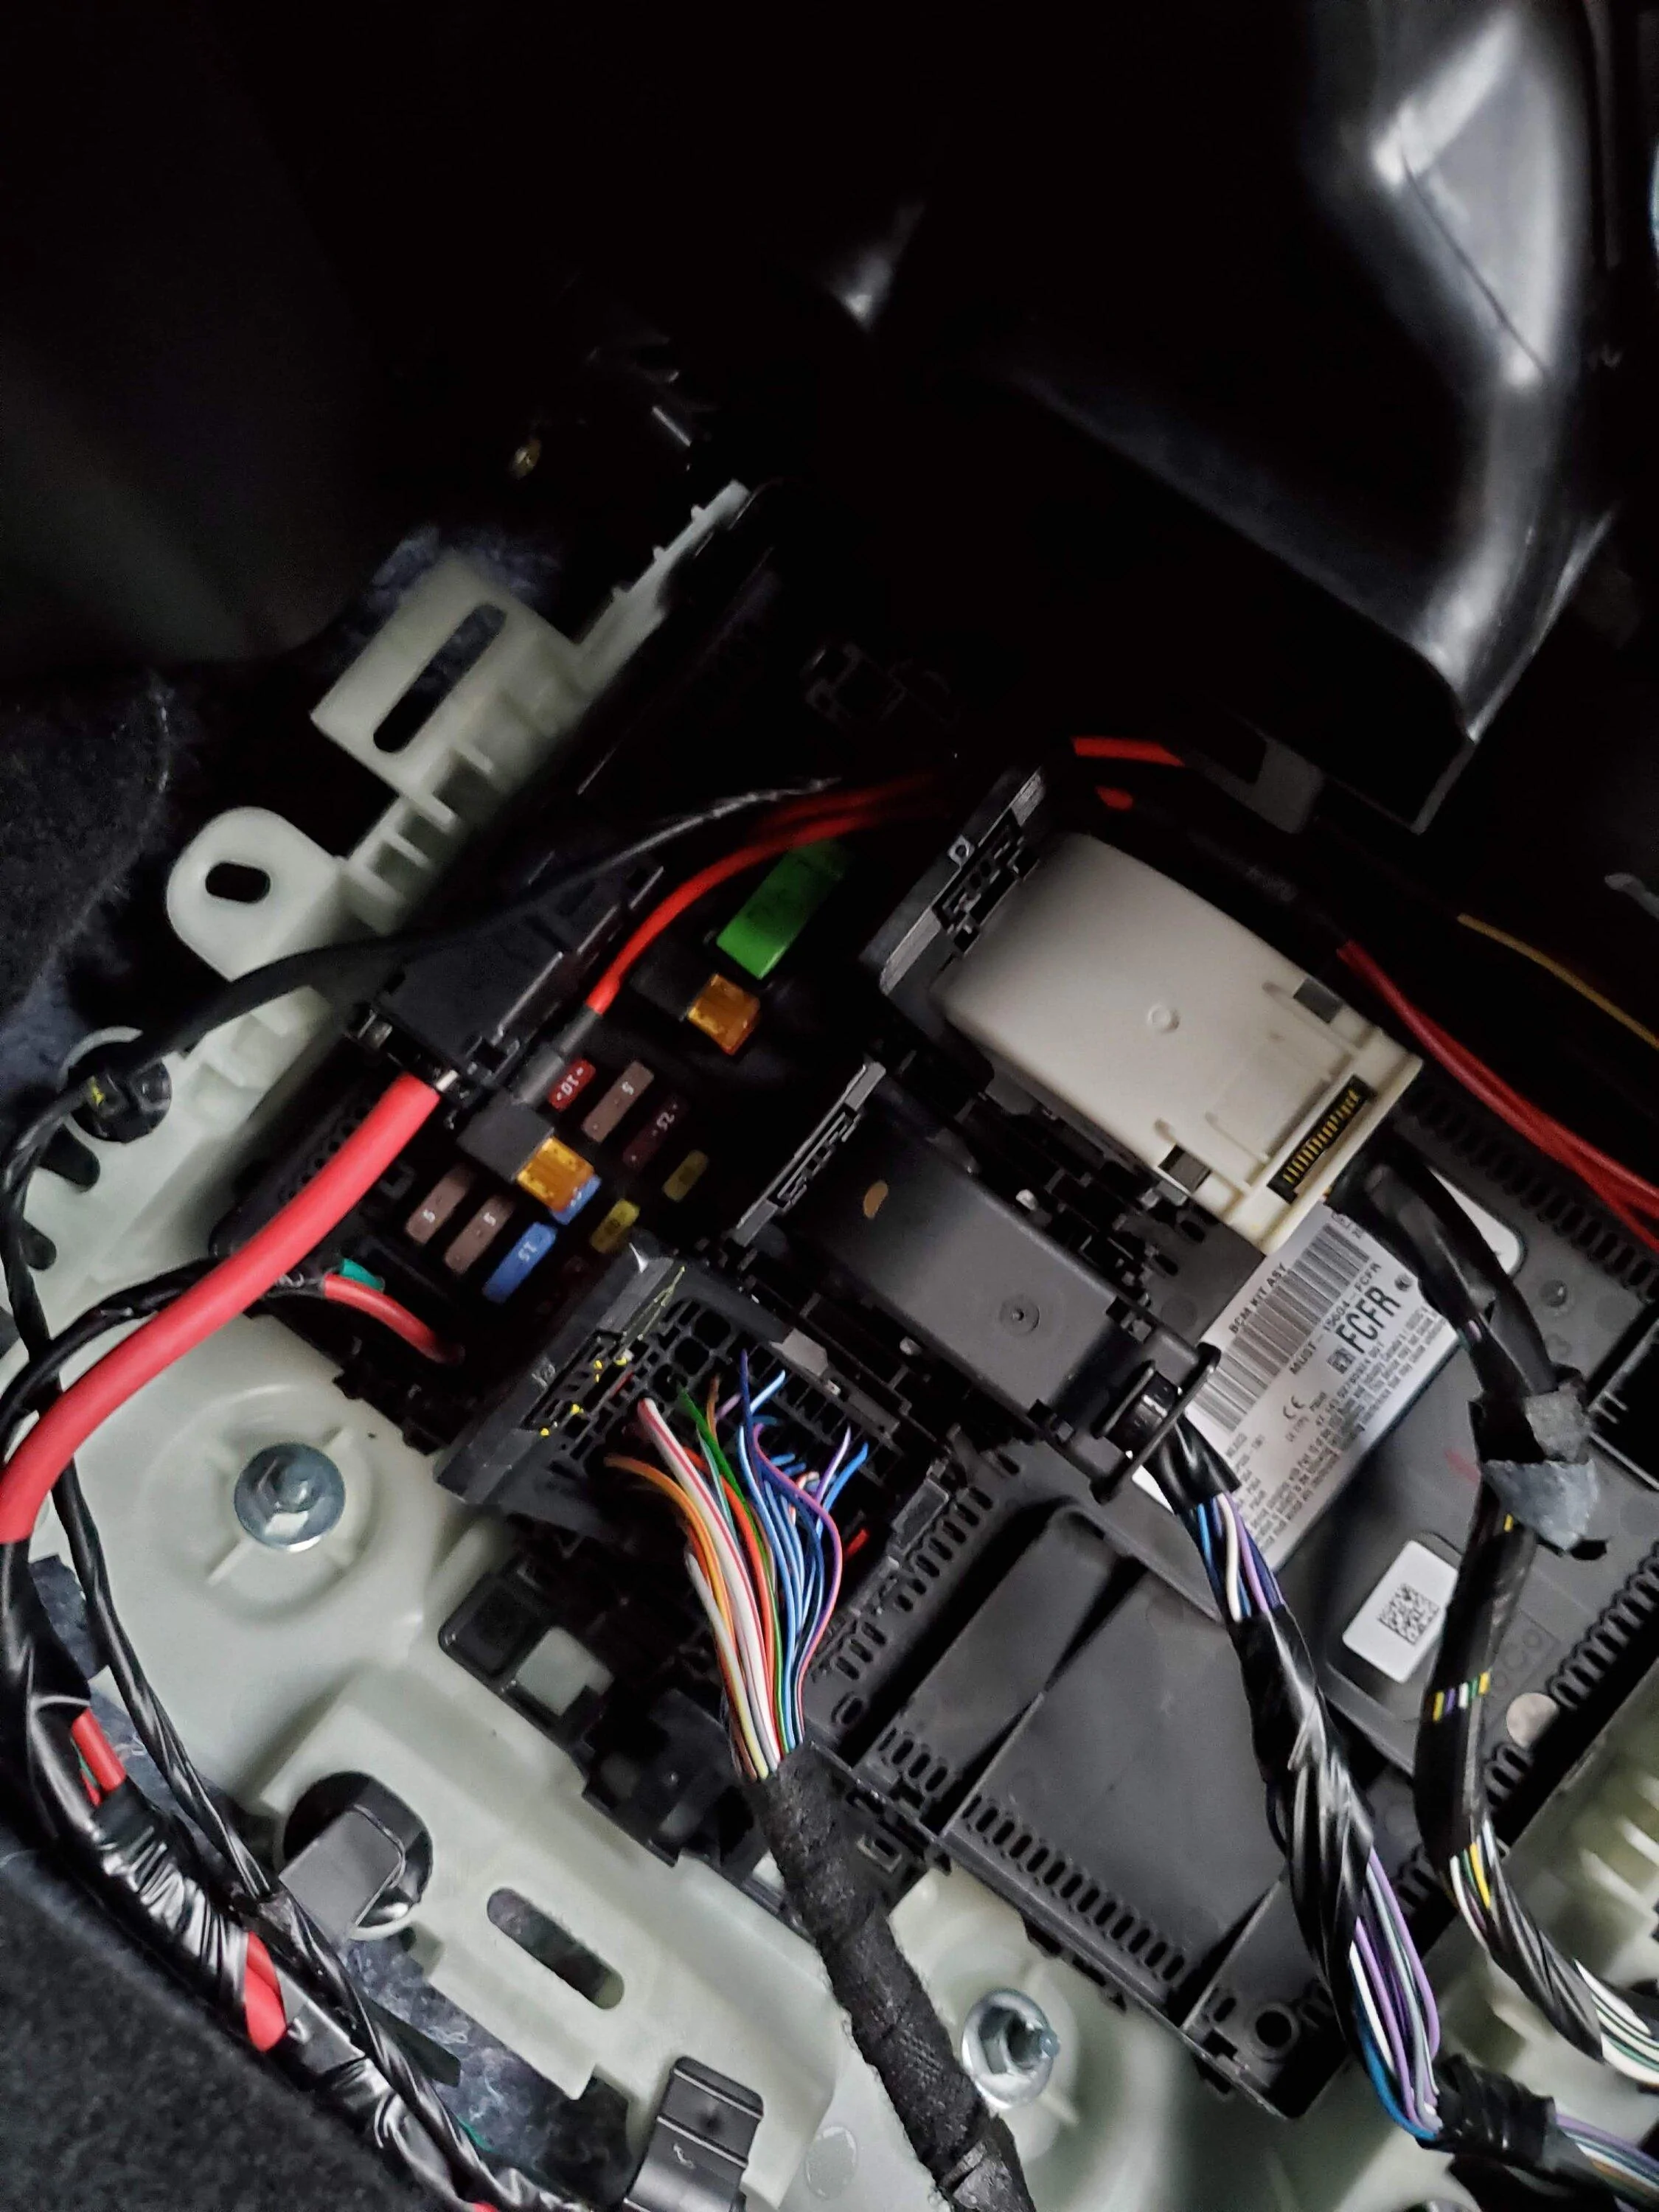
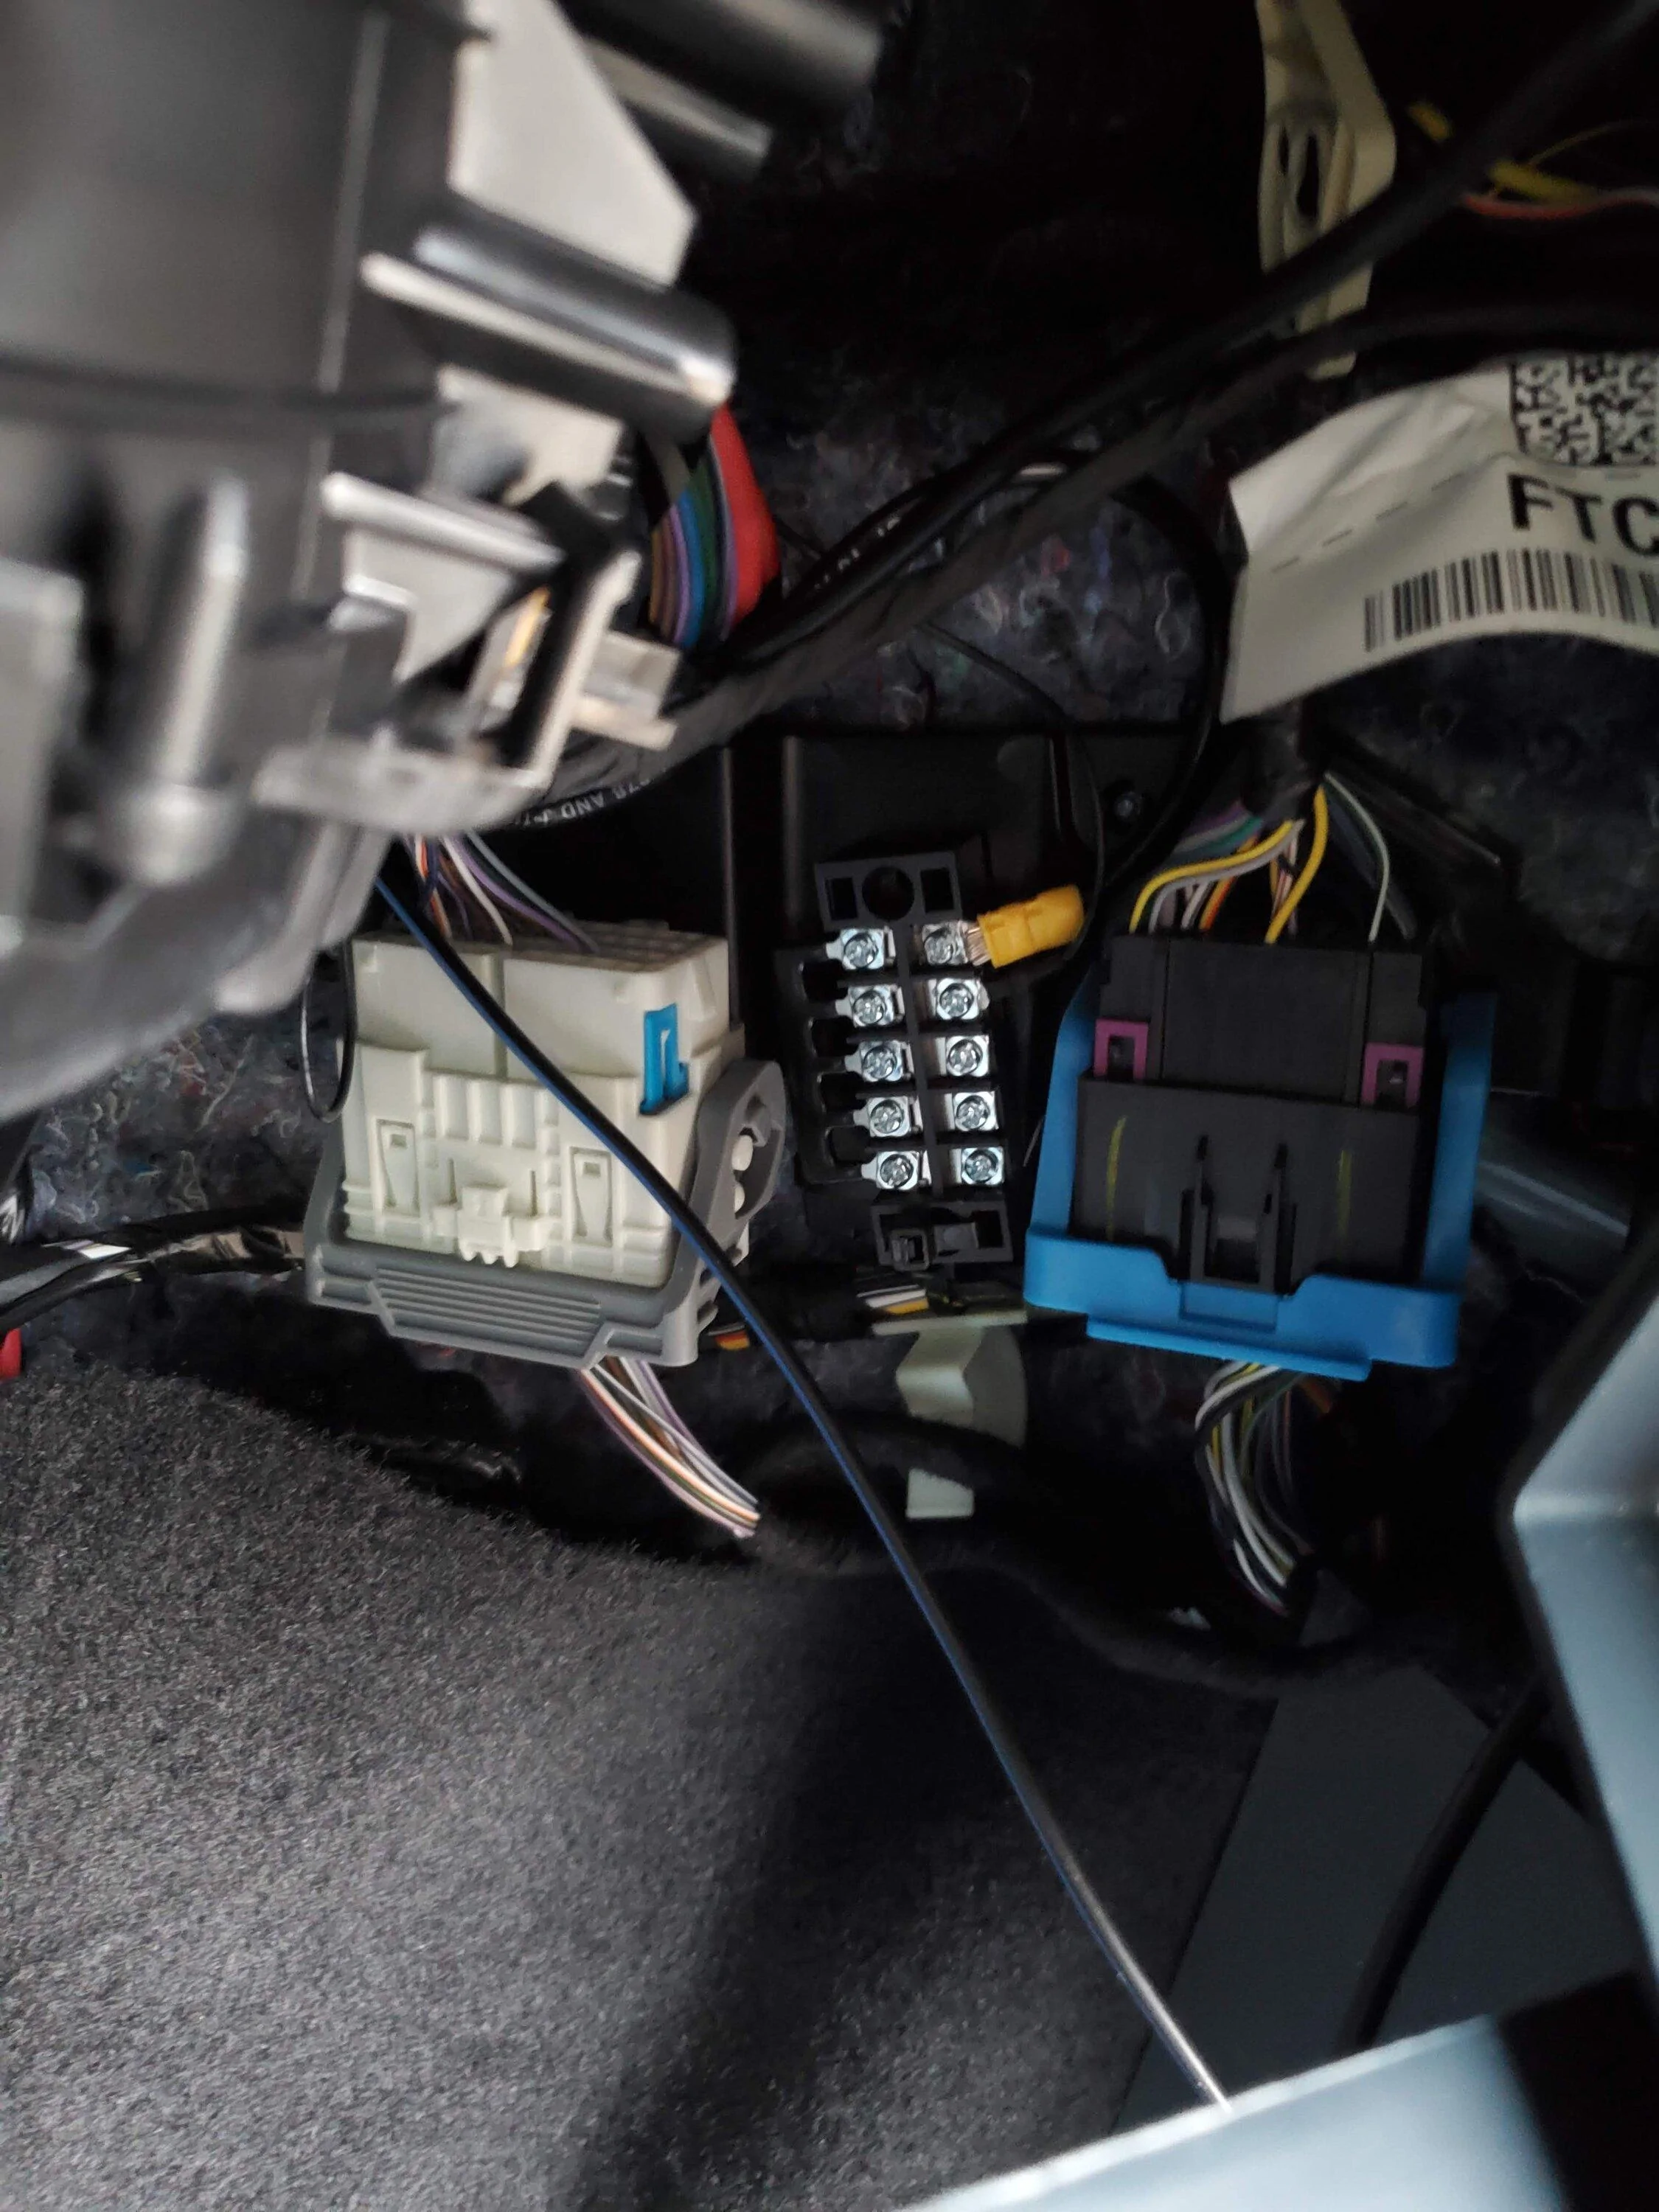
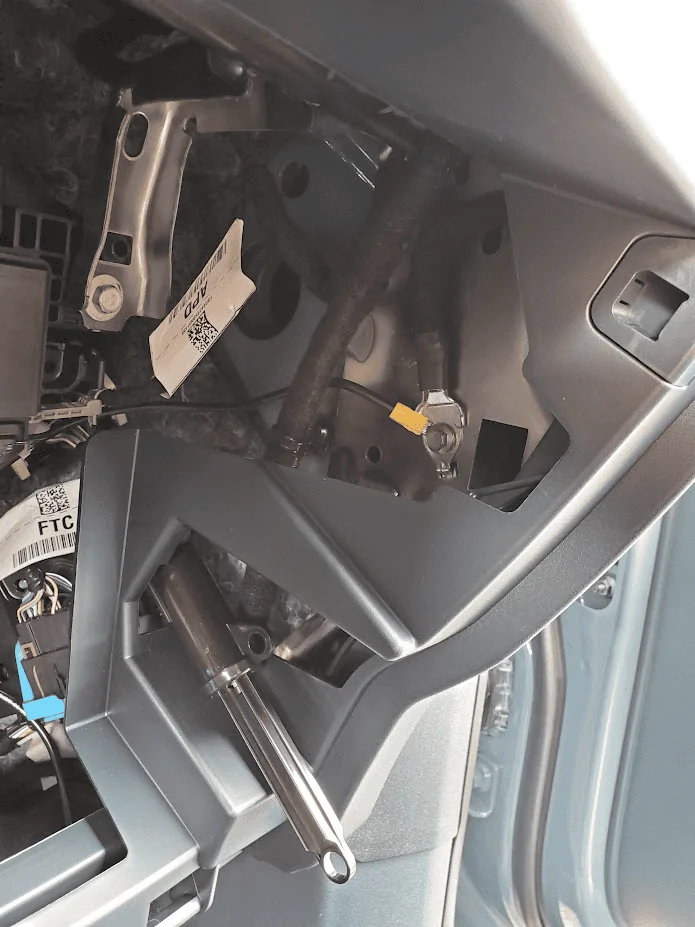
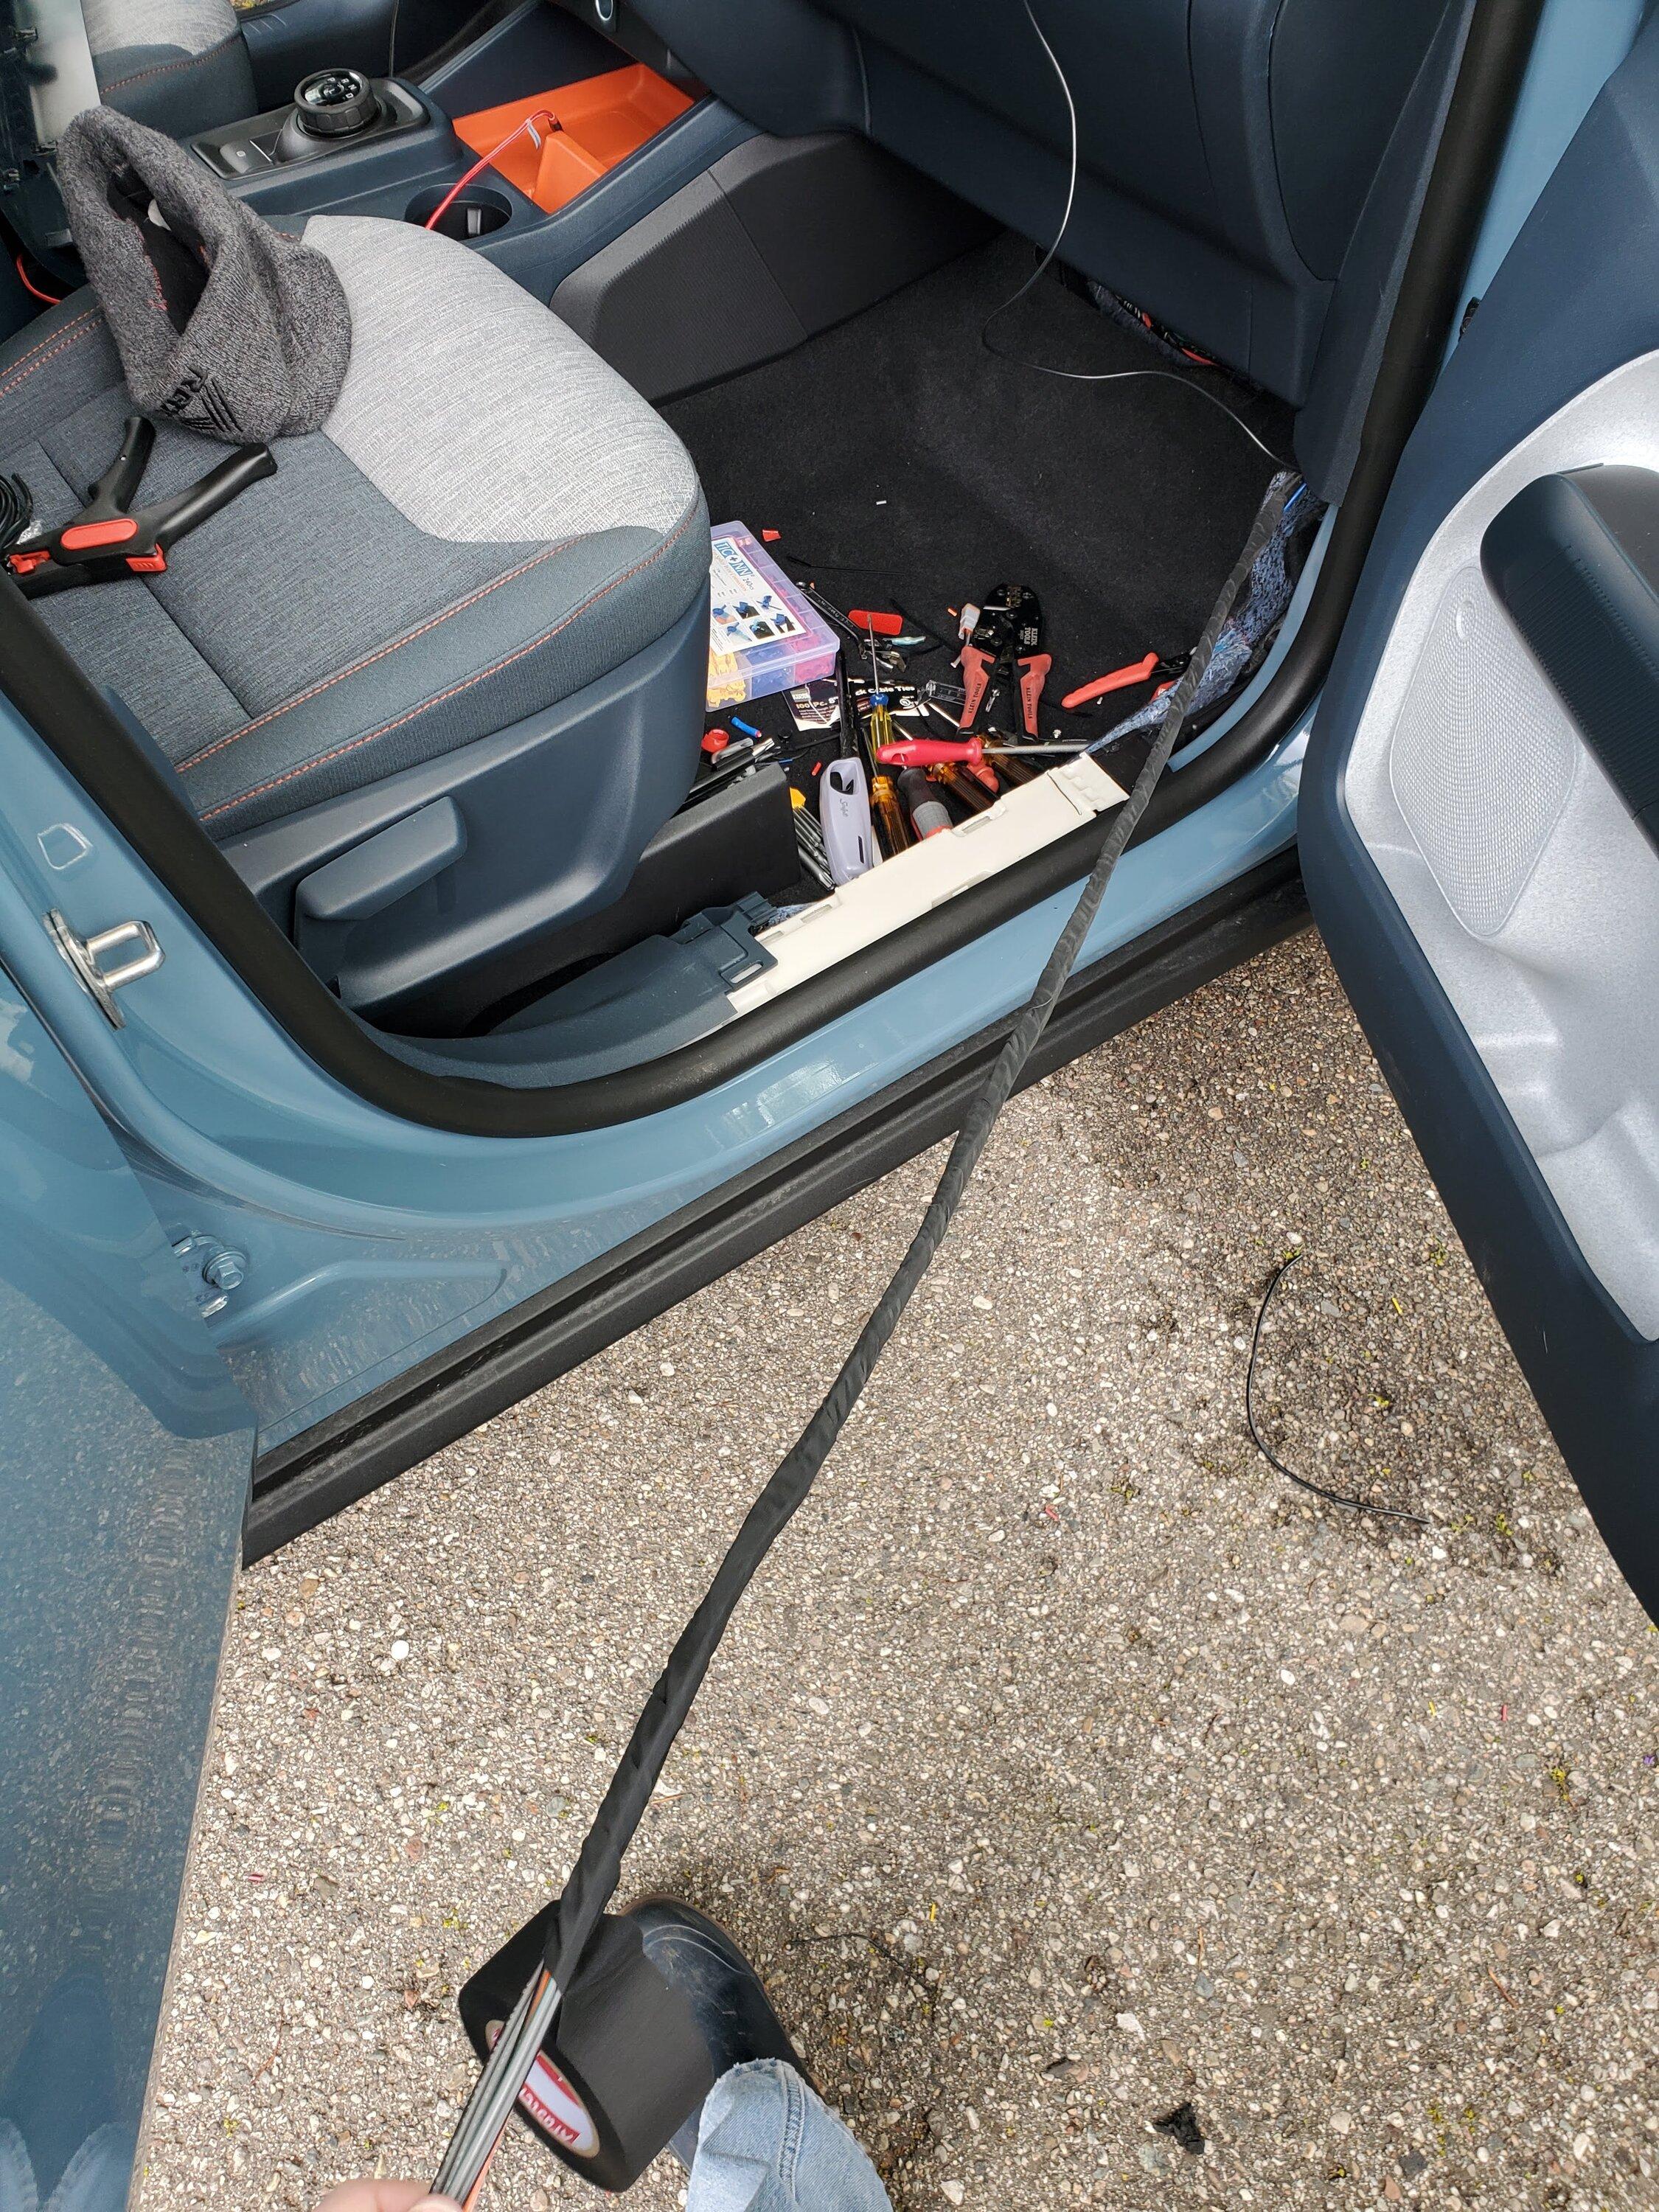
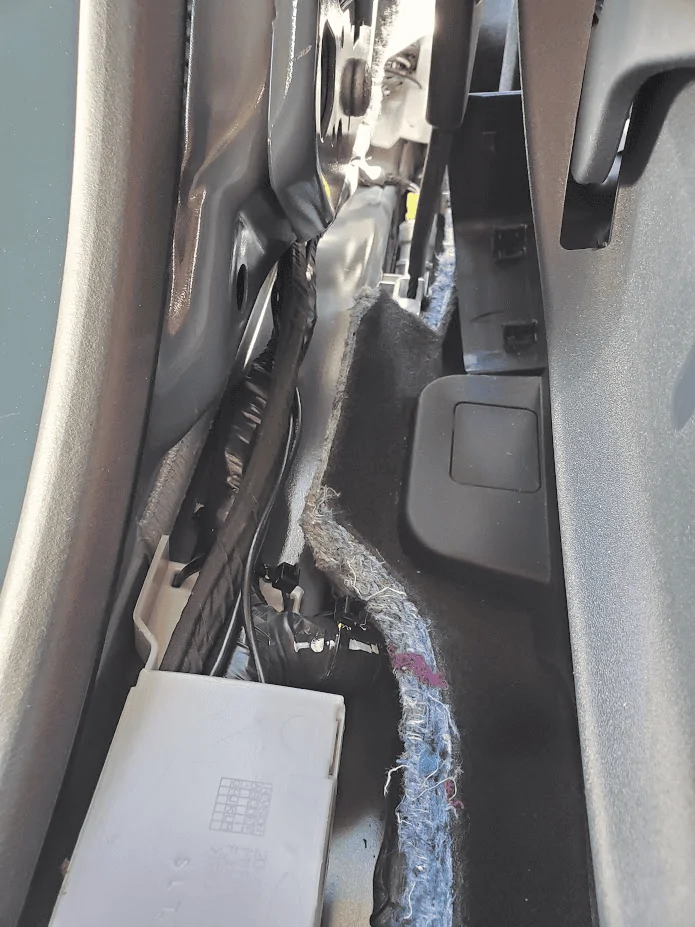
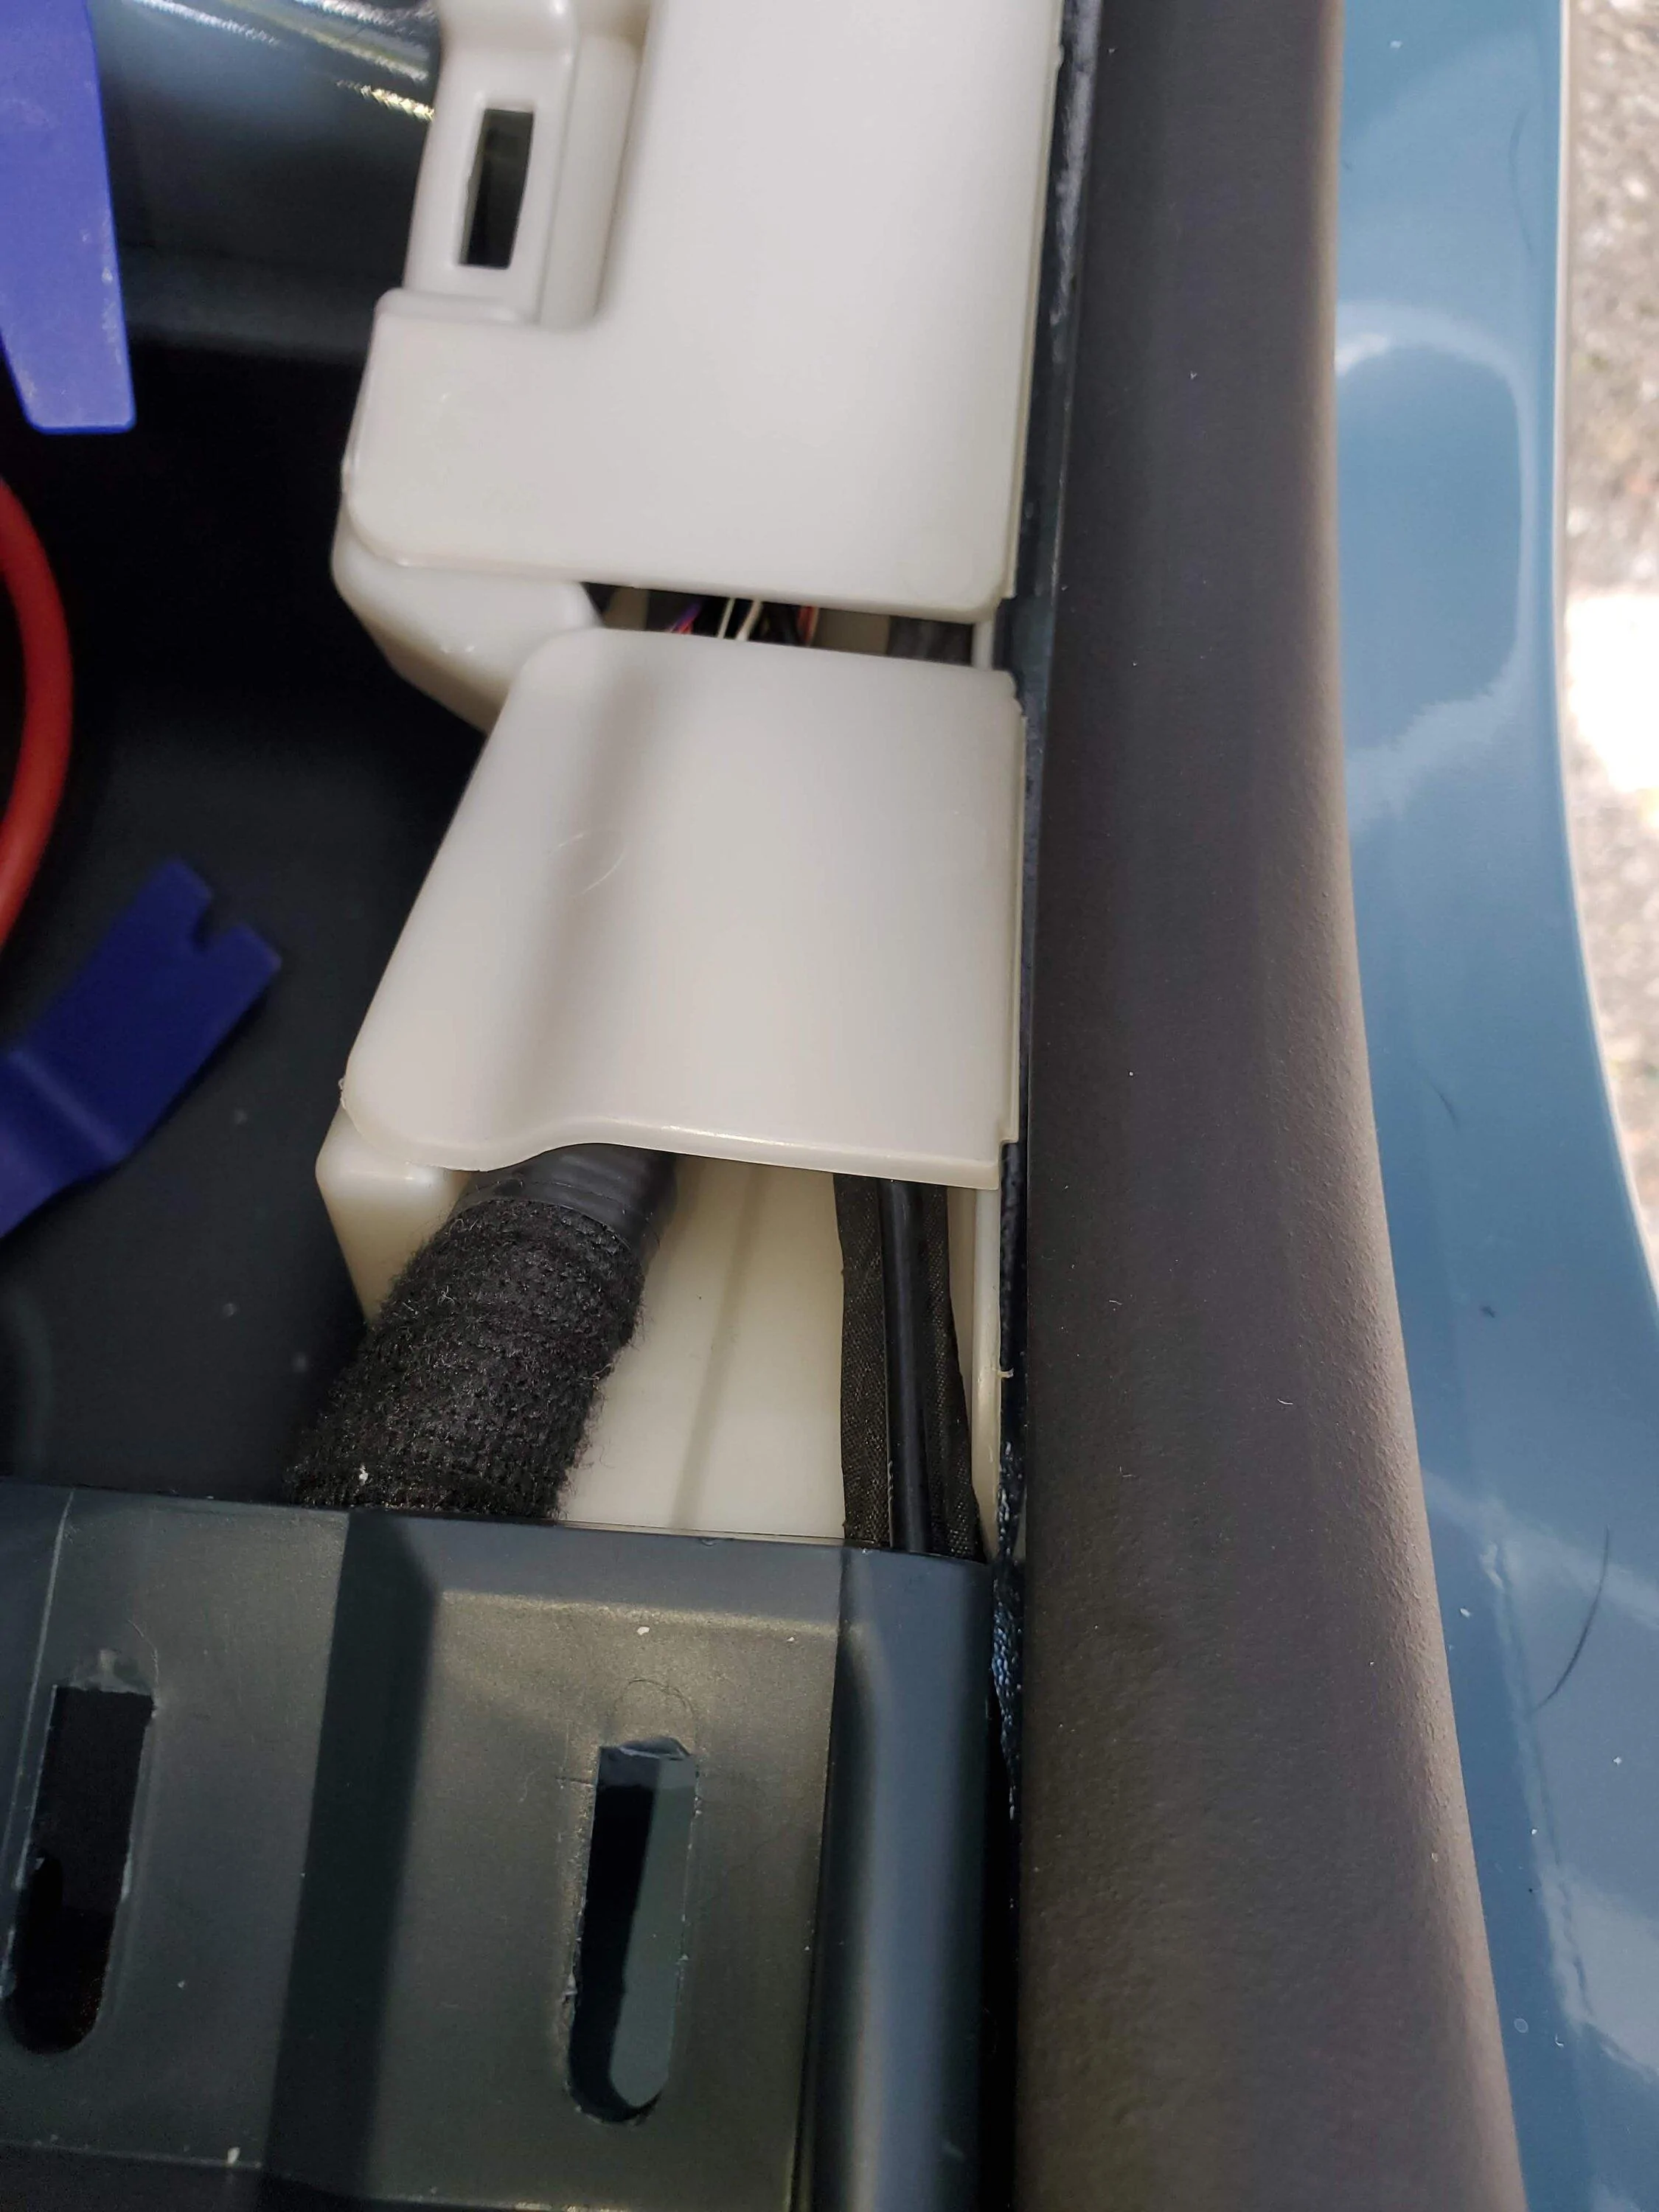
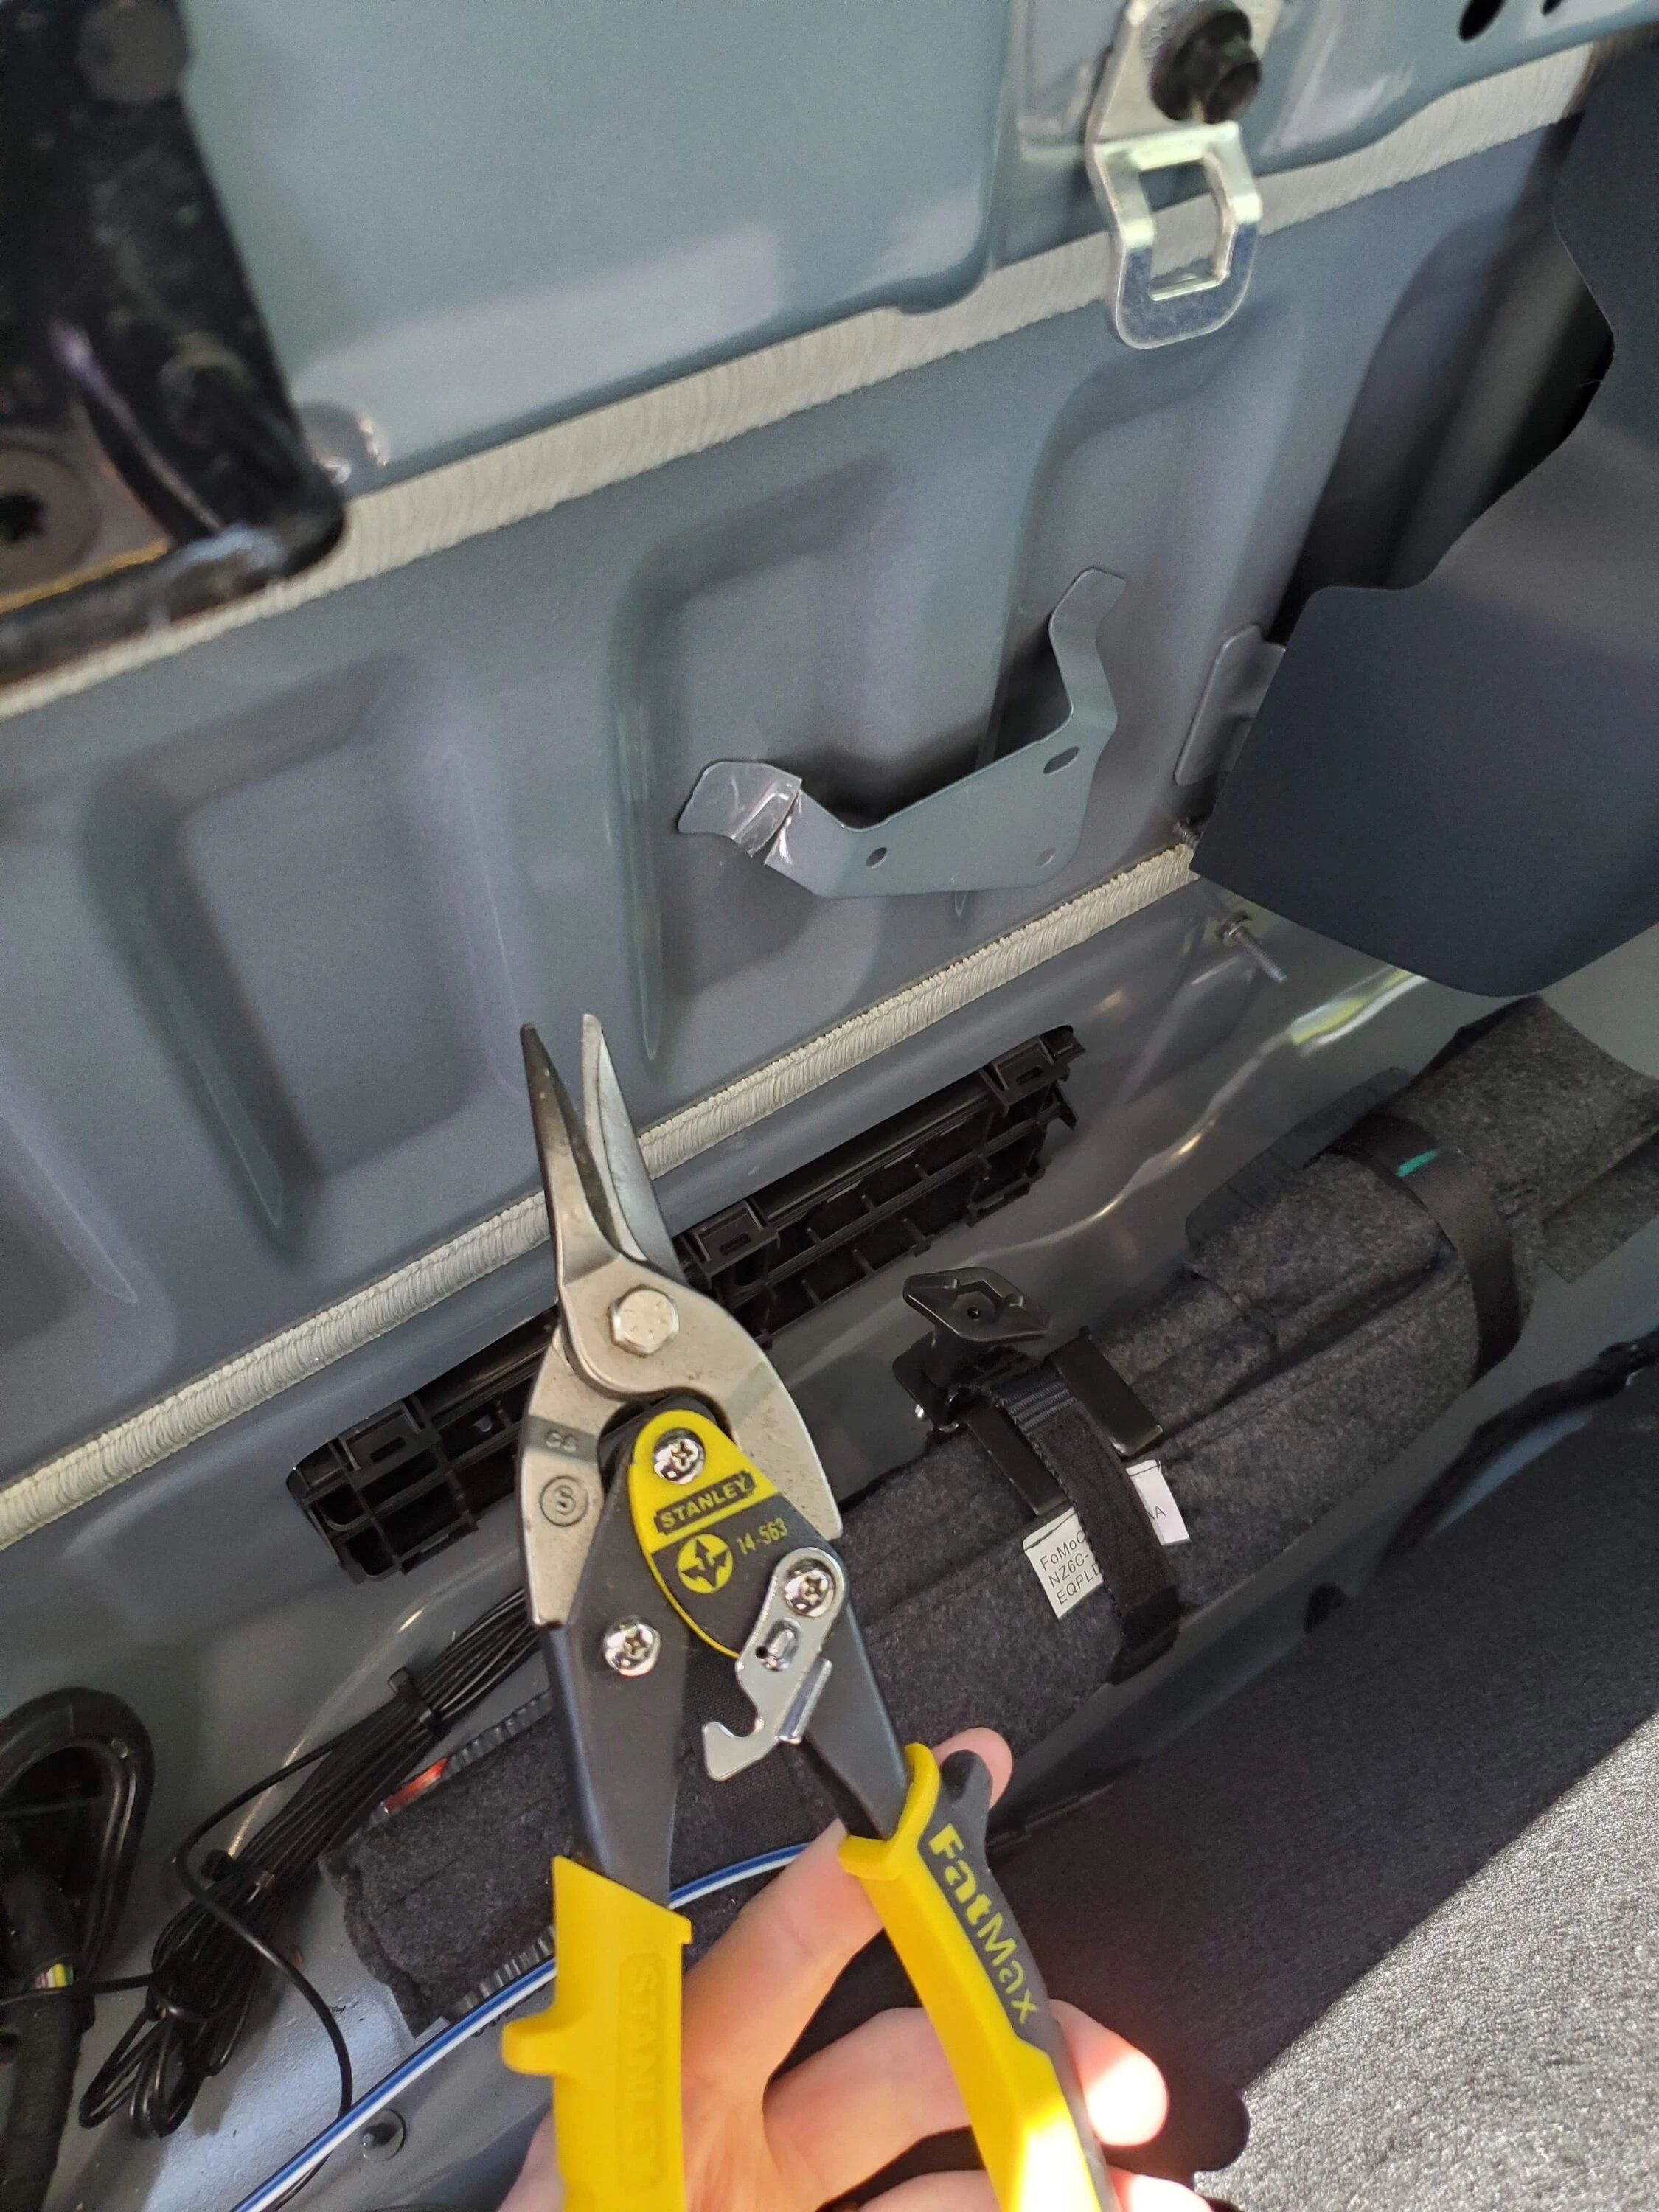
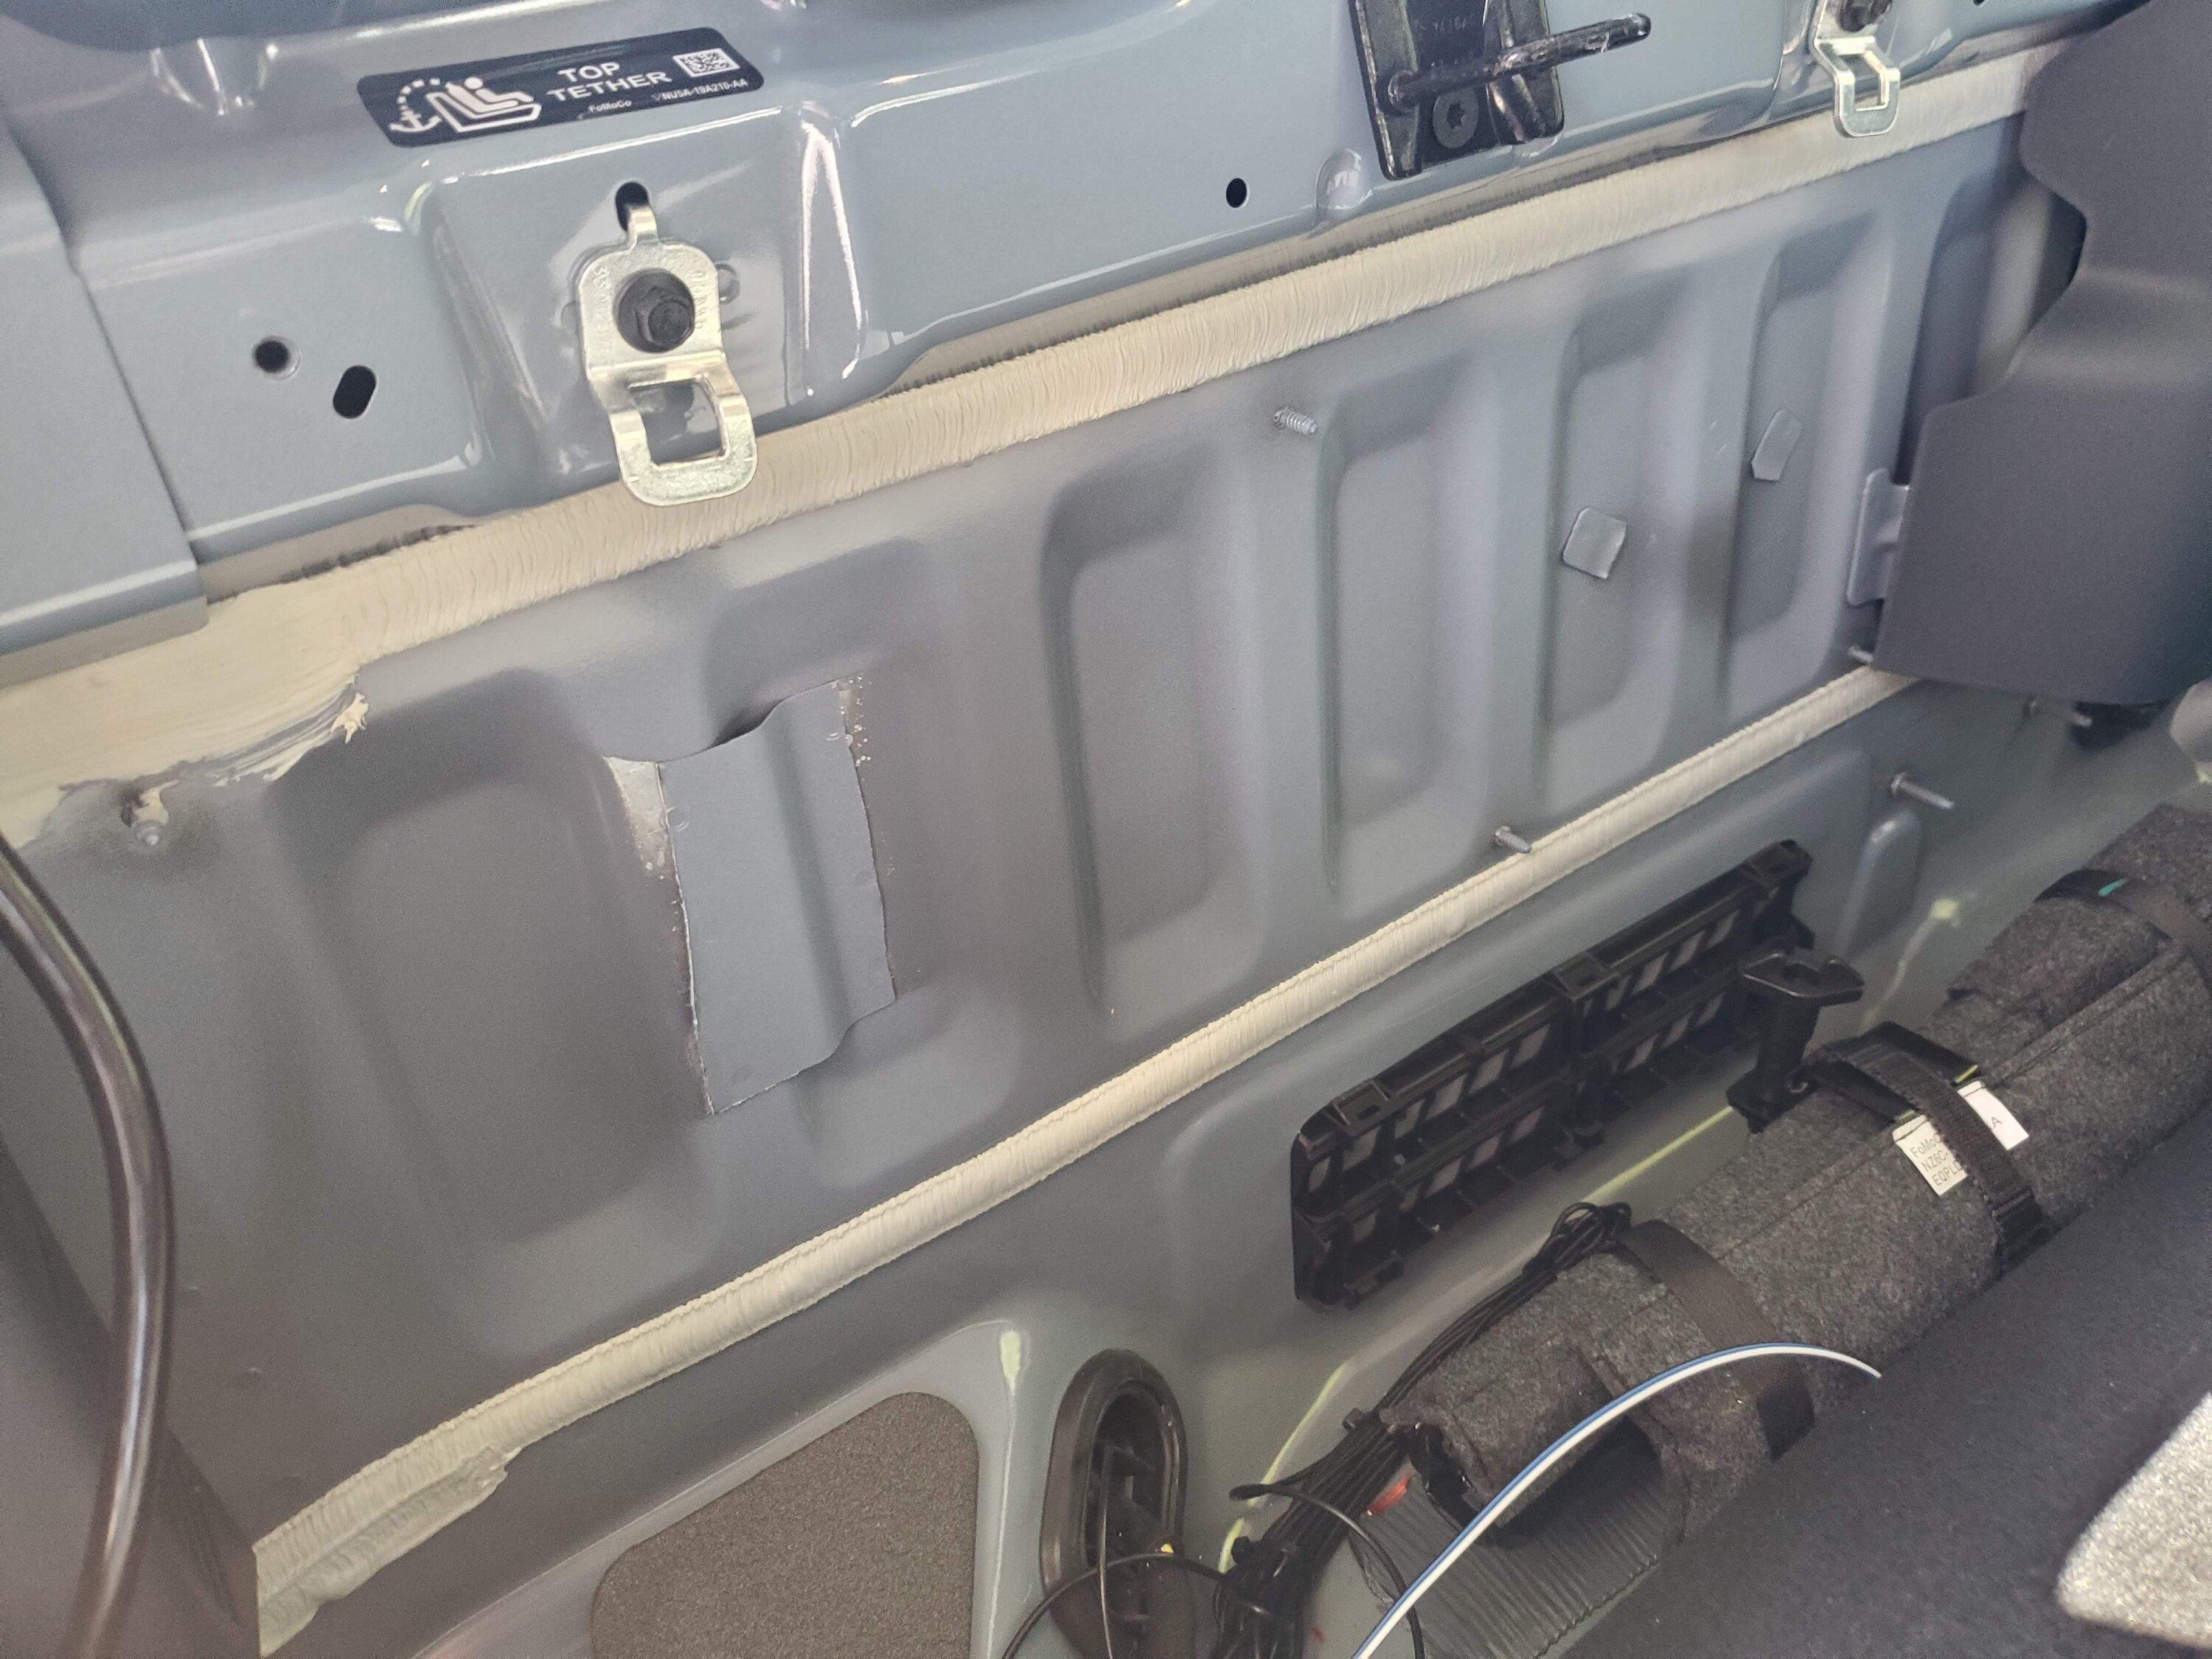
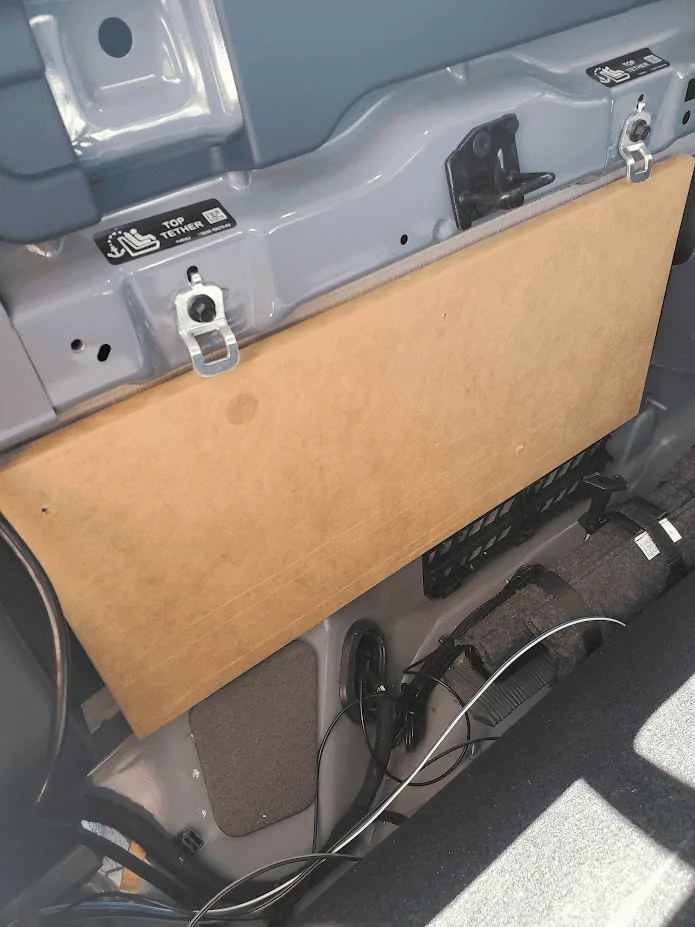
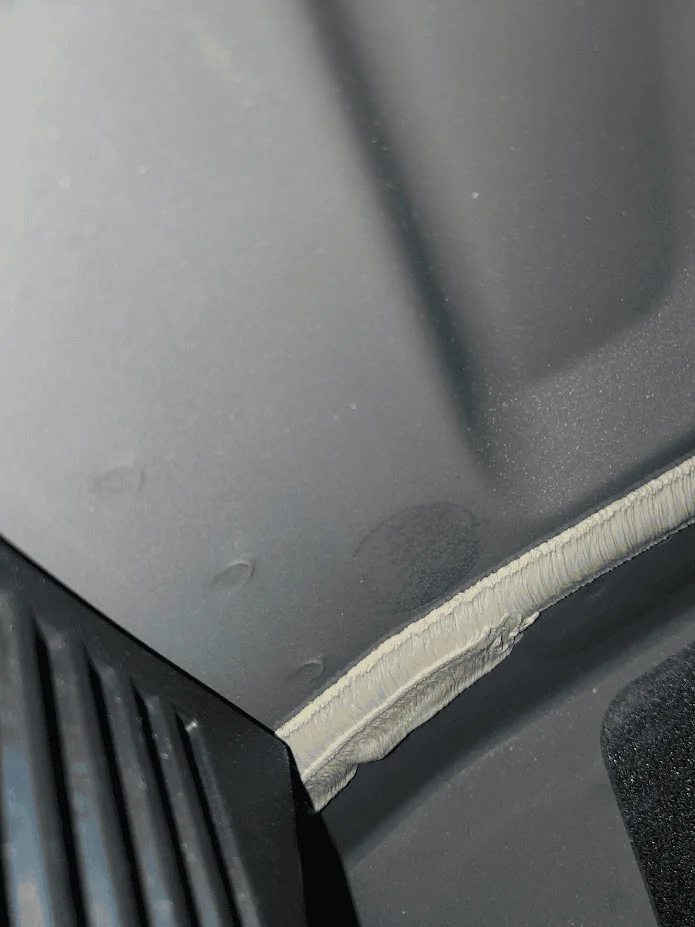
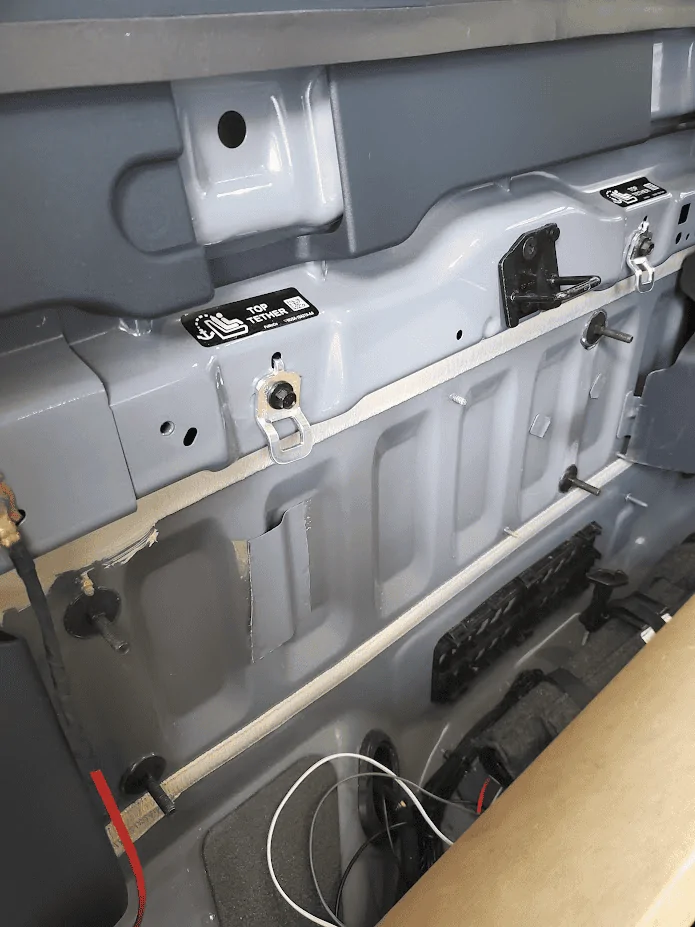
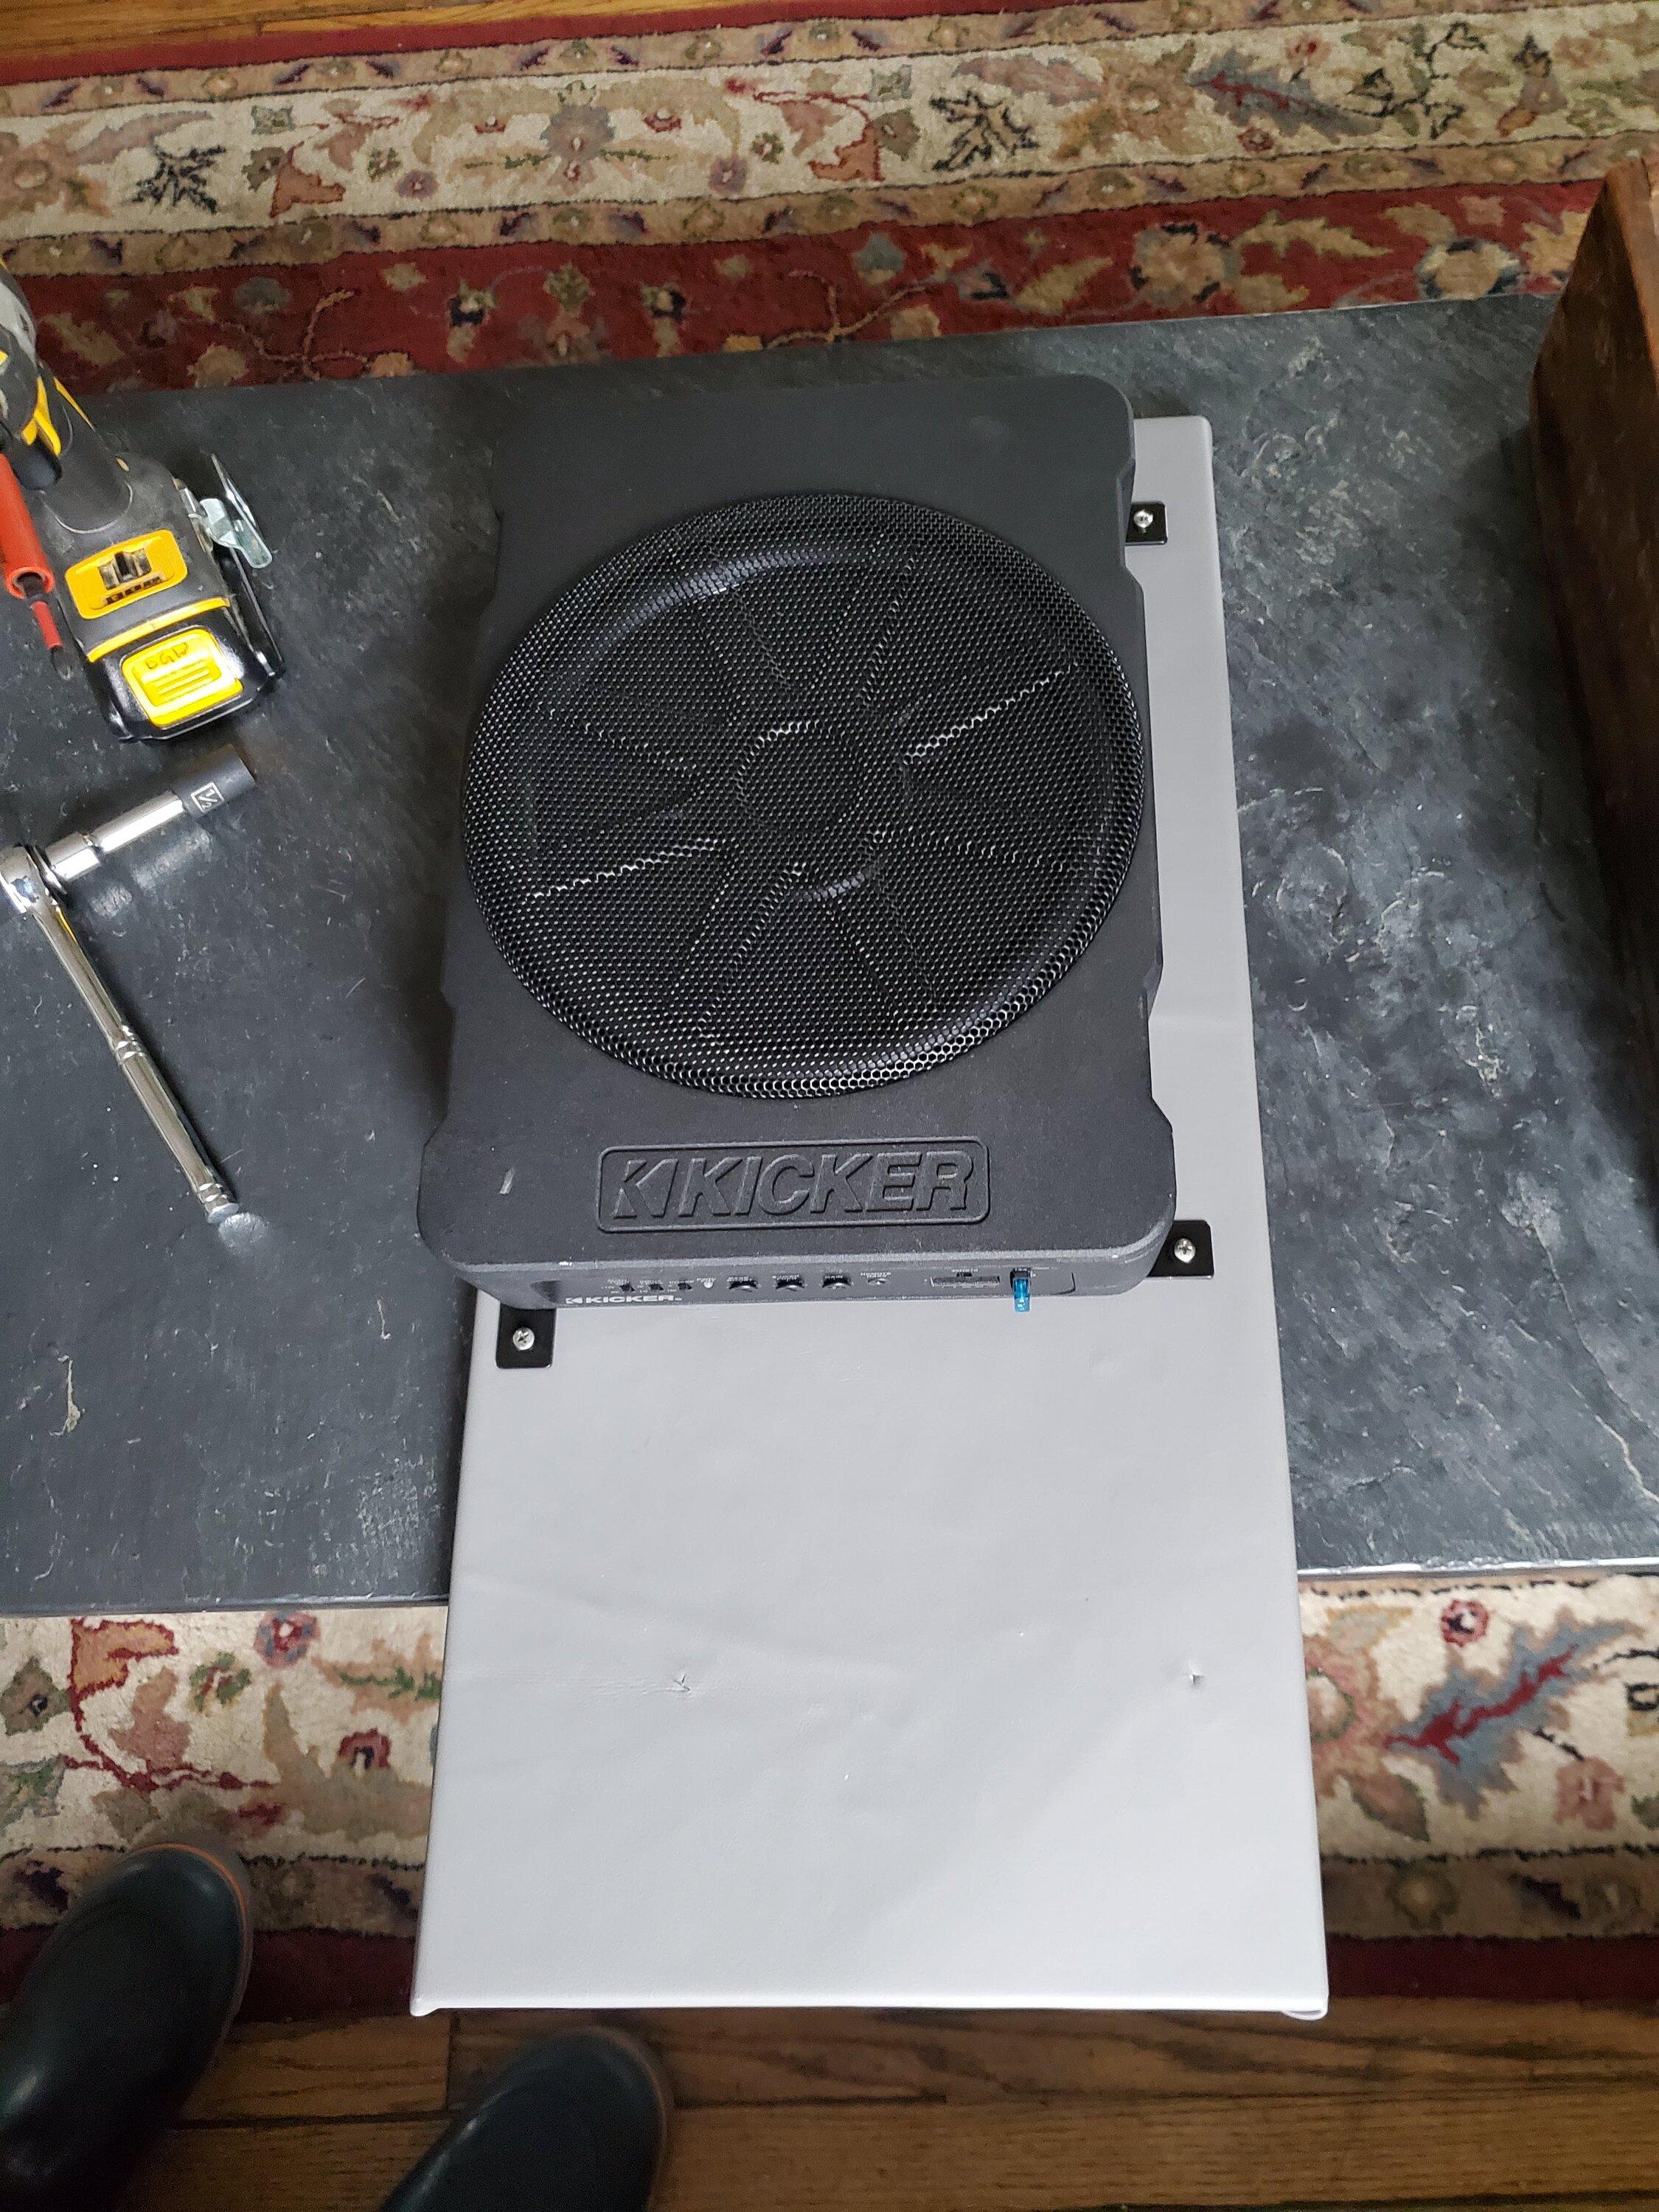
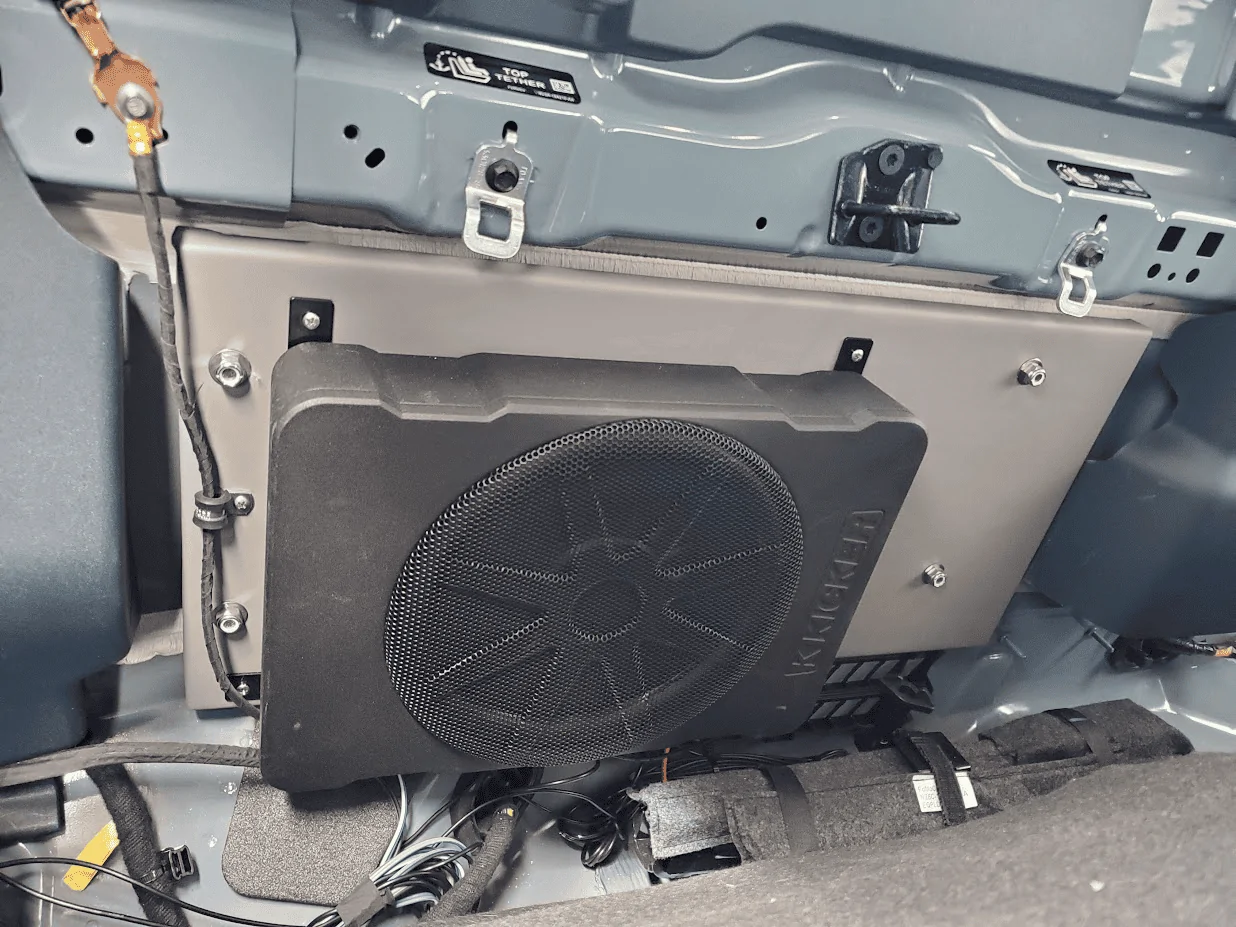
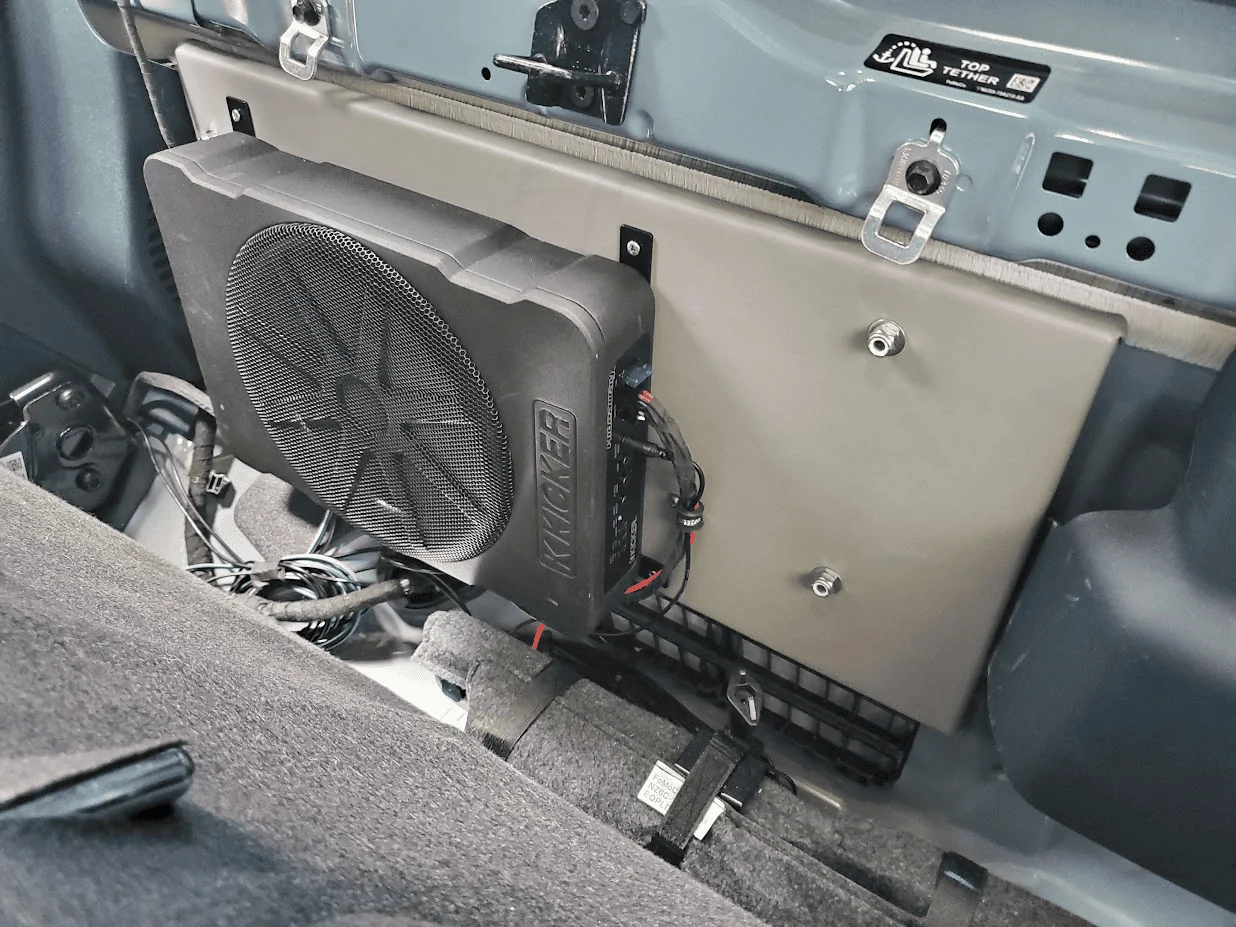
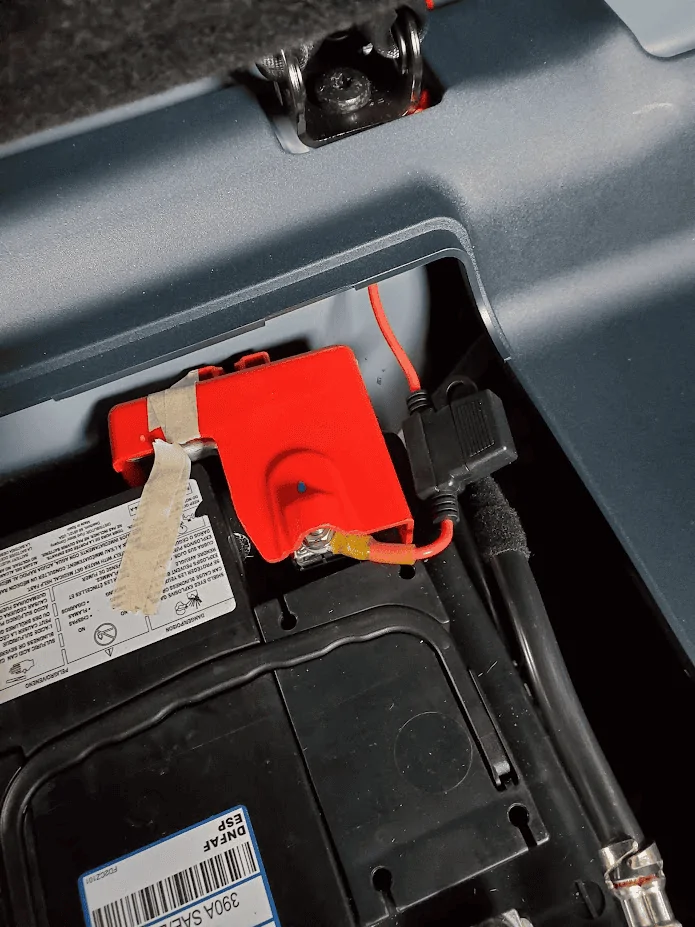
Can someone please help me find out where or what I can connect the remote turn-on wire for my HS-10. It is used for the Automatic Turn-On Selection. On the HS-10 you can select Remote Turn On or DC Offset Turn On.
Sponsored


nickynicardo

2.5L Hybrid
New member
First Name
nicholas
Joined
Jan 28, 2023
Threads
0
Messages
3
Reaction score
1
Location
orange county, ca
Vehicle(s)
2023 maverick; 2003 honda element
Engine
2.5L Hybrid
I plan to remove the unused OEM "B&O bracket" and mount a panel for the Hideaway. By not using the existing bracket, I think I can keep the Hideway from being pushed into the seatback. I plan to mount a panel close to the back wall without drilling through to the bed or having to rely on existing mount points that are used for other purposes.

There are solutions for this, notably from Weld Nuts, which make stainless fasteners that use an expensive structural adhesive. For what I need, they are overkill and cost-prohibitive.

I've been researching alternatives and decided to try elevator bolts and JB Weld. I wanted to test the strength and adhesion before relying on them to mount equipment.

The bolts I purchased are these: https://www.lowes.com/pd/Hillman-1-4-in-x-1-1-4-in-Plain-Coarse-Thread-Elevator-Bolt-2-Count/3723270

I needed a jig to hold them in place until the JB Weld cured, so I made a crude fixture out of some 1/8" ply and brass scrap. I am sure someone with a 3D printer could whip out something a lot snazzier:

1.Jig.jpeg

1. Jig parts to hold elevator bolt while adhesive cures

2.Bottom of Jig.jpeg

2. Bottom if jig has two rare-earth magnets to hold it in place

3. Top of Jig.jpeg

3. Assembled jig with elevator bolt

When I installed an aftermarket receiver hitch on my 2018 Colorado, I removed the factory bumper hitch and I still have it. It served as a good test platform to test the elevator bolt / JB Weld on.

4.Jig on Bumper.jpeg

4. Jig magnetically secured to test fixture (old bumper) with spring compression holding elevator bolt during curing.

5.Bumper.jpeg

5. JB Weld cured and bolt adhered to bumper.

here's a thought: since i lack any jig-making tools, what if i used rare earth magnets directly on the flat of the bolt to hold it in place while it cures? do you think that would work?
 

Mc_Flier

2.5L Hybrid
Well-known member
Joined
Oct 7, 2022
Threads
5
Messages
316
Reaction score
390
Location
Alabama
Vehicle(s)
Area 51 Maverick Hybrid, Street Glide Special
Engine
2.5L Hybrid
Clubs
 
Never ceases to amaze me. So many talented craftsmen on this forum.
 
OP
OP
Red Ryder

Red Ryder

2.5L Hybrid
Well-known member
Joined
Jun 20, 2021
Threads
12
Messages
1,190
Reaction score
1,737
Location
United States (TN)
Vehicle(s)
22 Maverick XLT Iconic Silver
Engine
2.5L Hybrid
here's a thought: since i lack any jig-making tools, what if i used rare earth magnets directly on the flat of the bolt to hold it in place while it cures? do you think that would work?
Absolutely! That is an excellent plan. You may consider using some wax paper or plastic wrap between the magnet and the flat head to avoid adhering the magnet. I actually made a similar jig to the one I posted for another application using ice cream sticks and rubberbands instead of brass and springs. Let us know how it goes.
 

bwil415

2.5L Hybrid
Well-known member
Joined
Sep 21, 2022
Threads
0
Messages
91
Reaction score
187
Location
Michigan
Vehicle(s)
G37
Engine
2.5L Hybrid
Thanks for taking the time to post how you did this Red Ryder! I followed the same basic steps and put a quick video together here showing the results.
I'm doing the install this weekend, but watching your video, I noticed you connected the ground to the negative post on the battery. The manual says to avoid this since it will bypass the current measuring shunt and will affect the truck's ability to monitor the 12v battery discharge and health. There is a good grounding post just above the sub to the left. @Red Ryder grounded his in that spot as seen in his final photo, and I've done the same.
 

Sponsored

bwil415

2.5L Hybrid
Well-known member
Joined
Sep 21, 2022
Threads
0
Messages
91
Reaction score
187
Location
Michigan
Vehicle(s)
G37
Engine
2.5L Hybrid
So I did the install on my hybrid XLT and it's working great. I started by pulling the climate control panel off and tapping the front speakers right out of the head unit. According to a diagram I saw in another thread the LF+ is blue, LF- is gray-brown, RF+ is yellow-orange, and RF- is green-brown where the second color is the stripe.

Ford Maverick Another method to mount Kicker Hideaway / amp board to back cabin wall 20230421_200811


I also made my own "speed wire" which you can see in the photo. It's a 9 lead harness where there are 4 sets of speaker cables and a lone conductor for remote 12v. For just the sub, you only need 4 wires, but I was already going to tap the fusebox for my dashcam, and wanted to go ahead and run extra speaker wires in case I do an amp or DSP in the future. The 2 extra sets would allow for a return signal to the front speakers.

While working in this area, I also pulled the lower USB/cigarette panel and drilled a 9/32" hole and installed the kicker knob after removing it from the factory housing. There is another forum user who did the same thing. There are gaps behind it where the wire can meet up with the audio cables right above it.

Ford Maverick Another method to mount Kicker Hideaway / amp board to back cabin wall 1682876074451

Ford Maverick Another method to mount Kicker Hideaway / amp board to back cabin wall 1682876131431


The wires are wrapped in harness tape and pass right behind the climate panel to the fuse box area behind the glove box. I used micro 3 fuse taps on fuse 3 for switched 12v and fuse 5 for constant 12v (dashcam).

Ford Maverick Another method to mount Kicker Hideaway / amp board to back cabin wall 20230421_200802


I also put in a ground terminal which is not necessary for the sub either. It's grounded to an existing lug to the right of the glovebox which is easily visible when it's removed.

Ford Maverick Another method to mount Kicker Hideaway / amp board to back cabin wall 20230421_200758

Ford Maverick Another method to mount Kicker Hideaway / amp board to back cabin wall 1682876178533


The passenger kick panel was a pain for me. It has to slide down out of the panel above and has 2 large clips holding it on the side. I actually ended up cracking it around the top one trying to force it back into place after wiring. I used my soldering iron to "weld" it back together on the back side to stop the crack from growing.

Ford Maverick Another method to mount Kicker Hideaway / amp board to back cabin wall 20230427_175238
Ford Maverick Another method to mount Kicker Hideaway / amp board to back cabin wall 20230427_175818


It really helps to remove that panel, the B pillar lower panel, and the rear passenger kick panel, because then you can open up the factory cable trays which have plenty of room for new wiring. It was just a matter of wrapping the harness as needed, laying it in the cable trays, and feeding it through behind the seatbelt area. If you're not using the cable trays, you can just loosen the bottom of the b pillar panel and push it through. There is room under the door seals for a few wires by themselves. You can see my 9 wire harness, sub remote knob wire, and rear dashcam wire which is too much to fit into the gaps there. The wire trays are held closed with fragile little tabs. I found the best way was to insert a small dull flathead into the top and pry the catch away so the tab can come through.


Ford Maverick Another method to mount Kicker Hideaway / amp board to back cabin wall 20230422_115409
Ford Maverick Another method to mount Kicker Hideaway / amp board to back cabin wall 1682875952745

Ford Maverick Another method to mount Kicker Hideaway / amp board to back cabin wall 20230422_122514


I made my boad wider at 24" instead of 18" to have some extra room for expansion as mentioned, but that necessitated removing the window motor bracket also. For removing the brackets, I snipped the window motor one off with some tin snips, and then I just peeled the amp bracket back and bent it back and forth close to the spot welds until it broke. It turned out surprisingly well. I also used a soft face mallet to flatten the left over bits.

Ford Maverick Another method to mount Kicker Hideaway / amp board to back cabin wall 20230427_120914
Ford Maverick Another method to mount Kicker Hideaway / amp board to back cabin wall 20230427_142753


I held the board in place, and then hit it with a mallet over the existing screws that stick out so that they indented the MDF and I knew were to drill some holes that will be used for alignment.

Ford Maverick Another method to mount Kicker Hideaway / amp board to back cabin wall 1682876694040


With those 3 holes, the board will hold itself in place, and I just picked where to place the elevator bolts. The left two are the same as @Red Ryder, but I moved the right two over approximately 3-7/8" since my board is wider and I could get over to the next flat spot.

I drilled holes for the bolts, I think they were 3/8" for 5/16" bolts. I used the board itself as the fixture for gluing like @potatosalad did in his video. I mixed the JB weld and placed it on each bolt, positioned the board over the factory studs with the holes I drilled earlier, and then used a rolled up sweatshirt pinned between the board and the back seat to clamp it all in place for 24h. This method is fine, but I screwed up the first attempt. I neglected to sand the paint where the glue would contact and all 4 bolts peeled off cleanly after curing.

Ford Maverick Another method to mount Kicker Hideaway / amp board to back cabin wall 1682877253527

Ford Maverick Another method to mount Kicker Hideaway / amp board to back cabin wall 1682877269850


I just reglued it the same way after roughing up the contact surfaces with 80 grit, and that worked perfectly.

Ford Maverick Another method to mount Kicker Hideaway / amp board to back cabin wall 1682878842331


Covered the board in some marine vinyl, mounted the sub flush with the bottom edge, and finished the install.

Ford Maverick Another method to mount Kicker Hideaway / amp board to back cabin wall 20230429_101424
Ford Maverick Another method to mount Kicker Hideaway / amp board to back cabin wall 20230429_102453


I got 5/16-18 x 1-1/2 elevator bolts from Amazon. They are the perfect length for 3/4 MDF, a washer, and a nylon locknut without counterboring.

Ford Maverick Another method to mount Kicker Hideaway / amp board to back cabin wall 1682877422339

Ford Maverick Another method to mount Kicker Hideaway / amp board to back cabin wall 1682877469415


15A inline fuse and the ground is connected just above the speaker to the left.

Ford Maverick Another method to mount Kicker Hideaway / amp board to back cabin wall 1682877521434


Overall I'm quite happy with the setup. The backseat latches no problem. I don't feel the need for an amp or anything else at this point, but I have the option in the future. I'm coming from an Infiniti, and I think the Maverick is much easier to work with for installing something like this. The trim panels are simpler to remove and there's not sound deadening and carpet everywhere (for better or worse). I got the sub for $200 on eBay and the wire was out of the trash can at work, so my price was great for the upgrade it provides.
 
Last edited:

snowkarver

2.0L EcoBoost
Well-known member
Joined
Sep 13, 2022
Threads
22
Messages
237
Reaction score
452
Location
BC, Canada
Vehicle(s)
Volvo XC60, XLT Tremor
Engine
2.0L EcoBoost
Seems to be a popular upgrade technique. :)

5/8" MDF with a layer of Kilmat 80 on the back and automotive carpet up front. Also went with the 24" width to take advantage of the available space and make room for my Audison DSP amp.

I wish I had read bwil415's post an hour earlier this morning because I literally made the same mistake today - not hitting up the paint (and in my case, the zinc coating on the bolt heads) with sandpaper, because the epoxy weld also sheared off after curing without making a good bond. Make sure to rough up all contact surfaces!

Test fit:

Ford Maverick Another method to mount Kicker Hideaway / amp board to back cabin wall tempImagelzwLnW


Board construction:

Ford Maverick Another method to mount Kicker Hideaway / amp board to back cabin wall tempImagezqL4S7


Mounting template:

Ford Maverick Another method to mount Kicker Hideaway / amp board to back cabin wall tempImageWYX3s1


Final board fitting:

Ford Maverick Another method to mount Kicker Hideaway / amp board to back cabin wall tempImagexdGBp8

Ford Maverick Another method to mount Kicker Hideaway / amp board to back cabin wall tempImageu1lTB8
 
Last edited:

Tomjoness

2.0L EcoBoost
Active member
First Name
Tj
Joined
Jan 22, 2023
Threads
2
Messages
30
Reaction score
10
Location
Florida
Vehicle(s)
2022 max xlt
Engine
2.0L EcoBoost
Done. The mount is 3/4 MDF to which Kilmat 80 was applied and covered with sub-box carpet.
Kilmat also applied on Maverick's back wall. No rattles and sounds great. I did move the HS-10 down to the bottom edge of the mount to ensure easy no-interference seat latching.

Mount_DWG.webp


Installed.jpg
I am missing the four feet on my hideaway any suggestions
 

Joe Mac

2.0L EcoBoost
Well-known member
First Name
Joe
Joined
Sep 15, 2022
Threads
1
Messages
263
Reaction score
253
Location
Marin
Vehicle(s)
Shelby GT350 F250 Super Duty
Engine
2.0L EcoBoost
Hi guys great read. But I'm curious why you didn't just bolt the amp to the truck?
Why did you have to bolt it to the plywood?
Thanks
 
Sponsored
OP
OP
Red Ryder

Red Ryder

2.5L Hybrid
Well-known member
Joined
Jun 20, 2021
Threads
12
Messages
1,190
Reaction score
1,737
Location
United States (TN)
Vehicle(s)
22 Maverick XLT Iconic Silver
Engine
2.5L Hybrid
I am missing the four feet on my hideaway any suggestions
Nice amp/sub board! As for the Hideaway's mounting brackets, you might contact Kicker support and see if they could help with replacements. Alternatively, you could use some sort of cinch strap, either velcro or heavy duty elastic/rubber to hold it. Good thing is that it won't become a missile in the event of an accident with the seat latched.
 
OP
OP
Red Ryder

Red Ryder

2.5L Hybrid
Well-known member
Joined
Jun 20, 2021
Threads
12
Messages
1,190
Reaction score
1,737
Location
United States (TN)
Vehicle(s)
22 Maverick XLT Iconic Silver
Engine
2.5L Hybrid
Hi guys great read. But I'm curious why you didn't just bolt the amp to the truck?
Why did you have to bolt it to the plywood?
Thanks
Not to speak for snowkarver, but remember this is not a typical truck with a separate bed. The rear cabin sheet metal is the front wall of the bed. Using an amp board for mounting is always a great idea even without that situation. It allows easy reconfiguration and helps with cable management, providing a base for wire retainers, fuse blocks, etc. And, as Telemachus indicated, the board dampens vibrations too.
 
Last edited:

MikeyG

2.0L EcoBoost
Well-known member
Joined
Jan 23, 2022
Threads
12
Messages
338
Reaction score
190
Location
phila
Vehicle(s)
Ford Maverick
Engine
2.0L EcoBoost
So I did the install on my hybrid XLT and it's working great. I started by pulling the climate control panel off and tapping the front speakers right out of the head unit. According to a diagram I saw in another thread the LF+ is blue, LF- is gray-brown, RF+ is yellow-orange, and RF- is green-brown where the second color is the stripe.

20230421_200811.jpg


I also made my own "speed wire" which you can see in the photo. It's a 9 lead harness where there are 4 sets of speaker cables and a lone conductor for remote 12v. For just the sub, you only need 4 wires, but I was already going to tap the fusebox for my dashcam, and wanted to go ahead and run extra speaker wires in case I do an amp or DSP in the future. The 2 extra sets would allow for a return signal to the front speakers.

While working in this area, I also pulled the lower USB/cigarette panel and drilled a 9/32" hole and installed the kicker knob after removing it from the factory housing. There is another forum user who did the same thing. There are gaps behind it where the wire can meet up with the audio cables right above it.

1682876074451.png

1682876131431.png


The wires are wrapped in harness tape and pass right behind the climate panel to the fuse box area behind the glove box. I used micro 3 fuse taps on fuse 3 for switched 12v and fuse 5 for constant 12v (dashcam).

20230421_200802.jpg


I also put in a ground terminal which is not necessary for the sub either. It's grounded to an existing lug to the right of the glovebox which is easily visible when it's removed.

20230421_200758.jpg

1682876178533.png


The passenger kick panel was a pain for me. It has to slide down out of the panel above and has 2 large clips holding it on the side. I actually ended up cracking it around the top one trying to force it back into place after wiring. I used my soldering iron to "weld" it back together on the back side to stop the crack from growing.

20230427_175238.jpg
20230427_175818.jpg


It really helps to remove that panel, the B pillar lower panel, and the rear passenger kick panel, because then you can open up the factory cable trays which have plenty of room for new wiring. It was just a matter of wrapping the harness as needed, laying it in the cable trays, and feeding it through behind the seatbelt area. If you're not using the cable trays, you can just loosen the bottom of the b pillar panel and push it through. There is room under the door seals for a few wires by themselves. You can see my 9 wire harness, sub remote knob wire, and rear dashcam wire which is too much to fit into the gaps there. The wire trays are held closed with fragile little tabs. I found the best way was to insert a small dull flathead into the top and pry the catch away so the tab can come through.


20230422_115409.jpg
1682875952745.png

20230422_122514.jpg


I made my boad wider at 24" instead of 18" to have some extra room for expansion as mentioned, but that necessitated removing the window motor bracket also. For removing the brackets, I snipped the window motor one off with some tin snips, and then I just peeled the amp bracket back and bent it back and forth close to the spot welds until it broke. It turned out surprisingly well. I also used a soft face mallet to flatten the left over bits.

20230427_120914.jpg
20230427_142753.jpg


I held the board in place, and then hit it with a mallet over the existing screws that stick out so that they indented the MDF and I knew were to drill some holes that will be used for alignment.

1682876694040.png


With those 3 holes, the board will hold itself in place, and I just picked where to place the elevator bolts. The left two are the same as @Red Ryder, but I moved the right two over approximately 3-7/8" since my board is wider and I could get over to the next flat spot.

I drilled holes for the bolts, I think they were 3/8" for 5/16" bolts. I used the board itself as the fixture for gluing like @potatosalad did in his video. I mixed the JB weld and placed it on each bolt, positioned the board over the factory studs with the holes I drilled earlier, and then used a rolled up sweatshirt pinned between the board and the back seat to clamp it all in place for 24h. This method is fine, but I screwed up the first attempt. I neglected to sand the paint where the glue would contact and all 4 bolts peeled off cleanly after curing.

1682877253527.png

1682877269850.png


I just reglued it the same way after roughing up the contact surfaces with 80 grit, and that worked perfectly.

1682878842331.webp


Covered the board in some marine vinyl, mounted the sub flush with the bottom edge, and finished the install.

20230429_101424.jpg
20230429_102453.jpg


I got 5/16-18 x 1-1/2 elevator bolts from Amazon. They are the perfect length for 3/4 MDF, a washer, and a nylon locknut without counterboring.

1682877422339.png

1682877469415.png


15A inline fuse and the ground is connected just above the speaker to the left.

1682877521434.png


Overall I'm quite happy with the setup. The backseat latches no problem. I don't feel the need for an amp or anything else at this point, but I have the option in the future. I'm coming from an Infiniti, and I think the Maverick is much easier to work with for installing something like this. The trim panels are simpler to remove and there's not sound deadening and carpet everywhere (for better or worse). I got the sub for $200 on eBay and the wire was out of the trash can at work, so my price was great for the upgrade it provides.
Nice info. How do you get the climate control panel off? I’m looking to do my bass knob in there also.
 
Last edited:
OP
OP
Red Ryder

Red Ryder

2.5L Hybrid
Well-known member
Joined
Jun 20, 2021
Threads
12
Messages
1,190
Reaction score
1,737
Location
United States (TN)
Vehicle(s)
22 Maverick XLT Iconic Silver
Engine
2.5L Hybrid


Top