Sponsored

Active Powered "All-N-One" Subwoofers

uh50

2.0L EcoBoost
Well-known member
First Name
Howard
Joined
Oct 4, 2021
Threads
30
Messages
1,236
Reaction score
1,395
Location
Brookhaven Lake O' the Pines, Texas
Website
www.hchaney.com
Vehicle(s)
2022 Maverick XL, VB, 2.0 EB
Engine
2.0L EcoBoost
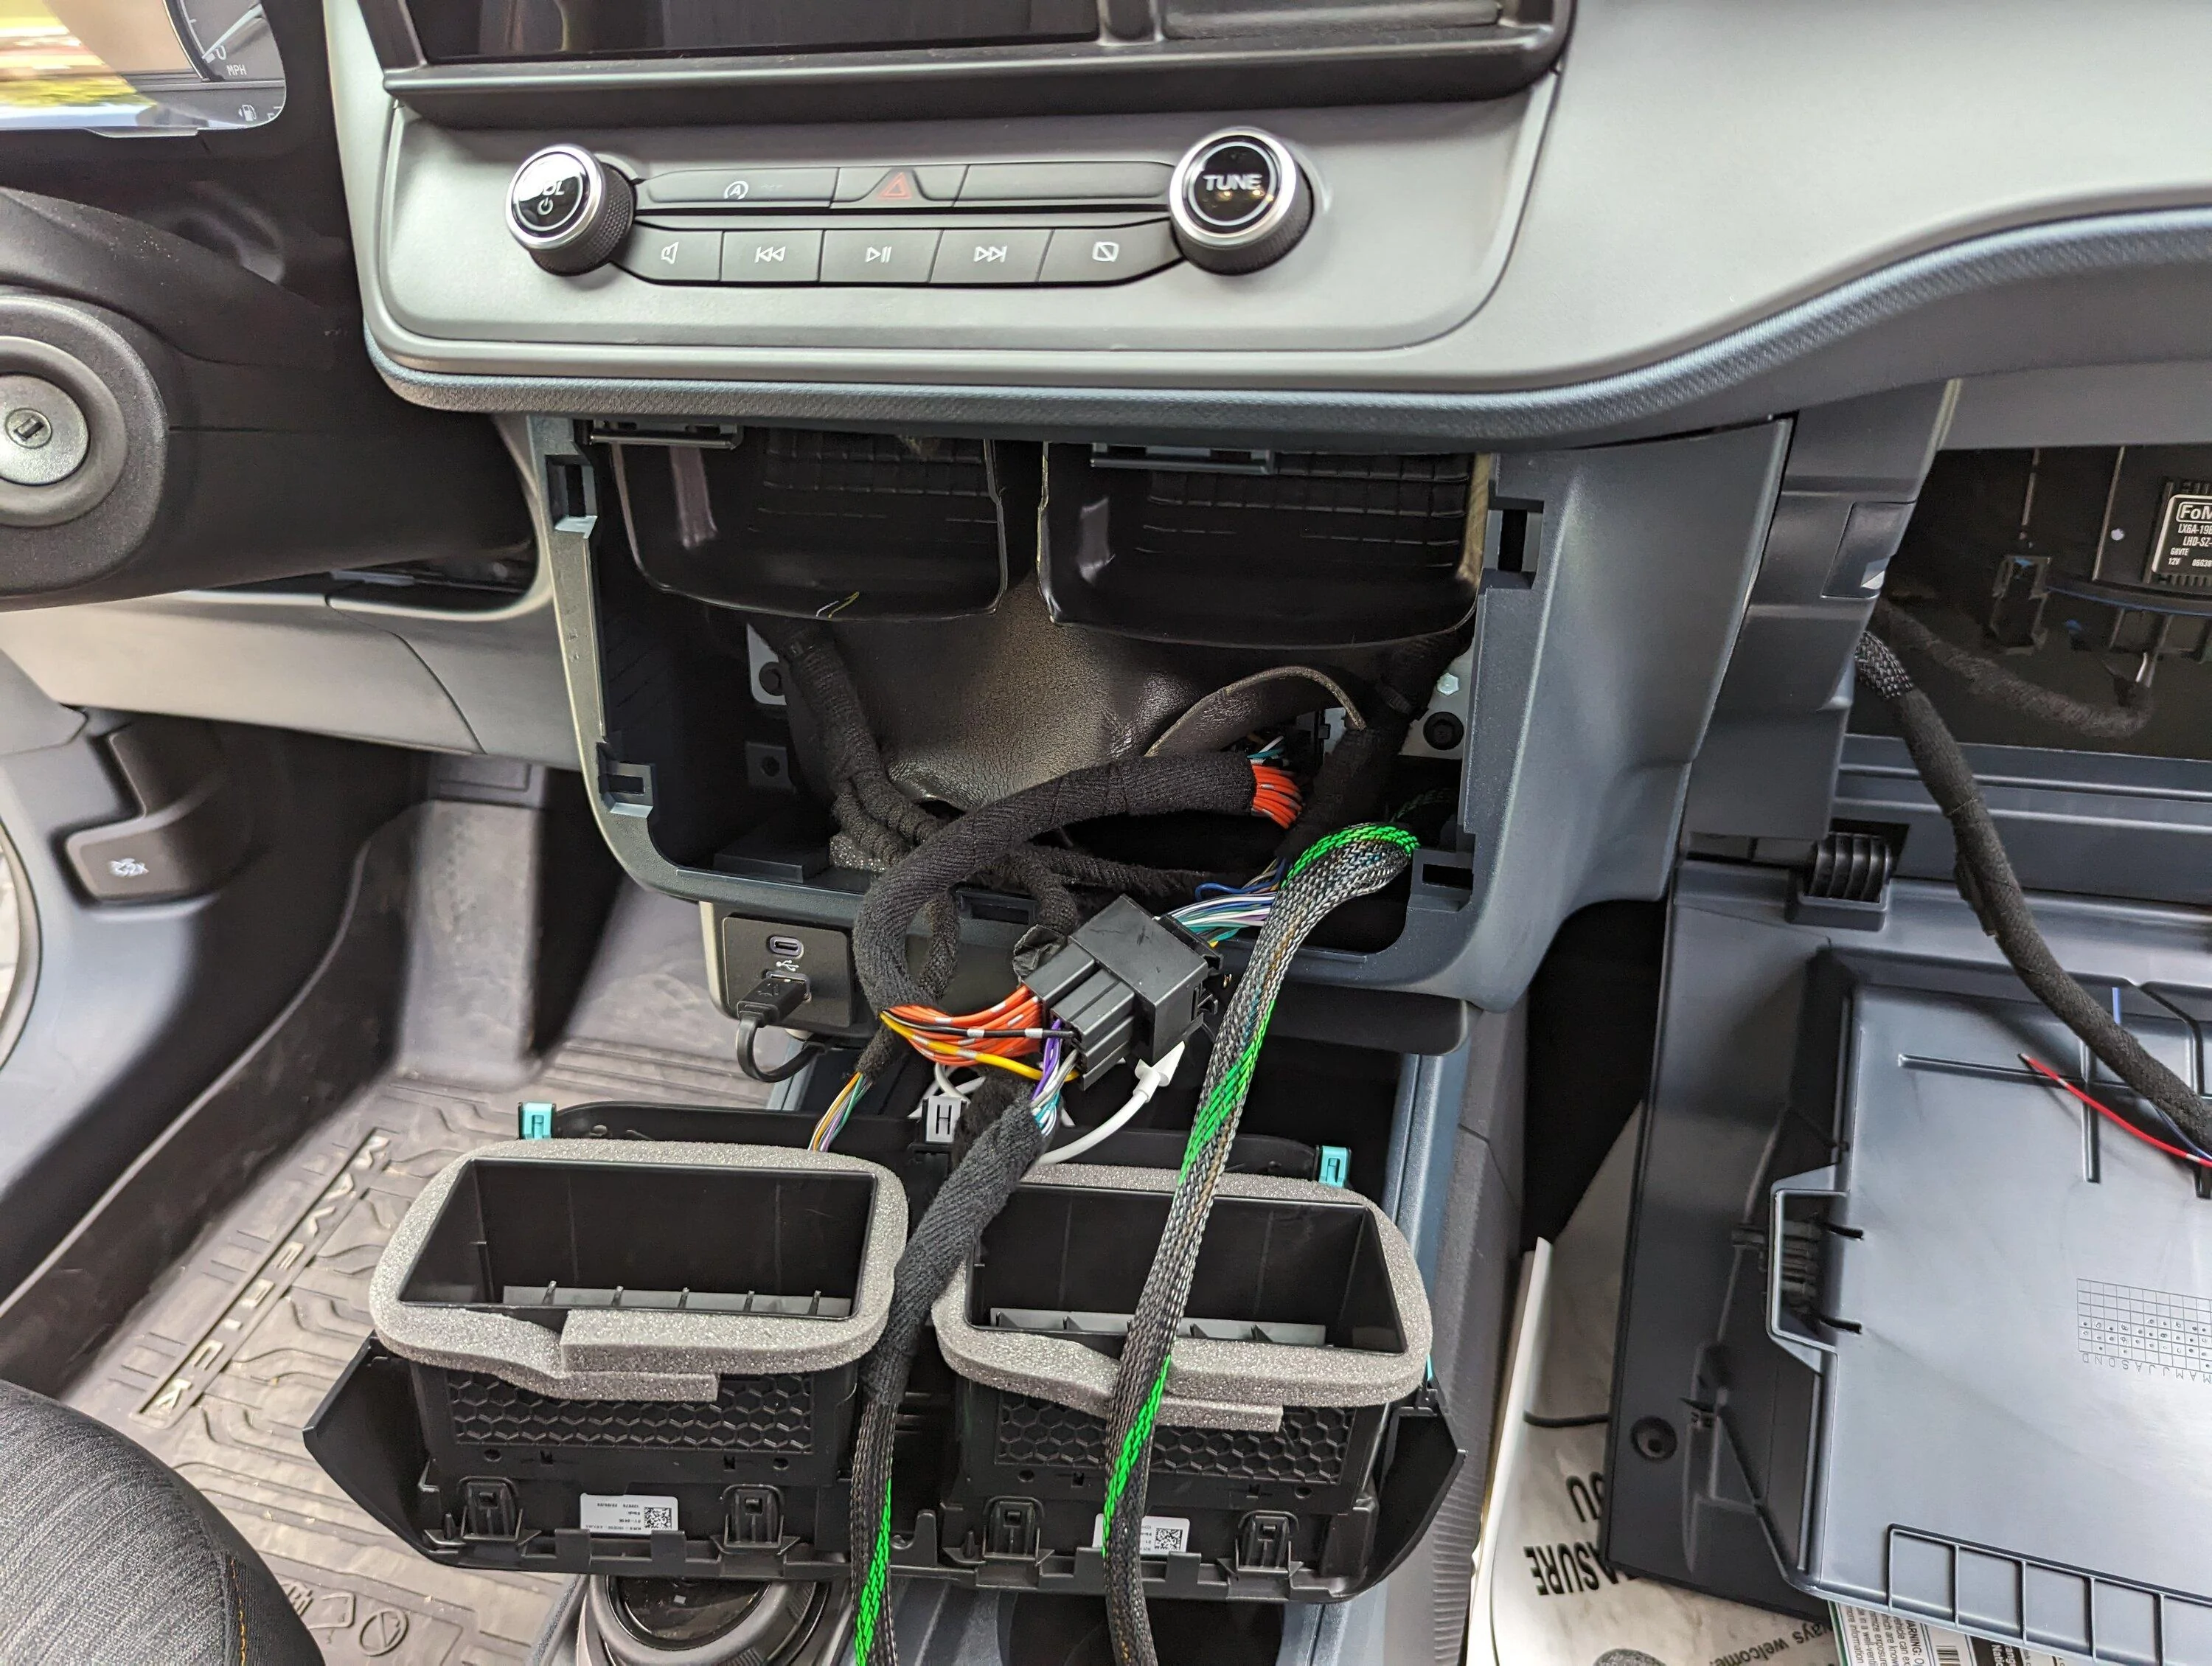
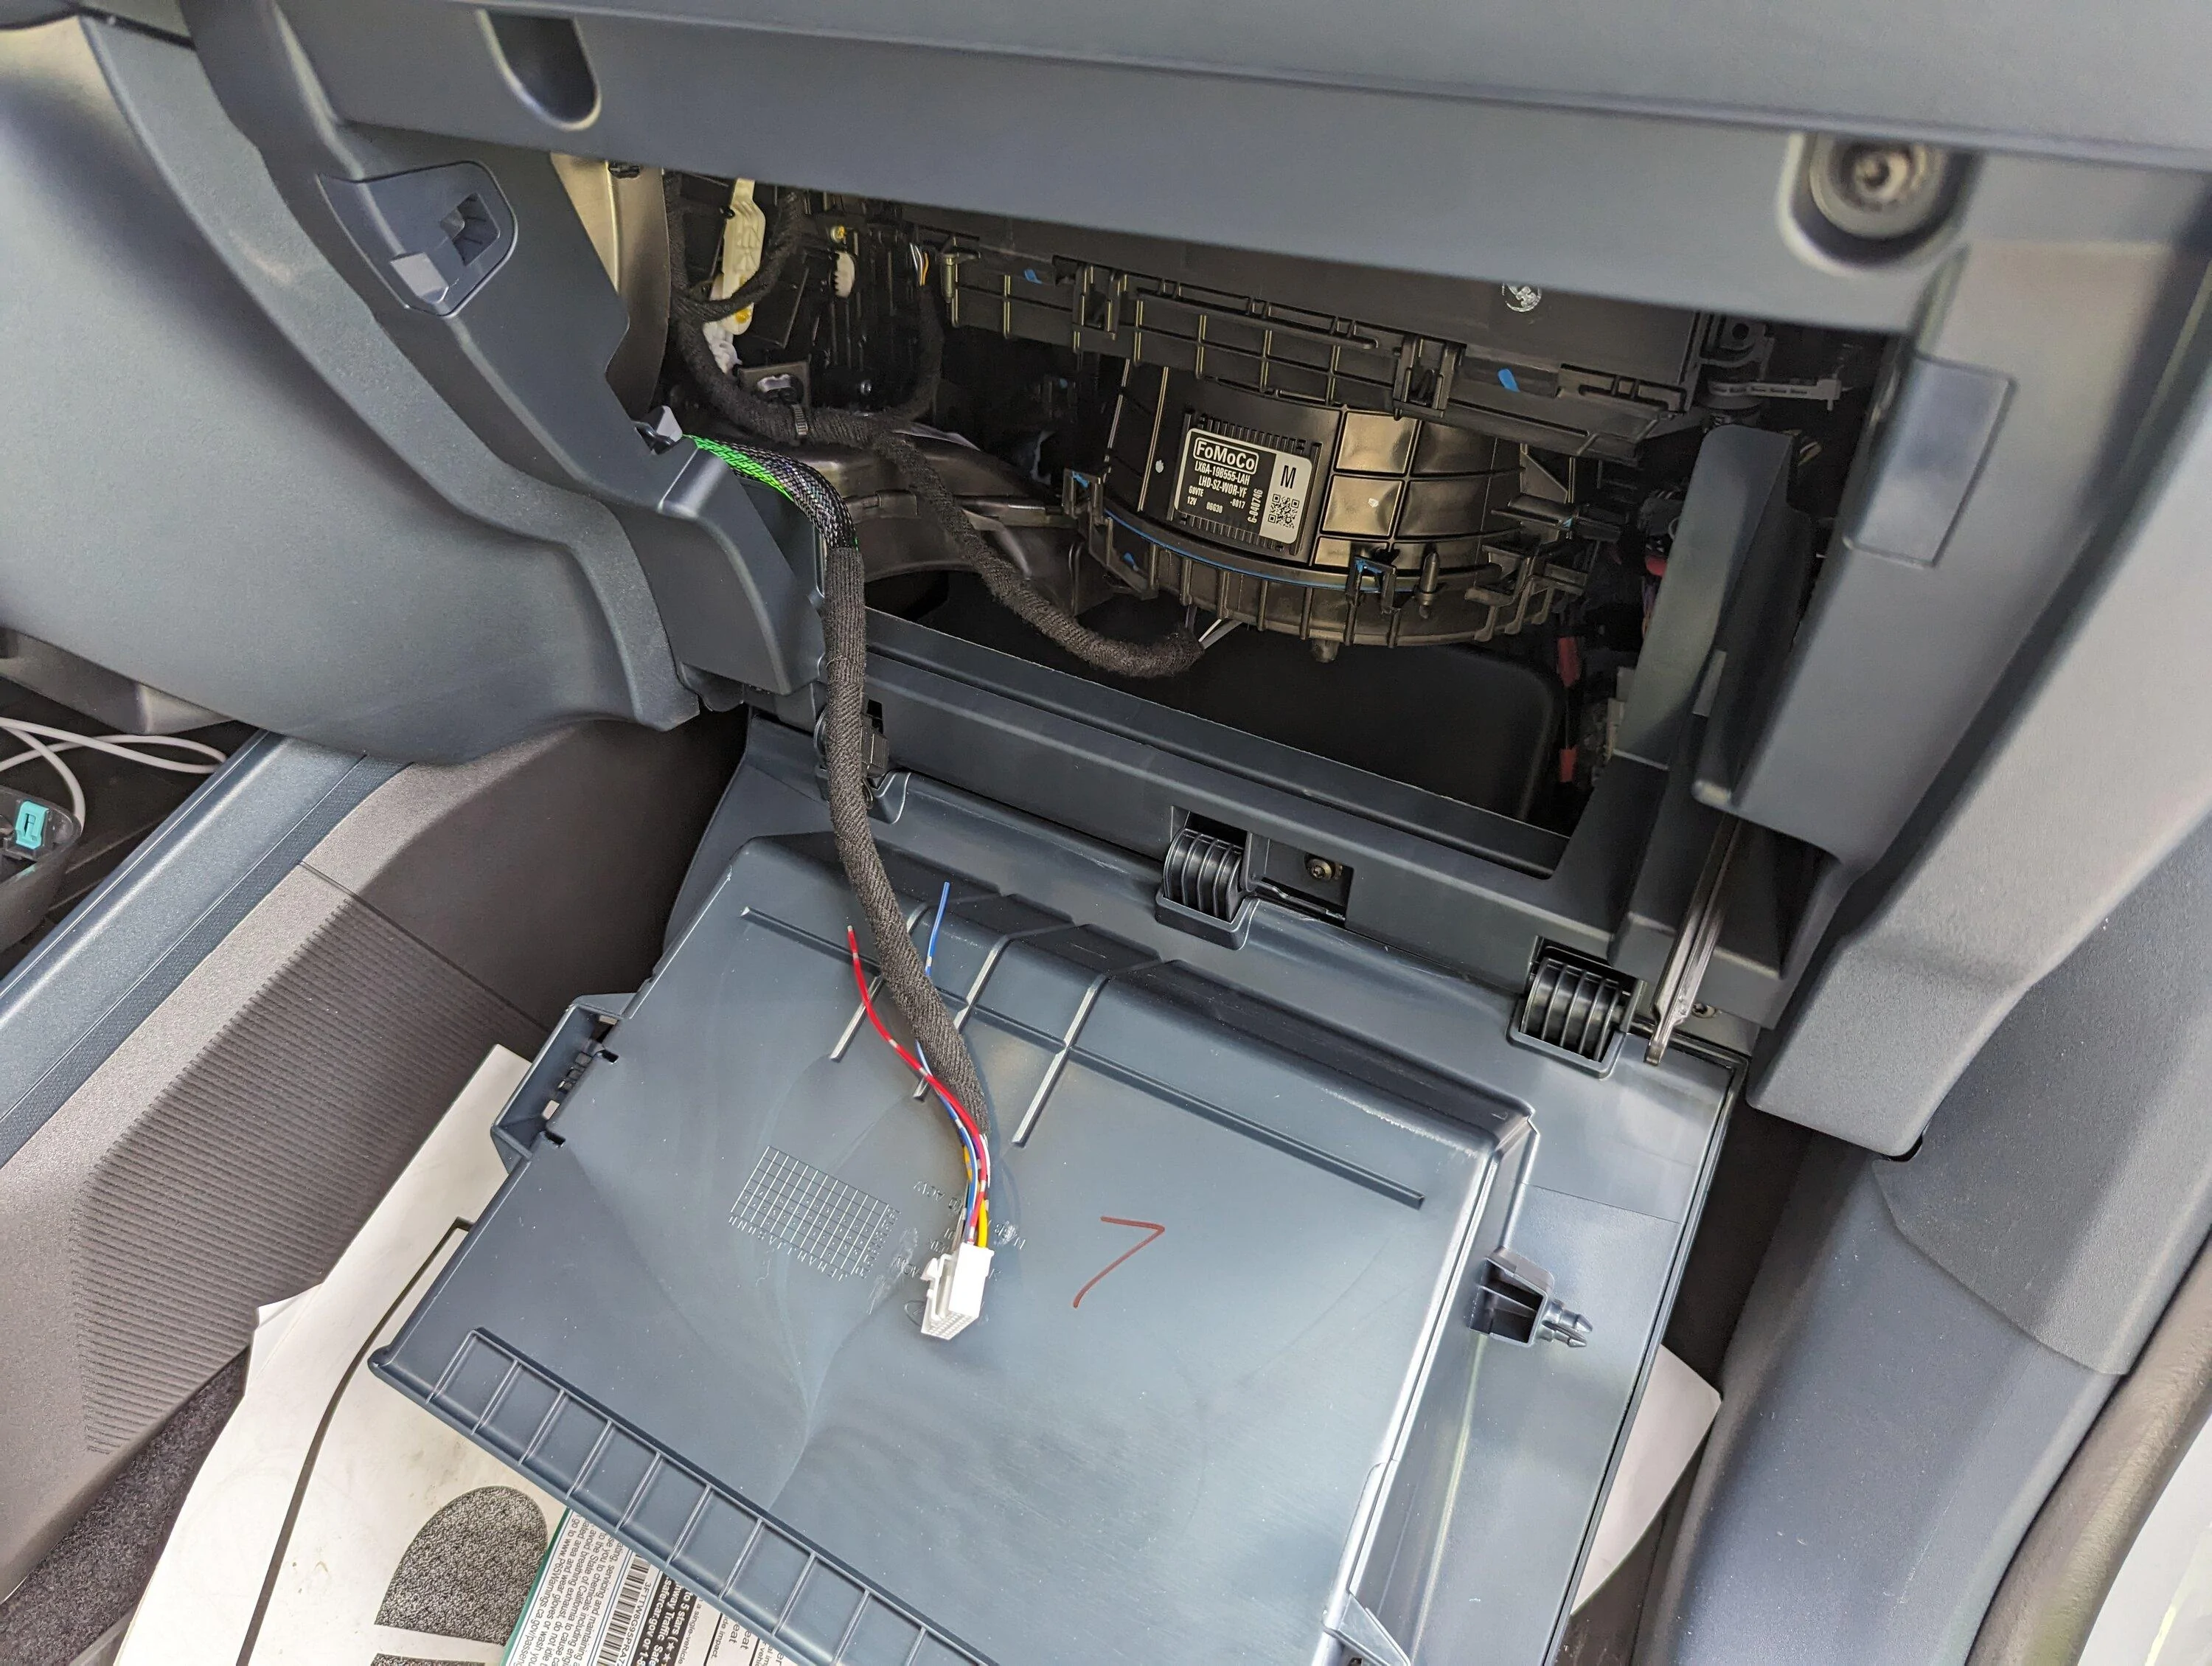
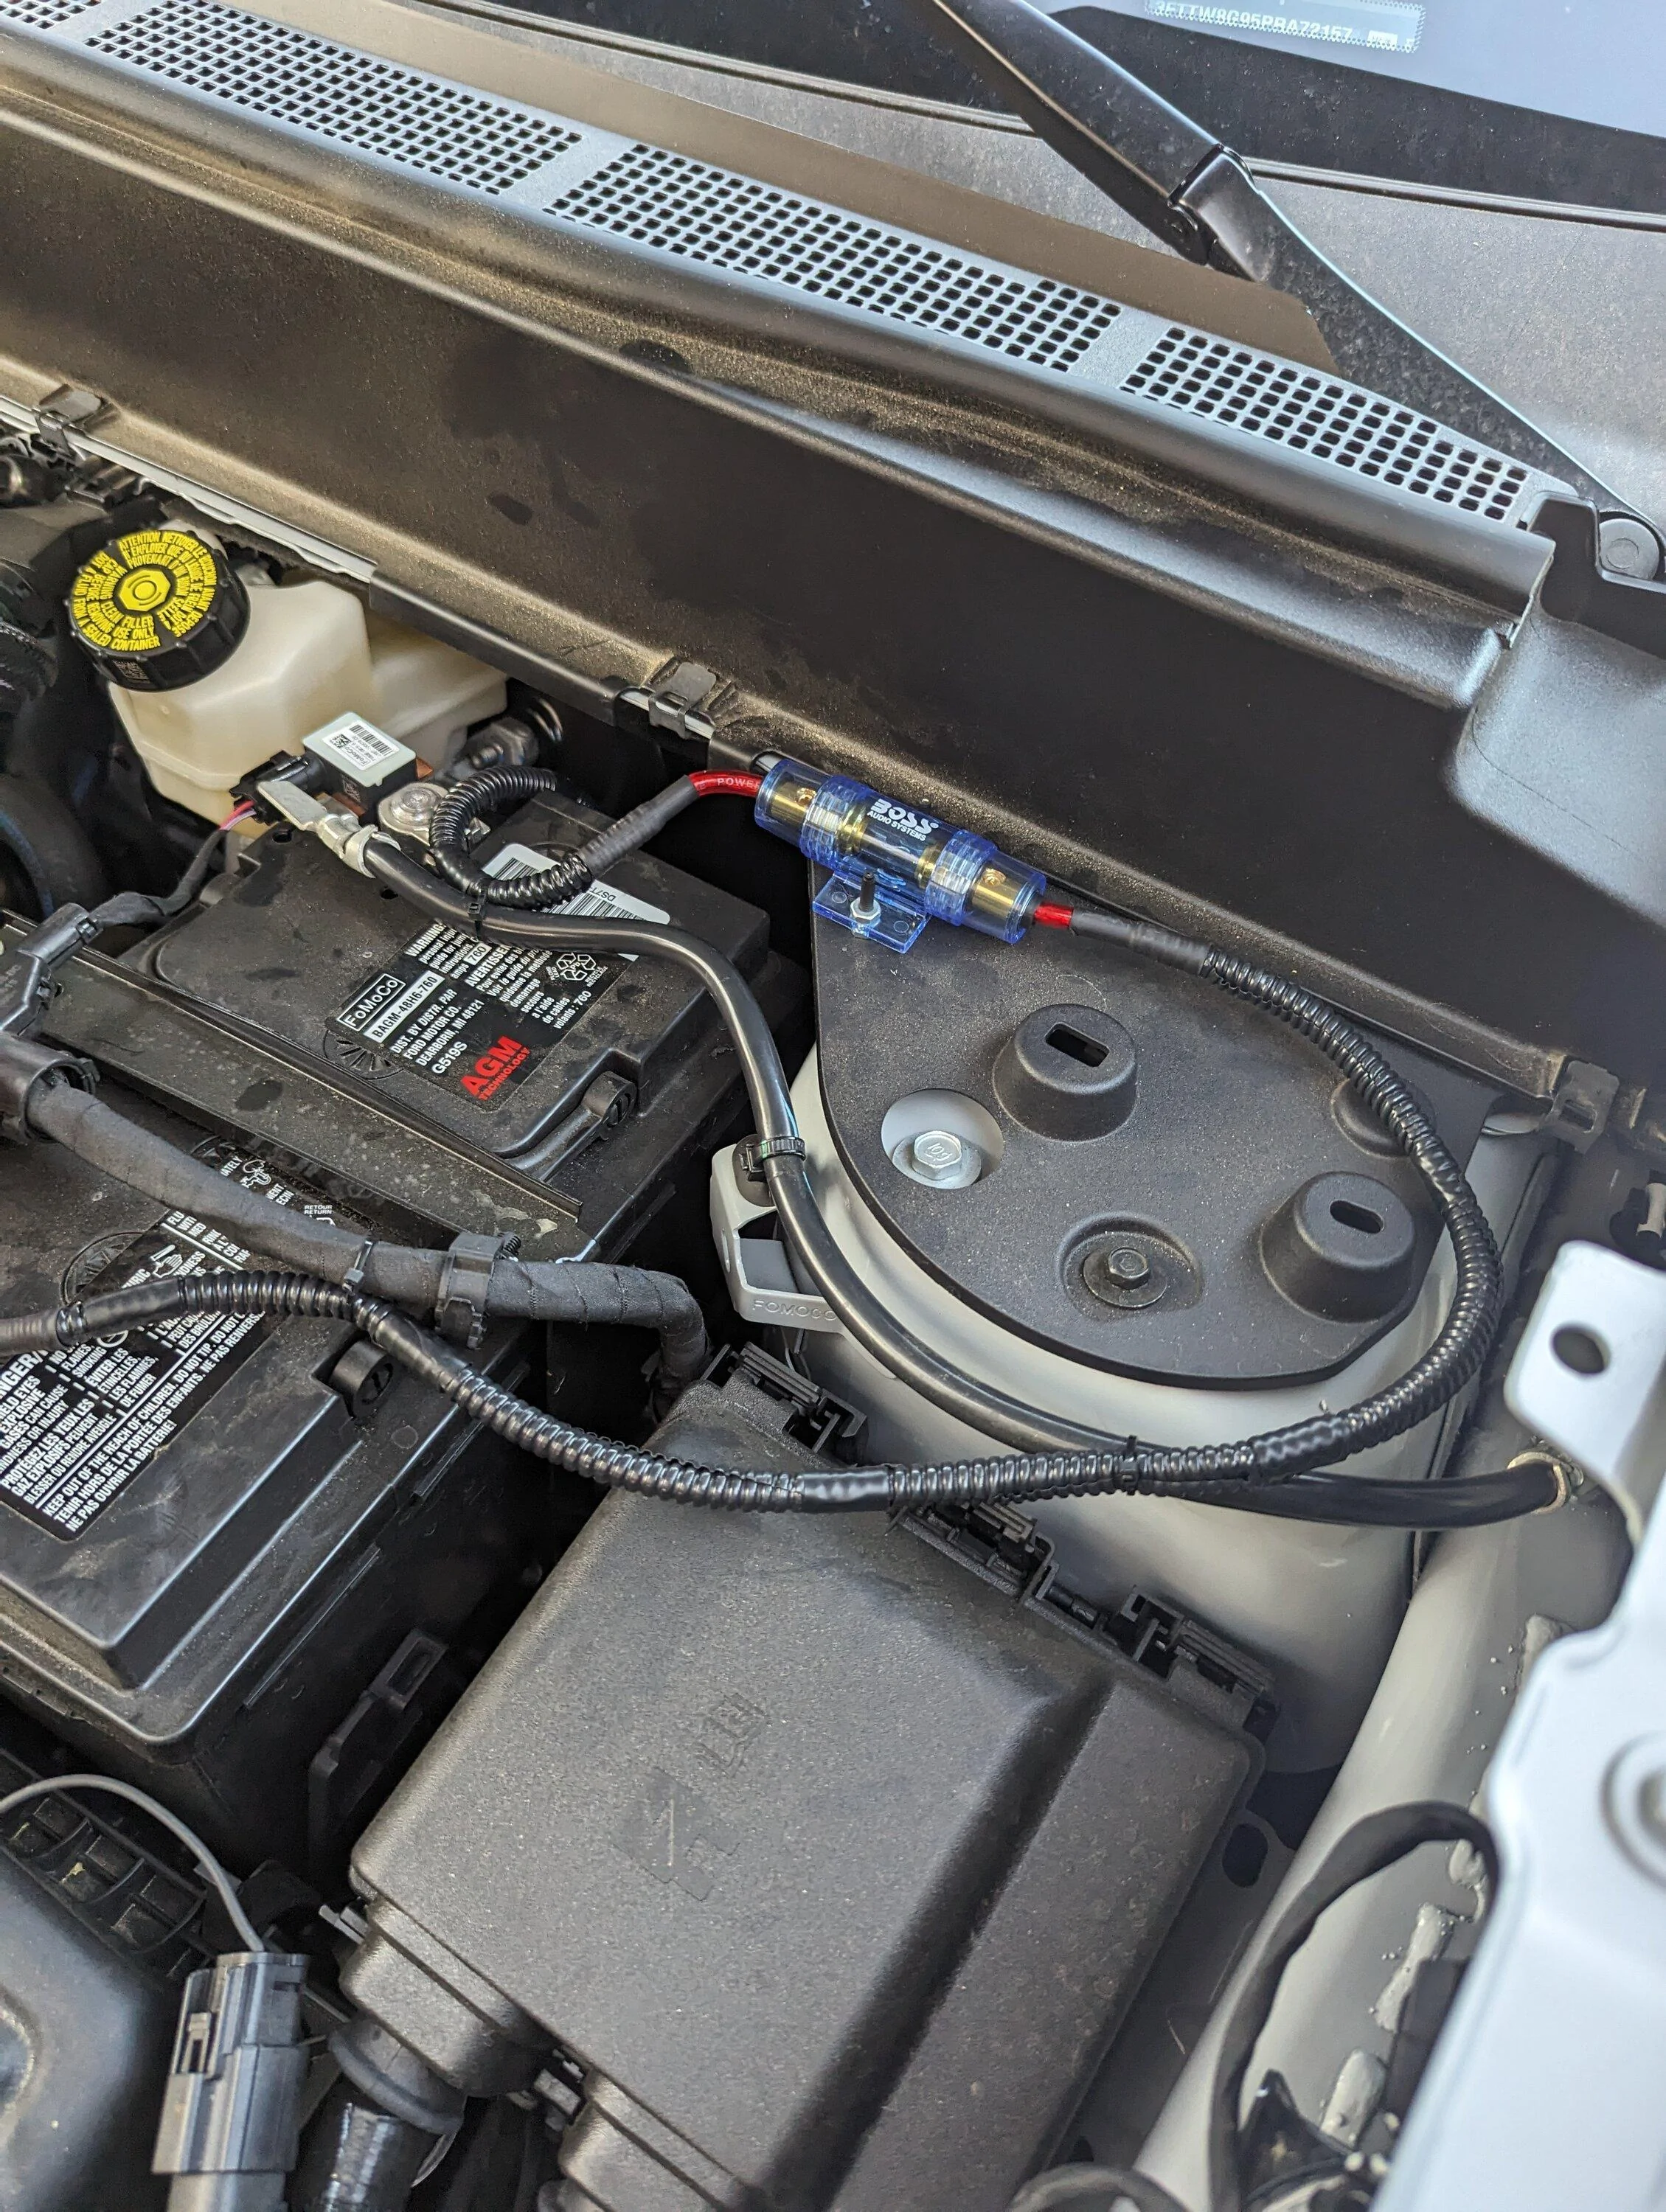
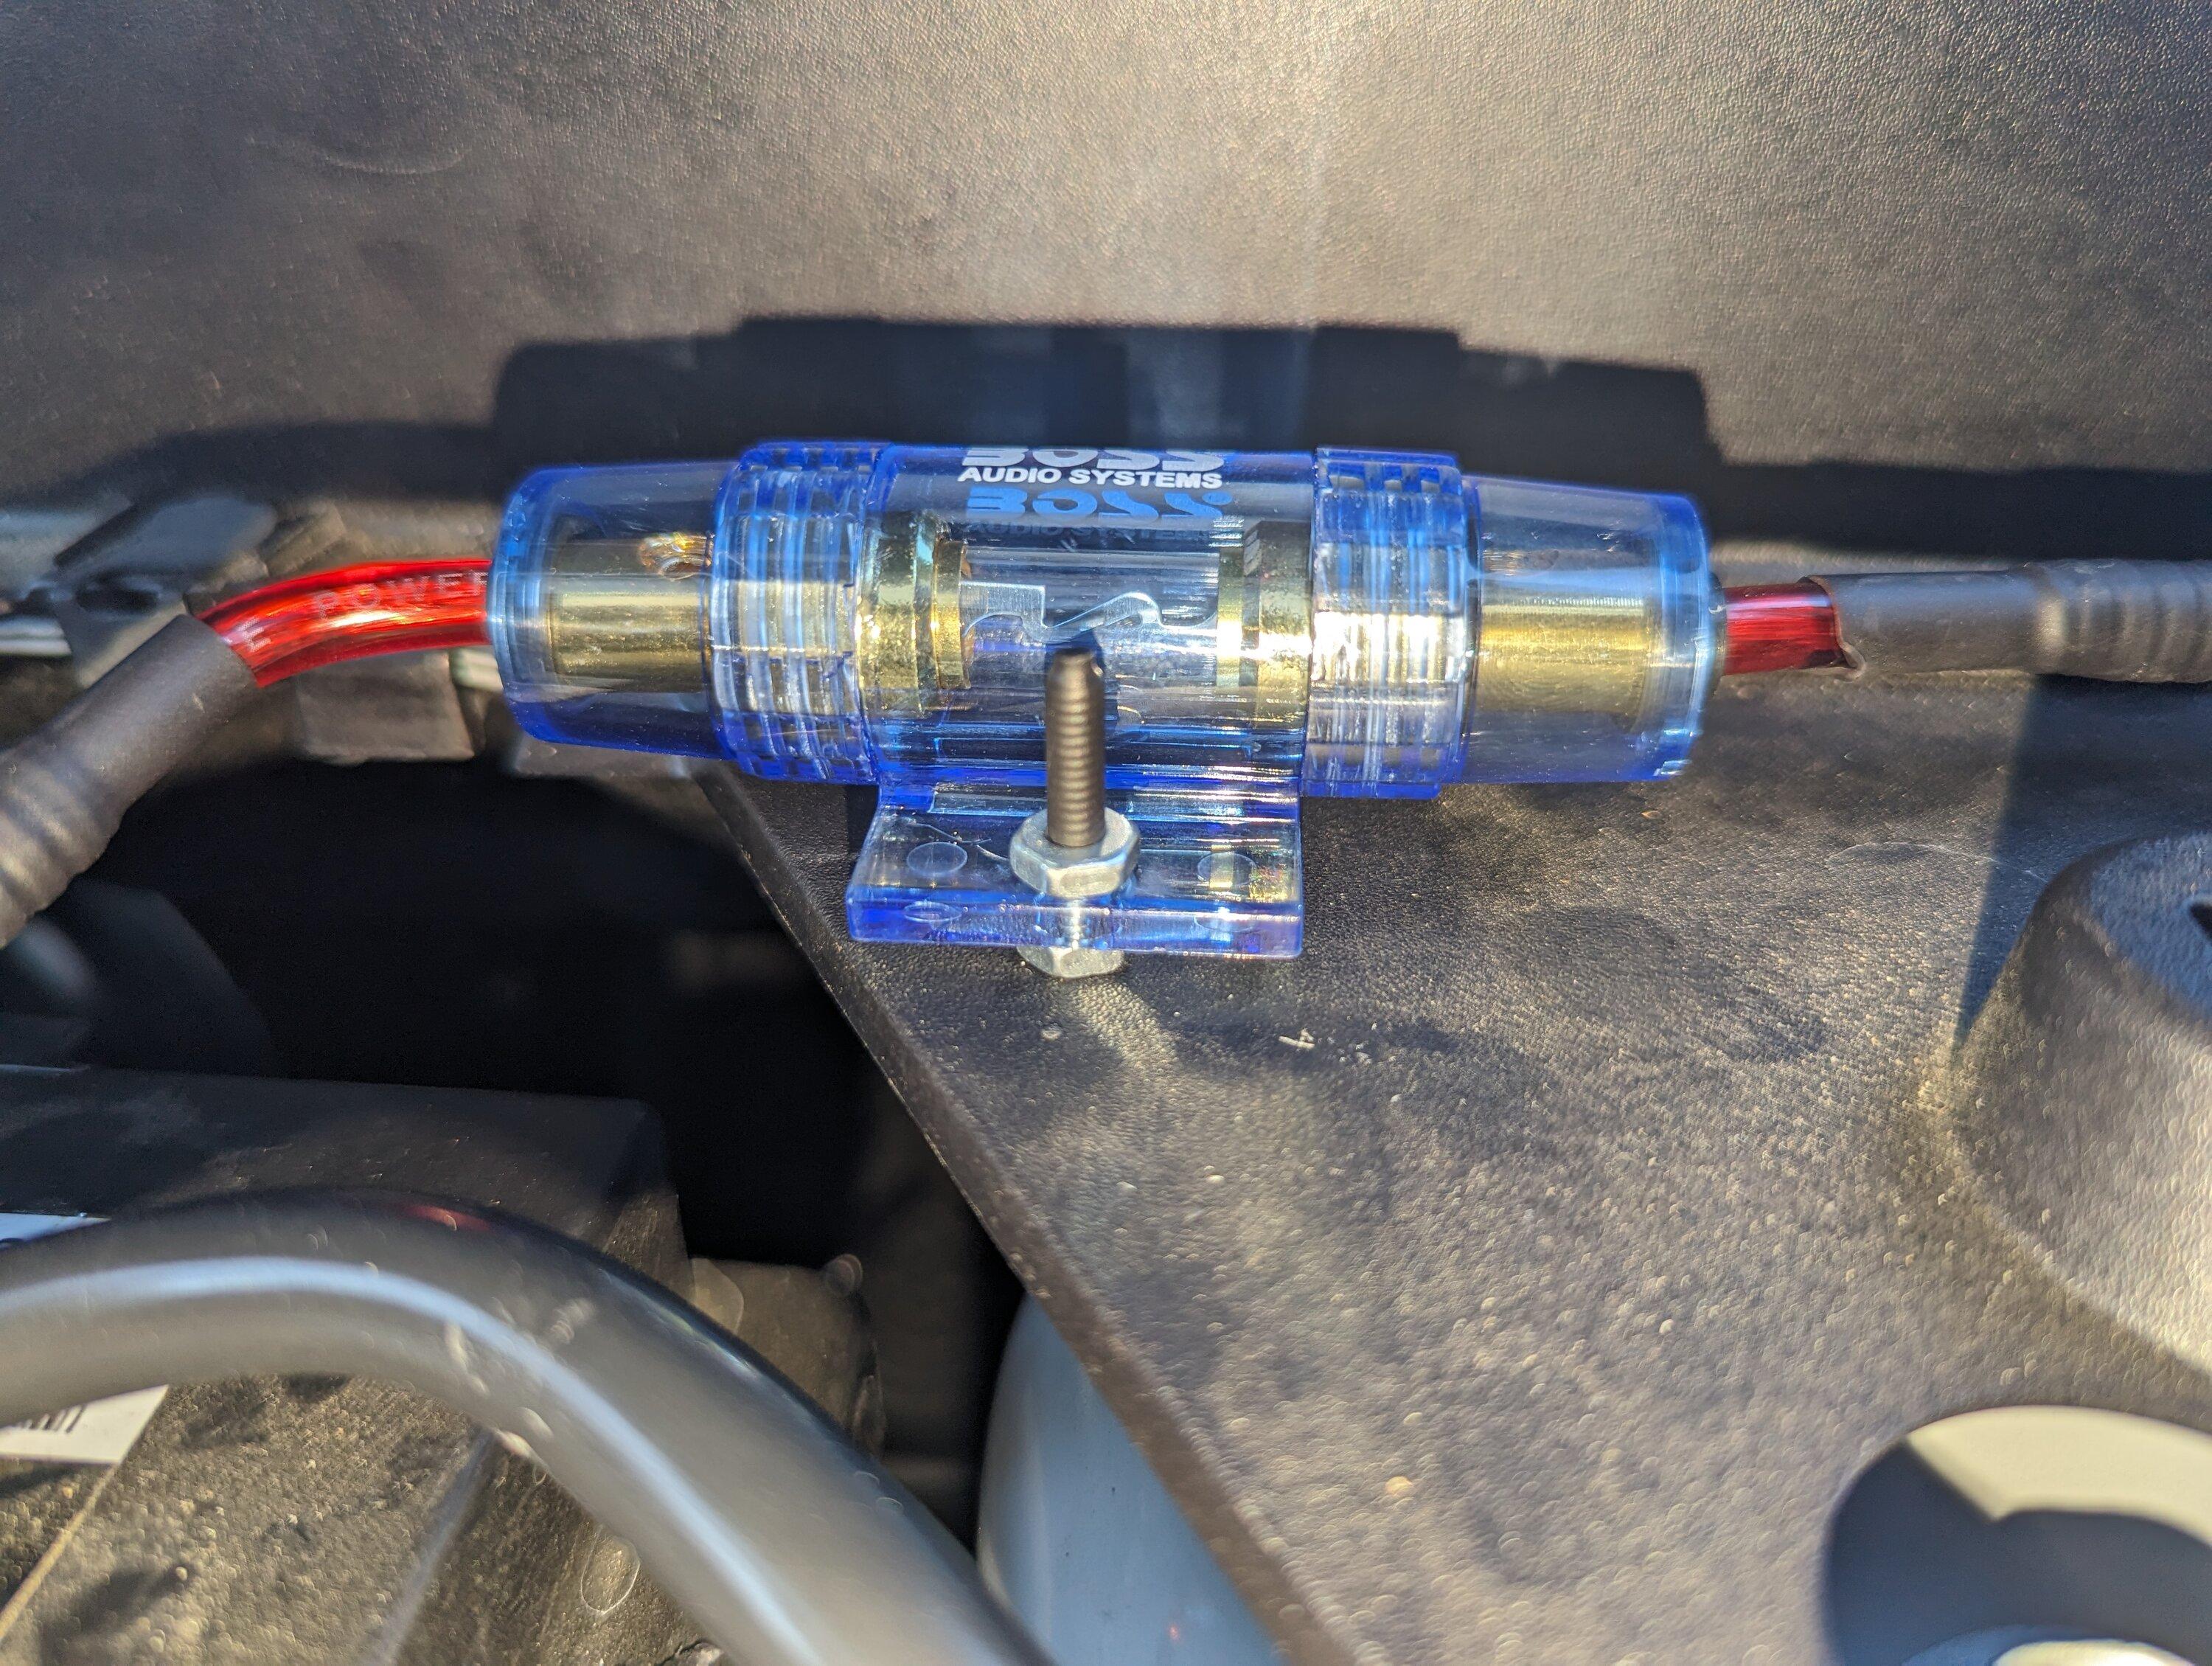
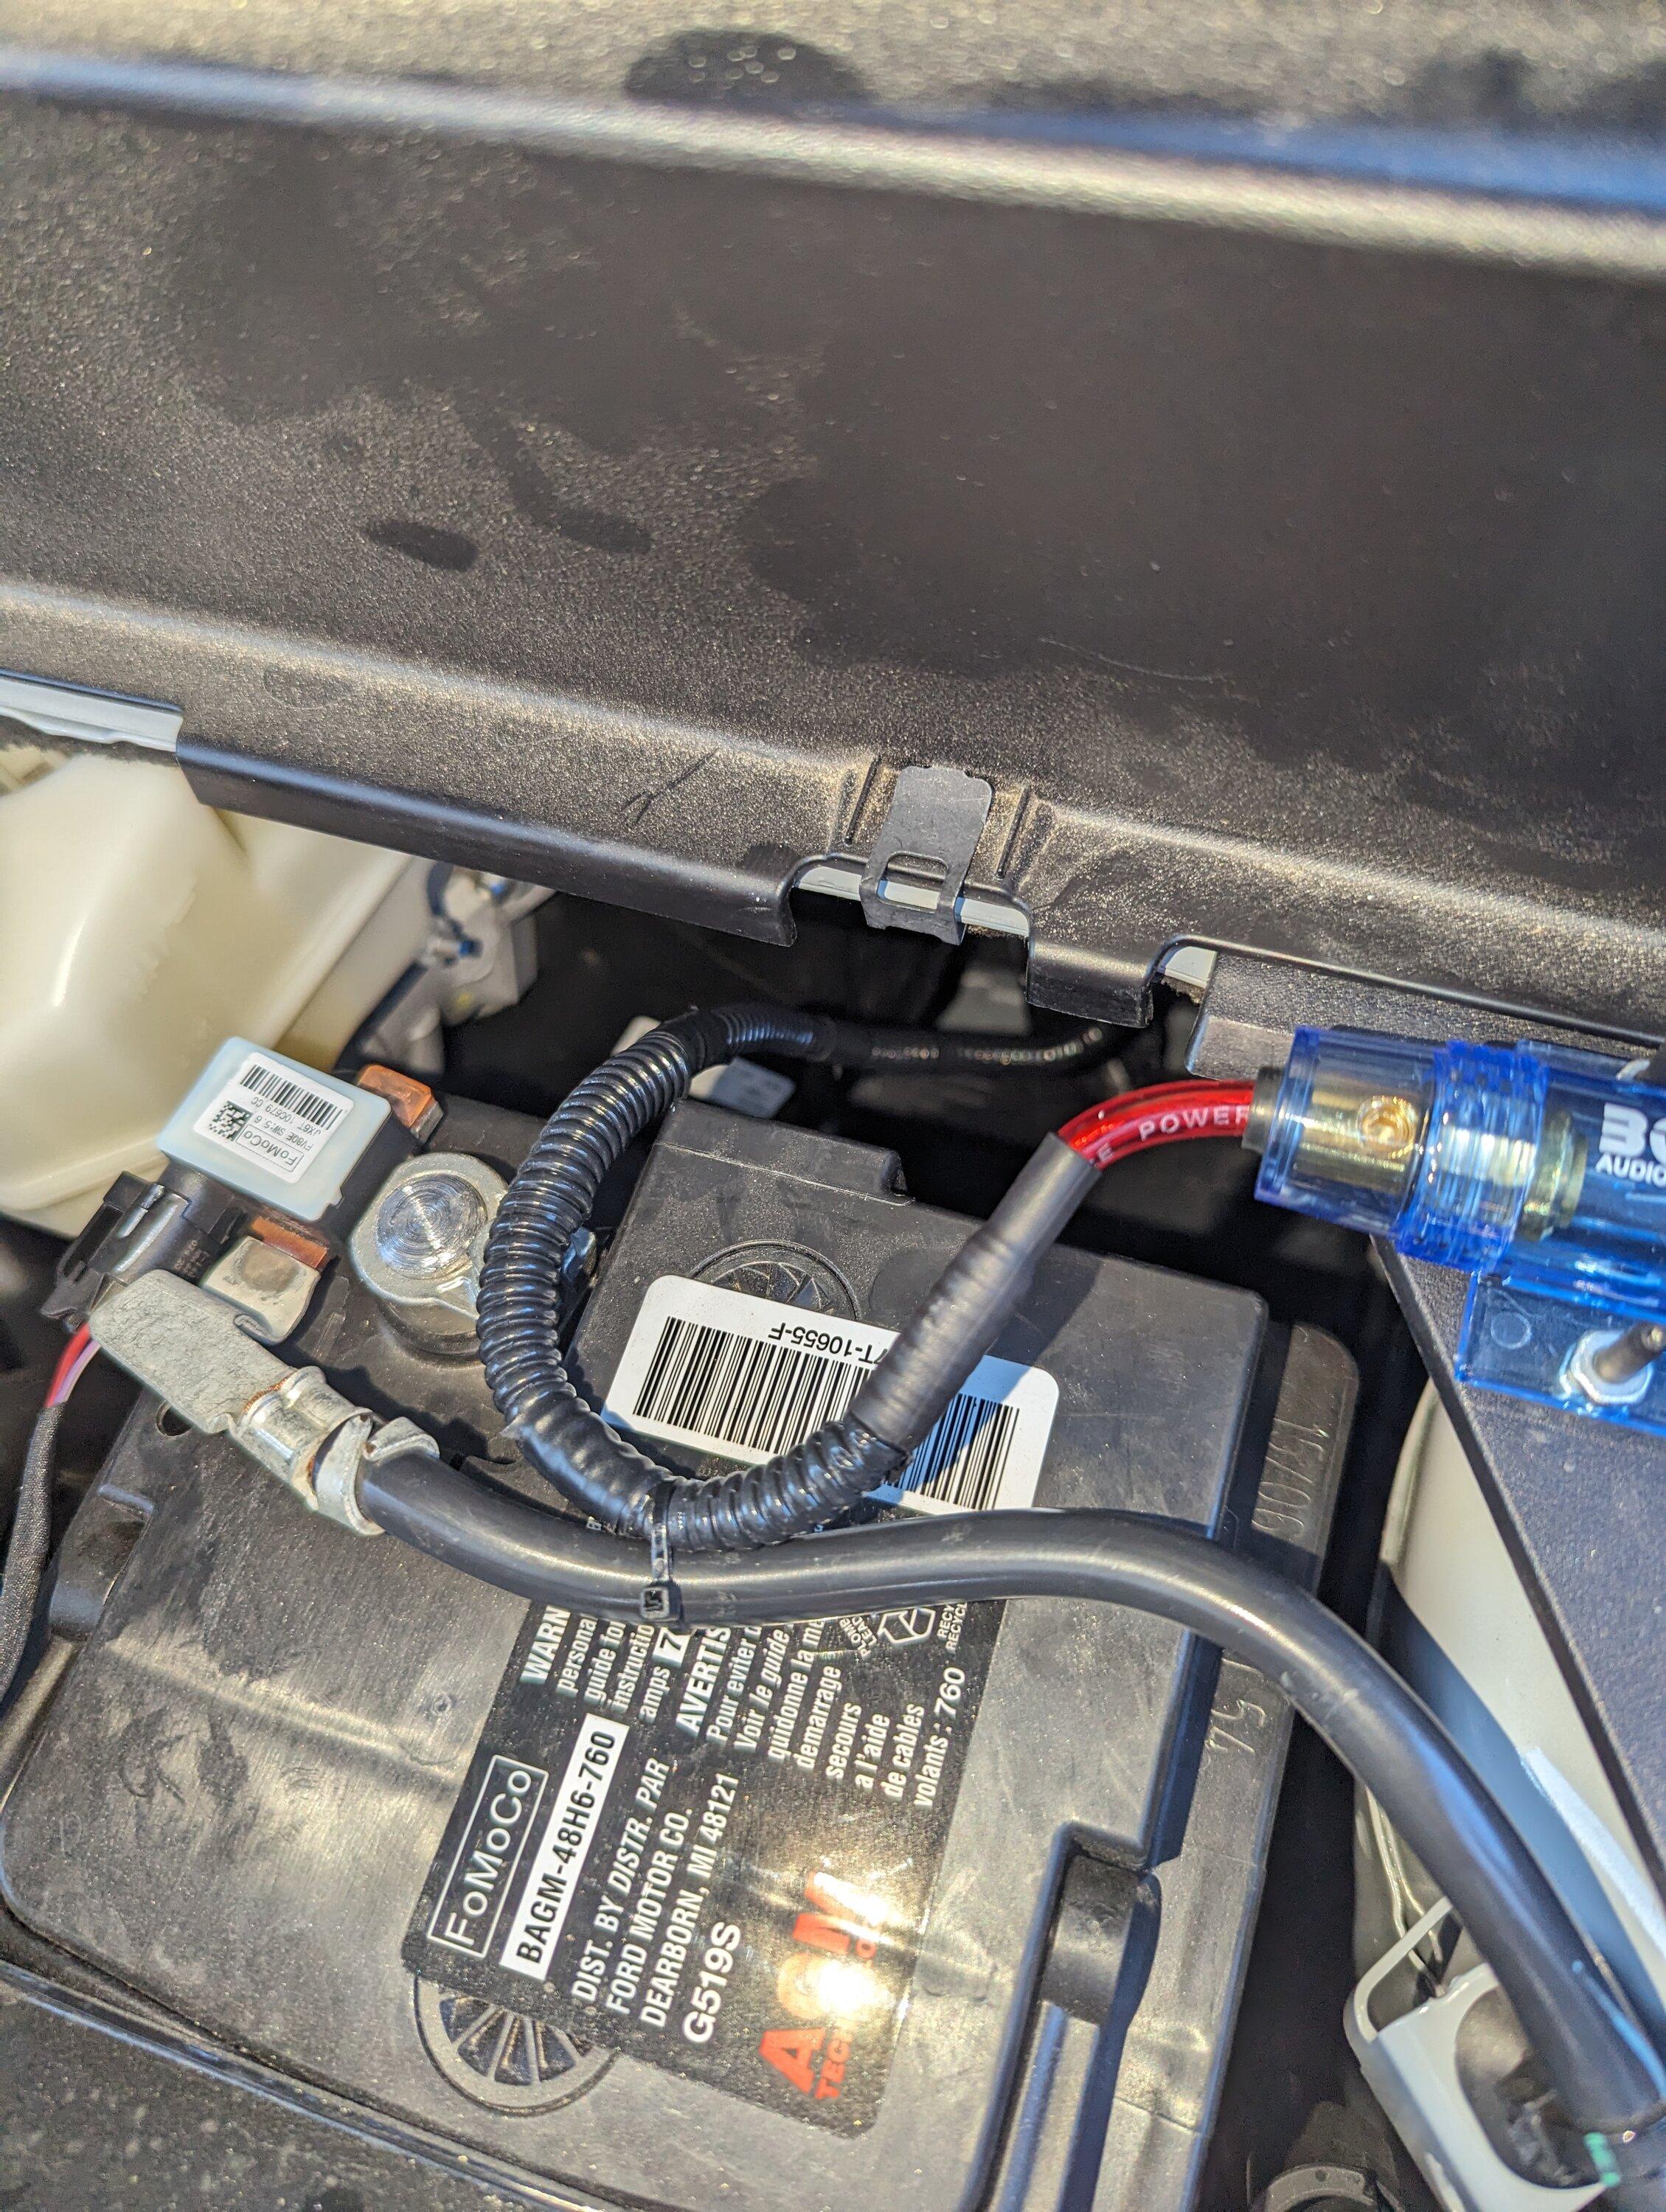
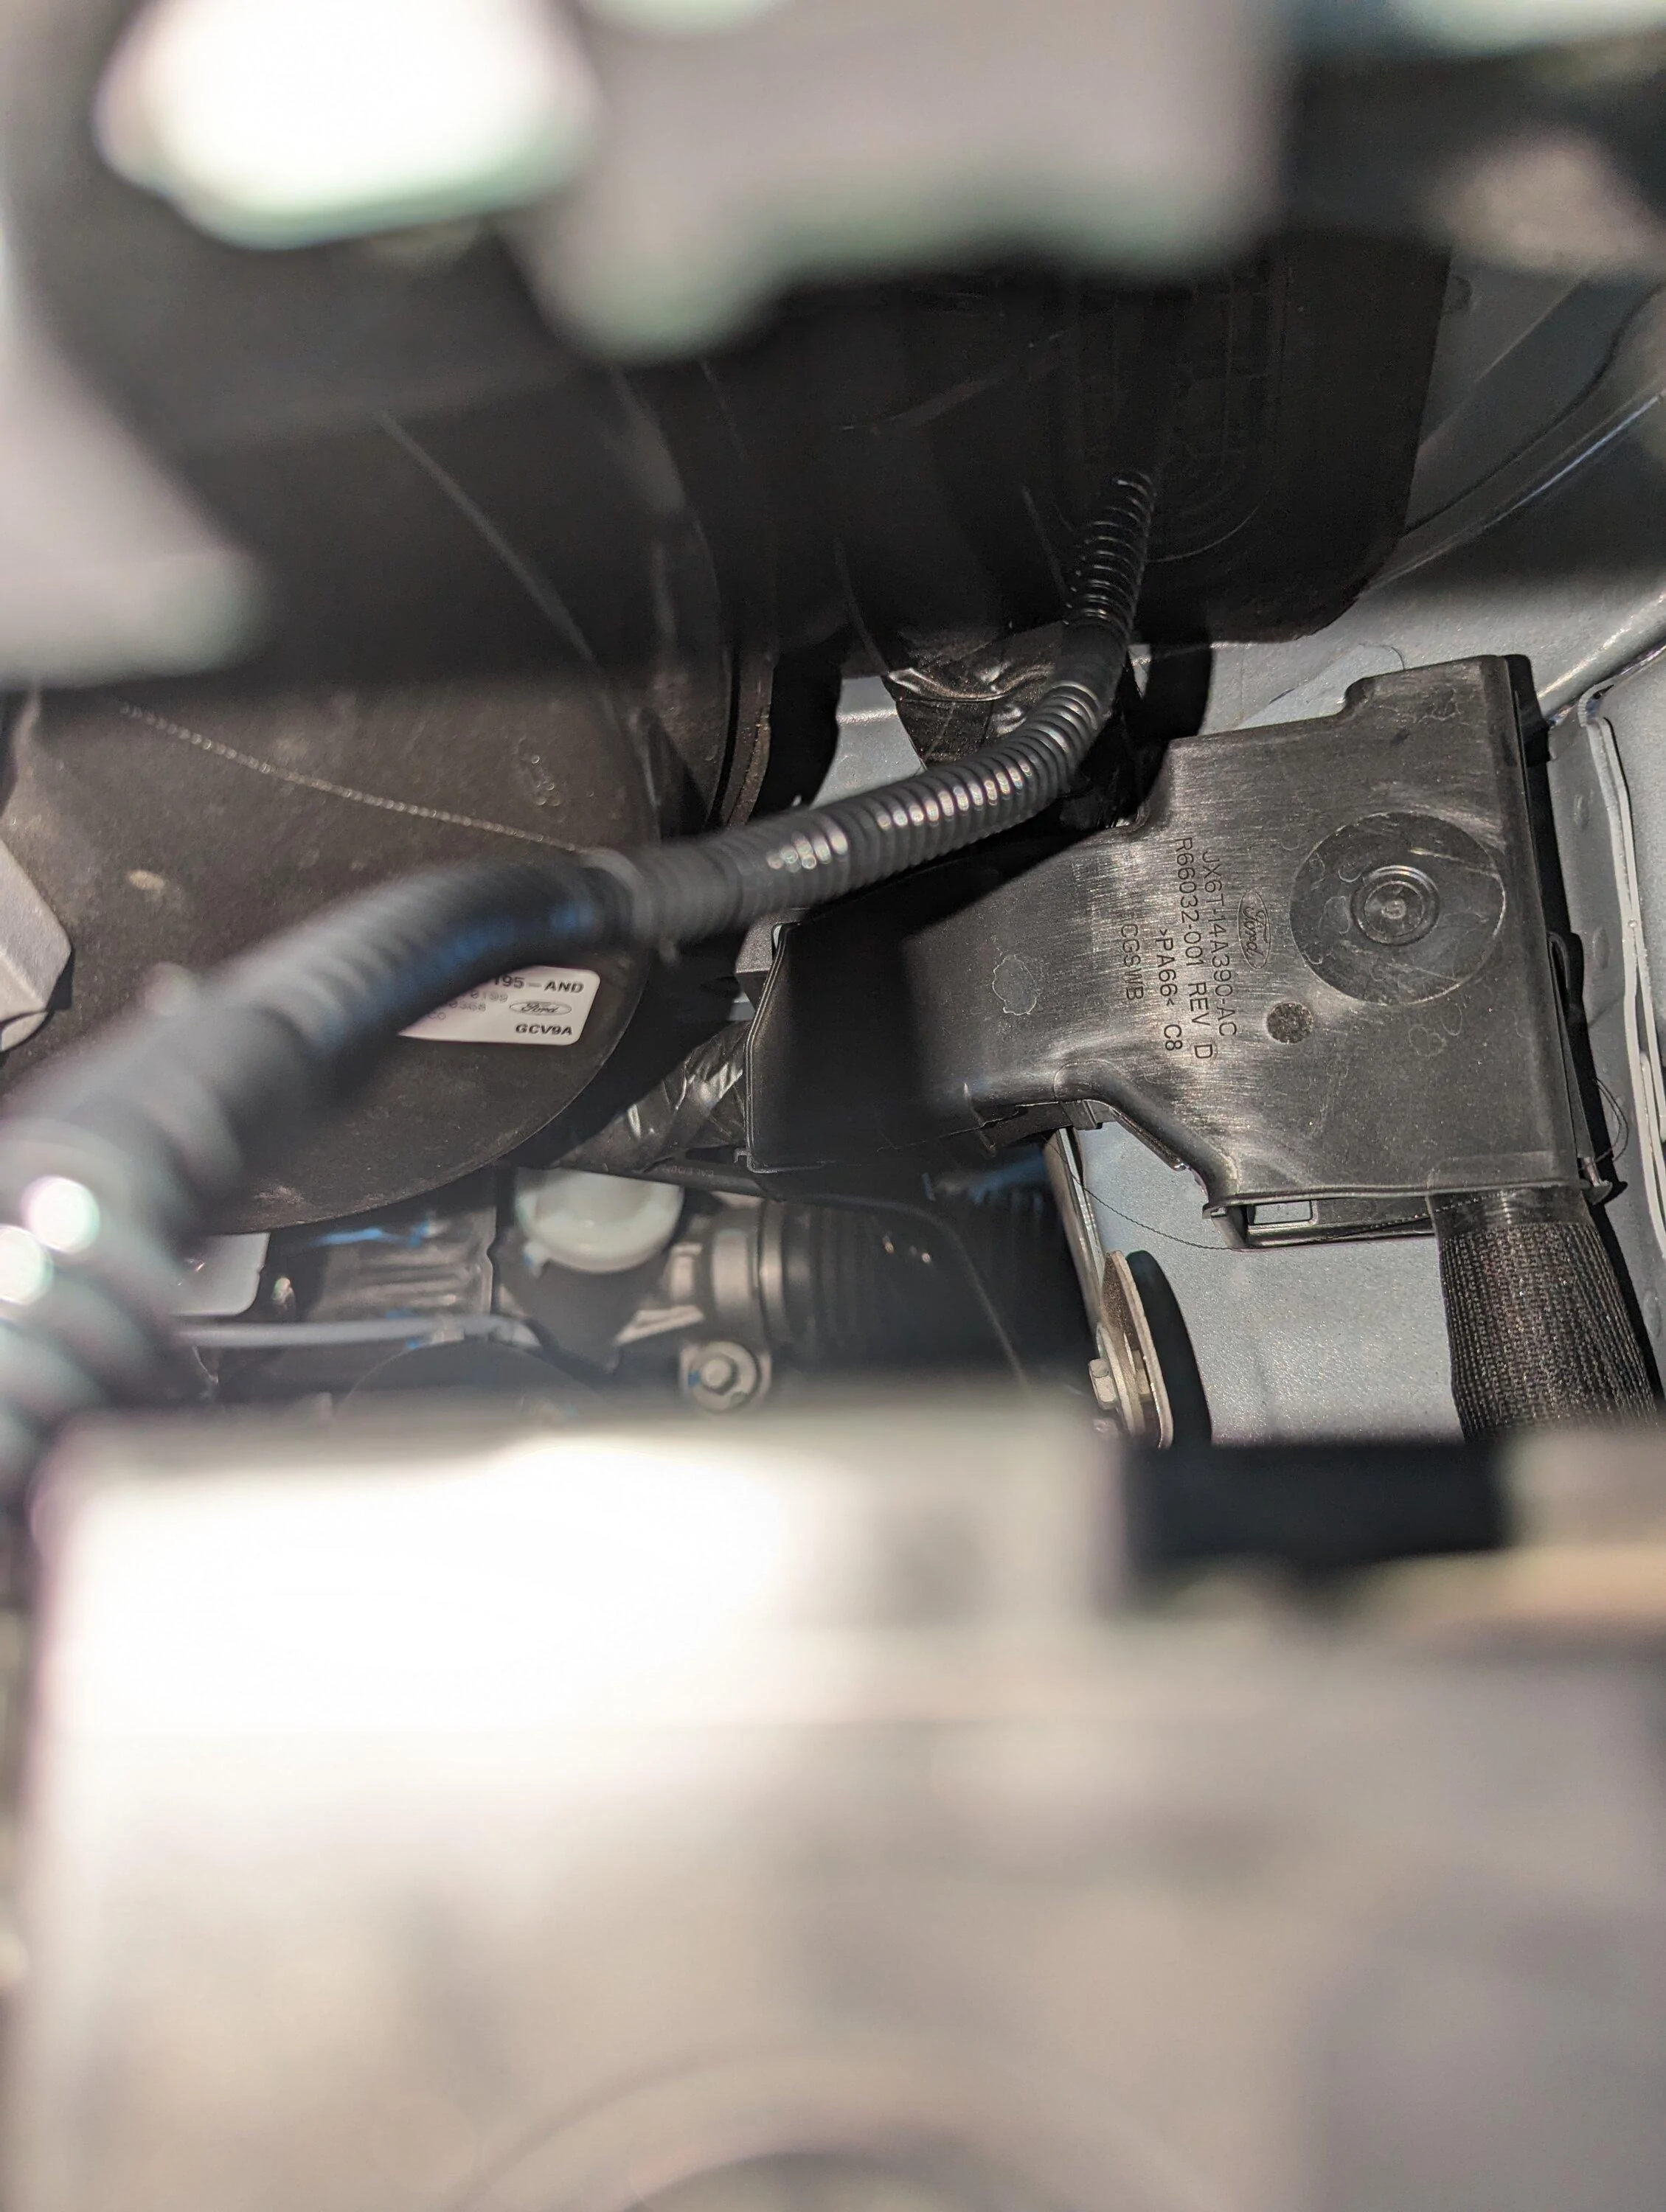
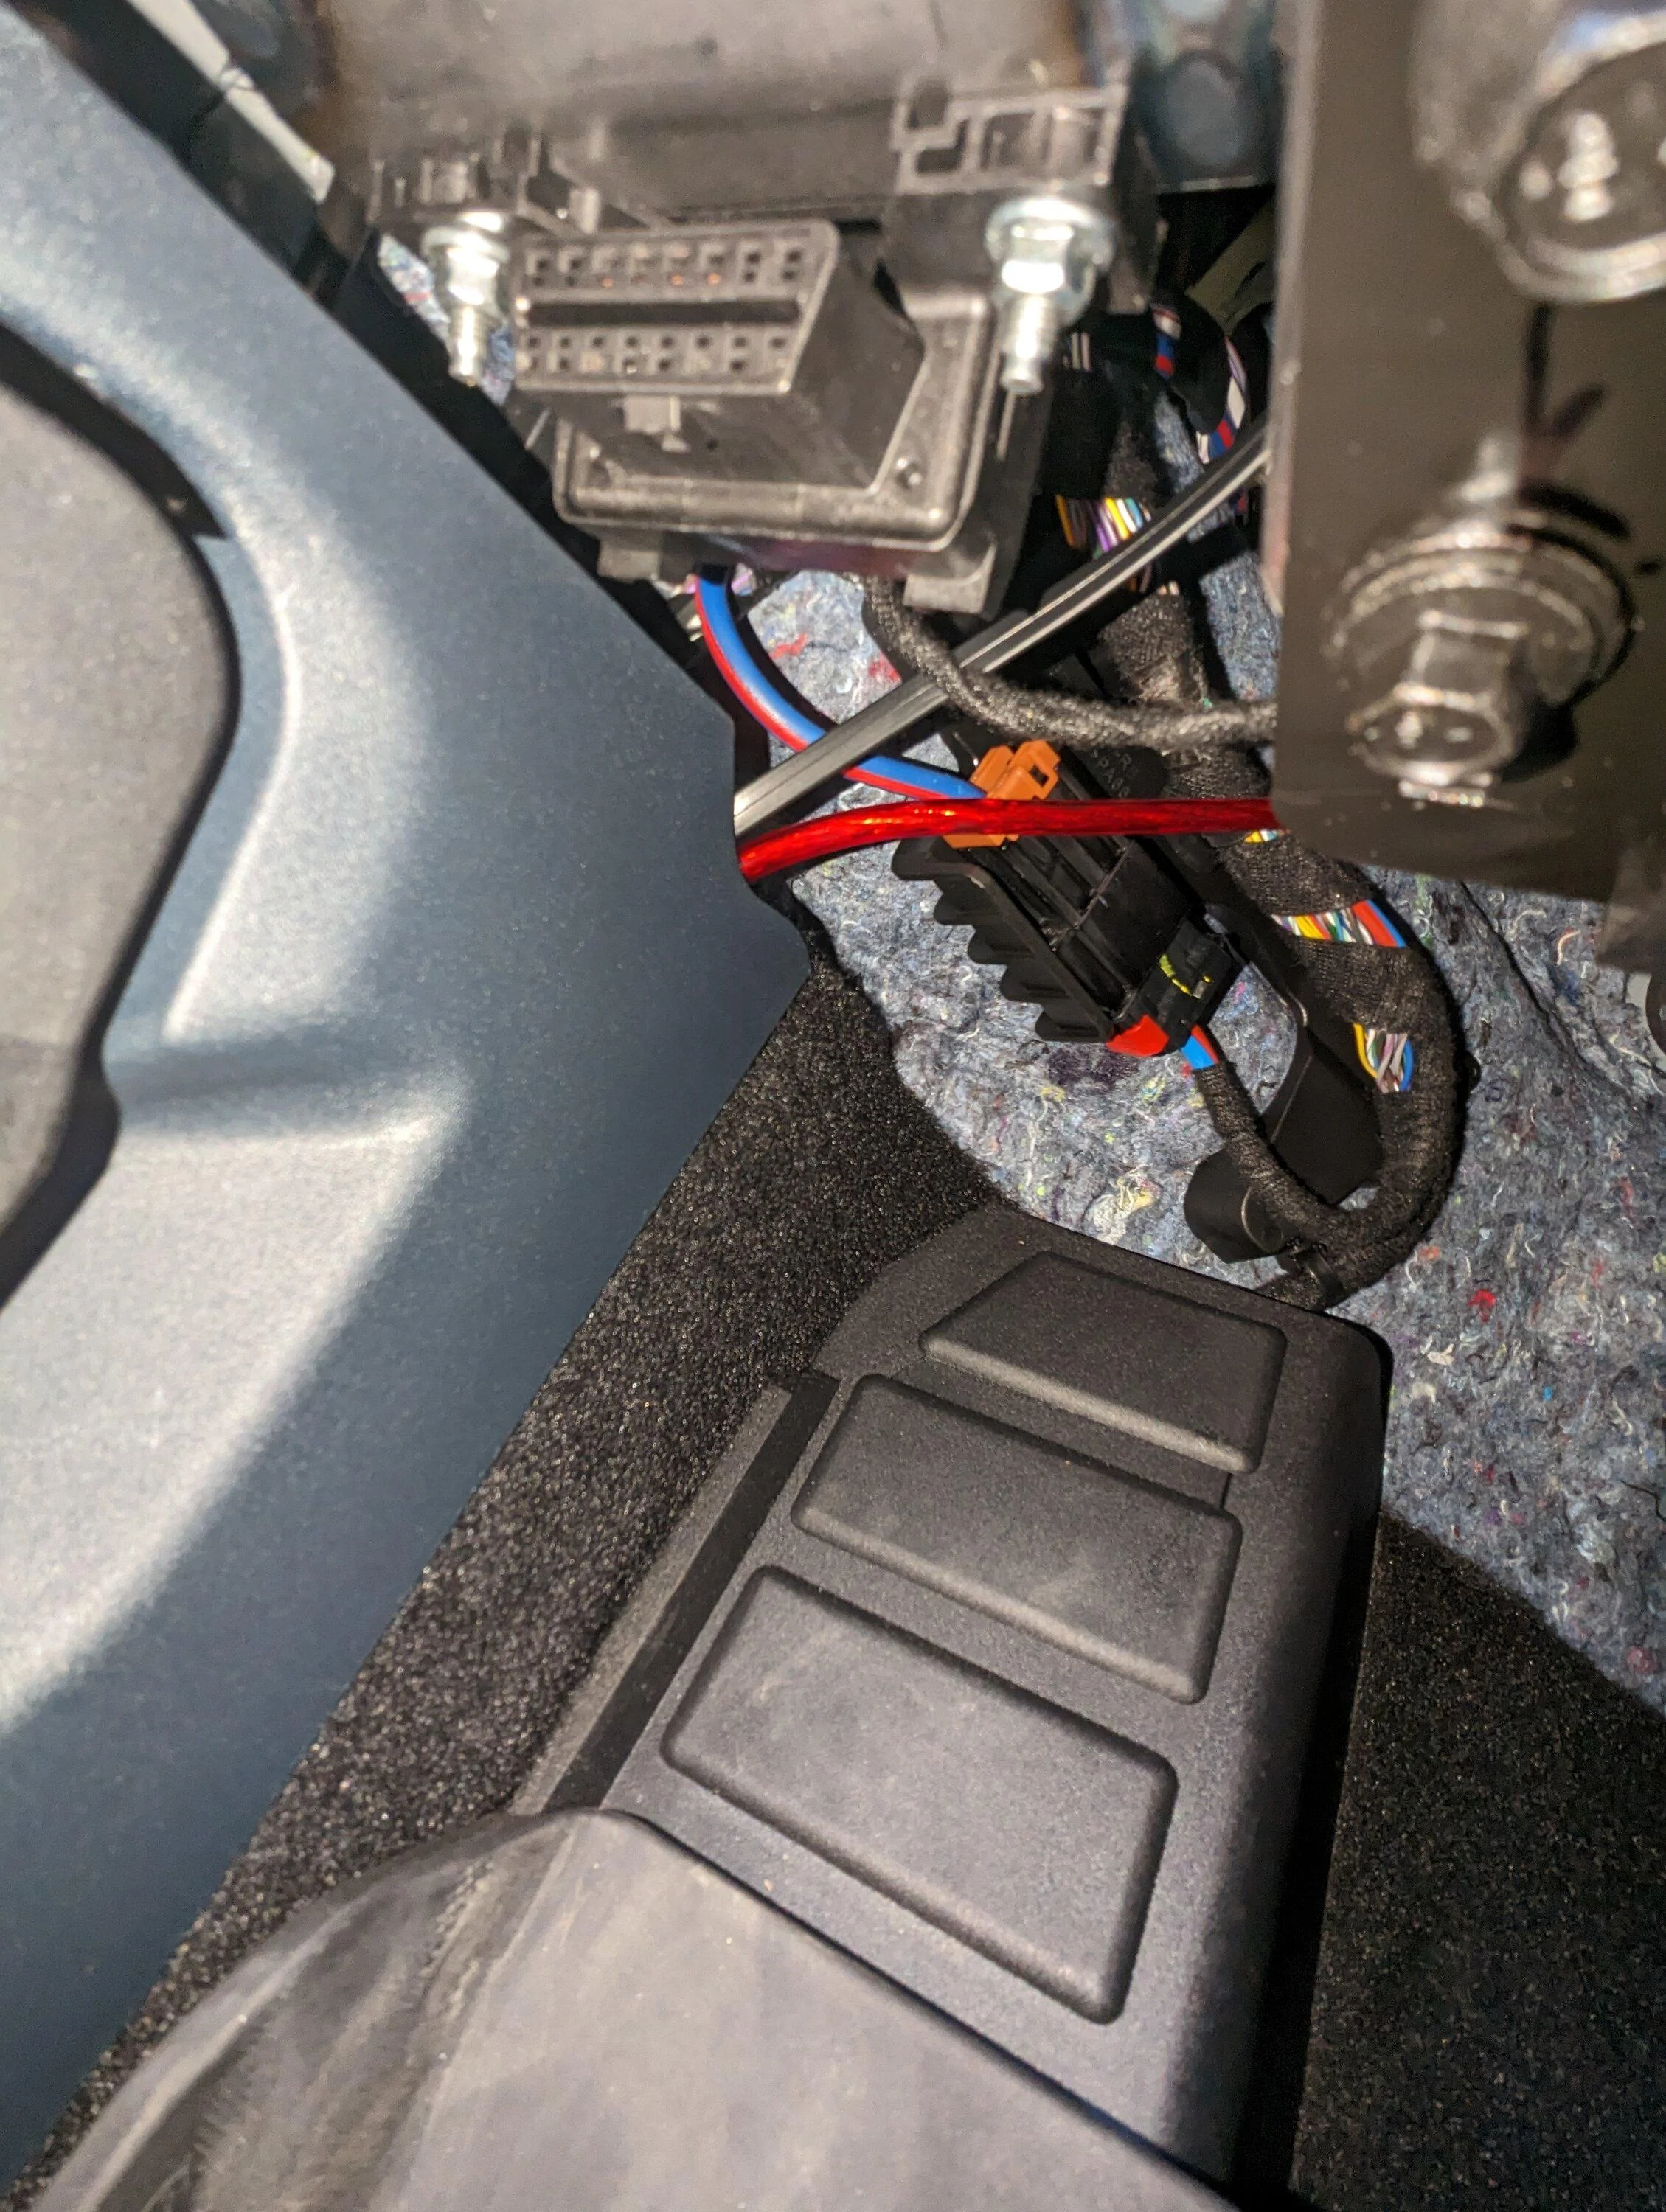
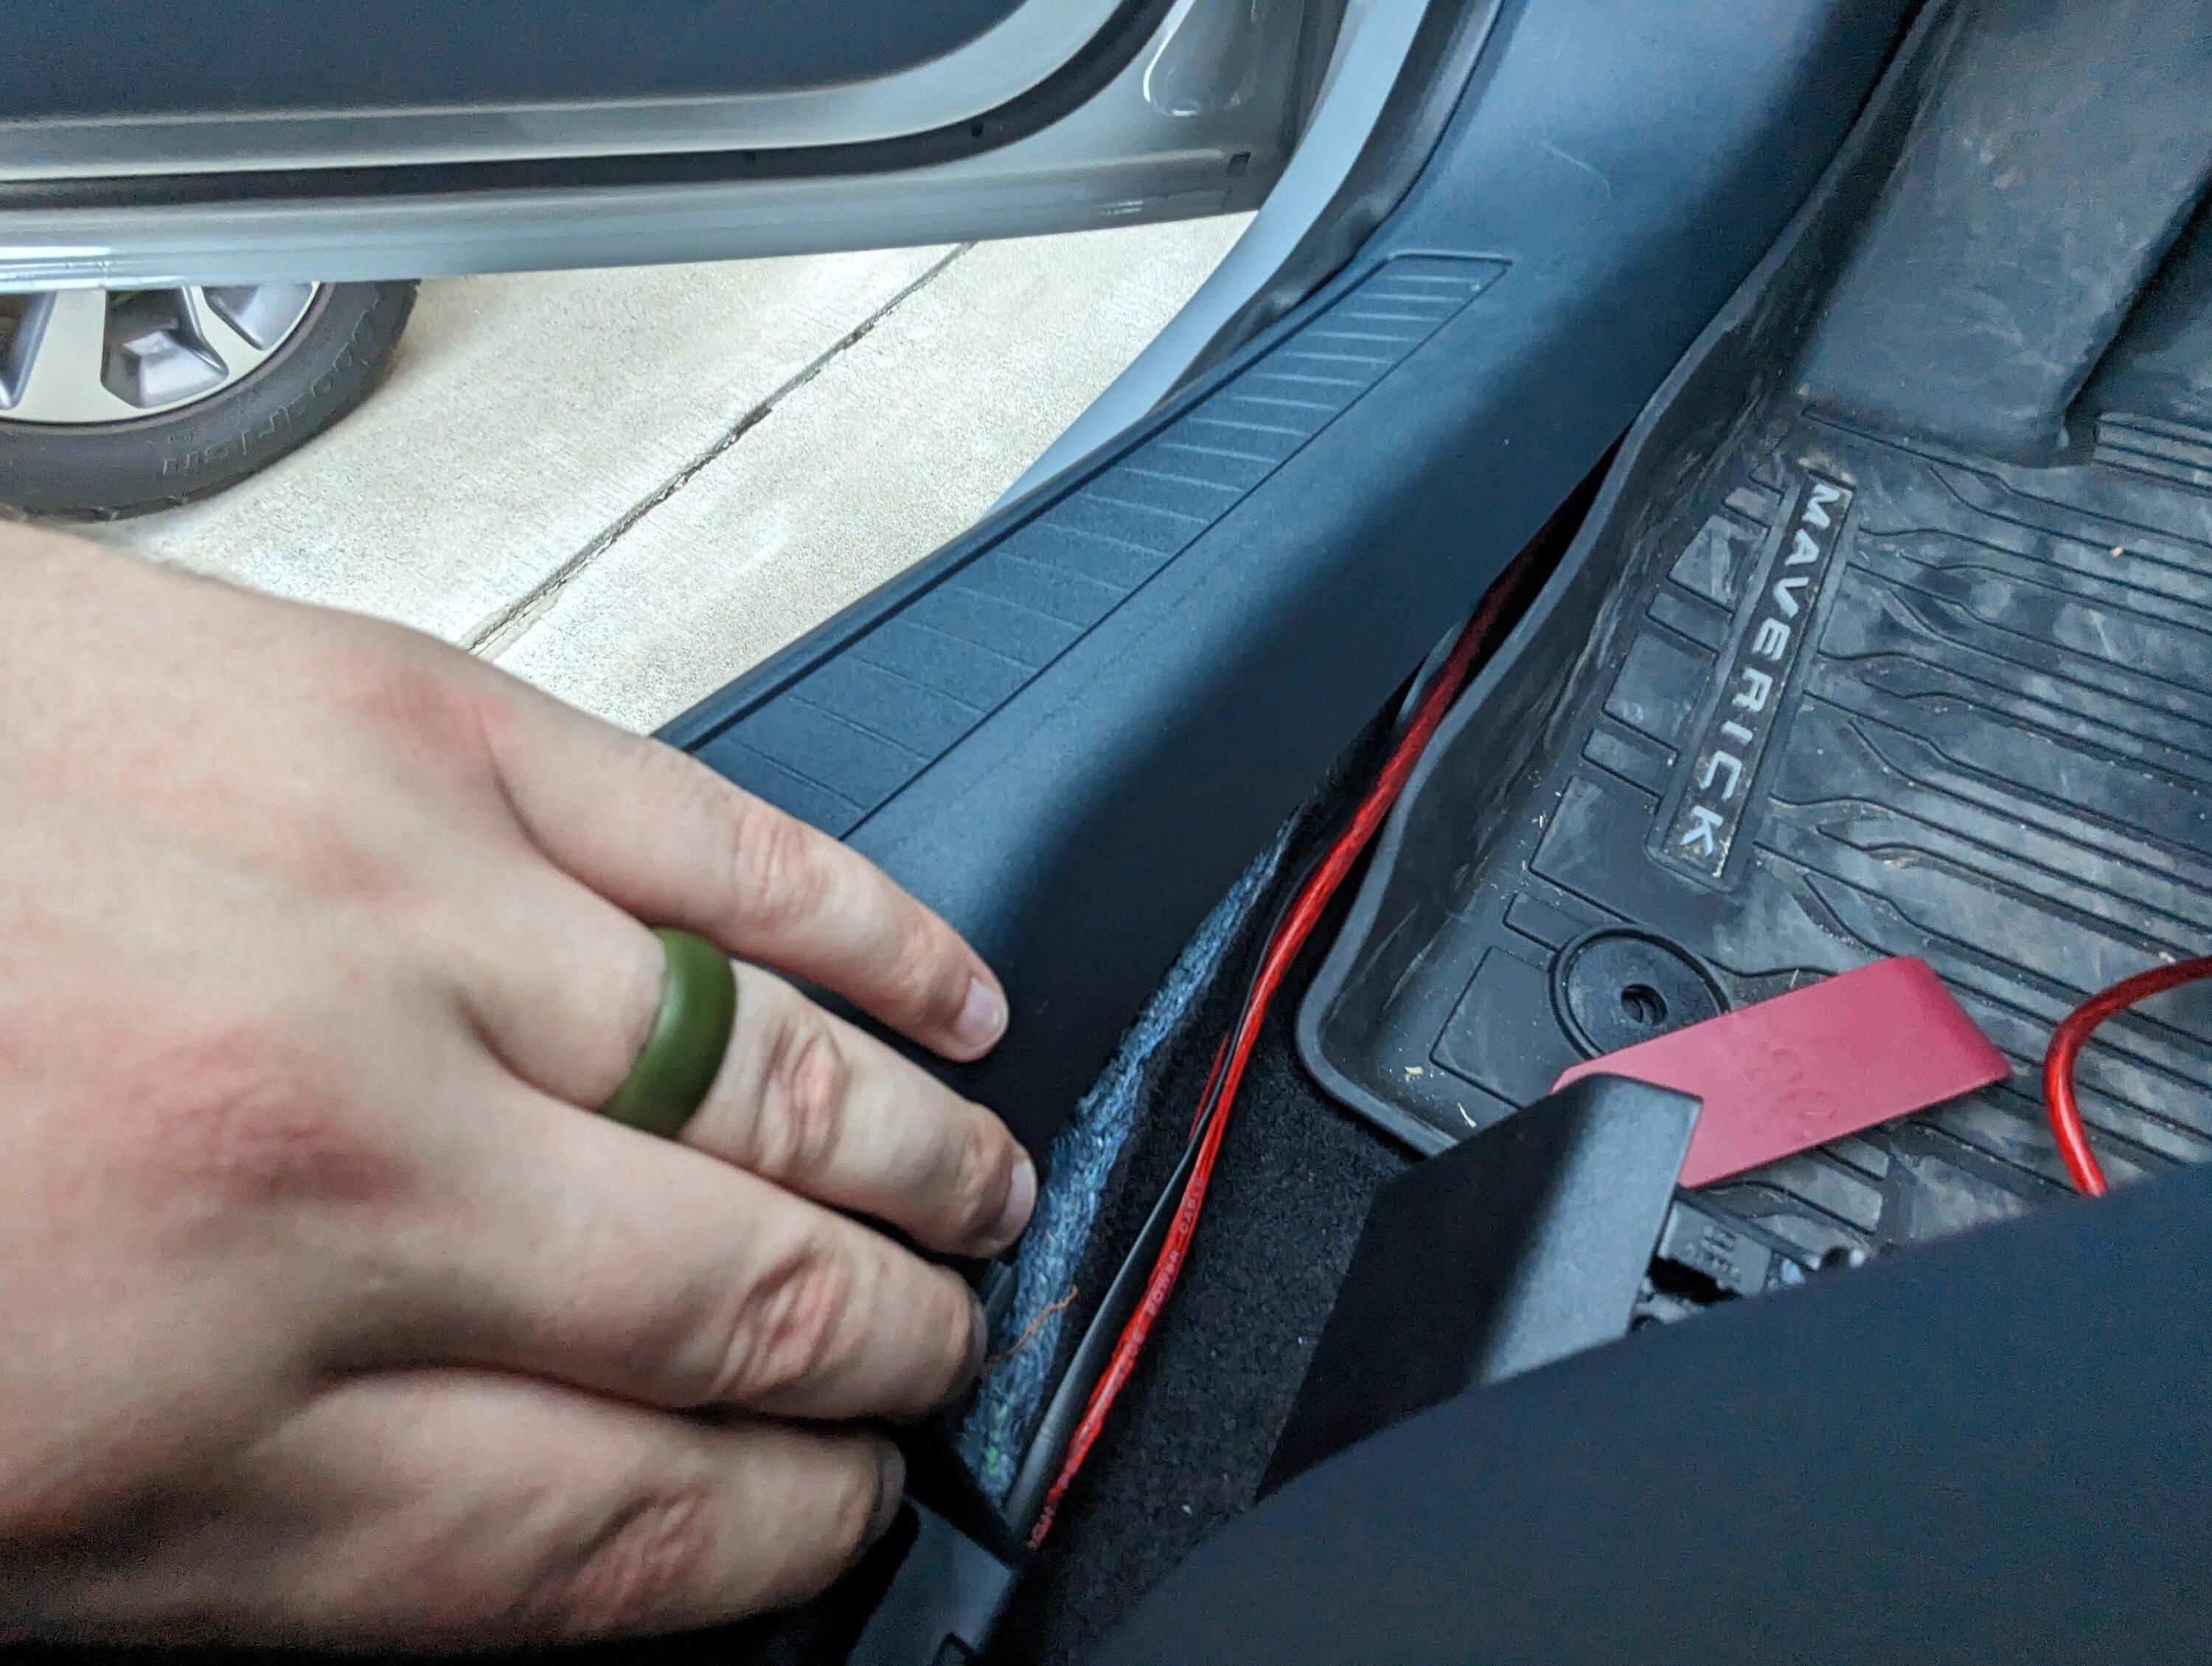
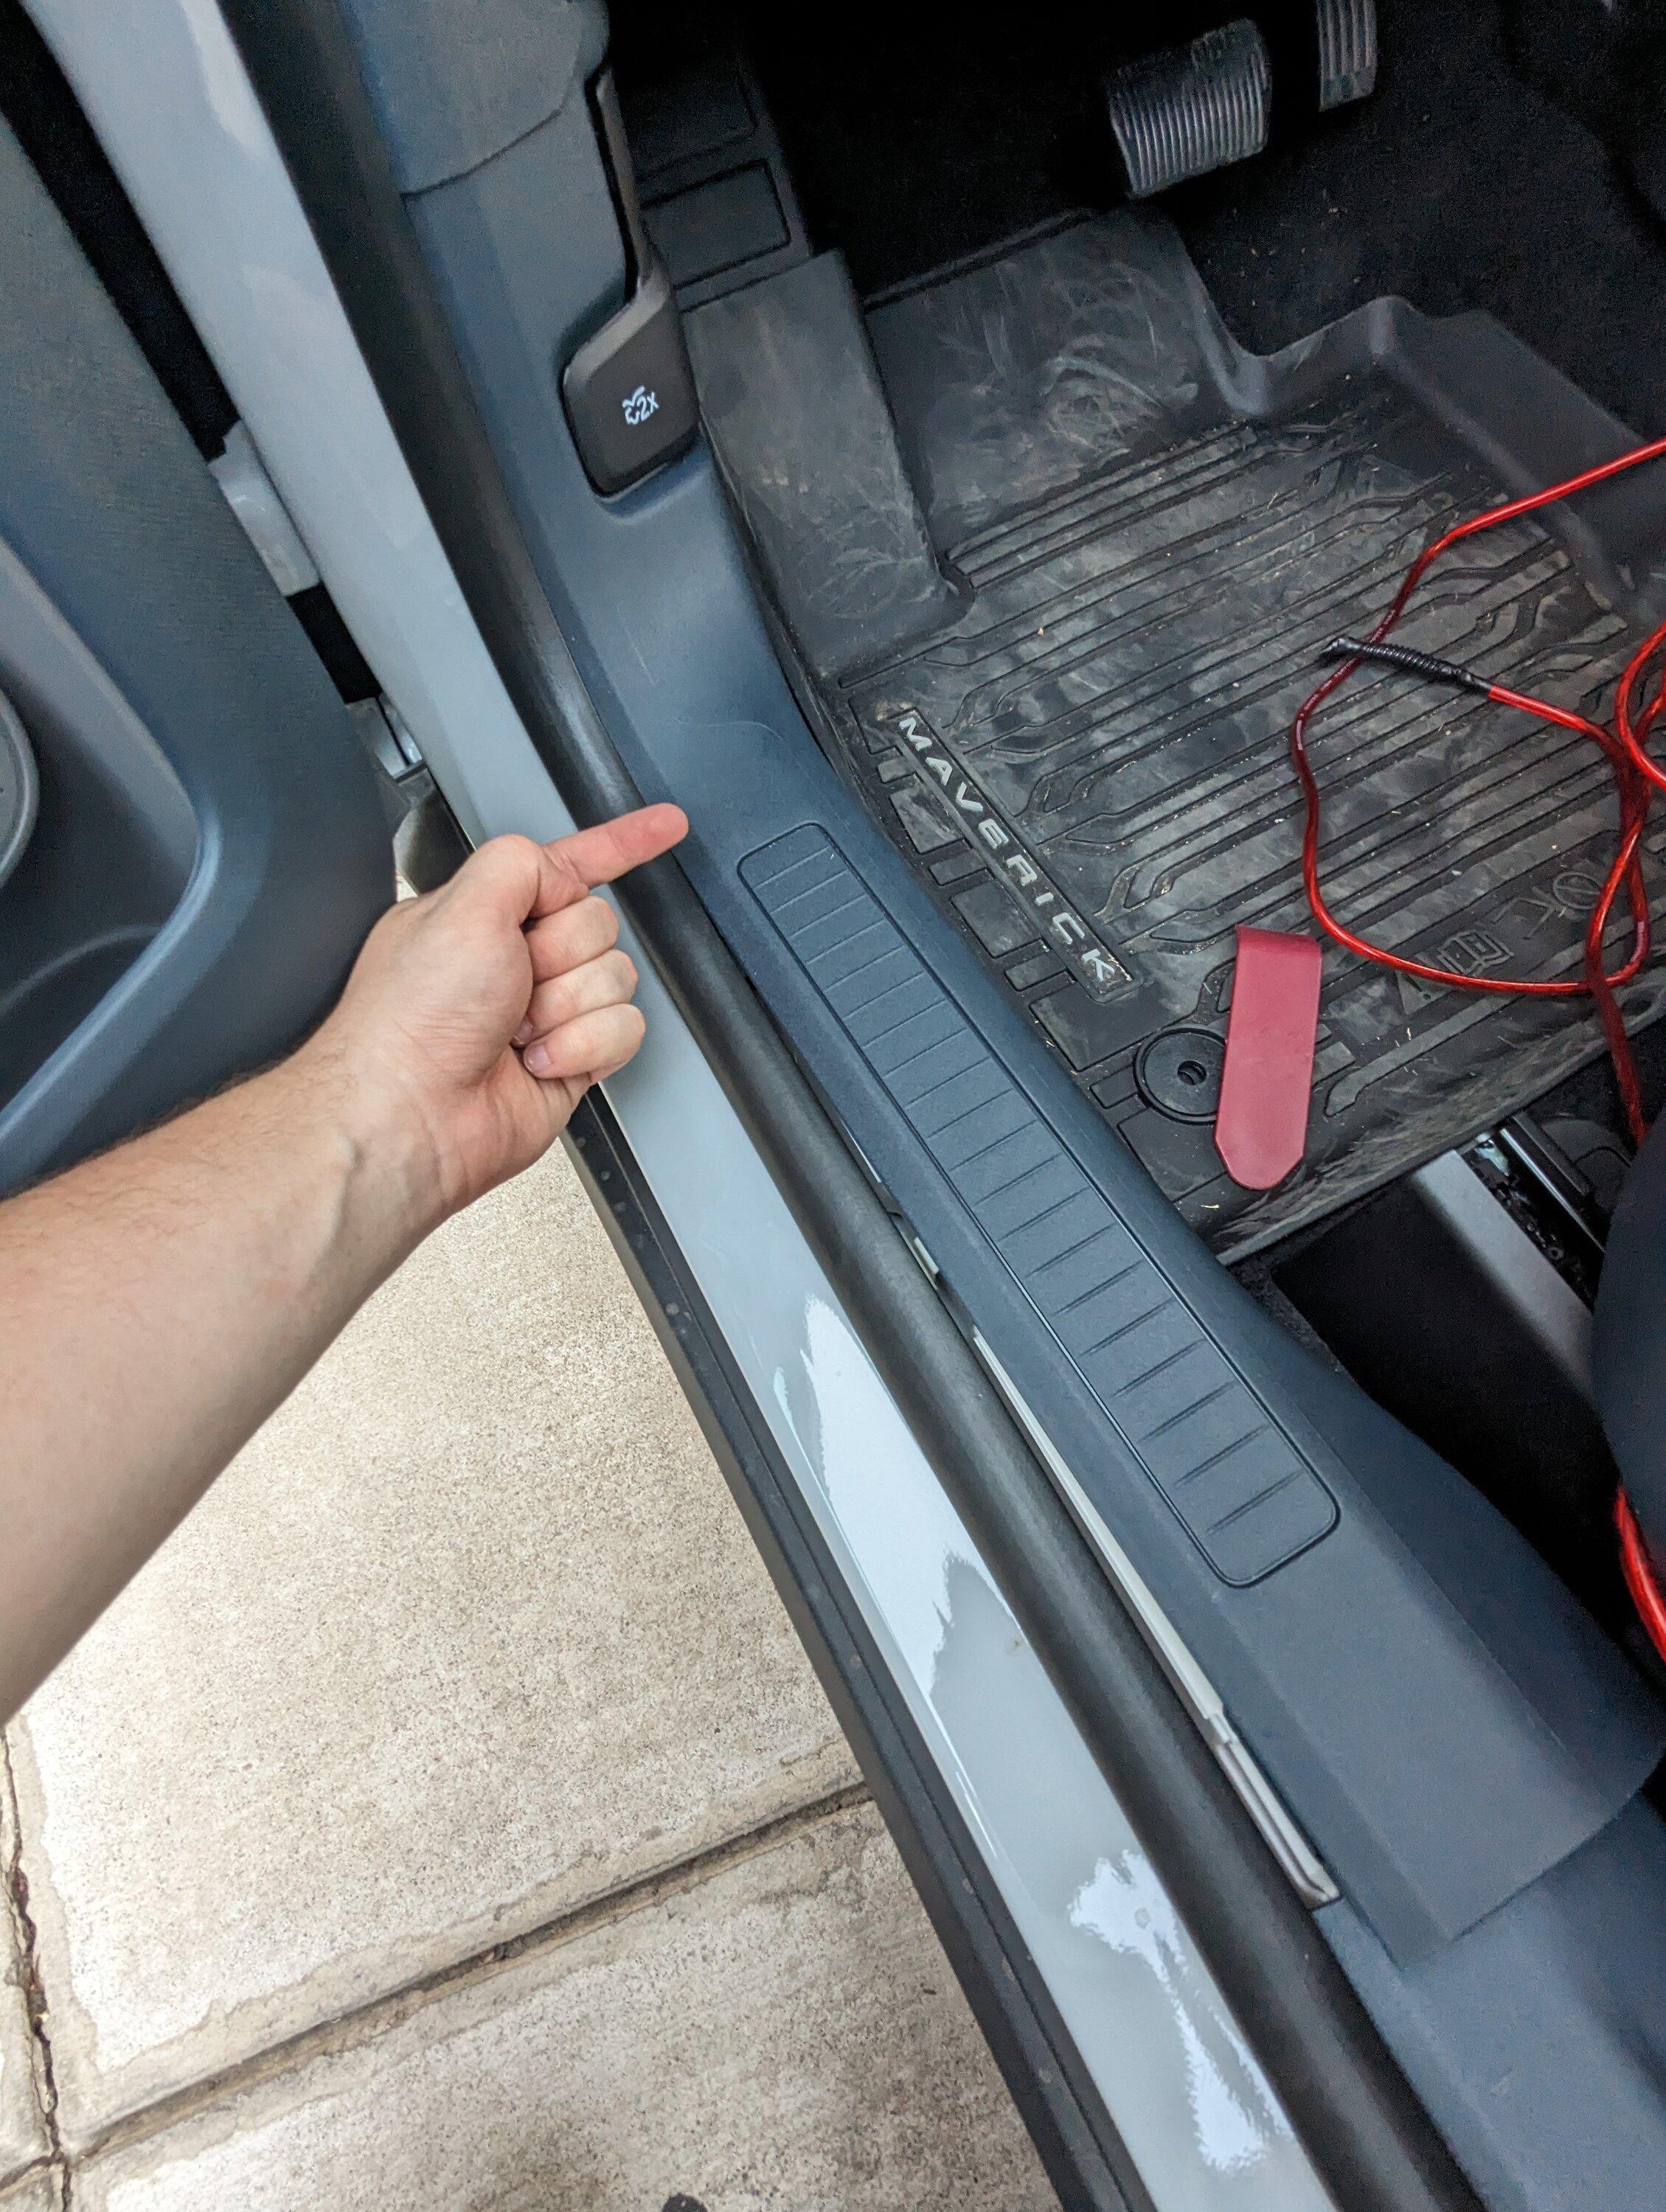
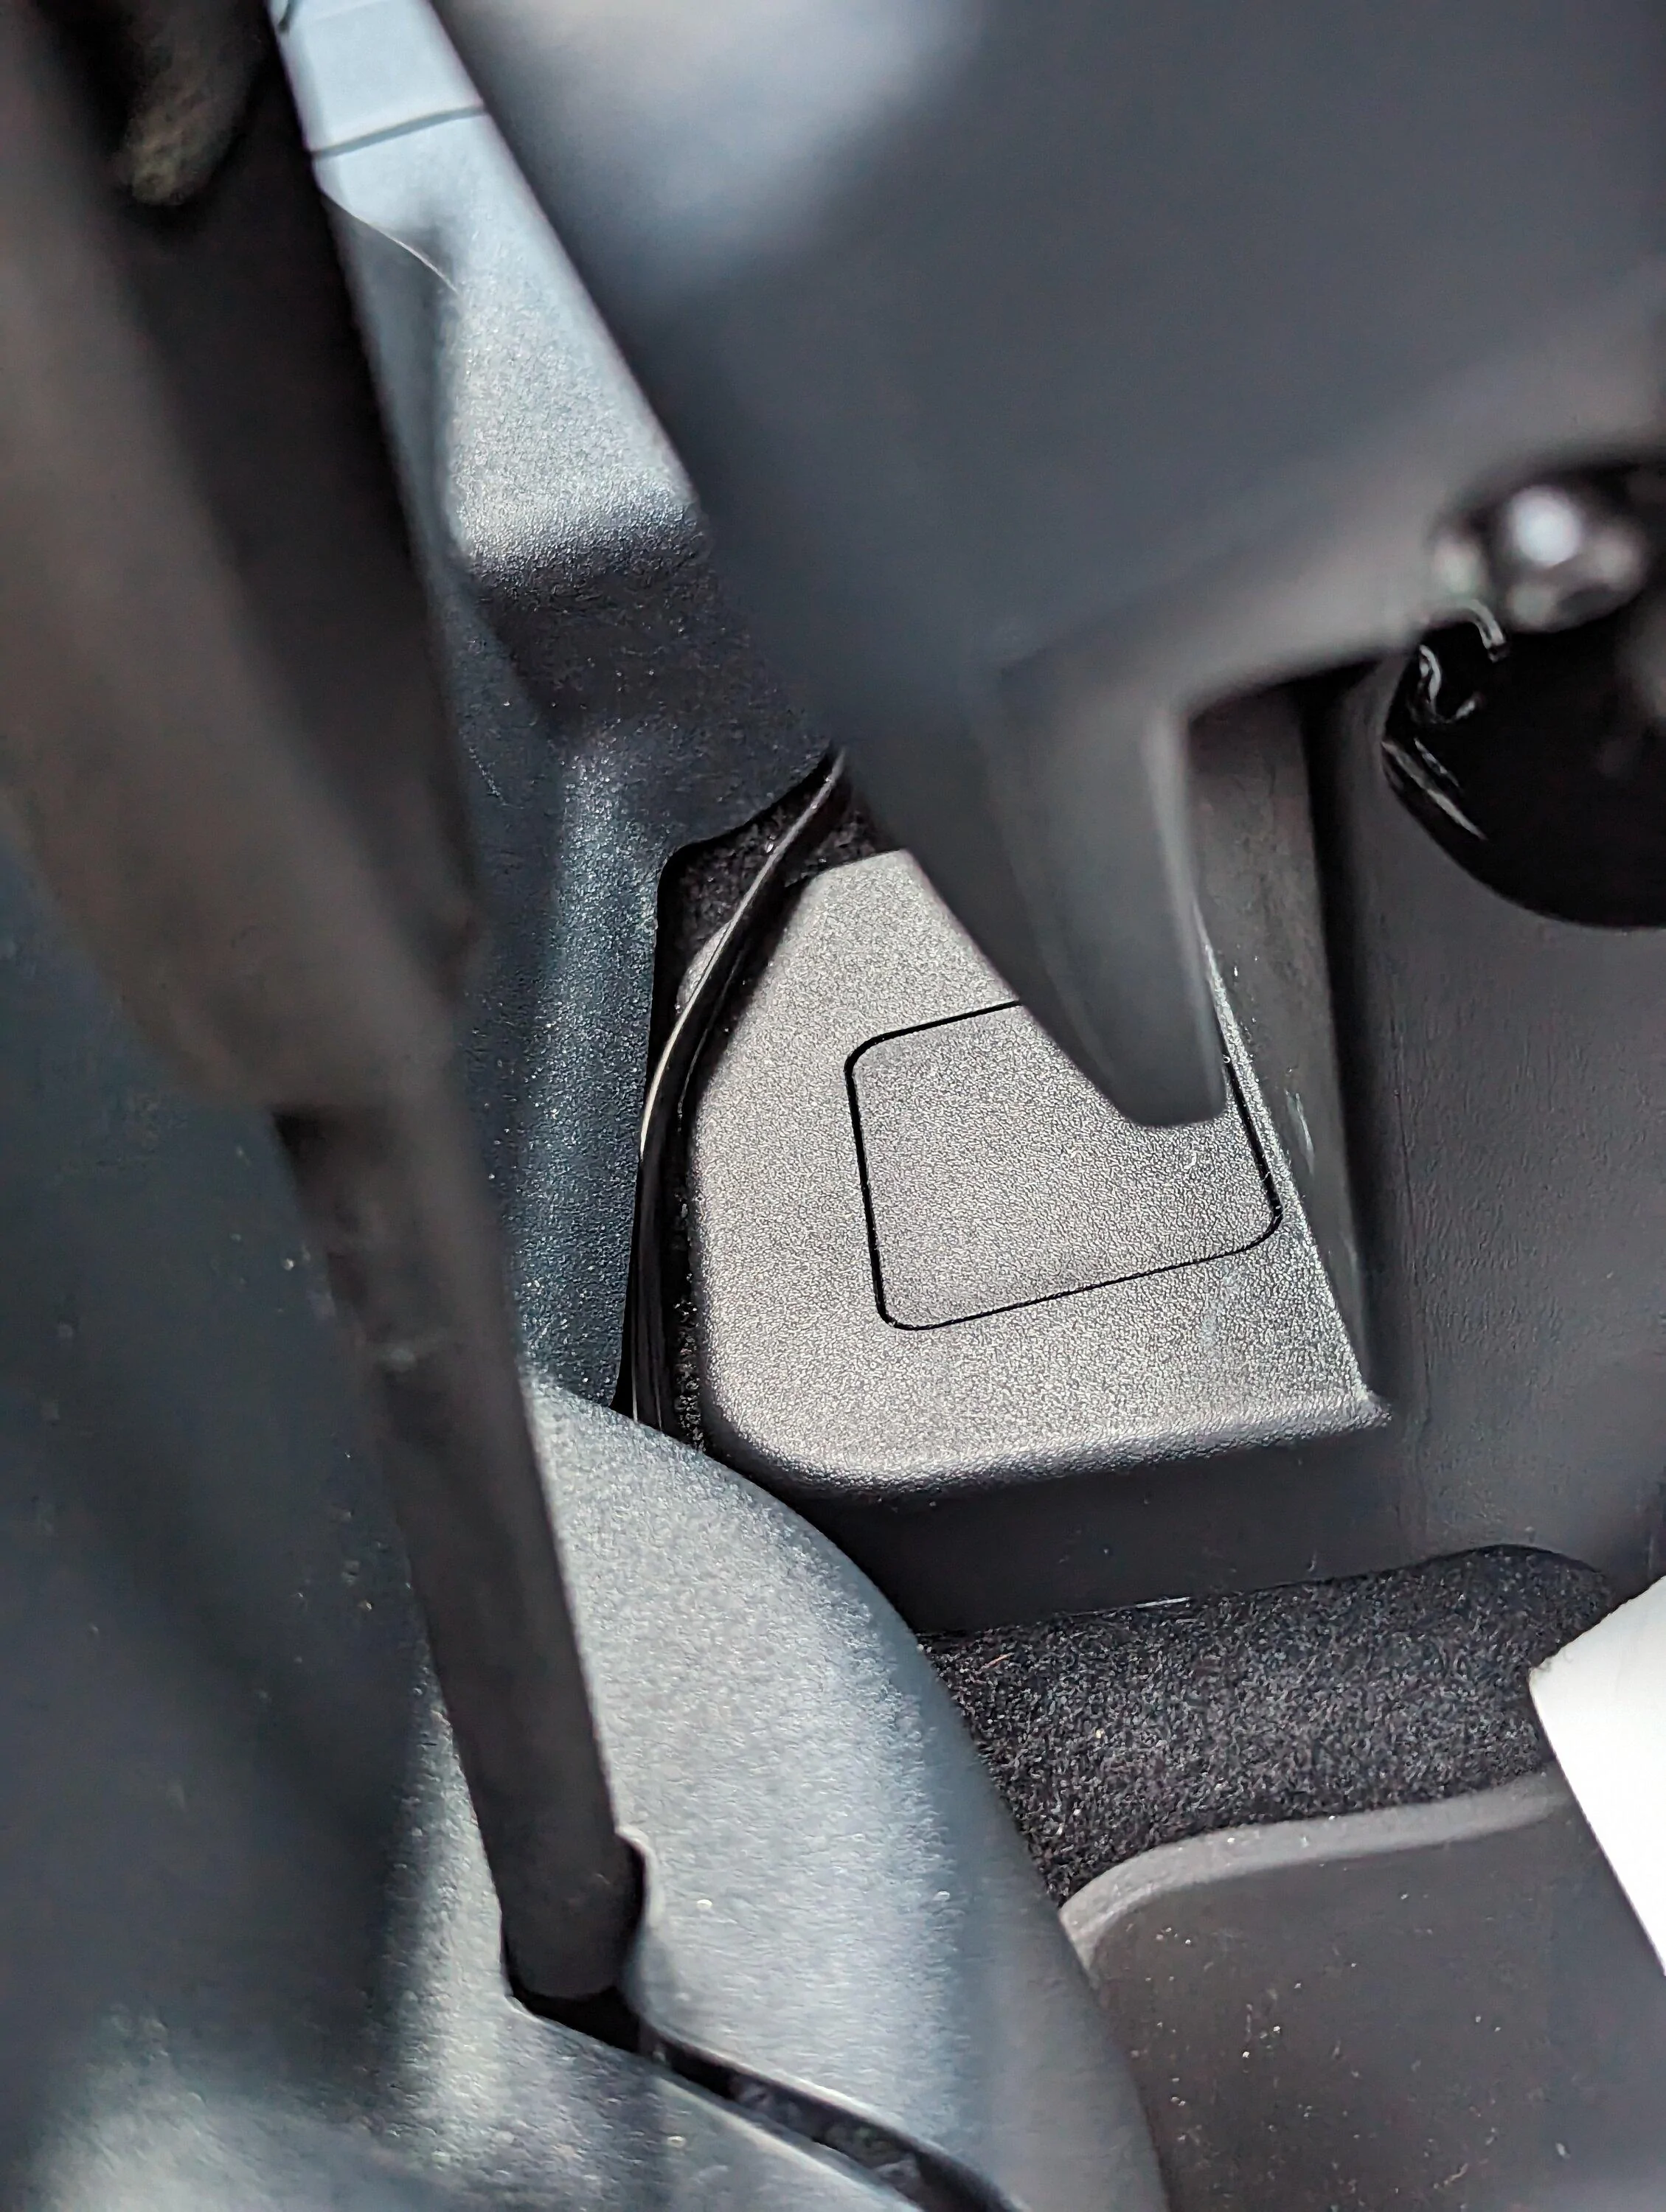
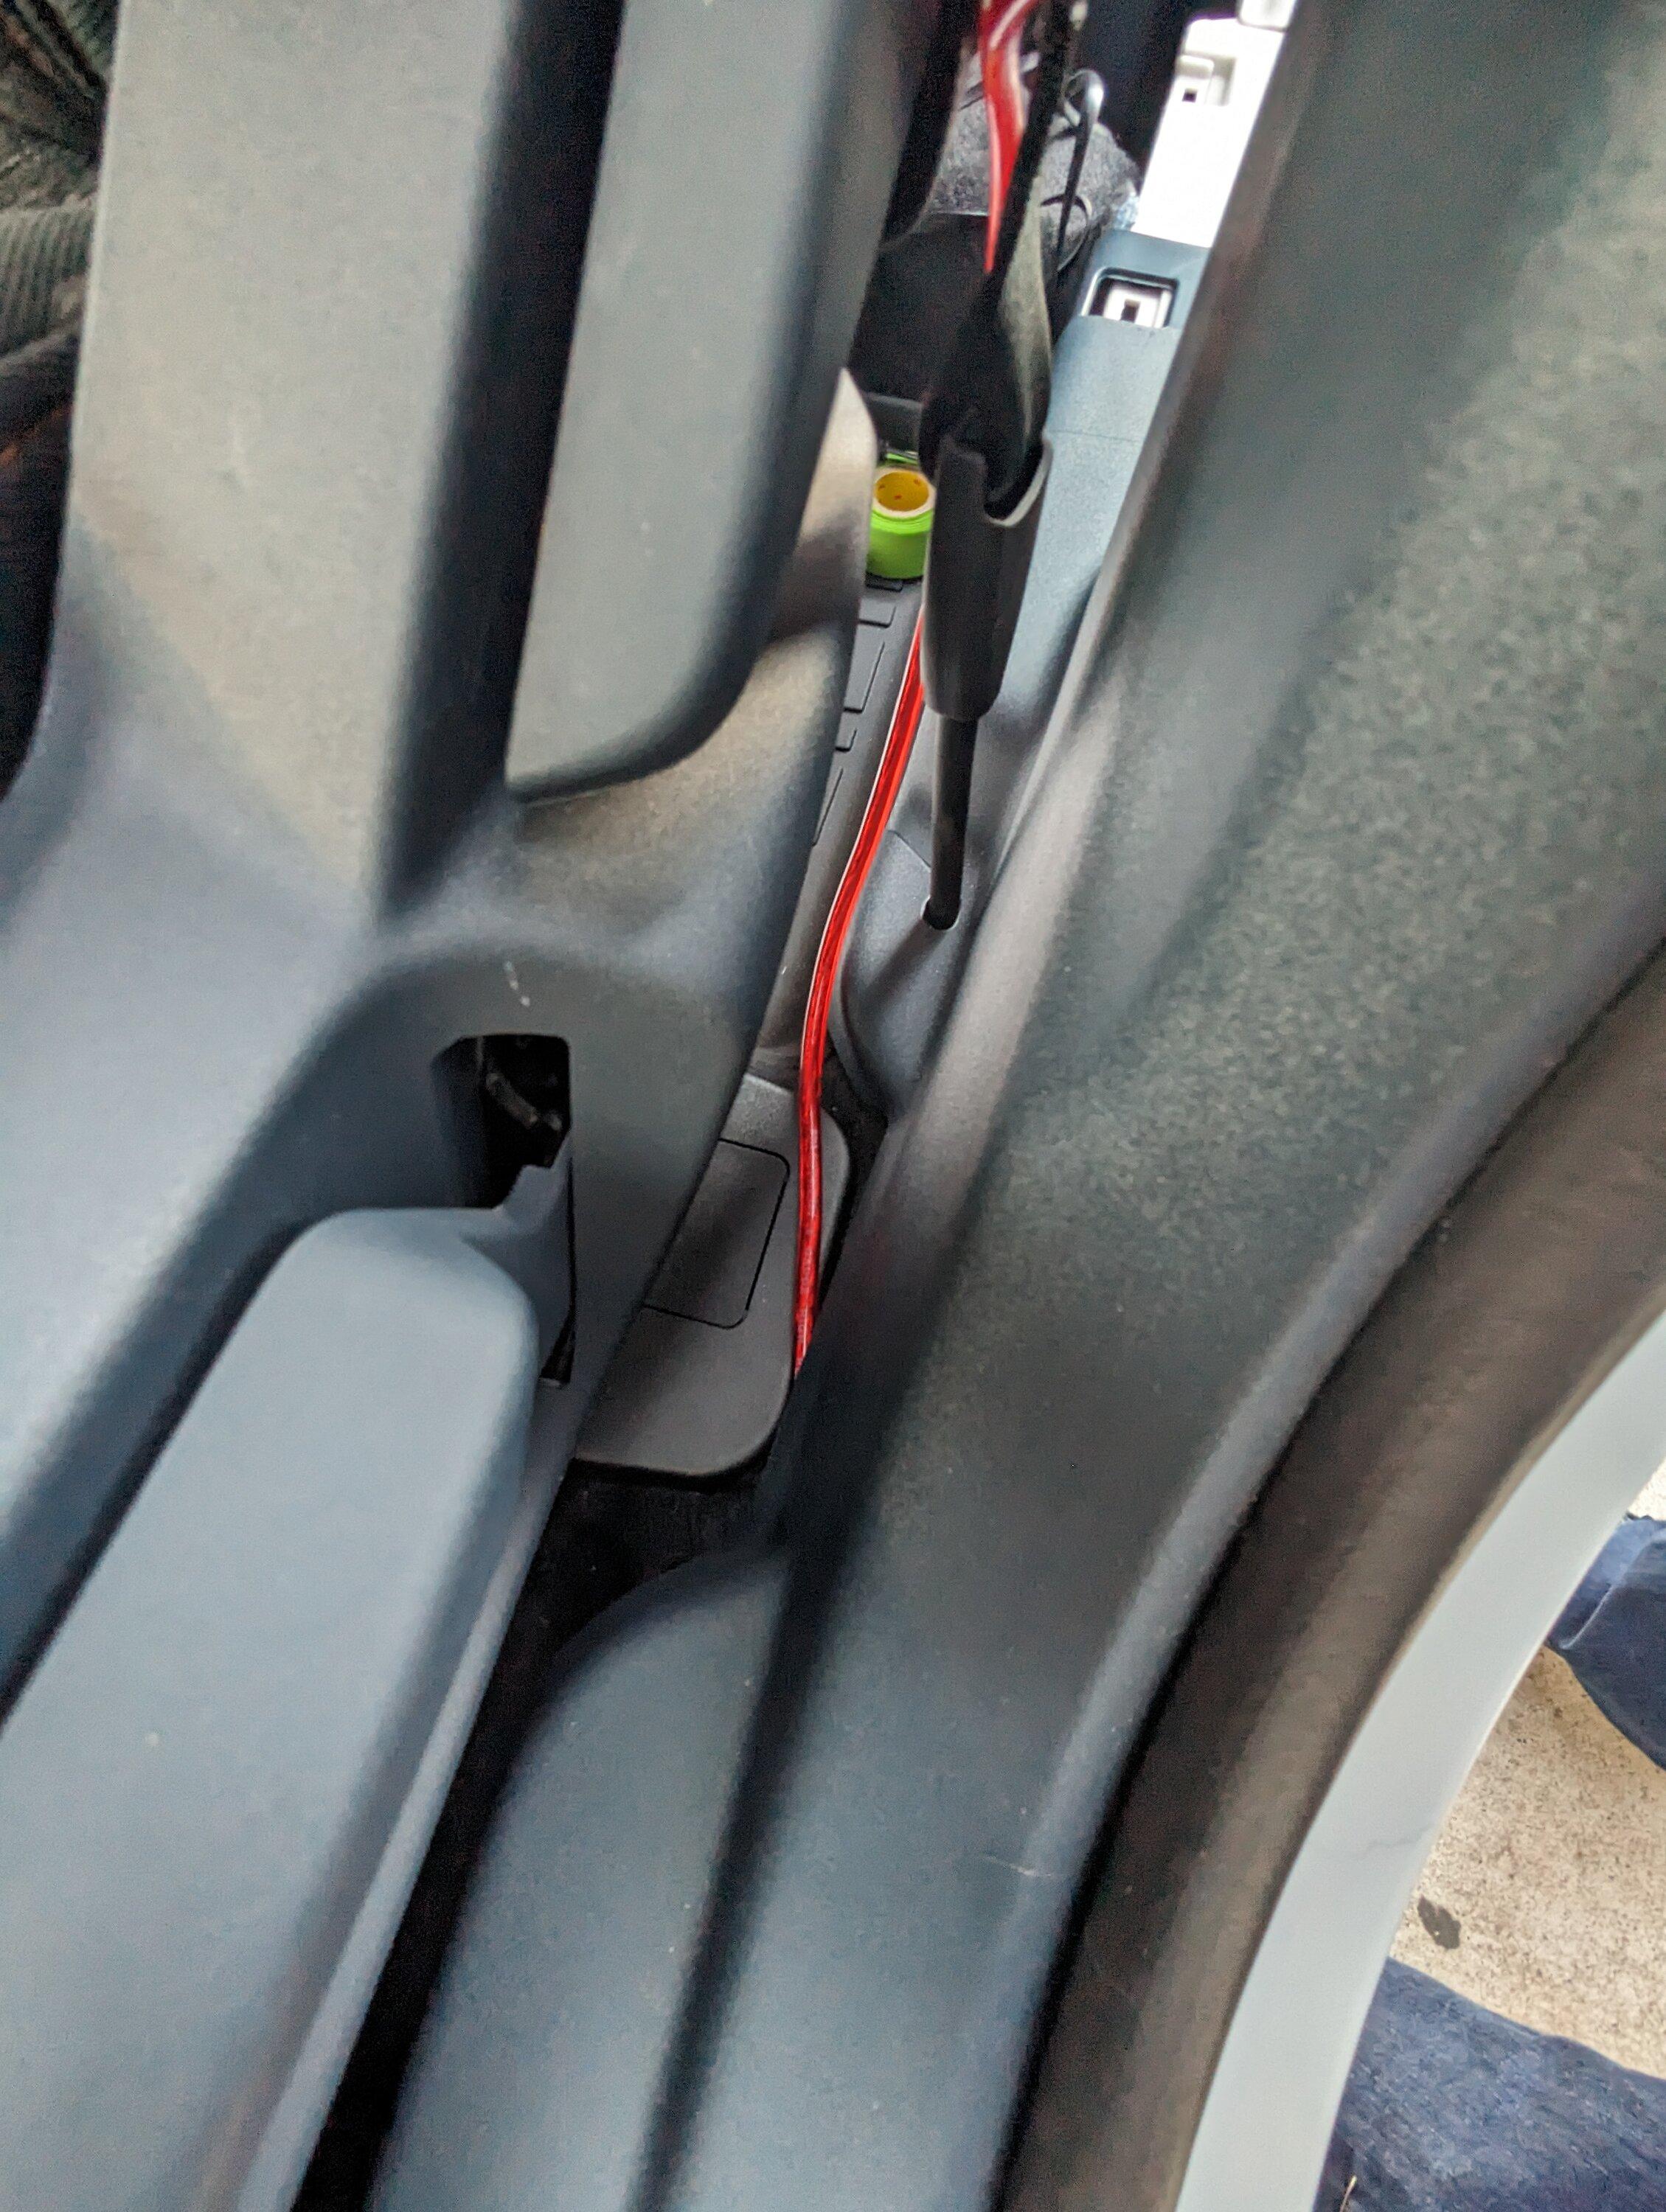
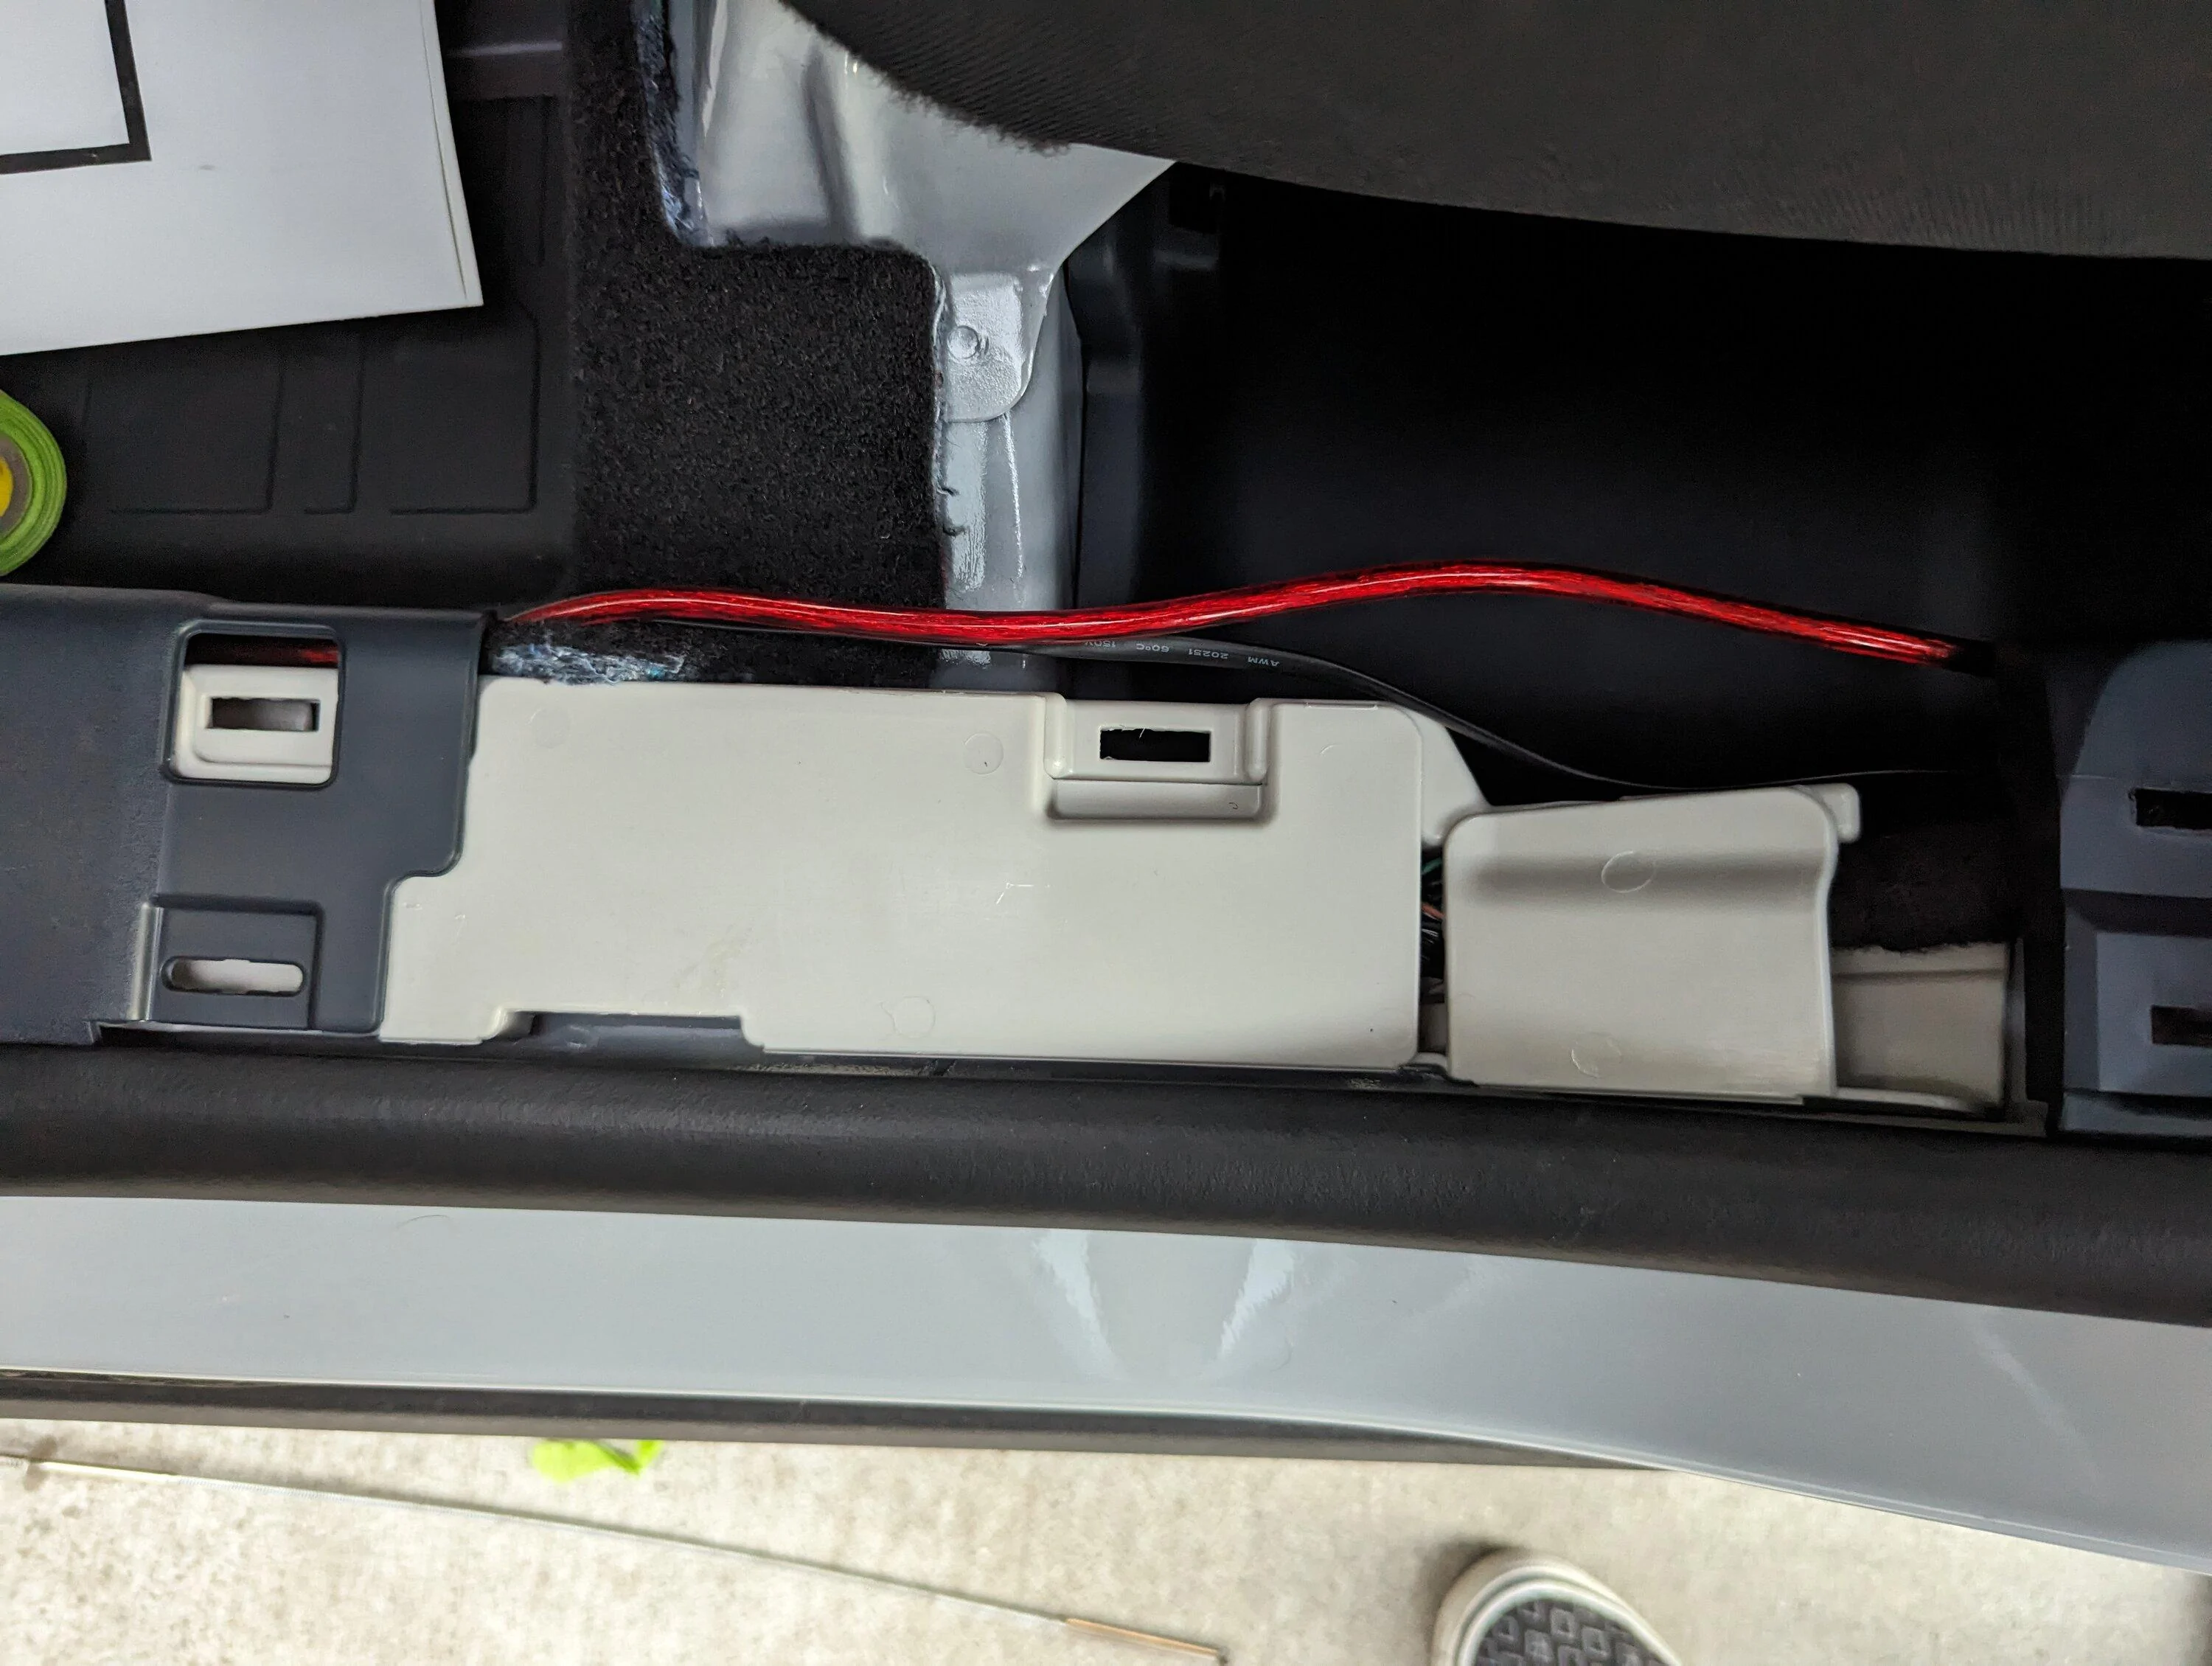
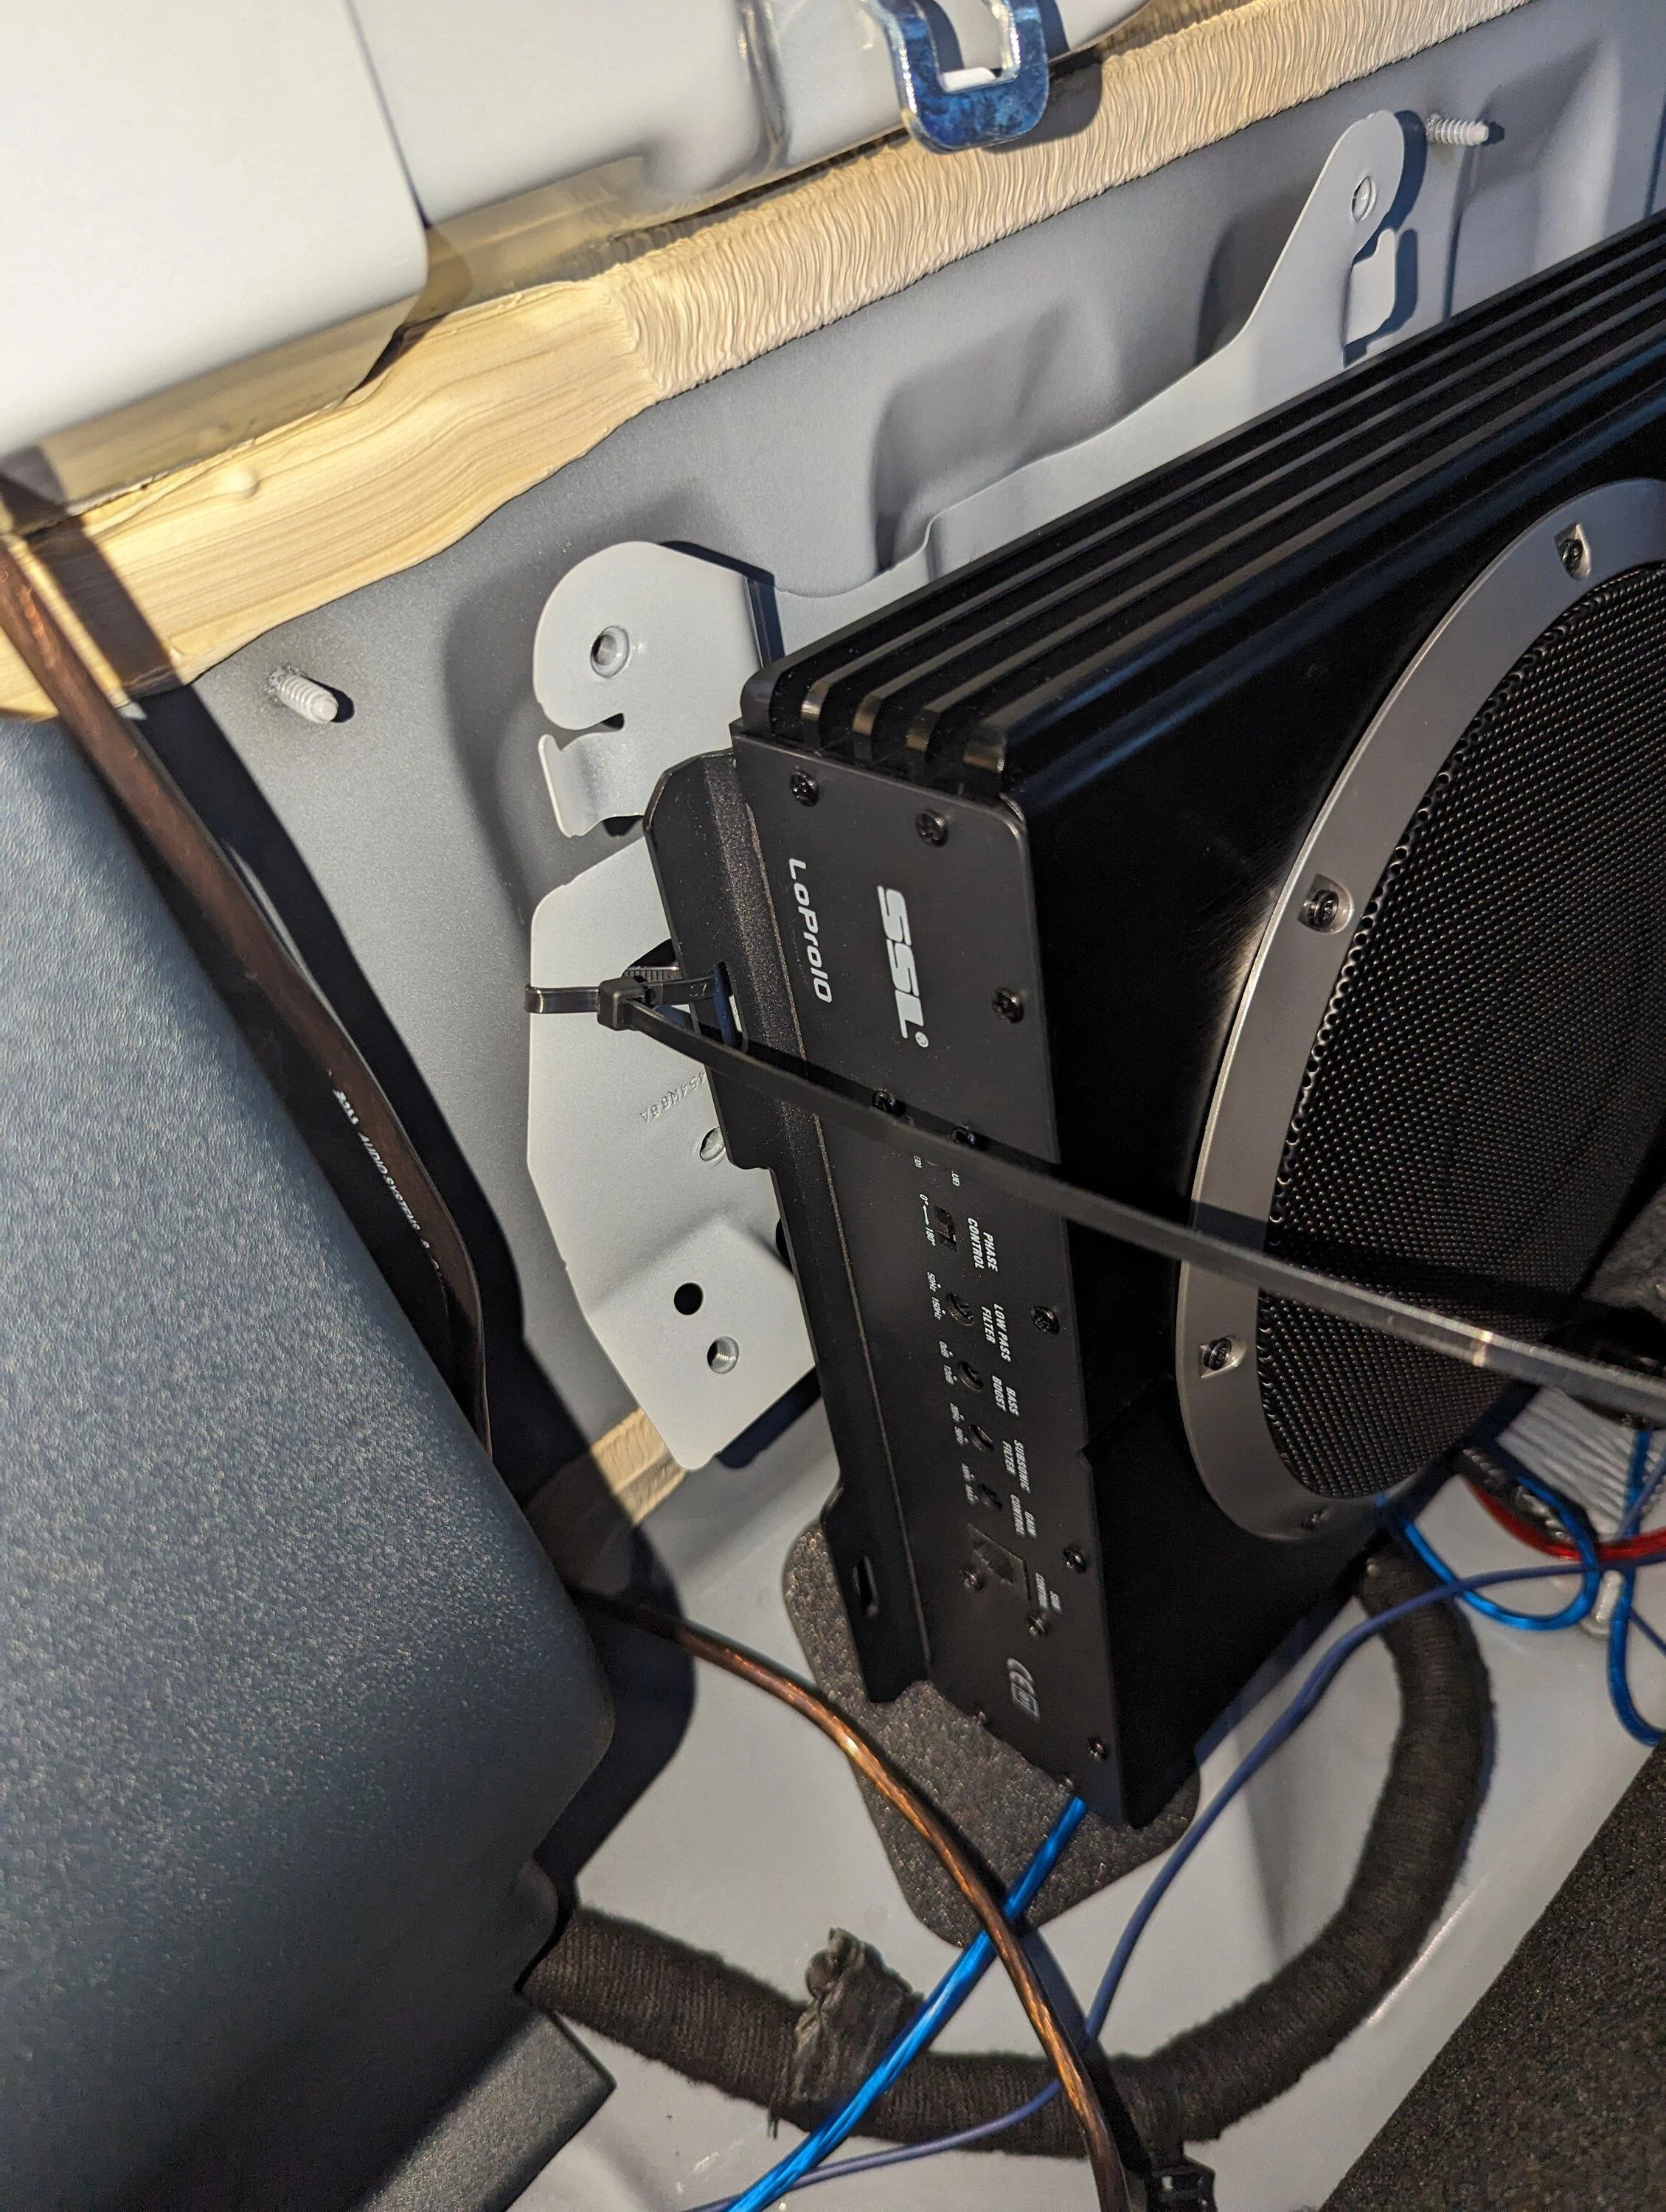
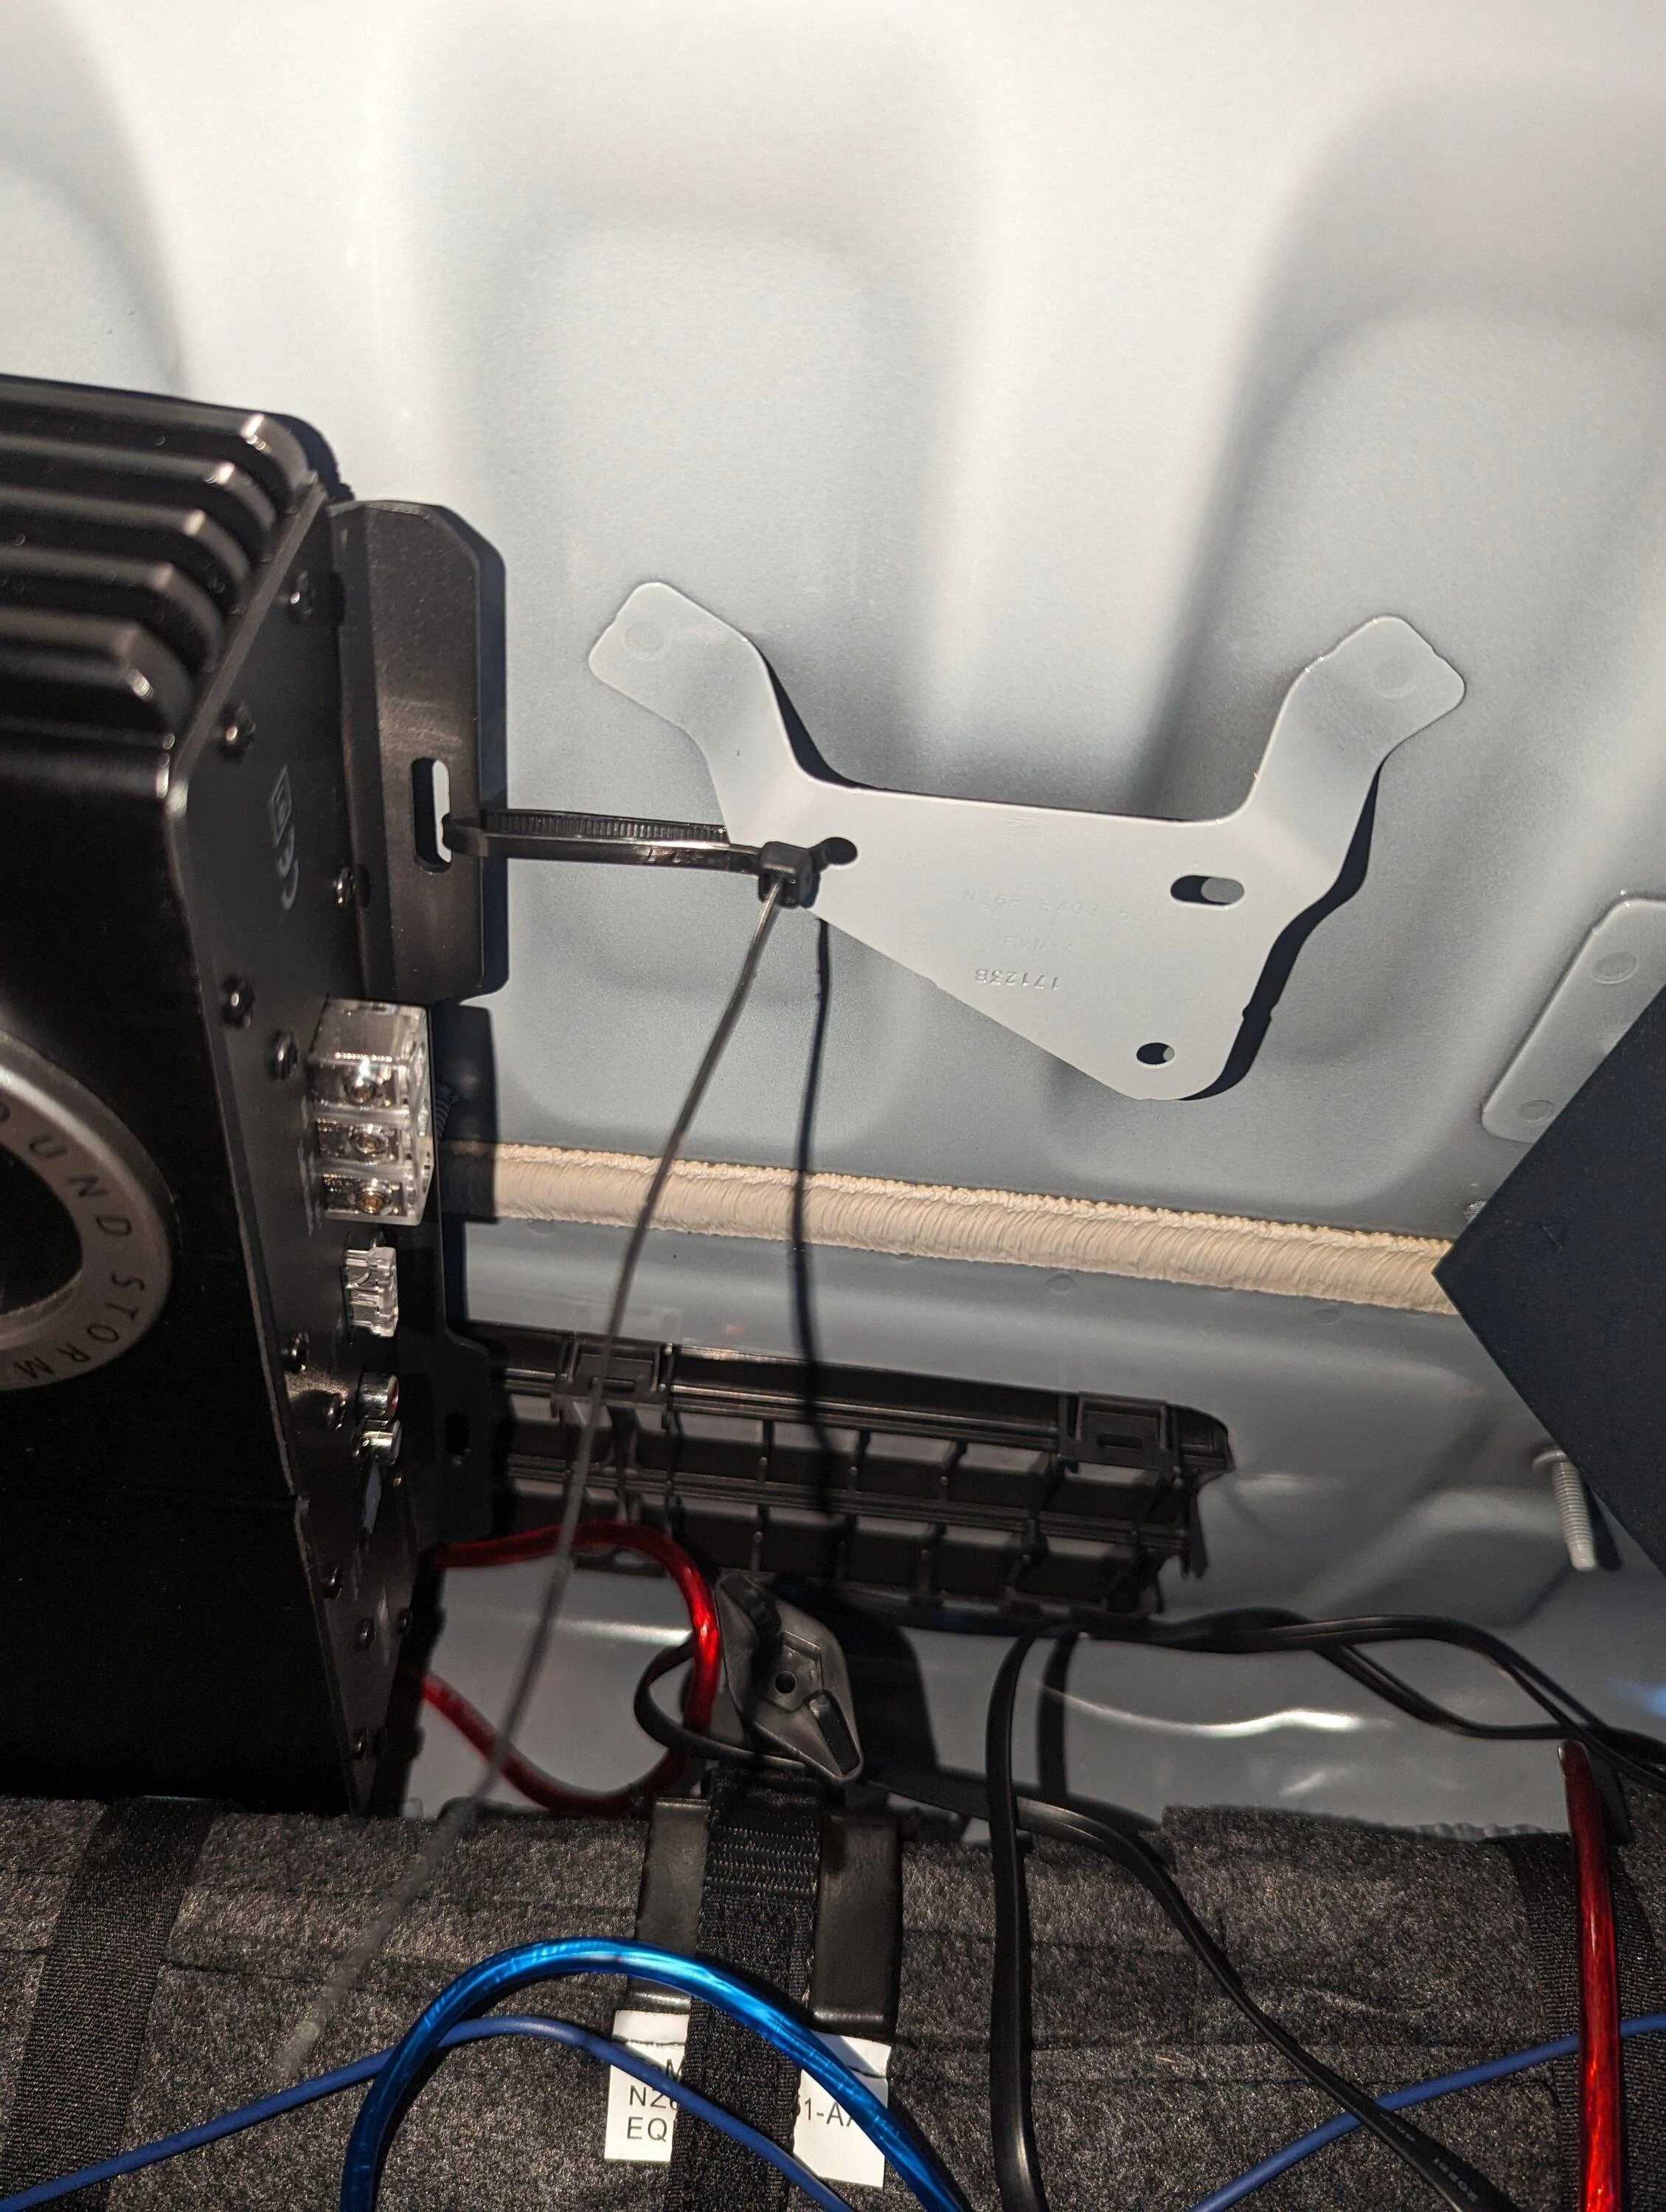
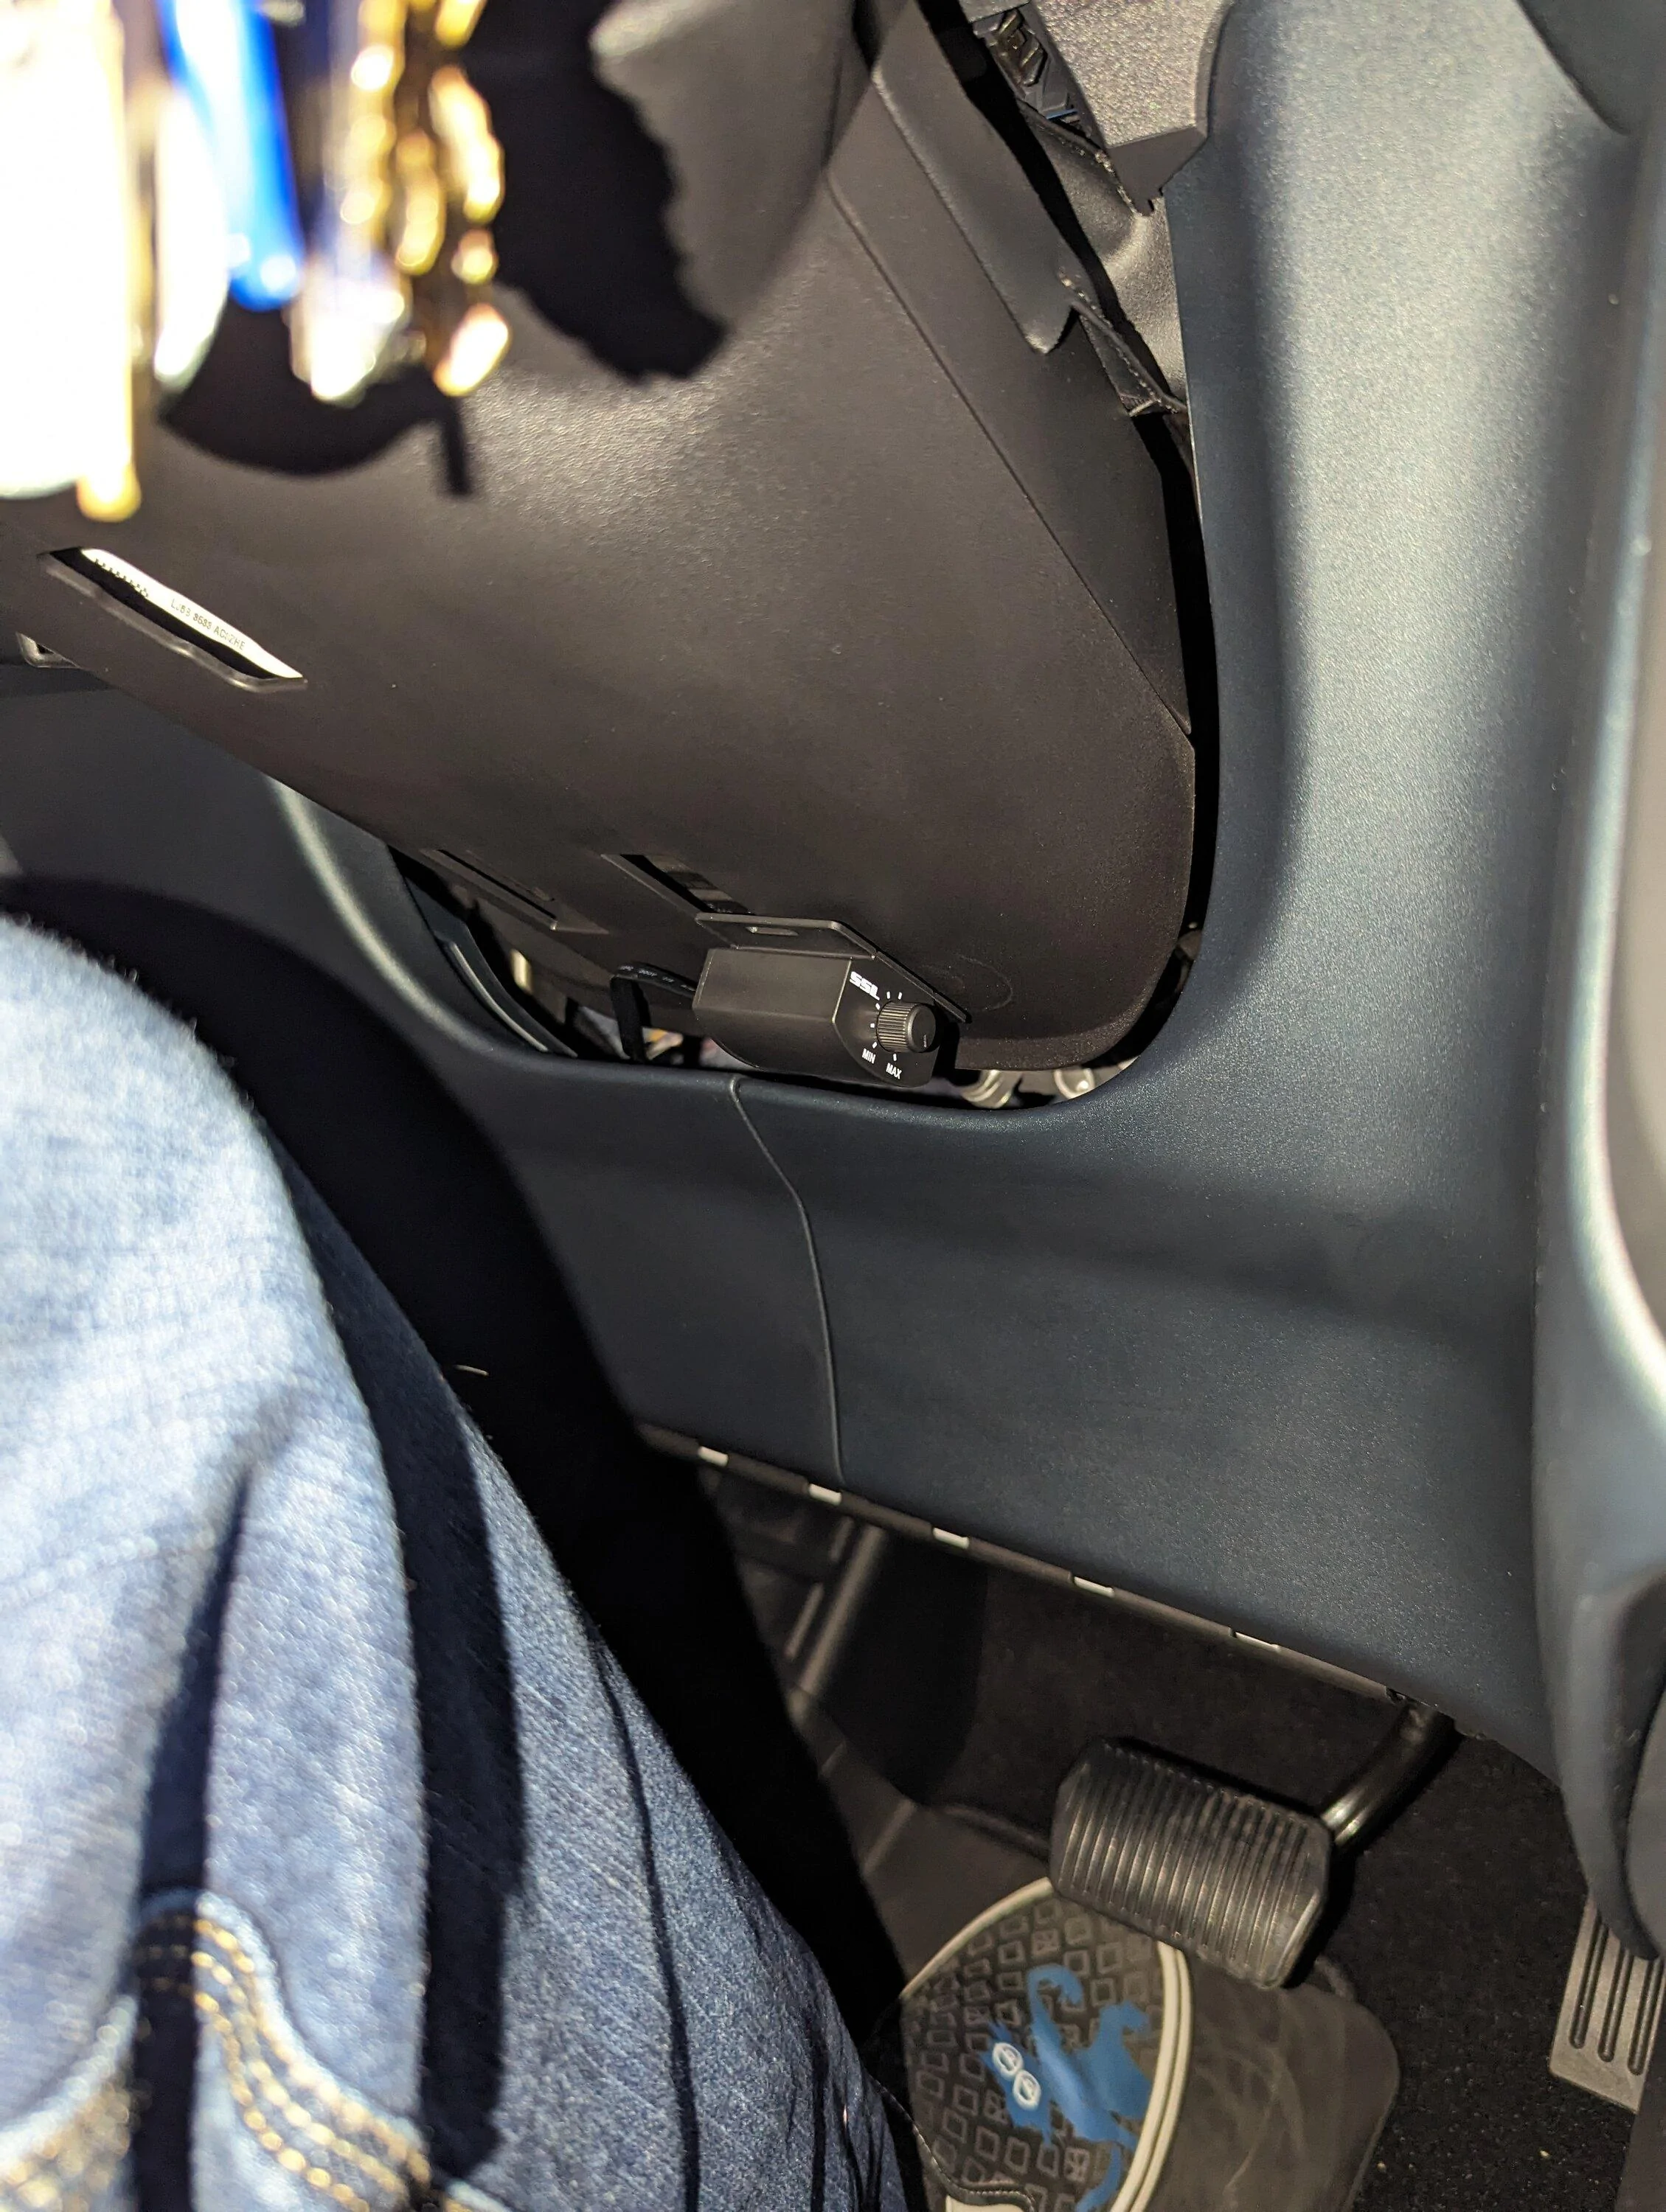
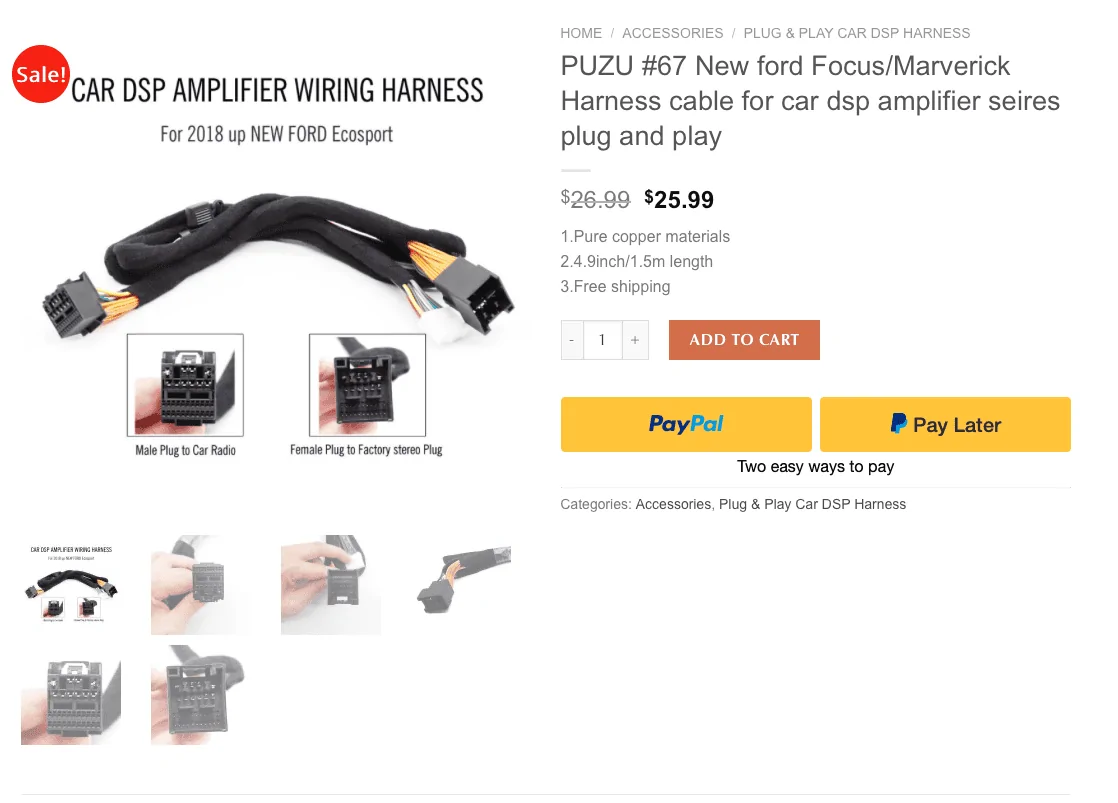
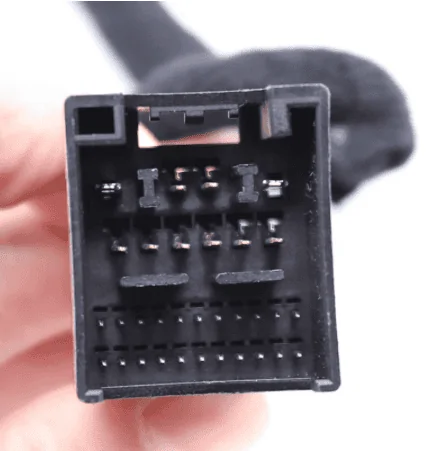
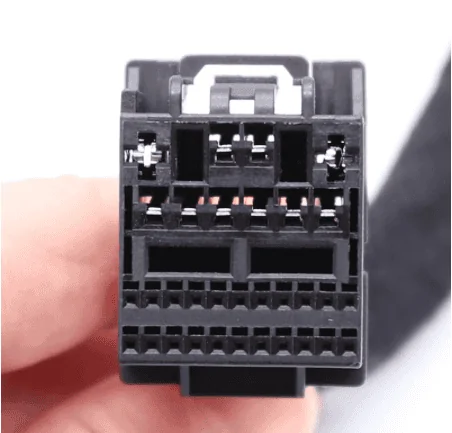
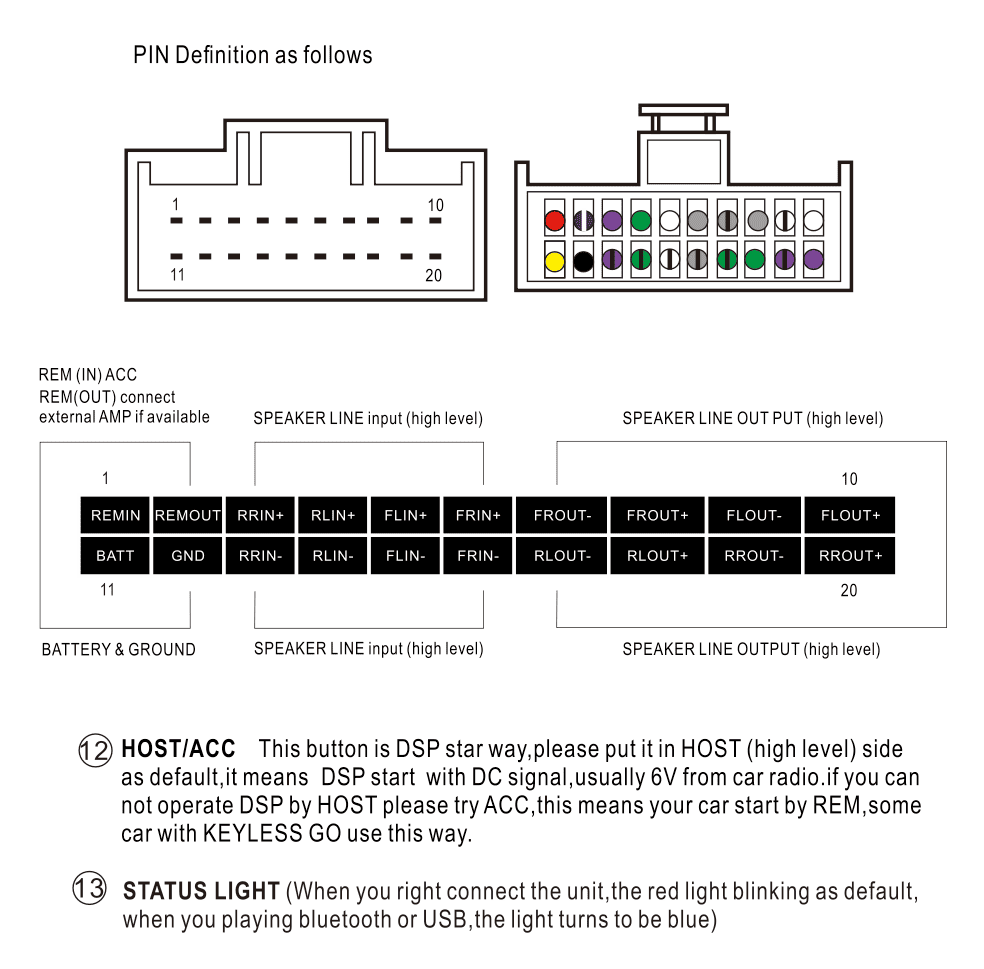
I had the same reaction when I connected the Puzu PUZU PZ-C7, except I had already replaced the front and rear speakers. I'm enjoying the sound enhancement of the DSP Amp.
Sponsored


bradyhuutch

2.0L EcoBoost
Member
First Name
Brady
Joined
Aug 10, 2023
Threads
0
Messages
9
Reaction score
23
Location
SoCal
Vehicle(s)
2023 Maverick XLT Tremor
Engine
2.0L EcoBoost
I just installed the PUZU PZ-C7 and WOW. I am almost blown away with the improvement you get for such little investment and ease of installation. The improvement in sound quality from the stock speakers alone is excellent. The amp is currently sitting inside my glove box until I get the sub in, but I plan on installing it under the dash. There should be more than enough room behind the glove box on top of the AC components. More pics to come!

1000001090.webp
1000001089.webp
My BOSS wiring kit came in a couple days ago and I finally installed the SSL sub last night, here are my thoughts:

The compact 10" sub is a very welcome improvement to the lower end of the audio. I listen to a lot of EDM and bass-heavy music, but my taste in music is very broad so I played many samples. Vocals and commercials come through very bass heavy, rock, metal, and alt music are pretty balanced, and EDM bass comes through a little lacking. The bass knob is extremely useful in keeping the sound exactly where I want it and I find myself using it much more than I thought I would. Note that I still have a good amount of tuning to do with the PZ-C7 and the sub's built-in amp so the need for the knob will likely decrease after proper tuning.

Overall I am extremely pleased and think the sub is well worth the extra $125.

Now for some notes on installation:

Running all the wires wasn't too terrible. No issues with breaking clips during panel removal, many don't even need to be removed. Plenty of space for the sub in the factory amp location. Pictures of my process below.

Ford Maverick Active Powered "All-N-One" Subwoofers PXL_20230825_020752621.MP

1) I used the 10mm terminal mount nut for the positive lead. I was planning on using one of the 1/2" nuts but putting the lead here prevented me from reinstalling the plastic cover.

Ford Maverick Active Powered "All-N-One" Subwoofers PXL_20230825_020754588.MP

2) I routed the positive lead along the factory battery cables and secured them with zip ties. I used a couple machine screws to mount my fuse from the bottom of the plastic cover on the driver side strut tower.

Ford Maverick Active Powered "All-N-One" Subwoofers PXL_20230825_020847803

3) I used some heat shrink on the screws to make sure the nuts didn't back off. I didn't have any loctite on hand.

Ford Maverick Active Powered "All-N-One" Subwoofers PXL_20230825_020801432

4) From the fuse, the positive cable goes down to a grommet in the driver side foot well.

Ford Maverick Active Powered "All-N-One" Subwoofers PXL_20230825_020810160

5) Towards the top right of this picture you can see the oval-shaped grommet.

Ford Maverick Active Powered "All-N-One" Subwoofers PXL_20230825_020951129

6) The grommet has circles on the back. I used a drill bit of the same size to make a small hole just big enough for the 8ga cable to go through. The seal between the cable and the grommet look to be weather tight.

Ford Maverick Active Powered "All-N-One" Subwoofers PXL_20230825_021142923
7) I fed the cable to the left toward the kick panel that holds the hood latch release. FROM HERE ON, THE RCA AND REM CABLES FOR THE SUB FOLLOW THE SAME PATH AND STEPS, BUT ON THE OTHER SIDE OF THE TRUCK.

Ford Maverick Active Powered "All-N-One" Subwoofers PXL_20230825_021225633.MP

8) From there, I popped this panel up and fed the cable along the side.

Ford Maverick Active Powered "All-N-One" Subwoofers PXL_20230825_021234139.MP

9) Only pop the clips up to this point on the horizontal piece, the ones toward the front of the truck where it goes vertical are a PITA to reinstall.

Ford Maverick Active Powered "All-N-One" Subwoofers PXL_20230825_021356891

10) I didn't remove the panel that holds the seat belt in place. There is plenty of room to tuck the cable in. Black cable is for the bass knob, the positive follows in its place.

Ford Maverick Active Powered "All-N-One" Subwoofers PXL_20230825_021508458.MP

11) Plenty of room for the positive cable without removing the panel as previously mentioned.

Ford Maverick Active Powered "All-N-One" Subwoofers PXL_20230825_021934247.MP

12) I removed the kick panel at the rear driver side door and routed the cables along the side.

Ford Maverick Active Powered "All-N-One" Subwoofers PXL_20230825_021805291.MP

13) After removing the panel that covers the side of the under-seat storage, I routed the cables as shown beneath the existing harness using a guide rod.

Ford Maverick Active Powered "All-N-One" Subwoofers PXL_20230825_021811818

14) Here's a closeup of how I routed the cables under the existing harness.

Ford Maverick Active Powered "All-N-One" Subwoofers PXL_20230825_022801509

15) Since I will also be testing another sub, I temporarily secured the left side to the "butterfly mount" with a zip tie. The sub wil be permanently fixed to a piece of acryllic once I select which one I am going to keep.

Ford Maverick Active Powered "All-N-One" Subwoofers PXL_20230825_022811917

16) The right side got zip tied to this mount. Side note, I slipped some cardboard between the back of the cab and the sub to prevent some of the rattling. I suspect this will stop once the sub is permanently mounted.

Ford Maverick Active Powered "All-N-One" Subwoofers PXL_20230825_024959040

17) This is where I chose to temporarily mount my bass knob. Hidden but still easily accessible.

I will be sure to update with which sub I end up keeping, as well as how I make the mounting plate and some suggestions for cable management once the install is completed!

Let me know if you have any questions!
 
Last edited:

Lambretta

2.5L Hybrid
Active member
Joined
Jul 12, 2023
Threads
7
Messages
34
Reaction score
62
Location
Maryland
Vehicle(s)
24 Ford Maverick XL
Engine
2.5L Hybrid
My BOSS wiring kit came in a couple days ago and I finally installed the SSL sub last night, here are my thoughts:

The compact 10" sub is a very welcome improvement to the lower end of the audio. I listen to a lot of EDM and bass-heavy music, but my taste in music is very broad so I played many samples. Vocals and commercials come through very bass heavy, rock, metal, and alt music are pretty balanced, and EDM bass comes through a little lacking. The bass knob is extremely useful in keeping the sound exactly where I want it and I find myself using it much more than I thought I would. Note that I still have a good amount of tuning to do with the PZ-C7 and the sub's built-in amp so the need for the knob will likely decrease after proper tuning.

Overall I am extremely pleased and think the sub is well worth the extra $125.

Now for some notes on installation:

Running all the wires wasn't too terrible. No issues with breaking clips during panel removal, many don't even need to be removed. Plenty of space for the sub in the factory amp location. Pictures of my process below.

PXL_20230825_020752621.MP.webp

1) I used the 10mm terminal mount nut for the positive lead. I was planning on using one of the 1/2" nuts but putting the lead here prevented me from reinstalling the plastic cover.

PXL_20230825_020754588.MP.webp

2) I routed the positive lead along the factory battery cables and secured them with zip ties. I used a couple machine screws to mount my fuse from the bottom of the plastic cover on the driver side strut tower.

PXL_20230825_020847803.jpg

3) I used some heat shrink on the screws to make sure the nuts didn't back off. I didn't have any loctite on hand.

PXL_20230825_020801432.jpg

4) From the fuse, the positive cable goes down to a grommet in the driver side foot well.

PXL_20230825_020810160.webp

5) Towards the top right of this picture you can see the oval-shaped grommet.

PXL_20230825_020951129.jpg

6) The grommet has circles on the back. I used a drill bit of the same size to make a small hole just big enough for the 8ga cable to go through. The seal between the cable and the grommet look to be weather tight.

PXL_20230825_021142923.webp
7) I fed the cable to the left toward the kick panel that holds the hood latch release. FROM HERE ON, THE RCA AND REM CABLES FOR THE SUB FOLLOW THE SAME PATH AND STEPS, BUT ON THE OTHER SIDE OF THE TRUCK.

PXL_20230825_021225633.MP.jpg

8) From there, I popped this panel up and fed the cable along the side.

PXL_20230825_021234139.MP.jpg

9) Only pop the clips up to this point on the horizontal piece, the ones toward the front of the truck where it goes vertical are a PITA to reinstall.

PXL_20230825_021356891.webp

10) I didn't remove the panel that holds the seat belt in place. There is plenty of room to tuck the cable in. Black cable is for the bass knob, the positive follows in its place.

PXL_20230825_021508458.MP.jpg

11) Plenty of room for the positive cable without removing the panel as previously mentioned.

PXL_20230825_021934247.MP.webp

12) I removed the kick panel at the rear driver side door and routed the cables along the side.

PXL_20230825_021805291.MP.jpg

13) After removing the panel that covers the side of the under-seat storage, I routed the cables as shown beneath the existing harness using a guide rod.

PXL_20230825_021811818.webp

14) Here's a closeup of how I routed the cables under the existing harness.

PXL_20230825_022801509.webp

15) Since I will also be testing another sub, I temporarily secured the left side to the "butterfly mount" with a zip tie. The sub wil be permanently fixed to a piece of acryllic once I select which one I am going to keep.

PXL_20230825_022811917.webp

16) The right side got zip tied to this mount. Side note, I slipped some cardboard between the back of the cab and the sub to prevent some of the rattling. I suspect this will stop once the sub is permanently mounted.

PXL_20230825_024959040.webp

17) This is where I chose to temporarily mount my bass knob. Hidden but still easily accessible.

I will be sure to update with which sub I end up keeping, as well as how I make the mounting plate and some suggestions for cable management once the install is completed!

Let me know if you have any questions!
Thanks for the great info and pictures! I am looking at doing a similar set up when my mav gets delivered. A few questions.

Did you mount the dsp behing the dash?

And was there a way to get the usb cord accessible but hidden to do the tuning?

Did you tap the rear speakers for sub or did you run the rcas from dsp back to sub? If you ran it back did you do driver’s side since you had the panels up already for the power/bass knob?
 

Javskies

2.0L EcoBoost
Well-known member
First Name
Javi
Joined
Jun 16, 2023
Threads
7
Messages
165
Reaction score
386
Location
CO
Vehicle(s)
2023 XLT AWD
Engine
2.0L EcoBoost
Clubs
 
My BOSS wiring kit came in a couple days ago and I finally installed the SSL sub last night, here are my thoughts:

The compact 10" sub is a very welcome improvement to the lower end of the audio. I listen to a lot of EDM and bass-heavy music, but my taste in music is very broad so I played many samples. Vocals and commercials come through very bass heavy, rock, metal, and alt music are pretty balanced, and EDM bass comes through a little lacking. The bass knob is extremely useful in keeping the sound exactly where I want it and I find myself using it much more than I thought I would. Note that I still have a good amount of tuning to do with the PZ-C7 and the sub's built-in amp so the need for the knob will likely decrease after proper tuning.

Overall I am extremely pleased and think the sub is well worth the extra $125.

Now for some notes on installation:

Running all the wires wasn't too terrible. No issues with breaking clips during panel removal, many don't even need to be removed. Plenty of space for the sub in the factory amp location. Pictures of my process below.

PXL_20230825_020752621.MP.jpg

1) I used the 10mm terminal mount nut for the positive lead. I was planning on using one of the 1/2" nuts but putting the lead here prevented me from reinstalling the plastic cover.

PXL_20230825_020754588.MP.jpg

2) I routed the positive lead along the factory battery cables and secured them with zip ties. I used a couple machine screws to mount my fuse from the bottom of the plastic cover on the driver side strut tower.

PXL_20230825_020847803.jpg

3) I used some heat shrink on the screws to make sure the nuts didn't back off. I didn't have any loctite on hand.

PXL_20230825_020801432.jpg

4) From the fuse, the positive cable goes down to a grommet in the driver side foot well.

PXL_20230825_020810160.jpg

5) Towards the top right of this picture you can see the oval-shaped grommet.

PXL_20230825_020951129.jpg

6) The grommet has circles on the back. I used a drill bit of the same size to make a small hole just big enough for the 8ga cable to go through. The seal between the cable and the grommet look to be weather tight.

PXL_20230825_021142923.jpg
7) I fed the cable to the left toward the kick panel that holds the hood latch release. FROM HERE ON, THE RCA AND REM CABLES FOR THE SUB FOLLOW THE SAME PATH AND STEPS, BUT ON THE OTHER SIDE OF THE TRUCK.

PXL_20230825_021225633.MP.jpg

8) From there, I popped this panel up and fed the cable along the side.

PXL_20230825_021234139.MP.jpg

9) Only pop the clips up to this point on the horizontal piece, the ones toward the front of the truck where it goes vertical are a PITA to reinstall.

PXL_20230825_021356891.jpg

10) I didn't remove the panel that holds the seat belt in place. There is plenty of room to tuck the cable in. Black cable is for the bass knob, the positive follows in its place.

PXL_20230825_021508458.MP.jpg

11) Plenty of room for the positive cable without removing the panel as previously mentioned.

PXL_20230825_021934247.MP.jpg

12) I removed the kick panel at the rear driver side door and routed the cables along the side.

PXL_20230825_021805291.MP.jpg

13) After removing the panel that covers the side of the under-seat storage, I routed the cables as shown beneath the existing harness using a guide rod.

PXL_20230825_021811818.jpg

14) Here's a closeup of how I routed the cables under the existing harness.

PXL_20230825_022801509.jpg

15) Since I will also be testing another sub, I temporarily secured the left side to the "butterfly mount" with a zip tie. The sub wil be permanently fixed to a piece of acryllic once I select which one I am going to keep.

PXL_20230825_022811917.jpg

16) The right side got zip tied to this mount. Side note, I slipped some cardboard between the back of the cab and the sub to prevent some of the rattling. I suspect this will stop once the sub is permanently mounted.

PXL_20230825_024959040.jpg

17) This is where I chose to temporarily mount my bass knob. Hidden but still easily accessible.

I will be sure to update with which sub I end up keeping, as well as how I make the mounting plate and some suggestions for cable management once the install is completed!

Let me know if you have any questions!
Ohhh I was thinking of putting the sub in the under seat cubby but if it fits behind thats so much better! Thanks for the install how to!
 

bradyhuutch

2.0L EcoBoost
Member
First Name
Brady
Joined
Aug 10, 2023
Threads
0
Messages
9
Reaction score
23
Location
SoCal
Vehicle(s)
2023 Maverick XLT Tremor
Engine
2.0L EcoBoost
Thanks for the great info and pictures! I am looking at doing a similar set up when my mav gets delivered. A few questions.

Did you mount the dsp behing the dash?

And was there a way to get the usb cord accessible but hidden to do the tuning?

Did you tap the rear speakers for sub or did you run the rcas from dsp back to sub? If you ran it back did you do driver’s side since you had the panels up already for the power/bass knob?
DSP is currently living in my glove box but I plan on mounting it on top of the A/C components behind the glove box with some removable double sided tape.

The USB would be accessable when mounted if you either drop the glove box or leave the cord plugged in and hanging inside the glovebox.

I used RCAs from the glove box to the rear following the same exact method as the power cable. The DSP was on the passenger side and I didn't feel like running more wires through the dash. Best practice is to run audio and power separately anyway.

Look between the pictures at my comments if you missed them, a couple helpful tips.
 

Sponsored

MavFromTheDead

2.0L EcoBoost
Well-known member
First Name
Derek
Joined
Nov 19, 2022
Threads
9
Messages
235
Reaction score
255
Location
Leander, Texas
Vehicle(s)
XLT Tremor
Engine
2.0L EcoBoost
Clubs
 
No, I do not think just adding a subwoofer is a waste of time or effort. It is a fairly easy upgrade to the factory system. A sub will enhance the bass response to supplement the front speakers. Just make sure to take the feed to the subwoofer from the front speaker leads as the rear speaker frequency response is limited. Not sure where the limitation starts as I've seen 75Hz, 80Hz, and 150Hz.

With that said, the fronts were an easy install. Even the rears were fairly easy through taking the simple step by step process. Replacing the front speakers with 6.5” REF-6532IXm and rear speakers with 4” x 6” REF-6432CFX Infinity Reference was a tremendous improvement. After installing the Infinity speakers, I'm not so sure I would have installed a subwoofer and Amp, but they were already ordered.

Anyway, go for it, you'll be glad you did.
Sorry to revive the an old thread. I've recently read pretty much the whole thing, great info. I ordered the infinity front speakers. If I'm just installing those do I need anything else? You typed about a harness, is that only if I'm doing all 4 speakers? Thanks Uh50 for all your info!
 

uh50

2.0L EcoBoost
Well-known member
First Name
Howard
Joined
Oct 4, 2021
Threads
30
Messages
1,236
Reaction score
1,395
Location
Brookhaven Lake O' the Pines, Texas
Website
www.hchaney.com
Vehicle(s)
2022 Maverick XL, VB, 2.0 EB
Engine
2.0L EcoBoost
My BOSS wiring kit came in a couple days ago and I finally installed the SSL sub last night, here are my thoughts:

The compact 10" sub is a very welcome improvement to the lower end of the audio. I listen to a lot of EDM and bass-heavy music, but my taste in music is very broad so I played many samples. Vocals and commercials come through very bass heavy, rock, metal, and alt music are pretty balanced, and EDM bass comes through a little lacking. The bass knob is extremely useful in keeping the sound exactly where I want it and I find myself using it much more than I thought I would. Note that I still have a good amount of tuning to do with the PZ-C7 and the sub's built-in amp so the need for the knob will likely decrease after proper tuning.

Overall I am extremely pleased and think the sub is well worth the extra $125.

Now for some notes on installation:

Running all the wires wasn't too terrible. No issues with breaking clips during panel removal, many don't even need to be removed. Plenty of space for the sub in the factory amp location. Pictures of my process below.

PXL_20230825_020752621.MP.jpg

1) I used the 10mm terminal mount nut for the positive lead. I was planning on using one of the 1/2" nuts but putting the lead here prevented me from reinstalling the plastic cover.

PXL_20230825_020754588.MP.jpg

2) I routed the positive lead along the factory battery cables and secured them with zip ties. I used a couple machine screws to mount my fuse from the bottom of the plastic cover on the driver side strut tower.

PXL_20230825_020847803.jpg

3) I used some heat shrink on the screws to make sure the nuts didn't back off. I didn't have any loctite on hand.

PXL_20230825_020801432.jpg

4) From the fuse, the positive cable goes down to a grommet in the driver side foot well.

PXL_20230825_020810160.jpg

5) Towards the top right of this picture you can see the oval-shaped grommet.

PXL_20230825_020951129.jpg

6) The grommet has circles on the back. I used a drill bit of the same size to make a small hole just big enough for the 8ga cable to go through. The seal between the cable and the grommet look to be weather tight.

PXL_20230825_021142923.jpg
7) I fed the cable to the left toward the kick panel that holds the hood latch release. FROM HERE ON, THE RCA AND REM CABLES FOR THE SUB FOLLOW THE SAME PATH AND STEPS, BUT ON THE OTHER SIDE OF THE TRUCK.

PXL_20230825_021225633.MP.jpg

8) From there, I popped this panel up and fed the cable along the side.

PXL_20230825_021234139.MP.jpg

9) Only pop the clips up to this point on the horizontal piece, the ones toward the front of the truck where it goes vertical are a PITA to reinstall.

PXL_20230825_021356891.jpg

10) I didn't remove the panel that holds the seat belt in place. There is plenty of room to tuck the cable in. Black cable is for the bass knob, the positive follows in its place.

PXL_20230825_021508458.MP.jpg

11) Plenty of room for the positive cable without removing the panel as previously mentioned.

PXL_20230825_021934247.MP.jpg

12) I removed the kick panel at the rear driver side door and routed the cables along the side.

PXL_20230825_021805291.MP.jpg

13) After removing the panel that covers the side of the under-seat storage, I routed the cables as shown beneath the existing harness using a guide rod.

PXL_20230825_021811818.jpg

14) Here's a closeup of how I routed the cables under the existing harness.

PXL_20230825_022801509.jpg

15) Since I will also be testing another sub, I temporarily secured the left side to the "butterfly mount" with a zip tie. The sub wil be permanently fixed to a piece of acryllic once I select which one I am going to keep.

PXL_20230825_022811917.jpg

16) The right side got zip tied to this mount. Side note, I slipped some cardboard between the back of the cab and the sub to prevent some of the rattling. I suspect this will stop once the sub is permanently mounted.

PXL_20230825_024959040.jpg

17) This is where I chose to temporarily mount my bass knob. Hidden but still easily accessible.

I will be sure to update with which sub I end up keeping, as well as how I make the mounting plate and some suggestions for cable management once the install is completed!

Let me know if you have any questions!
Great job and thanks for all the pics.
 

uh50

2.0L EcoBoost
Well-known member
First Name
Howard
Joined
Oct 4, 2021
Threads
30
Messages
1,236
Reaction score
1,395
Location
Brookhaven Lake O' the Pines, Texas
Website
www.hchaney.com
Vehicle(s)
2022 Maverick XL, VB, 2.0 EB
Engine
2.0L EcoBoost
Sorry to revive the an old thread. I've recently read pretty much the whole thing, great info. I ordered the infinity front speakers. If I'm just installing those do I need anything else? You typed about a harness, is that only if I'm doing all 4 speakers? Thanks Uh50 for all your info!
Great questions. If you are only replacing the front speakers and not installing the DSP Amp, then a harness is not required. The harness just provides a loop through the DSP Amp to amplify the speaker circuits, as well as providing power.

Don't worry about reviving an ol' thread. That's what they are here for...to read and use. Never mind the info is still current.

Good luck with your install and I hope you enjoy the Infinities as much as I have.:cool:
 

Javskies

2.0L EcoBoost
Well-known member
First Name
Javi
Joined
Jun 16, 2023
Threads
7
Messages
165
Reaction score
386
Location
CO
Vehicle(s)
2023 XLT AWD
Engine
2.0L EcoBoost
Clubs
 
I just installed the PUZU PZ-C7 and WOW. I am almost blown away with the improvement you get for such little investment and ease of installation. The improvement in sound quality from the stock speakers alone is excellent. The amp is currently sitting inside my glove box until I get the sub in, but I plan on installing it under the dash. There should be more than enough room behind the glove box on top of the AC components. More pics to come!

1000001090.jpg
1000001089.jpg
Just installed mine and absolutely love it. Have you connected to it and changed any settings or just leave it as stock? Gonna order a powered sub today and hopefully by the weekend have a sick sound system
 

bradyhuutch

2.0L EcoBoost
Member
First Name
Brady
Joined
Aug 10, 2023
Threads
0
Messages
9
Reaction score
23
Location
SoCal
Vehicle(s)
2023 Maverick XLT Tremor
Engine
2.0L EcoBoost
Just installed mine and absolutely love it. Have you connected to it and changed any settings or just leave it as stock? Gonna order a powered sub today and hopefully by the weekend have a sick sound system
I linked channels 5/6 together and changed the frequency curve to give it more low bass. These are the L and R RCA channels for the sub output. It made a pretty big difference!
 
Sponsored

bradyhuutch

2.0L EcoBoost
Member
First Name
Brady
Joined
Aug 10, 2023
Threads
0
Messages
9
Reaction score
23
Location
SoCal
Vehicle(s)
2023 Maverick XLT Tremor
Engine
2.0L EcoBoost
My BOSS wiring kit came in a couple days ago and I finally installed the SSL sub last night, here are my thoughts:

The compact 10" sub is a very welcome improvement to the lower end of the audio. I listen to a lot of EDM and bass-heavy music, but my taste in music is very broad so I played many samples. Vocals and commercials come through very bass heavy, rock, metal, and alt music are pretty balanced, and EDM bass comes through a little lacking. The bass knob is extremely useful in keeping the sound exactly where I want it and I find myself using it much more than I thought I would. Note that I still have a good amount of tuning to do with the PZ-C7 and the sub's built-in amp so the need for the knob will likely decrease after proper tuning.

Overall I am extremely pleased and think the sub is well worth the extra $125.

Now for some notes on installation:

Running all the wires wasn't too terrible. No issues with breaking clips during panel removal, many don't even need to be removed. Plenty of space for the sub in the factory amp location. Pictures of my process below.

PXL_20230825_020752621.MP.jpg

1) I used the 10mm terminal mount nut for the positive lead. I was planning on using one of the 1/2" nuts but putting the lead here prevented me from reinstalling the plastic cover.

PXL_20230825_020754588.MP.jpg

2) I routed the positive lead along the factory battery cables and secured them with zip ties. I used a couple machine screws to mount my fuse from the bottom of the plastic cover on the driver side strut tower.

PXL_20230825_020847803.jpg

3) I used some heat shrink on the screws to make sure the nuts didn't back off. I didn't have any loctite on hand.

PXL_20230825_020801432.jpg

4) From the fuse, the positive cable goes down to a grommet in the driver side foot well.

PXL_20230825_020810160.jpg

5) Towards the top right of this picture you can see the oval-shaped grommet.

PXL_20230825_020951129.jpg

6) The grommet has circles on the back. I used a drill bit of the same size to make a small hole just big enough for the 8ga cable to go through. The seal between the cable and the grommet look to be weather tight.

PXL_20230825_021142923.jpg
7) I fed the cable to the left toward the kick panel that holds the hood latch release. FROM HERE ON, THE RCA AND REM CABLES FOR THE SUB FOLLOW THE SAME PATH AND STEPS, BUT ON THE OTHER SIDE OF THE TRUCK.

PXL_20230825_021225633.MP.jpg

8) From there, I popped this panel up and fed the cable along the side.

PXL_20230825_021234139.MP.jpg

9) Only pop the clips up to this point on the horizontal piece, the ones toward the front of the truck where it goes vertical are a PITA to reinstall.

PXL_20230825_021356891.jpg

10) I didn't remove the panel that holds the seat belt in place. There is plenty of room to tuck the cable in. Black cable is for the bass knob, the positive follows in its place.

PXL_20230825_021508458.MP.jpg

11) Plenty of room for the positive cable without removing the panel as previously mentioned.

PXL_20230825_021934247.MP.jpg

12) I removed the kick panel at the rear driver side door and routed the cables along the side.

PXL_20230825_021805291.MP.jpg

13) After removing the panel that covers the side of the under-seat storage, I routed the cables as shown beneath the existing harness using a guide rod.

PXL_20230825_021811818.jpg

14) Here's a closeup of how I routed the cables under the existing harness.

PXL_20230825_022801509.jpg

15) Since I will also be testing another sub, I temporarily secured the left side to the "butterfly mount" with a zip tie. The sub wil be permanently fixed to a piece of acryllic once I select which one I am going to keep.

PXL_20230825_022811917.jpg

16) The right side got zip tied to this mount. Side note, I slipped some cardboard between the back of the cab and the sub to prevent some of the rattling. I suspect this will stop once the sub is permanently mounted.

PXL_20230825_024959040.jpg

17) This is where I chose to temporarily mount my bass knob. Hidden but still easily accessible.

I will be sure to update with which sub I end up keeping, as well as how I make the mounting plate and some suggestions for cable management once the install is completed!

Let me know if you have any questions!
I installed the BOSS sub yesterday. The sub still needs some breaking in but I can tell it already has better low end response and is less punchy than the SSL sub. A little odd considering they are both 10" subs with "1200W" amps. If nothing major happens I will be keeping this one installed.
 

uh50

2.0L EcoBoost
Well-known member
First Name
Howard
Joined
Oct 4, 2021
Threads
30
Messages
1,236
Reaction score
1,395
Location
Brookhaven Lake O' the Pines, Texas
Website
www.hchaney.com
Vehicle(s)
2022 Maverick XL, VB, 2.0 EB
Engine
2.0L EcoBoost
I'm still lovin' my Puzu PZ-C7 DSP Amp. I know harnesses are something that are expensive for many name brand DSP & straight amps. I had a thought. Here is a link to the Puzu harness for the Ford Maverick.

Great option for an almost plug and play harness using the Puzu DSP Ford Maverick harness by just replacing the DSP connector with your own amp's connector. It is cheap at $25.99 direct from the Puzu website. If you buy an amp of any kind and it comes with it's own connector, a lot of people don't want to cut factory wiring, this is the option:

Purchase the Puzu DSP harness for Ford, cut the DSP Amp connector off and wire up your amp harness. This will give your amp a speaker feed and then the amp output goes to the factory speaker wiring. My Puzu harness was truly plug and play with a Puzu DSP Amp. Easy Peezy.​

The link for the harness is here.

Ford Maverick Active Powered "All-N-One" Subwoofers 1698241830123

Puzu DSP Amp harness male connector. Plugs into the Ford ACM.
Ford Maverick Active Powered "All-N-One" Subwoofers 1698242335441

Puzu DSP Amp harness female connector. Unplug the cables & connector for the speakers from the ACM and plug it into this female connector.
Ford Maverick Active Powered "All-N-One" Subwoofers 1698243106632


Ford's pinout guide for the Maverick and others is shown below.

This is how my system is connected using the Puzu harness feeding the DSP Amp.
Ford Maverick Active Powered "All-N-One" Subwoofers 1698242473733


This is Puzu's DSP connector pinout guide. After cutting off the DSP connector, you can use It to identify the wiring structure for attaching your own amp's connector to the Puzu harness. The power (BATT) and ground (GND) do not have to be used and should not be used with most amps, or DSPs. Note it has a Remote in (REMIN) and Remote out (REMOUT).
Ford Maverick Active Powered "All-N-One" Subwoofers 1698242702942


This harness was included with the Puzu PZ-C7 DSP Amp I purchased on eBay and I believe the vendor sells them for $20, but I'm not sure.

I don't work for Puzu and don't make any money off of them. I had to buy all my own equipment. This is just a good harness option for those that want something reasonably priced and easy to accomplish.

I hope this information helps someone. Let me know the results if any of you decide to go this route.

This is Ford's pinout guide.
Ford Maverick Active Powered "All-N-One" Subwoofers 1698243515306
 
Last edited:

HushCarAudio

Well-known member
Gold Sponsor
First Name
Bruce
Joined
Oct 7, 2023
Threads
1
Messages
78
Reaction score
70
Location
Aubrey TX
Vehicle(s)
Maverick
Engine
Undecided
I build plug and play harnesses if interested.
 

MavFromTheDead

2.0L EcoBoost
Well-known member
First Name
Derek
Joined
Nov 19, 2022
Threads
9
Messages
235
Reaction score
255
Location
Leander, Texas
Vehicle(s)
XLT Tremor
Engine
2.0L EcoBoost
Clubs
 
I'm still lovin' my Puzu PZ-C7 DSP Amp. I know harnesses are something that are expensive for many name brand DSP & straight amps. I had a thought. Here is a link to the Puzu harness for the Ford Maverick.

Great option for an almost plug and play harness using the Puzu DSP Ford Maverick harness by just replacing the DSP connector with your own amp's connector. It is cheap at $25.99 direct from the Puzu website. If you buy an amp of any kind and it comes with it's own connector, a lot of people don't want to cut factory wiring, this is the option:

Purchase the Puzu DSP harness for Ford, cut the DSP Amp connector off and wire up your amp harness. This will give your amp a speaker feed and then the amp output goes to the factory speaker wiring. My Puzu harness was truly plug and play with a Puzu DSP Amp. Easy Peezy.​

The link for the harness is here.

1698241830123.png

Puzu DSP Amp harness male connector. Plugs into the Ford ACM.
1698242335441.png

Puzu DSP Amp harness female connector. Unplug the cables & connector for the speakers from the ACM and plug it into this female connector.
1698243106632.png


Ford's pinout guide for the Maverick and others is shown below.

This is how my system is connected using the Puzu harness feeding the DSP Amp.
1698242473733.png


This is Puzu's DSP connector pinout guide. After cutting off the DSP connector, you can use It to identify the wiring structure for attaching your own amp's connector to the Puzu harness. The power (BATT) and ground (GND) do not have to be used and should not be used with most amps, or DSPs. Note it has a Remote in (REMIN) and Remote out (REMOUT).
1698242702942.png


This harness was included with the Puzu PZ-C7 DSP Amp I purchased on eBay and I believe the vendor sells them for $20, but I'm not sure.

I don't work for Puzu and don't make any money off of them. I had to buy all my own equipment. This is just a good harness option for those that want something reasonably priced and easy to accomplish.

I hope this information helps someone. Let me know the results if any of you decide to go this route.

This is Ford's pinout guide.
1698243515306.jpeg
Nice, I was going to ask for an update. After installing the Infinities, I definitely need more low end. Thinking of going with the Rockville powered 10". I was just curious is there a reason why I don't see a lot if people putting these subs under the seat(s)?
 

colinl

2.0L EcoBoost
Well-known member
First Name
Colin
Joined
Jun 21, 2022
Threads
32
Messages
5,440
Reaction score
6,179
Location
ICT
Vehicle(s)
'22 Maverick Lariat AWD, '22 Bronco OBX 2-Door
Engine
2.0L EcoBoost
Clubs
 
I was just curious is there a reason why I don't see a lot if people putting these subs under the seat(s)?
there's no need to do it because there is a lot more room behind the rear bench. The angle of the backrest creates a fairly deep space at the bottom and a Kicker HS10 fits.

at best, you might be able to squeeze in a MTX Terminator 8" under a front seat. I put one under the seat in my son's SUV. the little MTX is better than nothing, but it's way less impressive than a HS10.

(edit) if you meant in the bins, you can do that too, but you're giving up the bin basically for nothing. it fits behind the seat backrest and then you can use the bin for other cargo.

I have heard Rockville several times and if I'm polite I would say you get what you pay for, and I'd pay more for a Kicker HS10.
Sponsored


Top