- Thread starter
- #1
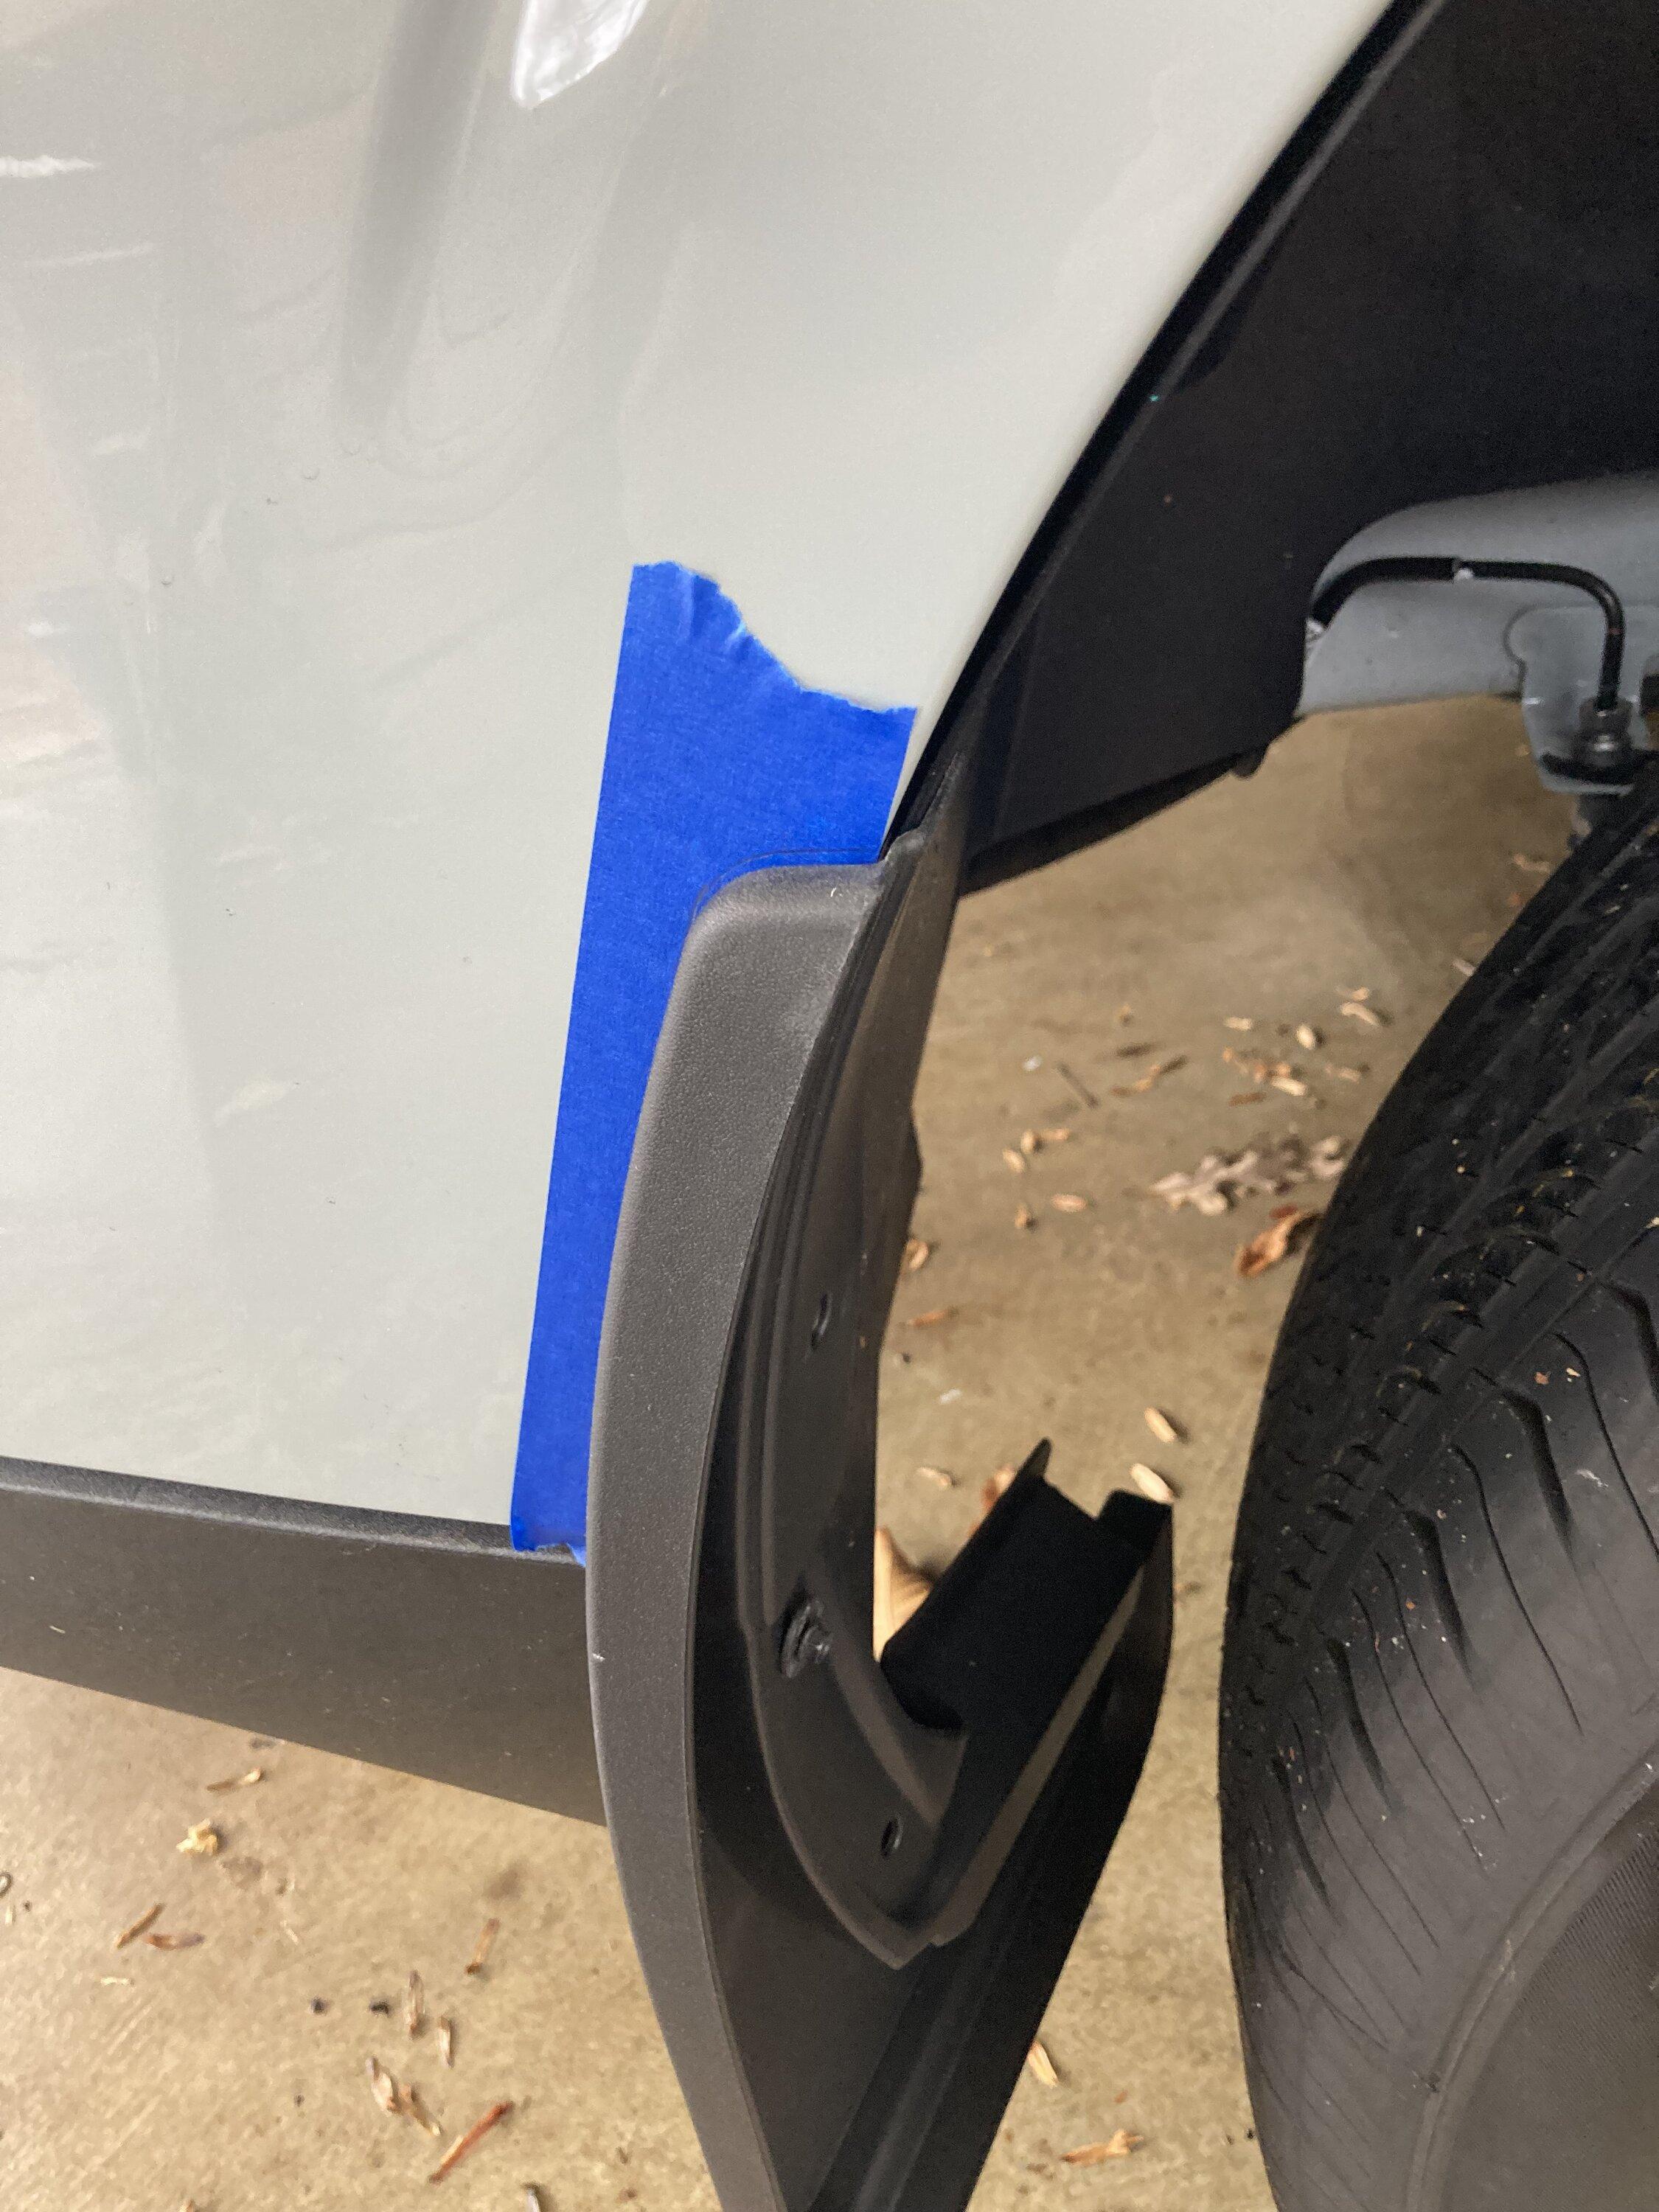
On Sunday I installed the mudflaps. I wanted to share my method on how I installed the film, since I hadn’t seen it on here when I was looking on this forum. Hope it may help someone. Sorry I only took one picture during installation but you should get the idea.
1 Remove pushpins/bolts.
2 Hold mudflap in place and eyeball where plastic comes in contact with paint.
3 Remove mudflap and put painters tape on paint in this area make sure to go at least an inch higher and a bit wider of the non mudflap portion covered.
4 Insert one pin and push/hold mudflap in place firmly and trace contour on tape.
5 Remove mudflap and peel back tape starting at bottom and cut out contour with scissors as you are peeling upward. Make sure after you cut to keep the non-cutout portion on vehicle’s paint, leaving the extra tape on top helps with this. Once I got near the bottom of the top radius I pressed the tape back on the fender then finished the cut starting at the wheel well and cut rearward.
5 Place cut out tape on film and cut out film (make sure you place painters tape on the topside of film), remove painters tape from top of film
6 Remaining painters tape will still be on vehicle, so you can align film accurately.
7 Affix film, remove tape from fender, position and pin/bolt mudflap in place.
Note that the included film is too narrow to cover entire width. You can either buy wider film, patch a second piece in, or what I did was just do the outside. Since on mine that is where the plastic was touching the paint, particularly the upper rear portion.
Sponsored