OP
OP

- Thread starter
- #46
I just realized that my videos never posted. I'm not familiar with how to add a video. Can someone please tell me how. Thank you in advance
Sponsored
I figured out how to add videos. Updated original post. Weird thing is I had added links to all of the items used for mods and now they don't show up? Oh well, I'm just not good at this forum stuff.I just realized that my videos never posted. I'm not familiar with how to add a video. Can someone please tell me how. Thank you in advance
Question how did you tweek to add video to the screen? Impressive.One year and one week from the order date we got my wife’s truck.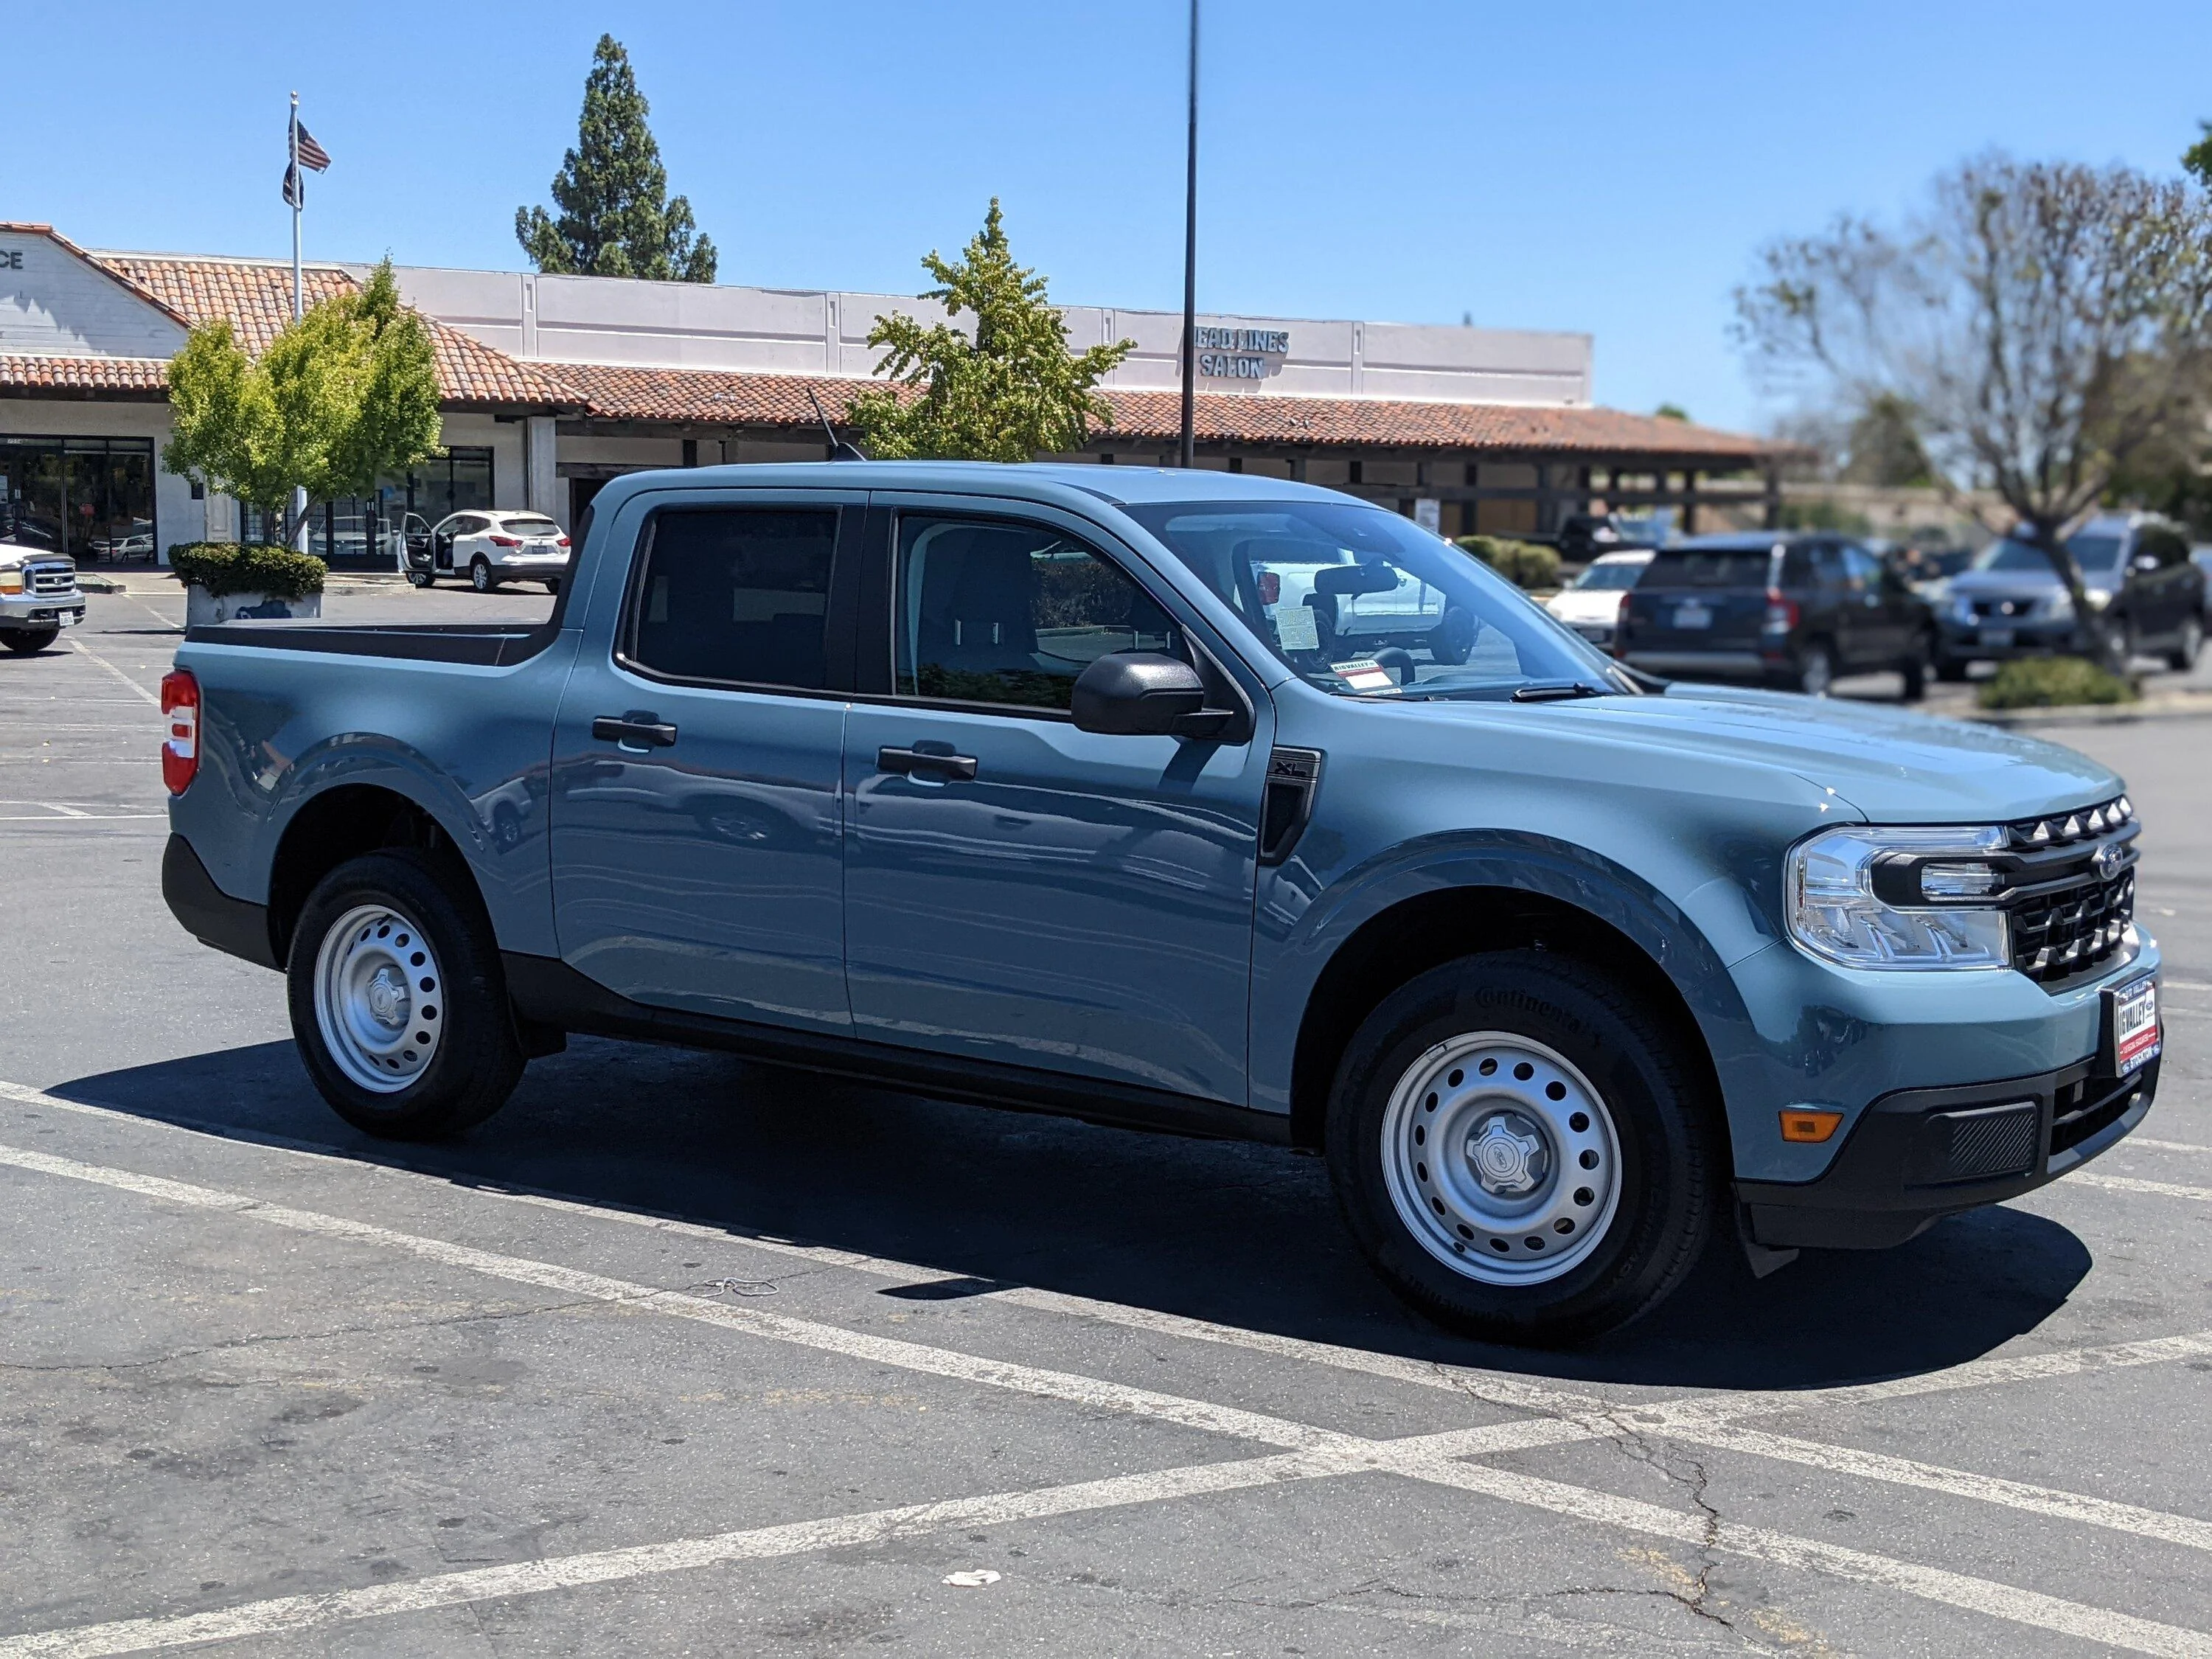
I took two plus weeks to decide on which modifications to do and wait for parts. Thanks to all who posted and shared their ideas and diy tutorials. Too many to list, but thanks to all of you.
Here's my additions. Total add-ons cost just under $2200.00.
Majority of the cost are the items that I had the dealership add:
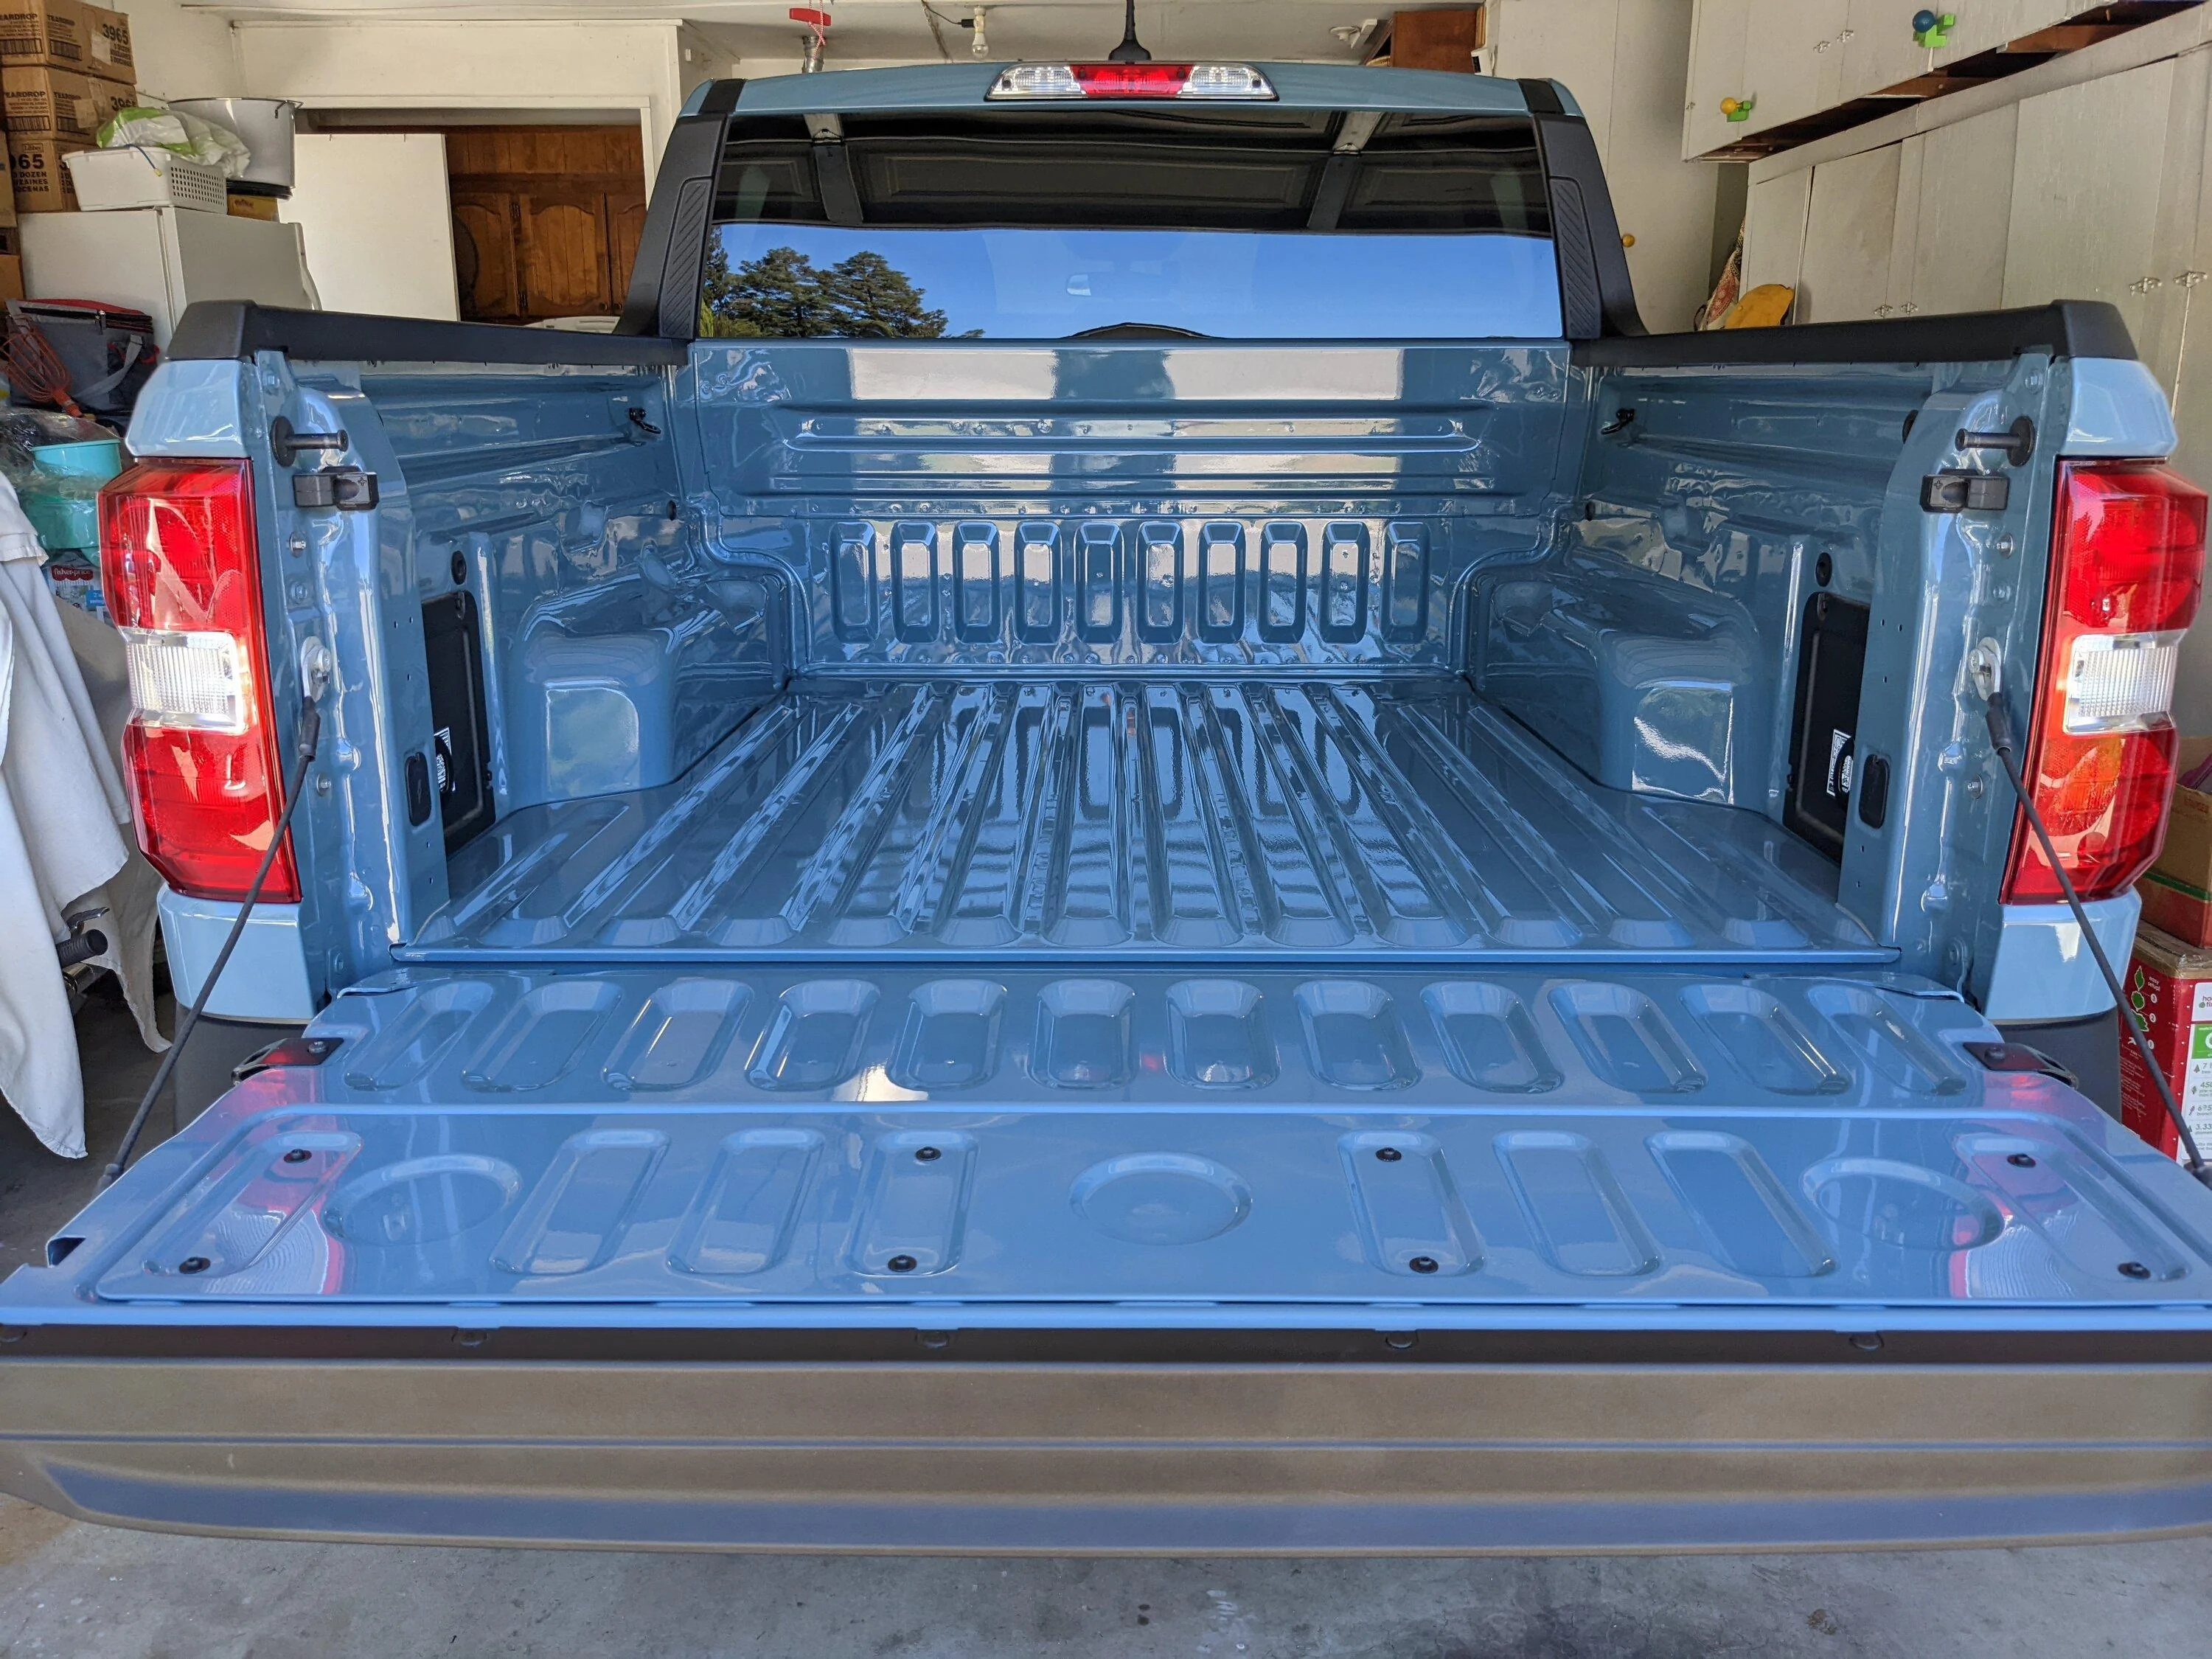
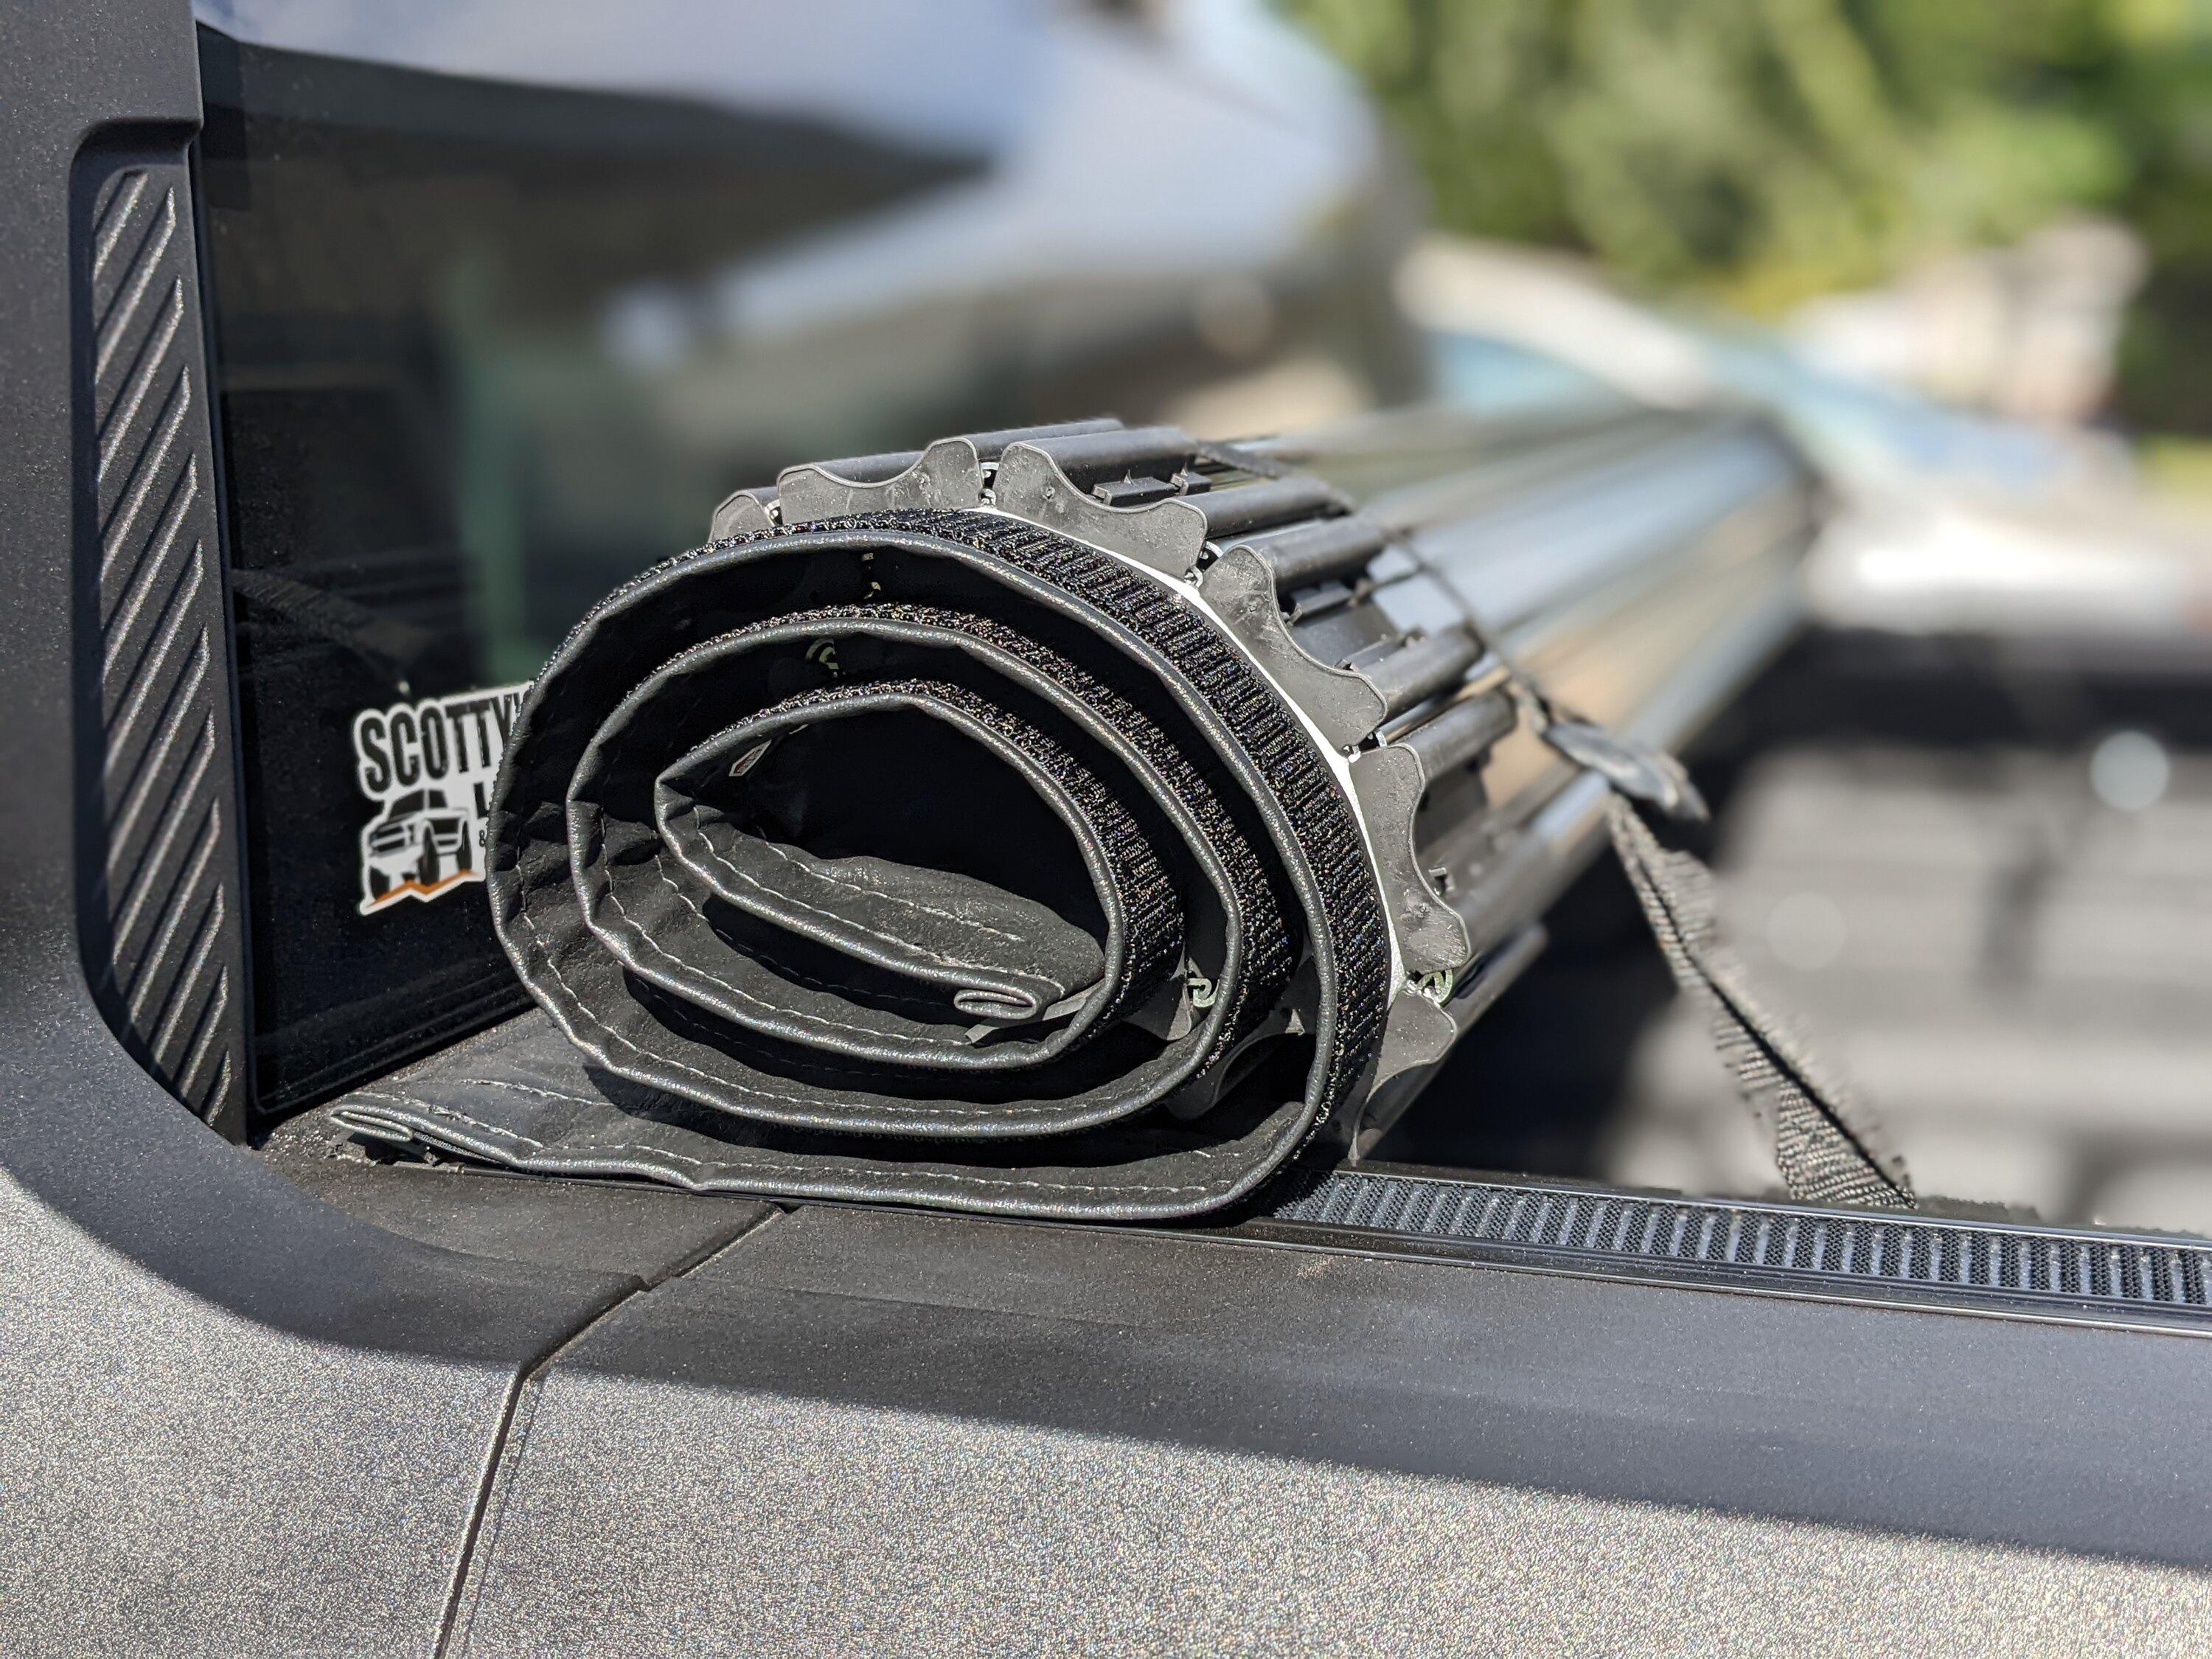
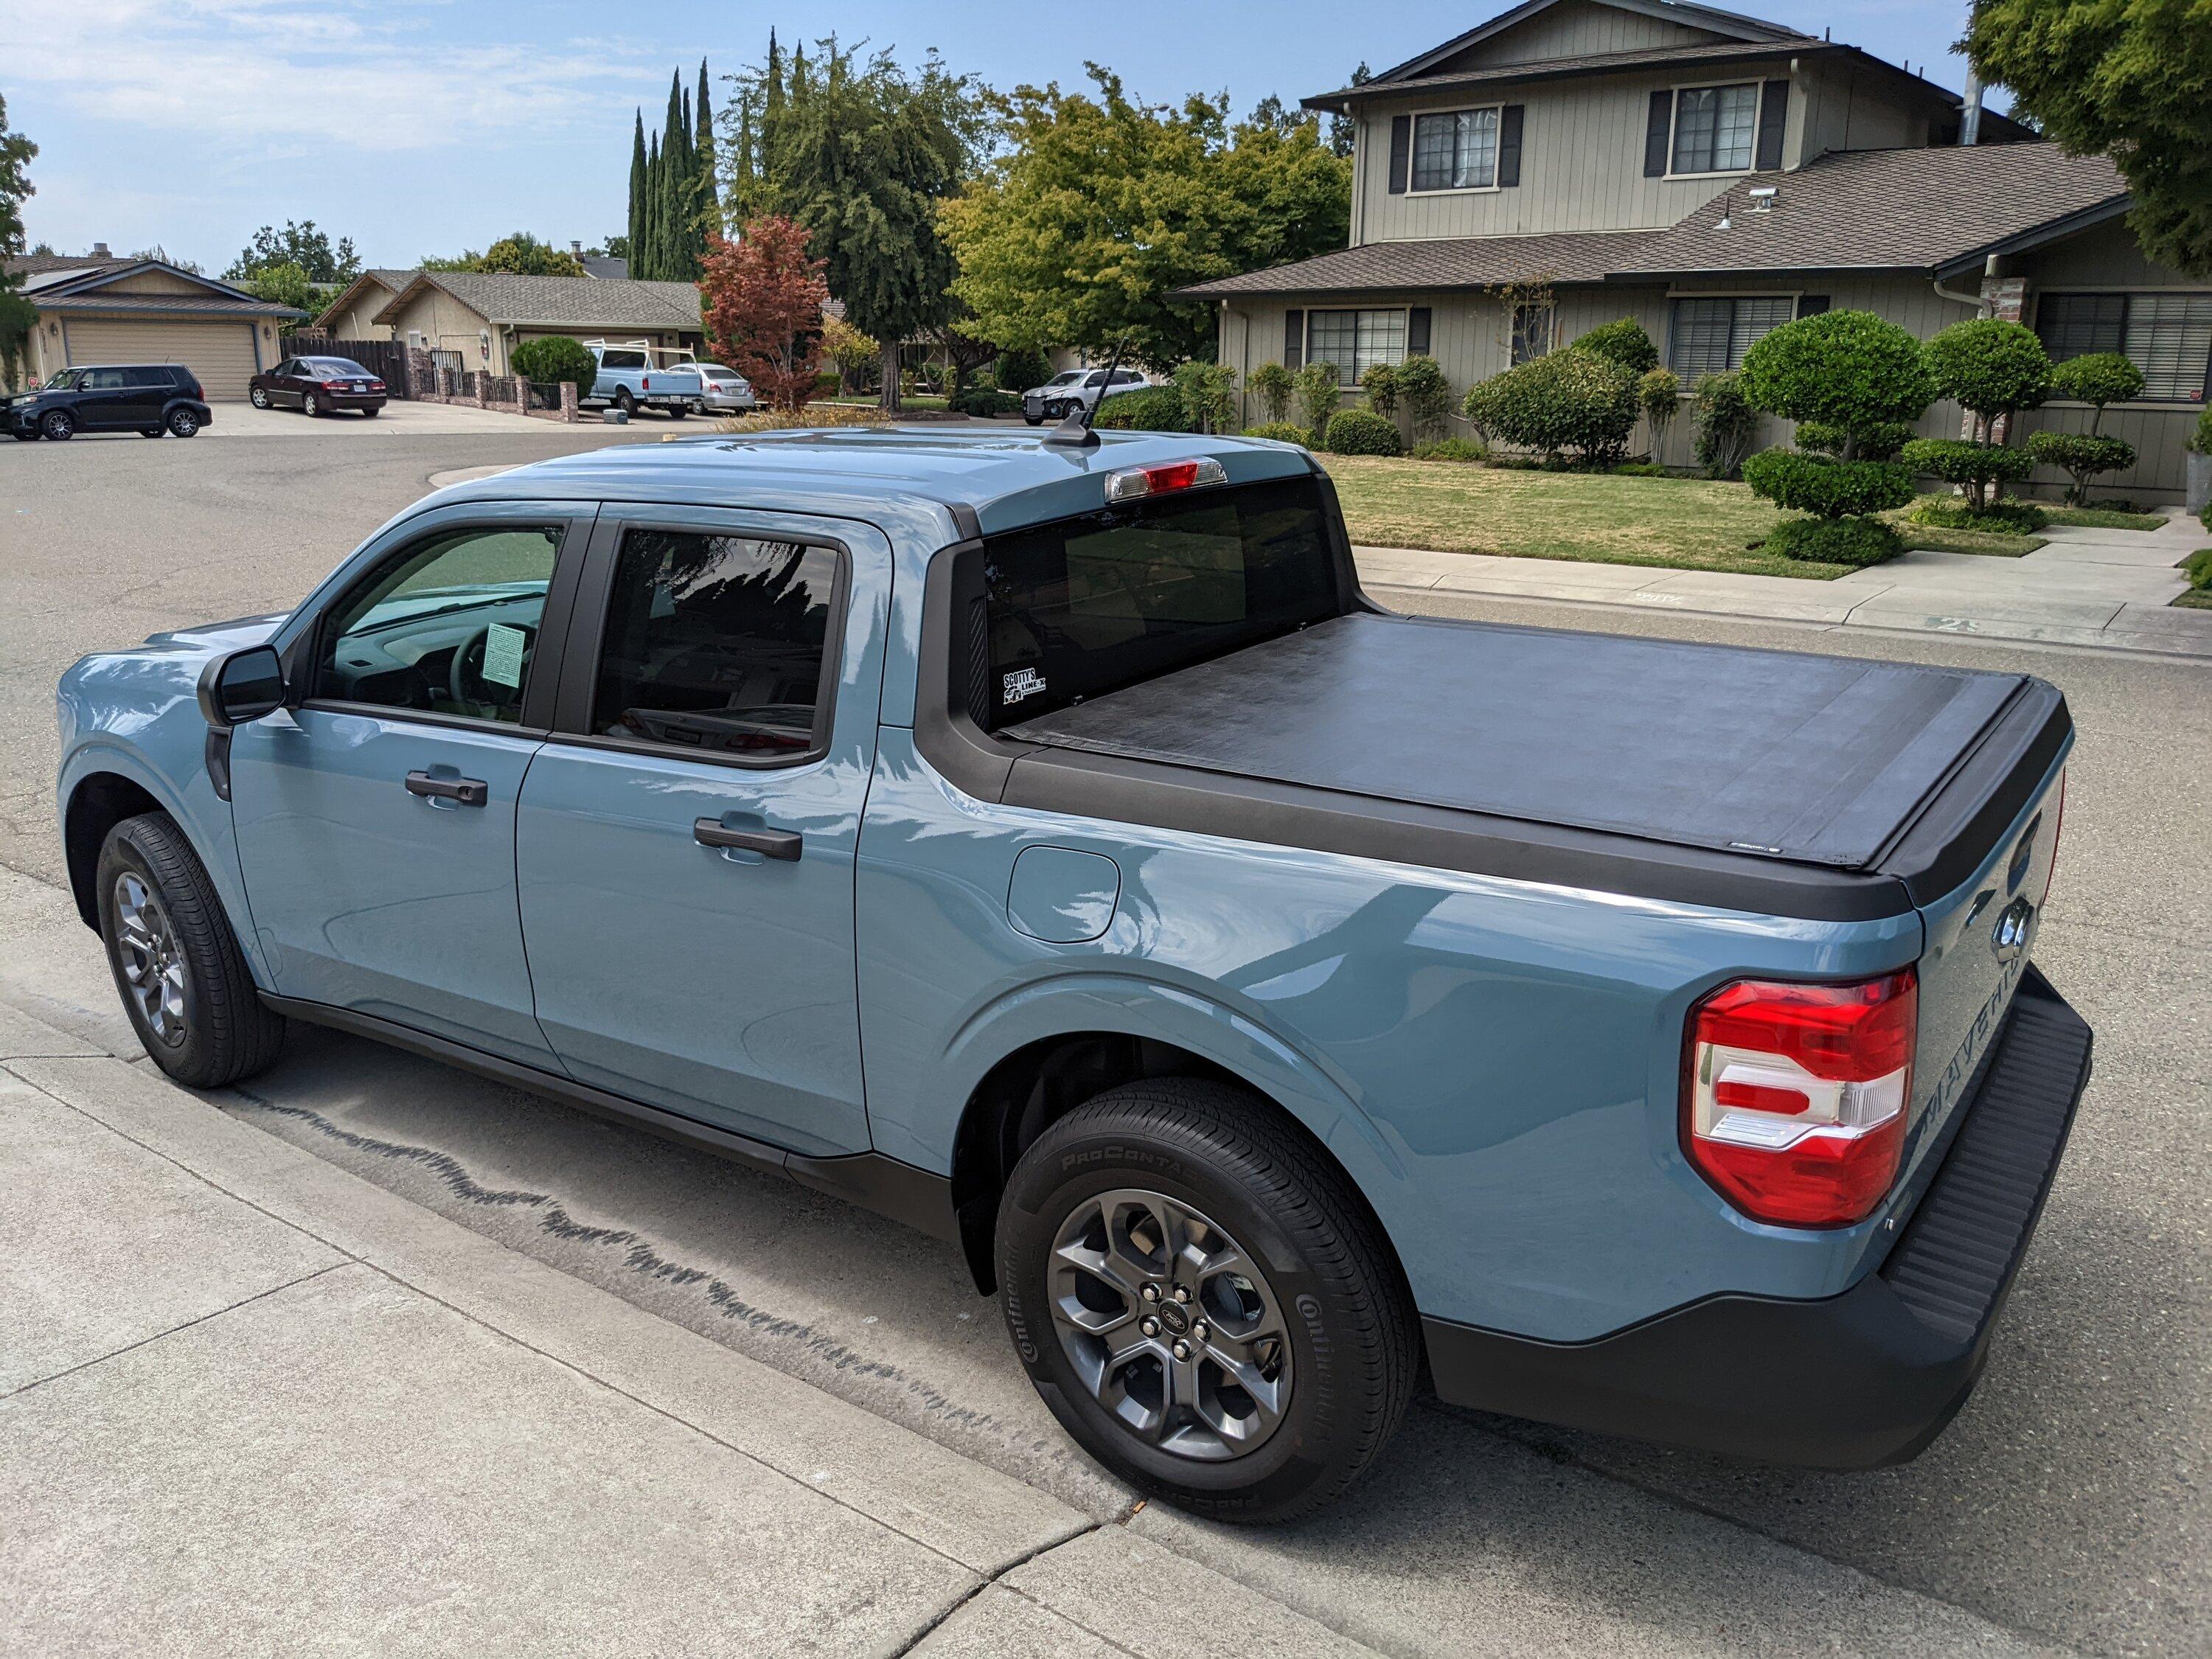
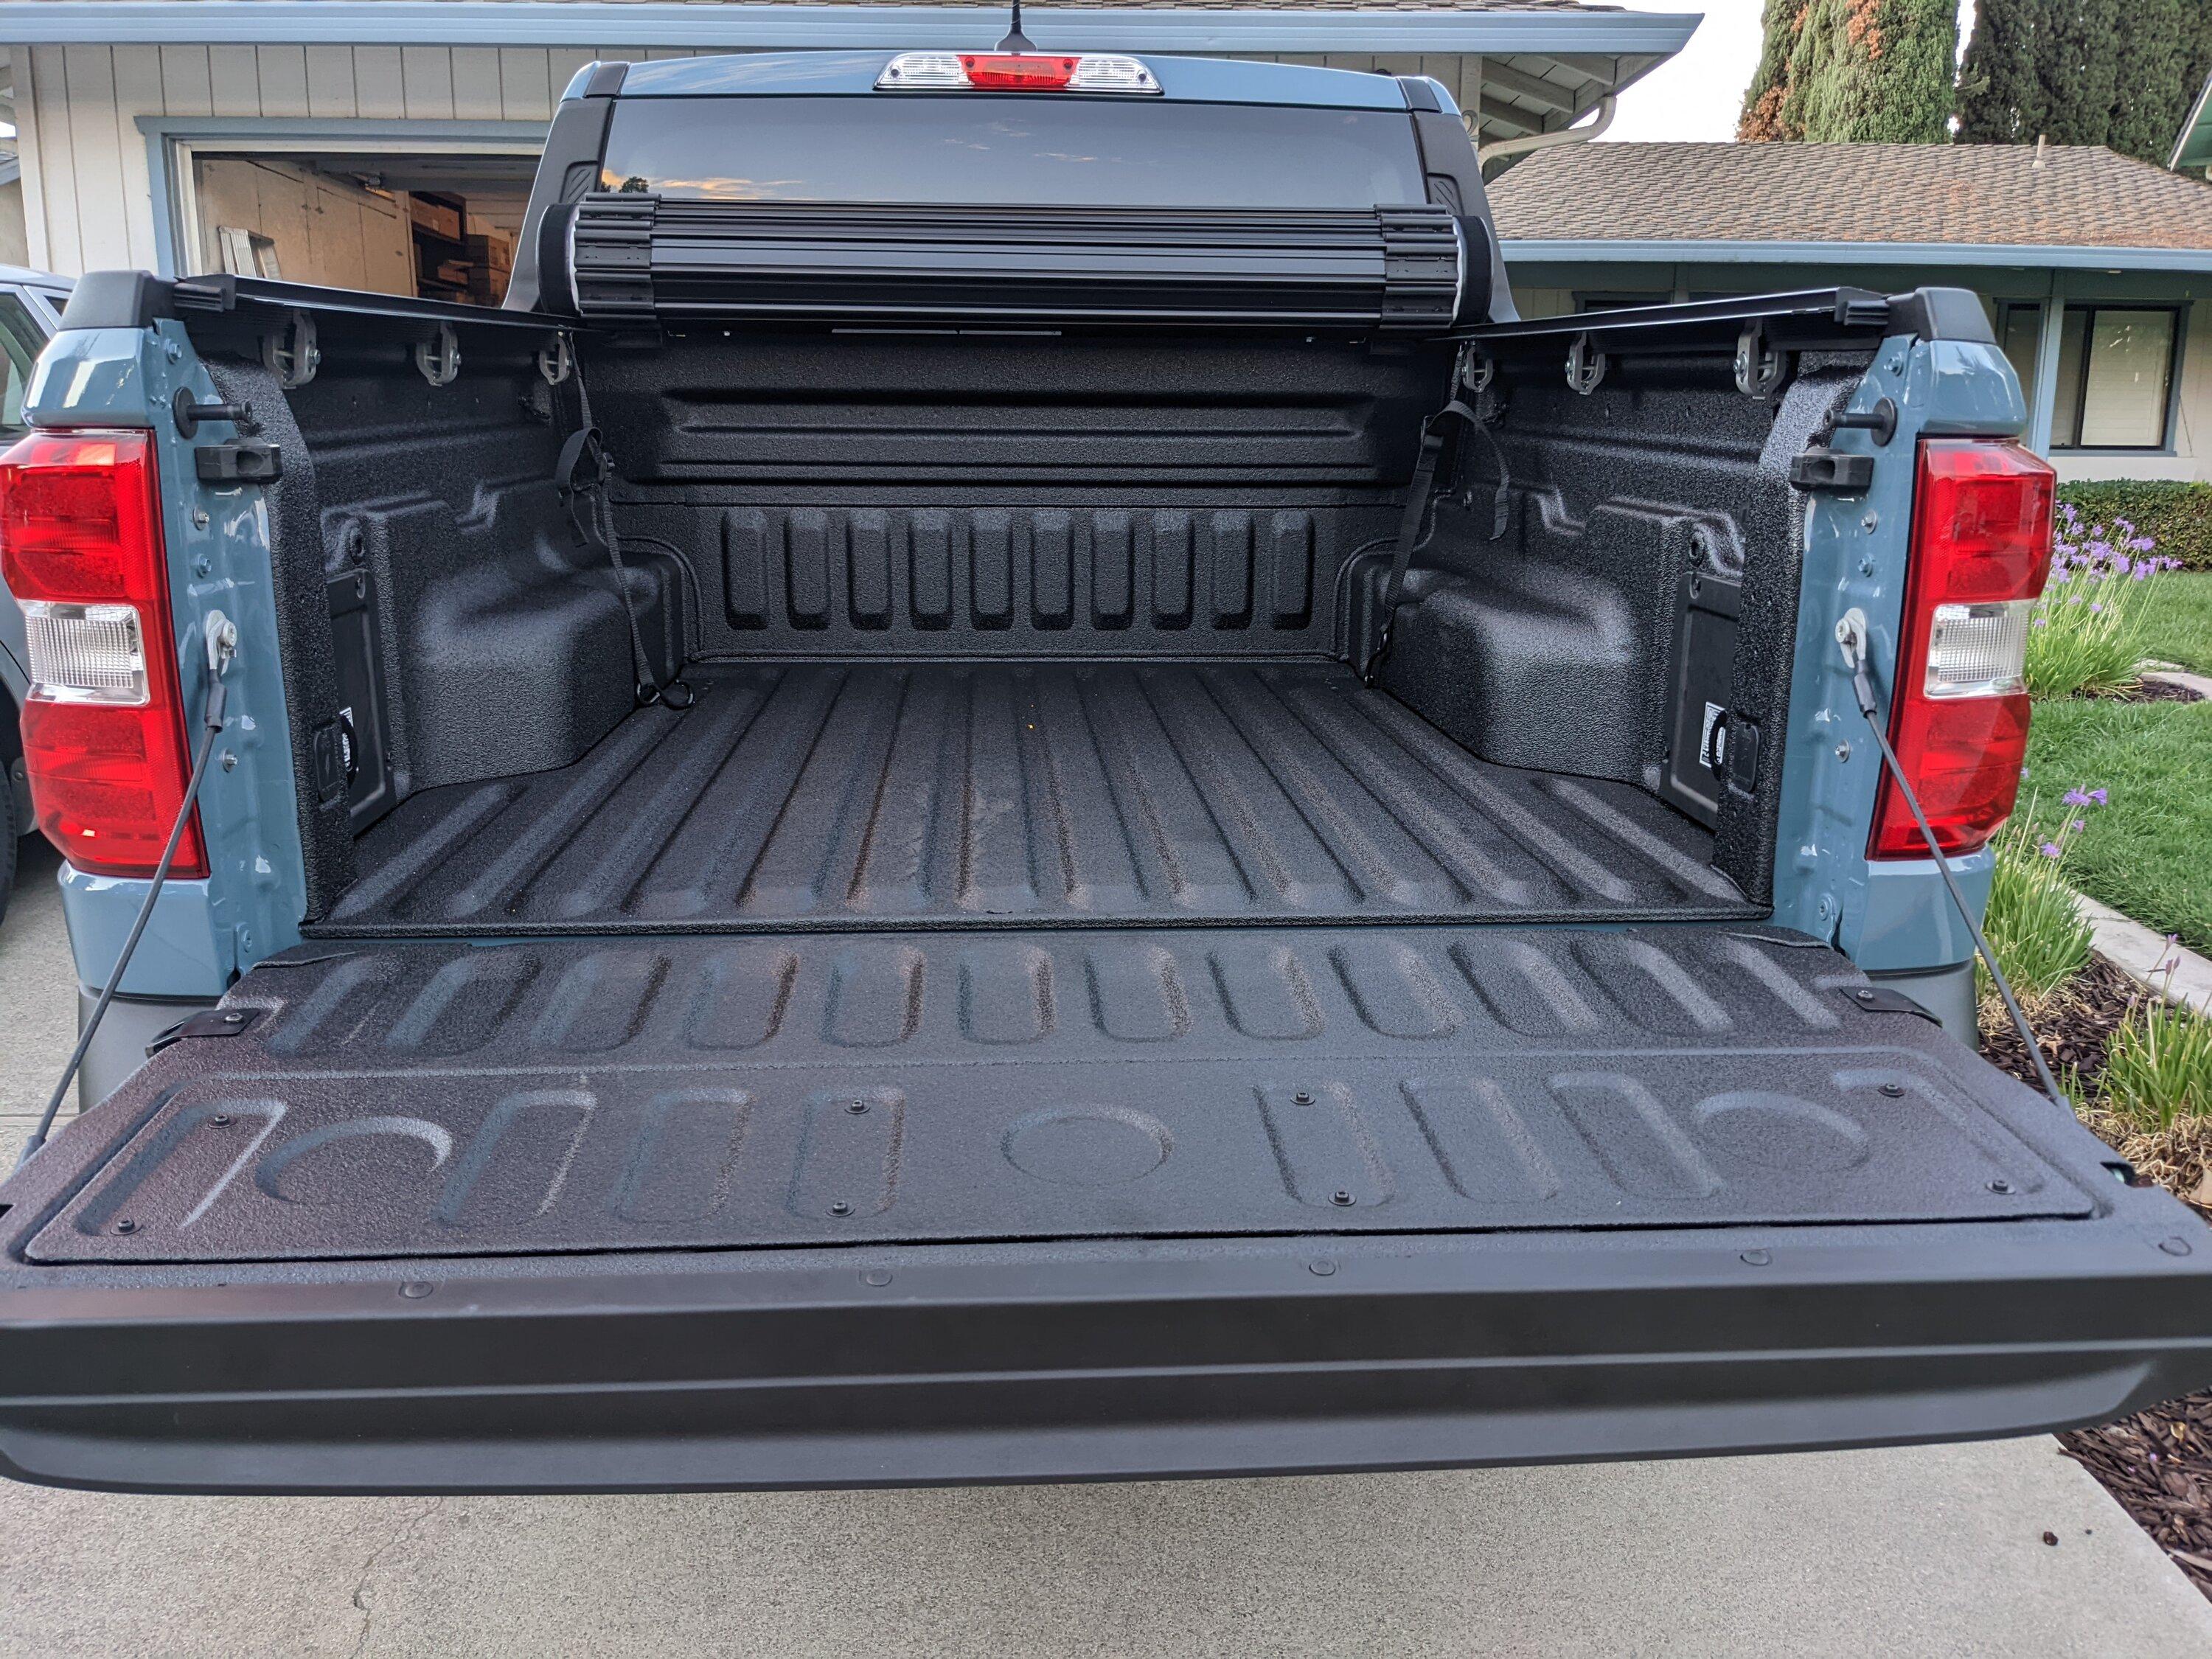
Truxedo Sentry hard tonneau roll cover.
Line-X spray in bed liner.
XLT wheels – from forum member Mavlove, that the dealership swapped out for me.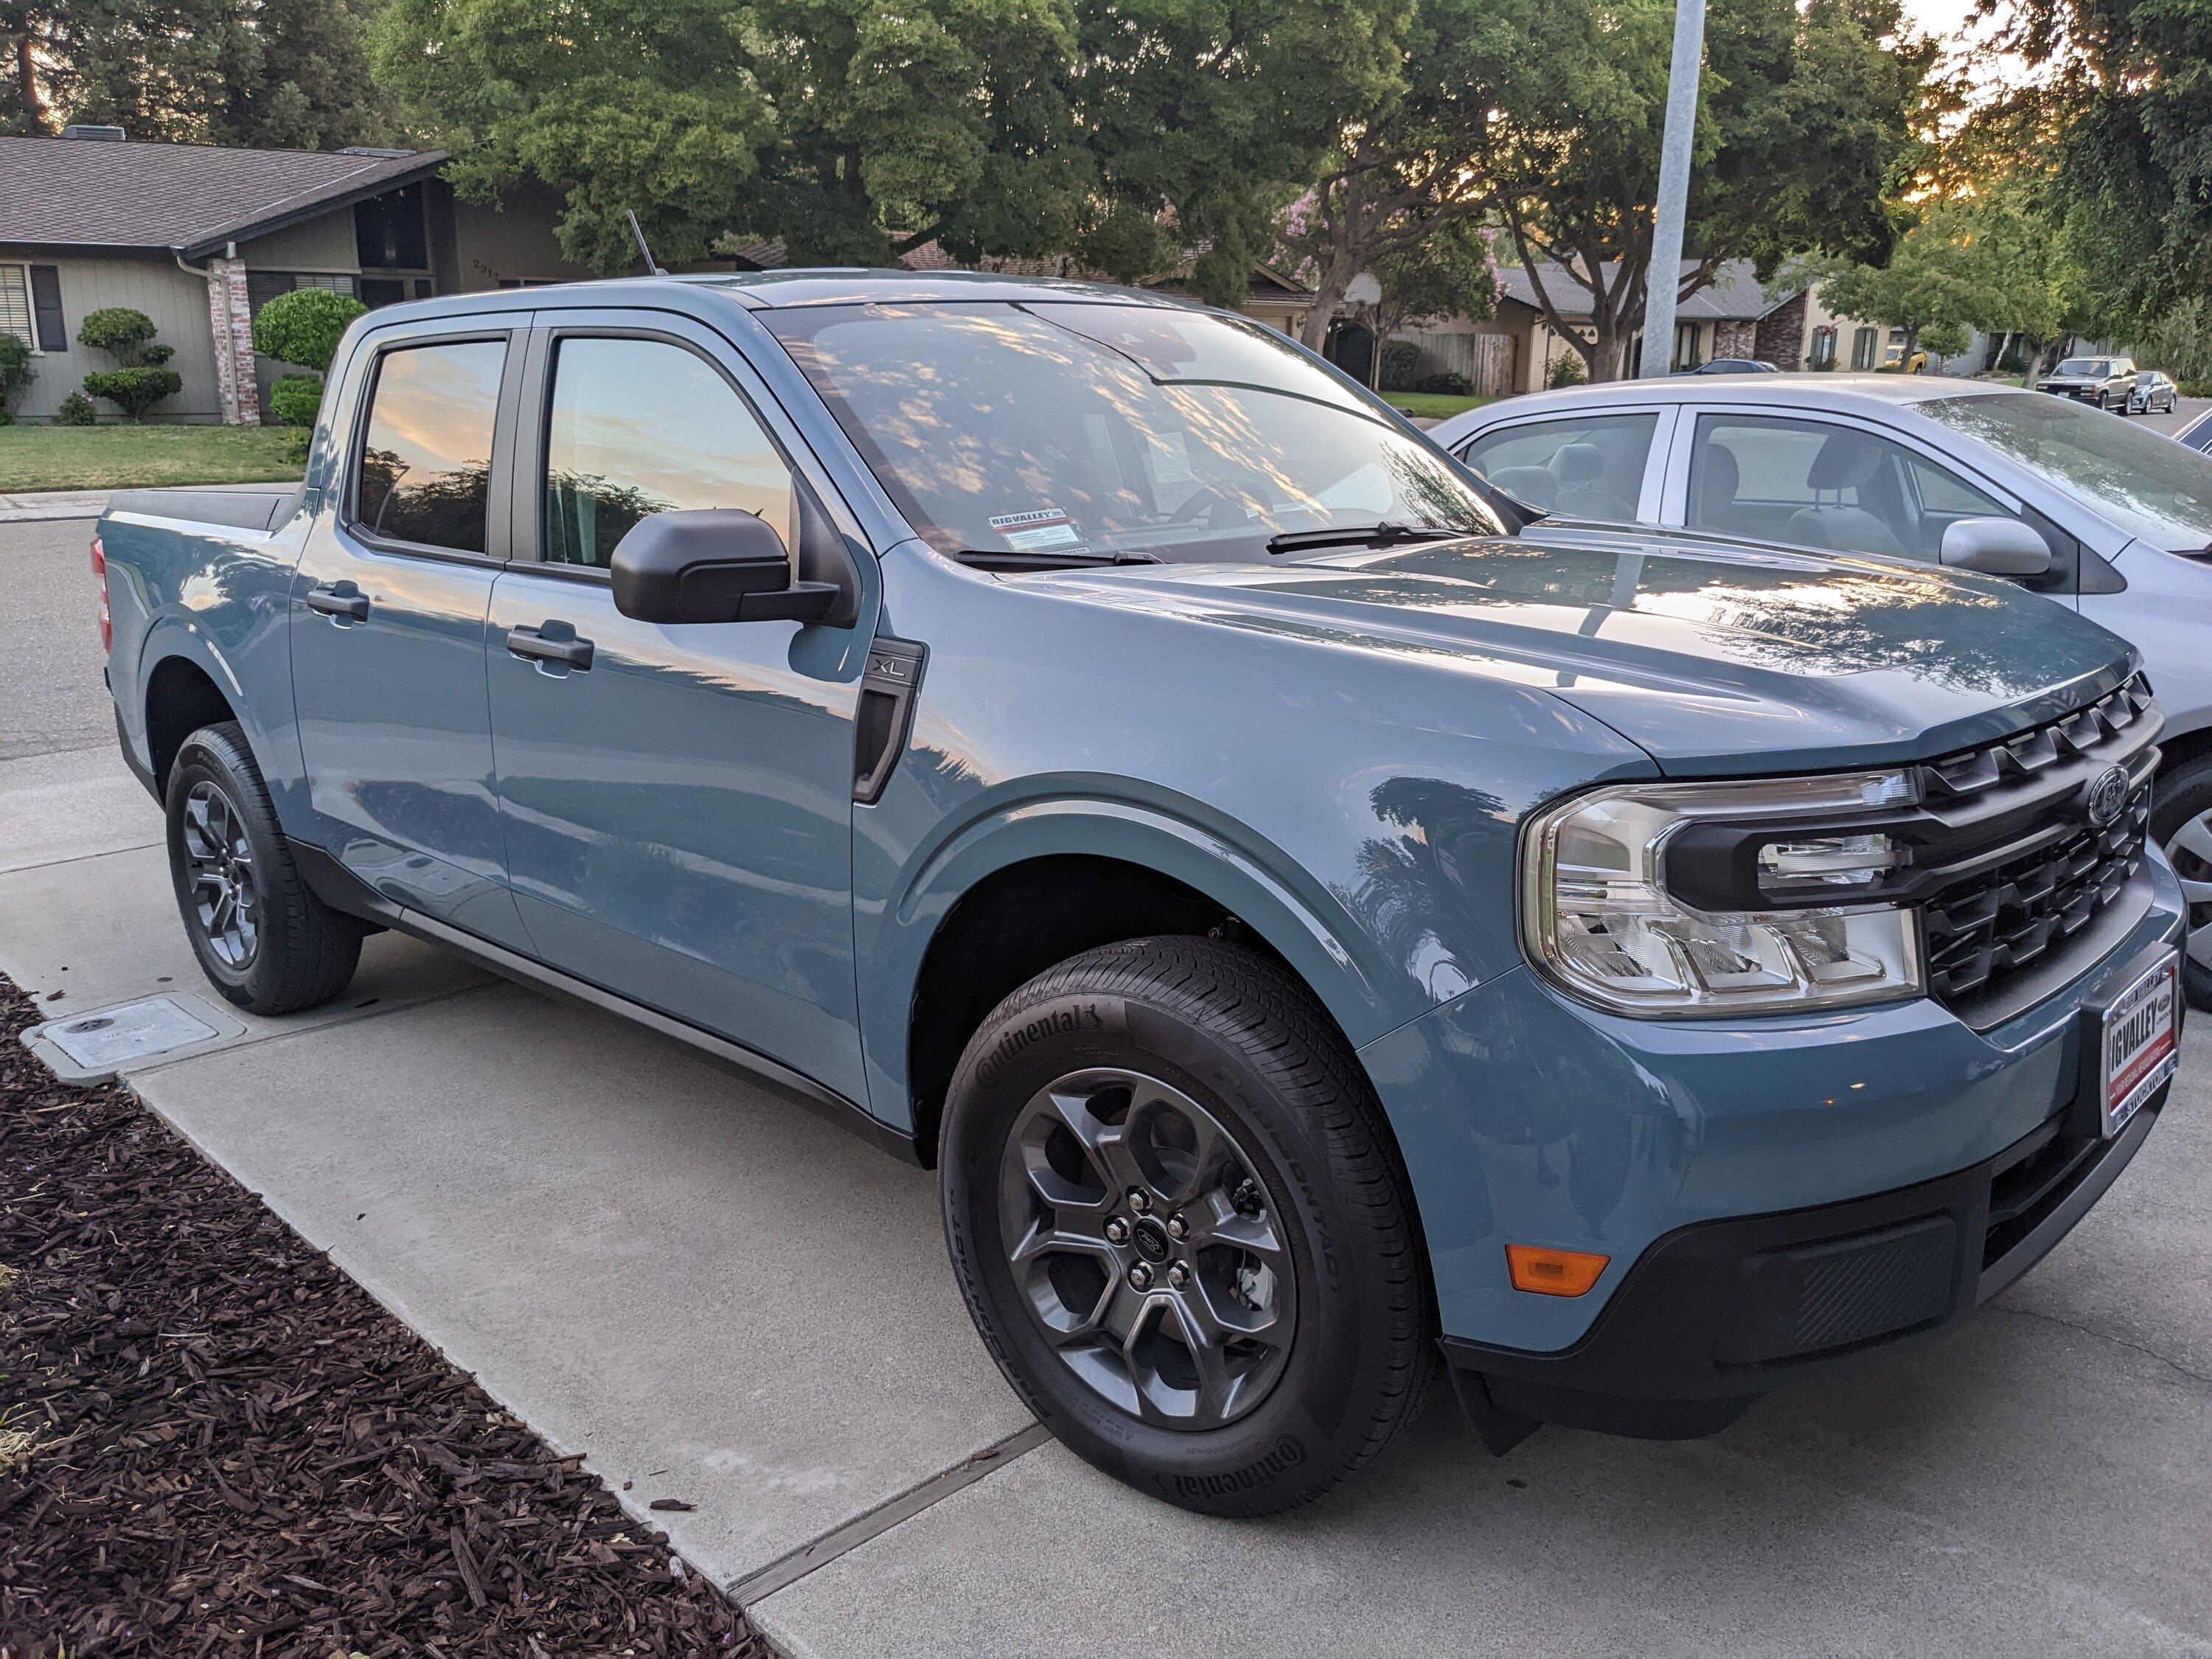
My adds that I did after arrival of final parts:
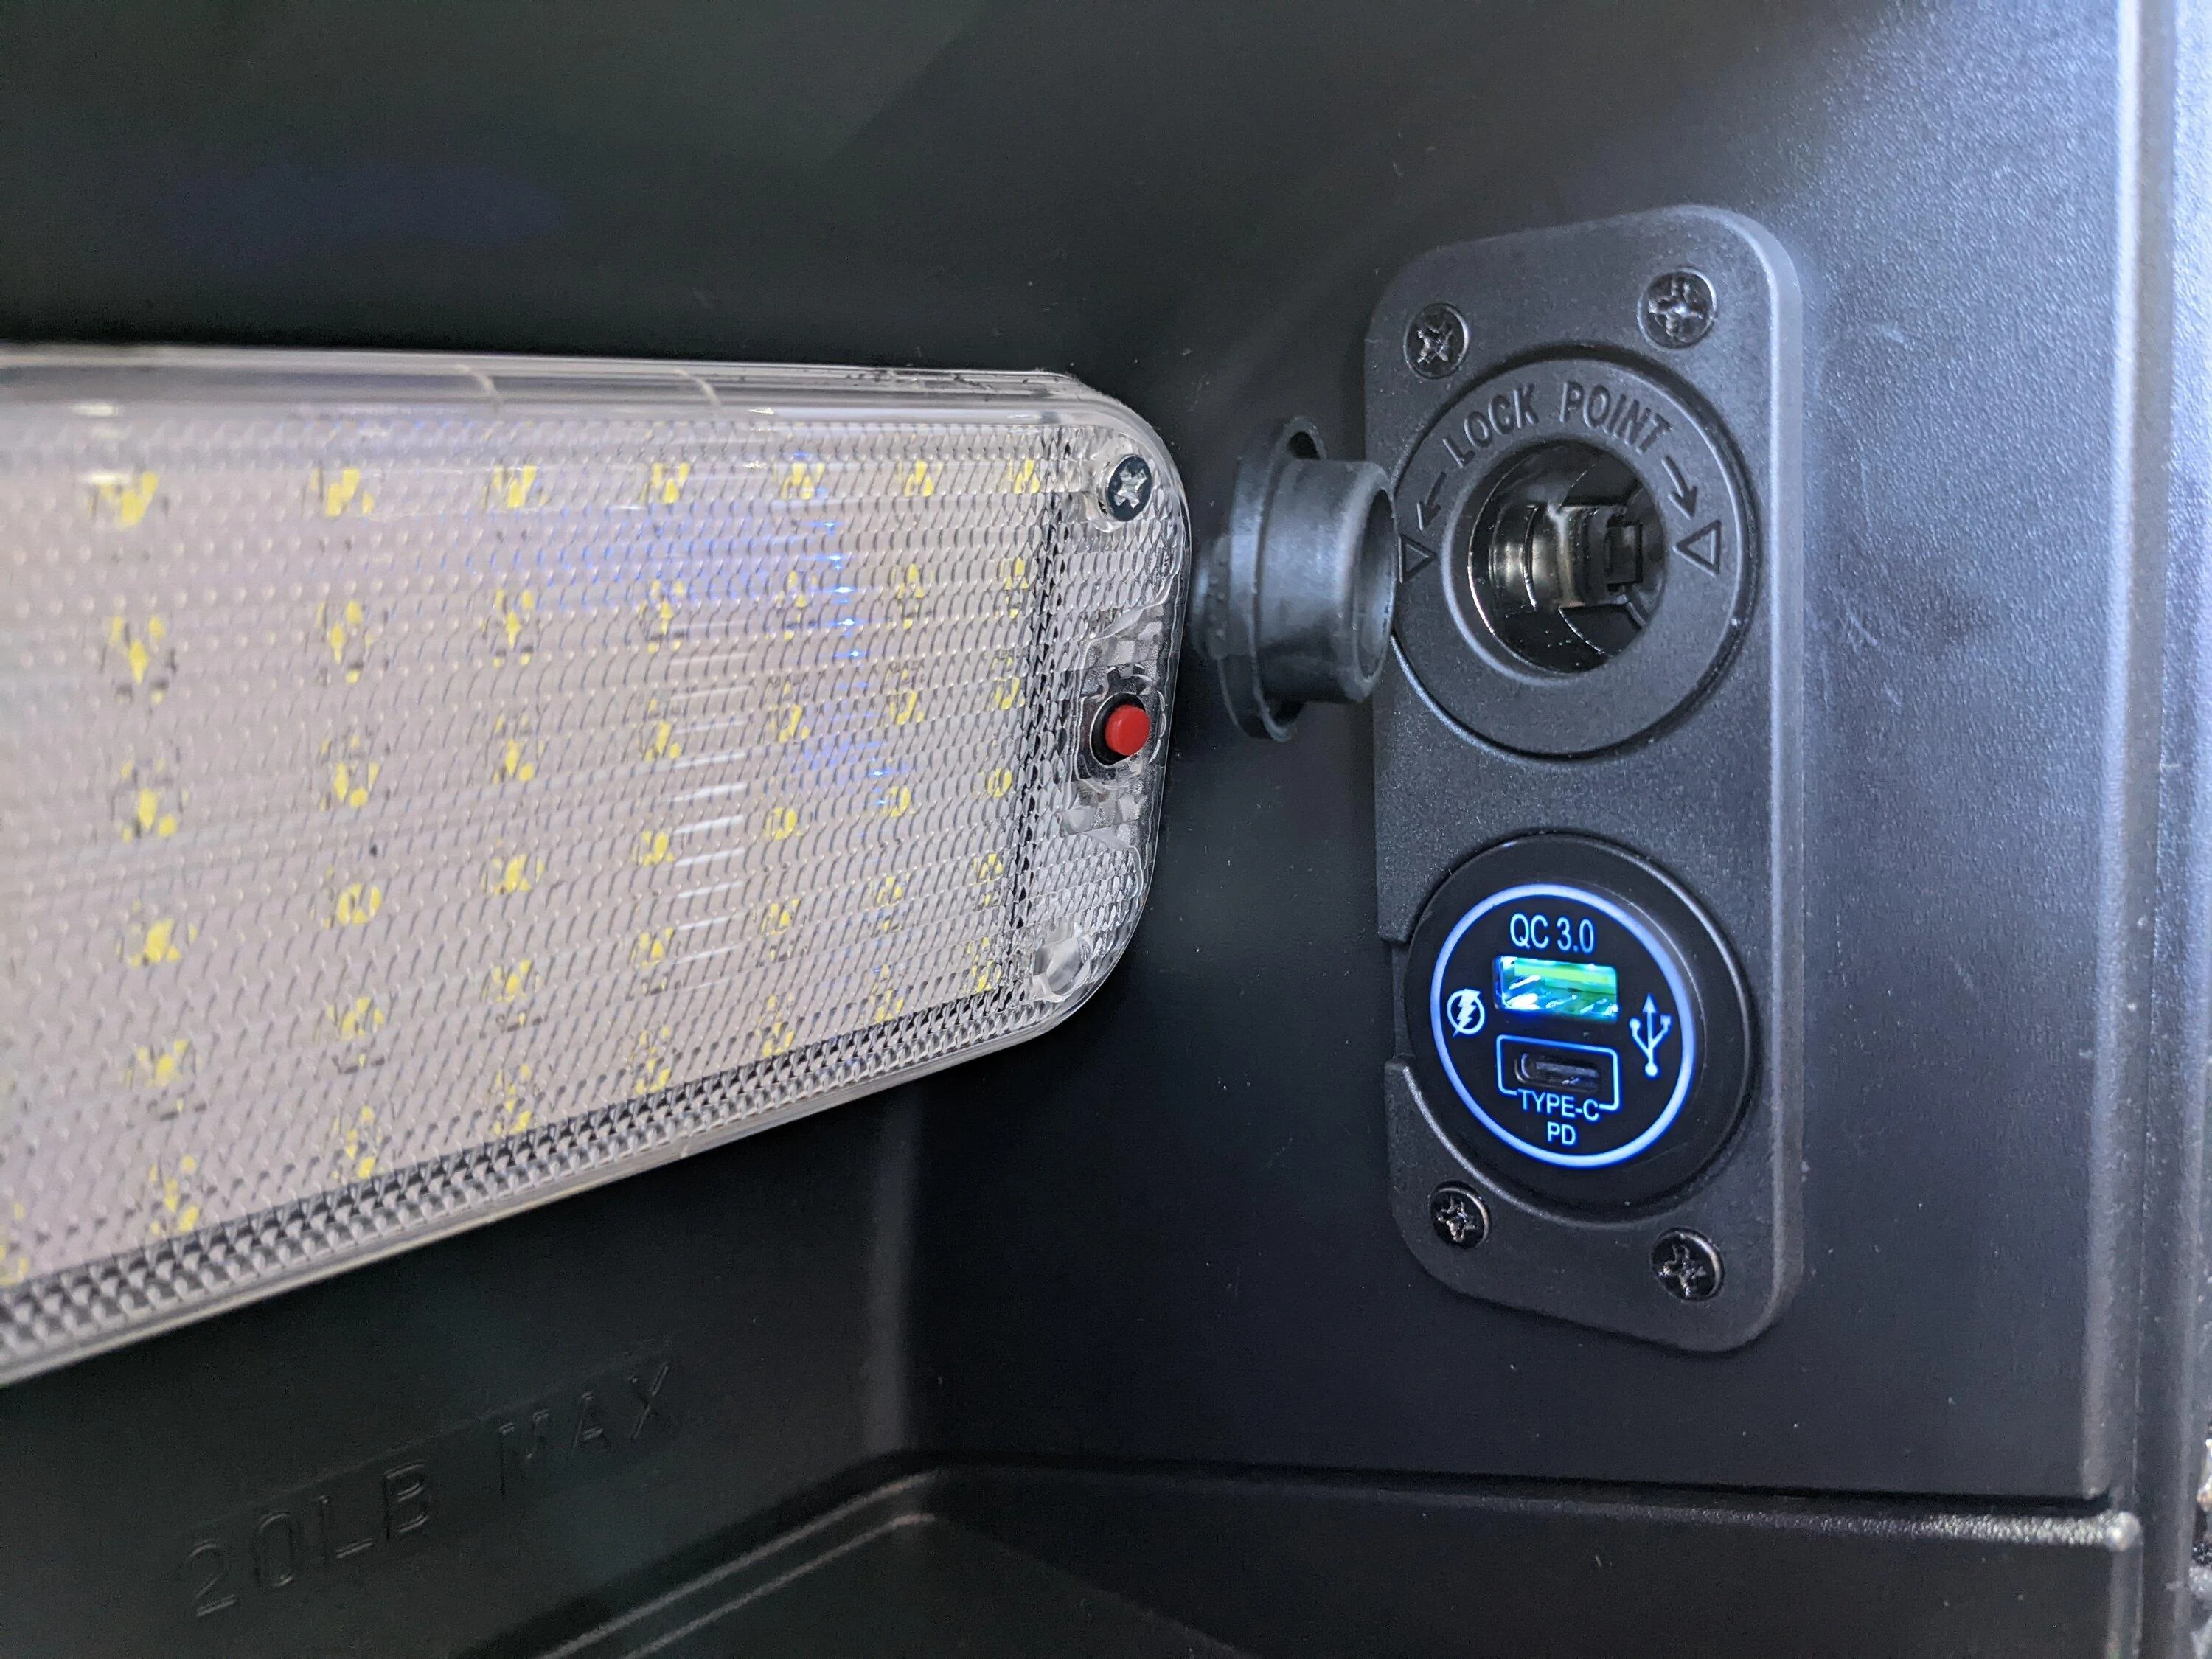
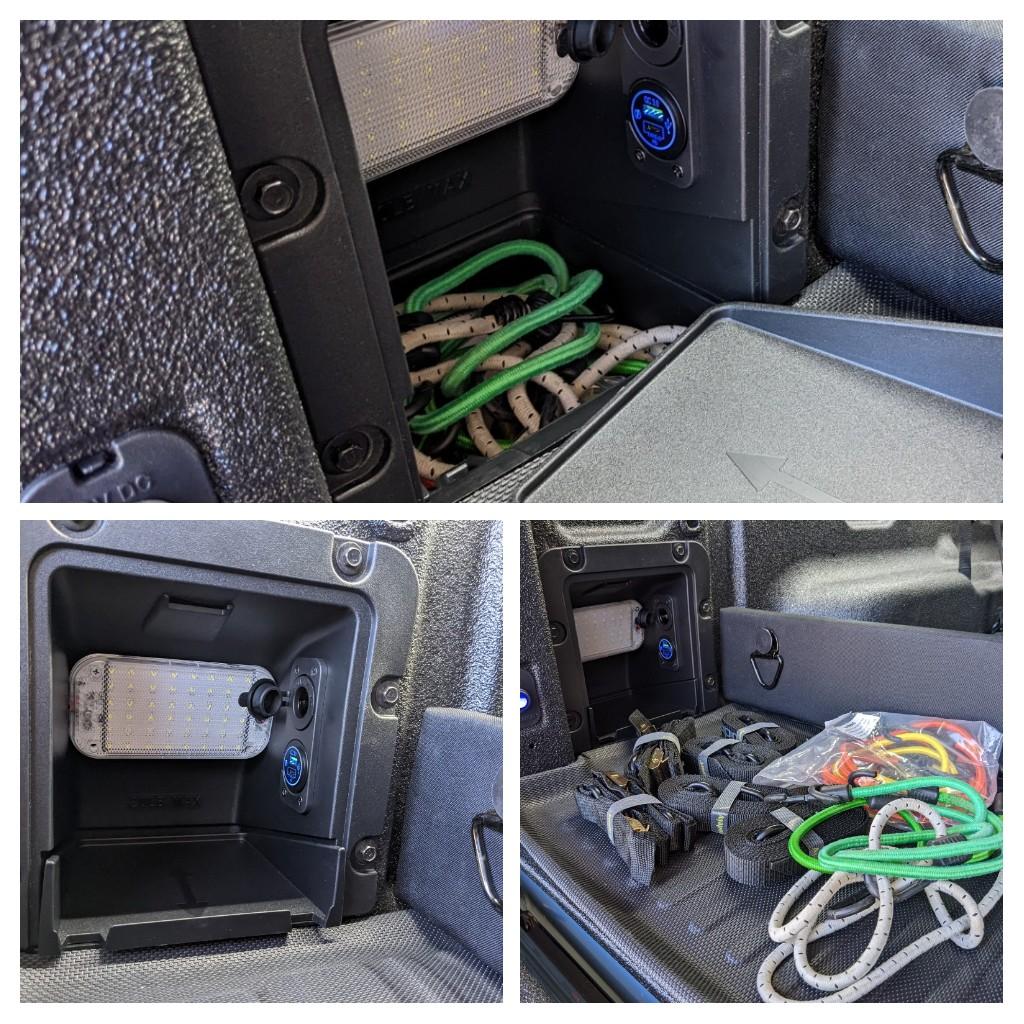
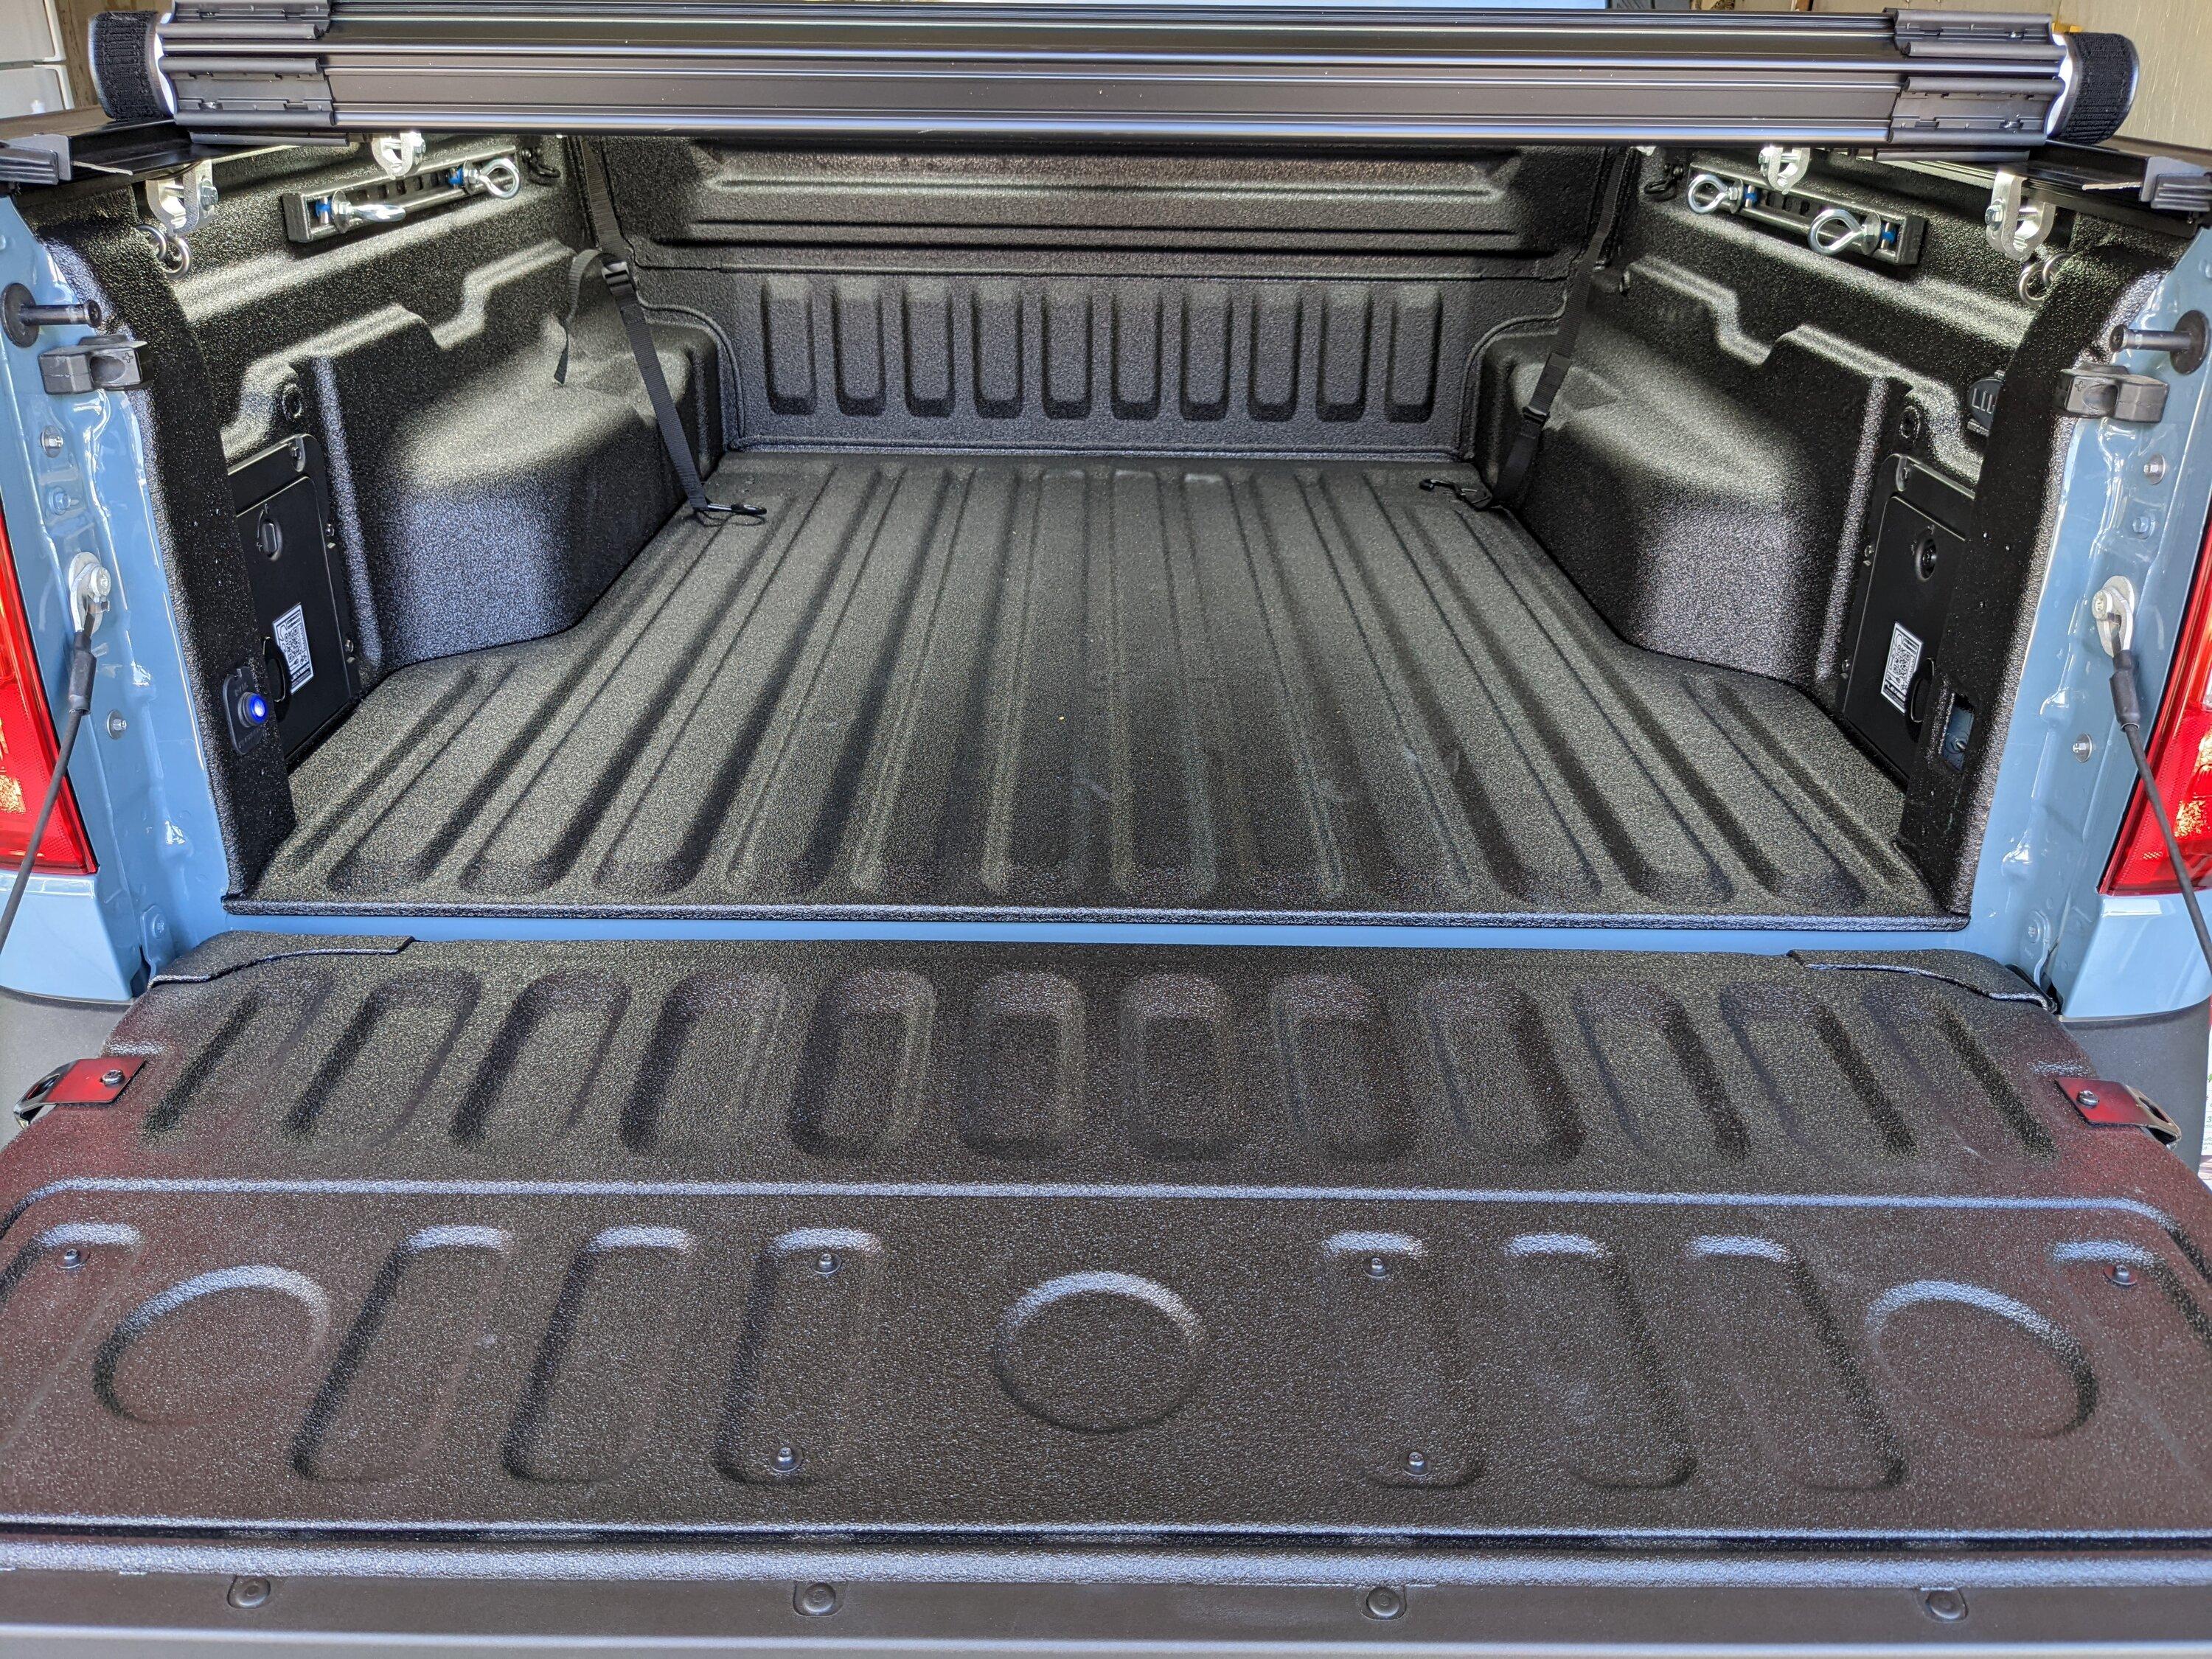
Two bed cubbies. installed lights in both. Works well for when I need just a little light and to see what’s deep in the cubby. Also added reed switches so the cubby lights turn off when the cover is closed. Right side cubby has the cig lighter socket, two USB C and one USB A port and the voltage display.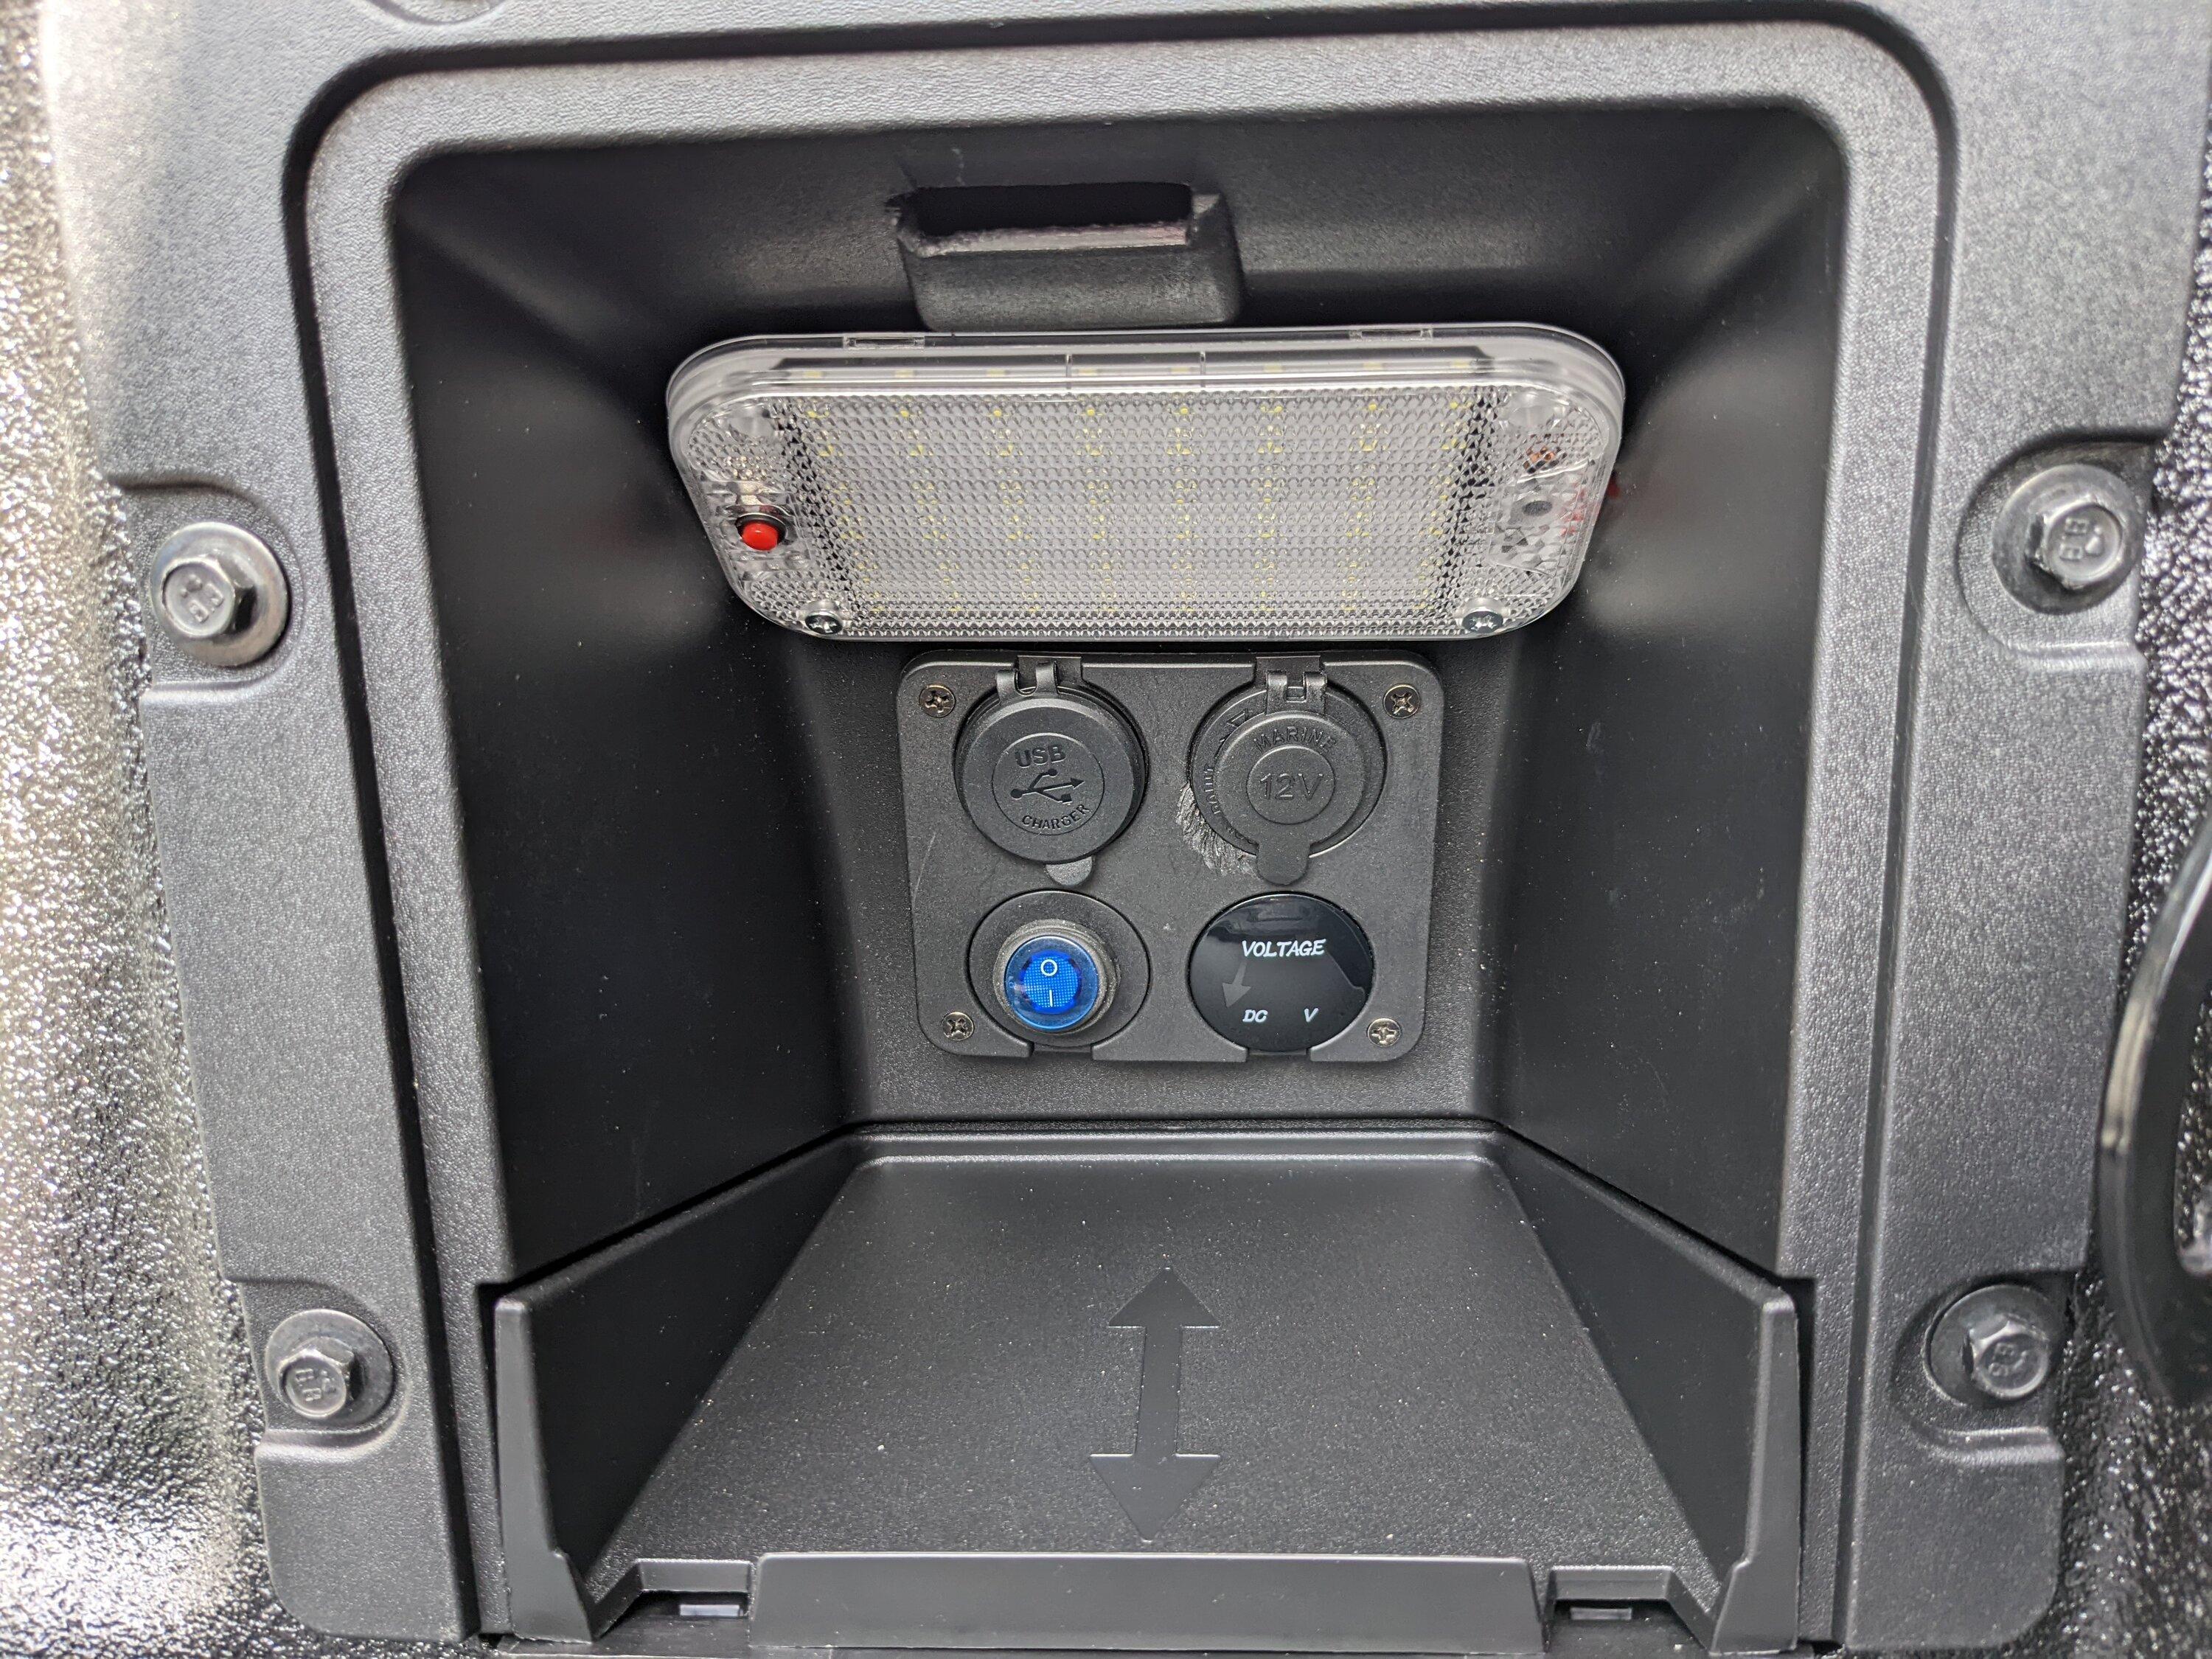
I added a lock to the door. It's were I store my tire pump, battery jump starter and AC inverter.

Left side. Added cubby light, USB ports and 12v outlet. We use it to store our bungees and straps. The cubbies actually fit a lot.
Side rails with adjustable tie downs, painted black with bed liner paint. $45 for parts from the hardware store.
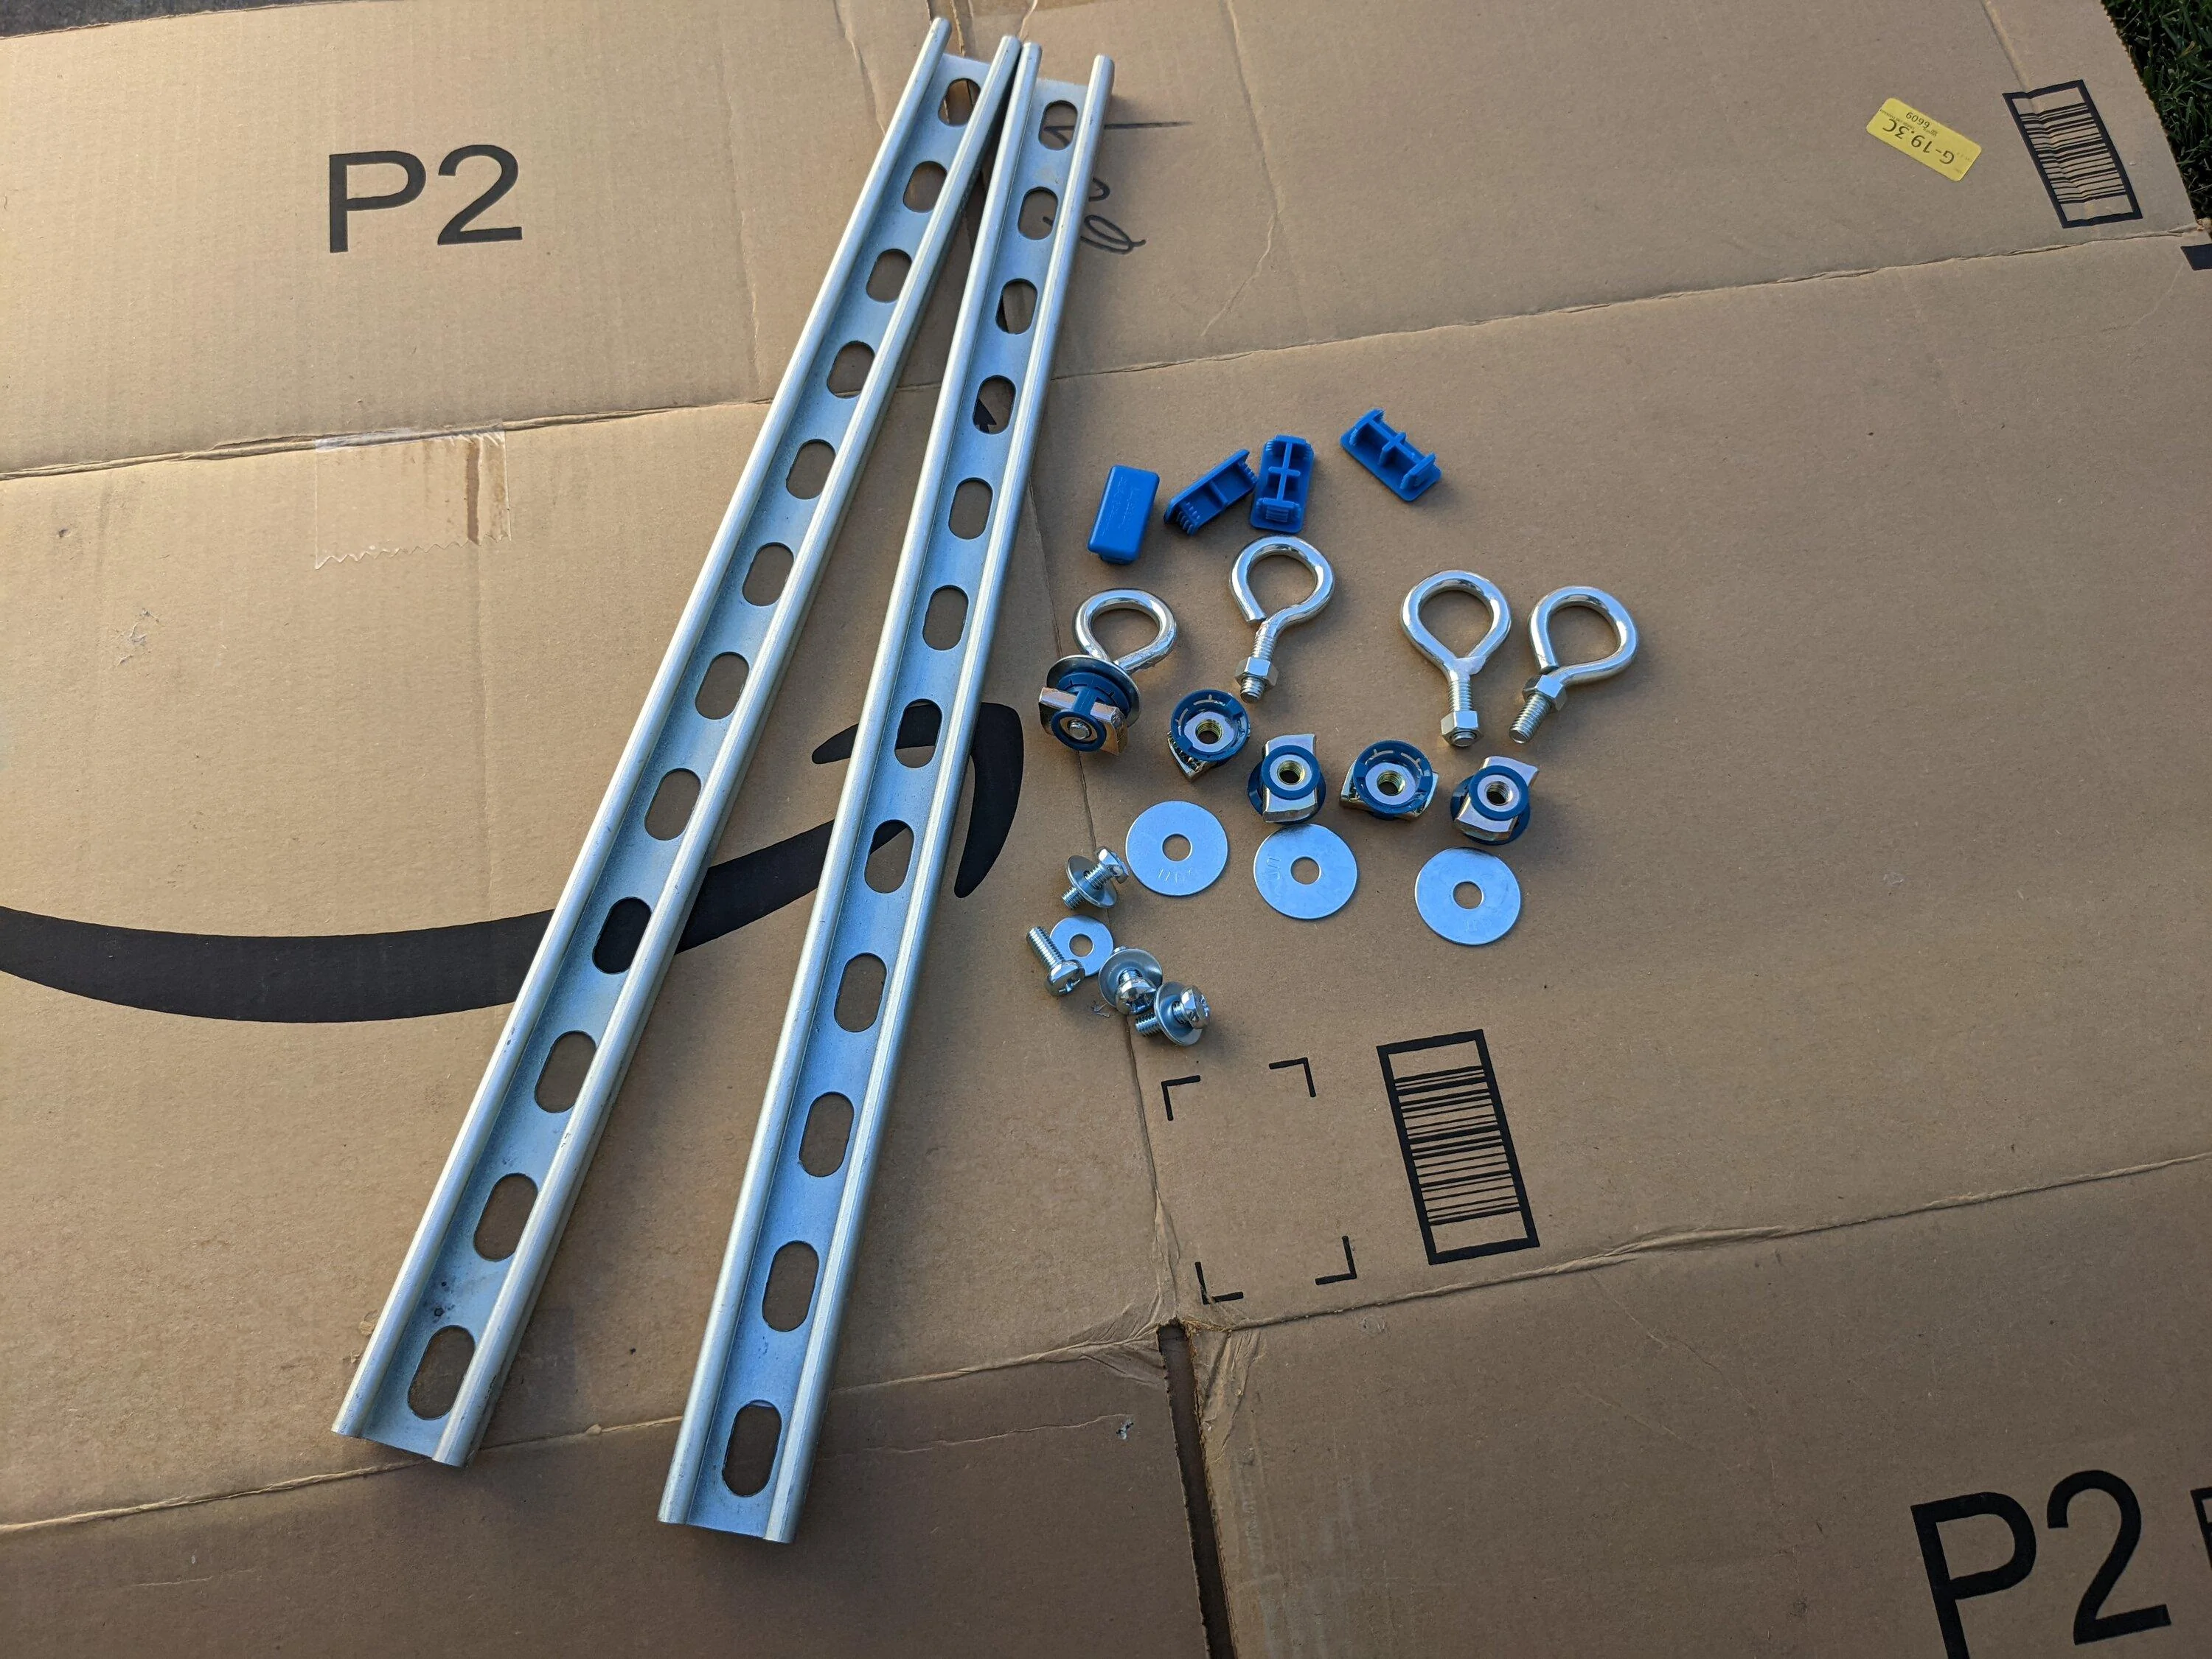
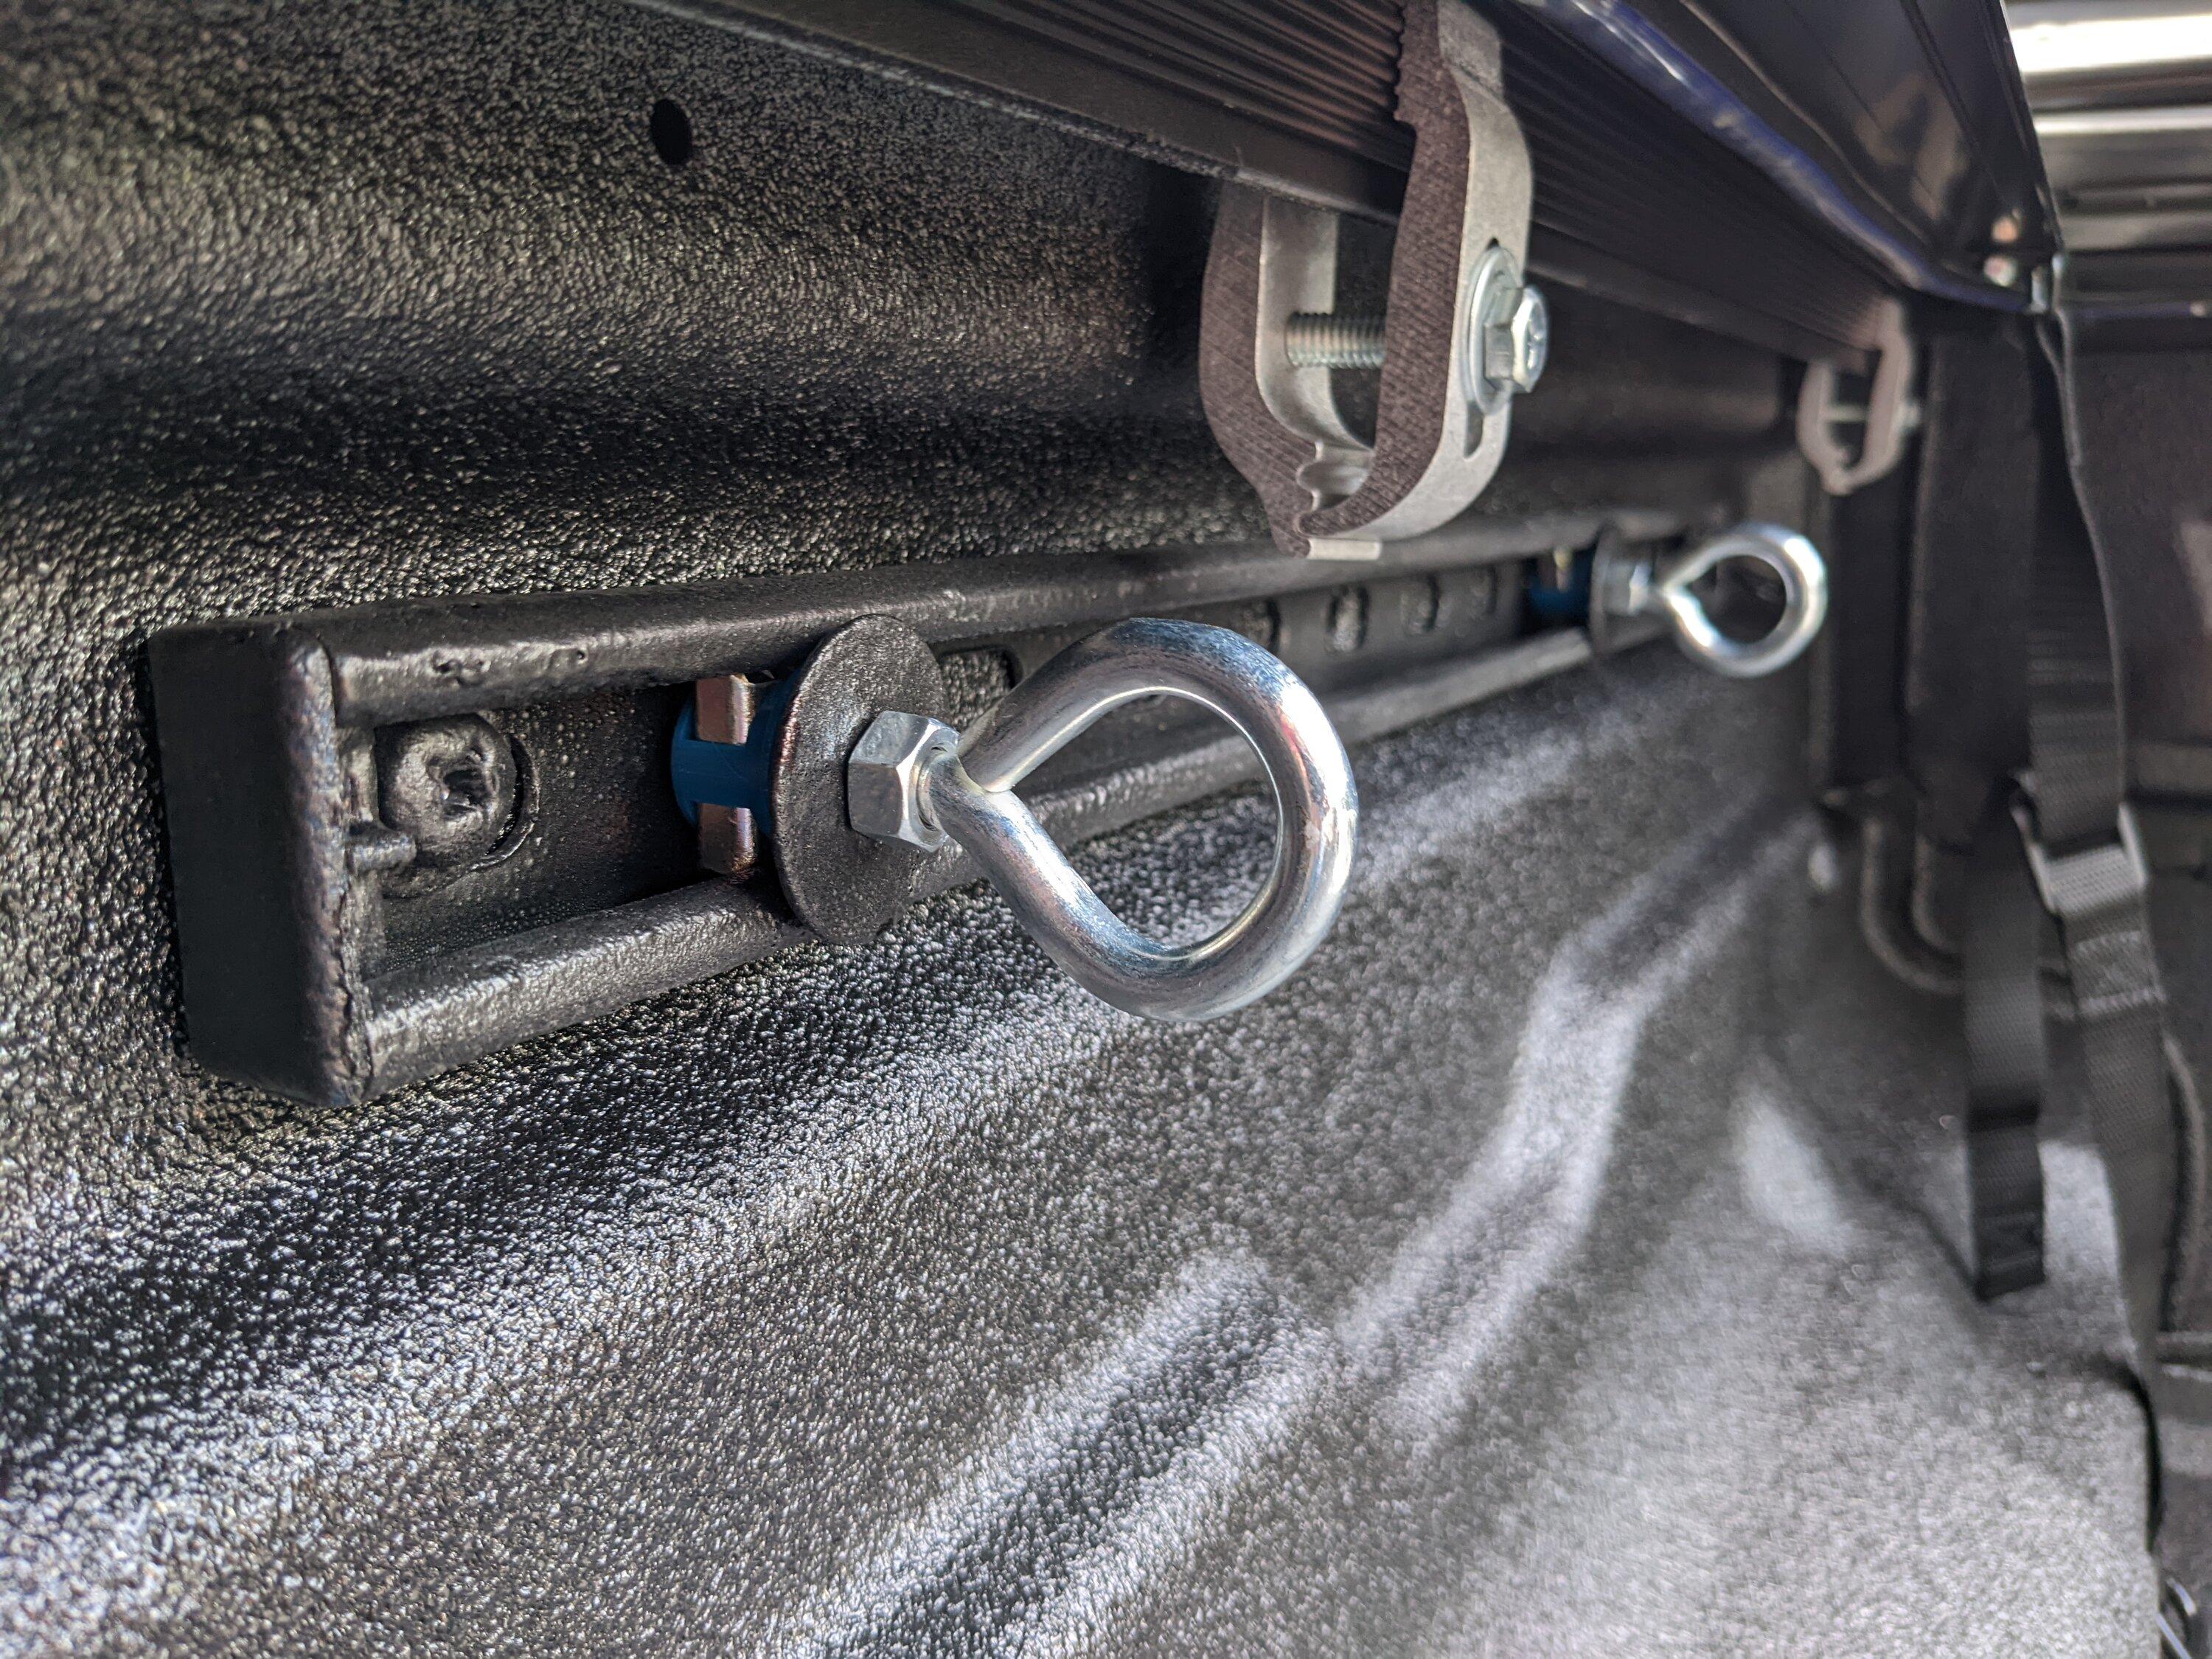

Added two additional tie down rings above cubbies.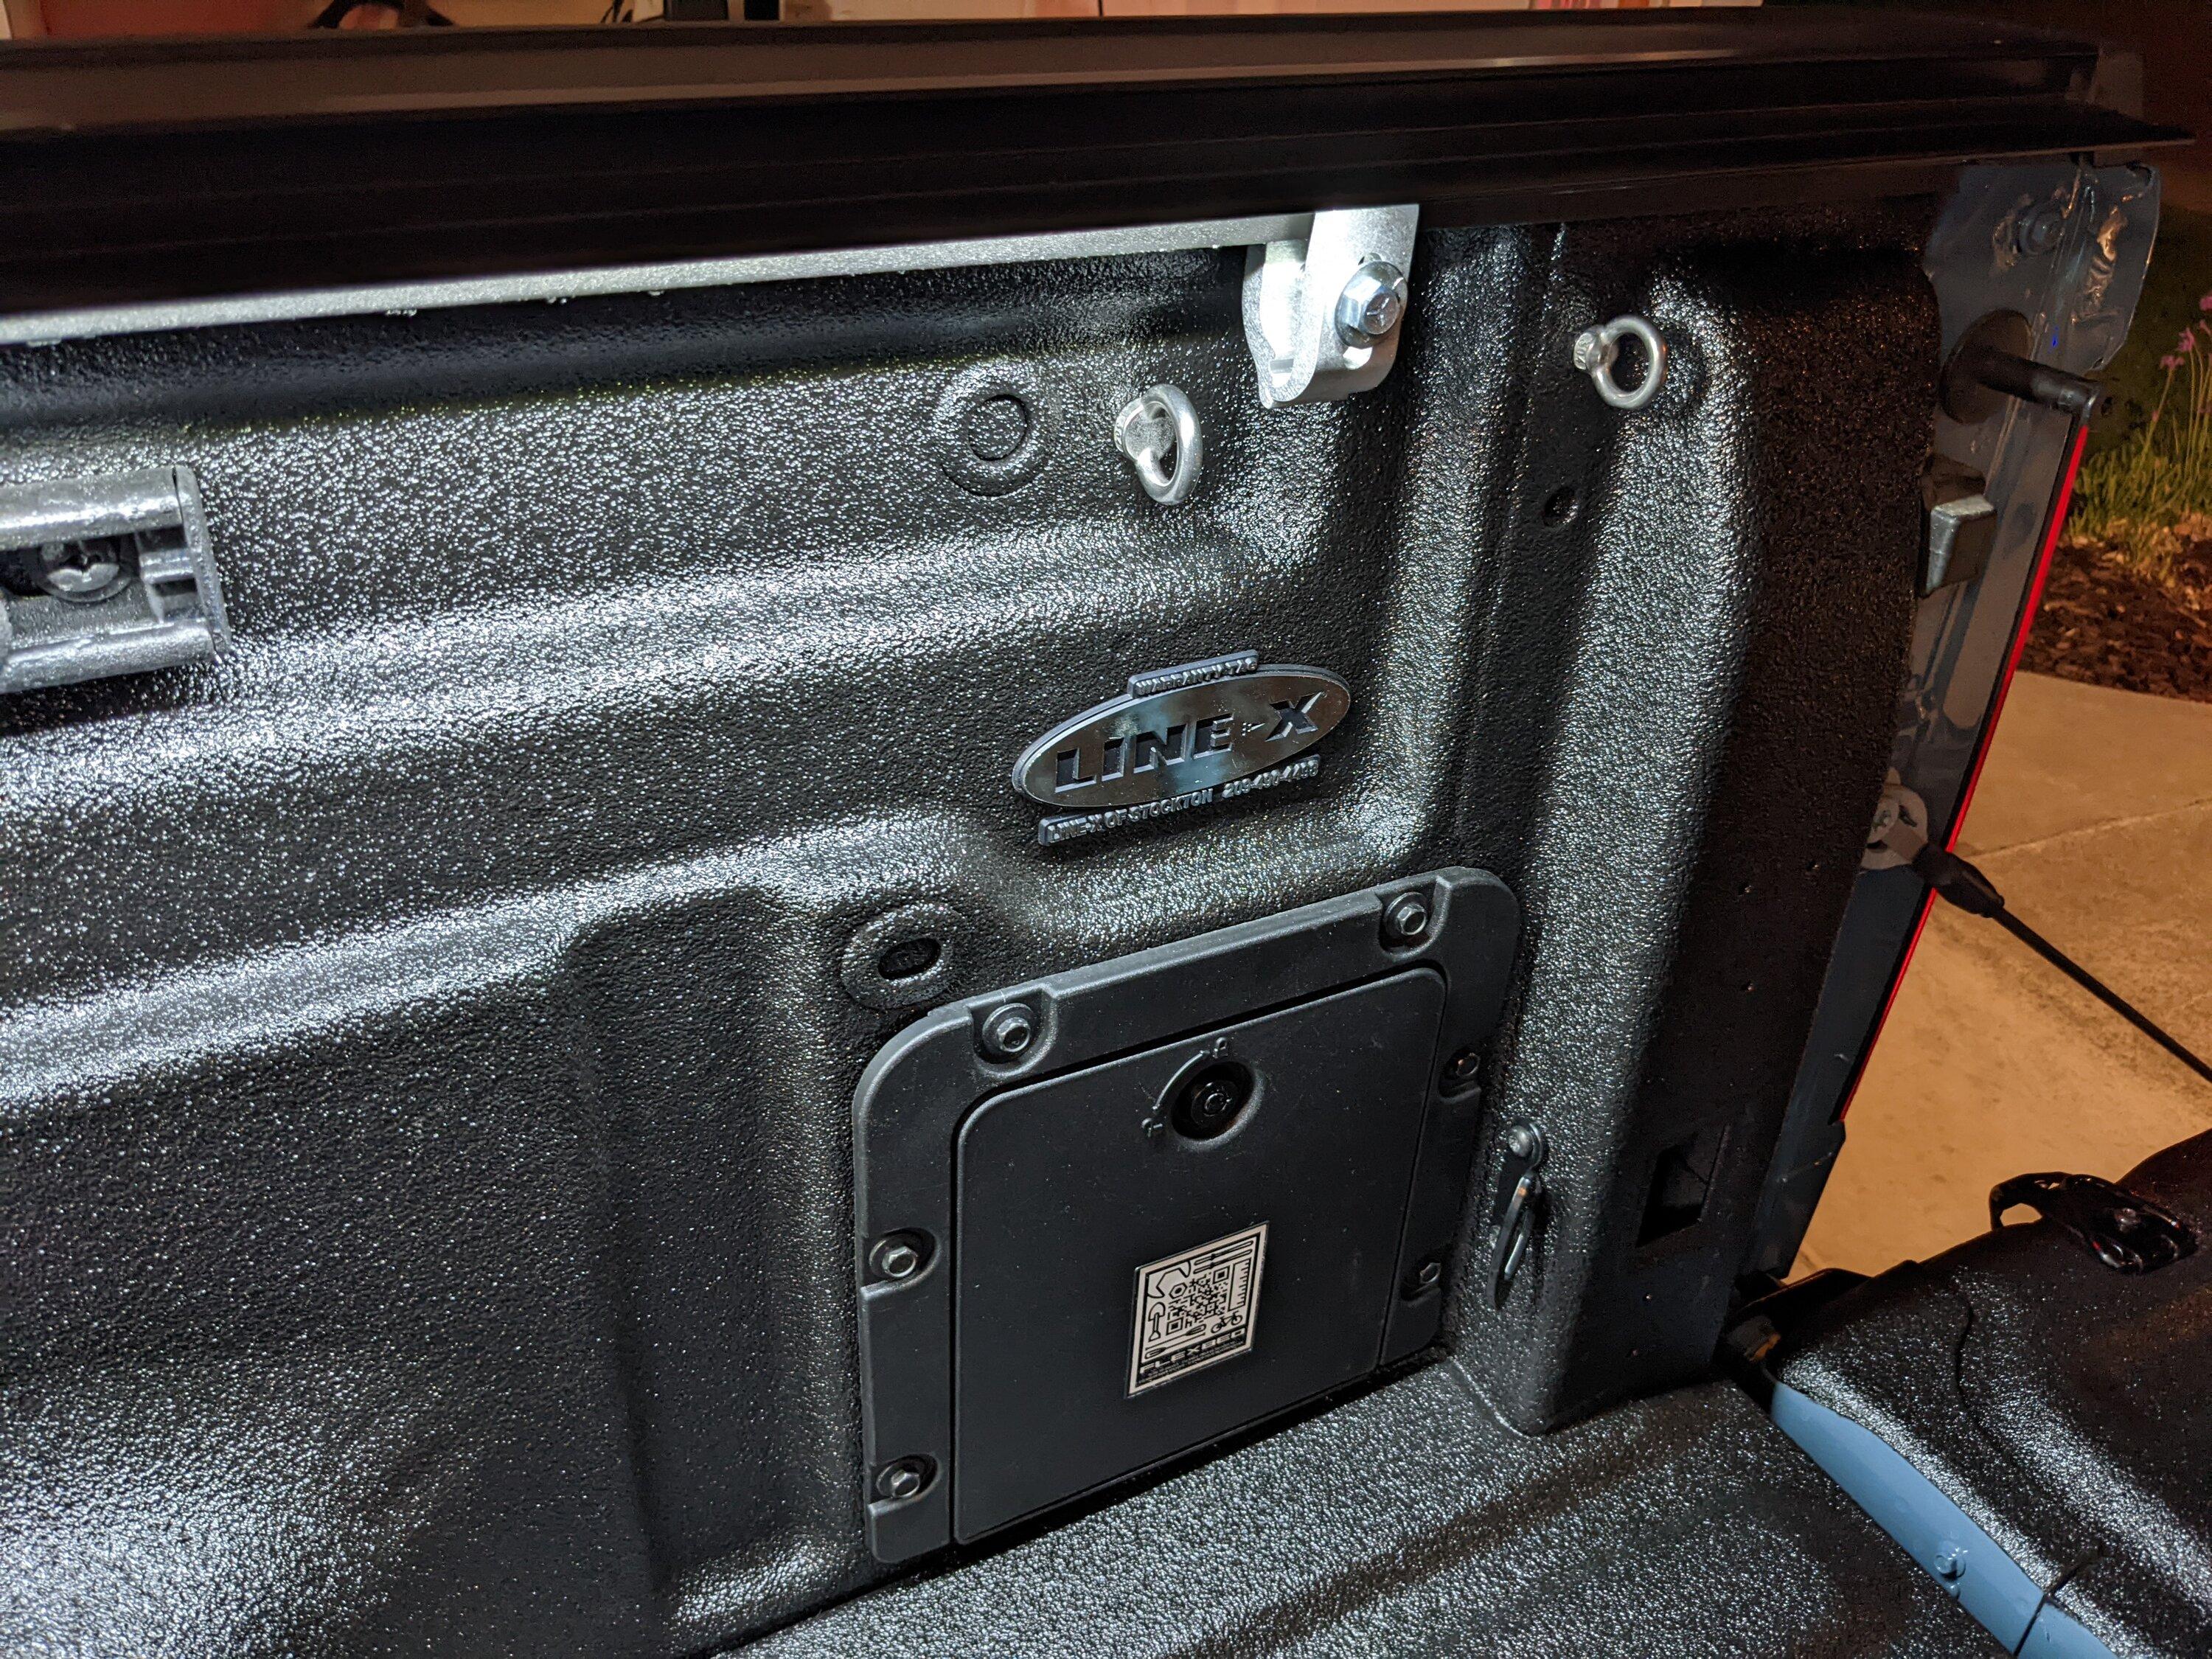
Bed lighting. Wired it without having to take off tail lights or run wire under the truck. Much easier and super quick and clean looking install.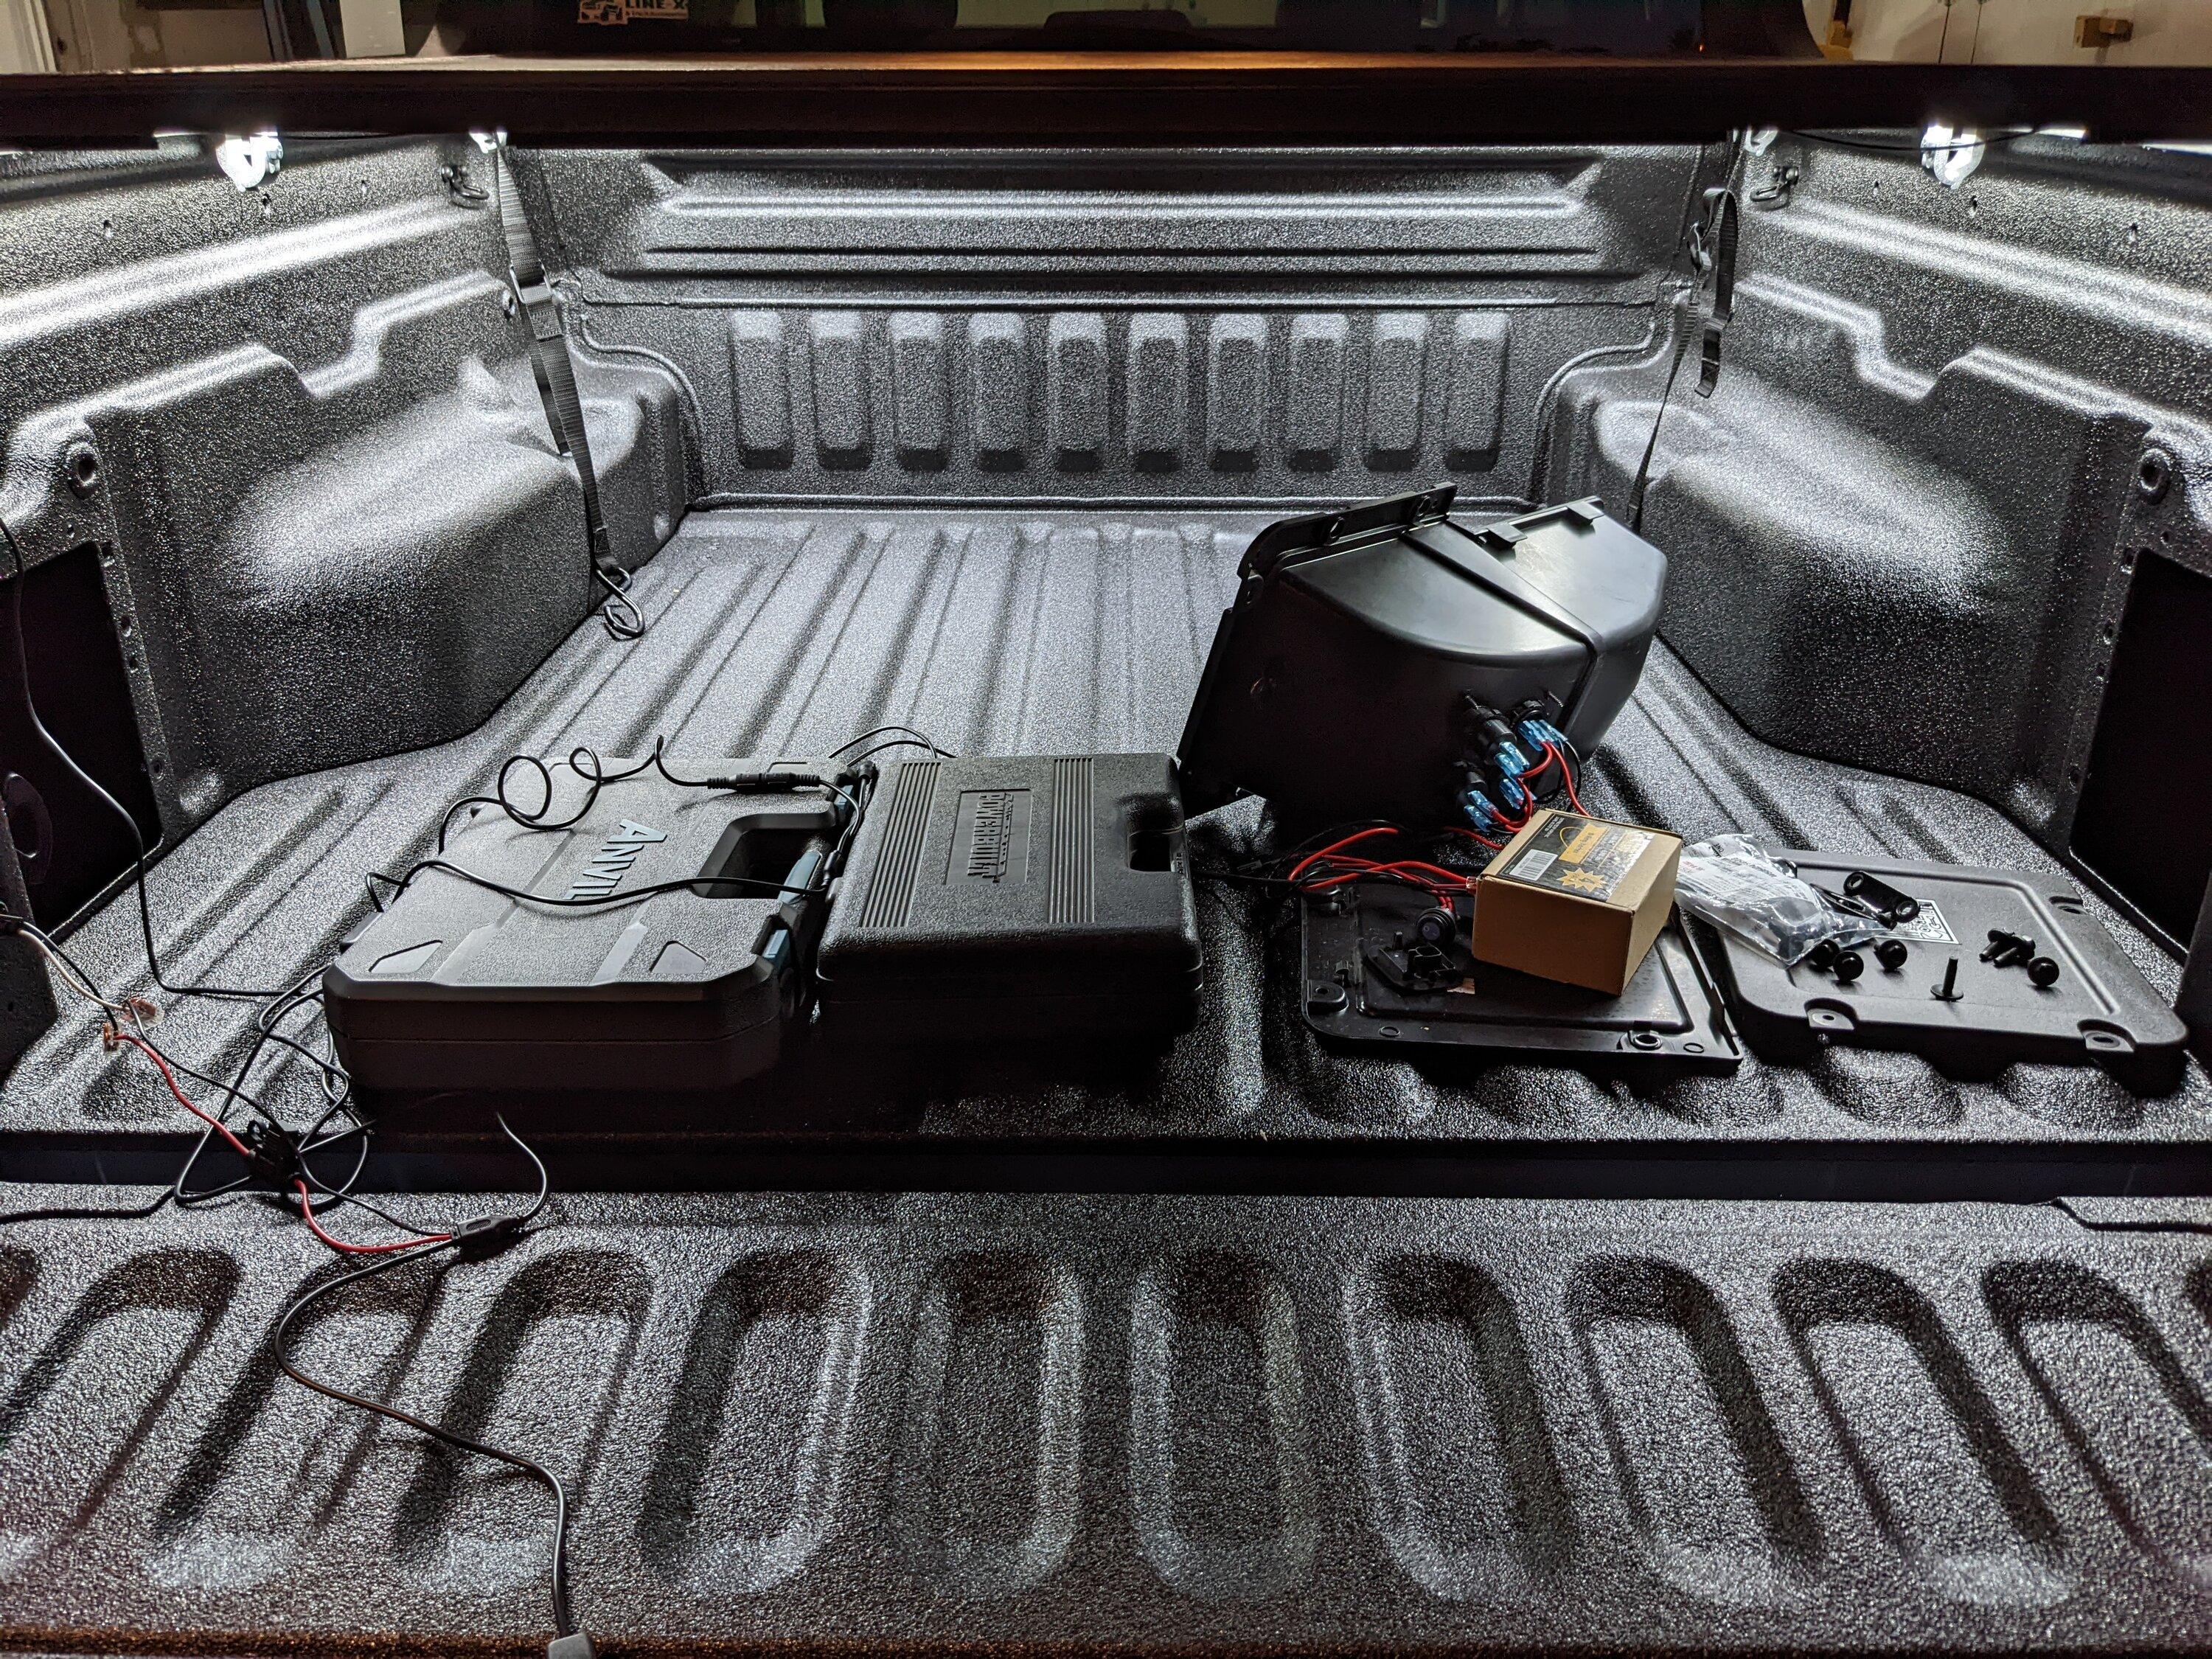
I installed the power switch on the cover that had the wiring harness.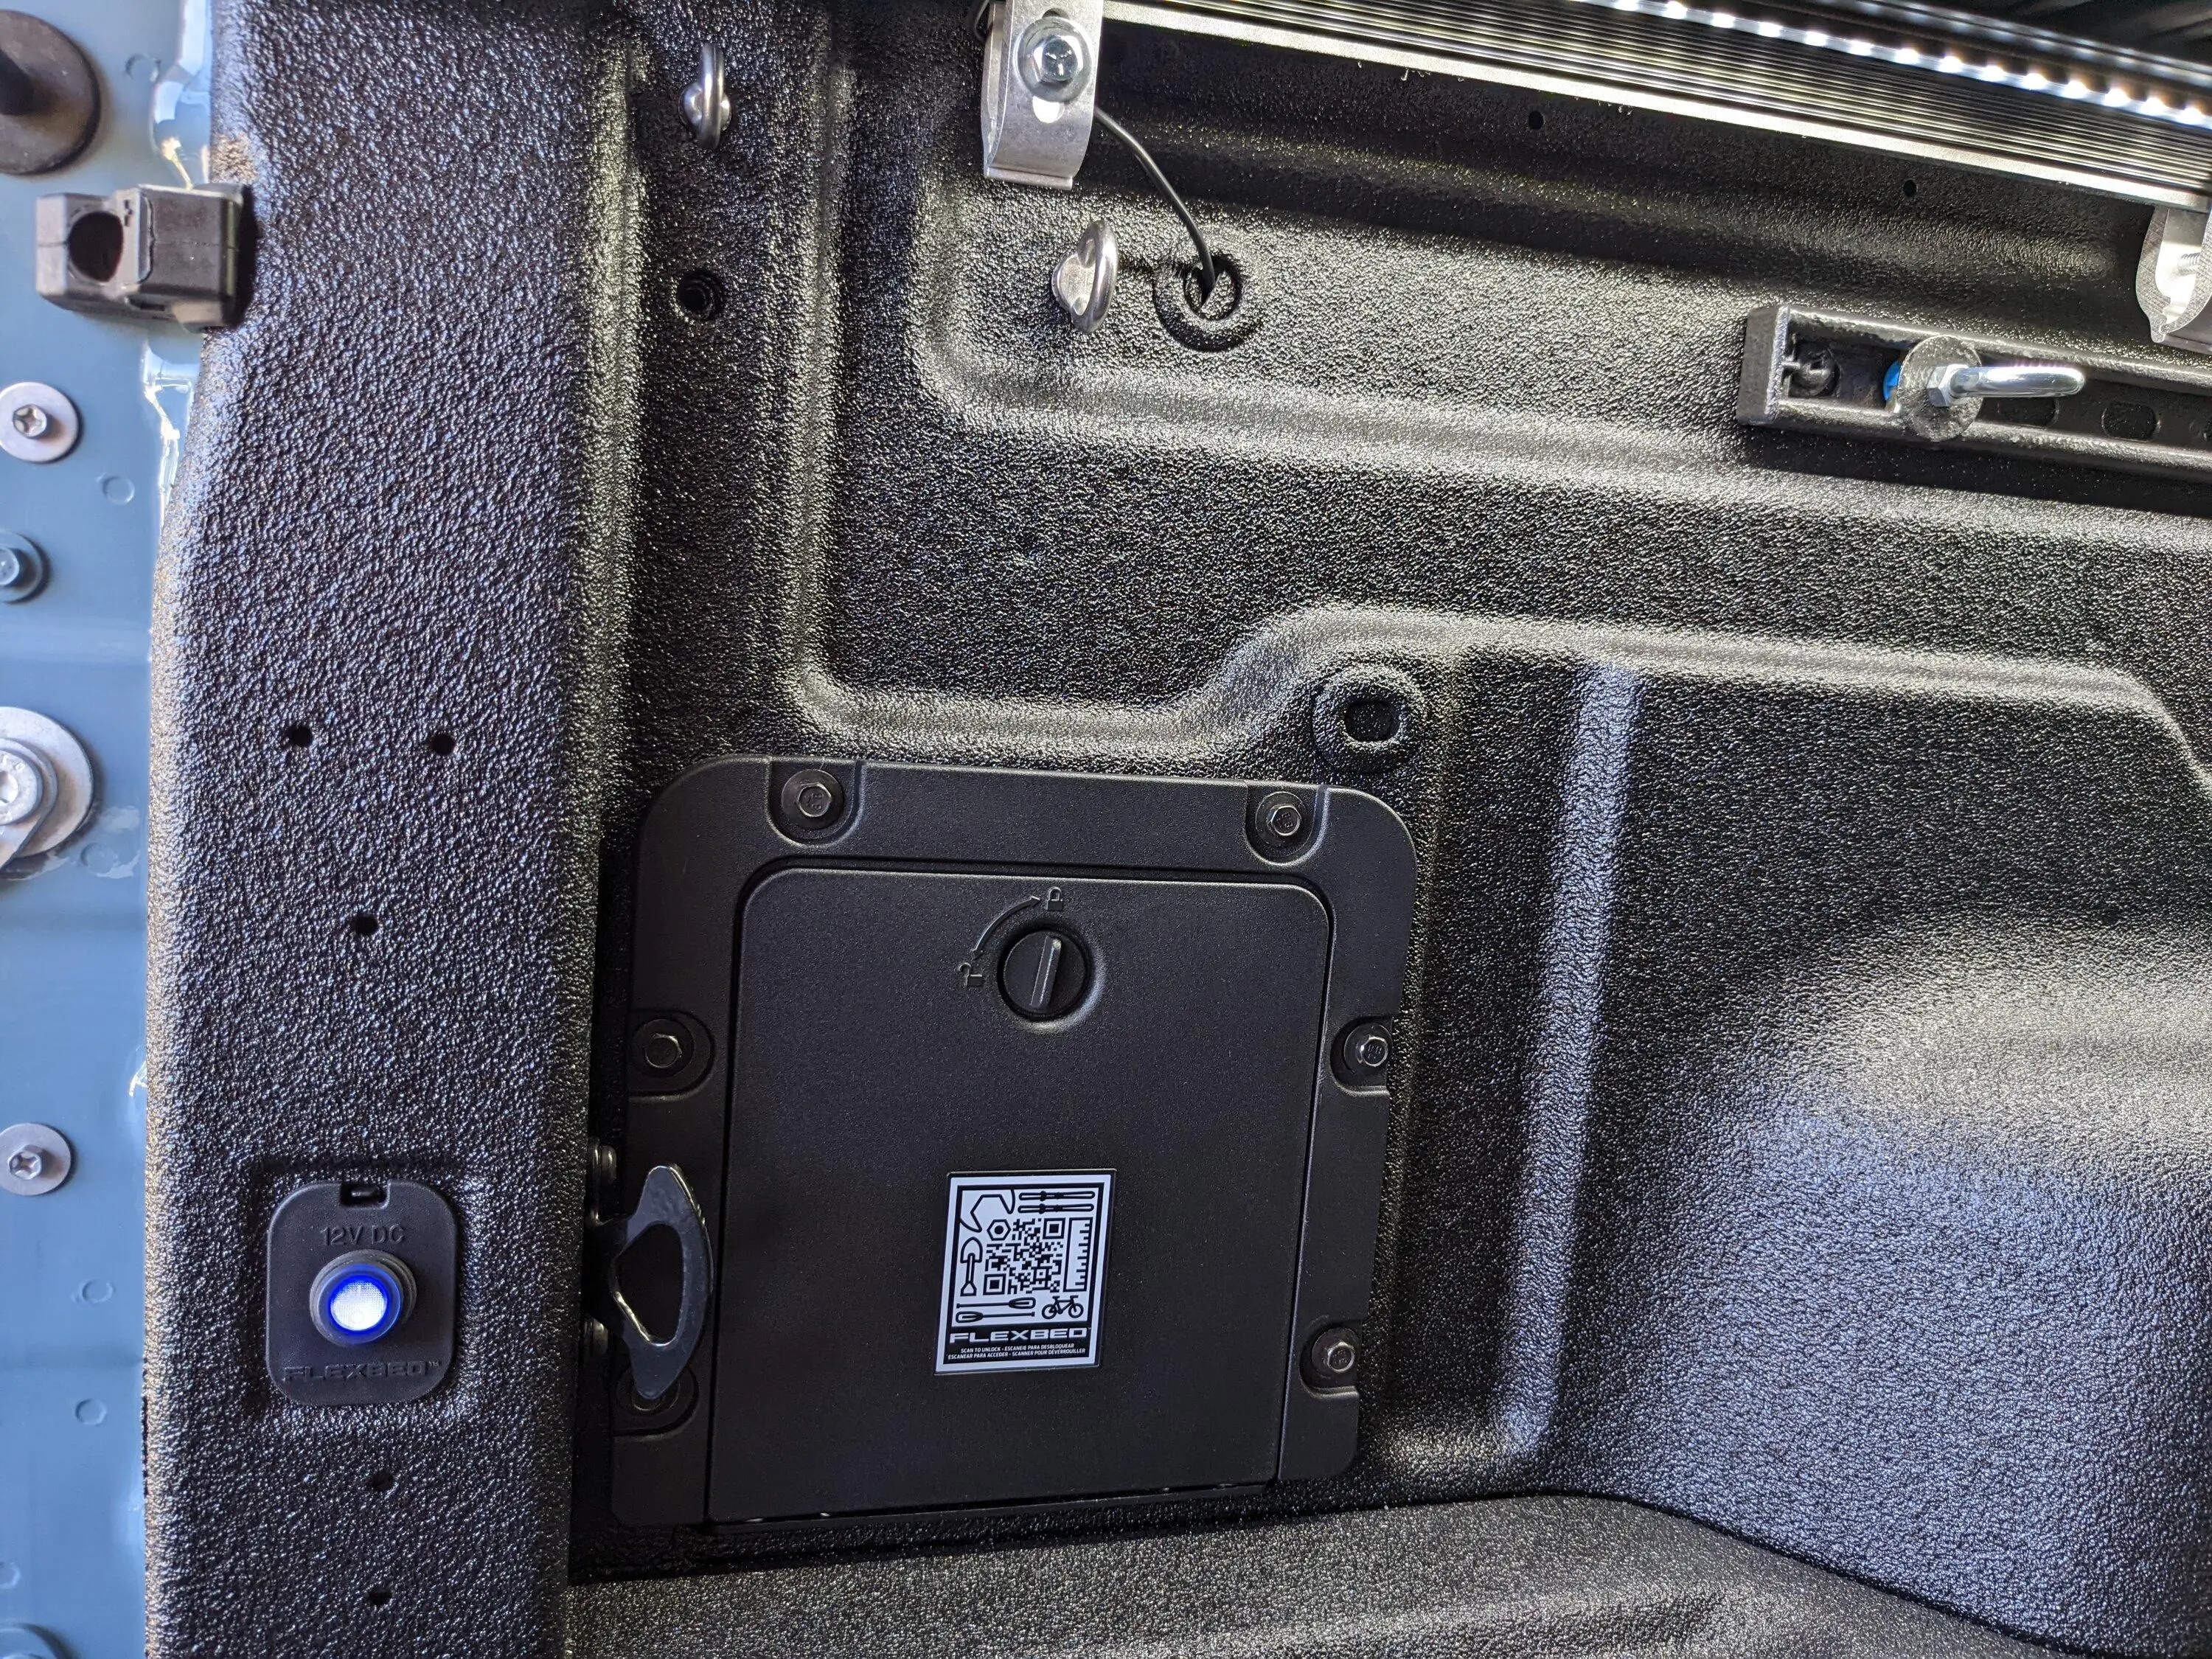
I also added a pin switch so lights turn on when the tailgate is open and off when closed.
Bed divider. Wrapped a 2x6 with waterproof material. The roll of material should be enough to cover two more dividers. Attached six triangle rings with elevator bolts to this one.

Smartliner floor mats.
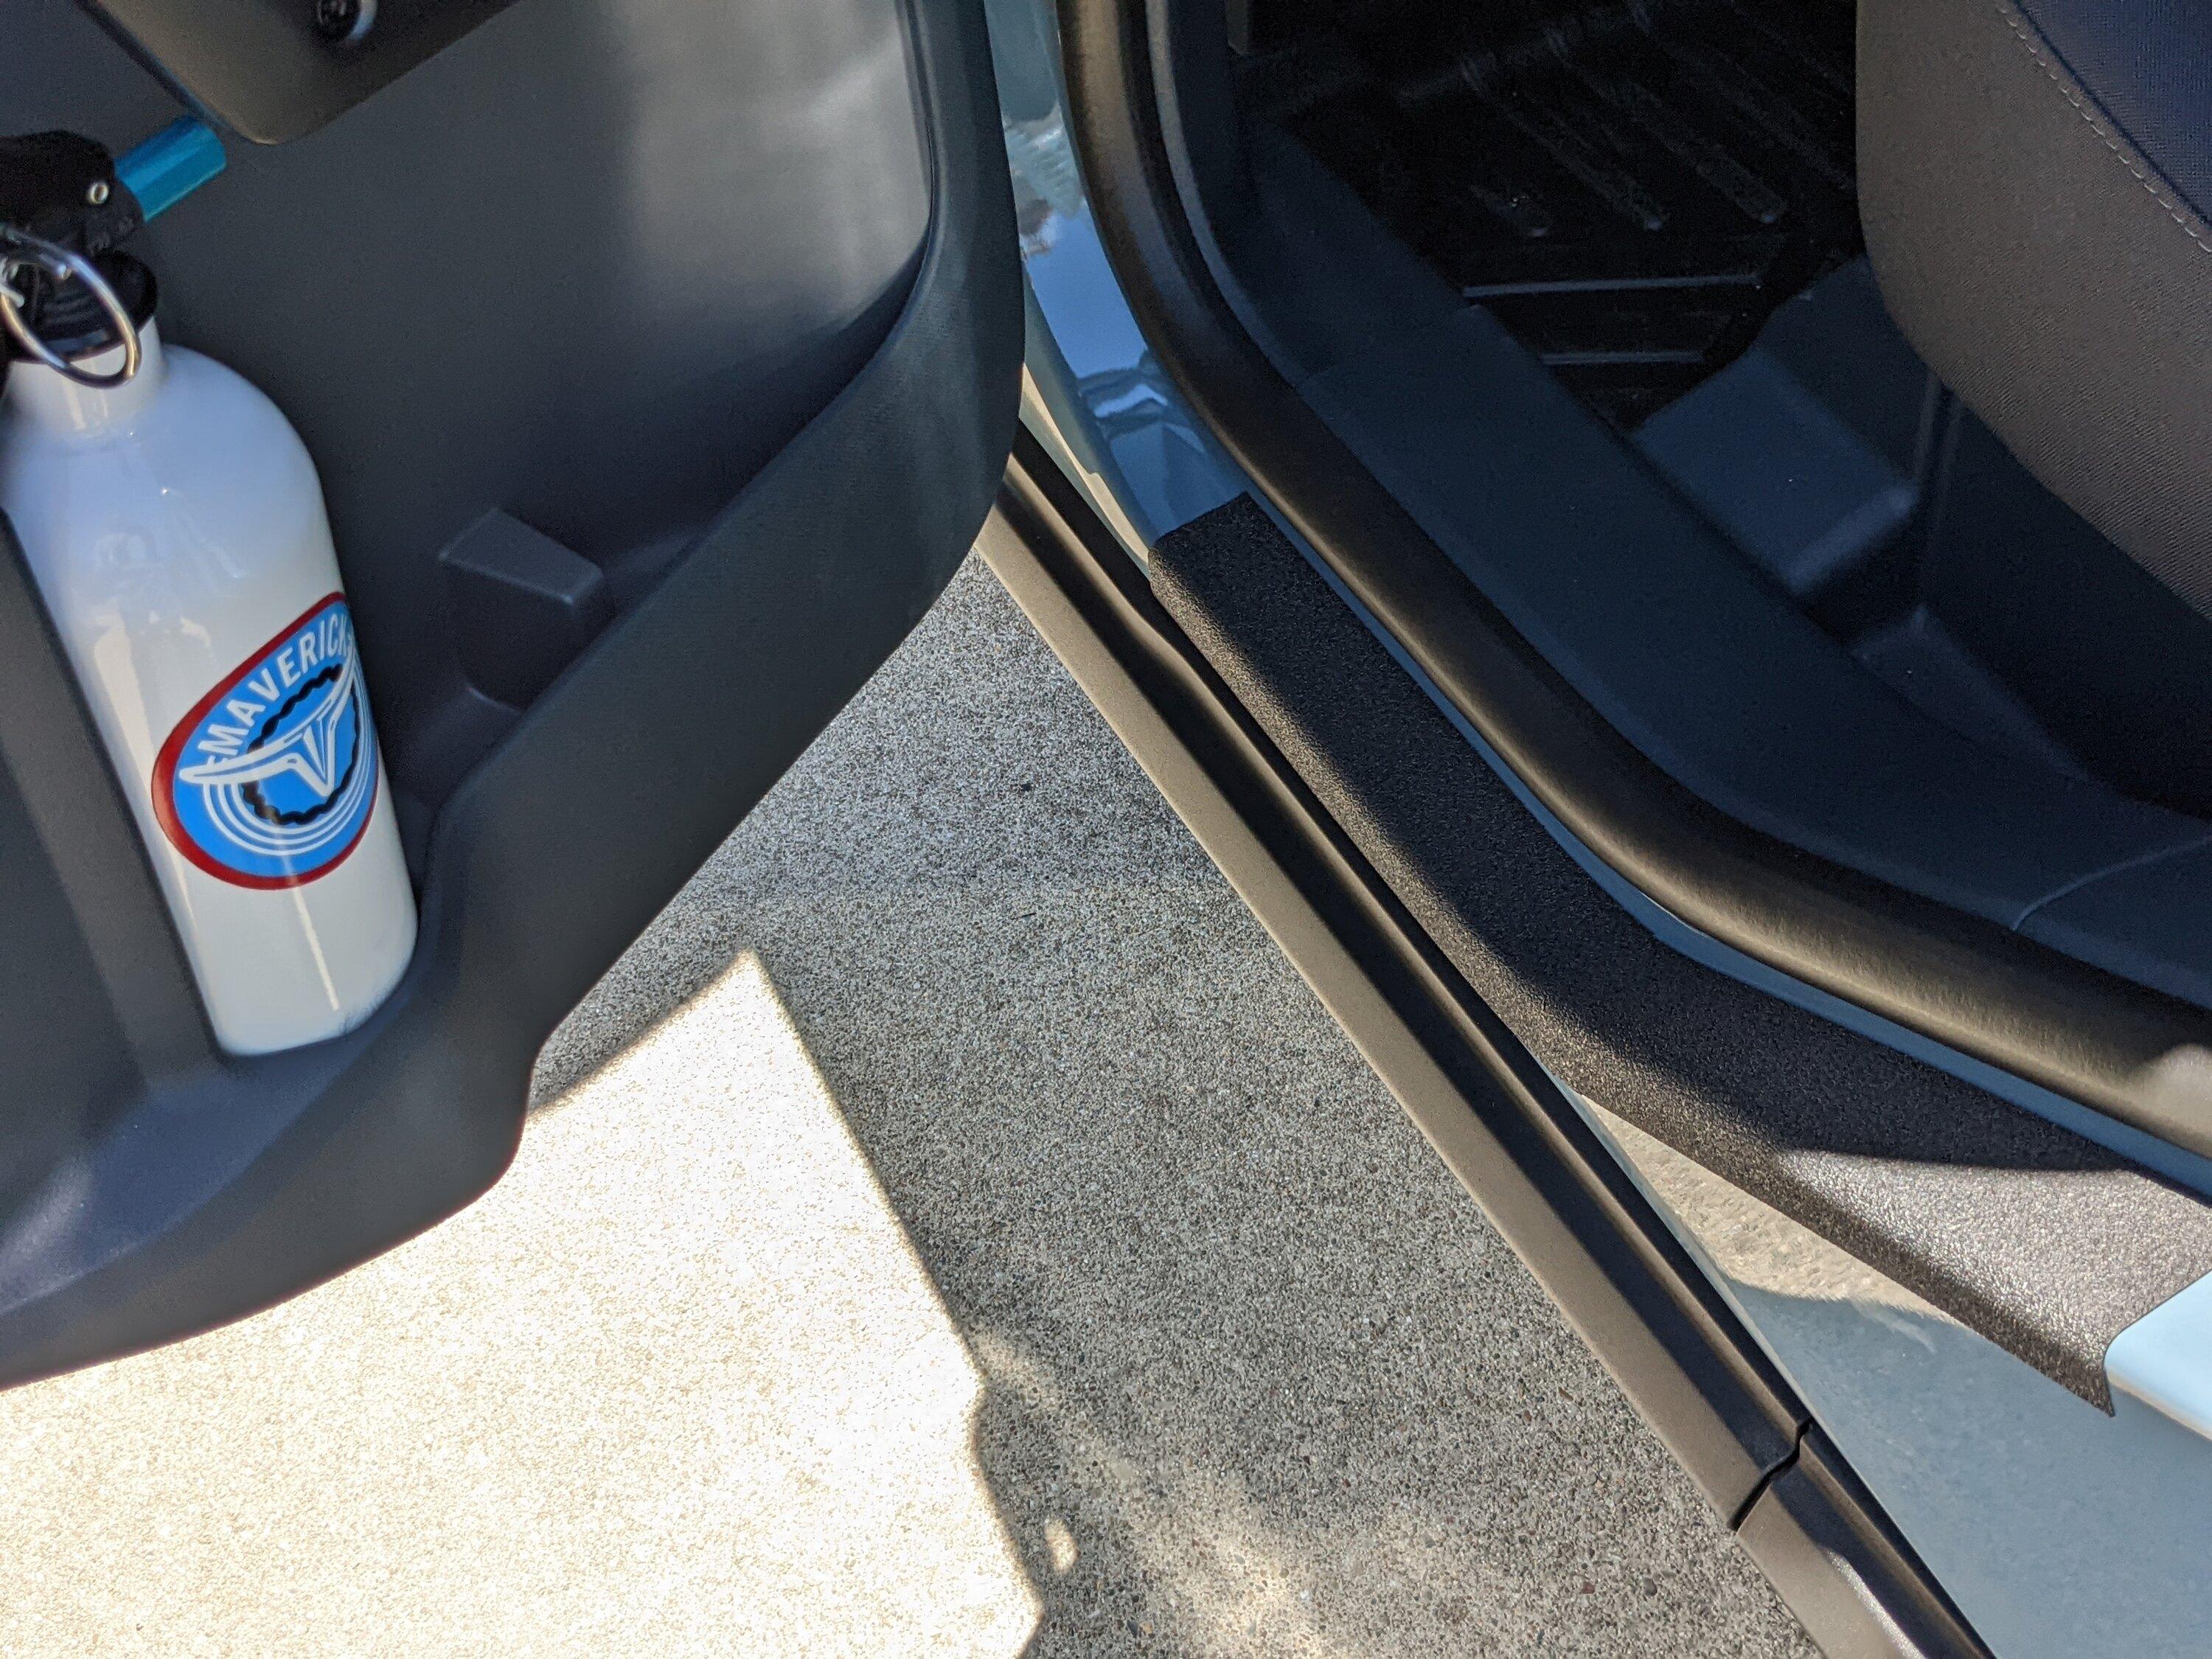
Fire extinguisher in passenger door fits perfectly.
Matching tumbler.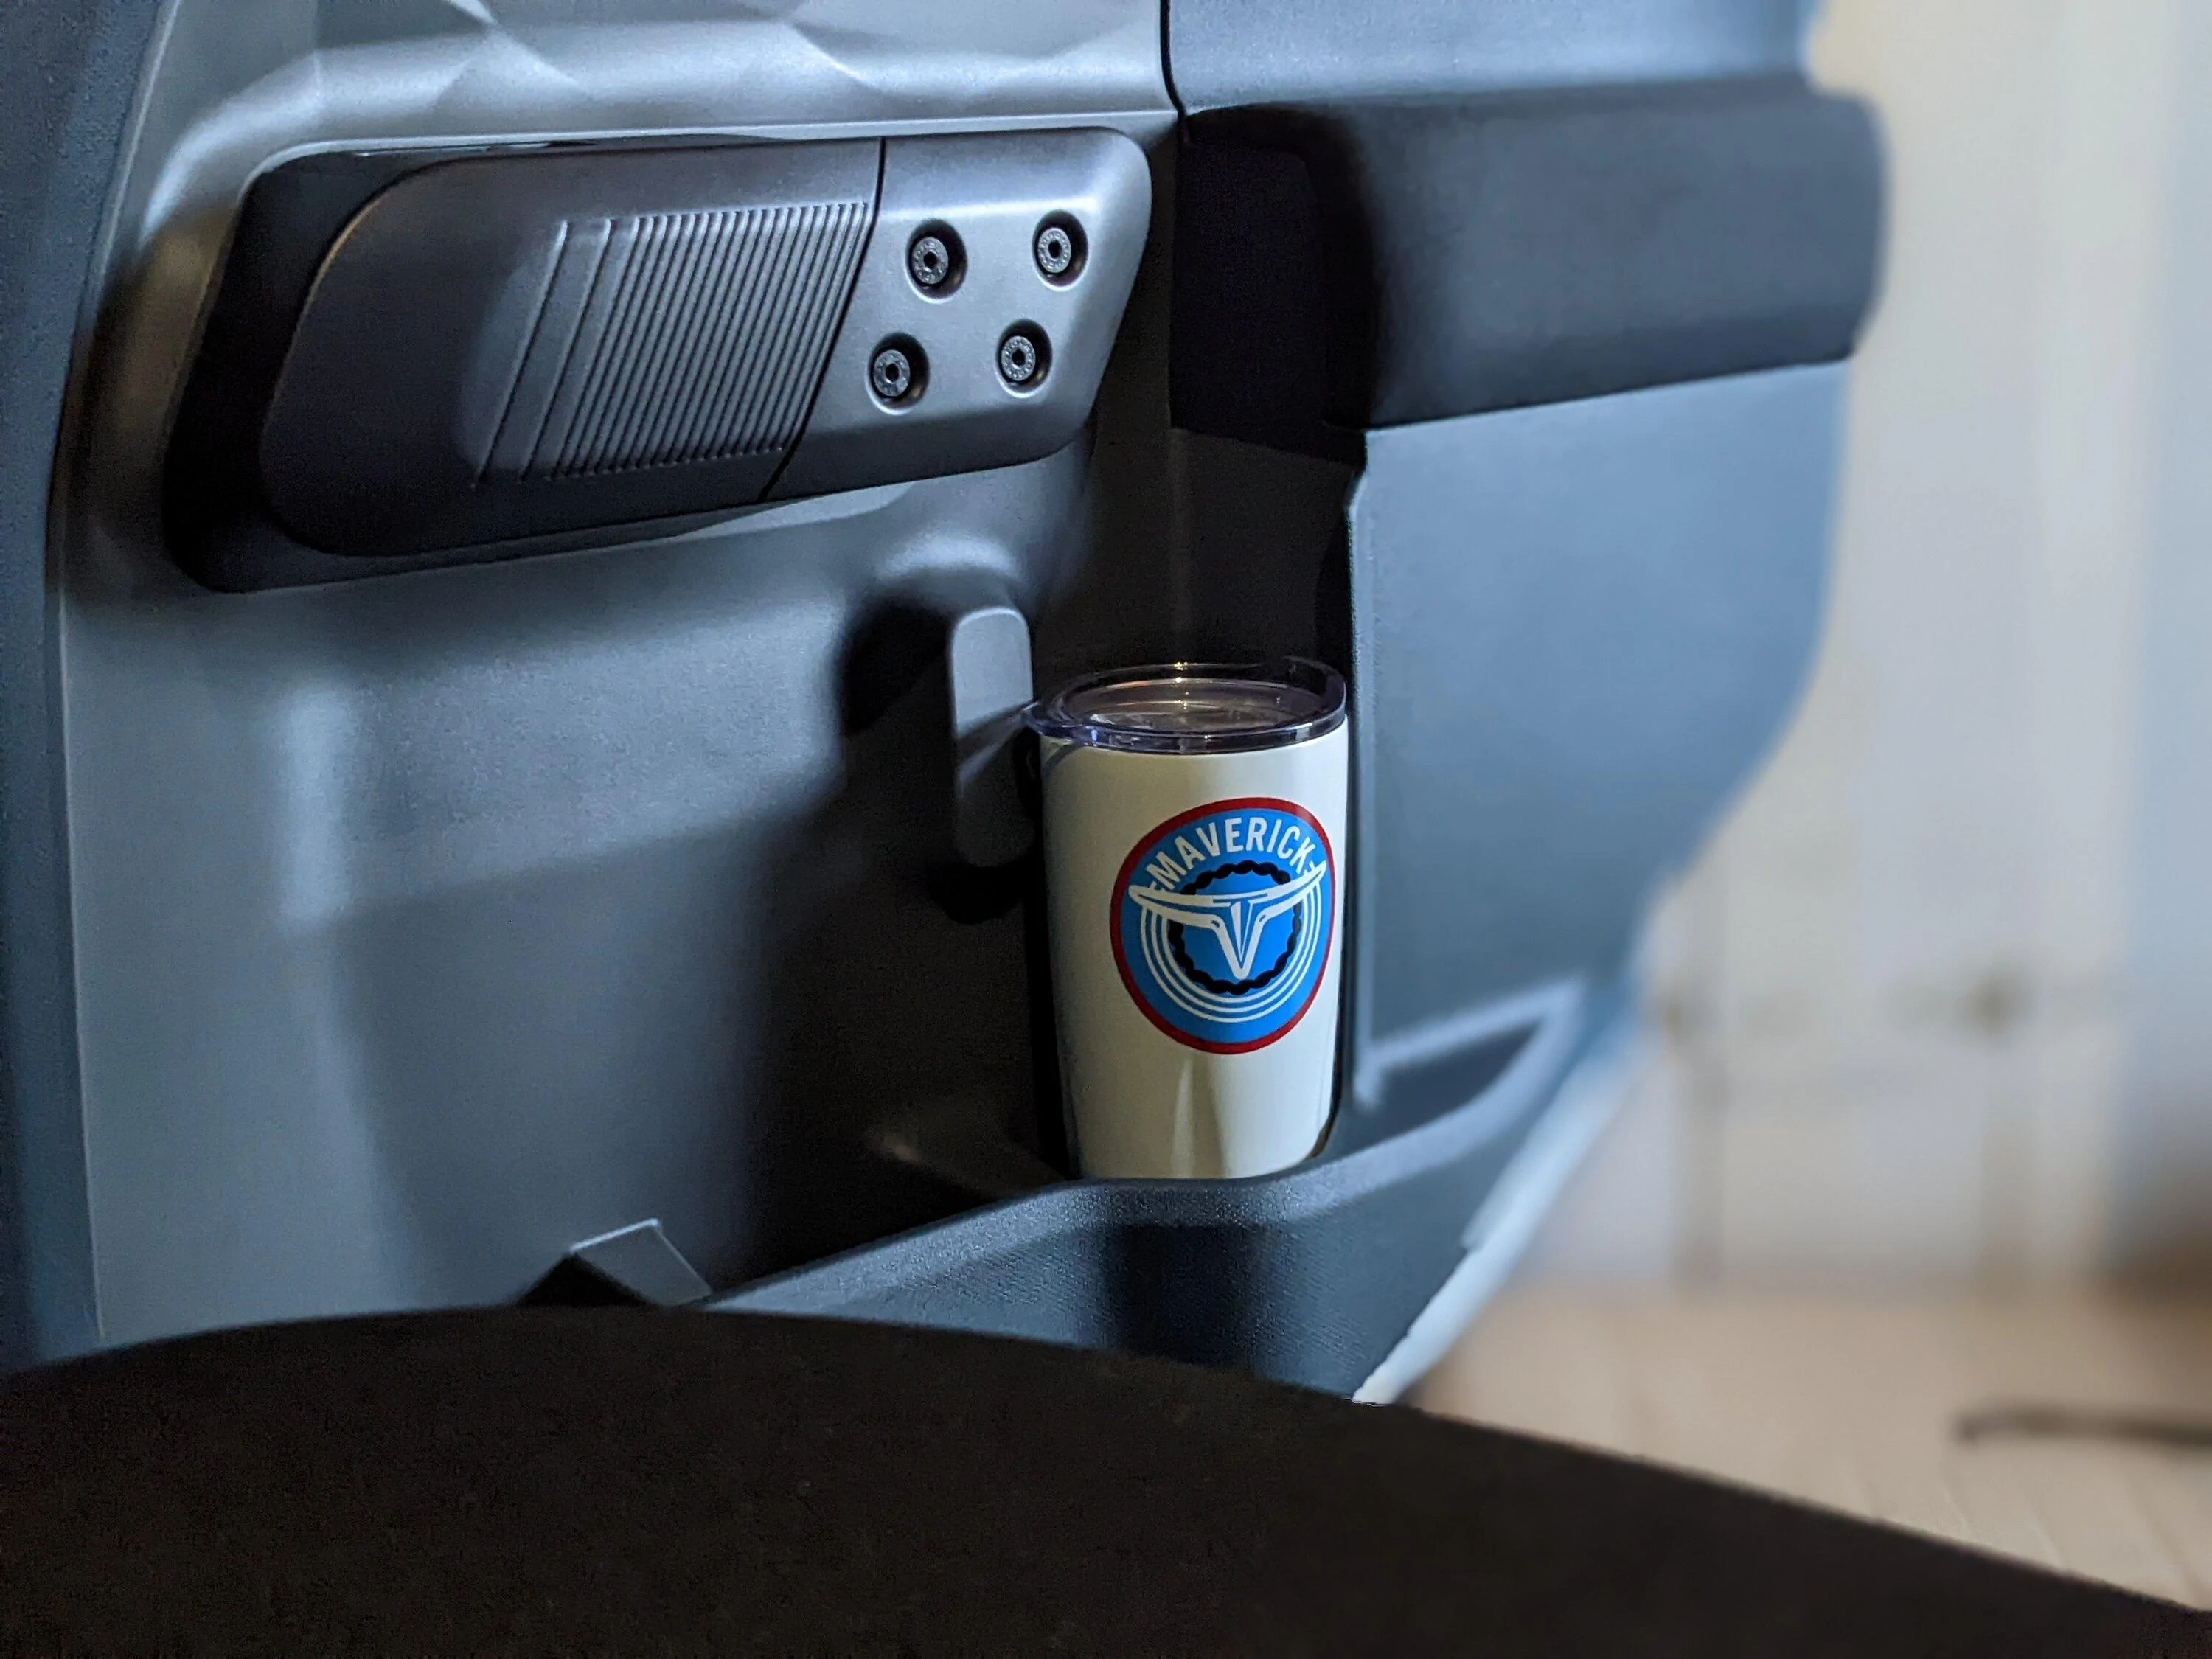
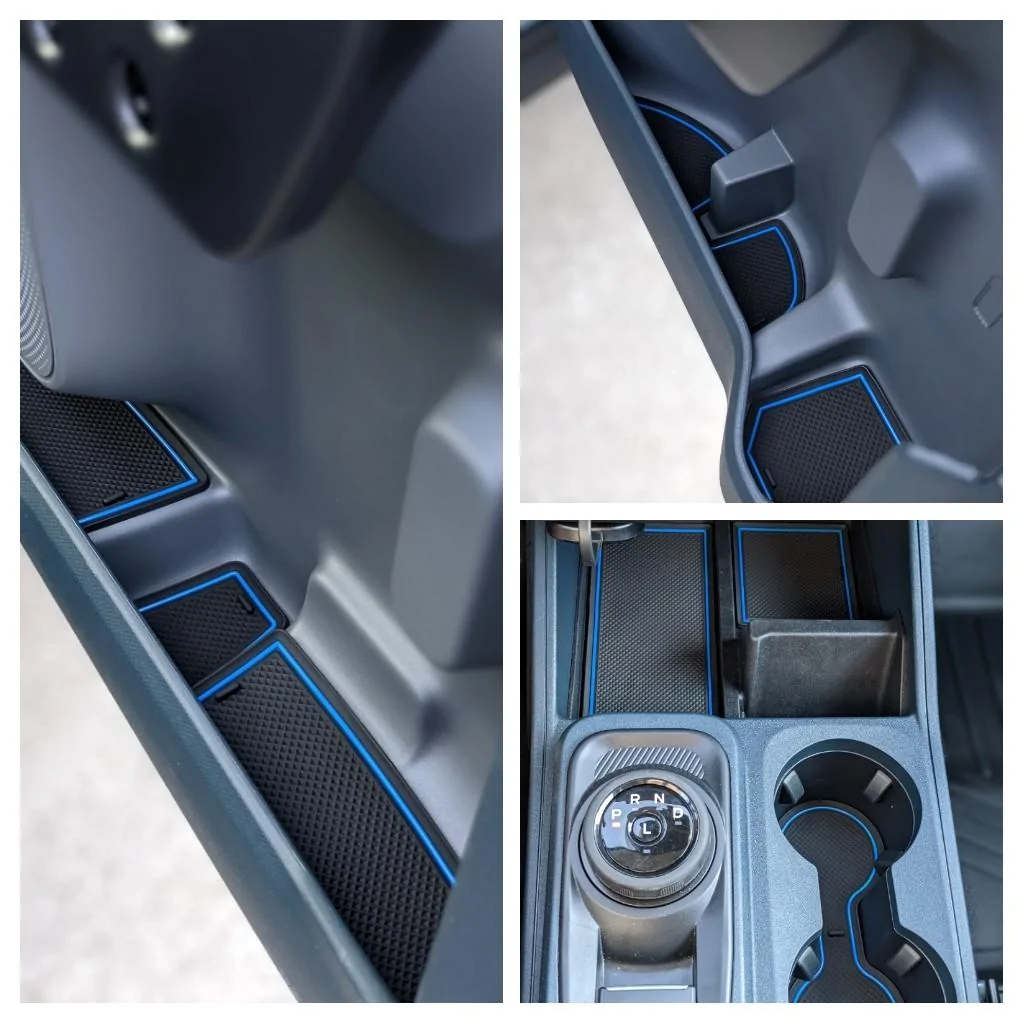
Center console inserts.
Here's a link https://a.co/d/4oM30FO
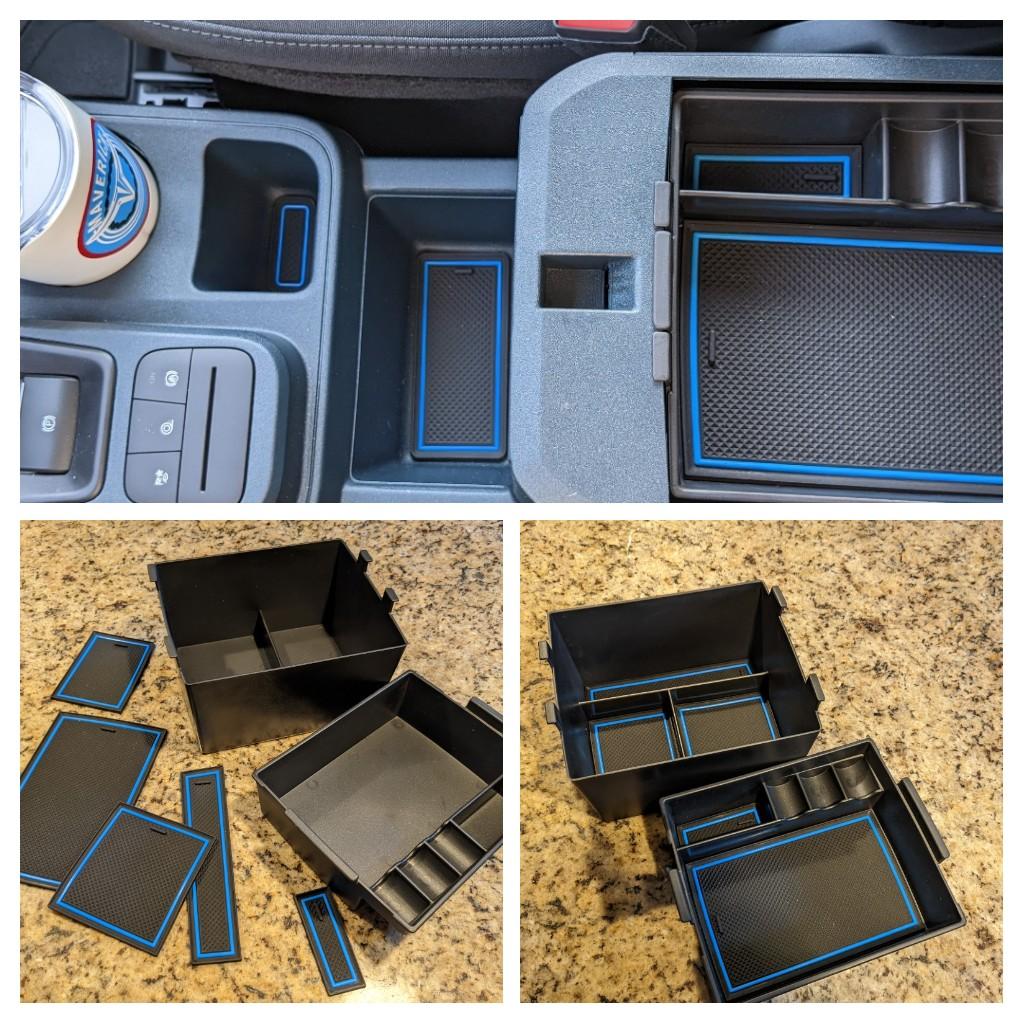
Additional blue inserts.
LED coaster in cup holder.
Used my Scosche phone holder. It fits nicely into the cubby without additional accessories.
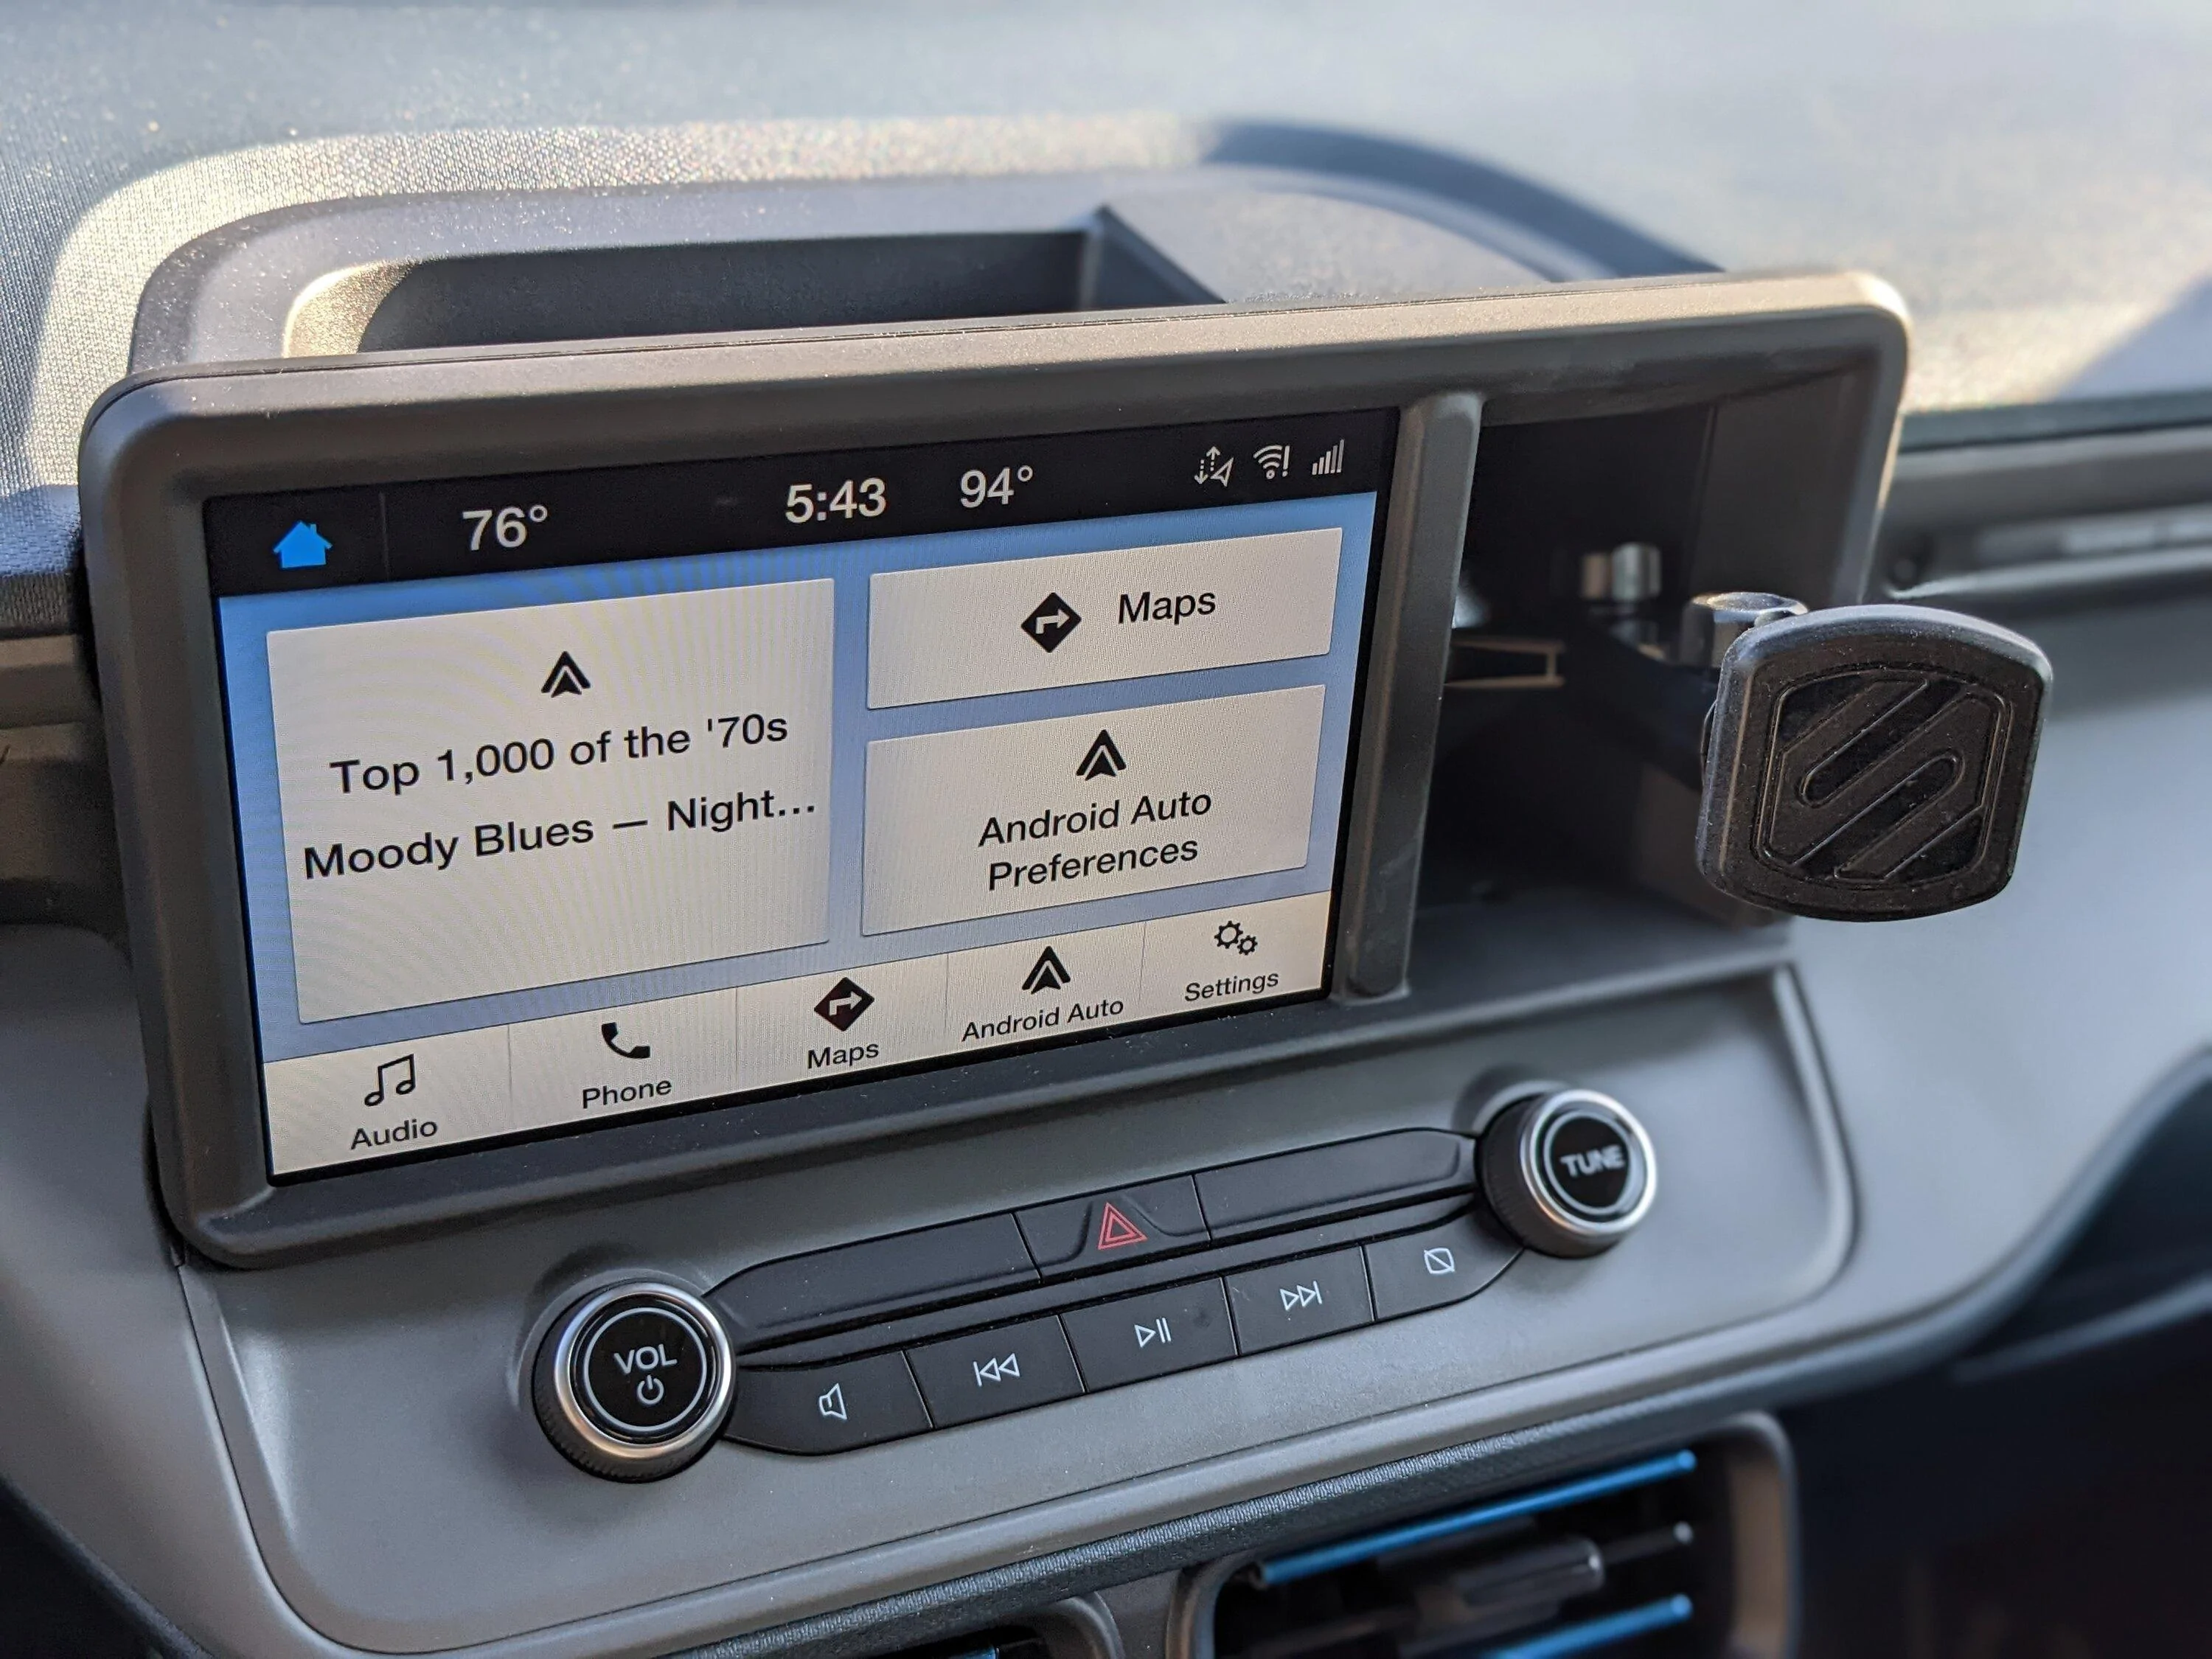
Wireless Android Auto using the Motorola MA1.
We use the non data USB ports for phone charging so Android Auto doesn’t get confused.
Tweaked Android Auto to allow videos.
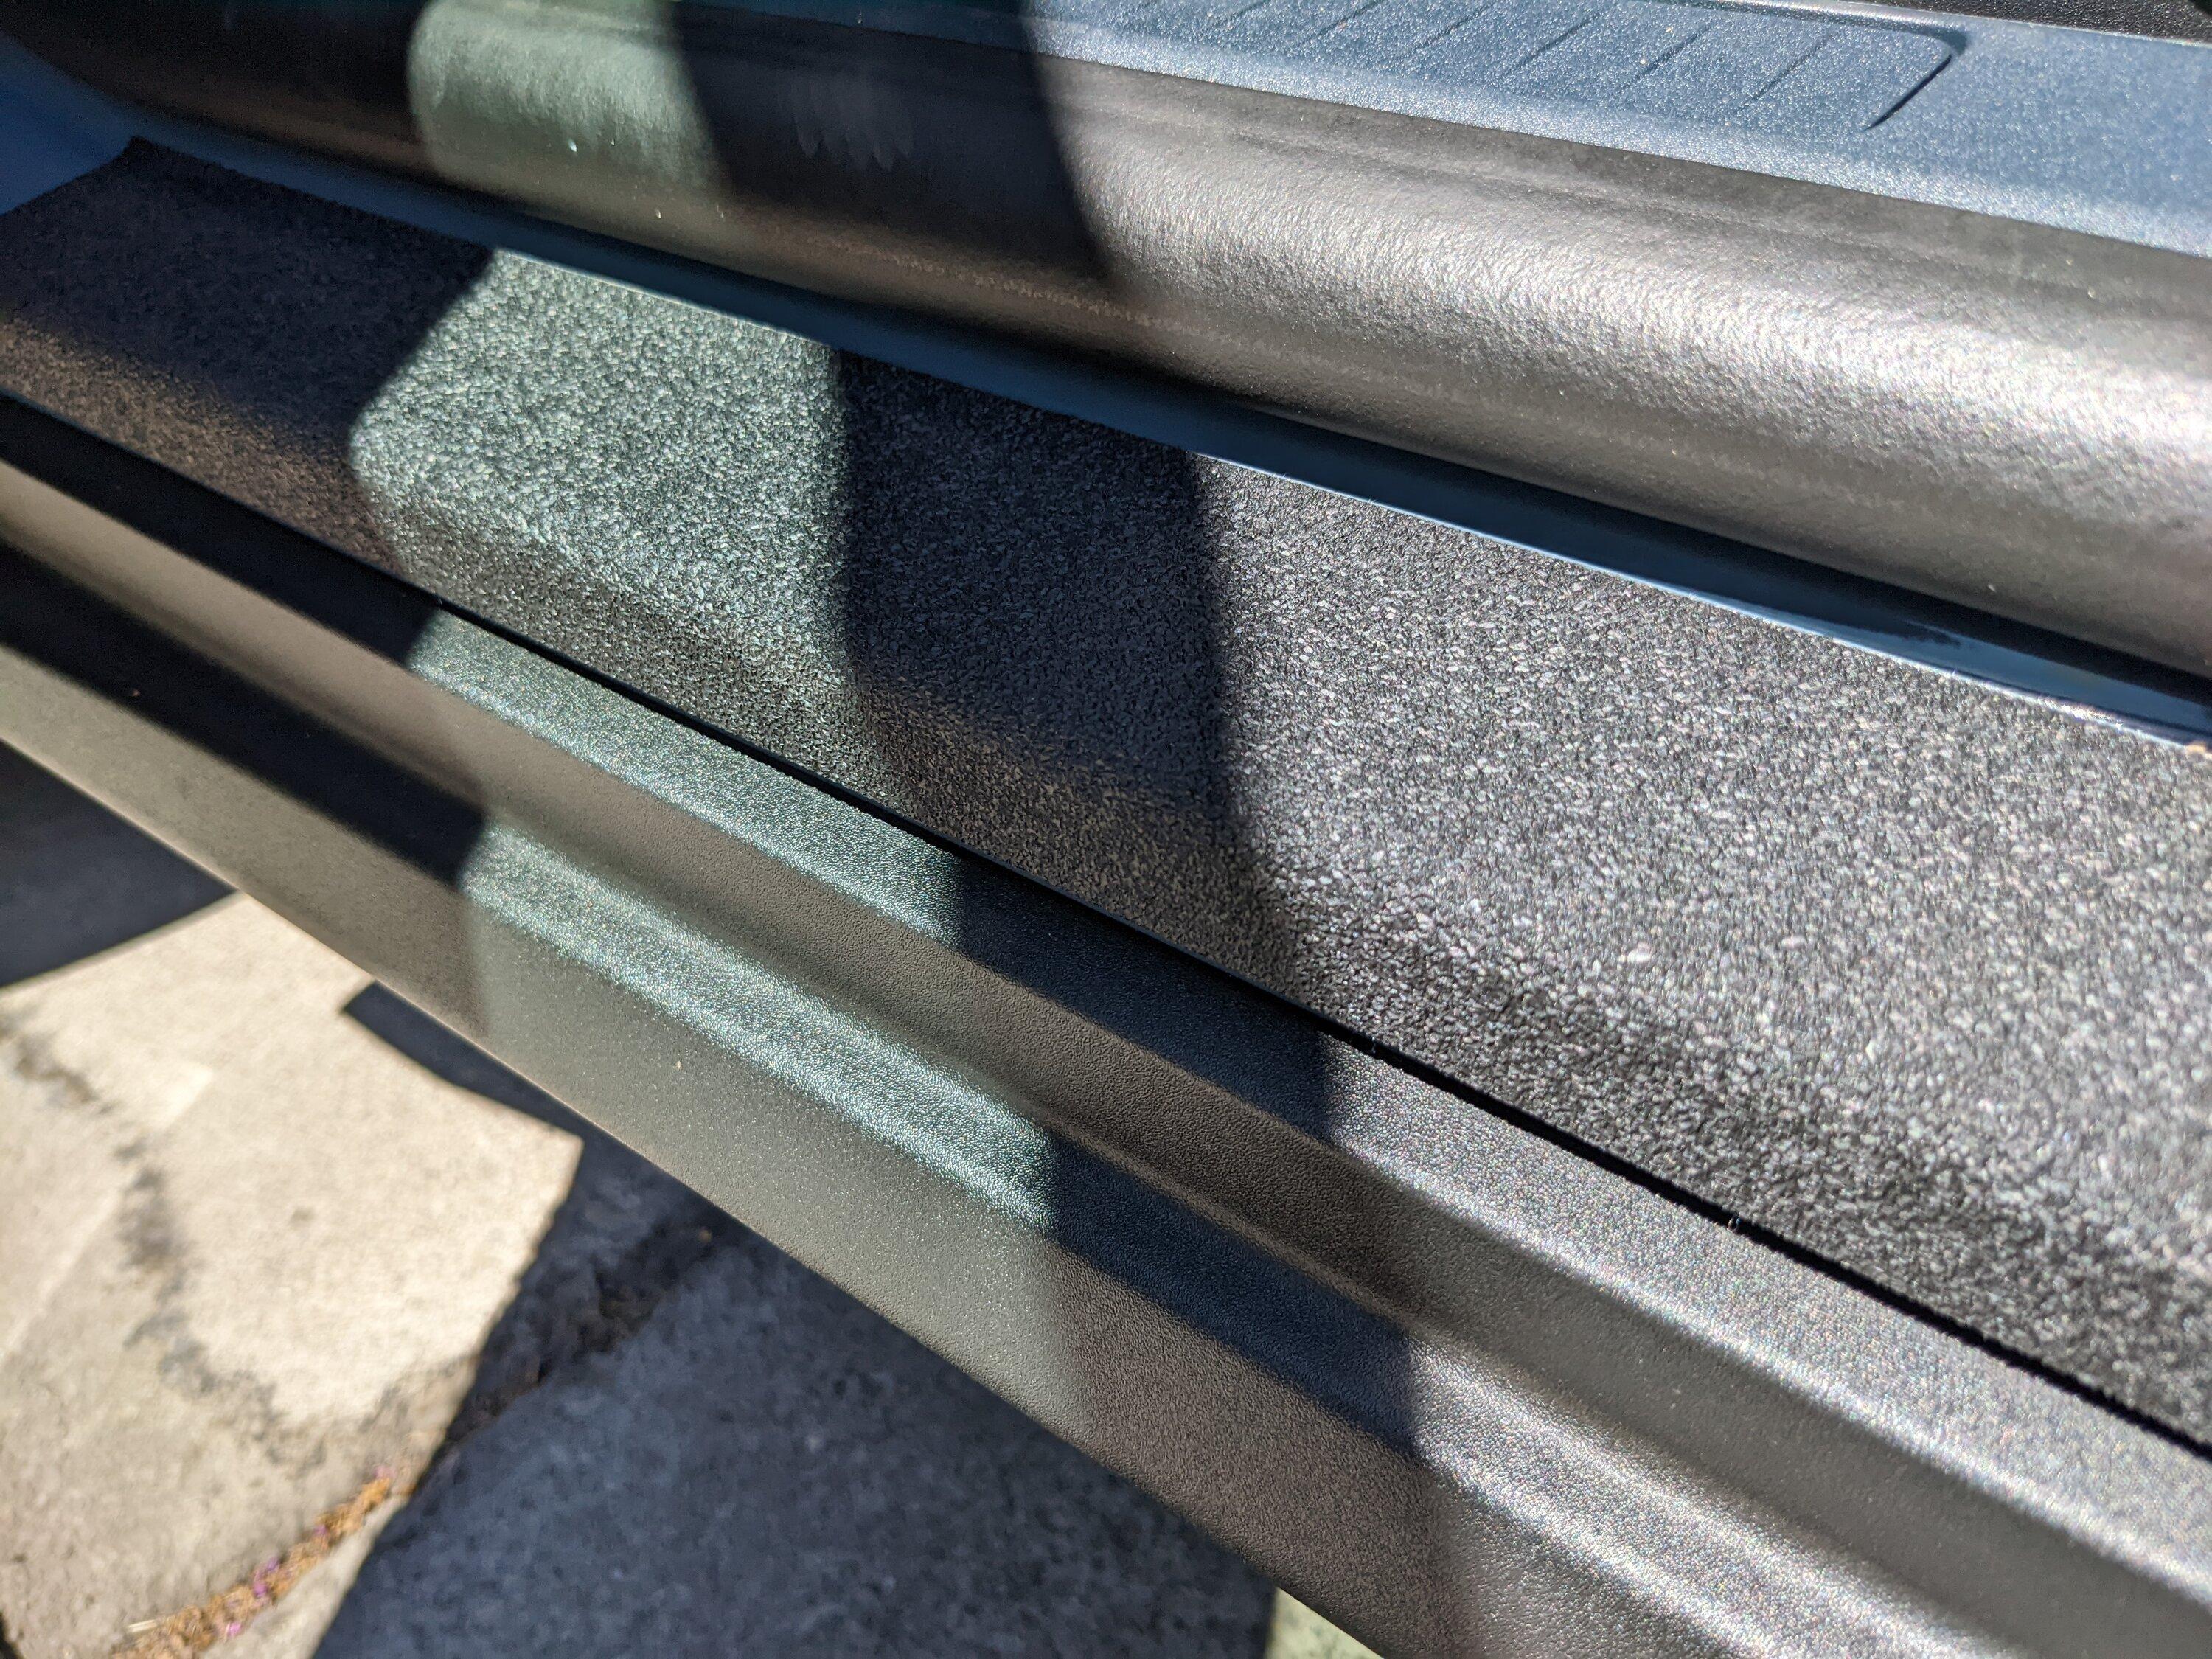
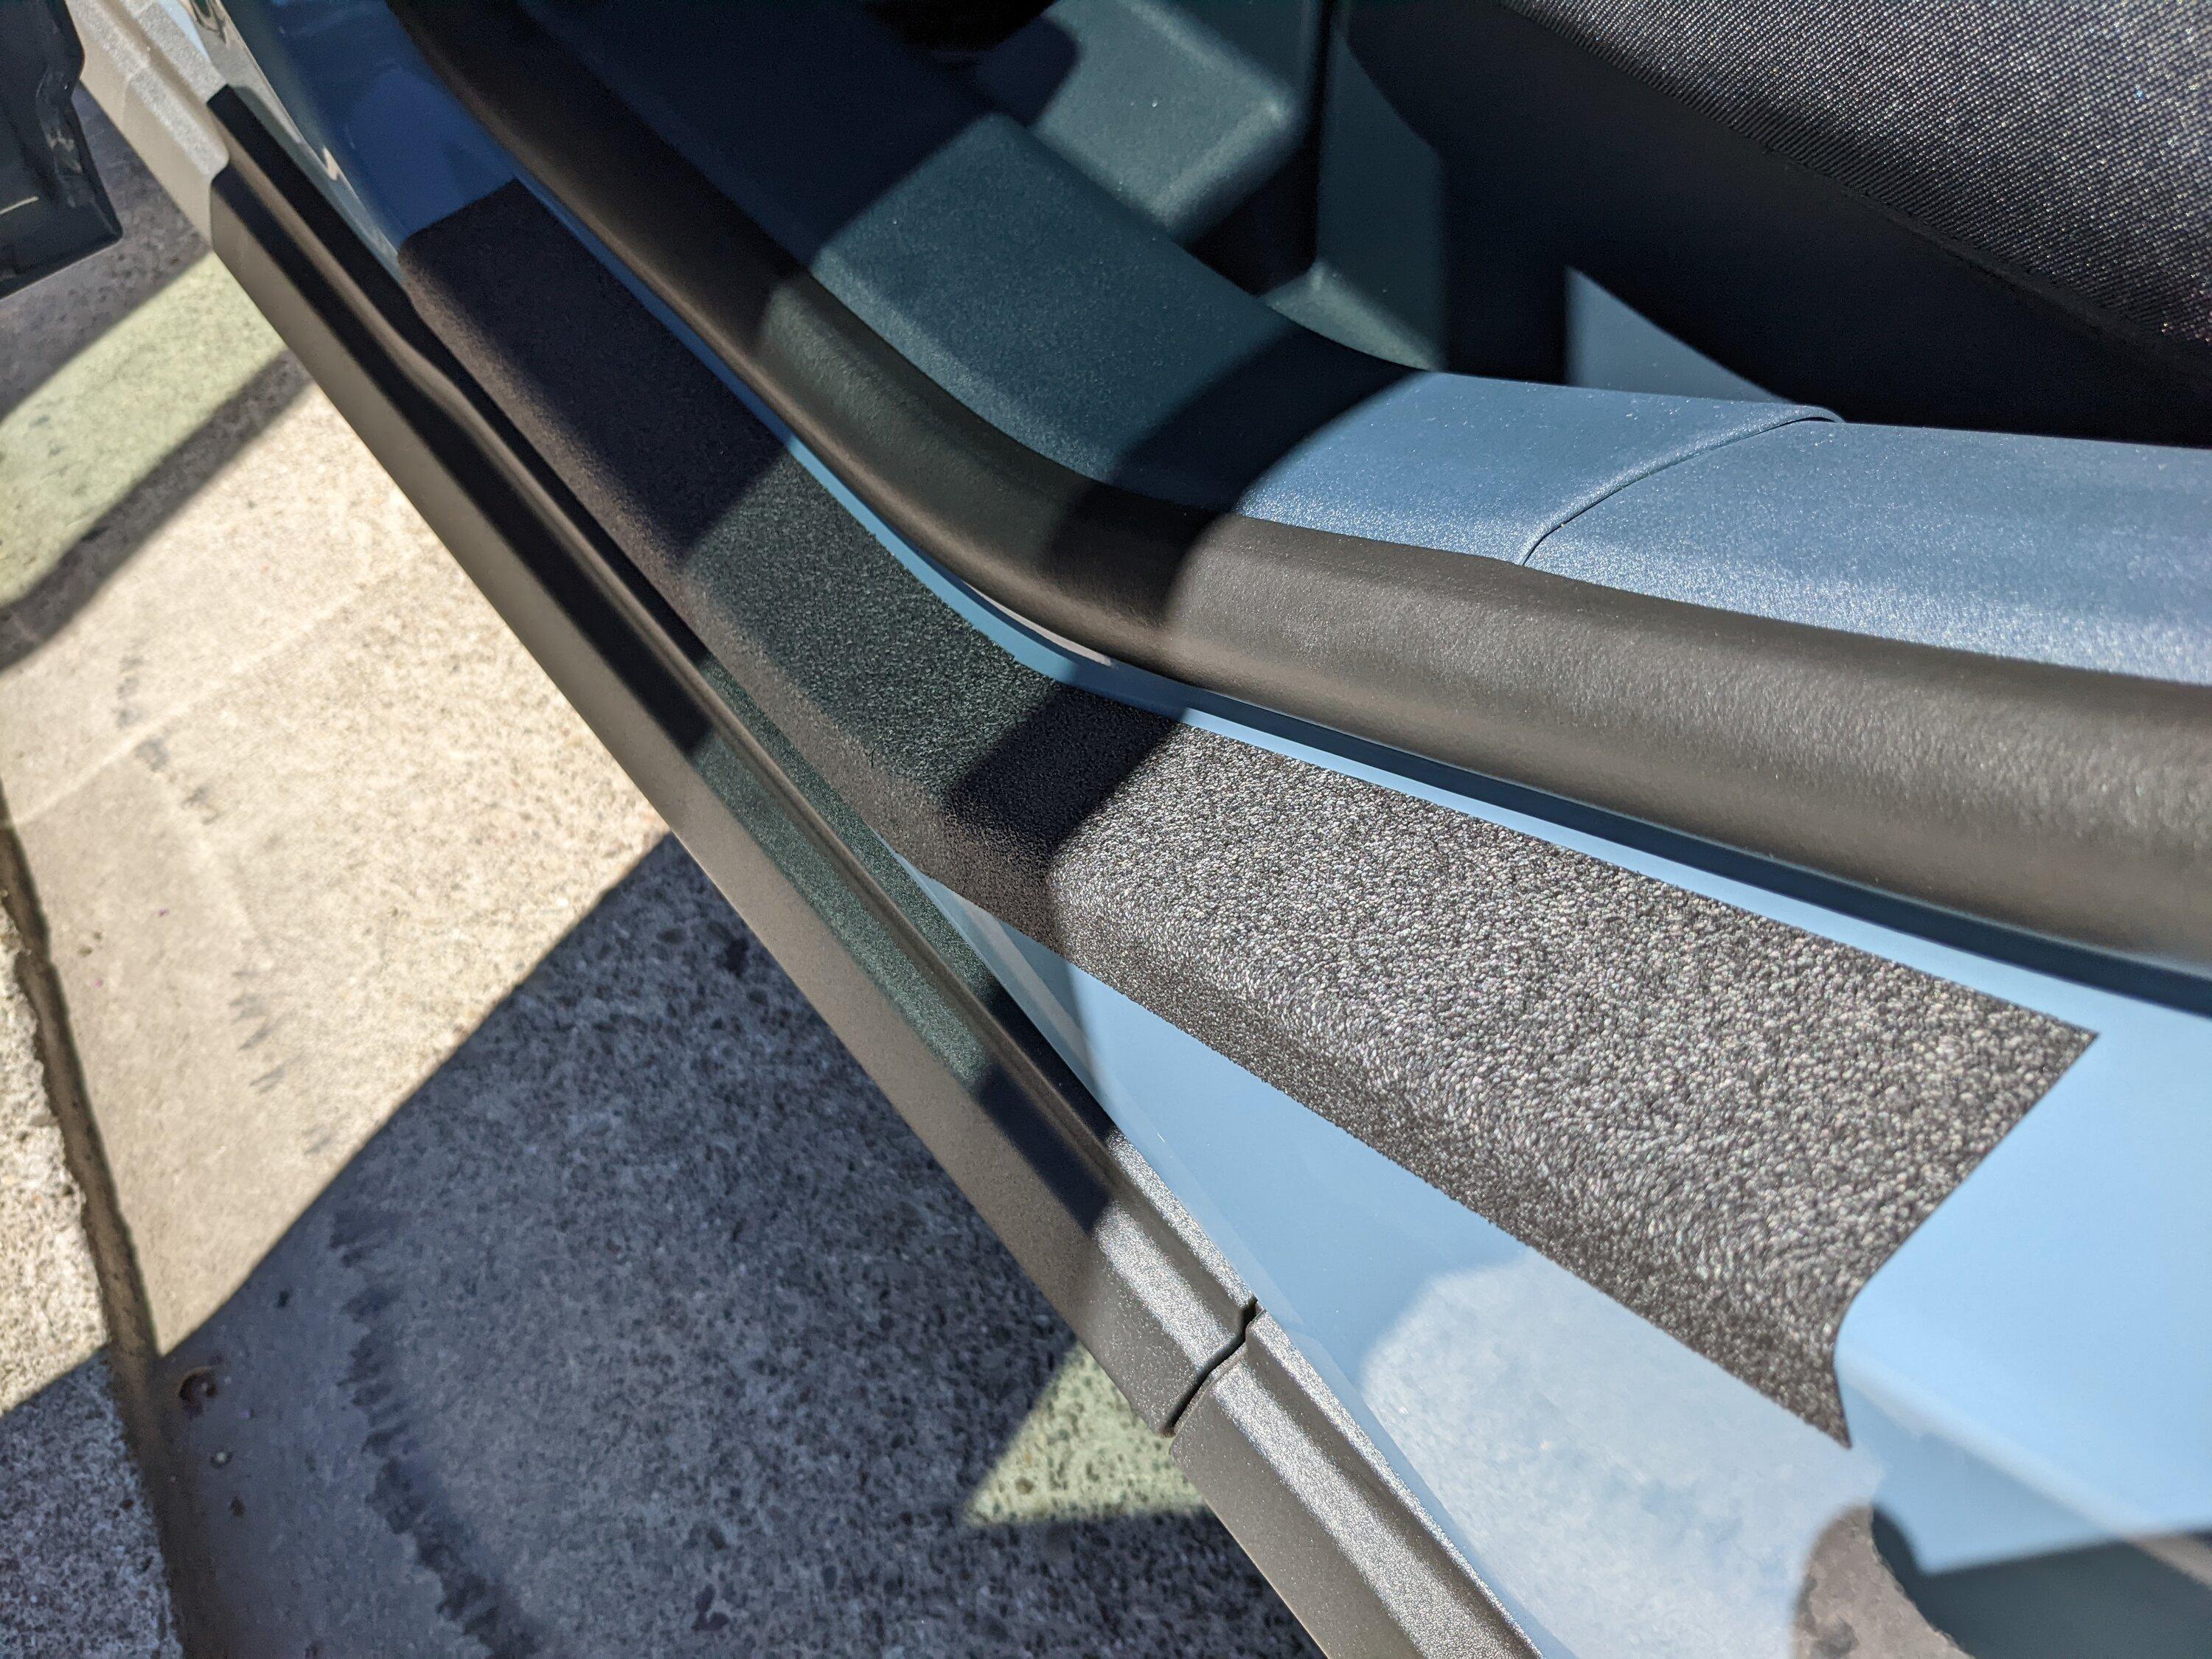
Added protection for the door sills. The texture is similar to bed liner.
Added a light that projects my logo onto the ground.
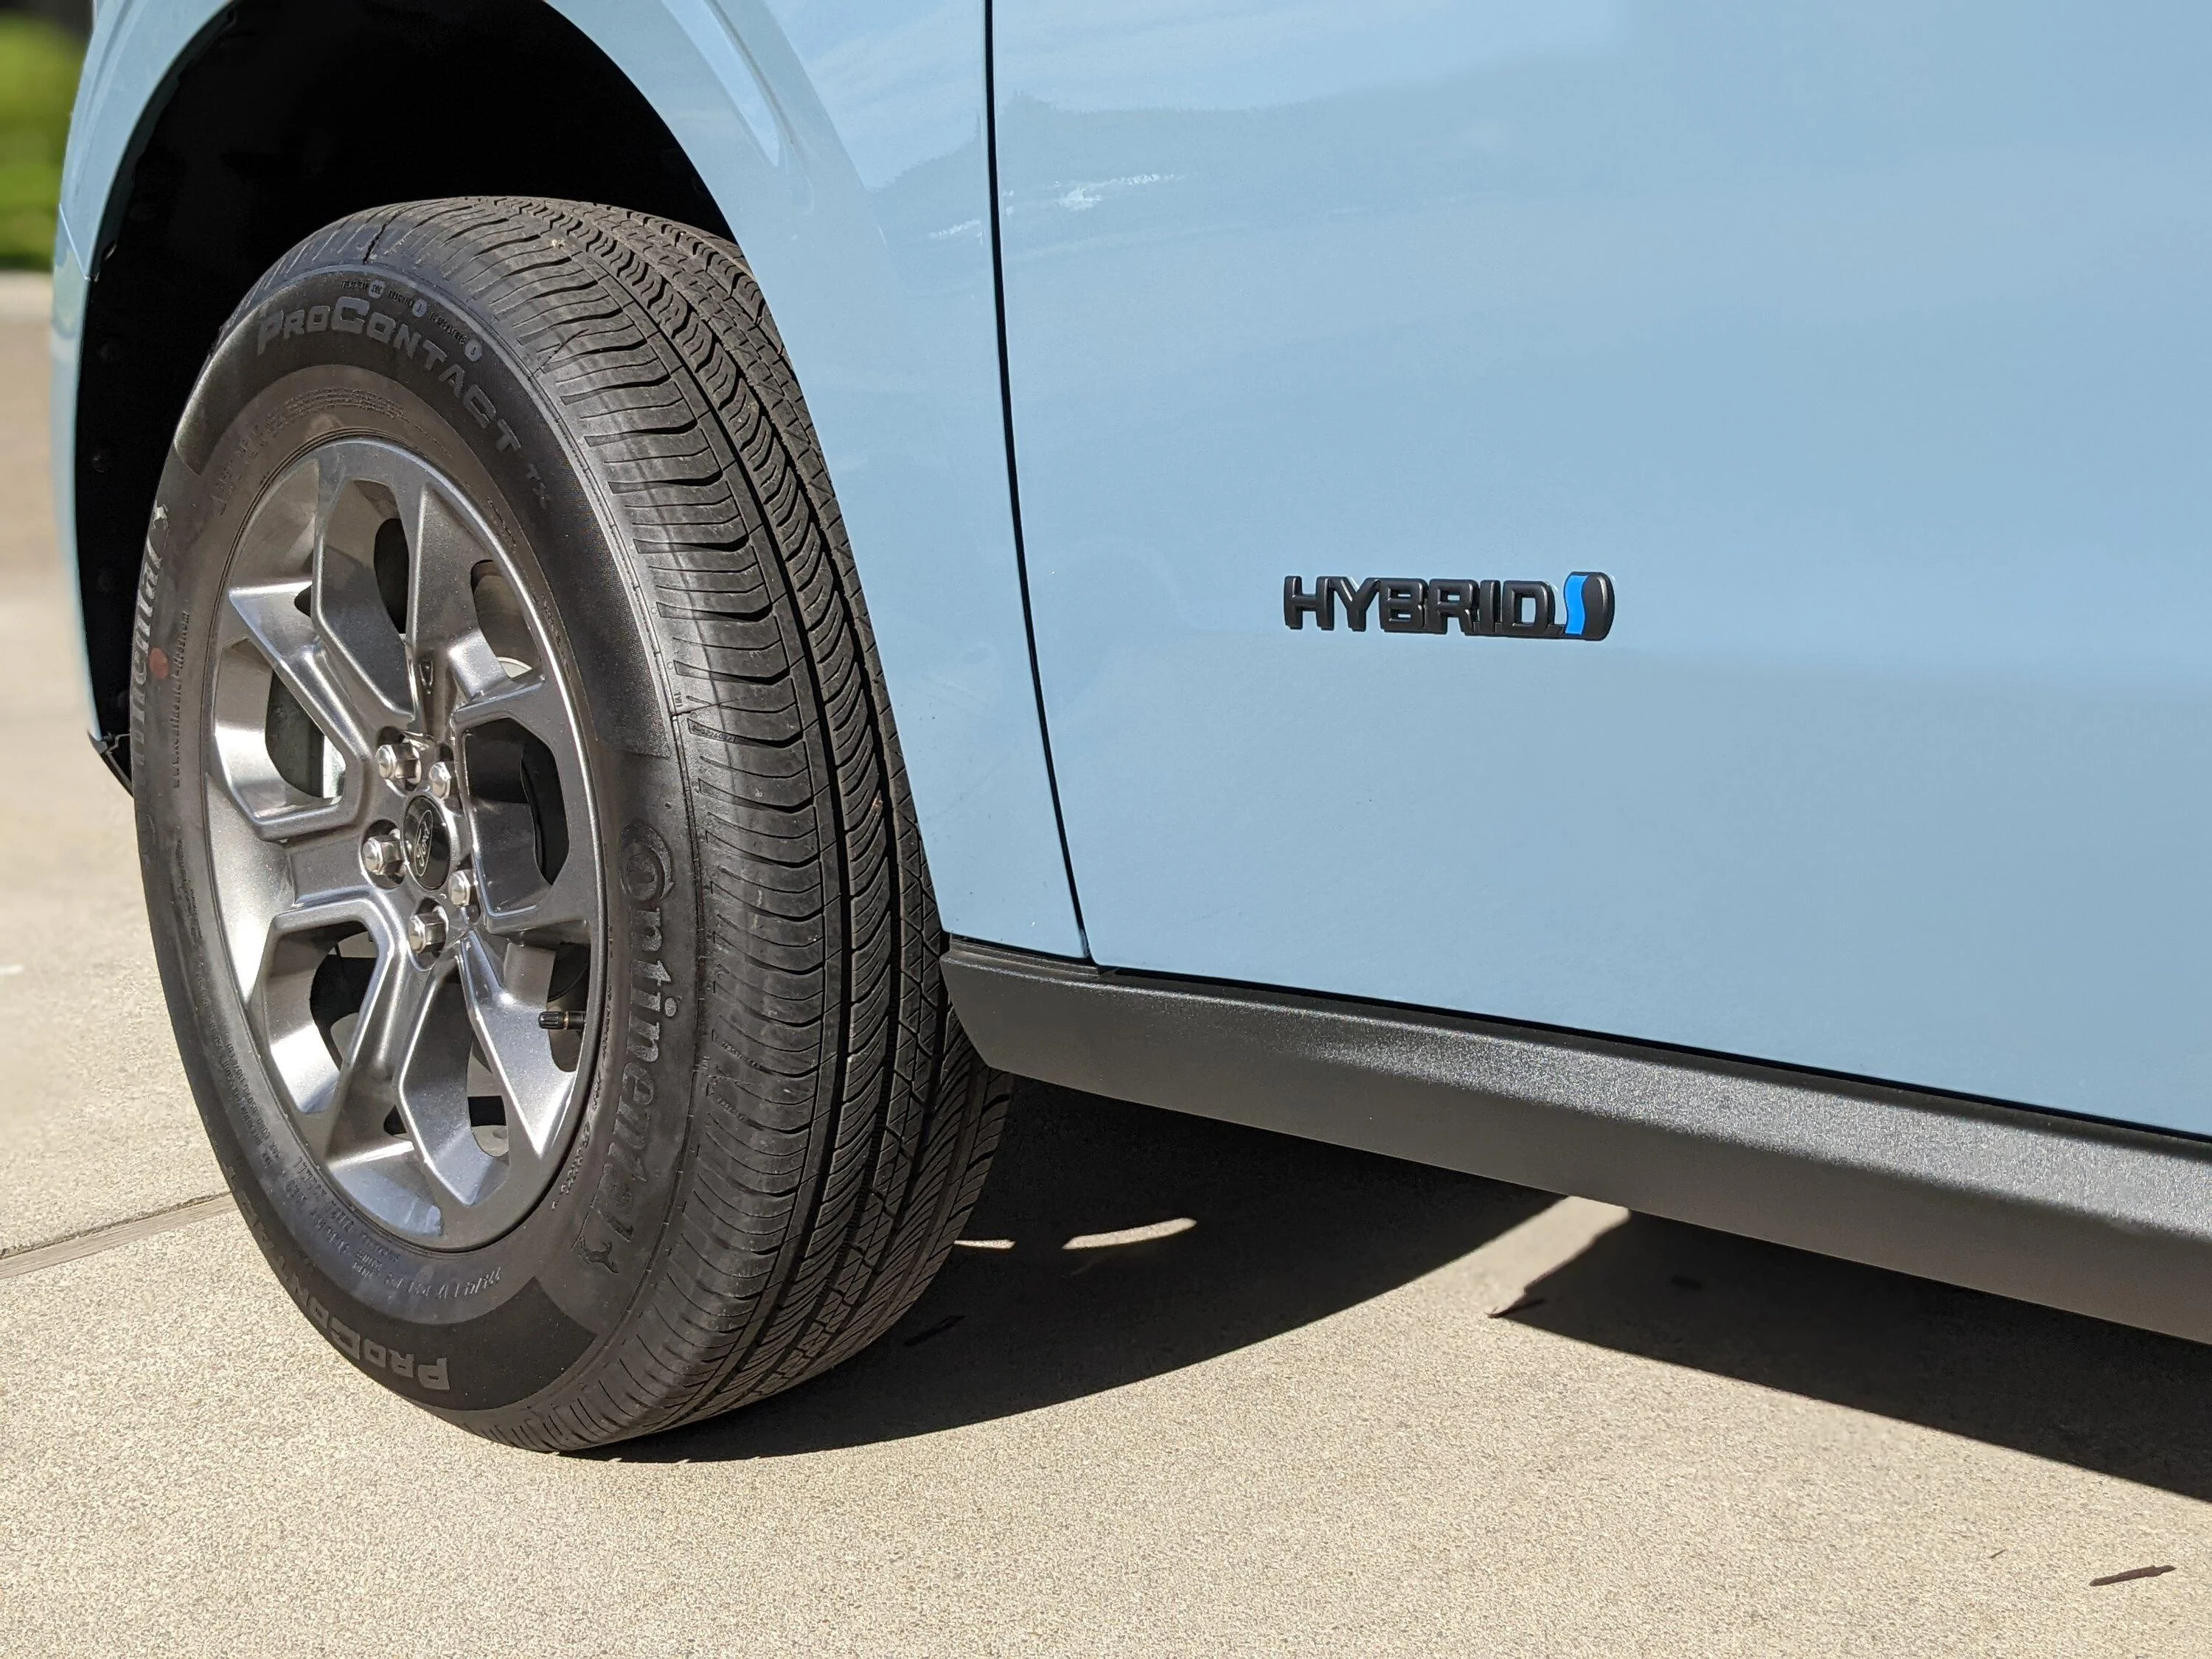
Hybrid emblem on driver’s side door.
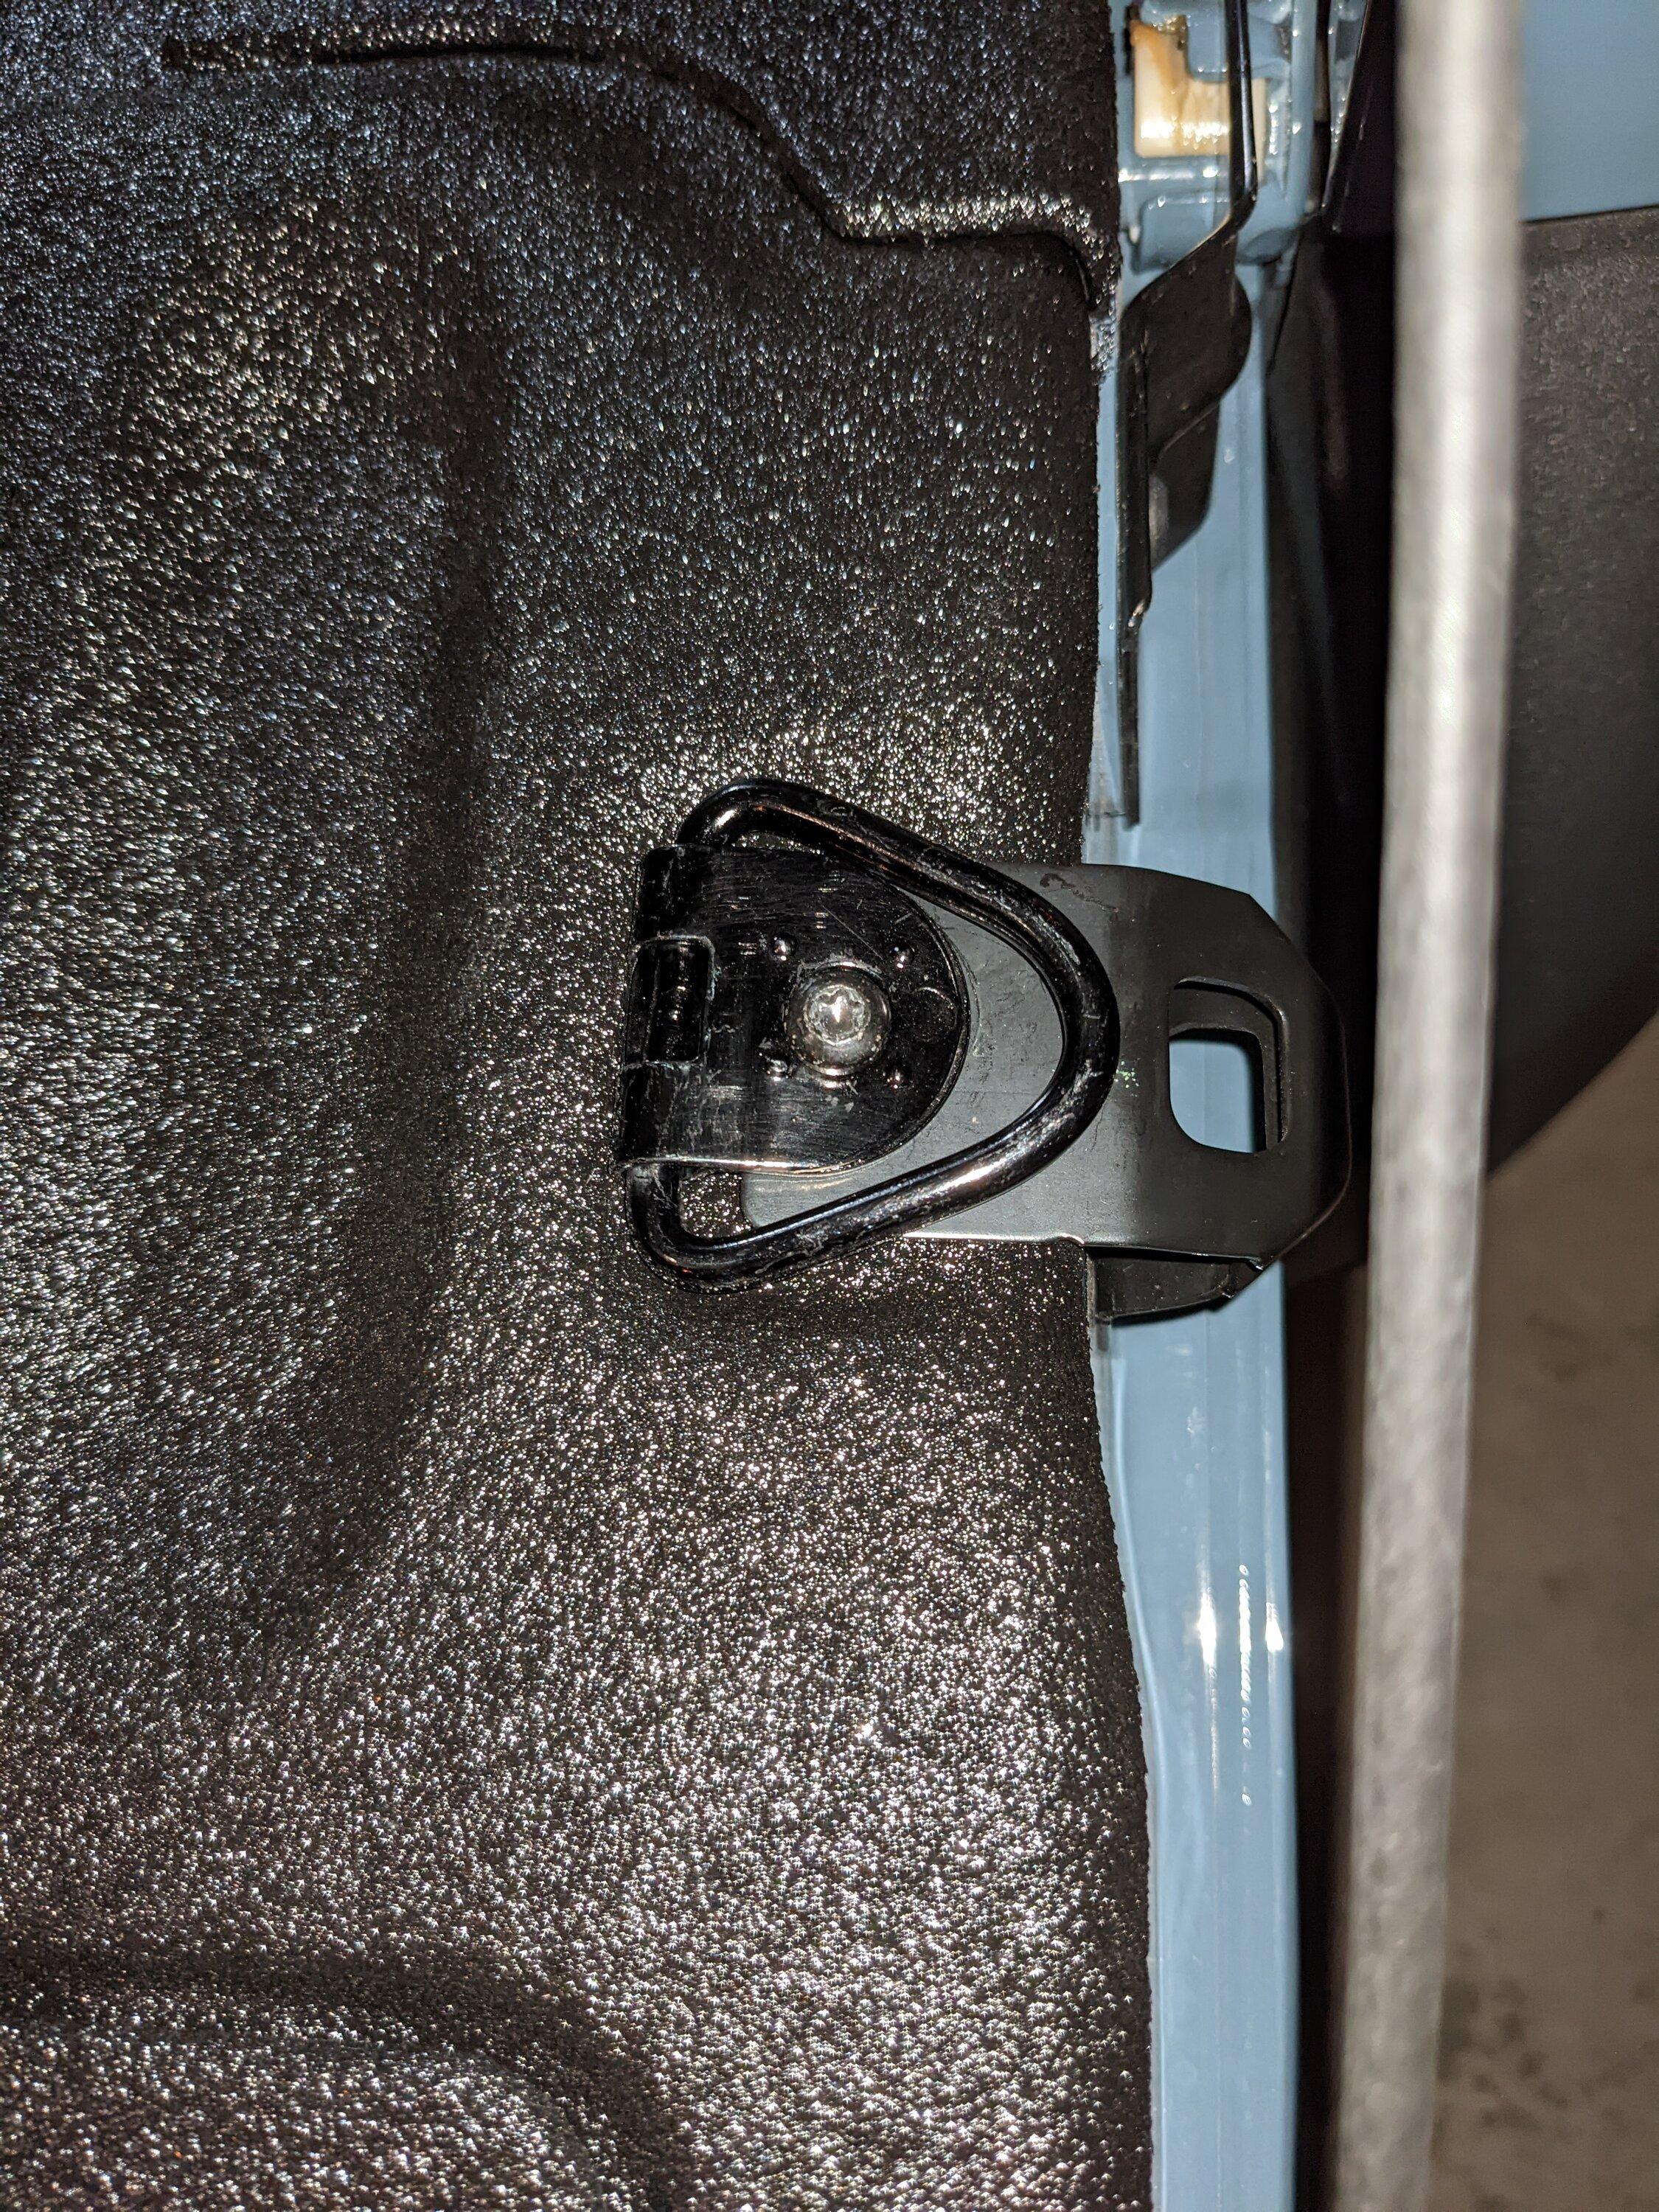
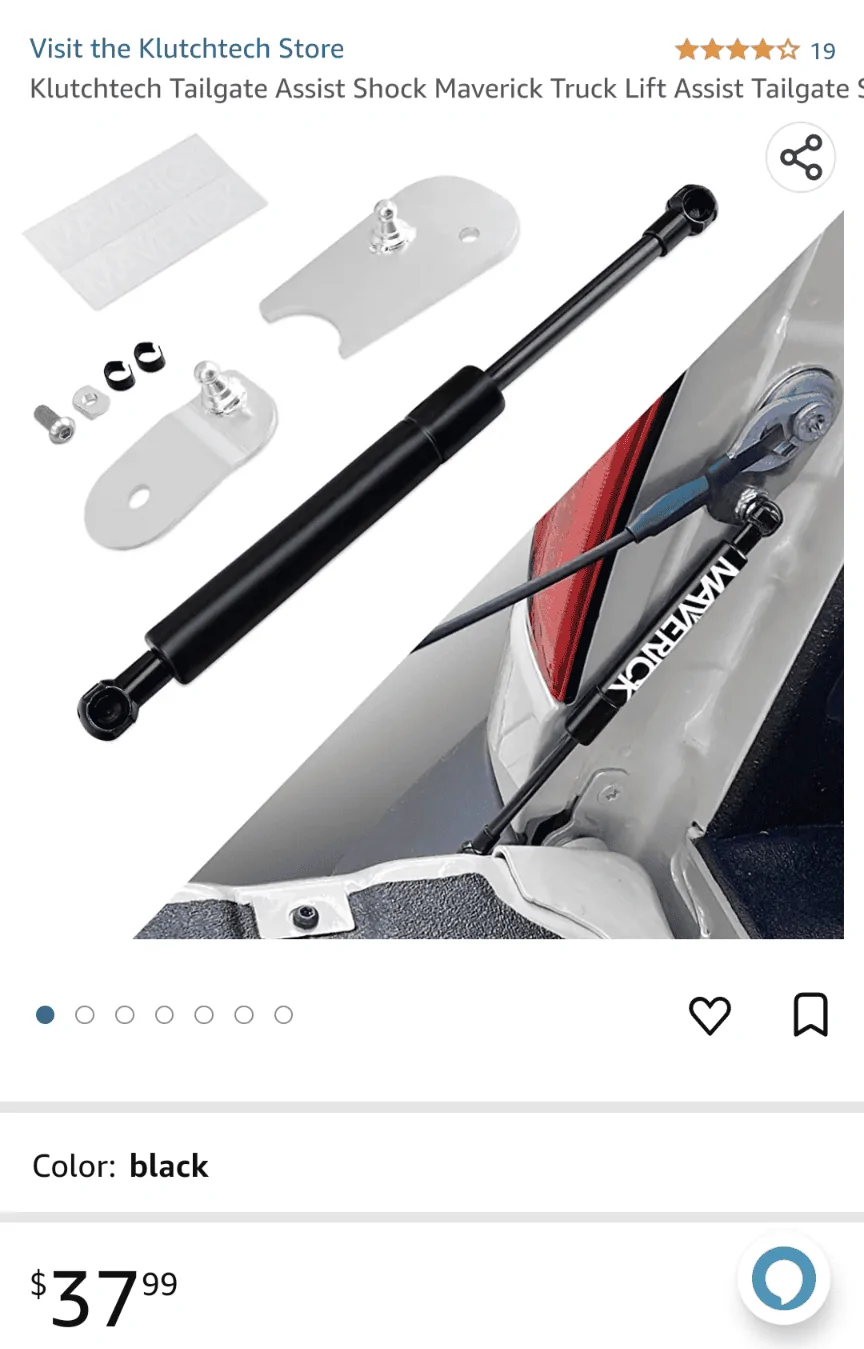
I installed a triangle tie down in place of bottle opener tie down to prepare for install of tailgate assist. Still waiting waiting for dealership to get it done.
You can also pop them out before shutting the tailgate and tie things down. I installed four of them onto the tailgate.
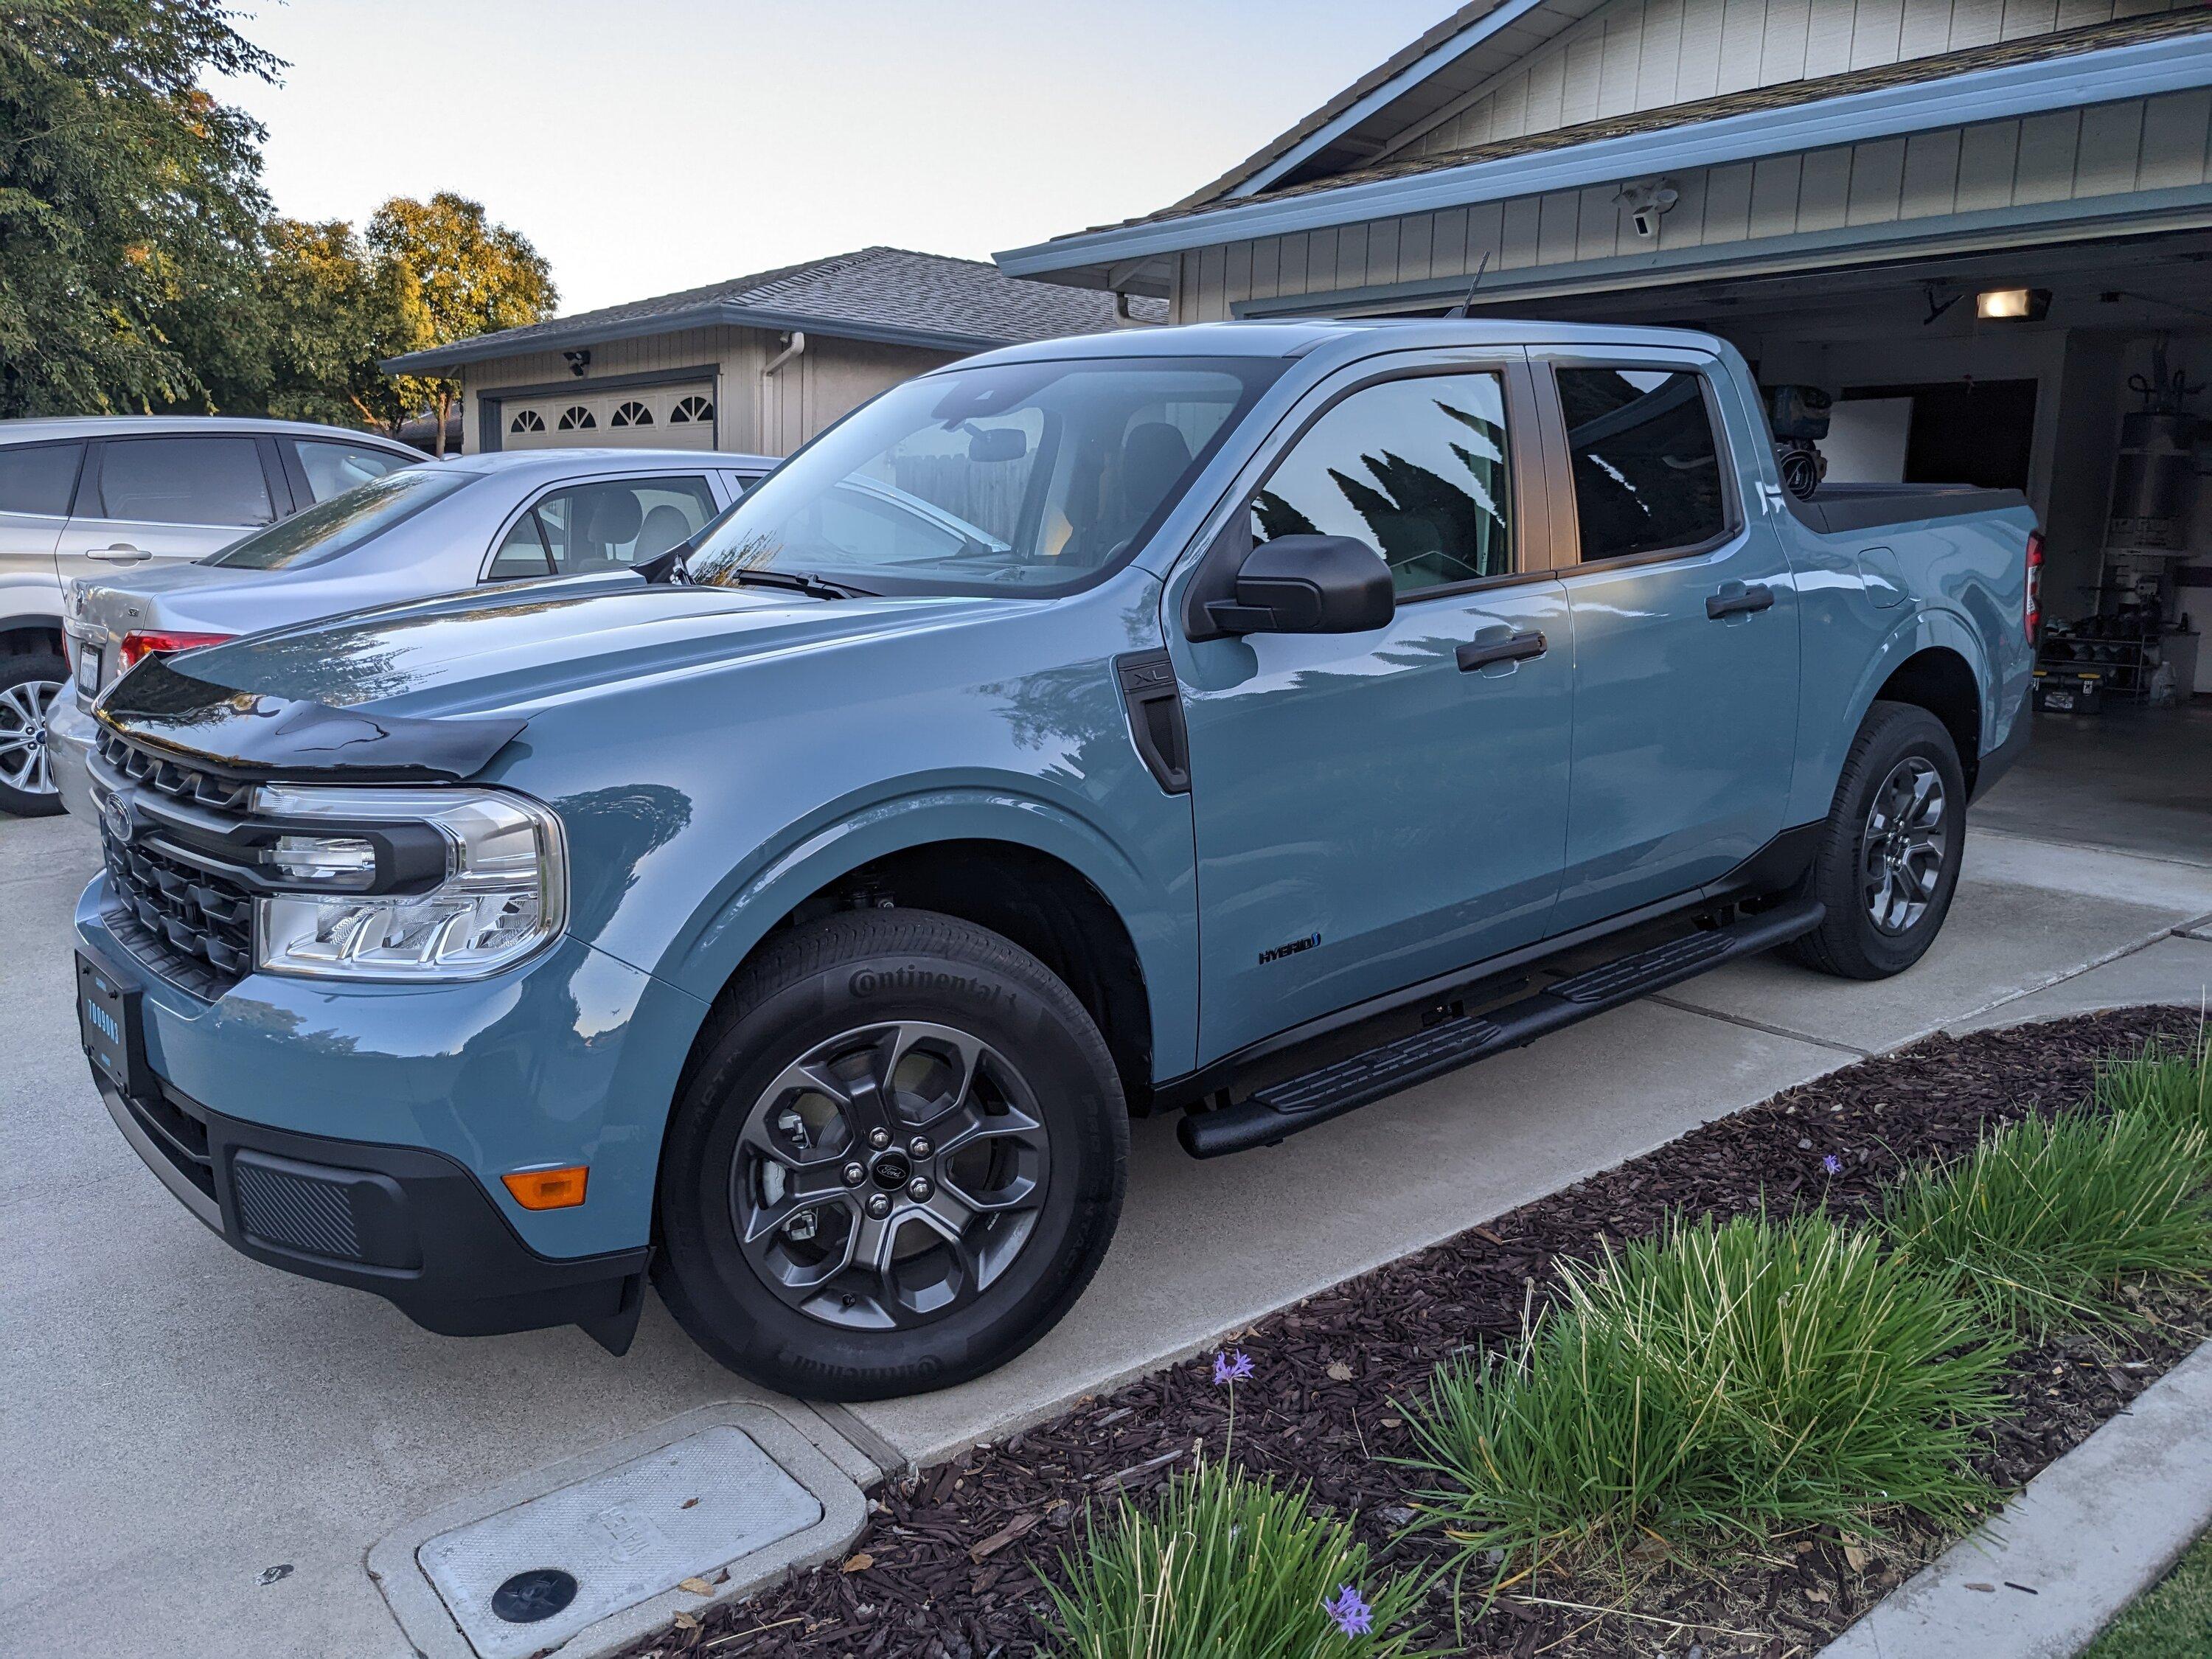
AVS Bug Deflector II from Real Truck. It screws into the existing holes under the hood. I’ll be able to periodically remove it to clean the front of the hood. I didn't want the adhesive one.

I also added MAVERICK lettering as you can see in the picture above I kept it very subtle.
New license plate.
View attachment 66458
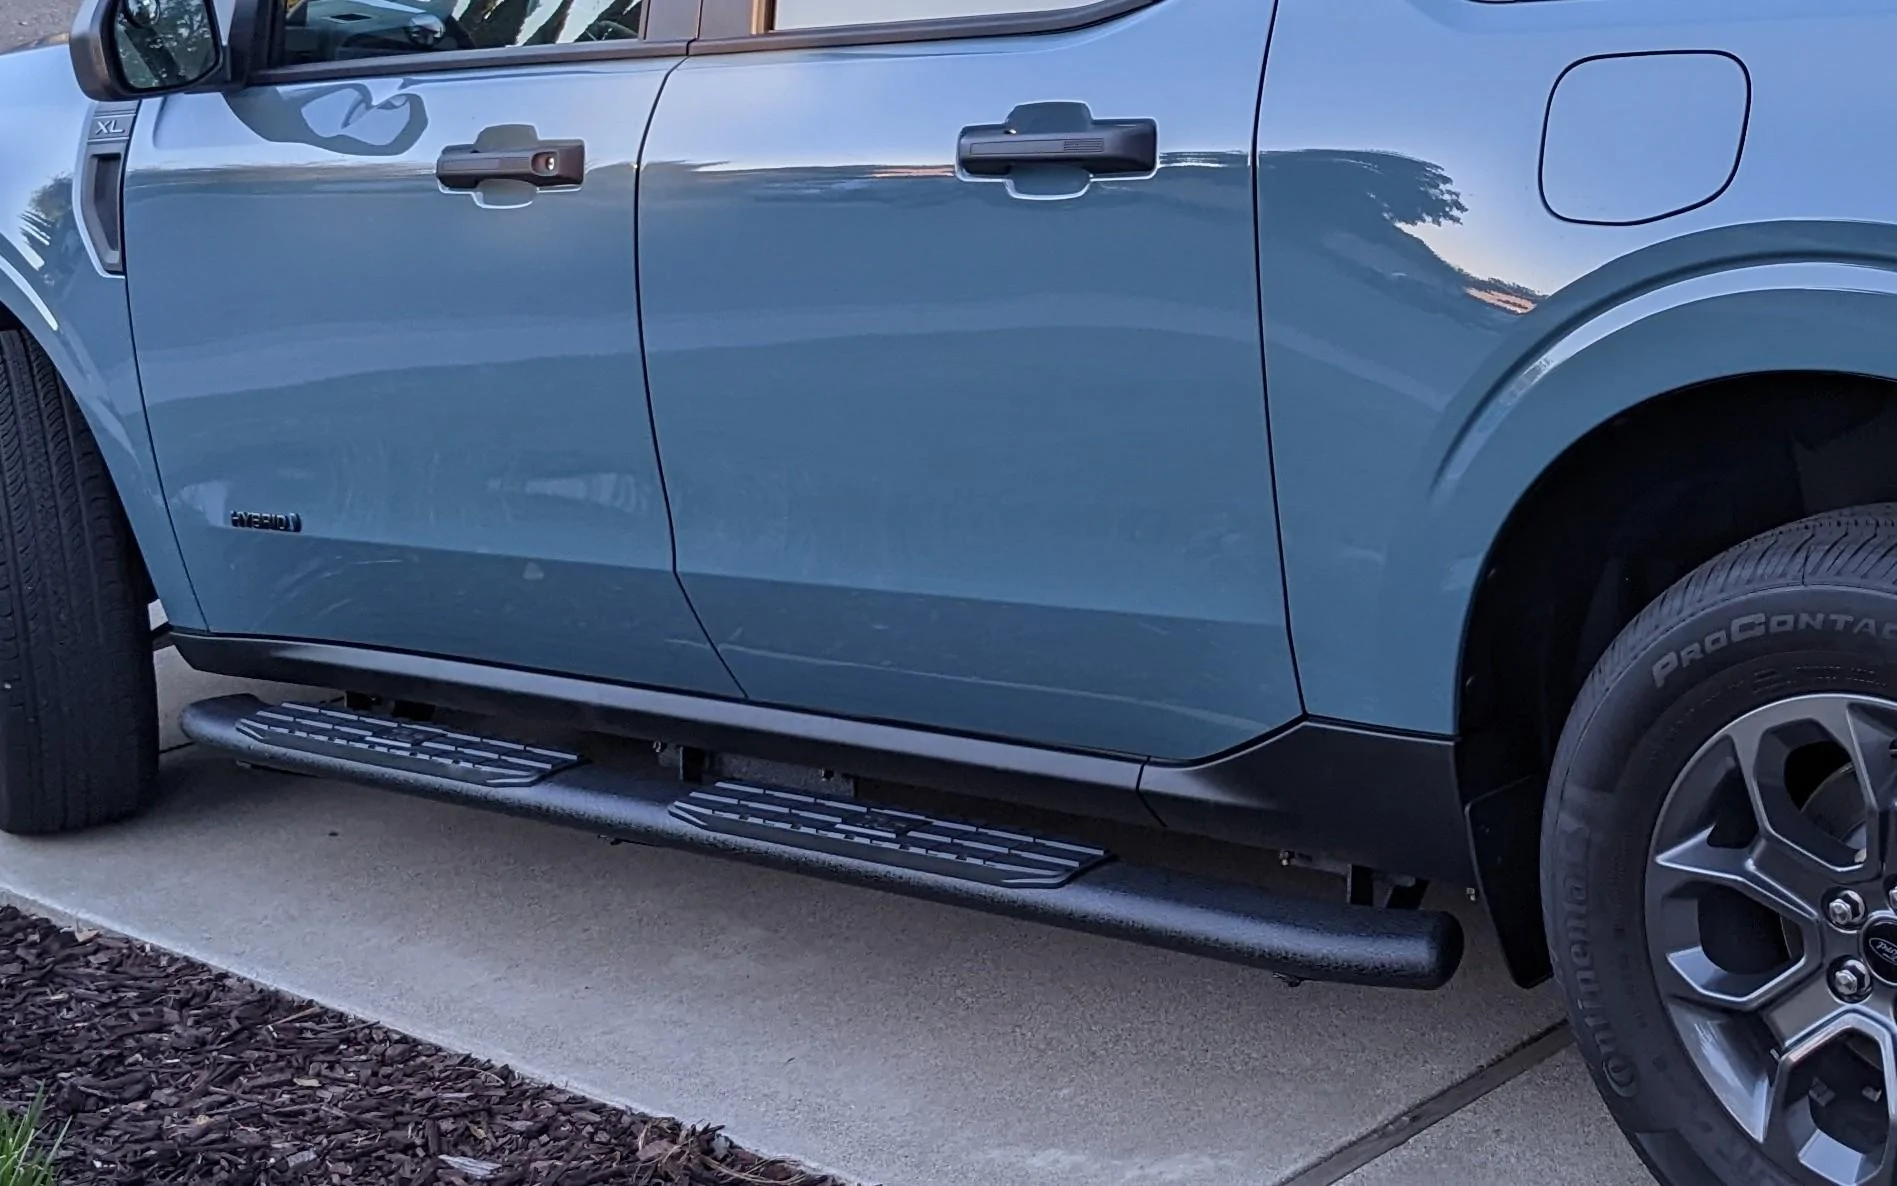
Added step rails. Makes it easier for wife and grandkids. It might even help with dings.
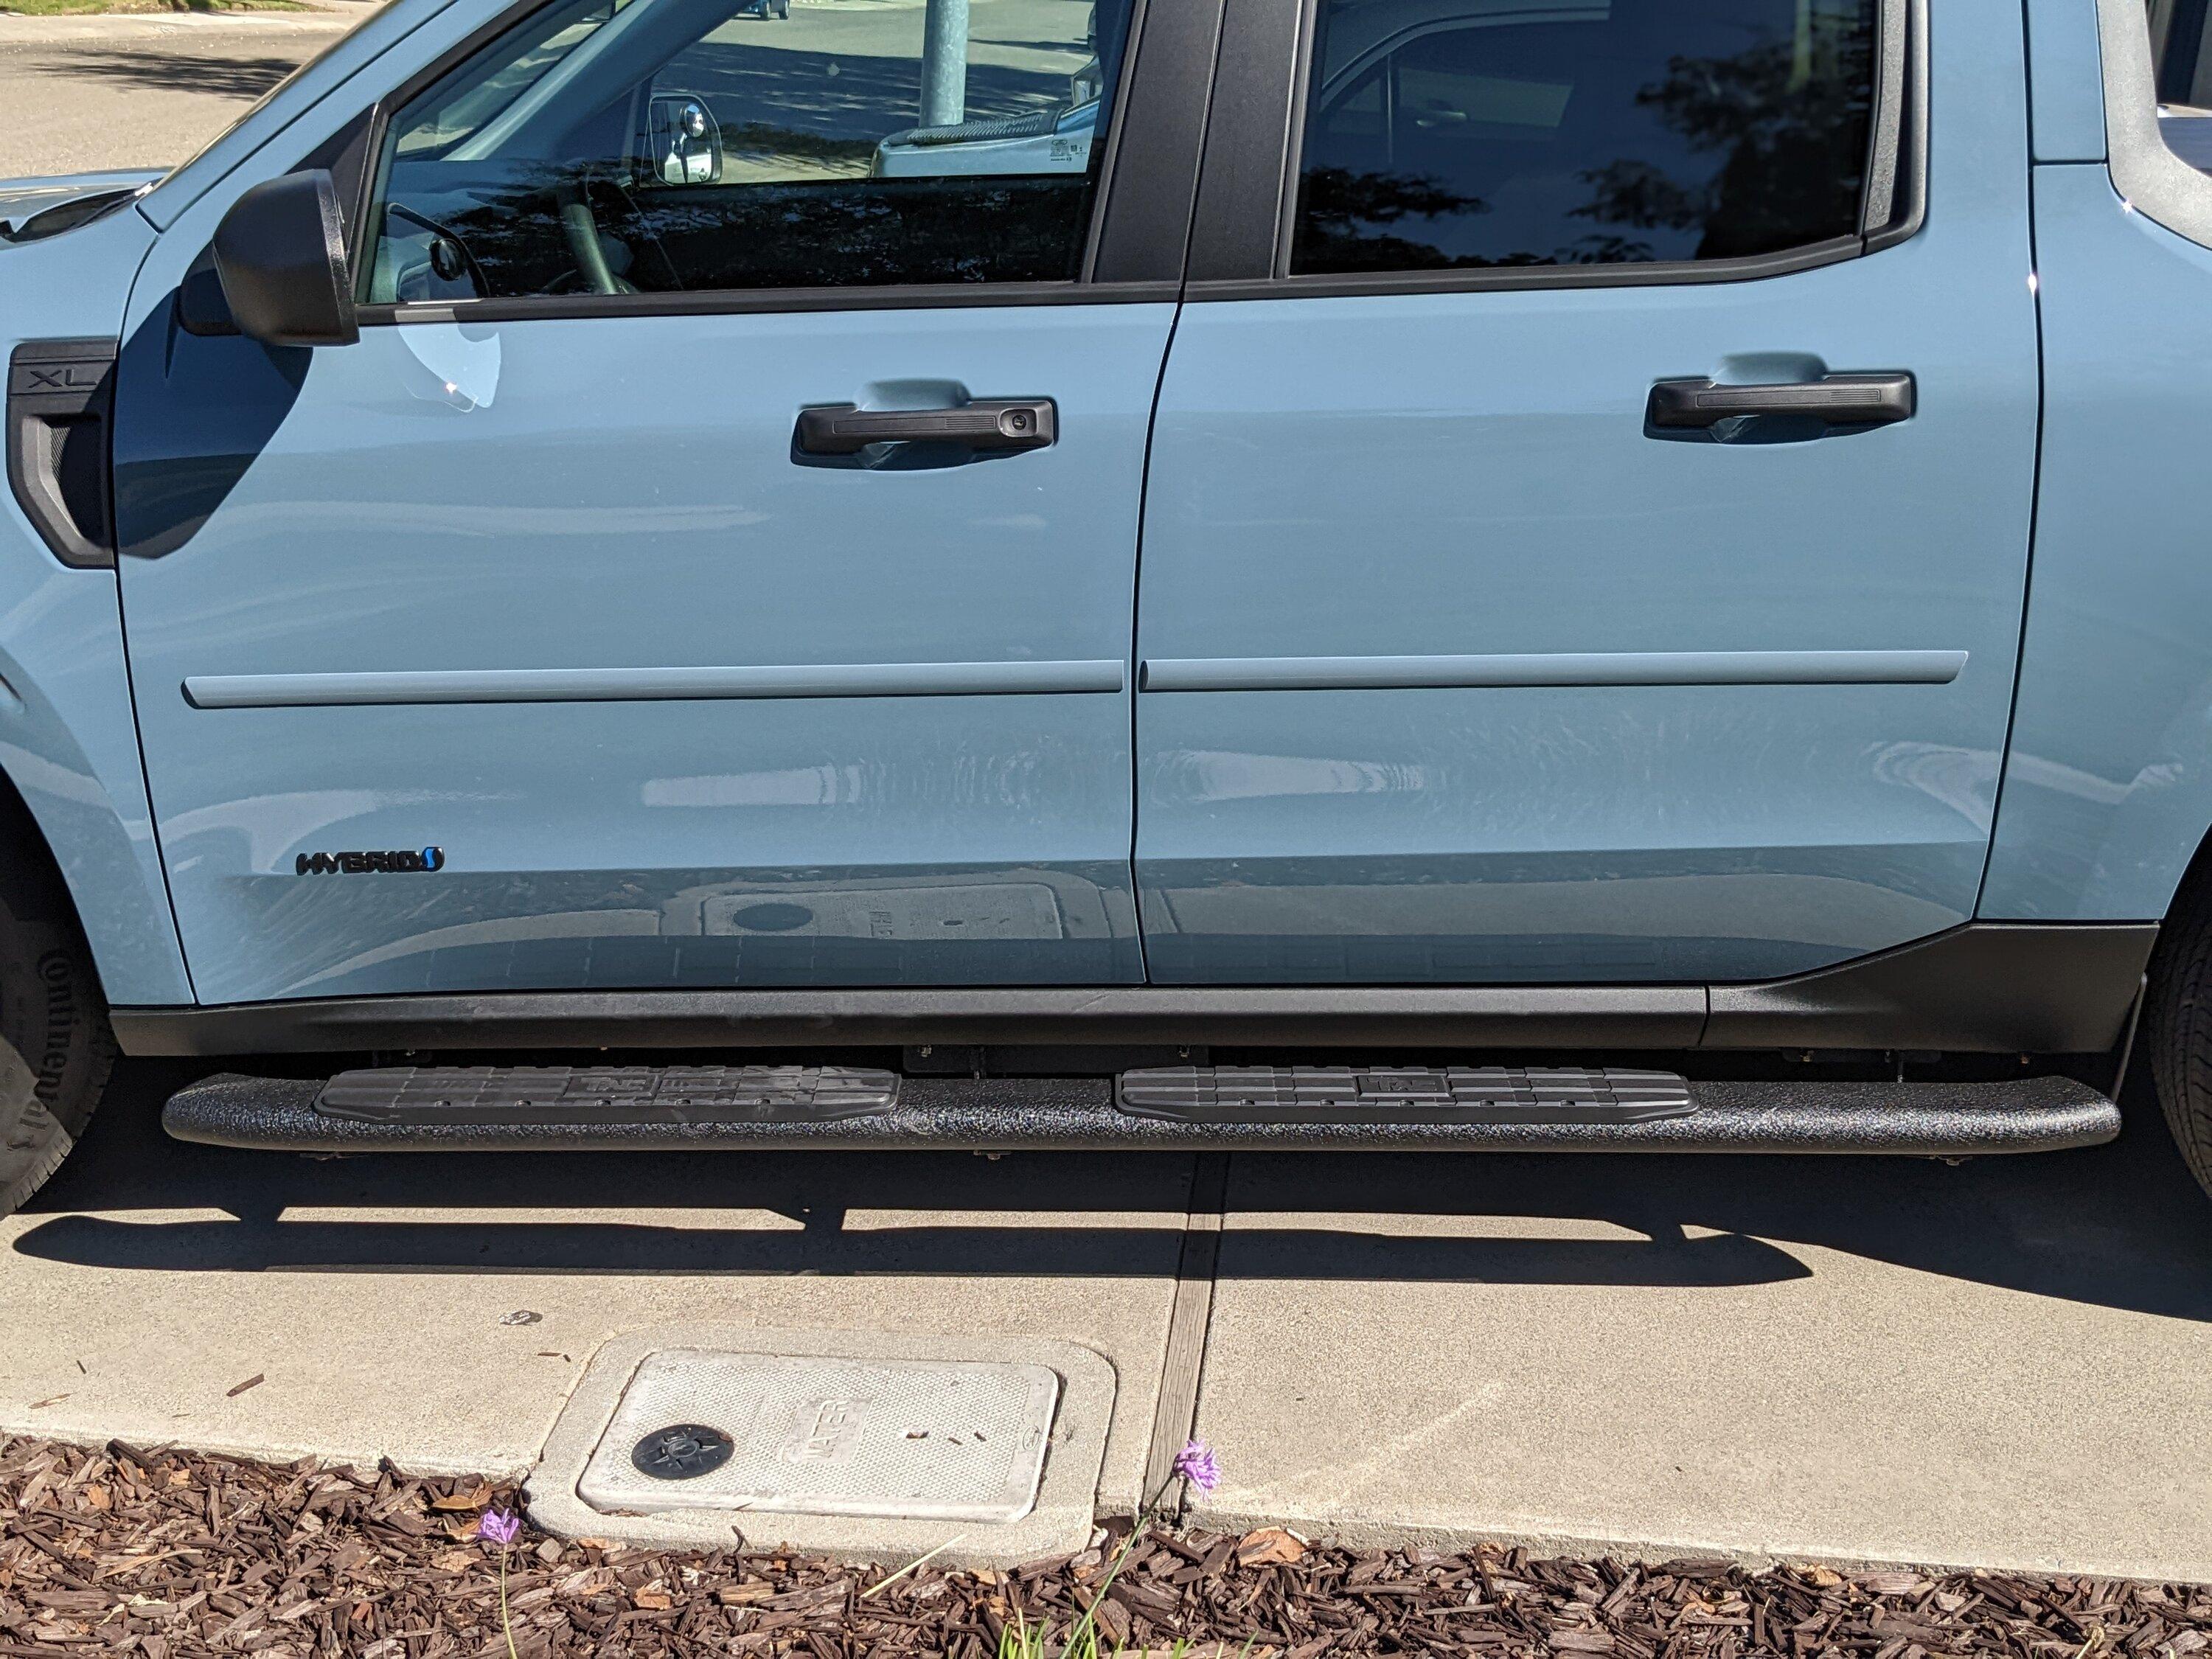
Added side mouldings to give wife peace of mind regarding dings. I tell her trucks are going to get dings, but she still wanted them.
With these last two additions total upgrade costs are just under $2,600.
Just make sure you don't use it while you're driving.Question how did you tweek to add video to the screen? Impressive.
I really like what you did with the bed electronicsOne year and one week from the order date we got my wife’s truck.
I took two plus weeks to decide on which modifications to do and wait for parts. Thanks to all who posted and shared their ideas and diy tutorials. Too many to list, but thanks to all of you.
Here's my additions. Total add-ons cost just under $2200.00.
Majority of the cost are the items that I had the dealership add:
Truxedo Sentry hard tonneau roll cover.
Line-X spray in bed liner.
XLT wheels – from forum member Mavlove, that the dealership swapped out for me.
My adds that I did after arrival of final parts:
Two bed cubbies. installed lights in both. Works well for when I need just a little light and to see what’s deep in the cubby. Also added reed switches so the cubby lights turn off when the cover is closed. Right side cubby has the cig lighter socket, two USB C and one USB A port and the voltage display.
I added a lock to the door. It's were I store my tire pump, battery jump starter and AC inverter.
Left side. Added cubby light, USB ports and 12v outlet. We use it to store our bungees and straps. The cubbies actually fit a lot.
Side rails with adjustable tie downs, painted black with bed liner paint. $45 for parts from the hardware store.
Added two additional tie down rings above cubbies.
Bed lighting. Wired it without having to take off tail lights or run wire under the truck. Much easier and super quick and clean looking install.
I installed the power switch on the cover that had the wiring harness.
I also added a pin switch so lights turn on when the tailgate is open and off when closed.
Bed divider. Wrapped a 2x6 with waterproof material. The roll of material should be enough to cover two more dividers. Attached six triangle rings with elevator bolts to this one.
Smartliner floor mats.
Fire extinguisher in passenger door fits perfectly.
Matching tumbler.
Center console inserts.
Additional blue inserts.
LED coaster in cup holder.
Used my Scosche phone holder. It fits nicely into the cubby without additional accessories.
Wireless Android Auto using the Motorola MA1.
We use the non data USB ports for phone charging so Android Auto doesn’t get confused.
Added protection for the door sills. The texture is similar to bed liner.
Added a light that projects my logo onto the ground.
Hybrid emblem on driver’s side door.
I installed a triangle tie down in place of bottle opener tie down to prepare for install of tailgate assist. Still waiting waiting for dealership to get it done.
You can also pop them out before shutting the tailgate and tie things down. I installed four of them onto the tailgate.
AVS Bug Deflector II from Real Truck. It screws into the existing holes under the hood. I’ll be able to periodically remove it to clean the front of the hood. I didn't want the adhesive one.
I also added MAVERICK lettering as you can see in the picture above I kept it very subtle.
New license plate.
View attachment 66458
Added step rails. Makes it easier for wife and grandkids. It might even help with dings.
Added side mouldings to give wife peace of mind regarding dings. I tell her trucks are going to get dings, but she still wanted them.
With these last two additions total upgrade costs are just under $2,600.
Link to the kit?the light kit i bought has an auto-shutoff after 15 minutes.
How have you liked the AVS Bug Deflector II from Real Truck? I got the one from ford but have not yet installed it. Did yours also come with tape or just screws? Maybe add blue lock tight to screw threads?One year and one week from the order date we got my wife’s truck.
I took two plus weeks to decide on which modifications to do and wait for parts. Thanks to all who posted and shared their ideas and diy tutorials. Too many to list, but thanks to all of you.
Here's my additions. Total add-ons cost just under $2200.00.
Majority of the cost are the items that I had the dealership add:
Truxedo Sentry hard tonneau roll cover.
Line-X spray in bed liner.
XLT wheels – from forum member Mavlove, that the dealership swapped out for me.
My adds that I did after arrival of final parts:
Two bed cubbies. installed lights in both. Works well for when I need just a little light and to see what’s deep in the cubby. Also added reed switches so the cubby lights turn off when the cover is closed. Right side cubby has the cig lighter socket, two USB C and one USB A port and the voltage display.
I added a lock to the door. It's were I store my tire pump, battery jump starter and AC inverter.
Left side. Added cubby light, USB ports and 12v outlet. We use it to store our bungees and straps. The cubbies actually fit a lot.
Side rails with adjustable tie downs, painted black with bed liner paint. $45 for parts from the hardware store.
Added two additional tie down rings above cubbies.
Bed lighting. Wired it without having to take off tail lights or run wire under the truck. Much easier and super quick and clean looking install.
I installed the power switch on the cover that had the wiring harness.
I also added a pin switch so lights turn on when the tailgate is open and off when closed.
Bed divider. Wrapped a 2x6 with waterproof material. The roll of material should be enough to cover two more dividers. Attached six triangle rings with elevator bolts to this one.
Smartliner floor mats.
Fire extinguisher in passenger door fits perfectly.
Matching tumbler.
Center console inserts.
Additional blue inserts.
LED coaster in cup holder.
Used my Scosche phone holder. It fits nicely into the cubby without additional accessories.
Wireless Android Auto using the Motorola MA1.
We use the non data USB ports for phone charging so Android Auto doesn’t get confused.
Added protection for the door sills. The texture is similar to bed liner.
Added a light that projects my logo onto the ground.
Hybrid emblem on driver’s side door.
I installed a triangle tie down in place of bottle opener tie down to prepare for install of tailgate assist. Still waiting waiting for dealership to get it done.
You can also pop them out before shutting the tailgate and tie things down. I installed four of them onto the tailgate.
AVS Bug Deflector II from Real Truck. It screws into the existing holes under the hood. I’ll be able to periodically remove it to clean the front of the hood. I didn't want the adhesive one.
I also added MAVERICK lettering as you can see in the picture above I kept it very subtle.
New license plate.
View attachment 66458
Added step rails. Makes it easier for wife and grandkids. It might even help with dings.
Added side mouldings to give wife peace of mind regarding dings. I tell her trucks are going to get dings, but she still wanted them.
With these last two additions total upgrade costs are just under $2,600.
Looks great, congratulations! She might appreciate the tailgate assist? That was a small but big deal for me.One year and one week from the order date we got my wife’s truck.
I took two plus weeks to decide on which modifications to do and wait for parts. Thanks to all who posted and shared their ideas and diy tutorials. Too many to list, but thanks to all of you.
Here's my additions. Total add-ons cost just under $2200.00.
Majority of the cost are the items that I had the dealership add:
Truxedo Sentry hard tonneau roll cover.
Line-X spray in bed liner.
XLT wheels – from forum member Mavlove, that the dealership swapped out for me.
My adds that I did after arrival of final parts:
Two bed cubbies. installed lights in both. Works well for when I need just a little light and to see what’s deep in the cubby. Also added reed switches so the cubby lights turn off when the cover is closed. Right side cubby has the cig lighter socket, two USB C and one USB A port and the voltage display.
I added a lock to the door. It's were I store my tire pump, battery jump starter and AC inverter.
Left side. Added cubby light, USB ports and 12v outlet. We use it to store our bungees and straps. The cubbies actually fit a lot.
Side rails with adjustable tie downs, painted black with bed liner paint. $45 for parts from the hardware store.
Added two additional tie down rings above cubbies.
Bed lighting. Wired it without having to take off tail lights or run wire under the truck. Much easier and super quick and clean looking install.
I installed the power switch on the cover that had the wiring harness.
I also added a pin switch so lights turn on when the tailgate is open and off when closed.
Bed divider. Wrapped a 2x6 with waterproof material. The roll of material should be enough to cover two more dividers. Attached six triangle rings with elevator bolts to this one.
Smartliner floor mats.
Fire extinguisher in passenger door fits perfectly.
Matching tumbler.
Center console inserts.
Additional blue inserts.
LED coaster in cup holder.
Used my Scosche phone holder. It fits nicely into the cubby without additional accessories.
Wireless Android Auto using the Motorola MA1.
We use the non data USB ports for phone charging so Android Auto doesn’t get confused.
Added protection for the door sills. The texture is similar to bed liner.
Added a light that projects my logo onto the ground.
Hybrid emblem on driver’s side door.
I installed a triangle tie down in place of bottle opener tie down to prepare for install of tailgate assist. Still waiting waiting for dealership to get it done.
You can also pop them out before shutting the tailgate and tie things down. I installed four of them onto the tailgate.
AVS Bug Deflector II from Real Truck. It screws into the existing holes under the hood. I’ll be able to periodically remove it to clean the front of the hood. I didn't want the adhesive one.
I also added MAVERICK lettering as you can see in the picture above I kept it very subtle.
New license plate.
View attachment 66458
Added step rails. Makes it easier for wife and grandkids. It might even help with dings.
Added side mouldings to give wife peace of mind regarding dings. I tell her trucks are going to get dings, but she still wanted them.
With these last two additions total upgrade costs are just under $2,600.
Of all the items added this was one of two items that I'm least happy with. It turns out that numerous people had same issues with fitment. I wasn't aware of it when I purchased it. When I went to put it on not all of the holes lined up. It uses screws only. No need for tape. I pretty much forced it to fit on. I could have returned it but it works great as is. Even though it's flawed install, it works well with no issues. It rides smooth at high speeds.How have you liked the AVS Bug Deflector II from Real Truck? I got the one from ford but have not yet installed it. Did yours also come with tape or just screws? Maybe add blue lock tight to screw threads?
Funny that you wrote that. I just ordered it last night from Amazon. I ordered the DeeZee brand cuz it was the original and it's what Ford uses but was tempted by the other brand that had Maverick written on it for a dollar less.Looks great, congratulations! She might appreciate the tailgate assist? That was a small but big deal for me.
Cool deal! Quick easy install. I got mine from Ford, wish it had "Maverick" on the side like yours. Small and simple thing, but like it a lot. Enjoy your truck!Funny that you wrote that. I just ordered it last night from Amazon. I ordered the DeeZee brand cuz it was the original and it's what Ford uses but was tempted by the other brand that had Maverick written on it for a dollar less.
It's been 7 months and I've been waiting for Ford dealership to install it. They're just plain stupid, keep on telling me that the part hasn't come in. After 7 months? It's been available everywhere online. But Ford can't get it? Actually it's not Ford. It's the dealership, they've sucked from the get go.
I'm finally done waiting for dealership. Not worth my time or the hassle. It's due to arrive tomorrow. It'll take me about 10 minutes to install it. Something the dealership couldn't do in 7 months.
Oh, and since I'm venting, I never received my FITS kit either.
I found it.. Works great and easy to follow the directions..Just make sure you don't use it while you're driving.
Search YouTube for AAAD.
CoolI found it.. Works great and easy to follow the directions..
 it's incredible how easy it is to use. The main app I use is car stream, basically YouTube on Android Auto. No rooting and no extra equipment is a big plus.
I completely agree with you...Cool
