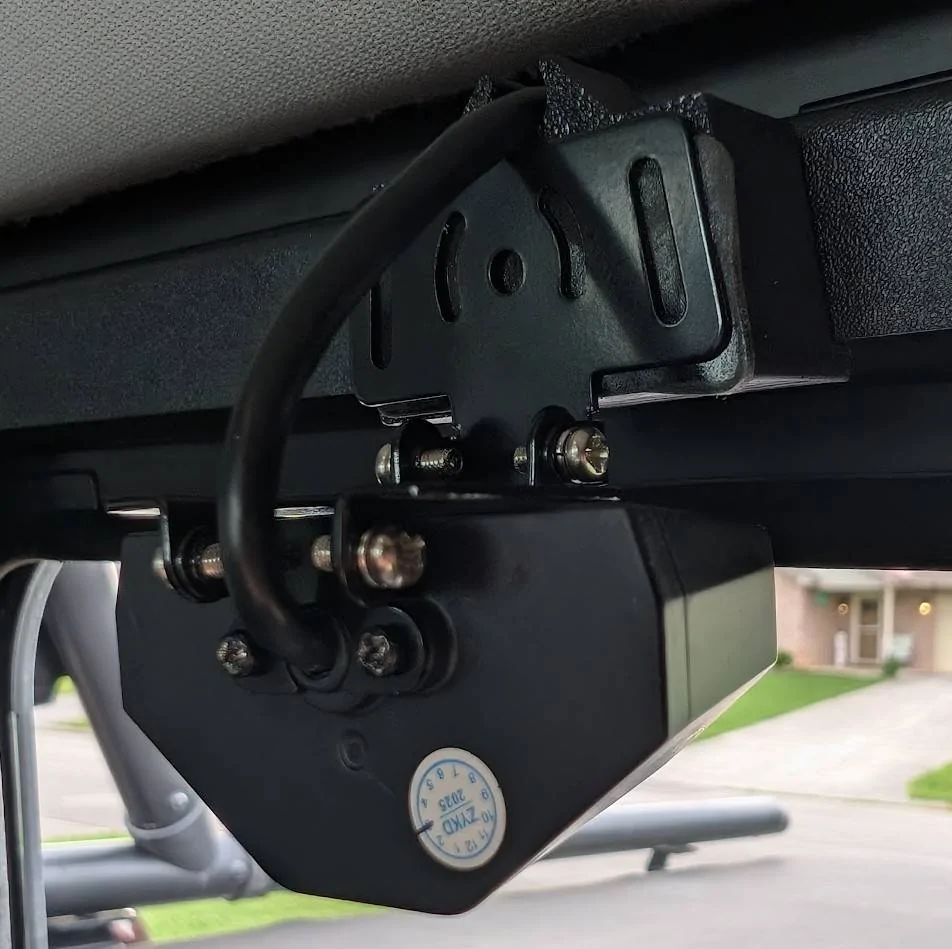
The mounting tape that comes with the wolfbox camera works pretty well. I destroyed it over the course of prototyping so this happens to be 3m "30 lb." double sided tape. I used a different double sided tape in another iteration but it had too much play and caused the camera to shake, which is obviously annoying. The tape is applied to the back of the adapter and then the front of the rail. I wanted to try add a clipping mechanism to hold onto the rail, but there's no real room in the back against the wall to full wrap around, so we're stuck with mounting tape.
Regarding the cable run, I didn't have a picture of it, but you can tuck the cable up into the ceiling padding and around to the side and then go a few directions. I ended up going down and behind the seat, but I'm thinking of going up and around along the top instead. Haven't really landed on a final decision.
I hadn't uploaded the STL anywhere yet, but I probably could/should. Otherwise if you want to just dm me your email, I could just do that.
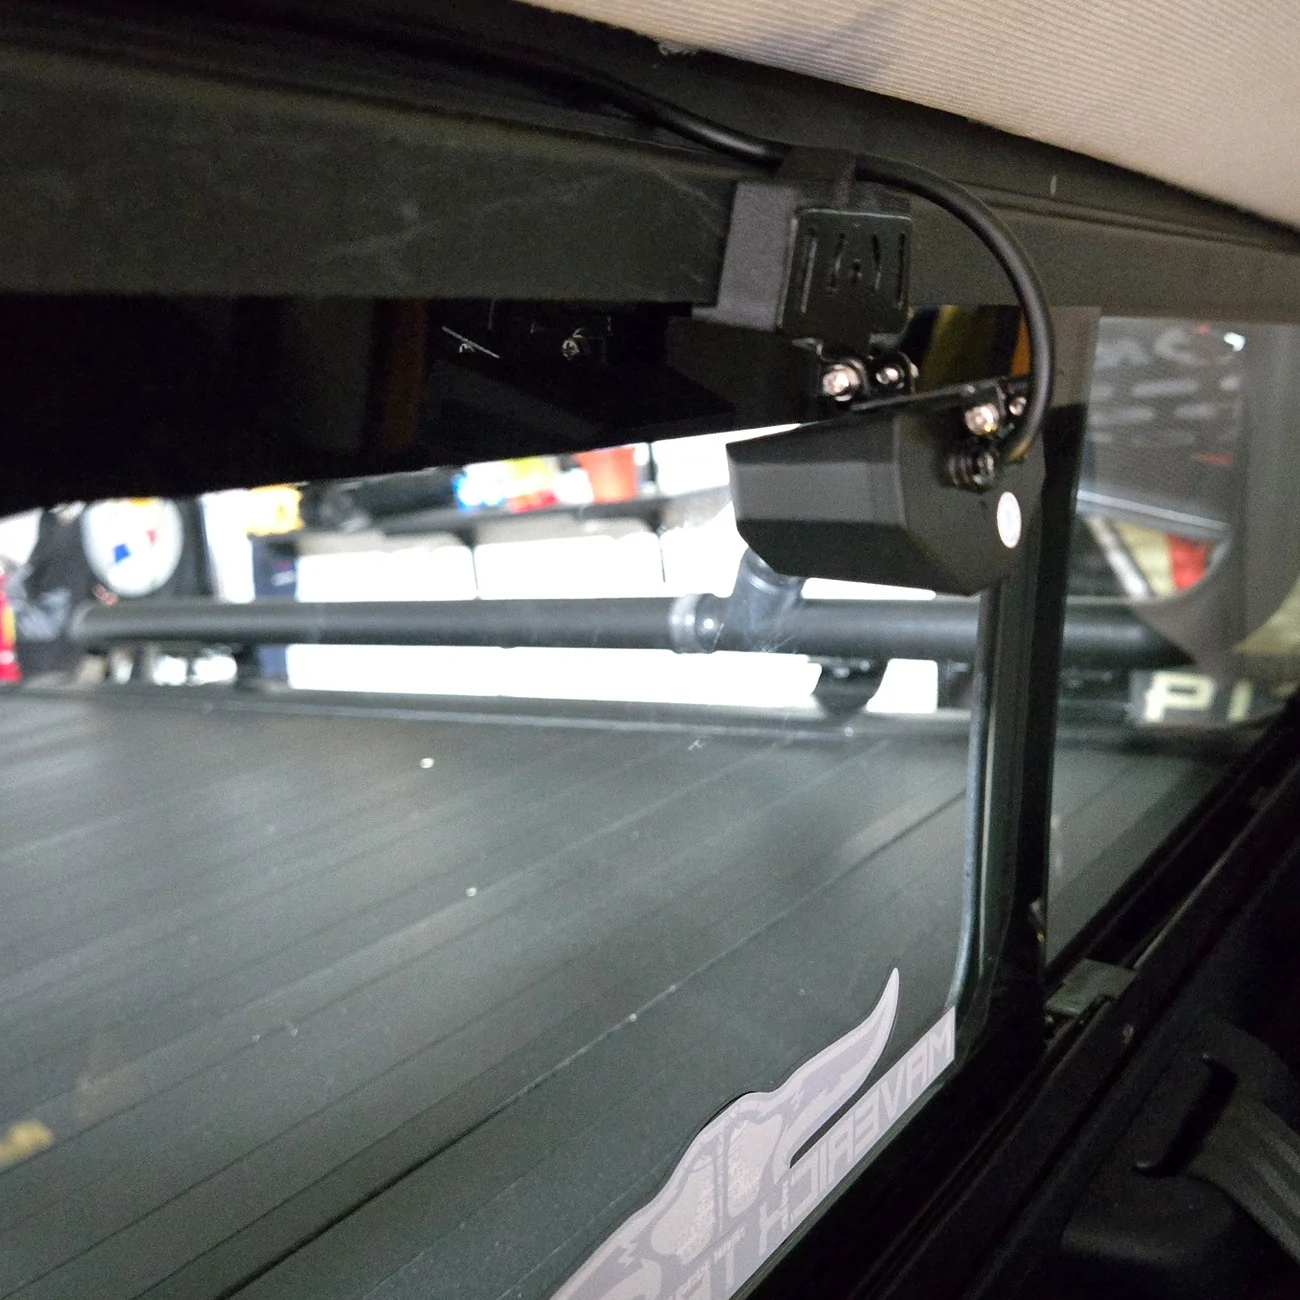
Thanks again Wilklersticks, for sending the STL. The Wolfbox arrived this morning, and is now installed. The mount worked great on the sliding rear window. I goofed getting the double-sided tape line up, but the camera is level ,so I will probably leave alone .
Thanks again Wilklersticks, for sending the STL. The Wolfbox arrived this morning, and is now installed. The mount worked great on the sliding rear window. I goofed getting the double-sided tape line up, but the camera is level ,so I will probably leave alone .
Yea, that level is the thing that was going to annoy me the most, thus the little ledge to help with that. Good lookin' install. Glad you liked it. And welcome to the club!
I'm in the process of research, research, research and getting my ducks in a row. Inquiring if you hard wired your cam? If so, could you tell me which fuse you tapped? I've got one tapping skill under my belt and used #6 already. I'm going to search locally if someone will print your stl file, but if I'm unsuccessful are you still willing to print and ship?
The mounting tape that comes with the wolfbox camera works pretty well. I destroyed it over the course of prototyping so this happens to be 3m "30 lb." double sided tape. I used a different double sided tape in another iteration but it had too much play and caused the camera to shake, which is obviously annoying. The tape is applied to the back of the adapter and then the front of the rail. I wanted to try add a clipping mechanism to hold onto the rail, but there's no real room in the back against the wall to full wrap around, so we're stuck with mounting tape.
Regarding the cable run, I didn't have a picture of it, but you can tuck the cable up into the ceiling padding and around to the side and then go a few directions. I ended up going down and behind the seat, but I'm thinking of going up and around along the top instead. Haven't really landed on a final decision.
I hadn't uploaded the STL anywhere yet, but I probably could/should. Otherwise if you want to just dm me your email, I could just do that.
And sorry, didn't see your comment above, but I tucked the wires into the headliner and then ran them down the side, behind the seat, along the base of the doors, up the passenger side sill, back into the head liner and then drilled a small hole to let the wires through the black plastic cover.
There's another person's post showing some of the steps, especially the hole in the black plastic, but it looks pretty darn clean, I think. Have had a few people ask if it's stock, to which I laugh and say no.


") .
.